![[kaneko lab.]](https://www.kkaneko.jp/info/logo_png.png)
イメージスティッチング(自作アルゴリズムによる実装)
【概要】
OpenCV の高水準 API(cv2.Stitcher)を使わず,特徴点検出・マッチング・RANSAC による相似変換推定・最大全域木による接続関係の決定・ゲイン補正・マルチバンドブレンディングまでの一連の処理を Python で自作し,複数のカラー画像から1枚のパノラマ画像を合成する。特徴点検出器には SIFT(既定),ORB,AKAZE のいずれかを選択でき,連番でない順不同の画像集合でも自動で位置関係を推定できる。cv2.Stitcher を用いる簡便な方法は,別ページ「イメージスティッチング」を参照。
【目次】
【関連する外部ページ】
- OpenCV の公式ページ: https://opencv.org
- GitHub の OpenCV のページ: https://github.com/opencv/opencv/releases
- OpenCV の stitching モジュール(stitching_detailed.py): https://github.com/opencv/opencv/tree/4.x/modules/stitching
- OpenStitching/stitching(PyPI パッケージ
stitching): https://github.com/OpenStitching/stitching - CorentinBrtx/image-stitching(ゲイン補正・マルチバンドブレンディングの実装例): https://github.com/CorentinBrtx/image-stitching
【サイト内の関連情報】
Python 3.12 のインストール
Pythonのインストールを行い、Pythonのプログラムを実行する環境を整える。扱う環境は、Windows搭載パソコンである。金子研究室では、Python 3.12.10を推奨する。
[Windows での Python 3.12 のインストール手順を見るには、ここをクリック]
Windows での Python 3.12 のインストール
以下のいずれかの方法でPython 3.12をインストールする。Pythonがインストール済みの場合、この手順は不要である。
方法 1:winget によるインストール
【インストールコマンドの実行方法】
管理者権限でコマンドプロンプトを起動する(手順:Windowsキーまたはスタートメニュー → cmd と入力 → 右クリック → 「管理者として実行」)。そして、コマンド全体をコマンドプロンプトにコピー&ペーストする。
--scope machine を指定することで、システム全体(全ユーザー向け)にインストールされる。このオプションの実行には管理者権限が必要である。インストール完了後、コマンドプロンプトを再起動するとPATHが反映される。
REM Python 3.12 をシステム領域にインストール
winget install --id Python.Python.3.12 -e --scope machine --silent --accept-source-agreements --accept-package-agreements --override "/quiet InstallAllUsers=1 PrependPath=1 Include_test=0 Include_pip=1 Include_launcher=1 InstallLauncherAllUsers=1 TargetDir=\"C:\Program Files\Python312\""
if not "%ERRORLEVEL%"=="0" ( color 0c & echo Python 3.12 のインストールに失敗しました & ping 127.0.0.1 -n 6 >nul & color )

REM Python と Scripts を PATH 先頭に追加
powershell -NoProfile -Command "$p='C:\Program Files\Python312'; $s=\"$p\Scripts\"; if(Test-Path $p){$k=[Microsoft.Win32.Registry]::LocalMachine.OpenSubKey('SYSTEM\CurrentControlSet\Control\Session Manager\Environment',$true); $c=$k.GetValue('Path','',[Microsoft.Win32.RegistryValueOptions]::DoNotExpandEnvironmentNames); $t=$k.GetValueKind('Path'); $new=$c; if((';'+$new+';') -notlike \"*;$p;*\"){$new=$p+';'+$new}; if((';'+$new+';') -notlike \"*;$s;*\"){$new=$s+';'+$new}; if($new -ne $c){$k.SetValue('Path',$new,$t)}; $k.Close()}"

REM 現在のセッションにも反映(システムPATHを再取得して連結)
for /f "usebackq tokens=2,*" %A in (`reg query "HKLM\SYSTEM\CurrentControlSet\Control\Session Manager\Environment" /v Path`) do set "PATH=%B"

REM pip / wheel の更新
python -m pip install --no-user -U pip wheel
if not "%ERRORLEVEL%"=="0" ( color 0c & echo pip / wheel の更新に失敗しました & ping 127.0.0.1 -n 6 >nul & color )
方法 2:インストーラーによるインストール
- Python公式サイト(https://www.python.org/downloads/)にアクセスし、「Download Python 3.x.x」ボタンからWindows用インストーラーをダウンロードする。
- ダウンロードしたインストーラーを実行する。
- 初期画面の下部に表示される「Add python.exe to PATH」にチェックを入れてから「Customize installation」を選択する。このチェックを入れ忘れると、コマンドプロンプトから
pythonコマンドを実行できない。 - 「Install Python 3.xx for all users」にチェックを入れ、「Install」をクリックする。
インストールの確認
コマンドプロンプトで以下を実行する。
python --versionバージョン番号(例:Python 3.12.x)が表示されればインストール成功である。「'python' は、内部コマンドまたは外部コマンドとして認識されていません。」と表示される場合は、インストールが正常に完了していない。
Python の開発環境 Visual Studio Code のインストールと Python 用の設定
Python の開発環境Visual Studio Code(プログラムを編集するソフトウェア。以下、VS Code)を整える。
[Windows での Visual Studio Code のインストールと Python 用の設定手順を見るには、ここをクリック]
Windows での Visual Studio Code のインストールと Python 用の設定手順
1. VS Code と拡張機能のインストール
以下のコマンドにより,既存の VS Code を削除し,全ユーザー共有の設定で再インストールしたうえで,拡張機能(VS Code に機能を追加するソフトウェア)をまとめて導入する.
【インストールコマンドの実行方法】
管理者権限でコマンドプロンプトを起動する(手順:Windows キーまたはスタートメニュー → cmd と入力 → 右クリック → 「管理者として実行」)。そして,コマンド全体をコマンドプロンプトにコピー&ペーストする。
インストールコマンド
REM ============================================================
REM Microsoft Visual Studio Code
REM ============================================================
REM Build Tools + Desktop development with C++(VCTools)+ 追加コンポーネント(一括)
REM 未インストール時: winget で新規インストール
REM インストール済み時: setup.exe modify でコンポーネント追加(バージョンは変更しない)
winget list --id Microsoft.VisualStudio.BuildTools 2>nul | findstr /i "BuildTools" >nul 2>&1
if %ERRORLEVEL% EQU 0 (
    for /f "usebackq delims=" %P in (`"C:\Program Files (x86)\Microsoft Visual Studio\Installer\vswhere.exe" -products Microsoft.VisualStudio.Product.BuildTools -property installationPath`) do start /wait "" "C:\Program Files (x86)\Microsoft Visual Studio\Installer\setup.exe" modify --installPath "%P" --add Microsoft.VisualStudio.Workload.VCTools --add Microsoft.VisualStudio.Workload.MSBuildTools --add Microsoft.VisualStudio.Component.VC.CMake.Project --add Microsoft.VisualStudio.Component.VC.Llvm.Clang --add Microsoft.VisualStudio.Component.VC.Llvm.ClangToolset --add Microsoft.VisualStudio.Component.Windows11SDK.26100 --add Microsoft.VisualStudio.Component.VC.v143.x86.x64 --includeRecommended --quiet --norestart --nocache
    if not "%ERRORLEVEL%"=="0" ( color 0c & echo Build Tools のコンポーネント追加に失敗しました & ping 127.0.0.1 -n 6 >nul & color )
) else (
    winget install --scope machine --id Microsoft.VisualStudio.BuildTools -e --silent --disable-interactivity --force --accept-source-agreements --accept-package-agreements --override "--quiet --wait --norestart --nocache --add Microsoft.VisualStudio.Workload.VCTools --includeRecommended --add Microsoft.VisualStudio.Workload.MSBuildTools --add Microsoft.VisualStudio.Component.VC.CMake.Project --add Microsoft.VisualStudio.Component.VC.Llvm.Clang --add Microsoft.VisualStudio.Component.VC.Llvm.ClangToolset --add Microsoft.VisualStudio.Component.Windows11SDK.26100 --add Microsoft.VisualStudio.Component.VC.v143.x86.x64"
    if not "%ERRORLEVEL%"=="0" ( color 0c & echo Build Tools のインストールに失敗しました & ping 127.0.0.1 -n 6 >nul & color )
)

REM 全ユーザー共有の拡張機能フォルダ
if not exist "C:\ProgramData\vscode-extensions" mkdir "C:\ProgramData\vscode-extensions"
icacls "C:\ProgramData\vscode-extensions" /grant "Everyone:(OI)(CI)M" /T

REM スタートメニューのショートカットを --extensions-dir 付きで再作成
if exist "C:\ProgramData\Microsoft\Windows\Start Menu\Programs\Visual Studio Code" rmdir /s /q "C:\ProgramData\Microsoft\Windows\Start Menu\Programs\Visual Studio Code"
if exist "C:\ProgramData\Microsoft\Windows\Start Menu\Programs\Visual Studio Code.lnk" del "C:\ProgramData\Microsoft\Windows\Start Menu\Programs\Visual Studio Code.lnk"
powershell -NoProfile -Command "$s=New-Object -ComObject WScript.Shell; $lnk=$s.CreateShortcut('C:\ProgramData\Microsoft\Windows\Start Menu\Programs\Visual Studio Code.lnk'); $lnk.TargetPath='C:\Program Files\Microsoft VS Code\Code.exe'; $lnk.Arguments='--extensions-dir \"C:\ProgramData\vscode-extensions\"'; $lnk.Save()"
REM ショートカットの検証
powershell -NoProfile -Command "$s=New-Object -ComObject WScript.Shell; $lnk=$s.CreateShortcut('C:\ProgramData\Microsoft\Windows\Start Menu\Programs\Visual Studio Code.lnk'); Write-Host 'TargetPath:' $lnk.TargetPath; Write-Host 'Arguments:' $lnk.Arguments"

REM ファイル / フォルダ右クリックの「Code で開く」を登録
reg add "HKLM\SOFTWARE\Classes\*\shell\VSCode\command" /ve /d "\"C:\Program Files\Microsoft VS Code\Code.exe\" --extensions-dir \"C:\ProgramData\vscode-extensions\" \"%1\"" /f
reg add "HKLM\SOFTWARE\Classes\Directory\shell\VSCode\command" /ve /d "\"C:\Program Files\Microsoft VS Code\Code.exe\" --extensions-dir \"C:\ProgramData\vscode-extensions\" \"%1\"" /f
reg add "HKLM\SOFTWARE\Classes\Directory\Background\shell\VSCode\command" /ve /d "\"C:\Program Files\Microsoft VS Code\Code.exe\" --extensions-dir \"C:\ProgramData\vscode-extensions\" \"%V\"" /f

REM --extensions-dir 付きで起動する code.cmd ラッパを作成
REM (%* を echo で書くと対話的 cmd で失われるため、PowerShell で [char]37+'*' を書き出す)
powershell -NoProfile -Command "$pct=[char]37; $q=[char]34; $c='@echo off'+[char]13+[char]10+$q+'C:\Program Files\Microsoft VS Code\bin\code.cmd'+$q+' --extensions-dir '+$q+'C:\ProgramData\vscode-extensions'+$q+' '+$pct+'*'+[char]13+[char]10; [IO.File]::WriteAllText('C:\ProgramData\vscode-extensions\vscode.cmd',$c,[Text.Encoding]::ASCII)"

REM 拡張機能のインストール
set "CODE=C:\Program Files\Microsoft VS Code\bin\code.cmd"
"%CODE%" --extensions-dir "C:\ProgramData\vscode-extensions" --uninstall-extension GitHub.copilot
"%CODE%" --extensions-dir "C:\ProgramData\vscode-extensions" --uninstall-extension GitHub.copilot-chat
"%CODE%" --extensions-dir "C:\ProgramData\vscode-extensions" --install-extension ms-python.python
"%CODE%" --extensions-dir "C:\ProgramData\vscode-extensions" --install-extension ms-python.vscode-pylance
"%CODE%" --extensions-dir "C:\ProgramData\vscode-extensions" --install-extension ms-python.debugpy
"%CODE%" --extensions-dir "C:\ProgramData\vscode-extensions" --install-extension MS-CEINTL.vscode-language-pack-ja
"%CODE%" --extensions-dir "C:\ProgramData\vscode-extensions" --install-extension saoudrizwan.claude-dev
"%CODE%" --extensions-dir "C:\ProgramData\vscode-extensions" --install-extension rust-lang.rust-analyzer
"%CODE%" --extensions-dir "C:\ProgramData\vscode-extensions" --install-extension tamasfe.even-better-toml
"%CODE%" --extensions-dir "C:\ProgramData\vscode-extensions" --install-extension anthropic.claude-code
"%CODE%" --extensions-dir "C:\ProgramData\vscode-extensions" --install-extension almenon.arepl
"%CODE%" --extensions-dir "C:\ProgramData\vscode-extensions" --list-extensions --show-versions

REM settings.json を作成(自動更新オフ、Python、Claude Code 設定)
if not exist "%APPDATA%\Code\User" mkdir "%APPDATA%\Code\User"
python -c "import json,os;data={'update.mode':'none','update.enableWindowsBackgroundUpdates':False,'extensions.autoUpdate':False,'python.defaultInterpreterPath':r'C:\Program Files\Python312\python.exe','claudeCode.environmentVariables':[{'name':'ANTHROPIC_API_KEY','value':'not-needed'},{'name':'ANTHROPIC_AUTH_TOKEN','value':'ollama'},{'name':'ANTHROPIC_BASE_URL','value':'http://localhost:11434'},{'name':'ANTHROPIC_MODEL','value':'glm-4.7-flash'},{'name':'CLAUDE_CODE_DISABLE_NONESSENTIAL_TRAFFIC','value':'1'}]};p=os.path.join(os.environ['APPDATA'],'Code','User','settings.json');open(p,'w',encoding='utf-8').write(json.dumps(data,indent=4));print('Done:',p)"

REM 自動更新の抑止ポリシー(settings.json に加えて、レジストリ側でも明示的にオフ)
reg add "HKLM\SOFTWARE\Policies\Microsoft\VSCode" /v "UpdateMode" /t REG_SZ /d "none" /f
echo === セットアップ完了 ===
2. Python インタプリタの選択
同一マシンに複数の Python がインストールされている場合,VS Code で使用する Python 本体(インタプリタ:Python プログラムを解釈・実行するソフトウェア)を選択する必要がある.
- コマンドパレット(コマンド名で機能を呼び出す VS Code の入力欄)を開く(
Ctrl+Shift+P) Python: Select Interpreterと入力する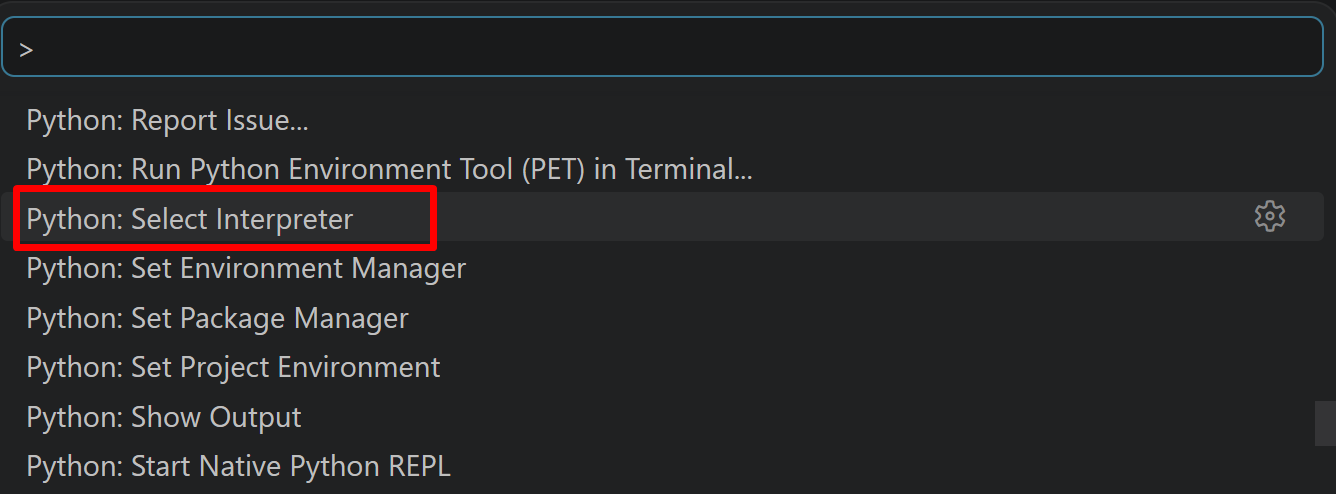
- 表示される一覧から,使用する Python(例:
C:\Program Files\Python312\python.exe)を選択する.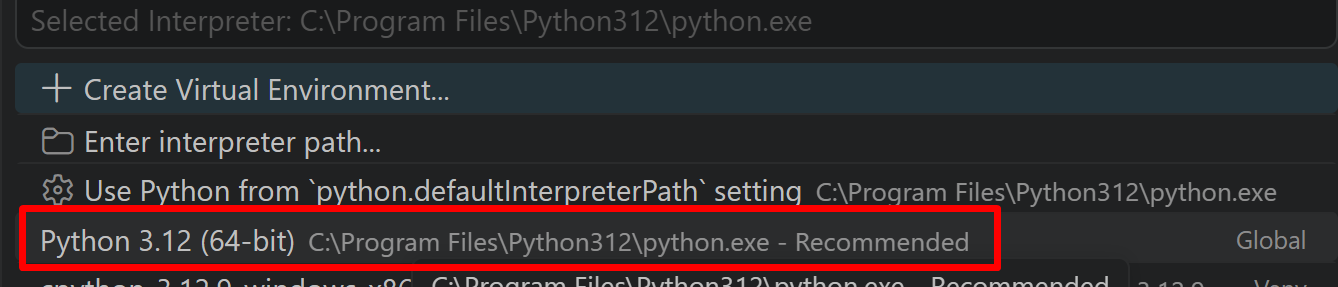
Python プログラム実行手順
[Windows での Python プログラム実行手順を見るには、ここをクリック]
Windows での Python 実行手順(Visual Studio Codeを使用)
プログラムファイルの作成と保存
- 左サイドバーの「エクスプローラー」アイコン(
Ctrl+Shift+E)をクリックする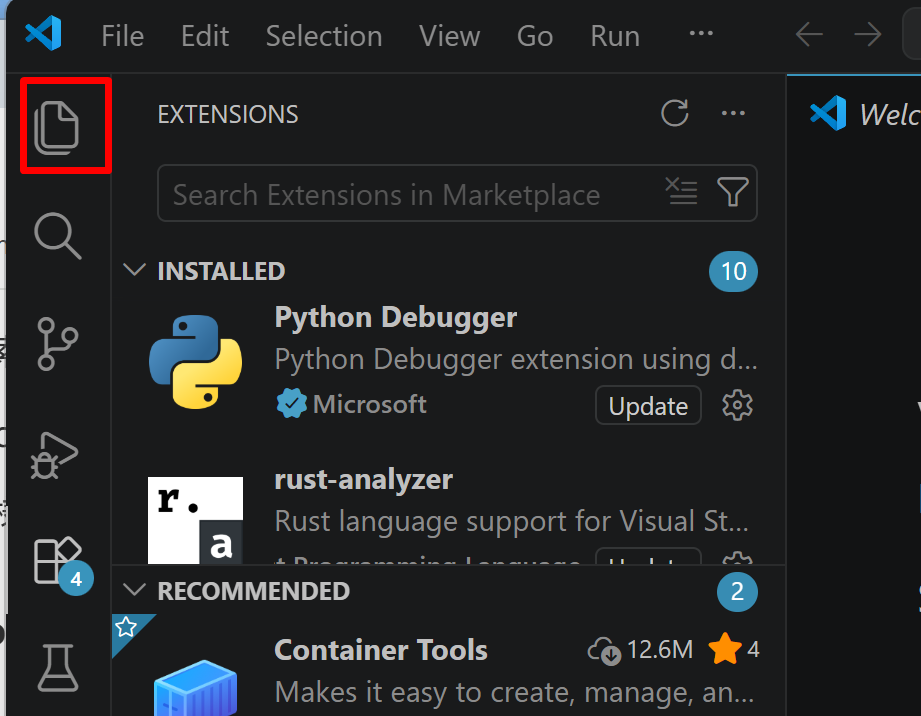
- 「NO FOLDER OPENED」(作業対象フォルダが未選択の状態)と表示される場合は,「Open Folder」をクリックし,プログラムを保存するフォルダを選択する
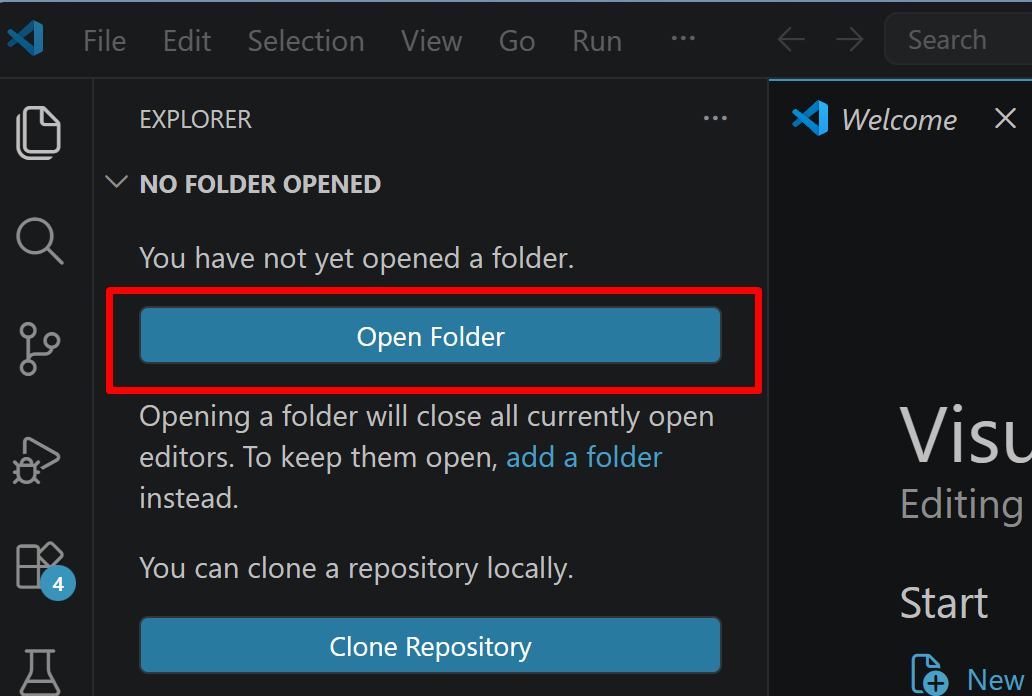
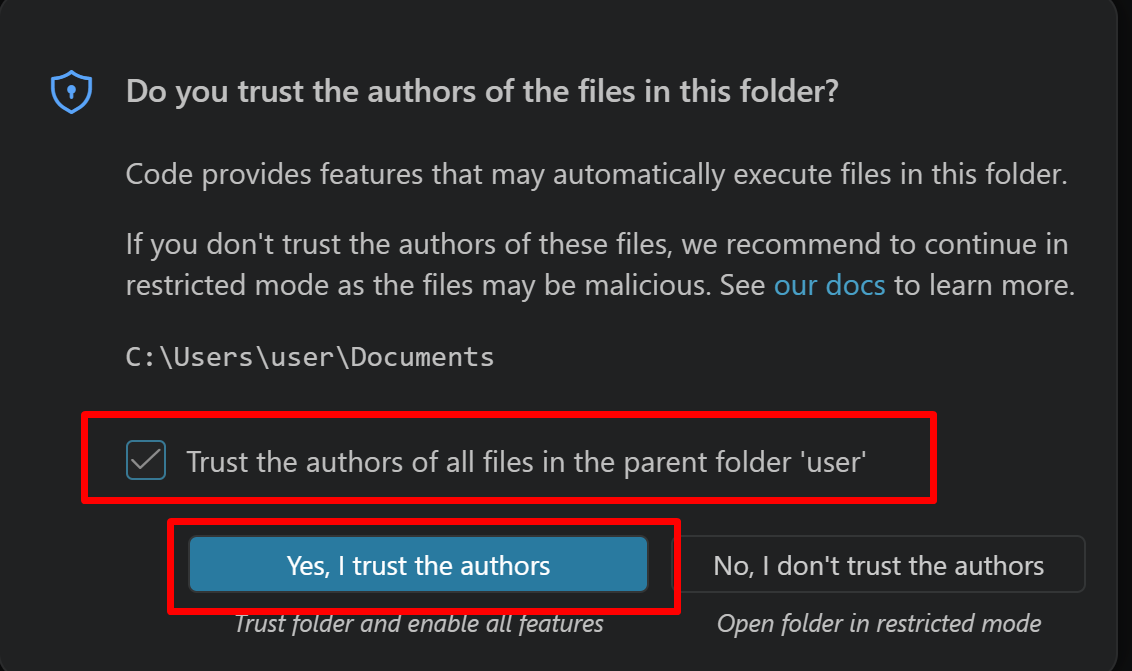
続いて「フォルダを信用するか」を確認する画面(フォルダ内のコードを実行してよいか確認する VS Code の仕組み)が表示されるので,チェックして Yes を選択する
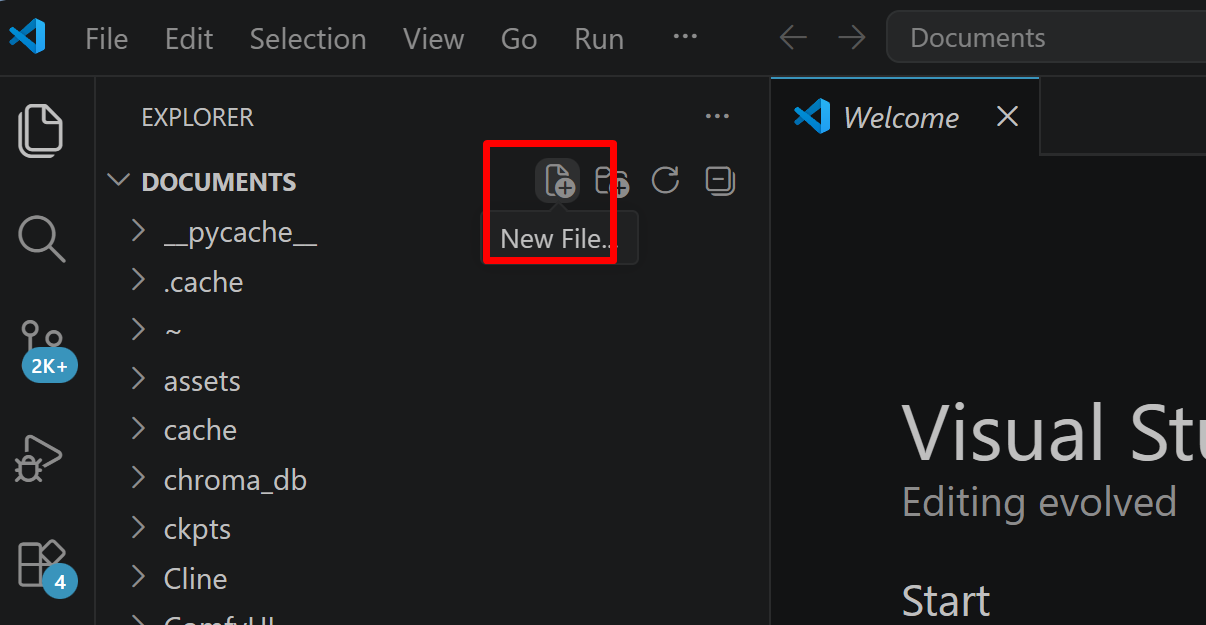
- フォルダ名の右側に表示される「新しいファイル」アイコンをクリックする
- ファイル名(例:
aitask.py.ファイル名は何でも良い)を入力しEnterを押す.拡張子は.py(Python ファイルを示す拡張子)とする
- 実行したいコードを選択し,
Ctrl+Cでコピーする.VS Code のエディタ領域にCtrl+Vで貼り付ける Ctrl+Sで保存する
プログラムの実行
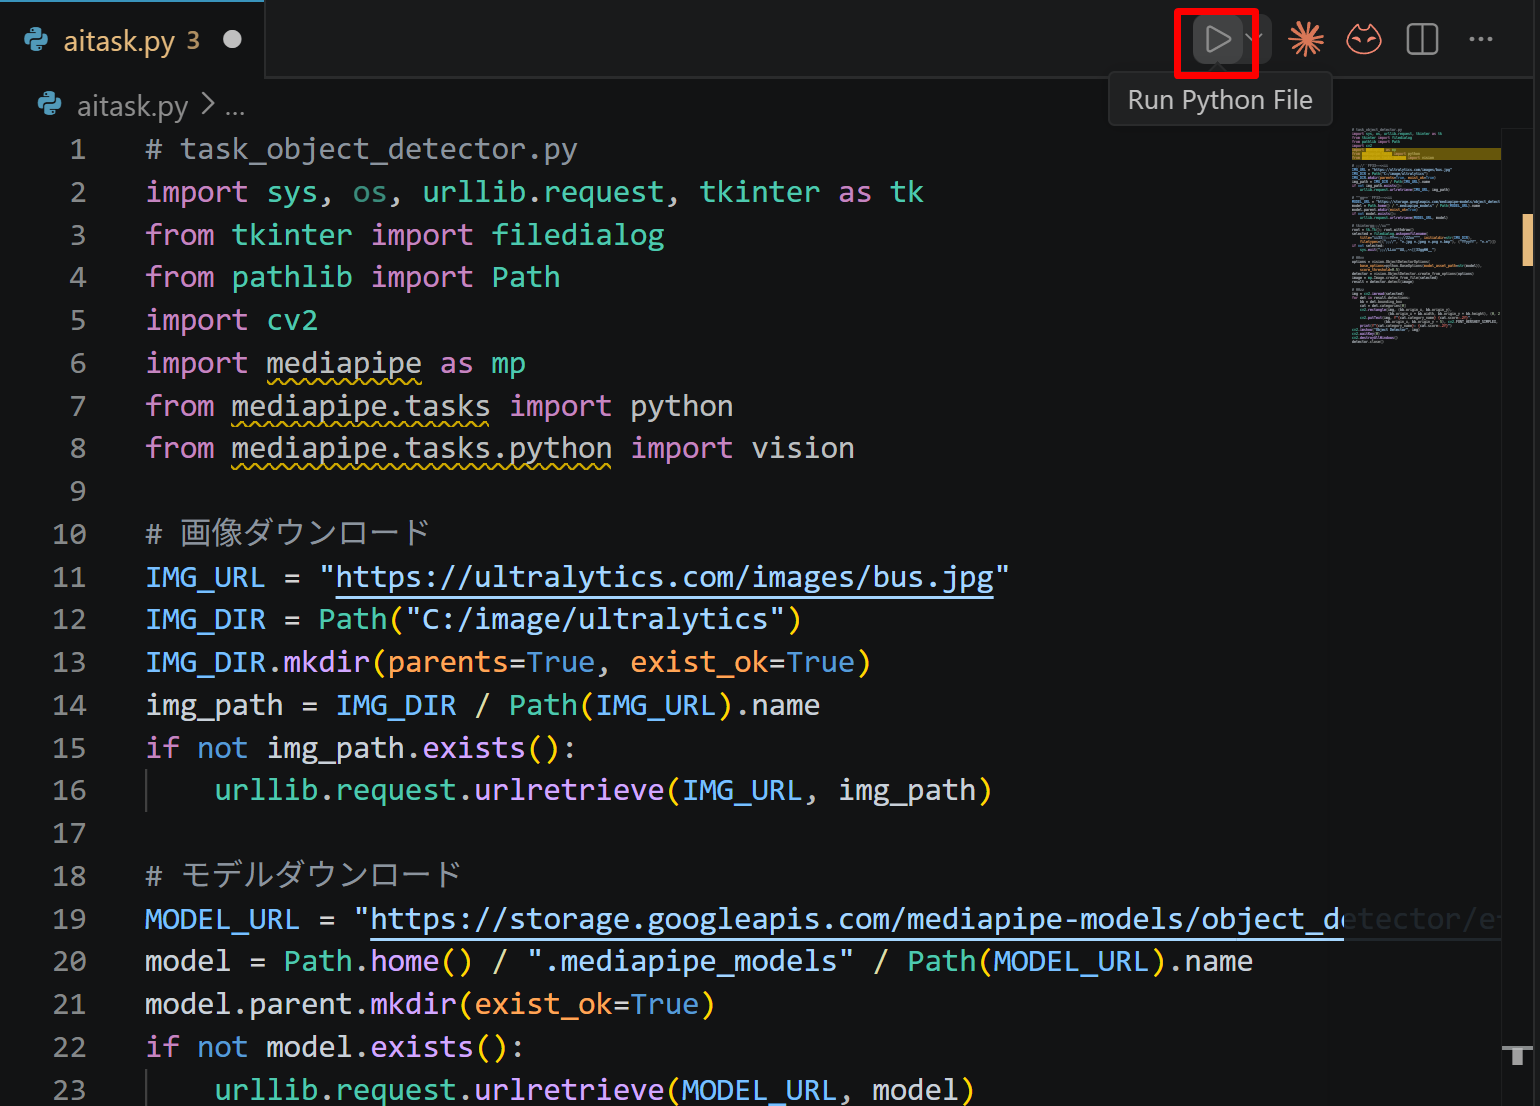
- エディタ右上の三角形「▷」アイコン(Run Python File:現在開いている Python ファイルを実行するボタン)をクリックする.または,エディタ上で右クリックし「ターミナルで Python ファイルを実行」を選択する
- VS Code 下部のターミナル(コマンドの入出力を表示する画面)に,実行結果(
print関数の出力等)が表示される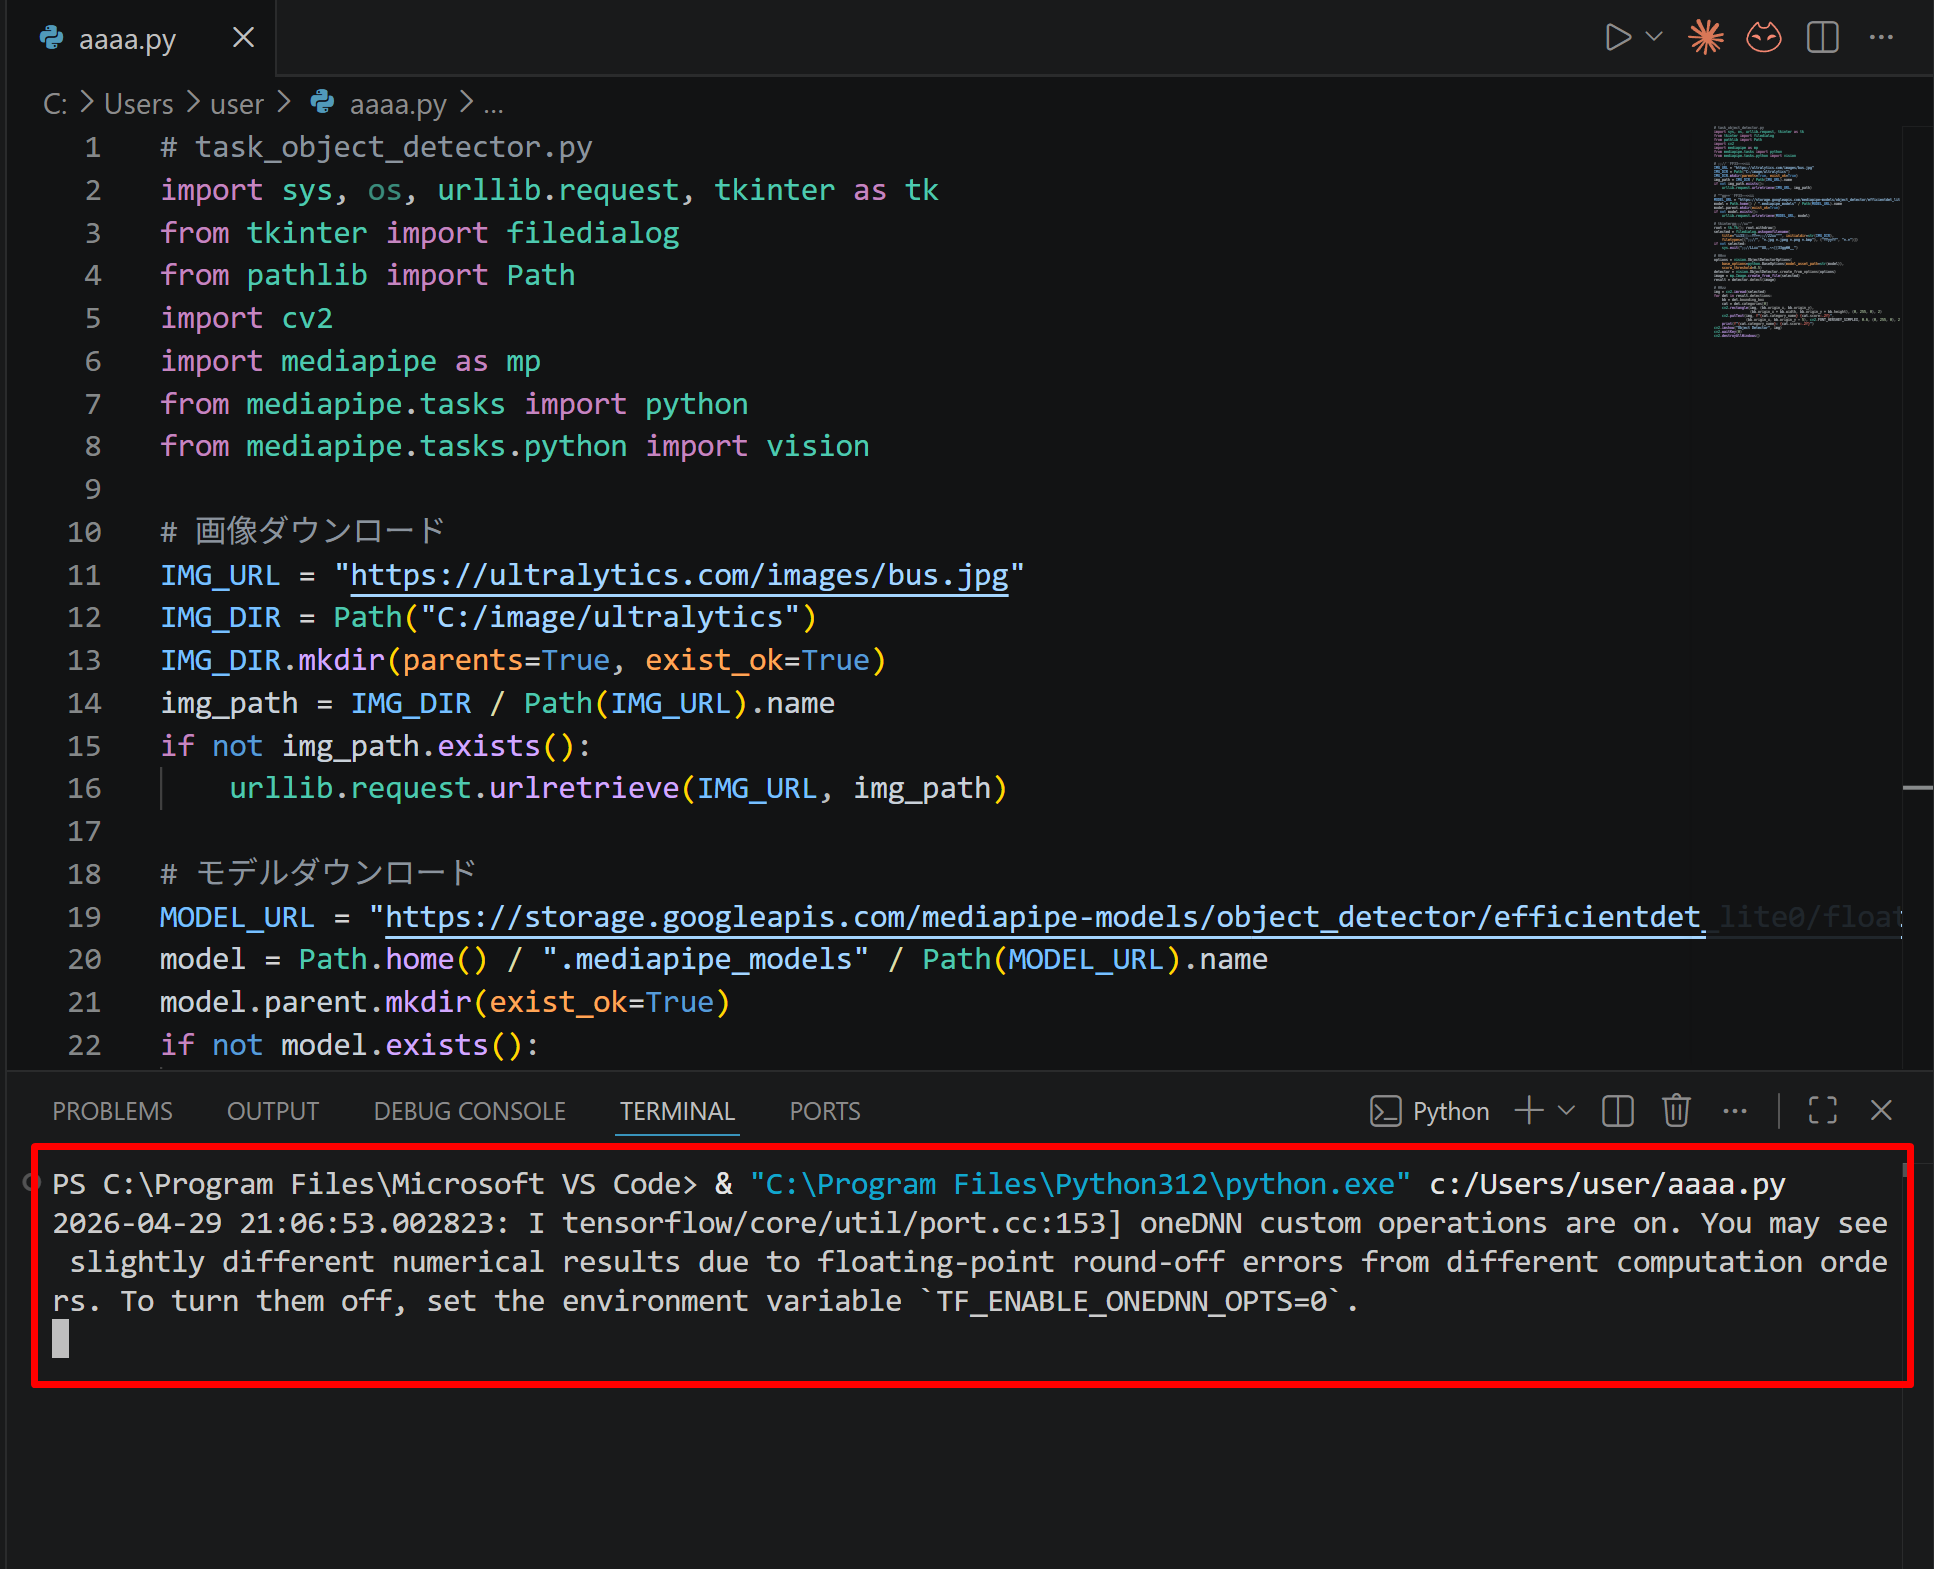
- tkinter(Python 標準の GUI ライブラリ)のファイル選択ダイアログを使うプログラムを実行した場合は,ダイアログが開くので対象画像を選択する
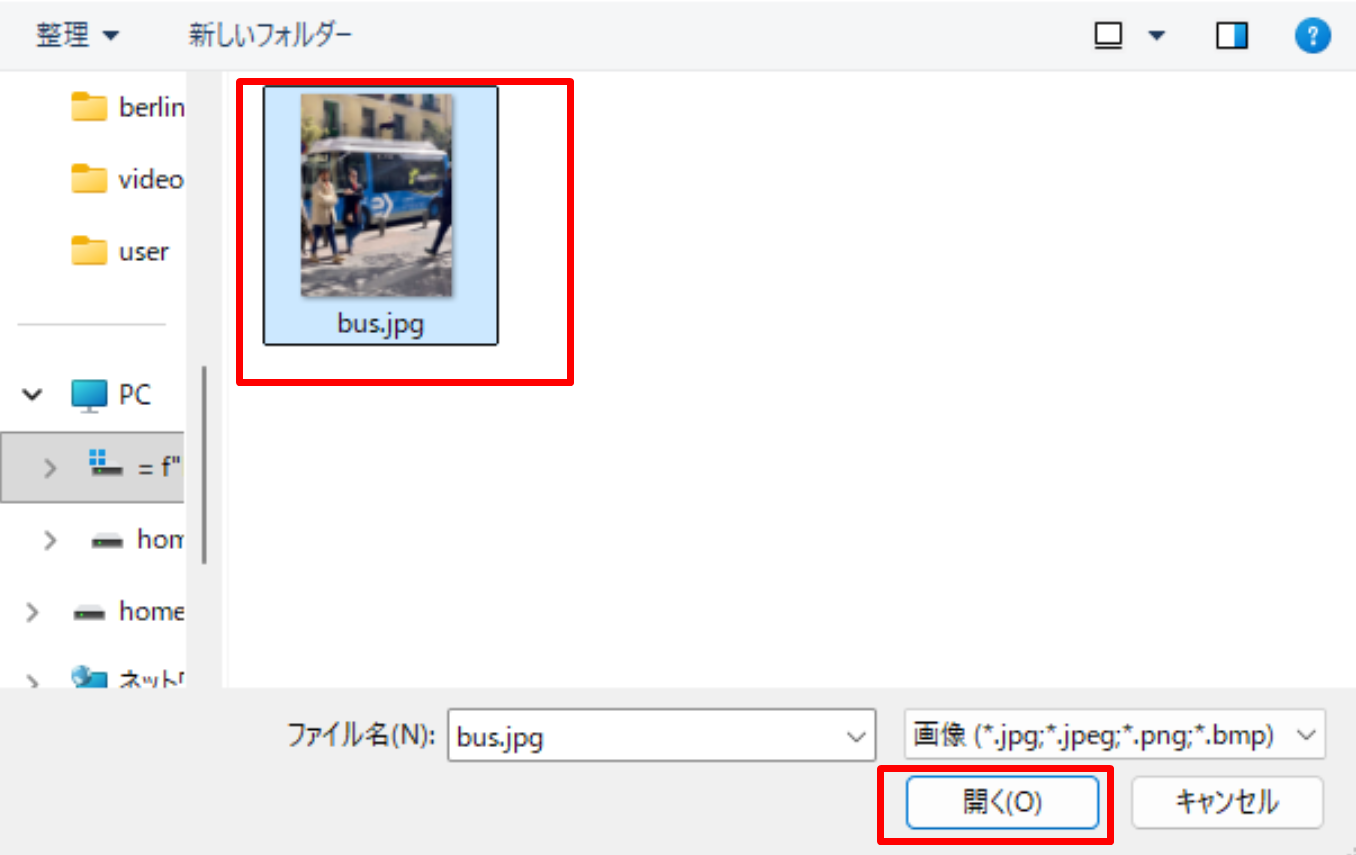
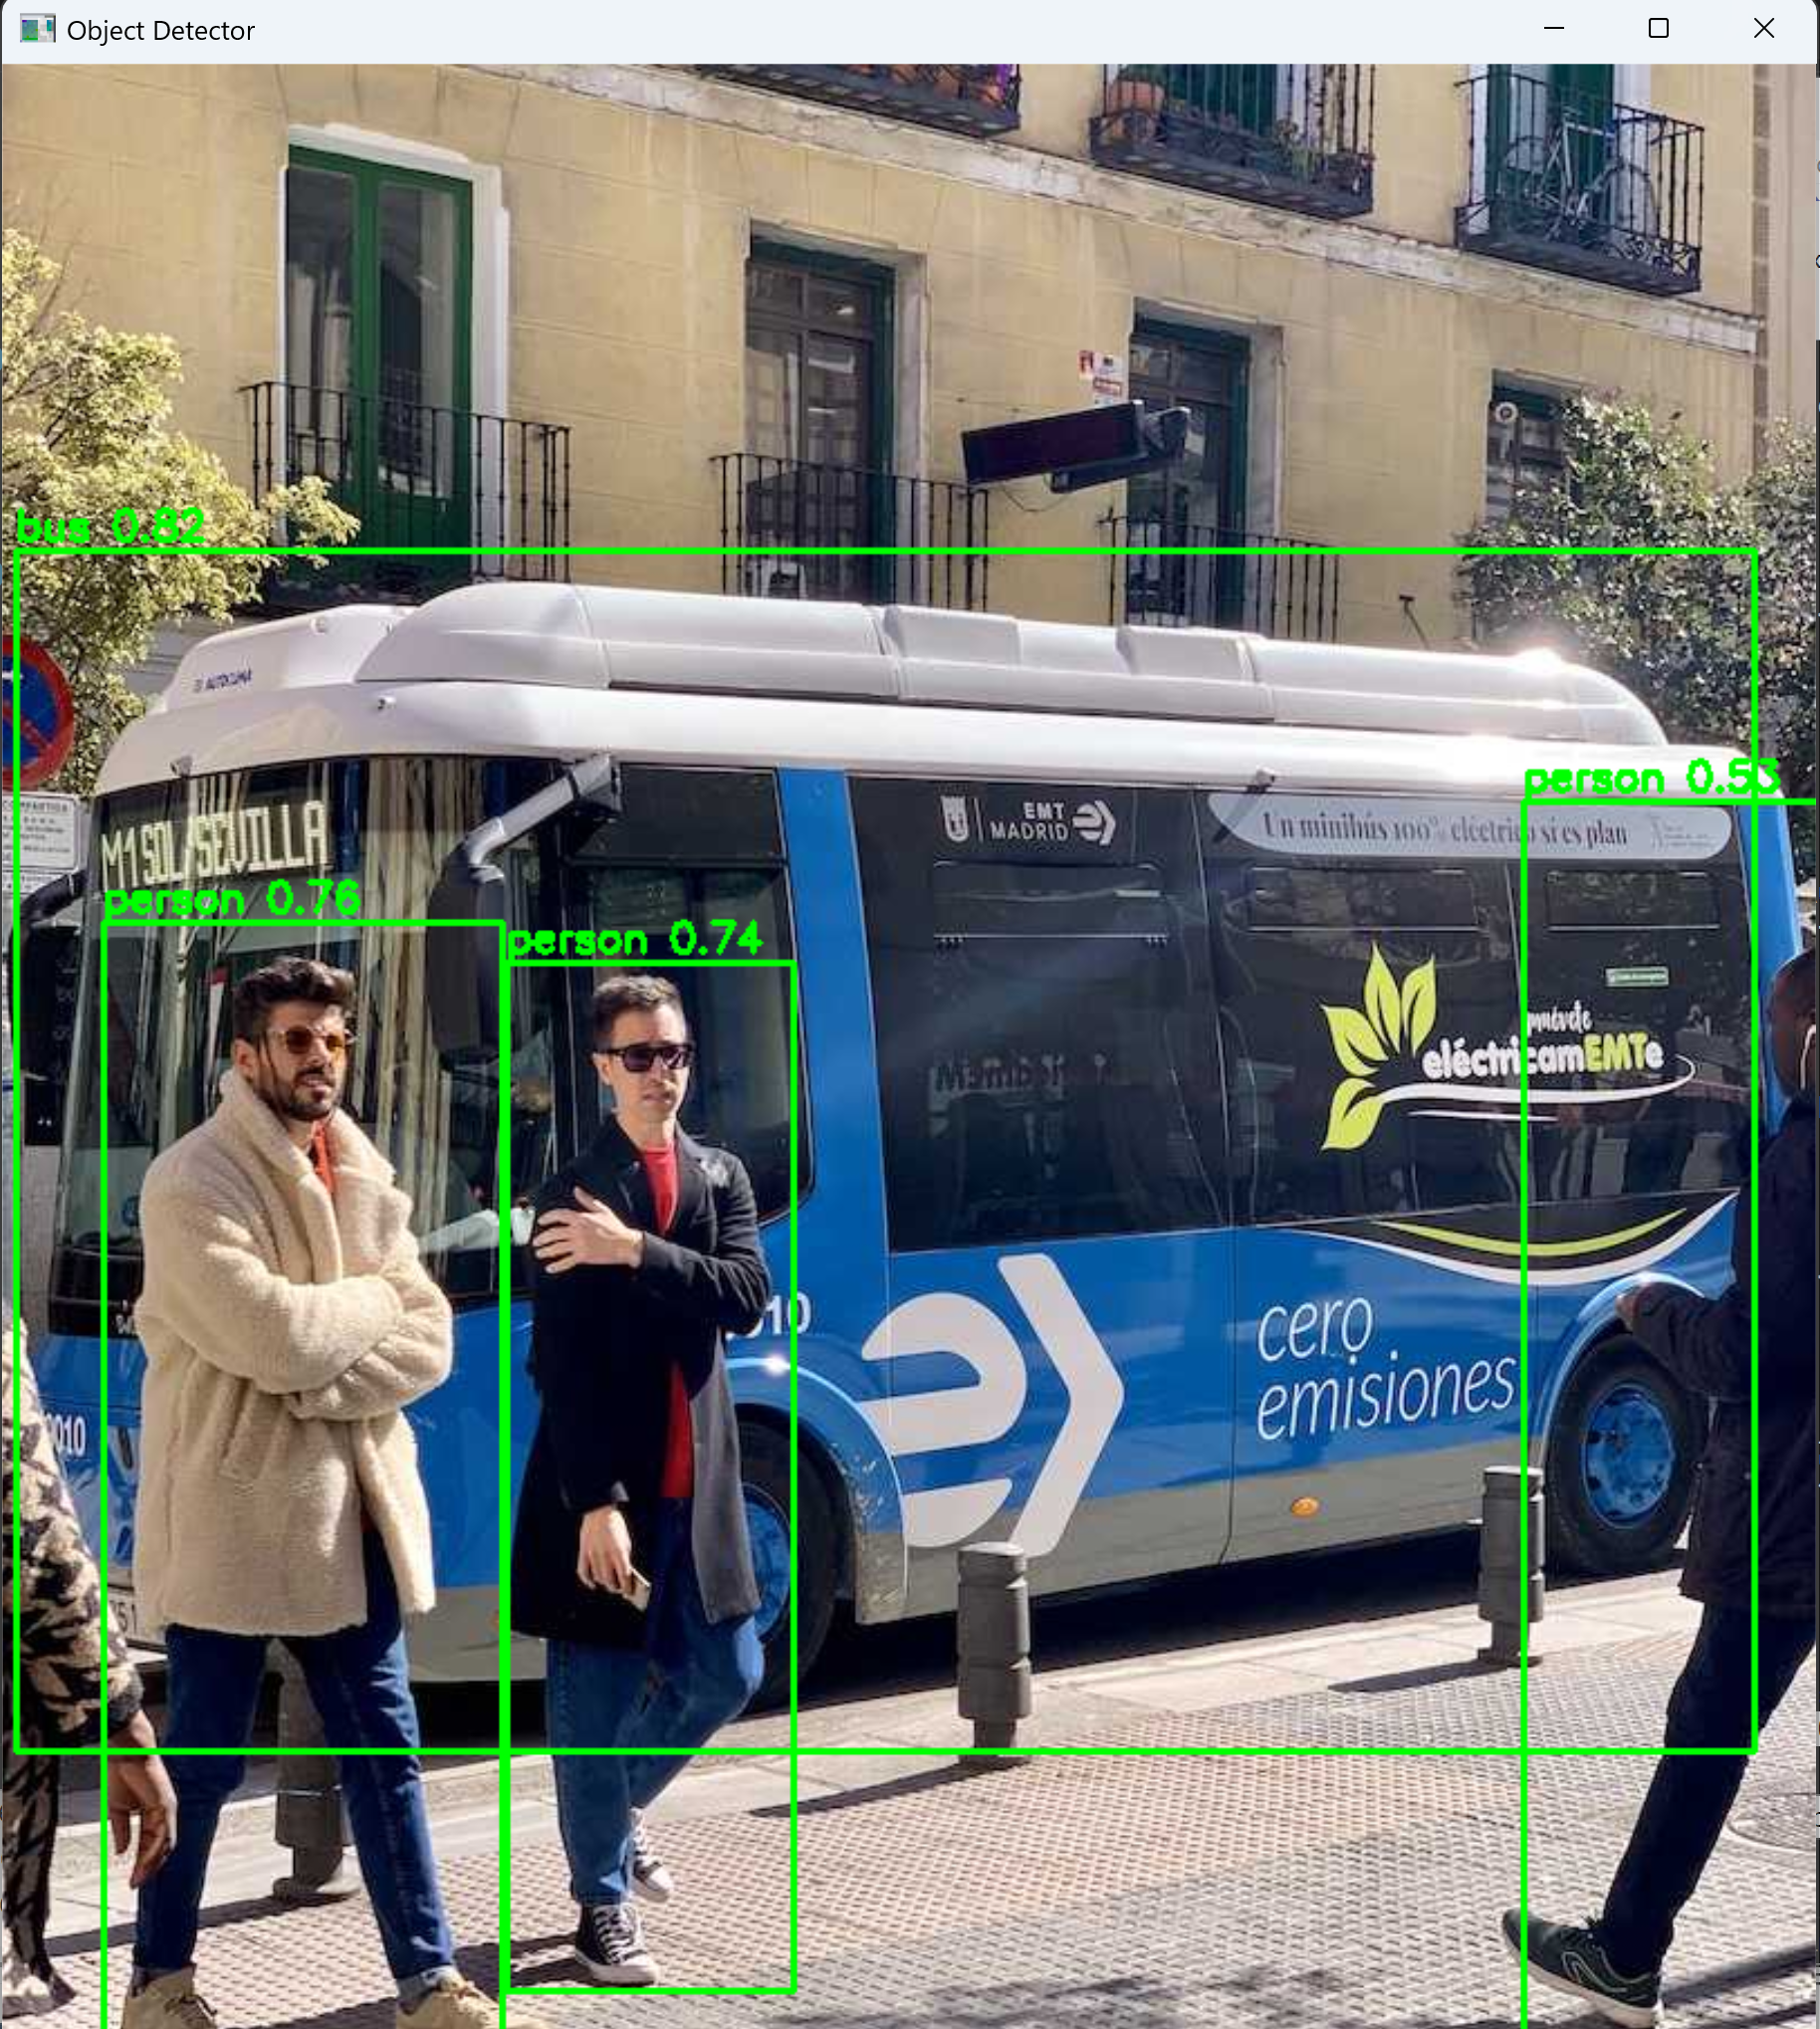
- VS Code 下部のターミナルで実行結果を確認する.OpenCV ウィンドウ(OpenCV が画像を表示するために開く専用ウィンドウ)が開いた場合はそちらも確認する.OpenCV ウィンドウは,マウスクリックでウィンドウをアクティブ(操作対象の状態)にしてからキーを押すと終了する

opencv-python,opencv-contrib-python,numpy のインストール(Windows 上) [クリックして展開]
次のコマンドは,旧バージョンを削除し,Python 用 opencv-python のインストールを行う。 最後の行はバージョン確認用のコマンドである。
管理者権限でコマンドプロンプトを起動する
(手順:Windowsキーまたはスタートメニュー → cmd と入力 → 右クリック → 「管理者として実行」)。
以下を実行する。
python -m pip uninstall -y opencv-python
python -m pip uninstall -y opencv-python-headless
python -m pip uninstall -y opencv-contrib-python
python -m pip install -U --no-user opencv-python opencv-contrib-python numpy
python -c "import sys, cv2; print(f'Python version: {sys.version}\nOpenCV version: {cv2.__version__}')"
SIFT・ORB・AKAZE はいずれも opencv-python 本体(features2d モジュール)に含まれ,追加のインストールなしに利用できる。上記のコマンドでは,画像・ビデオ処理に関する他の機能も使えるよう,opencv-contrib-python もあわせてインストールしている。
1. 実行のための準備とその確認手順(Windows 前提)
1.1 プログラムファイルの準備
第3章のソースコードをテキストエディタ(Visual Studio Codeやメモ帳など)に貼り付け,image_stitcher.py として保存する(文字コード:UTF-8)。
1.2 画像のダウンロード
本記事では,stitch.html と同じサンプル画像(OpenCV の公式リポジトリ opencv_extra で提供されているスティッチング用テストデータ)を使用する。
cd /d c:%HOMEPATH%
curl -L https://github.com/opencv/opencv_extra/raw/4.x/testdata/stitching/boat1.jpg?raw=true -o boat1.jpg
curl -L https://github.com/opencv/opencv_extra/raw/4.x/testdata/stitching/boat2.jpg?raw=true -o boat2.jpg
curl -L https://github.com/opencv/opencv_extra/raw/4.x/testdata/stitching/boat3.jpg?raw=true -o boat3.jpg
curl -L https://github.com/opencv/opencv_extra/raw/4.x/testdata/stitching/boat4.jpg?raw=true -o boat4.jpg
curl -L https://github.com/opencv/opencv_extra/raw/4.x/testdata/stitching/boat5.jpg?raw=true -o boat5.jpg
curl -L https://github.com/opencv/opencv_extra/raw/4.x/testdata/stitching/boat6.jpg?raw=true -o boat6.jpg
1.3 実行コマンド
コマンドプロンプトでファイルの保存先ディレクトリに移動し,以下を実行する。
python image_stitcher.py boat1.jpg boat2.jpg boat3.jpg boat4.jpg boat5.jpg boat6.jpg -o panorama.png1.4 動作確認チェックリスト
| 確認項目 | 期待される結果 |
|---|---|
| 画像の存在 | boat1.jpg〜boat6.jpg がカレントディレクトリに存在する |
| 特徴点検出とマッチング | コンソールに各画像の特徴点数とペアごとのインライア数が出力される |
| 接続関係の決定 | 基準画像(アンカー)がコンソールに出力される |
| プログラム実行後 | 合成されたパノラマ画像が panorama.png として保存される |
| 出力画像の確認 | 6枚の画像が継ぎ目の目立たない1枚のパノラマ画像として保存されている |
2. 概要・使い方・実行上の注意
処理のパイプライン
本プログラムは,次の7段階の処理で複数のカラー画像を1枚のパノラマ画像に合成する。
- 各画像から SIFT(既定)・ORB・AKAZE のいずれかで特徴点を検出する。
- 全ペアについて特徴点マッチング(SIFT では FLANN,ORB・AKAZE では総当たりのハミング距離)を行い,Lowe の ratio test で絞り込む。
- RANSAC で相似変換(平行移動・回転・一様拡縮のみ,せん断なし)を推定する。
- インライア数を重みとした最大全域木を構築し,画像同士の接続関係を決定する。連番でない順不同の画像集合でも自動で位置関係を推定できる。
- 全域木を基準画像(アンカー)からたどり,各画像の座標系をアンカー座標系(グローバル座標系)へ変換する行列を計算する。
- 全画像を1枚のキャンバスへワープしたのち,重なり領域の明るさのばらつきをゲイン補正で解消する。
- マルチバンドブレンディング(ラプラシアンピラミッドを用いる方式。Burt & Adelson, 1983)で継ぎ目を目立たせずに合成する。
コマンドライン引数
| 引数 | 既定値 | 説明 |
|---|---|---|
images | (必須) | 入力画像のパス(ワイルドカード可)または画像を含むディレクトリ |
-o, --output | panorama.png | 出力画像のパス |
--detector | sift | 特徴点検出器(sift,orb,akaze から選択) |
--ratio-thresh | 0.75 | Lowe の ratio test 閾値 |
--ransac-thresh | 4.0 | RANSAC 再投影誤差の閾値(ピクセル) |
--min-inliers | 15 | 有効なペアとみなす最小インライア数 |
--blend | multiband | ブレンディング方式(multiband,feather から選択) |
--num-bands | 5 | マルチバンドブレンディングのバンド数 |
--no-gain-compensation | (指定なし) | 指定するとゲイン補正を無効化する |
スクリプトから利用する場合
コマンドラインからだけでなく,ImageStitcher クラスを他の Python プログラムから直接呼び出すこともできる。
import cv2
from image_stitcher import ImageStitcher

images = [cv2.imread(p) for p in ["a.jpg", "b.jpg", "c.jpg"]]
stitcher = ImageStitcher(detector="sift", blend_method="multiband")
panorama = stitcher.stitch(images)
cv2.imwrite("panorama.png", panorama)
特徴点検出器の選択
既定の SIFT は特徴点の精度が高く,多くの場面で安定した結果が得られる。ORB は計算が高速だが,SIFT に比べて精度が劣る場合がある。AKAZE は非線形スケール空間に基づく検出器であり,SIFT・ORB とは異なる特性を持つ。ORB・AKAZE を選ぶ場合は --detector orb または --detector akaze を指定する。
3. ソースコード
以下は,複数のカラー画像を読み込み,相似変換の推定とマルチバンドブレンディングによってパノラマ画像を合成し,ファイルへ保存する Python プログラムである。コマンドラインから python image_stitcher.py として実行する。
from __future__ import annotations

import argparse
import glob
import logging
import os
from dataclasses import dataclass
from typing import Dict, List, Optional, Tuple

import cv2
import numpy as np

logging.basicConfig(level=logging.INFO, format="[%(levelname)s] %(message)s")
logger = logging.getLogger(__name__)


# ============================================================================
# データ構造
# ============================================================================

@dataclass
class PairwiseMatch:
    """2枚の画像間のペアワイズマッチング結果"""

    i: int  # 画像インデックス(小さい方)
    j: int  # 画像インデックス(大きい方、 j > i )
    transform_j_to_i: np.ndarray  # 2x3 相似変換行列(画像jの座標系 -> 画像iの座標系)
    num_inliers: int


# ============================================================================
# 特徴点検出
# ============================================================================

class FeatureExtractor:
    """画像から特徴点・特徴量記述子を検出するクラス"""

    def __init__(self, detector: str = "sift", n_features: int = 4000):
        name = detector.lower()
        if name == "sift":
            self.detector = cv2.SIFT_create(nfeatures=n_features)
            self.norm_type = cv2.NORM_L2
        elif name == "orb":
            self.detector = cv2.ORB_create(nfeatures=n_features)
            self.norm_type = cv2.NORM_HAMMING
        elif name == "akaze":
            self.detector = cv2.AKAZE_create()
            self.norm_type = cv2.NORM_HAMMING
        else:
            raise ValueError(f"未対応の検出器です: {detector}")
        self.name = name

    def detect_and_compute(self, image: np.ndarray):
        gray = cv2.cvtColor(image, cv2.COLOR_BGR2GRAY) if image.ndim == 3 else image
        keypoints, descriptors = self.detector.detectAndCompute(gray, None)
        return keypoints, descriptors


# ============================================================================
# 特徴点マッチング
# ============================================================================

class FeatureMatcher:
    """記述子同士をマッチングし、Loweのratio testでフィルタするクラス"""

    def __init__(self, norm_type: int, ratio_thresh: float = 0.75):
        self.ratio_thresh = ratio_thresh
        self.norm_type = norm_type
        if norm_type == cv2.NORM_L2:
            # SIFT等の浮動小数点記述子には FLANN(KD-Tree) を使用
            index_params = dict(algorithm=1, trees=5)  # FLANN_INDEX_KDTREE
            search_params = dict(checks=64)
            self.matcher = cv2.FlannBasedMatcher(index_params, search_params)
            self.use_flann = True
        else:
            # ORB/AKAZE等のバイナリ記述子には総当たり(Hamming距離)を使用
            self.matcher = cv2.BFMatcher(norm_type)
            self.use_flann = False

    def match(self, desc_query: np.ndarray, desc_train: np.ndarray) -> List[cv2.DMatch]:
        """desc_query(query)→ desc_train(train)へのマッチングを行う"""
        if desc_query is None or desc_train is None:
            return []
        if len(desc_query) < 2 or len(desc_train) < 2:
            return []
        if self.use_flann:
            knn = self.matcher.knnMatch(
                desc_query.astype(np.float32), desc_train.astype(np.float32), k=2
            )
        else:
            knn = self.matcher.knnMatch(desc_query, desc_train, k=2)

        good = []
        for pair in knn:
            if len(pair) != 2:
                continue
            m, n = pair
            if m.distance < self.ratio_thresh * n.distance:
                good.append(m)
        return good


# ============================================================================
# 相似変換(平行移動・回転・拡縮)の推定
# ============================================================================

def estimate_similarity_transform(
    kp_src, kp_dst, matches: List[cv2.DMatch], ransac_thresh: float, min_inliers: int
) -> Optional[Tuple[np.ndarray, int]]:
    """
    RANSAC を用いて src -> dst への相似変換(回転・一様スケール・並進のみ、せん断なし)を推定する。

    Returns
    -------
    (M, num_inliers) : M は 2x3 行列。dst_pt ≈ M @ [src_pt; 1]
    見つからない場合は None
    """
    if len(matches) < 4:
        return None

    pts_src = np.float32([kp_src[m.queryIdx].pt for m in matches]).reshape(-1, 1, 2)
    pts_dst = np.float32([kp_dst[m.trainIdx].pt for m in matches]).reshape(-1, 1, 2)

    M, inlier_mask = cv2.estimateAffinePartial2D(
        pts_src,
        pts_dst,
        method=cv2.RANSAC,
        ransacReprojThreshold=ransac_thresh,
        maxIters=5000,
        confidence=0.995,
    )
    if M is None or inlier_mask is None:
        return None

    num_inliers = int(inlier_mask.sum())
    if num_inliers < min_inliers:
        return None
    return M, num_inliers


def build_pairwise_matches(
    features: List[Tuple], matcher: FeatureMatcher, ransac_thresh: float, min_inliers: int
) -> List[PairwiseMatch]:
    """全ペア (i, j) について特徴点マッチングと相似変換推定を行う"""
    n = len(features)
    pairwise: List[PairwiseMatch] = []
    for i in range(n):
        kp_i, desc_i = features[i]
        for j in range(i + 1, n):
            kp_j, desc_j = features[j]
            # query = j, train = i として j -> i の対応点を得る
            matches = matcher.match(desc_j, desc_i)
            if len(matches) < 4:
                continue
            result = estimate_similarity_transform(kp_j, kp_i, matches, ransac_thresh, min_inliers)
            if result is None:
                continue
            M, num_inliers = result
            pairwise.append(PairwiseMatch(i=i, j=j, transform_j_to_i=M, num_inliers=num_inliers))
            logger.info(f"  画像{j} -> 画像{i} : インライア数 {num_inliers} / {len(matches)}")
    return pairwise


# ============================================================================
# 最大全域木の構築(Union-Find + Kruskal法)
# ============================================================================

class _UnionFind:
    def __init__(self, n: int):
        self.parent = list(range(n))

    def find(self, x: int) -> int:
        while self.parent[x] != x:
            self.parent[x] = self.parent[self.parent[x]]
            x = self.parent[x]
        return x

    def union(self, a: int, b: int) -> bool:
        ra, rb = self.find(a), self.find(b)
        if ra == rb:
            return False
        self.parent[ra] = rb
        return True


def build_maximum_spanning_tree(n: int, pairwise_matches: List[PairwiseMatch]) -> List[PairwiseMatch]:
    """
    インライア数を重みとした最大全域木を構築する。
    これにより、画像の入力順序に依存せず最も信頼できる接続経路を自動で選べる。
    """
    edges_sorted = sorted(pairwise_matches, key=lambda e: e.num_inliers, reverse=True)
    uf = _UnionFind(n)
    tree_edges: List[PairwiseMatch] = []
    for e in edges_sorted:
        if uf.union(e.i, e.j):
            tree_edges.append(e)
        if len(tree_edges) == n - 1:
            break

    if len(tree_edges) < n - 1:
        connected = set()
        for e in tree_edges:
            connected.add(e.i)
            connected.add(e.j)
        missing = [k for k in range(n) if k not in connected]
        raise RuntimeError(
            "画像同士の対応が取れず、パノラマとして接続できない画像があります。"
            f"孤立している画像インデックス: {missing}\n"
            "十分な重なり領域があるか、--min-inliers や --ratio-thresh の設定を確認してください。"
        )
    return tree_edges


# ============================================================================
# グローバル変換の計算
# ============================================================================

def _to_3x3(m_2x3: np.ndarray) -> np.ndarray:
    m = np.eye(3, dtype=np.float64)
    m[:2, :] = m_2x3
    return m


def compute_global_transforms(n: int, tree_edges: List[PairwiseMatch]) -> Tuple[Dict[int, np.ndarray], int]:
    """
    全域木を基準画像(アンカー)から幅優先探索でたどり、
    各画像 -> アンカー座標系(グローバル座標系)への変換行列を求める。
    アンカーは木の中で最も接続度(次数)が高い画像を選び、誤差の蓄積を抑える。
    """
    # 隣接リスト: adjacency[cur] = [(neighbor, neighborの座標系 -> curの座標系の変換), ...]
    adjacency: Dict[int, List[Tuple[int, np.ndarray]]] = {k: [] for k in range(n)}
    for e in tree_edges:
        inv_j_to_i = cv2.invertAffineTransform(e.transform_j_to_i)  # i -> j
        adjacency[e.i].append((e.j, e.transform_j_to_i))  # neighbor=j -> cur=i : j->i の変換そのもの
        adjacency[e.j].append((e.i, inv_j_to_i))          # neighbor=i -> cur=j : i->j の変換(逆行列)

    degree = {k: len(v) for k, v in adjacency.items()}
    anchor = max(range(n), key=lambda k: (degree[k], -k))

    global_transforms: Dict[int, np.ndarray] = {
        anchor: np.array([[1.0, 0.0, 0.0], [0.0, 1.0, 0.0]], dtype=np.float64)
    }
    visited = {anchor}
    queue = [anchor]
    while queue:
        cur = queue.pop(0)
        cur_global_3x3 = _to_3x3(global_transforms[cur])
        for neighbor, local_transform in adjacency[cur]:
            if neighbor in visited:
                continue
            neighbor_global_3x3 = cur_global_3x3 @ _to_3x3(local_transform)
            global_transforms[neighbor] = neighbor_global_3x3[:2, :]
            visited.add(neighbor)
            queue.append(neighbor)

    return global_transforms, anchor


# ============================================================================
# キャンバスサイズ計算とワーピング
# ============================================================================

def compute_canvas(images: List[np.ndarray], global_transforms: Dict[int, np.ndarray]):
    """全画像の四隅をグローバル座標系へ変換し、出力キャンバスの大きさとオフセットを求める"""
    all_corners = []
    for idx, img in enumerate(images):
        h, w = img.shape[:2]
        corners = np.array([[0, 0], [w, 0], [w, h], [0, h]], dtype=np.float64)
        T = global_transforms[idx]
        transformed = (T[:, :2] @ corners.T).T + T[:, 2]
        all_corners.append(transformed)
    all_corners = np.vstack(all_corners)

    min_xy = np.floor(all_corners.min(axis=0)).astype(int)
    max_xy = np.ceil(all_corners.max(axis=0)).astype(int)

    canvas_size = (int(max_xy[0] - min_xy[0]), int(max_xy[1] - min_xy[1]))  # (幅, 高さ)
    offset = (-int(min_xy[0]), -int(min_xy[1]))  # (dx, dy)
    return canvas_size, offset


def _final_transform(t_2x3: np.ndarray, offset: Tuple[int, int]) -> np.ndarray:
    t_3x3 = _to_3x3(t_2x3)
    offset_3x3 = np.array(
        [[1.0, 0.0, offset[0]], [0.0, 1.0, offset[1]], [0.0, 0.0, 1.0]], dtype=np.float64
    )
    final = offset_3x3 @ t_3x3
    return final[:2, :]


def warp_all(
    images: List[np.ndarray],
    global_transforms: Dict[int, np.ndarray],
    canvas_size: Tuple[int, int],
    offset: Tuple[int, int],
) -> Tuple[List[np.ndarray], List[np.ndarray]]:
    """全画像とその有効領域マスクを共通キャンバスへワープする"""
    warped_images, warped_masks = [], []
    for idx, img in enumerate(images):
        final_m = _final_transform(global_transforms[idx], offset)
        warped = cv2.warpAffine(
            img, final_m, canvas_size, flags=cv2.INTER_LINEAR, borderMode=cv2.BORDER_CONSTANT
        )
        mask = np.full(img.shape[:2], 255, dtype=np.uint8)
        warped_mask = cv2.warpAffine(
            mask, final_m, canvas_size, flags=cv2.INTER_NEAREST, borderMode=cv2.BORDER_CONSTANT
        )
        warped_images.append(warped)
        warped_masks.append(warped_mask)
    return warped_images, warped_masks


# ============================================================================
# ゲイン(明るさ)補正
# ============================================================================

def compensate_gain(
    warped_images: List[np.ndarray],
    warped_masks: List[np.ndarray],
    sigma_n: float = 10.0,
    sigma_g: float = 0.1,
) -> List[np.ndarray]:
    """
    重なり領域の平均輝度差を最小化するゲイン係数を最小二乗法で求め、明るさのばらつきを補正する。
    (Brown & Lowe 2007 のゲイン補正モデルの簡易実装)
    """
    n = len(warped_images)
    grays = [cv2.cvtColor(im, cv2.COLOR_BGR2GRAY).astype(np.float64) for im in warped_images]
    bin_masks = [m > 0 for m in warped_masks]

    A = np.zeros((n, n), dtype=np.float64)
    b = np.zeros(n, dtype=np.float64)

    for i in range(n):
        mask_i = bin_masks[i]
        for j in range(n):
            if i == j:
                continue
            overlap = mask_i & bin_masks[j]
            area = int(overlap.sum())
            if area < 100:
                continue
            mu_i = grays[i][overlap].mean()
            mu_j = grays[j][overlap].mean()
            coef = area / (sigma_n ** 2)
            A[i, i] += coef * (mu_i ** 2)
            A[i, j] -= coef * (mu_i * mu_j)
        area_i_total = int(mask_i.sum())
        if area_i_total > 0:
            A[i, i] += area_i_total / (sigma_g ** 2)
            b[i] += area_i_total / (sigma_g ** 2)

    try:
        gains = np.linalg.solve(A + np.eye(n) * 1e-6, b)
    except np.linalg.LinAlgError:
        gains = np.ones(n)

    gains = np.clip(gains, 0.5, 2.0)
    logger.info(f"  ゲイン補正係数: {np.round(gains, 3).tolist()}")

    compensated = []
    for img, g in zip(warped_images, gains):
        comp = np.clip(img.astype(np.float64) * g, 0, 255).astype(np.uint8)
        compensated.append(comp)
    return compensated


# ============================================================================
# ブレンディング(フェザー / マルチバンド)
# ============================================================================

def compute_feather_weights(masks: List[np.ndarray]) -> List[np.ndarray]:
    """各マスクの距離変換から、画素ごとに合計1になるよう正規化した重みマップを作る"""
    weights = []
    for m in masks:
        dist = cv2.distanceTransform((m > 0).astype(np.uint8), cv2.DIST_L2, 5)
        weights.append(dist.astype(np.float64))
    weight_sum = np.sum(weights, axis=0)
    weight_sum[weight_sum == 0] = 1.0
    return [w / weight_sum for w in weights]


def _gaussian_pyramid(img: np.ndarray, num_levels: int) -> List[np.ndarray]:
    pyramid = [img.astype(np.float64)]
    for _ in range(num_levels):
        pyramid.append(cv2.pyrDown(pyramid[-1]))
    return pyramid


def _laplacian_pyramid(img: np.ndarray, num_levels: int) -> List[np.ndarray]:
    gaussian = _gaussian_pyramid(img, num_levels)
    laplacian = []
    for i in range(num_levels):
        size = (gaussian[i].shape[1], gaussian[i].shape[0])
        expanded = cv2.pyrUp(gaussian[i + 1], dstsize=size)
        laplacian.append(gaussian[i] - expanded)
    laplacian.append(gaussian[-1])
    return laplacian


def multiband_blend(
    warped_images: List[np.ndarray], weight_maps: List[np.ndarray], num_bands: int = 5
) -> np.ndarray:
    """ラプラシアンピラミッドによるマルチバンドブレンディング(Burt & Adelson, 1983)"""
    n = len(warped_images)
    laplacians = [_laplacian_pyramid(img, num_bands) for img in warped_images]
    # 重みマップ(2次元)のガウシアンピラミッドを作り、カラー画像と乗算する際に次元を合わせる
    gauss_weights = [_gaussian_pyramid(w, num_bands) for w in weight_maps]

    blended_pyramid = []
    for level in range(num_bands + 1):
        acc = np.zeros_like(laplacians[0][level])
        for k in range(n):
            w = gauss_weights[k][level]
            if acc.ndim == 3 and w.ndim == 2:
                w = w[..., None]
            acc += laplacians[k][level] * w
        blended_pyramid.append(acc)

    result = blended_pyramid[-1]
    for level in range(num_bands - 1, -1, -1):
        size = (blended_pyramid[level].shape[1], blended_pyramid[level].shape[0])
        result = cv2.pyrUp(result, dstsize=size) + blended_pyramid[level]

    return np.clip(result, 0, 255).astype(np.uint8)


def feather_blend(warped_images: List[np.ndarray], weight_maps: List[np.ndarray]) -> np.ndarray:
    """単純な重み付き平均によるブレンディング(高速だが継ぎ目が残りやすい)"""
    acc = np.zeros_like(warped_images[0], dtype=np.float64)
    for img, w in zip(warped_images, weight_maps):
        acc += img.astype(np.float64) * w[..., None]
    return np.clip(acc, 0, 255).astype(np.uint8)


def crop_black_border(panorama: np.ndarray, masks: List[np.ndarray]) -> np.ndarray:
    """全画像のマスクを統合し、完全に空の余白部分を切り取る"""
    combined_mask = np.zeros(masks[0].shape, dtype=np.uint8)
    for m in masks:
        combined_mask = cv2.bitwise_or(combined_mask, m)
    coords = cv2.findNonZero(combined_mask)
    if coords is None:
        return panorama
    x, y, w, h = cv2.boundingRect(coords)
    return panorama[y : y + h, x : x + w]


# ============================================================================
# メインクラス
# ============================================================================

class ImageStitcher:
    """複数カラー画像の位置合わせ(相似変換)とパノラマ合成を行うクラス"""

    def __init__(
        self,
        detector: str = "sift",
        ratio_thresh: float = 0.75,
        ransac_thresh: float = 4.0,
        min_inliers: int = 15,
        blend_method: str = "multiband",
        num_bands: int = 5,
        gain_compensation: bool = True,
    ):
        self.detector_name = detector
        self.ratio_thresh = ratio_thresh
        self.ransac_thresh = ransac_thresh
        self.min_inliers = min_inliers
        self.blend_method = blend_method
        self.num_bands = num_bands
        self.gain_compensation = gain_compensation

    def stitch(self, images: List[np.ndarray]) -> np.ndarray:
        n = len(images)
        if n < 2:
            raise ValueError("stitch() には2枚以上の画像が必要です")

        extractor = FeatureExtractor(self.detector_name)
        matcher = FeatureMatcher(extractor.norm_type, self.ratio_thresh)

        logger.info(f"{n}枚の画像から特徴点を検出中 (detector={self.detector_name}) ...")
        features = [extractor.detect_and_compute(img) for img in images]
        for idx, (kp, _desc) in enumerate(features):
            logger.info(f"  画像{idx}: 特徴点数 = {len(kp) if kp is not None else 0}")

        logger.info("全ペアの特徴点マッチングと相似変換の推定中 ...")
        pairwise_matches = build_pairwise_matches(features, matcher, self.ransac_thresh, self.min_inliers)
        if not pairwise_matches:
            raise RuntimeError(
                "有効な対応関係が1組も見つかりませんでした。"
                "画像の重なりや --min-inliers / --ratio-thresh の設定を確認してください。"
            )

        logger.info("最大全域木を構築し、画像同士の接続関係を決定中 ...")
        tree_edges = build_maximum_spanning_tree(n, pairwise_matches)

        logger.info("基準画像を中心にグローバル変換を計算中 ...")
        global_transforms, anchor = compute_global_transforms(n, tree_edges)
        logger.info(f"  基準画像(アンカー): 画像{anchor}")

        canvas_size, offset = compute_canvas(images, global_transforms)
        logger.info(f"  出力キャンバスサイズ: {canvas_size}, オフセット: {offset}")

        warped_images, warped_masks = warp_all(images, global_transforms, canvas_size, offset)

        if self.gain_compensation:
            logger.info("画像間の明るさのばらつきを補正中(ゲイン補正)...")
            warped_images = compensate_gain(warped_images, warped_masks)

        logger.info(f"画像を合成中 (blend_method={self.blend_method}) ...")
        weight_maps = compute_feather_weights(warped_masks)
        if self.blend_method == "multiband":
            panorama = multiband_blend(warped_images, weight_maps, self.num_bands)
        elif self.blend_method == "feather":
            panorama = feather_blend(warped_images, weight_maps)
        else:
            raise ValueError(f"未対応の blend_method です: {self.blend_method}")

        panorama = crop_black_border(panorama, warped_masks)
        logger.info(f"完成したパノラマ画像のサイズ: {panorama.shape[1]} x {panorama.shape[0]}")
        return panorama


# ============================================================================
# CLI
# ============================================================================

def load_images(paths: List[str]) -> List[np.ndarray]:
    images = []
    for p in paths:
        img = cv2.imread(p, cv2.IMREAD_COLOR)
        if img is None:
            raise FileNotFoundError(f"画像を読み込めませんでした: {p}")
        images.append(img)
    return images


def _collect_input_paths(args_images: List[str]) -> List[str]:
    input_paths: List[str] = []
    for p in args_images:
        if os.path.isdir(p):
            for ext in ("*.jpg", "*.jpeg", "*.png", "*.bmp", "*.tif", "*.tiff"):
                input_paths.extend(sorted(glob.glob(os.path.join(p, ext))))
        else:
            matched = sorted(glob.glob(p))
            input_paths.extend(matched if matched else [p])
    return input_paths


def main():
    parser = argparse.ArgumentParser(
        description="複数カラー画像の位置合わせ(平行移動・回転・拡大縮小)とパノラマ合成"
    )
    parser.add_argument(
        "images", nargs="+", help="入力画像のパス(ワイルドカード可)または画像を含むディレクトリ"
    )
    parser.add_argument("-o", "--output", default="panorama.png", help="出力画像のパス")
    parser.add_argument(
        "--detector", default="sift", choices=["sift", "orb", "akaze"], help="特徴点検出器"
    )
    parser.add_argument("--ratio-thresh", type=float, default=0.75, help="Loweのratio test閾値")
    parser.add_argument(
        "--ransac-thresh", type=float, default=4.0, help="RANSAC再投影誤差の閾値(px)"
    )
    parser.add_argument(
        "--min-inliers", type=int, default=15, help="有効なペアとみなす最小インライア数"
    )
    parser.add_argument(
        "--blend", default="multiband", choices=["multiband", "feather"], help="ブレンディング方式"
    )
    parser.add_argument("--num-bands", type=int, default=5, help="マルチバンドブレンディングのバンド数")
    parser.add_argument(
        "--no-gain-compensation", action="store_true", help="ゲイン補正を無効化する"
    )
    args = parser.parse_args()

    input_paths = _collect_input_paths(args.images)
    if len(input_paths) < 2:
        raise SystemExit("2枚以上の画像を指定してください。")

    logger.info(f"入力画像 ({len(input_paths)}枚): {input_paths}")
    images = load_images(input_paths)

    stitcher = ImageStitcher(
        detector=args.detector,
        ratio_thresh=args.ratio_thresh,
        ransac_thresh=args.ransac_thresh,
        min_inliers=args.min_inliers,
        blend_method=args.blend,
        num_bands=args.num_bands,
        gain_compensation=not args.no_gain_compensation,
    )
    panorama = stitcher.stitch(images)
    cv2.imwrite(args.output, panorama)
    logger.info(f"パノラマ画像を保存しました: {args.output}")


if __name__ == "__main__":
    main()
4. まとめ
自作パイプラインによるイメージスティッチング
cv2.Stitcher のような高水準 API に頼らず,特徴点検出からブレンディングまでの一連の処理を自作することで,パイプラインの各段階を個別に確認・調整できる。本記事では,特徴点検出,マッチング,RANSAC による相似変換推定,最大全域木による接続関係の決定,ゲイン補正,マルチバンドブレンディングという7段階の処理でパノラマ画像を合成した。
特徴点検出とマッチング
SIFT・ORB・AKAZE から特徴点検出器を選択できる。SIFT を用いる場合は浮動小数点記述子のため FLANN(KD-Tree)でマッチングし,ORB・AKAZE を用いる場合はバイナリ記述子のため総当たり(ハミング距離)でマッチングする。Lowe の ratio test で誤対応を除去する。
RANSAC による相似変換の推定と最大全域木
RANSAC により,平行移動・回転・一様拡縮のみからなる相似変換(せん断なし)を頑健に推定する。全ペアの推定結果からインライア数を重みとした最大全域木を構築することで,画像の入力順序に依存せず,最も信頼できる接続経路を自動で選べる。
ゲイン補正とマルチバンドブレンディング
重なり領域の明るさのばらつきを最小二乗法によるゲイン補正で解消したのち,ラプラシアンピラミッドを用いたマルチバンドブレンディング(Burt & Adelson, 1983)で継ぎ目を目立たせずに合成する。単純な重み付き平均によるフェザーブレンディングも選択できるが,継ぎ目が残りやすい。
コマンドライン引数によるパラメータ調整
特徴点検出器,RANSAC の閾値,最小インライア数,ブレンディング方式などをコマンドライン引数で調整できる。画像同士の重なりが少ない場合は,--min-inliers や --ratio-thresh の値を見直す。