Vision Transormer による表情推定システム
【目次】
概要
本教材では、AI技術による表情推定技術を体験する。
主要技術: 表情推定(Facial Expression Recognition)
論文: "Facial Expression Recognition: A Review of Trends and Applications" および実装にVision Transformerを活用した "An Image is Worth 16x16 Words: Transformers for Image Recognition at Scale" (Dosovitskiy et al., ICLR 2021)
技術の新規性・特徴: 人間の顔画像から感情状態を自動的に認識する技術。Ekmanの7基本感情(怒り、嫌悪、恐怖、幸福、中性、悲しみ、驚き)を判定する。従来手法に加えて68点顔キーポイントによる前処理強化とVision Transformerによるグローバル文脈理解により、顔の向きや照明条件に頑健な認識を実現する。
アプリケーション例: 感情分析システム、顧客満足度調査、教育支援システム、ヘルスケアモニタリング、人間-コンピュータインタラクション、心理状態評価
体験価値: リアルタイムで自分の表情がどのように数値化・分類されるかを確認でき、表情と感情の関係性、AI技術による感情認識の精度と限界を確認できる。表情変化の追跡により、表情推定技術の実用性と応用可能性を確認できる。
事前準備
Python 3.12 のインストール(Windows 上) [クリックして展開]
以下のいずれかの方法で Python 3.12 をインストールする。Python がインストール済みの場合、この手順は不要である。
方法1:winget によるインストール
管理者権限のコマンドプロンプトで以下を実行する。管理者権限のコマンドプロンプトを起動するには、Windows キーまたはスタートメニューから「cmd」と入力し、表示された「コマンドプロンプト」を右クリックして「管理者として実行」を選択する。
winget install --id Python.Python.3.12 -e --scope machine --silent --accept-source-agreements --accept-package-agreements --override "/quiet InstallAllUsers=1 PrependPath=1 Include_test=0 Include_pip=1 Include_launcher=1 InstallLauncherAllUsers=1 TargetDir=\"C:\Program Files\Python312\""
powershell -Command "$p='C:\Program Files\Python312'; $s=\"$p\Scripts\"; $m=[Environment]::GetEnvironmentVariable('Path','Machine'); if($m -notlike \"*$s*\") { [Environment]::SetEnvironmentVariable('Path', \"$p;$s;$m\", 'Machine') }"
--scope machine を指定することで、システム全体(全ユーザー向け)にインストールされる。このオプションの実行には管理者権限が必要である。インストール完了後、コマンドプロンプトを再起動すると PATH が自動的に設定される。
方法2:インストーラーによるインストール
- Python 公式サイト(https://www.python.org/downloads/)にアクセスし、「Download Python 3.x.x」ボタンから Windows 用インストーラーをダウンロードする。
- ダウンロードしたインストーラーを実行する。
- 初期画面の下部に表示される「Add python.exe to PATH」に必ずチェックを入れてから「Customize installation」を選択する。このチェックを入れ忘れると、コマンドプロンプトから
pythonコマンドを実行できない。 - 「Install Python 3.xx for all users」にチェックを入れ、「Install」をクリックする。
インストールの確認
コマンドプロンプトで以下を実行する。
python --versionバージョン番号(例:Python 3.12.x)が表示されればインストール成功である。「'python' は、内部コマンドまたは外部コマンドとして認識されていません。」と表示される場合は、インストールが正常に完了していない。
AIエディタ Windsurf のインストール(Windows 上) [クリックして展開]
Pythonプログラムの編集・実行には、AIエディタの利用を推奨する。ここでは、Windsurfのインストールを説明する。Windsurf がインストール済みの場合、この手順は不要である。
管理者権限のコマンドプロンプトで以下を実行する。管理者権限のコマンドプロンプトを起動するには、Windows キーまたはスタートメニューから「cmd」と入力し、表示された「コマンドプロンプト」を右クリックして「管理者として実行」を選択する。
winget install --scope machine --id Codeium.Windsurf -e --silent --disable-interactivity --force --accept-source-agreements --accept-package-agreements --custom "/SP- /SUPPRESSMSGBOXES /NORESTART /CLOSEAPPLICATIONS /DIR=""C:\Program Files\Windsurf"" /MERGETASKS=!runcode,addtopath,associatewithfiles,!desktopicon"
powershell -Command "$env:Path=[System.Environment]::GetEnvironmentVariable('Path','Machine')+';'+[System.Environment]::GetEnvironmentVariable('Path','User'); windsurf --install-extension MS-CEINTL.vscode-language-pack-ja --force; windsurf --install-extension ms-python.python --force; windsurf --install-extension Codeium.windsurfPyright --force"
--scope machine を指定することで、システム全体(全ユーザー向け)にインストールされる。このオプションの実行には管理者権限が必要である。インストール完了後、コマンドプロンプトを再起動すると PATH が自動的に設定される。
【関連する外部ページ】
Windsurf の公式ページ: https://windsurf.com/
必要なライブラリのインストール
コマンドプロンプトを管理者として実行(手順:Windowsキーまたはスタートメニュー > cmd と入力 > 右クリック > 「管理者として実行」)し、以下を実行する:
REM PyTorch をインストール(GPU対応版)
set "CUDA_TAG=cu128"
set "PYTHON_PATH=C:\Program Files\Python312"
"%PYTHON_PATH%\Scripts\pip" install --no-user -U numpy torch torchvision torchaudio --index-url https://download.pytorch.org/whl/%CUDA_TAG%
pip install ultralytics transformers opencv-python numpy pillow
YOLOv11顔検出+Vision Transformer表情推定プログラム(折れ線グラフ機能付き)
概要
本プログラムは、動画像から人間の顔を検出し、その表情を7種類(怒り、嫌悪、恐怖、喜び、悲しみ、驚き、中立)に分類する。リアルタイムで複数の顔を同時に処理し、各顔の表情変化を時系列グラフとして可視化する。
主要技術
- YOLOv11
物体検出アルゴリズムである。画像全体を一度の推論で処理する[1]。本プログラムでは顔検出に特化したYOLOv11-faceモデルを使用し、68点の顔キーポイント検出も同時に行う。
- Vision Transformer (ViT)
画像を16×16ピクセルのパッチに分割し、各パッチをトークンとして扱うTransformerベースの画像認識手法である[2]。Self-Attention機構により画像全体の文脈を考慮した認識が可能となる。本プログラムではtrpakov/vit-face-expressionモデルを使用し、FER2013データセットで学習済みの表情分類を行う。
参考文献
- [1] Jocher, G., Qiu, J., & Chaurasia, A. (2024). Ultralytics YOLO11. https://github.com/ultralytics/ultralytics
- [2] Dosovitskiy, A., Beyer, L., Kolesnikov, A., Weissenborn, D., Zhai, X., Unterthiner, T., ... & Houlsby, N. (2021). An image is worth 16x16 words: Transformers for image recognition at scale. In International Conference on Learning Representations.
ソースコード
# プログラム名: YOLOv11顔検出+Vision Transformer表情推定システム(折れ線グラフ機能付き)
# 特徴技術名: Vision Transformer (ViT) + Real-time Emotion Time Series Visualization
# 出典: Dosovitskiy, A., et al. (2021). An image is worth 16x16 words: Transformers for image recognition at scale. ICLR.
# 新機能: 基本感情の時系列可視化(多線折れ線グラフ)
# 可視化理論根拠: Sheidin, J., et al. (2019). A comparative evaluation of techniques for time series visualizations of emotions
# 特徴機能: 画像を16x16パッチに分割し、Self-Attention機構により画像全体の文脈を考慮した表情認識を実現
# 学習済みモデル:
# - YOLOv11-face: 顔検出と68点キーポイント検出用モデル、WIDER FACEデータセットで学習
# モデルサイズ選択可能(デフォルト:s):
# n (nano): https://github.com/akanametov/yolo-face/releases/download/v0.0.0/yolov11n-face.pt
# s (small): https://github.com/akanametov/yolo-face/releases/download/v0.0.0/yolov11s-face.pt
# m (medium): https://github.com/akanametov/yolo-face/releases/download/v0.0.0/yolov11m-face.pt
# l (large): https://github.com/akanametov/yolo-face/releases/download/v0.0.0/yolov11l-face.pt
# - trpakov/vit-face-expression: FER2013データセットで学習済み、7クラス表情分類に対応、Hugging Faceから自動ダウンロード
# 方式設計:
# - 関連利用技術:
# - YOLOv11: 物体検出
# - OpenCV: 画像処理、カメラ制御、描画処理
# - Transformers: ViTモデルの推論
# - 入出力: 入力=動画(0:動画ファイル,1:カメラ,2:サンプル動画)、出力=OpenCV画面表示、フレームごとのprint()出力、終了時にresult.txt保存、折れ線グラフ表示
# - 処理手順: 1.YOLOv11で顔検出と68点キーポイント取得、2.顔領域を224x224へリサイズ、3.ViTでパッチ分割と位置埋め込み付与、4.Self-Attentionで特徴抽出、5.7クラス分類とスコア出力、6.時系列データ蓄積とグラフ更新
# - 前処理/後処理: 前処理=目位置から傾斜角度計算と回転補正、Lanczos補間リサイズ。後処理=キーポイント数に基づく簡易スコア補正と再正規化、時系列平滑化(設定に依存)
# - 追加処理: 環境変数設定でKeras互換性問題回避、グラフの非ブロッキング更新
# - 調整パラメータ: FACE_CONFIDENCE_THRESHOLD(デフォルト0.4)、KEYPOINT_QUALITY_THRESHOLD(5度)、MODEL_SIZE('s')、CHART_UPDATE_INTERVAL(1.0秒)、CHART_HISTORY_SIZE(60)
# 操作: q=終了, c=グラフ保存, g=グラフ表示, s=詳細表示切替(上位3クラス)
# 注意: WindowsではC:/Windows/Fonts/meiryo.ttcを使用してPillow+OpenCVで文字描画
import cv2
import tkinter as tk
from tkinter import filedialog
import os
import sys
import platform
import torch
import numpy as np
from PIL import Image, ImageDraw, ImageFont
from transformers import pipeline
from ultralytics import YOLO
import warnings
import time
import urllib.request
from datetime import datetime
from collections import deque, defaultdict
# Keras 3互換性に関する設定(Transformers利用時の推奨設定)
os.environ['USE_TF'] = '0'
os.environ['USE_TORCH'] = '1'
warnings.filterwarnings('ignore')
# ===== 設定・定数 =====
# YOLOv11-faceモデル設定
MODEL_SIZE = 's'
MODEL_PATH = os.path.join(os.path.expanduser('~'), 'Documents', f'yolov11{MODEL_SIZE}-face.pt')
MODEL_URL = f'https://github.com/akanametov/yolo-face/releases/download/v0.0.0/yolov11{MODEL_SIZE}-face.pt'
SAMPLE_VIDEO_URL = 'https://raw.githubusercontent.com/opencv/opencv/master/samples/data/vtest.avi'
SAMPLE_VIDEO_NAME = 'vtest.avi'
RESULT_FILE = 'result.txt'
# カメラ設定
WINDOW_WIDTH = 1920
WINDOW_HEIGHT = 1080
FPS = 30
# 検出・推定パラメータ
FACE_CONFIDENCE_THRESHOLD = 0.4
KEYPOINT_QUALITY_THRESHOLD = 5
HIGH_QUALITY_KEYPOINTS = 60
MEDIUM_QUALITY_KEYPOINTS = 40
HIGH_QUALITY_BONUS = 0.05
MEDIUM_QUALITY_BONUS = 0.02
# 折れ線グラフ設定
CHART_ENABLED = True
CHART_UPDATE_INTERVAL = 1.0
CHART_HISTORY_SIZE = 60
CHART_WINDOW_WIDTH = 800
CHART_WINDOW_HEIGHT = 600
CHART_MARGIN = 80
# 表示設定
IMAGE_SIZE = 224
# 日本語フォント設定(WindowsではMeiryo、その他はフォールバック)
FONT_PATH = 'C:/Windows/Fonts/meiryo.ttc' if platform.system() == 'Windows' else None
FONT_SIZE = 20
# 68点顔ランドマークのインデックス
LEFT_EYE_START = 36
LEFT_EYE_END = 42
RIGHT_EYE_START = 42
RIGHT_EYE_END = 48
MIN_VALID_KEYPOINTS = 5
# 表示用名称・色(モデルの表記ゆれを包含)
EMOTION_JAPANESE = {
'angry': 'Angry', 'anger': 'Angry',
'disgust': 'Disgust',
'fear': 'Fear',
'happy': 'Happy', 'happiness': 'Happy',
'neutral': 'Neutral',
'sad': 'Sad', 'sadness': 'Sad',
'surprise': 'Surprise'
}
EMOTION_COLORS = {
'angry': (0, 0, 255), 'anger': (0, 0, 255),
'disgust': (0, 128, 0),
'fear': (128, 0, 128),
'happy': (0, 255, 255), 'happiness': (0, 255, 255),
'neutral': (128, 128, 128),
'sad': (255, 0, 0), 'sadness': (255, 0, 0),
'surprise': (0, 165, 255)
}
# 初期値(ViT初期化後にモデルに合わせて再設定する)
BASIC_EMOTIONS = ['happy', 'sad', 'angry', 'fear', 'disgust', 'surprise']
def draw_japanese_text(img, text, position, font_path=FONT_PATH, font_size=FONT_SIZE, color=(0, 255, 0)):
"""Pillowで日本語描画(フォント未設定時はOpenCV英字にフォールバック)"""
if font_path and os.path.exists(font_path):
try:
font = ImageFont.truetype(font_path, font_size)
img_pil = Image.fromarray(cv2.cvtColor(img, cv2.COLOR_BGR2RGB))
draw = ImageDraw.Draw(img_pil)
draw.text(position, text, font=font, fill=color[::-1]) # BGR→RGB
return cv2.cvtColor(np.array(img_pil), cv2.COLOR_RGB2BGR)
except Exception:
pass
cv2.putText(img, text, position, cv2.FONT_HERSHEY_SIMPLEX, 0.7, color, 2)
return img
class EmotionTimeSeriesChart:
"""感情スコアの時系列をOpenCVで描画するクラス"""
def __init__(self):
self.enabled = CHART_ENABLED
if not self.enabled:
return
self.timestamps = deque(maxlen=CHART_HISTORY_SIZE)
self.emotion_data = {emotion: deque(maxlen=CHART_HISTORY_SIZE) for emotion in BASIC_EMOTIONS}
self.chart_width = CHART_WINDOW_WIDTH
self.chart_height = CHART_WINDOW_HEIGHT
self.margin = CHART_MARGIN
self.graph_width = self.chart_width - 2 * self.margin
self.graph_height = self.chart_height - 2 * self.margin
print('OpenCV感情グラフを初期化しました')
def add_data(self, emotion_scores, timestamp=None):
if not self.enabled:
return
if timestamp is None:
timestamp = datetime.now()
self.timestamps.append(timestamp)
for emotion in BASIC_EMOTIONS:
score = emotion_scores.get(emotion, 0.0) * 100
self.emotion_data[emotion].append(score)
def create_chart_image(self):
if not self.enabled or len(self.timestamps) < 2:
return None
img = np.zeros((self.chart_height, self.chart_width, 3), dtype=np.uint8)
img = draw_japanese_text(img, '感情時系列グラフ', (20, 30), color=(255, 255, 255))
cv2.rectangle(img, (self.margin, self.margin),
(self.margin + self.graph_width, self.margin + self.graph_height),
(255, 255, 255), 1)
for i in range(0, 101, 20):
y = self.margin + self.graph_height - int(i * self.graph_height / 100)
cv2.line(img, (self.margin - 5, y), (self.margin, y), (255, 255, 255), 1)
cv2.putText(img, f'{i}%', (10, y + 5), cv2.FONT_HERSHEY_SIMPLEX, 0.4, (255, 255, 255), 1)
data_count = len(self.timestamps)
if data_count < 2:
return img
for i, emotion in enumerate(BASIC_EMOTIONS):
color = EMOTION_COLORS.get(emotion, (255, 255, 255))
data = list(self.emotion_data.get(emotion, []))
if len(data) < 2:
continue
points = []
for j, value in enumerate(data):
if data_count > 1:
x = self.margin + int(j * self.graph_width / (data_count - 1))
else:
x = self.margin + self.graph_width // 2
y = self.margin + self.graph_height - int(value * self.graph_height / 100)
points.append((x, y))
for k in range(len(points) - 1):
cv2.line(img, points[k], points[k + 1], color, 2)
legend_y = 50 + i * 25
cv2.rectangle(img, (self.chart_width - 150, legend_y),
(self.chart_width - 130, legend_y + 15), color, -1)
cv2.putText(img, EMOTION_JAPANESE.get(emotion, emotion),
(self.chart_width - 120, legend_y + 12),
cv2.FONT_HERSHEY_SIMPLEX, 0.5, (255, 255, 255), 1)
return img
def save_chart(self, filename='emotion_chart.png'):
img = self.create_chart_image()
if img is not None:
cv2.imwrite(filename, img)
return True
return False
def show_chart(self):
img = self.create_chart_image()
if img is not None:
cv2.imshow('Emotion Chart', img)
cv2.waitKey(1)
def close(self):
try:
if cv2.getWindowProperty('Emotion Chart', cv2.WND_PROP_VISIBLE) >= 0:
cv2.destroyWindow('Emotion Chart')
except Exception:
pass
def download_yolo_model():
"""YOLOv11-faceの学習済み重みをローカルに取得"""
if not os.path.exists(MODEL_PATH):
print(f'YOLOv11{MODEL_SIZE}-faceモデルをダウンロードしています...')
print(f'モデルサイズ: {MODEL_SIZE} (nano=最軽量, small=軽量, medium=中程度, large=高精度)')
try:
os.makedirs(os.path.dirname(MODEL_PATH), exist_ok=True)
urllib.request.urlretrieve(MODEL_URL, MODEL_PATH)
print(f'YOLOv11{MODEL_SIZE}-faceモデルのダウンロードが完了しました')
except Exception as e:
print(f'YOLOv11{MODEL_SIZE}-faceモデルのダウンロードに失敗しました')
print(f'エラー: {e}')
print(f'URL: {MODEL_URL}')
sys.exit(1)
else:
print(f'YOLOv11{MODEL_SIZE}-faceモデルが既に存在します: {MODEL_PATH}')
# ガイダンス
print('=== YOLOv11顔検出+Vision Transformer表情推定システム(折れ線グラフ機能付き)===')
print('概要: リアルタイムで顔を検出し、Vision Transformerで7種類の表情を認識します')
print('機能: YOLOv11による顔検出 + ViT Self-Attentionによる表情分析')
print('新機能: リアルタイム感情時系列グラフ')
print('可視化: 6基本感情の多線折れ線グラフ')
print('操作: qキーで終了、sキーで詳細情報表示、cキーでグラフ画像保存')
print('出力: フレームごとの処理結果表示、終了時にresult.txt保存、リアルタイムグラフ表示')
print()
print('システム初期化中...')
download_yolo_model()
# GPU/CPU自動選択
device = torch.device('cuda' if torch.cuda.is_available() else 'cpu')
print(f'デバイス: {str(device)}')
# GPU使用時の最適化
if device.type == 'cuda':
torch.backends.cudnn.benchmark = True
# YOLOv11モデル初期化
face_model = YOLO(MODEL_PATH)
face_model.to(device)
face_model.eval()
# ViT表情認識モデル(全クラススコア取得のためtop_k=総クラス数に設定)
try:
device_index = 0 if torch.cuda.is_available() else -1
emotion_pipeline = pipeline(
'image-classification',
model='trpakov/vit-face-expression',
device=device_index,
framework='pt'
)
# モデルのラベル集合に合わせて内部表現を更新
id2label = emotion_pipeline.model.config.id2label
model_labels = [id2label[i].lower() for i in sorted(id2label)]
BASIC_EMOTIONS = [e for e in model_labels if e != 'neutral'] # 可視化対象(Neutralは除外)
print('ViT表情認識モデルの初期化が完了しました')
except Exception as e:
print(f'ViT表情認識モデルの初期化に失敗しました')
print(f'エラー: {e}')
sys.exit(1)
# 感情グラフ初期化
emotion_chart = EmotionTimeSeriesChart()
print('初期化完了')
print()
# グローバル状態
frame_count = 0
last_chart_update = time.time()
results_log = []
show_details = False # sキーでトグルする詳細表示フラグ
def process_face(frame, box, kp):
"""顔領域の回転補正→ViT推論→スコア補正(再正規化)→可視化用データ整形"""
x1, y1, x2, y2 = map(int, box)
face_img = frame[y1:y2, x1:x2]
if face_img.size == 0:
return None
# 顔向き補正(目の中心から傾斜角を推定)
enhanced_face = face_img
if kp is not None and len(kp) >= 68:
valid_kp = kp[(kp[:, 0] > 0) & (kp[:, 1] > 0)]
if len(valid_kp) >= MIN_VALID_KEYPOINTS:
left_eye = kp[LEFT_EYE_START:LEFT_EYE_END]
right_eye = kp[RIGHT_EYE_START:RIGHT_EYE_END]
left_valid = left_eye[(left_eye[:, 0] > 0) & (left_eye[:, 1] > 0)]
right_valid = right_eye[(right_eye[:, 0] > 0) & (right_eye[:, 1] > 0)]
if len(left_valid) > 0 and len(right_valid) > 0:
left_center = np.mean(left_valid, axis=0)
right_center = np.mean(right_valid, axis=0)
angle = np.arctan2(
right_center[1] - left_center[1],
right_center[0] - left_center[0]
) * 180.0 / np.pi
if abs(angle) > KEYPOINT_QUALITY_THRESHOLD:
h, w = face_img.shape[:2]
center = (w // 2, h // 2)
M = cv2.getRotationMatrix2D(center, -angle, 1.0)
enhanced_face = cv2.warpAffine(face_img, M, (w, h))
# 表情推定(全クラススコア)
face_rgb = cv2.cvtColor(enhanced_face, cv2.COLOR_BGR2RGB)
pil_img = Image.fromarray(face_rgb).resize((IMAGE_SIZE, IMAGE_SIZE), Image.Resampling.LANCZOS)
num_labels = len(emotion_pipeline.model.config.id2label)
results = emotion_pipeline(pil_img, top_k=num_labels)
emotions = {r['label'].lower(): float(r['score']) for r in results}
# ボーナス適用(トップラベルに加算→全体を再正規化)
kp_count = int(len(kp[(kp[:, 0] > 0) & (kp[:, 1] > 0)])) if kp is not None else 0
bonus = HIGH_QUALITY_BONUS if kp_count >= HIGH_QUALITY_KEYPOINTS else (MEDIUM_QUALITY_BONUS if kp_count >= MEDIUM_QUALITY_KEYPOINTS else 0.0)
if emotions:
top_label, _ = max(emotions.items(), key=lambda x: x[1])
adjusted = dict(emotions)
adjusted[top_label] = min(1.0, adjusted[top_label] + bonus)
s = sum(adjusted.values())
if s > 0:
adjusted = {k: v / s for k, v in adjusted.items()}
top_label, top_score = max(adjusted.items(), key=lambda x: x[1])
else:
adjusted = emotions
top_label, top_score = 'neutral', 0.0
return {
'box': (x1, y1, x2, y2),
'emotion': top_label,
'emotion_conf': float(top_score),
'all_emotions': adjusted,
'keypoint_count': kp_count
}
def update_emotion_chart(faces):
"""複数顔のスコア平均を時系列グラフへ追記"""
global last_chart_update
if not CHART_ENABLED or not faces:
return
current_time = time.time()
if current_time - last_chart_update < CHART_UPDATE_INTERVAL:
return
emotion_averages = defaultdict(float)
for face in faces:
for emotion, score in face['all_emotions'].items():
emotion_averages[emotion] += score
for emotion in list(emotion_averages.keys()):
emotion_averages[emotion] /= len(faces)
emotion_chart.add_data(dict(emotion_averages))
last_chart_update = current_time
def video_frame_processing(frame):
"""1フレームの処理(検出→推定→可視化)"""
global frame_count
current_time = time.time()
frame_count += 1
# 顔検出
results = face_model(frame, conf=FACE_CONFIDENCE_THRESHOLD, verbose=False)
faces = []
if results and results[0].boxes is not None:
boxes = results[0].boxes.xyxy.cpu().numpy()
confs = results[0].boxes.conf.cpu().numpy()
kps = None
if hasattr(results[0], 'keypoints') and results[0].keypoints is not None:
kps = results[0].keypoints.xy.cpu().numpy()
for i, (box, conf) in enumerate(zip(boxes, confs)):
kp = kps[i] if kps is not None and i < len(kps) else None
face_data = process_face(frame, box, kp)
if face_data:
face_data['detection_conf'] = float(conf)
face_data['keypoints'] = kp
faces.append(face_data)
# グラフ更新
update_emotion_chart(faces)
# 結果文字列の生成
result = ""
if faces:
result = f'{len(faces)}顔 -> '
for i, f in enumerate(faces):
emotion_jp = EMOTION_JAPANESE.get(f['emotion'], f['emotion'])
result += f"顔{i+1}:{emotion_jp}({f['emotion_conf']:.0%}) "
# 描画
for i, f in enumerate(faces):
x1, y1, x2, y2 = f['box']
color = EMOTION_COLORS.get(f['emotion'], (255, 255, 255))
# バウンディングボックス
cv2.rectangle(frame, (x1, y1), (x2, y2), color, 2)
# キーポイント描画
if f['keypoints'] is not None:
for kx, ky in f['keypoints']:
if kx > 0 and ky > 0:
cv2.circle(frame, (int(kx), int(ky)), 1, color, -1)
# ラベル
emotion_jp = EMOTION_JAPANESE.get(f['emotion'], f['emotion'])
label1 = f"{emotion_jp}: {f['emotion_conf']:.1%}"
label2 = f"Detect:{f['detection_conf']:.1%} | KP:{f['keypoint_count']}"
frame = draw_japanese_text(frame, label1, (x1, max(0, y1 - 30)), font_size=18, color=color)
frame = draw_japanese_text(frame, label2, (x1, min(y2 + 20, frame.shape[0] - 10)), font_size=16, color=(255, 255, 255))
frame = draw_japanese_text(frame, f'Face {i+1}', (max(0, x2 - 60), max(0, y1 - 10)), font_size=16, color=color)
# sキーON時の詳細表示(上位3クラス)
if show_details:
sorted_items = sorted(f['all_emotions'].items(), key=lambda x: x[1], reverse=True)
top_items = sorted_items[:3]
base_y = min(y2 + 40, frame.shape[0] - 10)
for idx, (emo, sc) in enumerate(top_items):
line = f"{EMOTION_JAPANESE.get(emo, emo)}: {sc:.0%}"
frame = draw_japanese_text(frame, line, (x1, min(base_y + idx * 20, frame.shape[0] - 10)), font_size=16, color=(200, 200, 200))
# 画面上のガイダンス
info1 = f'YOLOv11-face + ViT + Chart | Frame: {frame_count} | Faces: {len(faces)}'
info2 = f'Press: q=Quit, c=Save Chart, g=Show Chart, s=Toggle Details'
frame = draw_japanese_text(frame, info1, (10, 30), color=(255, 255, 255))
frame = draw_japanese_text(frame, info2, (10, 60), color=(255, 255, 0))
return frame, result, current_time
# 入力選択
print('0: 動画ファイル')
print('1: カメラ')
print('2: サンプル動画')
choice = input('選択: ')
if choice == '0':
root = tk.Tk()
root.withdraw()
path = filedialog.askopenfilename()
if not path:
exit()
cap = cv2.VideoCapture(path)
elif choice == '1':
cap = cv2.VideoCapture(0, cv2.CAP_DSHOW)
if not cap.isOpened():
cap = cv2.VideoCapture(0)
cap.set(cv2.CAP_PROP_BUFFERSIZE, 1)
else:
# サンプル動画ダウンロード・処理
SAMPLE_URL = 'https://raw.githubusercontent.com/opencv/opencv/master/samples/data/vtest.avi'
SAMPLE_FILE = 'vtest.avi'
urllib.request.urlretrieve(SAMPLE_URL, SAMPLE_FILE)
cap = cv2.VideoCapture(SAMPLE_FILE)
if not cap.isOpened():
print('動画ファイル・カメラを開けませんでした')
exit()
# メイン処理
print('\n=== 動画処理開始 ===')
print('操作方法:')
print(' q キー: プログラム終了')
print(' c キー: グラフを画像として保存')
print(' g キー: グラフを表示')
print(' s キー: 詳細情報の表示切り替え')
try:
while True:
ret, frame = cap.read()
if not ret:
break
MAIN_FUNC_DESC = "YOLOv11+ViT表情認識"
processed_frame, result, current_time = video_frame_processing(frame)
cv2.imshow(MAIN_FUNC_DESC, processed_frame)
if choice == '1': # カメラの場合
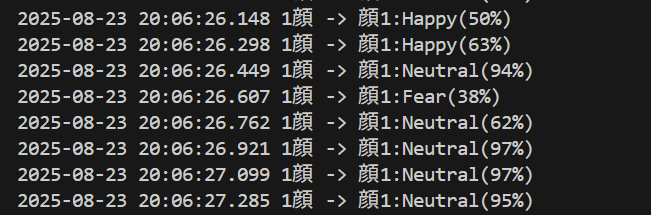
print(datetime.fromtimestamp(current_time).strftime("%Y-%m-%d %H:%M:%S.%f")[:-3], result)
else: # 動画ファイルの場合
print(frame_count, result)
results_log.append(result)
key = cv2.waitKey(1) & 0xFF
if key == ord('q'):
break
elif key == ord('c'):
if CHART_ENABLED:
timestamp = datetime.now().strftime('%Y%m%d_%H%M%S')
filename = f'emotion_chart_{timestamp}.png'
if emotion_chart.save_chart(filename):
print(f'感情グラフを {filename} に保存しました')
else:
print('グラフ保存に失敗しました')
else:
print('グラフ機能が無効です')
elif key == ord('g'):
if CHART_ENABLED:
emotion_chart.show_chart()
else:
print('グラフ機能が無効です')
elif key == ord('s'):
show_details = not show_details
print(f'詳細情報表示: {"ON" if show_details else "OFF"}')
finally:
print('\n=== プログラム終了 ===')
cap.release()
cv2.destroyAllWindows()
if results_log:
with open('result.txt', 'w', encoding='utf-8') as f:
f.write('=== 結果 ===\n')
f.write(f'処理フレーム数: {frame_count}\n')
f.write(f'使用デバイス: {str(device).upper()}\n')
if device.type == 'cuda':
f.write(f'GPU: {torch.cuda.get_device_name(0)}\n')
f.write('\n')
f.write('\n'.join(results_log))
print(f'\n処理結果をresult.txtに保存しました')
使用方法
- 上記のプログラムを実行
- カメラ画面に顔を向ける
- リアルタイムで表情認識結果が表示される
sキー:詳細情報表示qキー:プログラム終了
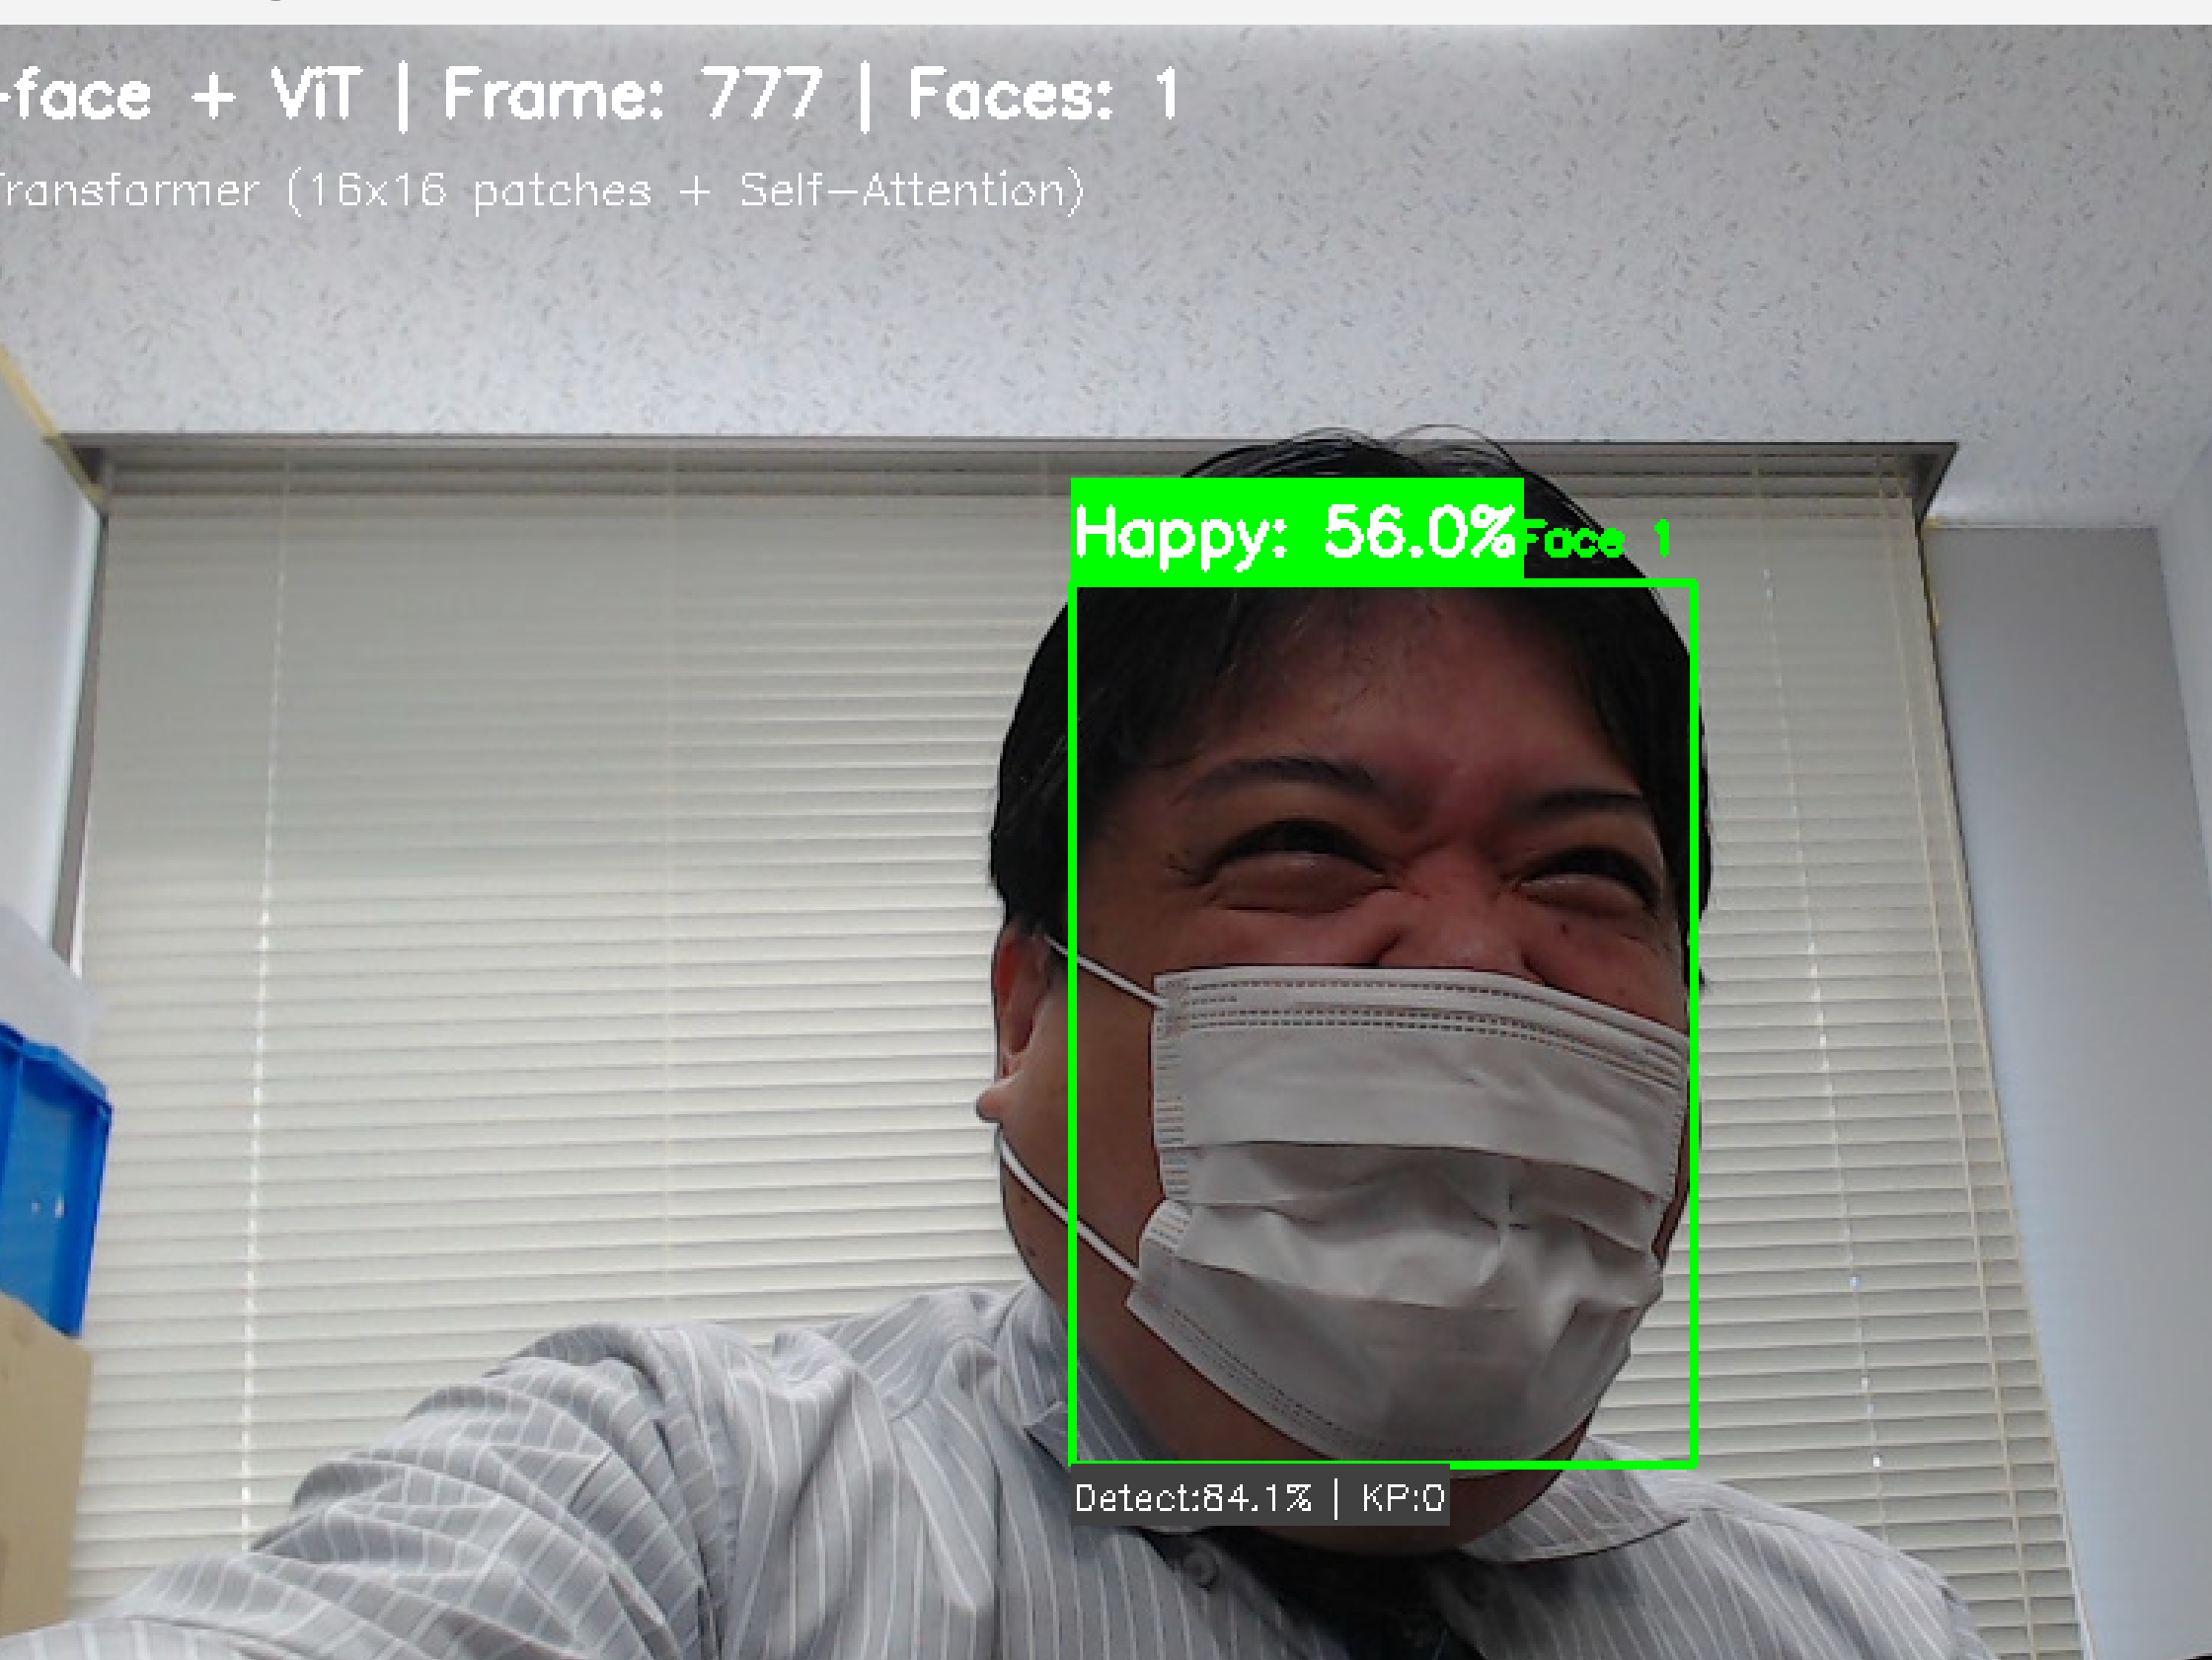
表示内容の見方
- 顔周囲のボックス色:認識された表情に対応
- 表情ラベル:日本語表記での表情名と信頼度
- キーポイント:68点の顔特徴点(小さな点)
- 詳細情報(
sキー):各表情の詳細スコア
実験・探求のアイデア
モデル選択実験
利用可能なYOLOv11-faceモデル:
yolov11n-face.pt(軽量・高速)yolov11s-face.pt(標準)yolov11m-face.pt(中程度)yolov11l-face.pt(高精度・重い)
プログラム内のMODEL_PATHを変更して各モデルの性能差を比較できる。
追加要素
- 精度比較実験
- 異なるモデルサイズでの認識精度の違い
- 同一人物での複数回測定による一貫性確認
- 複数人同時認識時の処理性能比較
- キーポイント効果検証
- 顔の角度を変えた際の認識精度変化
- 表情遷移分析
- 表情変化時の認識応答速度測定
- 中間表情での各感情スコア分布観察
- 表情の意図的演技と自然表情の認識差異
体験・実験・探求のアイデア
- 表情推定技術の特性理解
- 基本7感情の認識精度確認(意図的表情と自然表情の比較)
- 表情強度変化に対する認識スコアの遷移観察
- 別の人が同じ表情をした際の個人差による認識結果比較
- 技術的新発見の促進
- 表情推定における顔向き・照明の影響確認
- 応用可能性の探求
- 感情変化パターンの記録・分析による心理状態モニタリング
- グループ内感情分布の可視化による集団心理分析
- 表情トレーニング,感情認識教育ツール