チャットボットのための Web アプリケーションのひな形の Python と HTML プログラム(投稿された文章をそのまま返す)(Python を使用)(Windows 上)
前準備
Python 3.12 のインストール
Pythonのインストールを行い、Pythonのプログラムを実行する環境を整える。扱う環境は、Windows搭載パソコンである。金子研究室では、Python 3.12.10を推奨する。
[Windows での Python 3.12 のインストール手順を見るには、ここをクリック]
Windows での Python 3.12 のインストール
以下のいずれかの方法でPython 3.12をインストールする。Pythonがインストール済みの場合、この手順は不要である。
方法 1:winget によるインストール
【インストールコマンドの実行方法】
管理者権限でコマンドプロンプトを起動する(手順:Windowsキーまたはスタートメニュー → cmd と入力 → 右クリック → 「管理者として実行」)。そして、コマンド全体をコマンドプロンプトにコピー&ペーストする。
--scope machine を指定することで、システム全体(全ユーザー向け)にインストールされる。このオプションの実行には管理者権限が必要である。インストール完了後、コマンドプロンプトを再起動するとPATHが反映される。
REM Python 3.12 をシステム領域にインストール
winget install --id Python.Python.3.12 -e --scope machine --silent --accept-source-agreements --accept-package-agreements --override "/quiet InstallAllUsers=1 PrependPath=1 Include_test=0 Include_pip=1 Include_launcher=1 InstallLauncherAllUsers=1 TargetDir=\"C:\Program Files\Python312\""

REM Python と Scripts を PATH 先頭に追加
powershell -NoProfile -Command "$p='C:\Program Files\Python312'; $s=\"$p\Scripts\"; $c=[Environment]::GetEnvironmentVariable('Path','Machine'); if((Test-Path $p) -and (';'+$c+';' -notlike \"*;$p;*\") -and (';'+$c+';' -notlike \"*;$s;*\")){[Environment]::SetEnvironmentVariable('Path',\"$p;$s;$c\",'Machine')}"
方法 2:インストーラーによるインストール
- Python公式サイト(https://www.python.org/downloads/)にアクセスし、「Download Python 3.x.x」ボタンからWindows用インストーラーをダウンロードする。
- ダウンロードしたインストーラーを実行する。
- 初期画面の下部に表示される「Add python.exe to PATH」にチェックを入れてから「Customize installation」を選択する。このチェックを入れ忘れると、コマンドプロンプトから
pythonコマンドを実行できない。 - 「Install Python 3.xx for all users」にチェックを入れ、「Install」をクリックする。
インストールの確認
コマンドプロンプトで以下を実行する。
python --versionバージョン番号(例:Python 3.12.x)が表示されればインストール成功である。「'python' は、内部コマンドまたは外部コマンドとして認識されていません。」と表示される場合は、インストールが正常に完了していない。
チャットボットのための Web アプリケーションのひな形の Python と HTML プログラム(投稿された文章をそのまま返す)
flask, flask_cors, waitress のインストール
- 以下の手順を管理者権限のコマンドプロンプトで実行する
(手順:Windowsキーまたはスタートメニュー →
cmdと入力 → 右クリック → 「管理者として実行」)。 - 次のコマンドを実行
コマンドプロンプトを管理者として実行: 別ページ »で説明
python -m pip install -U --ignore-installed pip
python -m pip install -U flask flask_cors waitress
チャットボットのための Web アプリケーションのひな形の Python と HTML プログラム(投稿された文章をそのまま返す)を動かす
次の Python プログラムとHTMLファイルを使用する.
Python プログラム
# 準備
# python -m pip install -U flask flask_cors waitress
# 実行
# python chat.py ... development server
# waitress-serve --listen=0.0.0.0:1000 chat:app
from flask import Flask, request, jsonify, send_from_directory
from flask_cors import CORS
import os

app = Flask(__name__)
CORS(app)

def append_to_chatlog(text):
    file_path = 'chatlog.txt'
    with open(file_path, 'a', encoding='utf-8') as file:
        file.write(text + '\n')

@app.route('/response', methods=['POST'])
def respond():
    # POST リクエストからメッセージを取得
    message = request.get_json().get('message', '')
    append_to_chatlog('Q: ' + message)

    # レスポンスメッセージは受け取ったメッセージをそのまま返します
    response_message = "Received: " + message

    append_to_chatlog('A: ' + response_message)
    return jsonify({'message': response_message})

@app.route('/chat.html')
def send_chat_html():
    return send_from_directory('.', 'chat.html')

if __name__ == '__main__':
    app.run(host='localhost', port=1000, debug=True)
HTML ファイル
<!DOCTYPE html>
<HTML LANG="ja">
<head>
   <meta http-equiv="Content-Type" content="text/html; charset=utf-8">
   <meta http-equiv="Content-Script-Type" content="text/javascript">
   <meta http-equiv="Content-Style-Type" content="text/css">
</head>
<body>
    <h2>チャットボット</h2>
    <div id="chatLog" style="height: 200px; border: 1px solid #000; padding: 10px; overflow: auto;"></div>
    <input id="userInput" type="text" placeholder="メッセージを入力してください..." style="width: 80%;" />
    <button onclick="sendMessage()">送信</button>

    <script>
        async function sendMessage() {
            var input = document.getElementById('userInput');
            var chatLog = document.getElementById('chatLog');

            // ユーザーのメッセージを表示
            chatLog.innerHTML += 'Q: ' + input.value + '<br />';

            // ボットからの応答を生成
            var botResponse = await generateBotResponse(input.value);
            chatLog.innerHTML += 'A: ' + botResponse + '<br />';

            // チャットログを一番下にスクロール
            chatLog.scrollTop = chatLog.scrollHeight;

            // 入力フィールドをクリア
            input.value = '';
        }

        async function generateBotResponse(userMessage) {
            try {
                // ボットにメッセージを送信して応答を取得
                const response = await fetch('http://localhost:1000/response', {
                    method: 'POST',
                    headers: {
                        'Content-Type': 'application/json'
                    },
                    body: JSON.stringify({ message: userMessage })
                });

                if (!response.ok) {
                    throw new Error('サーバからの応答が正しく行われませんでした');
                }

                const data = await response.json();
                return data.message;
            } catch (error) {
                console.error('サーバとの通信に問題が発生しました', error);
                return 'サーバとの通信に問題が発生しました.もう一度メッセージを送信してみてください';
            }
        }
    </script>
</body>
</html>
- 以下の手順を管理者権限のコマンドプロンプトで実行する
(手順:Windowsキーまたはスタートメニュー →
cmdと入力 → 右クリック → 「管理者として実行」)。 - 上に示している Python プログラムとHTMLファイルをダウンロードする.
mkdir c:\htdocs cd c:\htdocs del chat.html del chat.py curl -O https://www.kkaneko.jp/ai/win/chat.html curl -O https://www.kkaneko.jp/ai/win/chat.py - チャットボットのプログラムを起動
新しく Windows のコマンドプロンプトを開き,次のコマンドを実行する.
cd c:\htdocs
waitress-serve --listen=0.0.0.0:1000 chat:app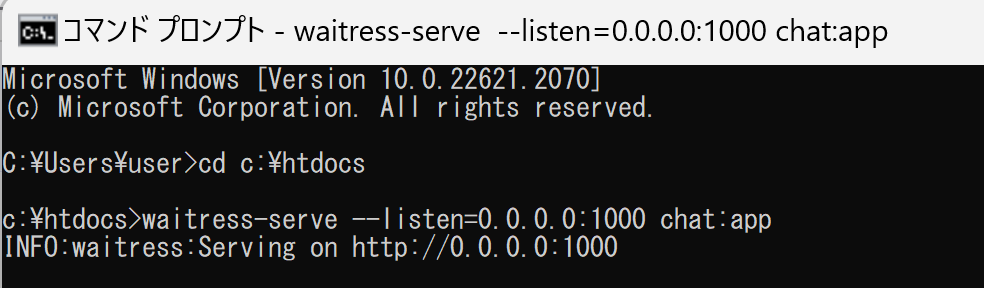
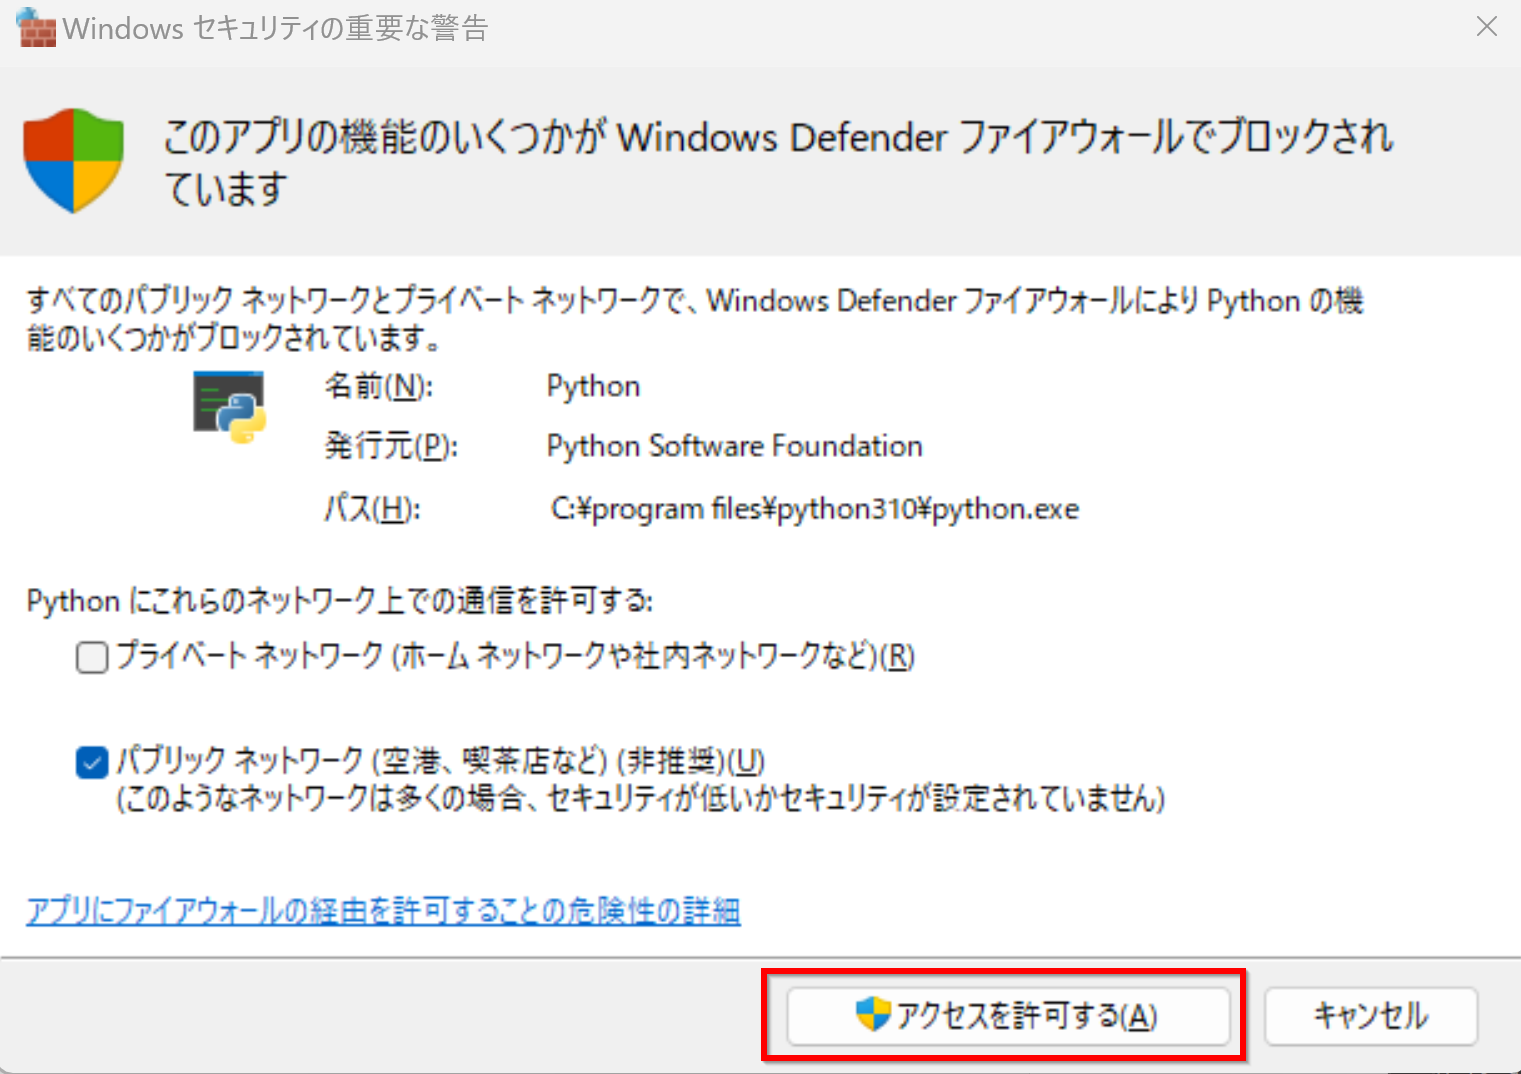
このとき,次のような警告が出る場合がある.そのときには「アクセスを許可する」をクリック.
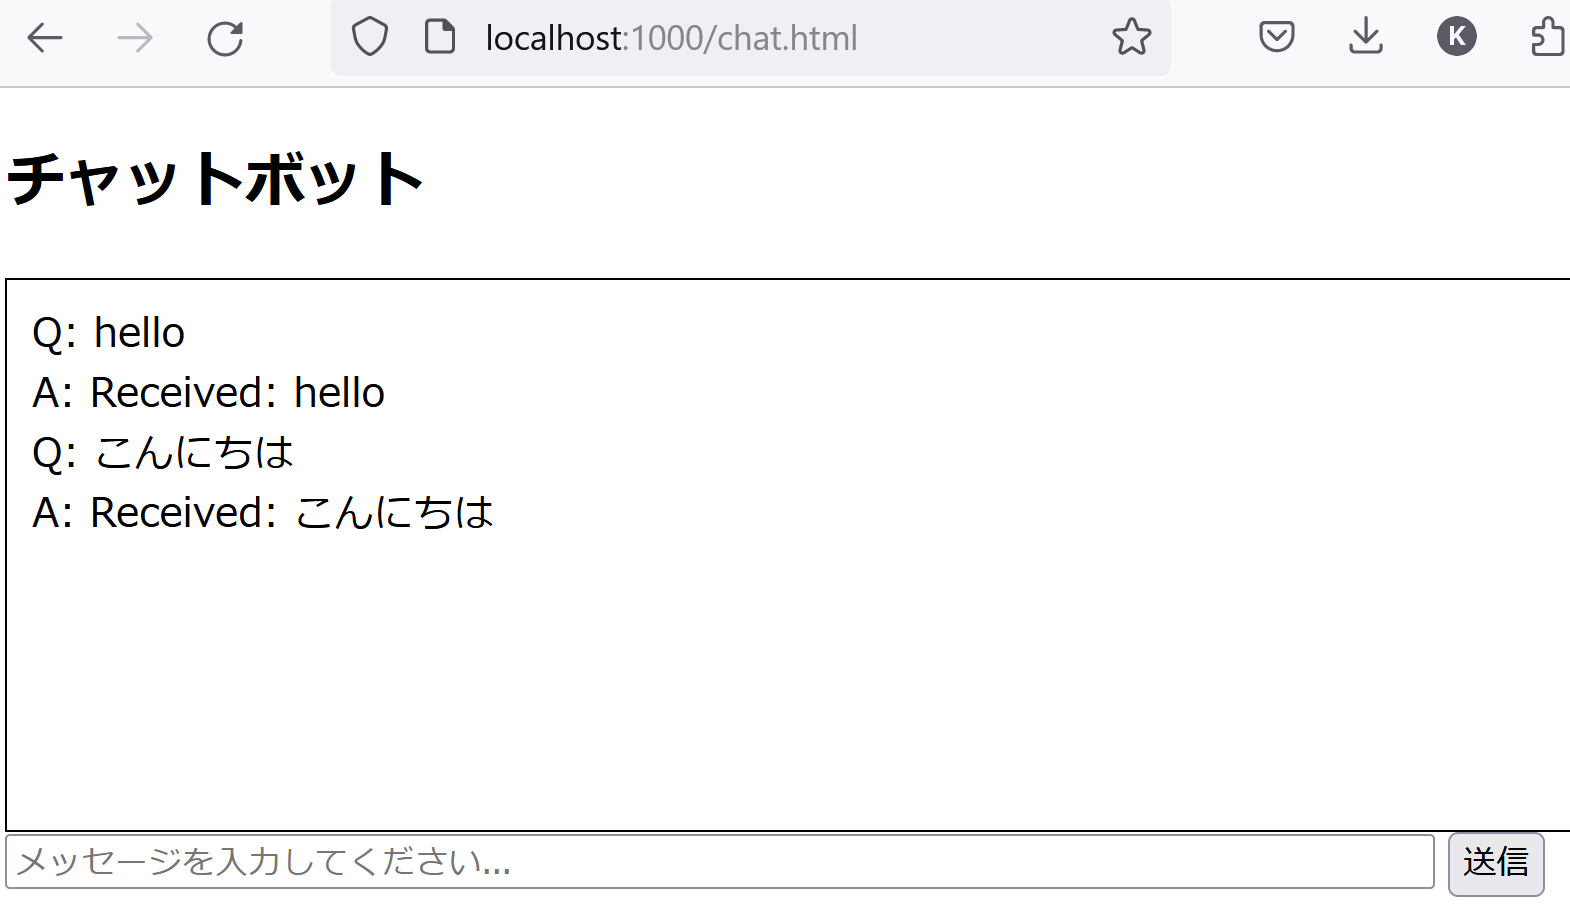
- Web ブラウザで「http://localhost:1000/chat.html」を開く
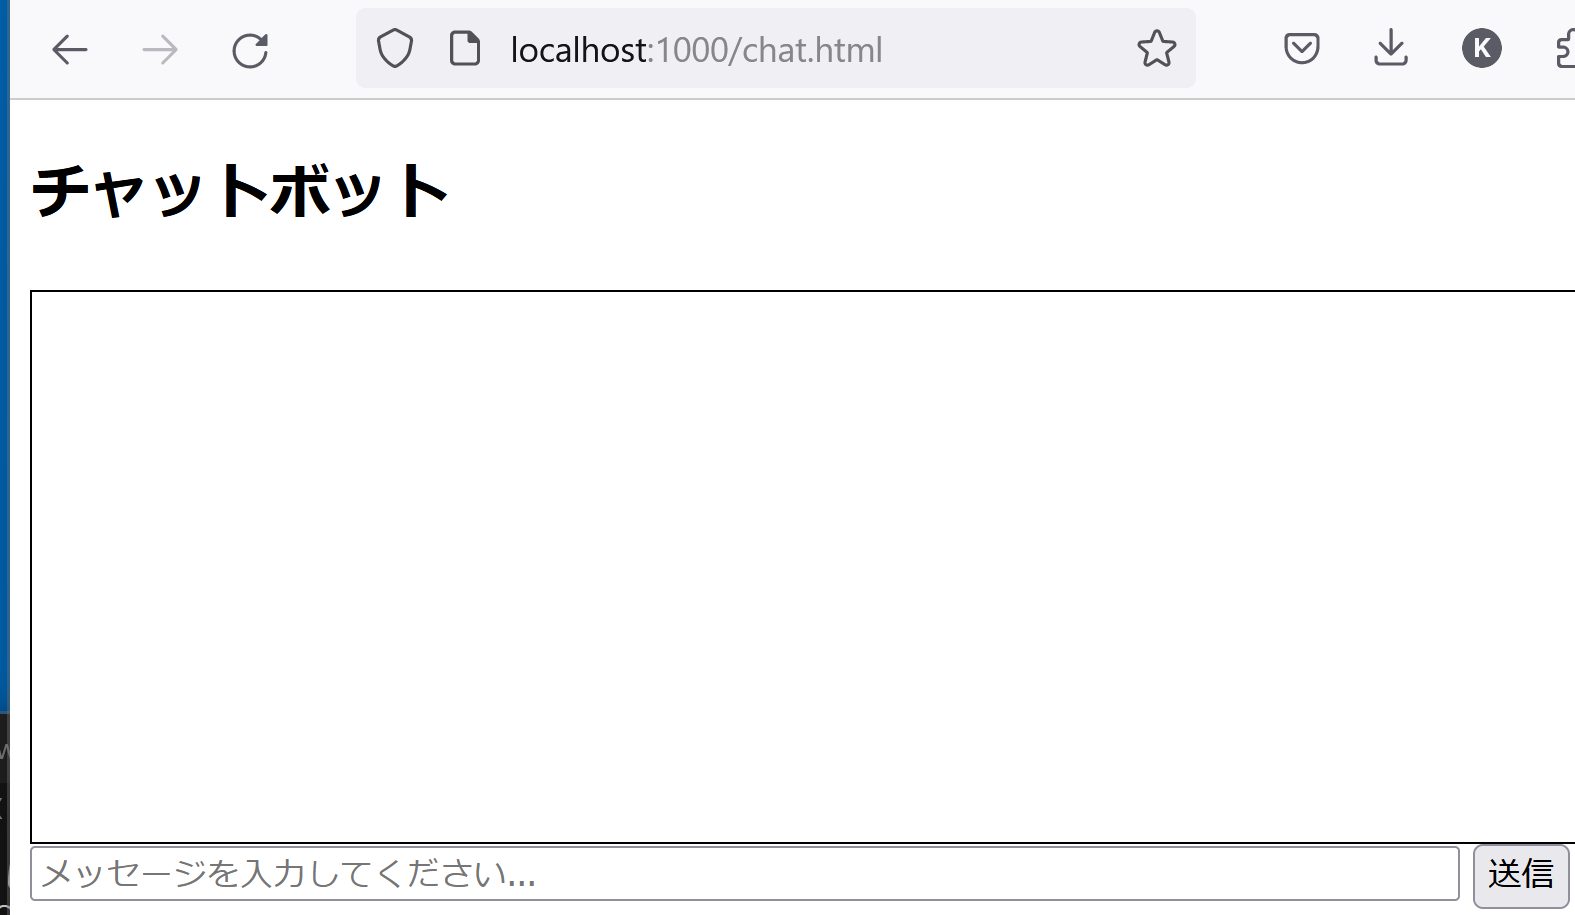
- メッセージを入れ「送信」をクリックすることで動作確認.
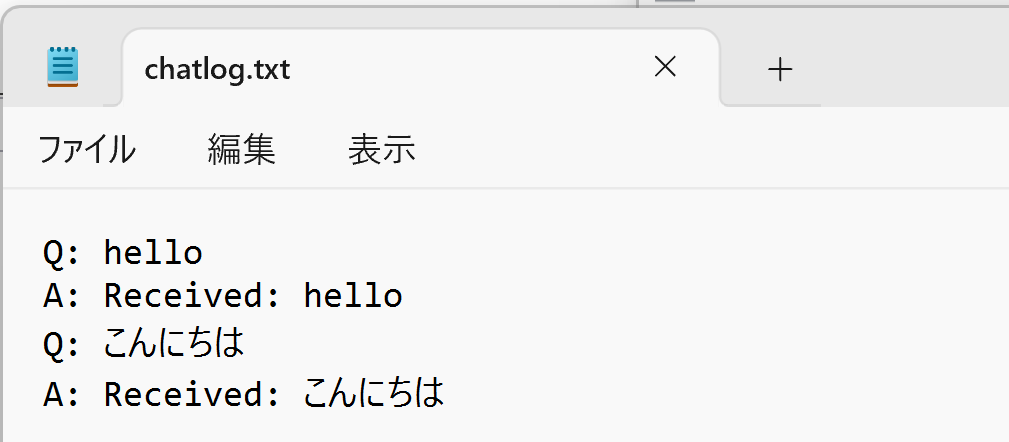
- ログは,c:\htdocs\chatlog.txt に残る