データベースの物理構造
【概要】 SQLの主要な操作としてテーブル定義がある.テーブル定義はSQLのCREATE TABLE文を用いて行い,「create table path (id integer primary key autoincrement, ...)」のように,フィールド名,データ型,制約条件などを指定する.SQLite 3データベースファイルの物理構造を理解することも重要である.SQLite 3の物理構造は,データベースヘッダとデータページで構成され,通常データページのサイズは1024バイト(16進数で0x400)である.SQLiteデータベースの基本的な格納単位はレコードであり,テーブルの1行に相当する.レコードは複数のフィールド値で構成され,バイナリエディタを使用すると,path,val,created_atなどのフィールド値をバイト列として確認できる.
【サイト内の関連ページ】
公開資料は クリエイティブコモンズ 表示-非営利-継承 4.0 国際ライセンス(CC BY-NC-SA 4.0) で提供しており,事前の許可なく自由に利用できます.条件は著作者表示(BY),非営利目的のみ(NC),同一ライセンスでの再配布(SA)です.
演習で行うこと
Windows では,バイナリエディタのインストール
Windows 用のバイナリエディタとしては,Stirling,BZ,HxD などが有名である.
- バイナリエディタ BZ のファイルの入手
- ファイルの確認
- ファイルの解凍
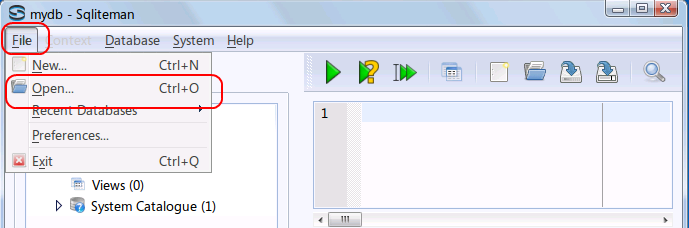
SQLite Manager Tool で既存のデータベースを開く
すでに作成済みのデータベースを,下記の手順で開くことができる.
以下の手順で,既存のデータベースファイルを開く.
- ツールバーの「DBオープン (Ctrl+O)」ボタンをクリックする.
- データベースファイルを開く
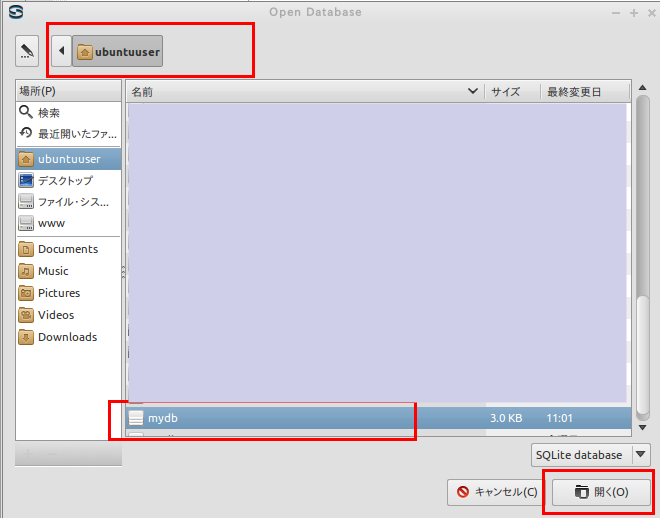
* Ubuntu での実行例(「mydb」を開く場合)
データベースファイル /home/ubuntuuser/mydb を選び, 「開く」をクリック
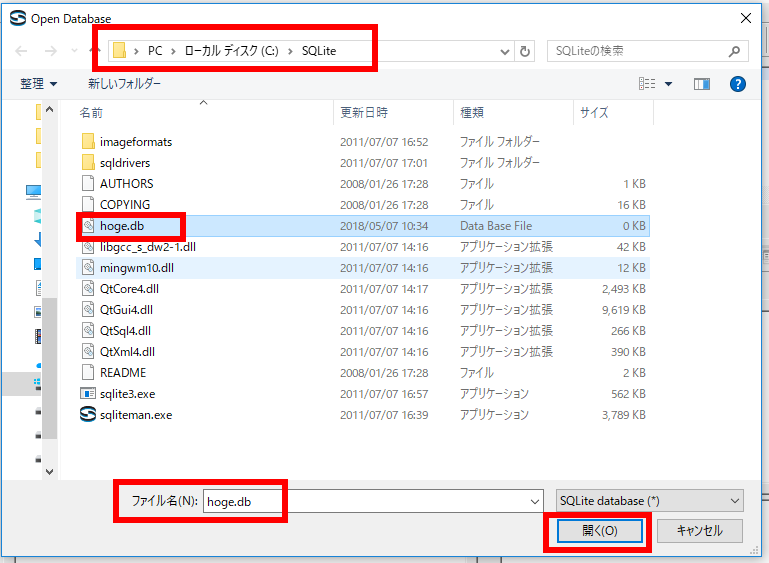
* Windows での実行例(「C:\SQLite\mydb」を開く場合)
データベースファイル C:\SQLite\mydb を選び, 「開く」をクリック
要するに,/home/<ユーザ名>/SQLite 3の下の mydb を選ぶ.
SQL を用いたテーブル定義と一貫性制約の記述
SQL を用いて,R テーブルを定義し,一貫性制約を記述する.
リレーショナル・スキーマ (relational schema): path(id, docid, path, val, created_at)
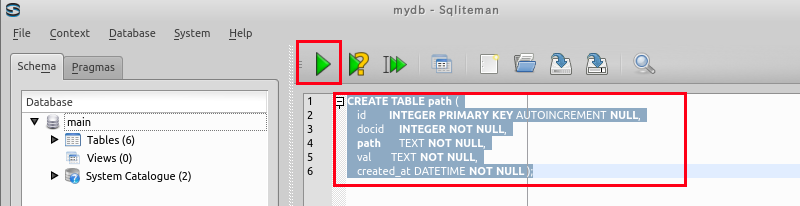
- path テーブルの定義
次の SQL を入力し,「▶ SQL実行 (F5)」を押下
create table path (
    id         integer primary key autoincrement NULL,
    docid      integer not null,
    path       text not null,
    val        text not null,
    created_at DATETIME not null );
* 「SQLエディタ」欄には,SQL プログラムを書くことができる.
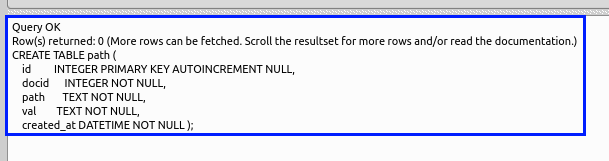
- 出力欄の確認
「出力」欄にエラーメッセージが表示されていないことを確認する.
SQL を用いたテーブルへの行の挿入
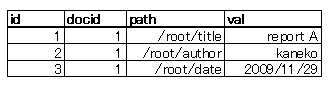
次のような path テーブルを作る.
以下の手順で,SQL を用いて path テーブルへの行の挿入を行う
- SQL プログラムの記述
begin transaction;
insert into path values( 1, 1, '/root/title', 'report A', datetime('now', 'localtime') );
insert into path values( 2, 1, '/root/author', 'kaneko', datetime('now', 'localtime') );
insert into path values( 3, 1, '/root/date', '2012/11/21', datetime('now', 'localtime') );
commit;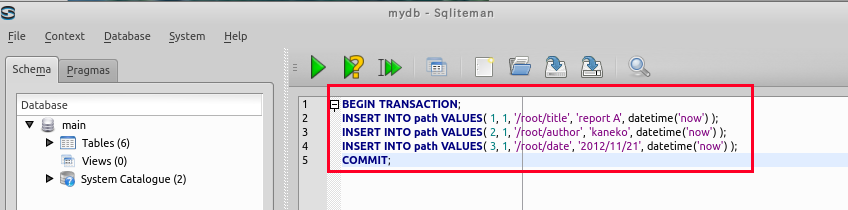
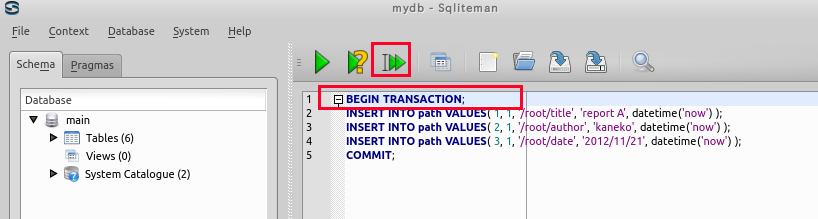
- 複数の SQL 文の一括実行
「SQLエディタ」に記述した複数の SQL 文をまとめて実行するには,「▶ SQL実行 (F5)」を押下する.
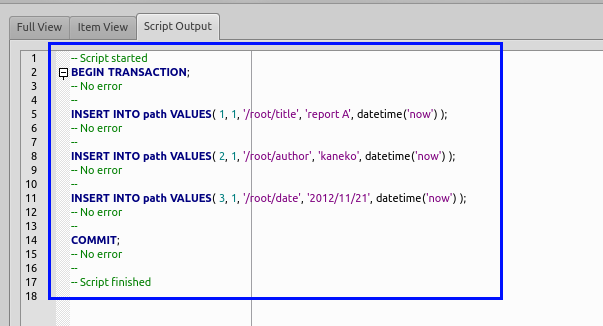
- 「出力」欄の確認
エラーメッセージが出ていないことを確認する.
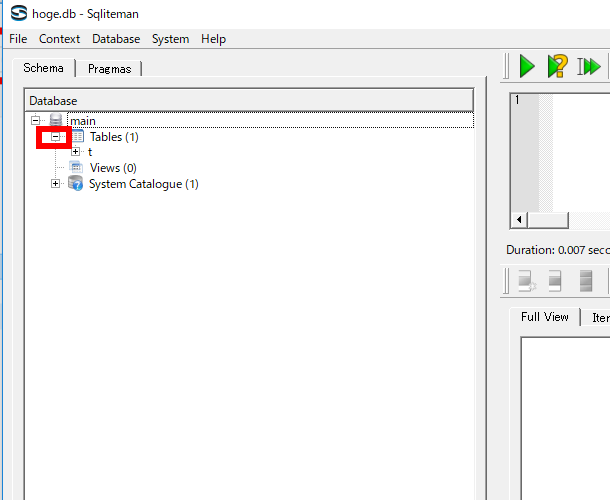
SQLite Manager Tool を用いたデータのブラウズ
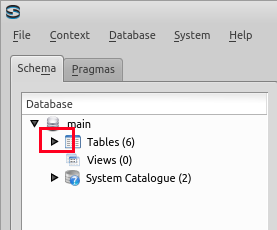
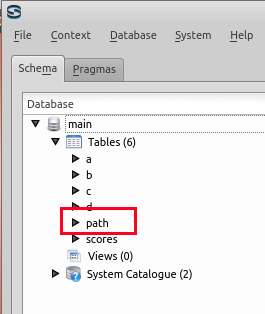
- path テーブル
まず,「スキーマナビゲータ」から,テーブル pathを選ぶ
「テーブル定義ビューワ」に path テーブルの CREATE 文が表示される
「出力」欄に,テーブル path のデータが表示される
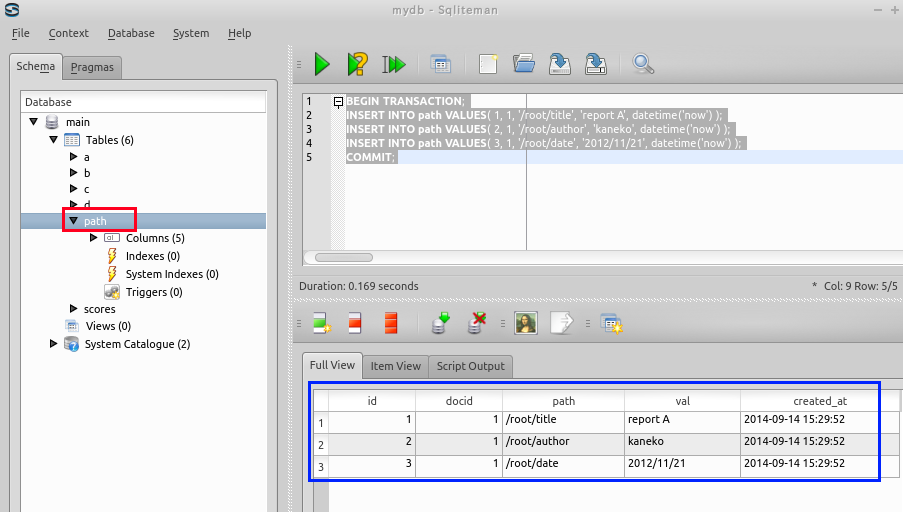
* もし,データに間違いがあれば,このウインドウで修正できる
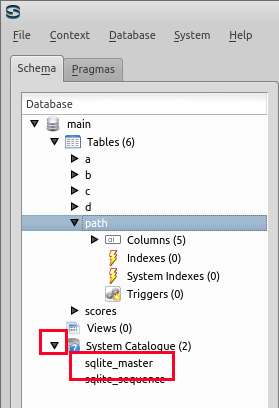
- 「SQLエディタ」に「SELECT * FROM sqlite_master;」と入力し,「▶ SQL実行 (F5)」を押下すると,「出力」欄にデータベース・スキーマ (database schema) が表示されるので確認する
- データベーススキーマの中のpath テーブルの行を確認する.
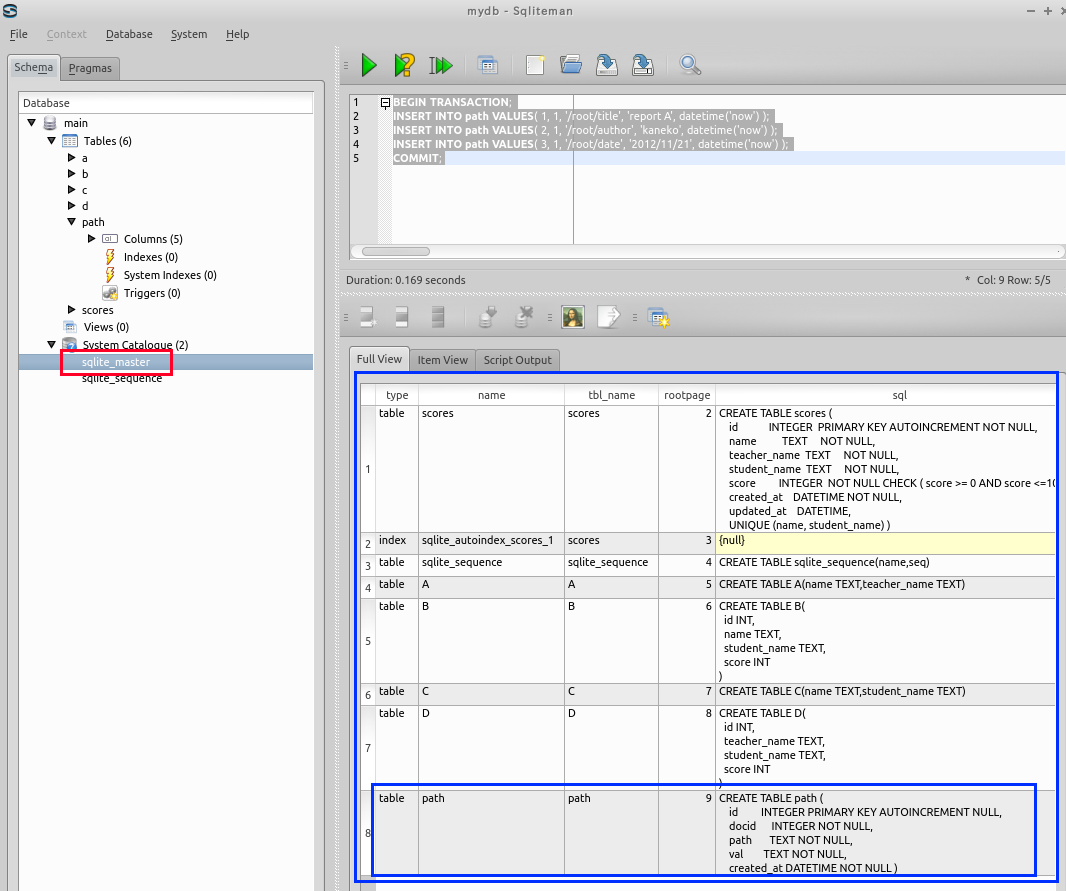
path テーブルのルート・ページ番号が分かる.この場合はたまたま「9」になっているが,「9」と違う値になっていても問題はない.
ルート・ページ番号は,データベース管理システムが自動的に決める番号である.
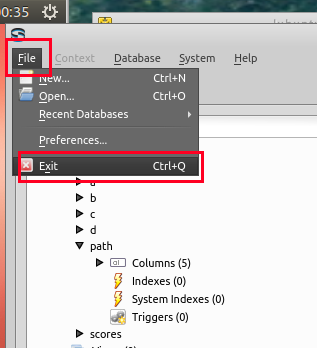
- 変更内容の保存とツールの終了
自動コミットは無効化されているため,ツールバーの「コミット」ボタンを押して変更内容を保存してから,SQLite Manager Tool を終了する
SQLite 3 のデータベースファイルの物理構造
SQLite 3 のデータベースファイルは,レコードを単位とした物理構造になっている.

- SQLite Manager Tool を終了しておくこと
- バイナリエディタの起動
以下の手順で,データベースファイル mydb をバイナリエディタで開き, データベースファイルが,レコードを単位とした物理構造になっていることを確認しておく.
* Ubuntu の場合 (GHex を起動する)
「プログラミング」→ 「Hex エディタ」のように操作する
* 端末を開いて, 「ghex」 のように実行しても良い.
* ghex2 が無いときは,「sudo apt -y install ghex2」を実行して,ghex2 をインストールする.あるいは,類似の同機能のソフトウェア (okteta など) を試す.
* Windows の場合 (Bz を開く)
- データベースファイルを開く
* Ubuntu の場合 (GHex を使う場合)
「ファイル」→「開く」
ディレクトリを選ぶ. ここでは,データベースファイル mydb2 を置いているディレクトリである「/home/ubuntuuser」を選んでいる
ファイルを選ぶ. ここでは,「mydb」を選んでいる (「mydb」をダブルクリック).
* Windows の場合 (Bz)
- データベース・ファイルの中から R テーブルのレコードを探す
* Ubuntu の場合 (GHex を使う場合)
「編集」→ 「検索」
検索文字列「root/」を指定して,「検索」をクリックする.
末尾に「.」が自動で入る.これは気にしないこと.
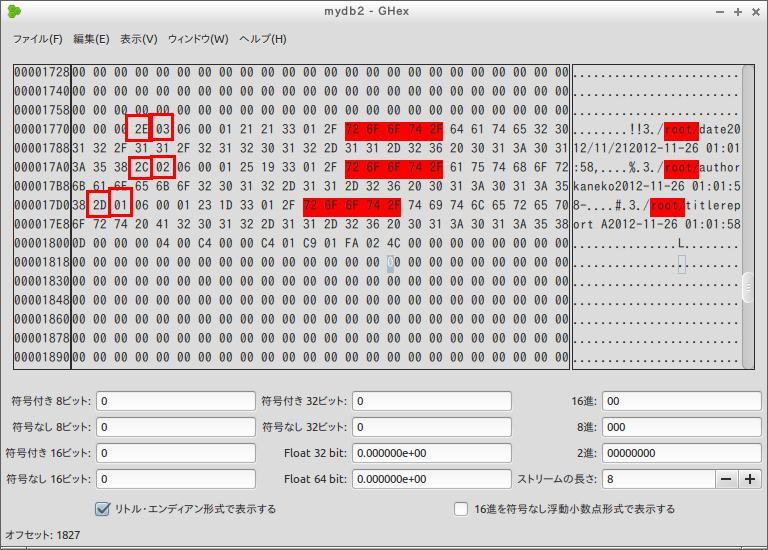
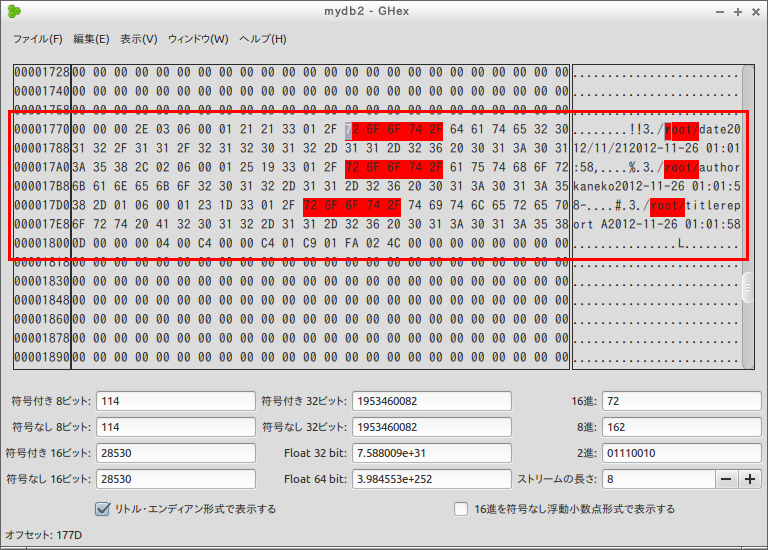
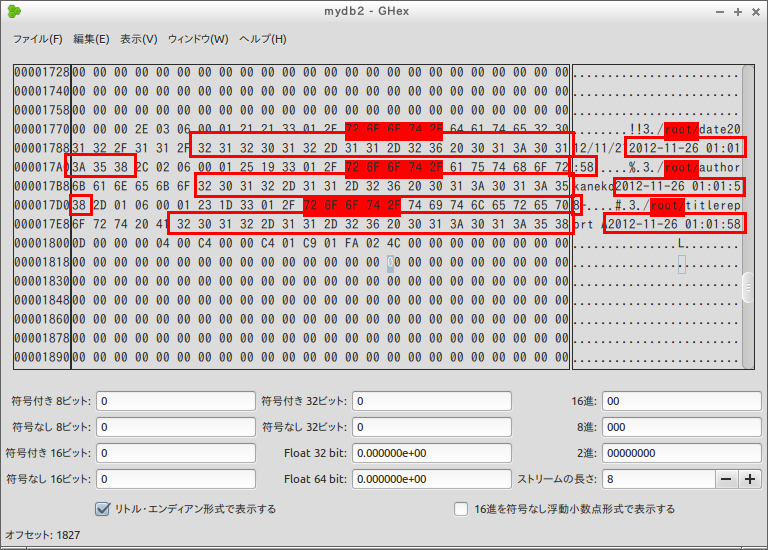
- データベースの中身の確認
バイナリエディタ GHex では,
- 左側: ファイルの中身が16進数で
- 右側: ファイルの中身がアルファベット,数字,英記号で
で表示され,ファイルの中身を簡単に確認できる.
データベース・ファイルのデータページの中には,レコードが並んでいることが確認できる.データページの中には未使用部分がある.
There a sequence of records in data pages in database file.
* データベースの構造
- SQLite 3 では,データベースヘッダがある
- SQLite 3 では,データページのサイズは 1024バイト (16進数で 400)
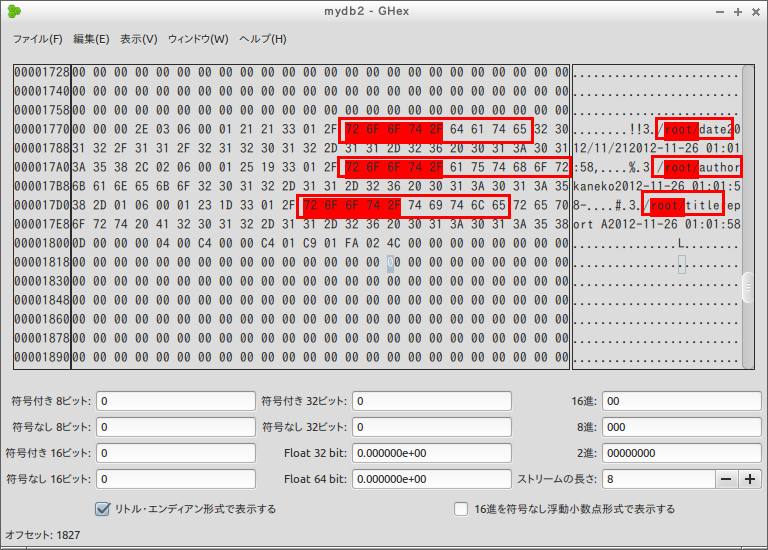
- path フィールドの値の確認
- val フィールドの値の確認
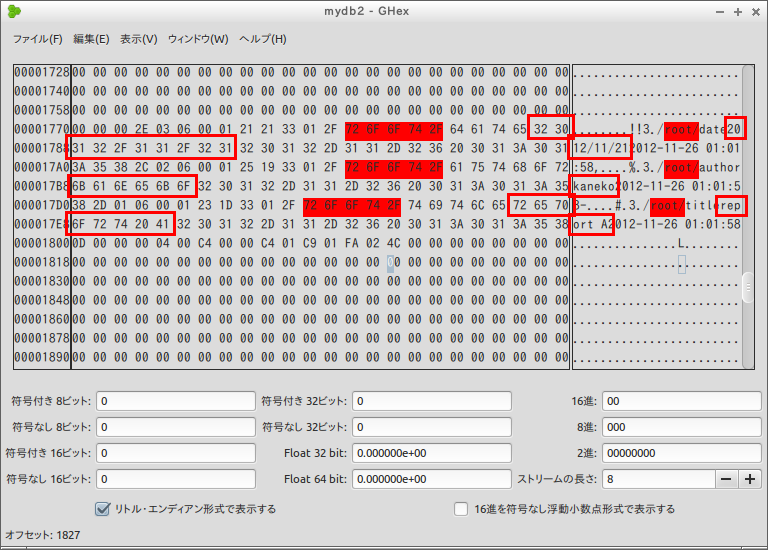
- created_at フィールドの値の確認
created_at には,now を使って現在時刻を入れたので,値が違っているであろう.
この演習では docid フィールドの値の確認は行わない.docid は整数データである.整数データはコード化されている.数値データのコード化体系はデータベース管理システムの種類によって違う. In this exercise, ignore the 'docid' field. The integer value is encoded.
- レコードの長さとキー
レコードヘッダには,レコードの長さとレコードのキー (key) が格納されている
今回は
- レコードの長さ: 2E, キーの値: 03
- レコードの長さ: 2C, キーの値: 02
- レコードの長さ: 2D, キーの値: 01
「id integer primary key autoincrement NULL,」と定義したので,idがキーである.