jQuery のインストール
Web サーバは使わずに,パソコンにファイルを置いていろいろと試してみる.
- jQeury のダウンロード,jQuery の「スターターキット」のダウンロード
- 「スターターキット」を使った演習
jQeury のダウンロード
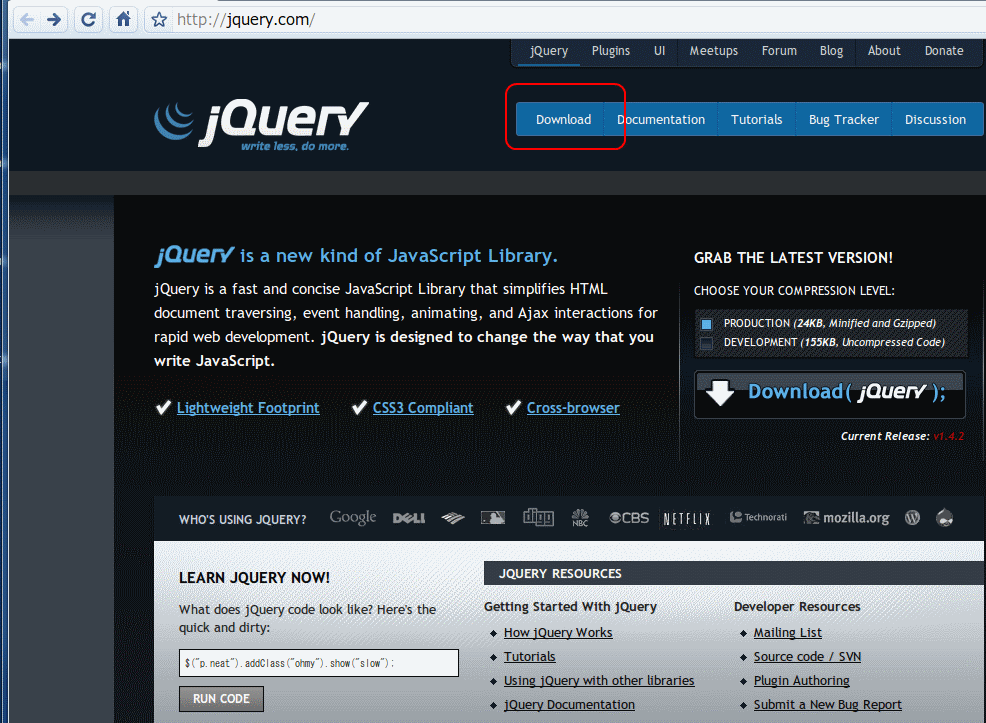
- jQuery の Web ページを開く
- 「Download」をクリック
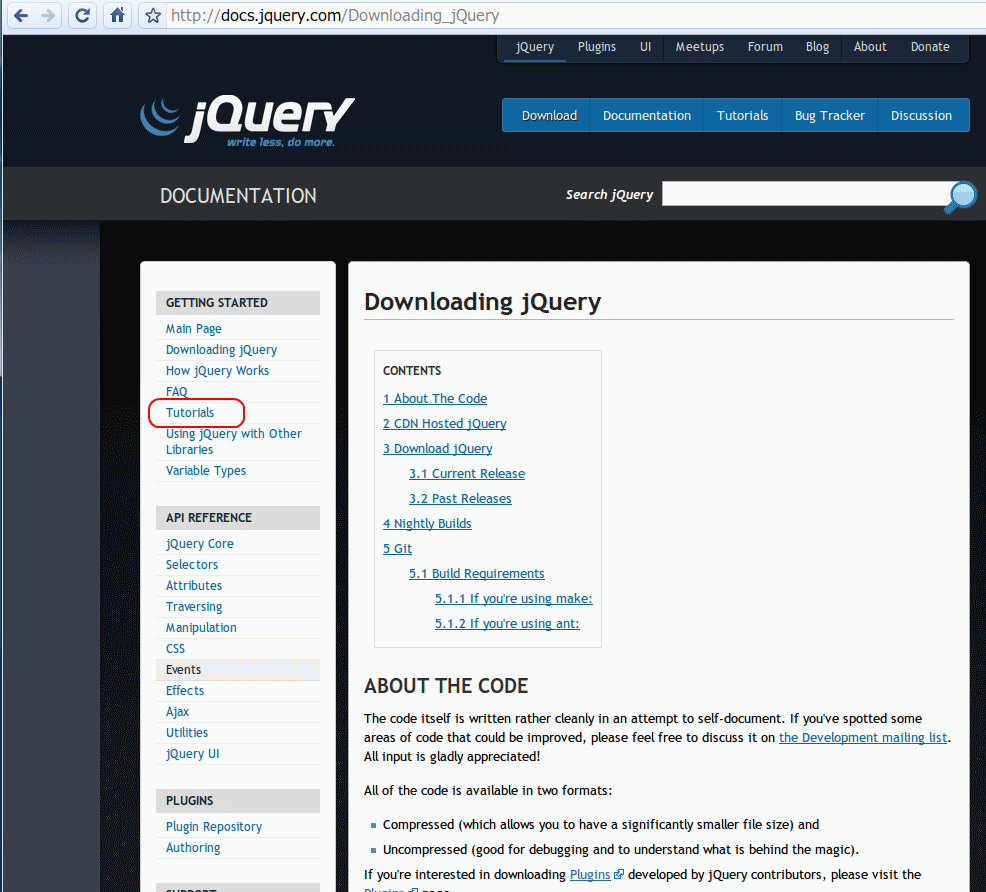
- 「Tutorials」をクリック
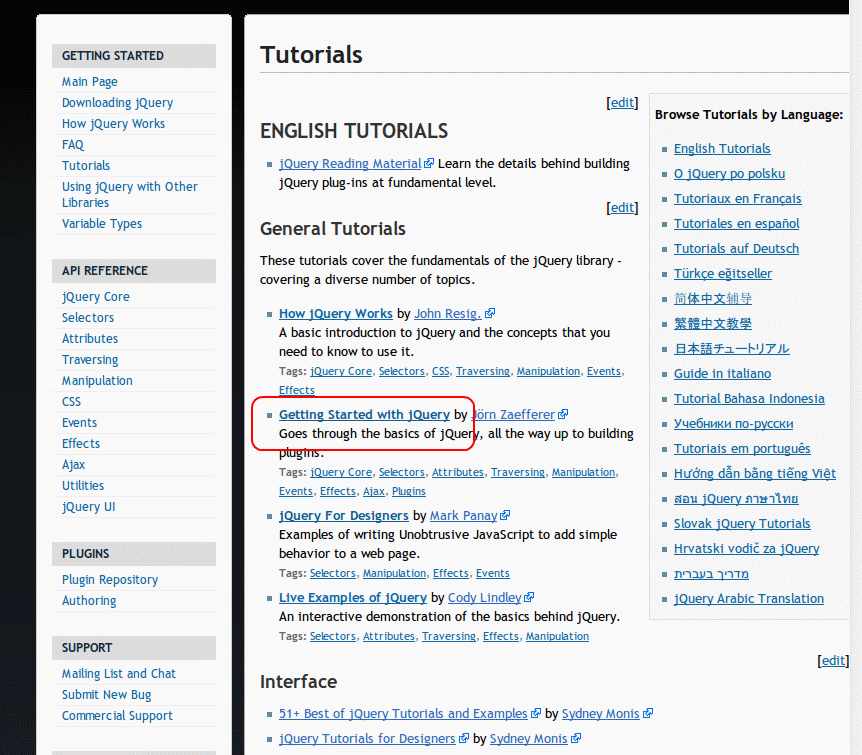
- 「Getting Started with jQuery」をクリック
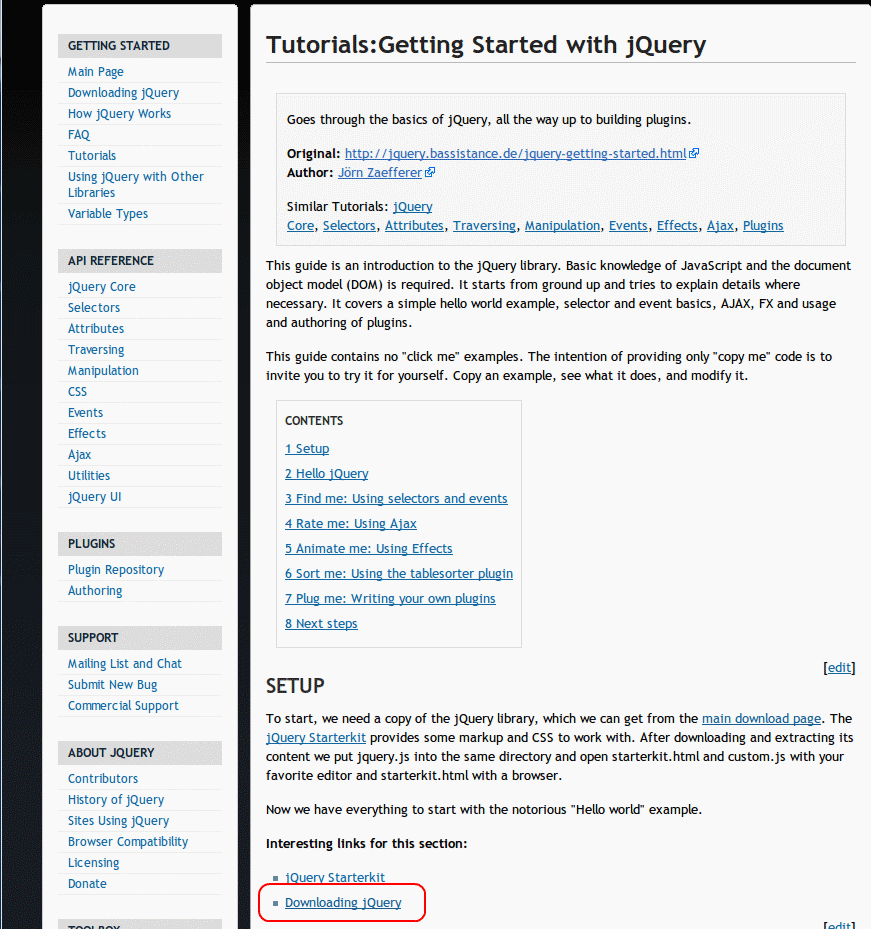
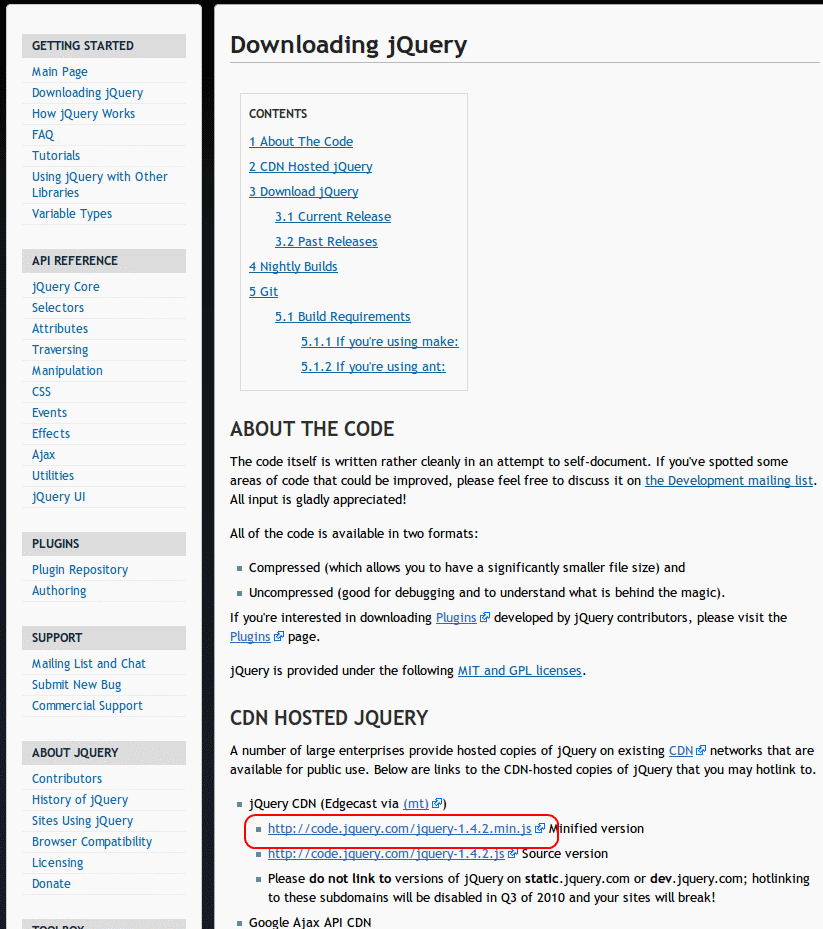
- 「Downloading jQuery」をクリック
- ダウンロードしたいので,「https://code.jquery.com/jquery-1.4.2.min.js」をクリック
- Web ブラウザで,前のページに戻る
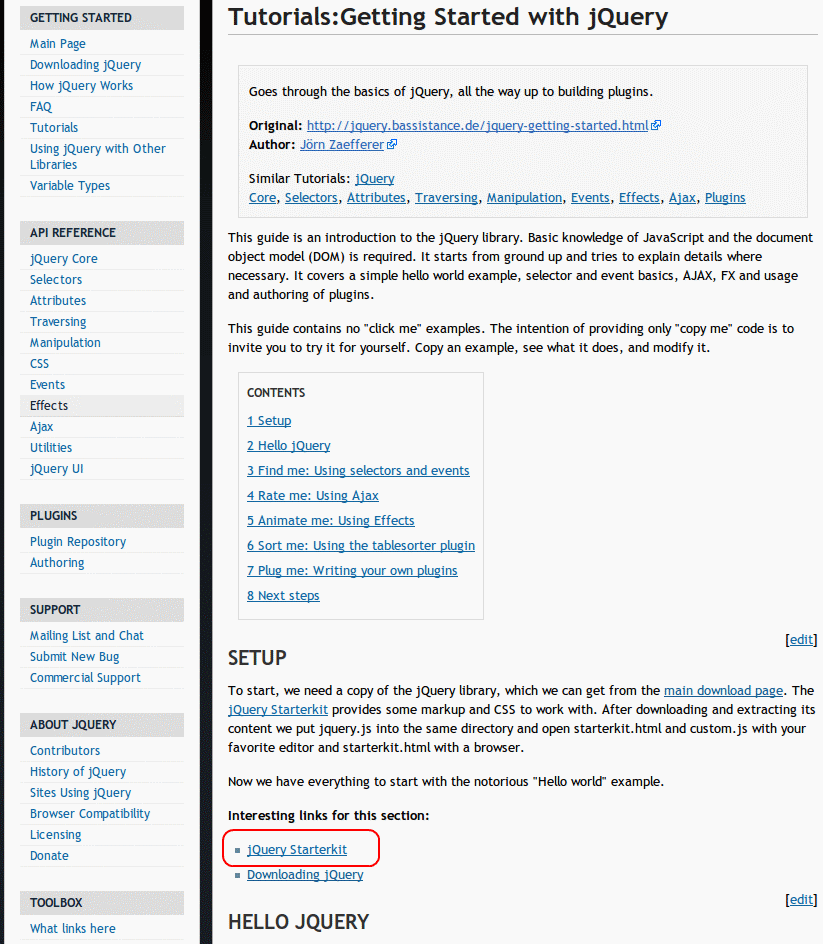
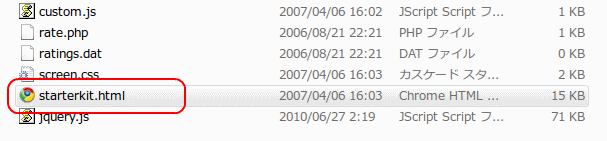
- ダウンロードしたいので,「jQuery Starterkit」をクリック
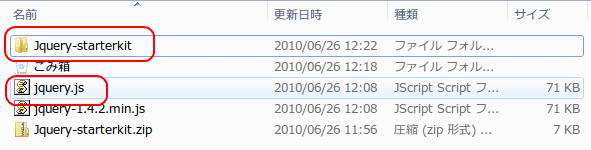
- ダウンロードした jquery-1.4.2.min.js は jquery.js という名前でコピー
- ダウンロードした Jquery-starterkit.zip は展開
展開すると,jquery-starterkit という名前でディレクトリができる.
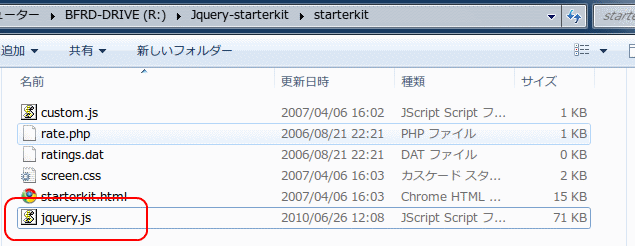
- ファイル jquery,js を jquery-starterkit/starterkit の下にコピー
これで,「スターターキット」の準備ができた.
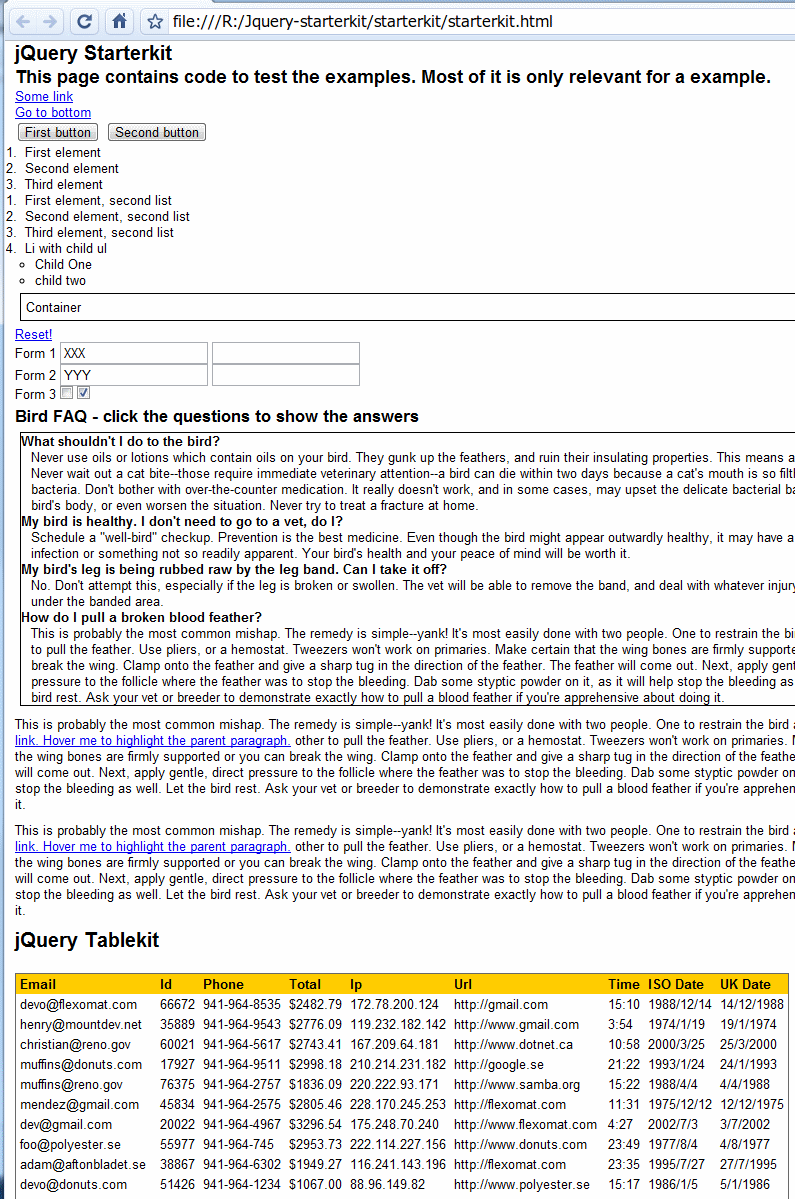
- Web ブラウザで starterkit.html を開く
- 次のような画面が現れる.
これでダウンロードはうまくいったことが確認できる.
「スターターキット」を使った演習
* 最初,custom.js は次のようになっています(つまり空です). この custom.js を書き換えて,jQuery のいろいろな機能を試してみます.

* クリック時のアラート表示
例えば,a 要素のクリック時に,アラート (alert) 表示
jQuery(document).ready(function() {
 $(document).ready(function() {
   $("a").click(function() {
     alert("Hello world!");
   });
 })
});
■ 実行結果の例
どこでもいいのでリンクをクリックすると,アラートが出る.
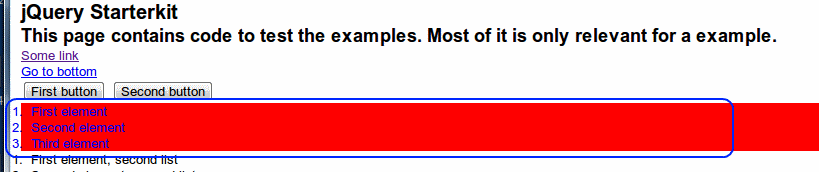
* クラスの追加
「#orderedlist」と記述しているので,idがorderedlistであるものが対象になる.
■ 要するに,タグの中で「id="orderedlist"」と書いている部分にマッチするということ.
それを,スタイルシートに記述された クラス「red」に変化させる(だから赤く表示される).starterkit のファイル screen.css にすでにクラス「red」が記述済みであることに注意.
jQuery(document).ready(function() {
 $(document).ready(function() {
   $("#orderedlist").addClass("red");
 });
});
■ 実行結果の例
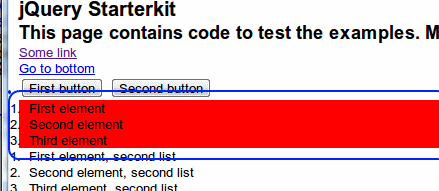
今度は「blue」も追加.
jQuery(document).ready(function() {
 $(document).ready(function() {
   $("#orderedlist").addClass("red");
   $("#orderedlist > li").addClass("blue");
 });
});
■ 実行結果の例
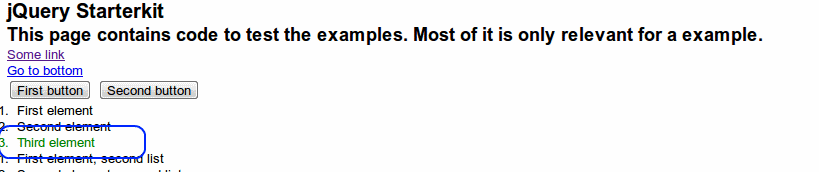
最終要素への hover 時のクラスの追加
「li:last」なので,li の最終要素
jQuery(document).ready(function() {
 $(document).ready(function() {
   $("#orderedlist li:last").hover(function() {
     $(this).addClass("green");
   },function(){
     $(this).removeClass("green");
   });
 });
});
■ 実行結果の例
「3. Third element」にマウスカーソルを合わせると色が変わる
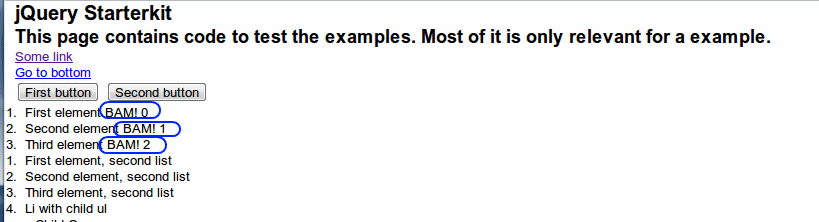
* 繰り返し処理とクラスの追加
まずは,繰り返し処理の例。
「.find("li").each(function(i)」なので,繰り返し処理
$(document).ready(function() {
  $("#orderedlist").find("li").each(function(i) {
    $(this).append( " BAM! " + i );
  });
});
■ 実行結果の例
「BANG ...」のような文字列が追加されている.
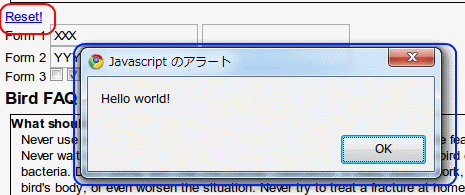
繰り返し処理,フィルタ
ある文字をクリックすると,フォームデータが消えるような処理.
jQuery(document).ready(function() {
 $(document).ready(function() {
   // use this to reset several forms at once
   $("#reset").click(function() {
     $("form").each(function() {
       this.reset();
     });
   });
 });
});
■ 実行結果の例
「Reset!」をクリックするとデータが消える.


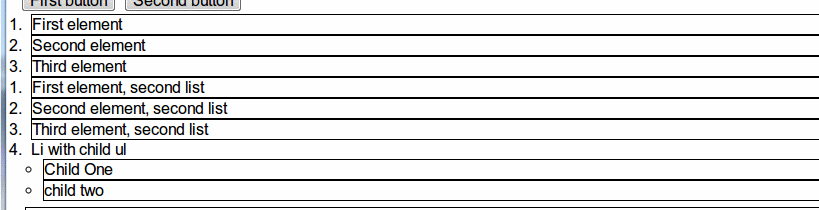
not を用いた除外
not を使い処置対象を除外.下記の例では,ul 要素を子に持つもの除外している。
$(document).ready(function() {
  $("li").not(":has(ul)").css("border", "1px solid black");
});
■ 実行結果の例
「Li with child ul」は除外ざれている.
XPath の例
XPath を書いて要素を指定.「[name]」の部分が XPath
$(document).ready(function() {
   $("a[name]").css("background", "#f00" );
 });
■ 実行結果の例
「Go to button」の行のみが色が変わる.

親要素
$(document).ready(function(){
  $("a").hover(function(){
    $(this).parents("p").addClass("highlight");
  },function(){
    $(this).parents("p").removeClass("highlight");
  });
});
■ 実行結果の例

テーブルのソート
書きかけ<script src="jquery.tablesorter.js"></script>
$(document).ready(function(){
  $("#large").tablesorter();
});
$(document).ready(function() {
  $("#large").tablesorter({
    // striping looking
    widgets: ['zebra']
  });
});