Ubuntu 12.04, 11.10, 11.04 で Android SDK のダウンロードとインストールとテスト実行
前準備
「Ubuntu 12.04, 11.10, 11.04 で Android SDK のダウンロードとインストールとテスト実行」の Web ページを参考に、次のことを行なっておく。
- Android SDK のダウンロードとインストール
- OpenJDK のダウンロードとインストール
- Eclipse と Eclipse のプラグインのダウンロードとインストール
- Eclipse ADT (Eclipse のプラグイン Android Development Tools) のダウンロードとインストール
Android アプリケーションプログラムでの画面遷移の例
Eclipse で Android プロジェクトの作成してみる
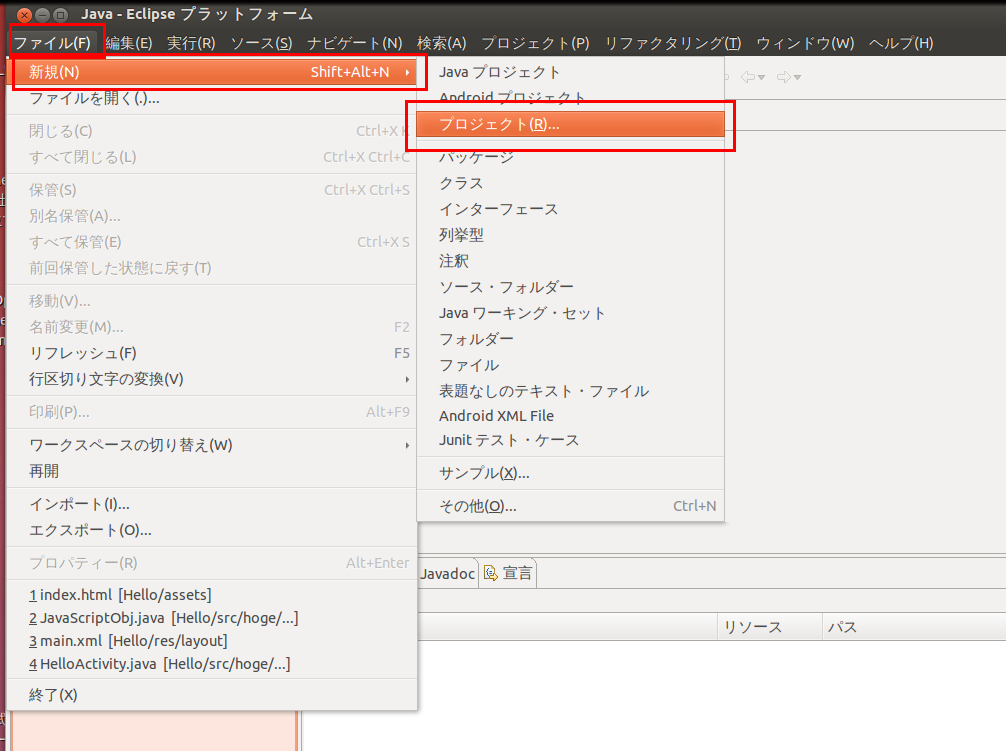
- Eclipse の起動
-
「ファイル (File)」
→
「新規 (New)」
→
「プロジェクト (Project)」 と操作する
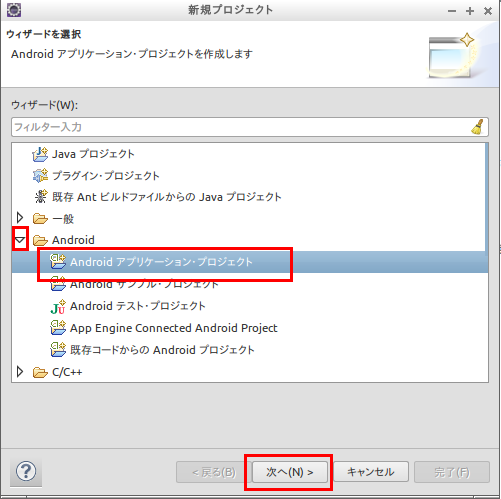
- Android プロジェクト (Android Project) を選ぶ
- プロジェクト名を設定する
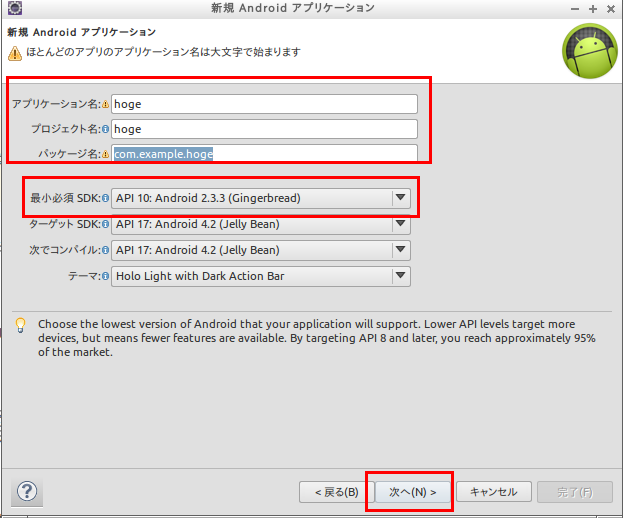
- ビルド・ターゲットを設定する
- パッケージ名などを設定する
画面遷移
JAVAとXMLを使用して3つのアクティビティ
- HelloActivity
- SampleActivity1
- SampleActivity2
を持ち、ボタンを押すことでSampleActivity1とSampleActivity2の間を交互に移動するアプリケーション。
起動するとまずHelloActivity呼ばれ、直ちに SampleActivity1に遷移する。 SampleActivity1にはボタンがあり、ボタンを押すとSampleActivity2へ遷移する。 SampleActivity2にもSampleActivity1と同様にボタンがあり、ボタンを押すとSampleActivity1へ遷移する。
今回の例ではActivityを複数使用するので、AndroidManifest.xmlファイルに使用するActivityを宣言する。 このとき、「android:name=」欄には、「.」に続いて作成したclassファイルの名前(今回の場合はSampleActivity1またはSampleActivity2)を記載する。
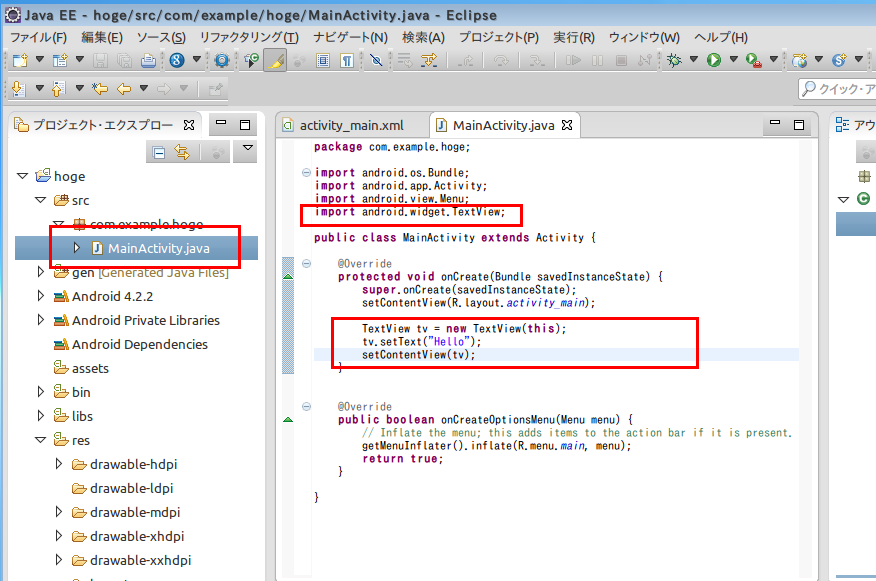
- HelloActivity.java
package hoge.hoge.com; import android.app.Activity; import android.os.Bundle; import android.content.Intent; public class HelloActivity extends Activity { /** Called when the activity is first created. */ public void onCreate(Bundle savedInstanceState) { super.onCreate(savedInstanceState); setContentView(R.layout.main); Intent i = new Intent (this, SampleActivity1.class); startActivity(i); } } - SampleActivity1.java
package hoge.hoge.com; import android.app.Activity; import android.os.Bundle; import android.content.Intent; import android.view.View; import android.view.View.OnClickListener; public class SampleActivity1 extends Activity implements OnClickListener{ /** Called when the activity is first created. */ public void onCreate(Bundle savedInstanceState) { super.onCreate(savedInstanceState); setContentView(R.layout.sampleactivity1); View button1 = findViewById(R.id.button1); button1.setOnClickListener(this); } public void onClick(View v) { switch (v.getId()) { case R.id.button1: Intent i = new Intent (this, SampleActivity2.class); startActivity(i); break; } } } - SampleActivity2.java
package hoge.hoge.com; import android.app.Activity; import android.os.Bundle; import android.content.Intent; import android.view.View; import android.view.View.OnClickListener; public class SampleActivity2 extends Activity implements OnClickListener{ /** Called when the activity is first created. */ public void onCreate(Bundle savedInstanceState) { super.onCreate(savedInstanceState); setContentView(R.layout.sampleactivity2); View button2 = findViewById(R.id.button2); button2.setOnClickListener(this); } public void onClick(View v) { switch (v.getId()) { case R.id.button2: Intent i = new Intent (this, SampleActivity1.class); startActivity(i); break; } } } - layout/main.xml
デフォルトのまま使う
<?xml version="1.0" encoding="utf-8"?> <LinearLayout xmlns:android="http://schemas.android.com/apk/res/android" android:layout_width="fill_parent" android:layout_height="fill_parent" android:orientation="vertical" > <TextView android:layout_width="fill_parent" android:layout_height="wrap_content" android:text="@string/hello" /> </LinearLayout> - values/strings.xml
<?xml version="1.0" encoding="utf-8"?> <resources> <string name="hello">Hello World, SampleActivity!</string> <string name="app_name">Hello</string> <string name="button1">ChangeActivity</string> <string name="button2">ChangeActivity</string> <string name="activity_title1">Activity1</string> <string name="activity_title2">Activity2</string> </resources> - layout/sampleactivity1.xml
<?xml version="1.0" encoding="utf-8"?> <LinearLayout xmlns:android="http://schemas.android.com/apk/res/android" android:layout_width="match_parent" android:layout_height="match_parent" android:orientation="vertical" > <TextView android:layout_width="fill_parent" android:layout_height="wrap_content" android:text="@string/activity_title1" /> <Button android:id="@+id/button1" android:layout_width="fill_parent" android:layout_height="wrap_content" android:text="@string/button1" /> </LinearLayout> - layout/sampleactivity2.xml
<?xml version="1.0" encoding="utf-8"?> <LinearLayout xmlns:android="http://schemas.android.com/apk/res/android" android:layout_width="match_parent" android:layout_height="match_parent" android:orientation="vertical" > <TextView android:layout_width="fill_parent" android:layout_height="wrap_content" android:text="@string/activity_title2" /> <Button android:id="@+id/button2" android:layout_width="fill_parent" android:layout_height="wrap_content" android:text="@string/button2" /> </LinearLayout> - AndroidManifest.xml
<?xml version="1.0" encoding="utf-8"?> <manifest xmlns:android="http://schemas.android.com/apk/res/android" package="hoge.hoge.com" android:versionCode="1" android:versionName="1.0" > <uses-sdk android:minSdkVersion="8" android:targetSdkVersion="10"/> <application android:icon="@drawable/ic_launcher" android:label="@string/app_name" > <activity android:name=".HelloActivity" android:label="@string/app_name" > <intent-filter> <action android:name="android.intent.action.MAIN" /> <category android:name="android.intent.category.LAUNCHER" /> </intent-filter> </activity> <activity android:name=".SampleActivity1" android:label="@string/app_name"> </activity> <activity android:name=".SampleActivity2" android:label="@string/app_name"> </activity> </application> </manifest> - アクティビティの Java ファイルを書き換えてみる
- 実行してみる
プロジェクトを右クリックし, 「実行 (Run)」 → 「Android アプリケーション (Android Application)」

しばらく待つと, エミュレータの画面に Activity1 の画面が現れる。
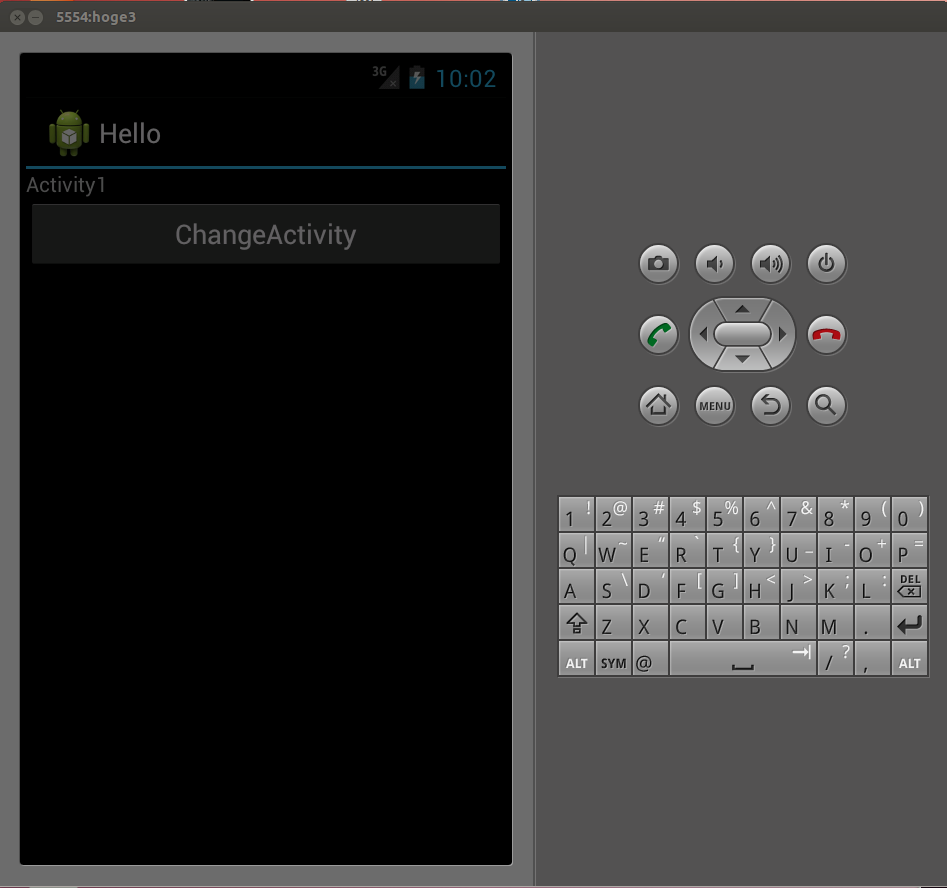
「ChangeActivity」ボタンを押すと、画面が遷移する。