LLaVA による画像理解(静止画用)(ソースコードと実行結果)
【目次】
プログラム利用ガイド
1. このプログラムの利用シーン
画像の内容を詳細に分析し、文章で説明する必要がある場面で活用するソフトウェアである。視覚障害者のための画像説明支援、監視カメラ映像の自動記録、文書管理における画像内容のテキスト化、教育現場での画像教材の説明文作成などに応用できる。場所や状況だけでなく、安全上の注意点や重要な表示内容も検出するため、実用的な情報抽出が可能である。
2. 主な機能
- シーン自動判定:画像を分析し、屋内施設(家庭、オフィス、店舗など)、屋外環境(道路、自然、観光地など)、交通機関(駅、空港)、詳細情報(文字、食品)の13種類に分類する。
- 2段階分析:第1段階で基本的な場所や状況を認識し、第2段階でシーンタイプに応じた詳細分析(安全性、設備状態、案内表示、注意事項など)を実施する。
- 複数の画像入力方式:ファイルから複数の画像を一括処理、ウェブカメラで撮影した画像を処理、インターネットからサンプル画像をダウンロードして処理のいずれかを選択できる。
- 結果の可視化と保存:OpenCV画面に分析結果をリアルタイム表示し、すべての処理結果をresult.txtファイルに自動保存する。
3. 基本的な使い方
- プログラムの起動:
ターミナルでプログラムを実行すると、入力方式の選択画面が表示される。キーボードで「0」(画像ファイル)、「1」(カメラ)、「2」(サンプル画像)のいずれかを入力し、Enterキーを押す。
- 画像の入力:
「0」を選択した場合は、ファイル選択ダイアログが表示されるため、分析したい画像ファイルを選択する(複数選択も可能)。
「1」を選択した場合は、カメラ映像が表示されるため、スペースキーを押して撮影する。
「2」を選択した場合は、自動的にサンプル画像がダウンロードされる。
- 結果の確認:
OpenCV画面に元の画像と分析結果が表示される。シーンタイプ、初期分析、詳細分析の3つの情報が日本語で表示される。ターミナルにも同じ内容が出力される。
- 次の画像への移動:
OpenCV画面を選択した状態で、キーボードの「q」キーを押すと次の画像の処理が開始される。すべての画像の処理が完了すると、プログラムが終了する。
- 結果の保存:
プログラム終了時に、すべての処理結果が自動的にresult.txtファイルに保存される。保存完了メッセージがターミナルに表示される。
4. 便利な機能
- 複数画像の一括処理:ファイル選択時に複数の画像を選択すると、順番に自動処理される。大量の画像を効率的に分析できる。
- カメラでの連続撮影:カメラモードでは、スペースキーを押すたびに撮影と分析が実行される。複数の対象を連続して記録できる。「q」キーでカメラモードを終了する。
- シーン特化分析:プログラムがシーンタイプを自動判定し、そのシーンで重要な観点(例:家庭内では安全性、駅では運行情報、食品では賞味期限など)に焦点を当てた分析を実施する。
- 日本語での結果表示:分析結果はすべて日本語で表示され、OpenCV画面では読みやすく折り返し表示される。MSゴシックフォントを使用している。
- 結果の自動保存:手動操作なしに、すべての分析結果がresult.txtファイルに保存される。後から結果を確認したり、他のソフトウェアで利用したりできる。
事前準備
ここでは、最低限の事前準備について説明する。機械学習や深層学習を行う場合は、NVIDIA CUDA、Visual Studio、Cursorなどを追加でインストールすると便利である。これらについては別ページ https://www.kkaneko.jp/cc/dev/aiassist.htmlで詳しく解説しているので、必要に応じて参照されたい。
Python 3.12 のインストール(Windows 上) [クリックして展開]
以下のいずれかの方法で Python 3.12 をインストールする。Python がインストール済みの場合、この手順は不要である。
方法1:winget によるインストール
管理者権限のコマンドプロンプトで以下を実行する。管理者権限のコマンドプロンプトを起動するには、Windows キーまたはスタートメニューから「cmd」と入力し、表示された「コマンドプロンプト」を右クリックして「管理者として実行」を選択する。
winget install --id Python.Python.3.12 -e --scope machine --silent --accept-source-agreements --accept-package-agreements --override "/quiet InstallAllUsers=1 PrependPath=1 Include_test=0 Include_pip=1 Include_launcher=1 InstallLauncherAllUsers=1 TargetDir=\"C:\Program Files\Python312\""
powershell -Command "$p='C:\Program Files\Python312'; $s=\"$p\Scripts\"; $m=[Environment]::GetEnvironmentVariable('Path','Machine'); if($m -notlike \"*$s*\") { [Environment]::SetEnvironmentVariable('Path', \"$p;$s;$m\", 'Machine') }"
--scope machine を指定することで、システム全体(全ユーザー向け)にインストールされる。このオプションの実行には管理者権限が必要である。インストール完了後、コマンドプロンプトを再起動すると PATH が自動的に設定される。
方法2:インストーラーによるインストール
- Python 公式サイト(https://www.python.org/downloads/)にアクセスし、「Download Python 3.x.x」ボタンから Windows 用インストーラーをダウンロードする。
- ダウンロードしたインストーラーを実行する。
- 初期画面の下部に表示される「Add python.exe to PATH」に必ずチェックを入れてから「Customize installation」を選択する。このチェックを入れ忘れると、コマンドプロンプトから
pythonコマンドを実行できない。 - 「Install Python 3.xx for all users」にチェックを入れ、「Install」をクリックする。
インストールの確認
コマンドプロンプトで以下を実行する。
python --versionバージョン番号(例:Python 3.12.x)が表示されればインストール成功である。「'python' は、内部コマンドまたは外部コマンドとして認識されていません。」と表示される場合は、インストールが正常に完了していない。
AIエディタ Windsurf のインストール(Windows 上) [クリックして展開]
Pythonプログラムの編集・実行には、AIエディタの利用を推奨する。ここでは、Windsurfのインストールを説明する。Windsurf がインストール済みの場合、この手順は不要である。
管理者権限のコマンドプロンプトで以下を実行する。管理者権限のコマンドプロンプトを起動するには、Windows キーまたはスタートメニューから「cmd」と入力し、表示された「コマンドプロンプト」を右クリックして「管理者として実行」を選択する。
winget install --scope machine --id Codeium.Windsurf -e --silent --disable-interactivity --force --accept-source-agreements --accept-package-agreements --custom "/SP- /SUPPRESSMSGBOXES /NORESTART /CLOSEAPPLICATIONS /DIR=""C:\Program Files\Windsurf"" /MERGETASKS=!runcode,addtopath,associatewithfiles,!desktopicon"
powershell -Command "$env:Path=[System.Environment]::GetEnvironmentVariable('Path','Machine')+';'+[System.Environment]::GetEnvironmentVariable('Path','User'); windsurf --install-extension MS-CEINTL.vscode-language-pack-ja --force; windsurf --install-extension ms-python.python --force; windsurf --install-extension Codeium.windsurfPyright --force"
--scope machine を指定することで、システム全体(全ユーザー向け)にインストールされる。このオプションの実行には管理者権限が必要である。インストール完了後、コマンドプロンプトを再起動すると PATH が自動的に設定される。
【関連する外部ページ】
Windsurf の公式ページ: https://windsurf.com/
NVIDIA CUDA Toolkit 12.8のインストール
- 前提条件(NVIDIA CUDA Toolkit インストール前): NVIDIA GPU,NVIDIA ドライバ,および Build Tools for Visual Studio もしくは Visual Studio が必要である.
- インストール中の注意: なるべく他のウインドウはすべて閉じておくこと.
以下のコマンドを管理者権限のコマンドプロンプトで実行する
(手順:Windowsキーまたはスタートメニュー → cmd と入力 → 右クリック → 「管理者として実行」)。
REM NVIDIA CUDA Toolkit 12.8 をシステム領域にインストール
winget install --scope machine --id Nvidia.CUDA --version 12.8 -e --silent --disable-interactivity --force --uninstall-previous --accept-source-agreements --accept-package-agreements --override "-s -n"

REM 環境変数TEMP, TMPの設定(一時ファイルの保存先を短いパスに変更)
mkdir C:\TEMP
set "TEMP_PATH=C:\TEMP"
setx TEMP "%TEMP_PATH%" /M >nul
setx TMP "%TEMP_PATH%" /M >nul
必要なライブラリをシステム領域にインストール
コマンドプロンプトを管理者として実行(手順:Windowsキーまたはスタートメニュー > cmd と入力 > 右クリック > 「管理者として実行」)し、以下を実行する。
REM PyTorch をインストール(GPU対応版)
set "CUDA_TAG=cu128"
set "PYTHON_PATH=C:\Program Files\Python312"
"%PYTHON_PATH%\Scripts\pip" install --no-user -U numpy torch torchvision torchaudio --index-url https://download.pytorch.org/whl/%CUDA_TAG%
pip install transformers pillow requests accelerate bitsandbytes opencv-python
プログラムコードの説明
1. 概要
このプログラムは、画像の内容を自然言語で説明するマルチモーダルAIシステムである。視覚情報とテキスト情報を統合して処理し、画像から場所、状況、対象物、安全上の注意点などを検出して説明文を生成する。シーンタイプを自動判定し、そのシーンに適した観点で詳細分析を実施する2段階処理を採用している。
2. 主要技術
Visual Instruction Tuning(視覚指示調整)
Liu et al.が2023年に発表した技術で、GPT-4で生成された158Kのマルチモーダル指示追従データを用いて視覚エンコーダと言語モデルを統合学習する手法である[1]。画像と自然言語の相互理解を実現し、GPT-4との比較で85.1%の相対スコアを達成した。この手法では、視覚特徴を言語空間に投影し、言語モデルで自己回帰的にテキストを生成する。
4bit量子化技術
BitsAndBytesライブラリによる4bit量子化技術を用いてモデルを圧縮する[2]。NF4データ型を使用してモデル重みを4bitで表現し、二重量子化によりパラメータあたり0.4bitの追加削減を実現する。計算処理自体は16bit精度で実行され、メモリ使用量を約4分の1に削減しながら推論精度を維持する。
3. 技術的特徴
- マルチモーダル特徴統合
CLIP ViT-L/14@336px視覚エンコーダで画像を特徴ベクトルに変換し、2層MLP(多層パーセプトロン)プロジェクション行列で言語空間に投影する。Vicuna v1.5言語モデル(Llama 2ベース、7Bパラメータ)で視覚特徴とテキストプロンプトを統合処理し、自然言語の説明文を生成する[1]。
- 2段階シーン分析
第1段階で画像の場所や状況を簡潔に認識し、その結果からシーンタイプ(屋内施設、屋外環境、交通機関、詳細情報など13種類)を判定する。第2段階では判定されたシーンタイプに特化したプロンプトテンプレートを適用し、そのシーンで重要な観点(安全性、設備状態、案内表示、注意事項など)に焦点を当てた詳細分析を実行する。
- Windows環境対応の量子化設定
BitsAndBytesConfigで4bit量子化、NF4量子化タイプ、二重量子化、float16計算データ型を設定する[2]。これにより7Bパラメータモデルで通常14GB程度必要なGPUメモリを約4分の1に削減し、Windows環境の限られたGPUリソースでも動作可能にする。
- 適応的テキスト生成制御
初期分析では100トークン、詳細分析では300トークンの最大生成トークン数(max_new_tokens)を設定し、温度パラメータ(temperature)を0.2として適度な創造性を持つ自然な応答を生成する。サンプリング有効化(do_sample=True)と上位確率閾値(top_p=0.9)を設定することで、多様性と品質のバランスを調整する。
4. 実装の特色
画像入力の多様性に対応し、以下の3つの入力ソースから選択できる。
- ファイル選択(tkinterによる複数ファイル対応)
- カメラ撮影(OpenCVによるリアルタイムキャプチャ、スペースキーで撮影)
- サンプル画像(GitHubから自動ダウンロード)
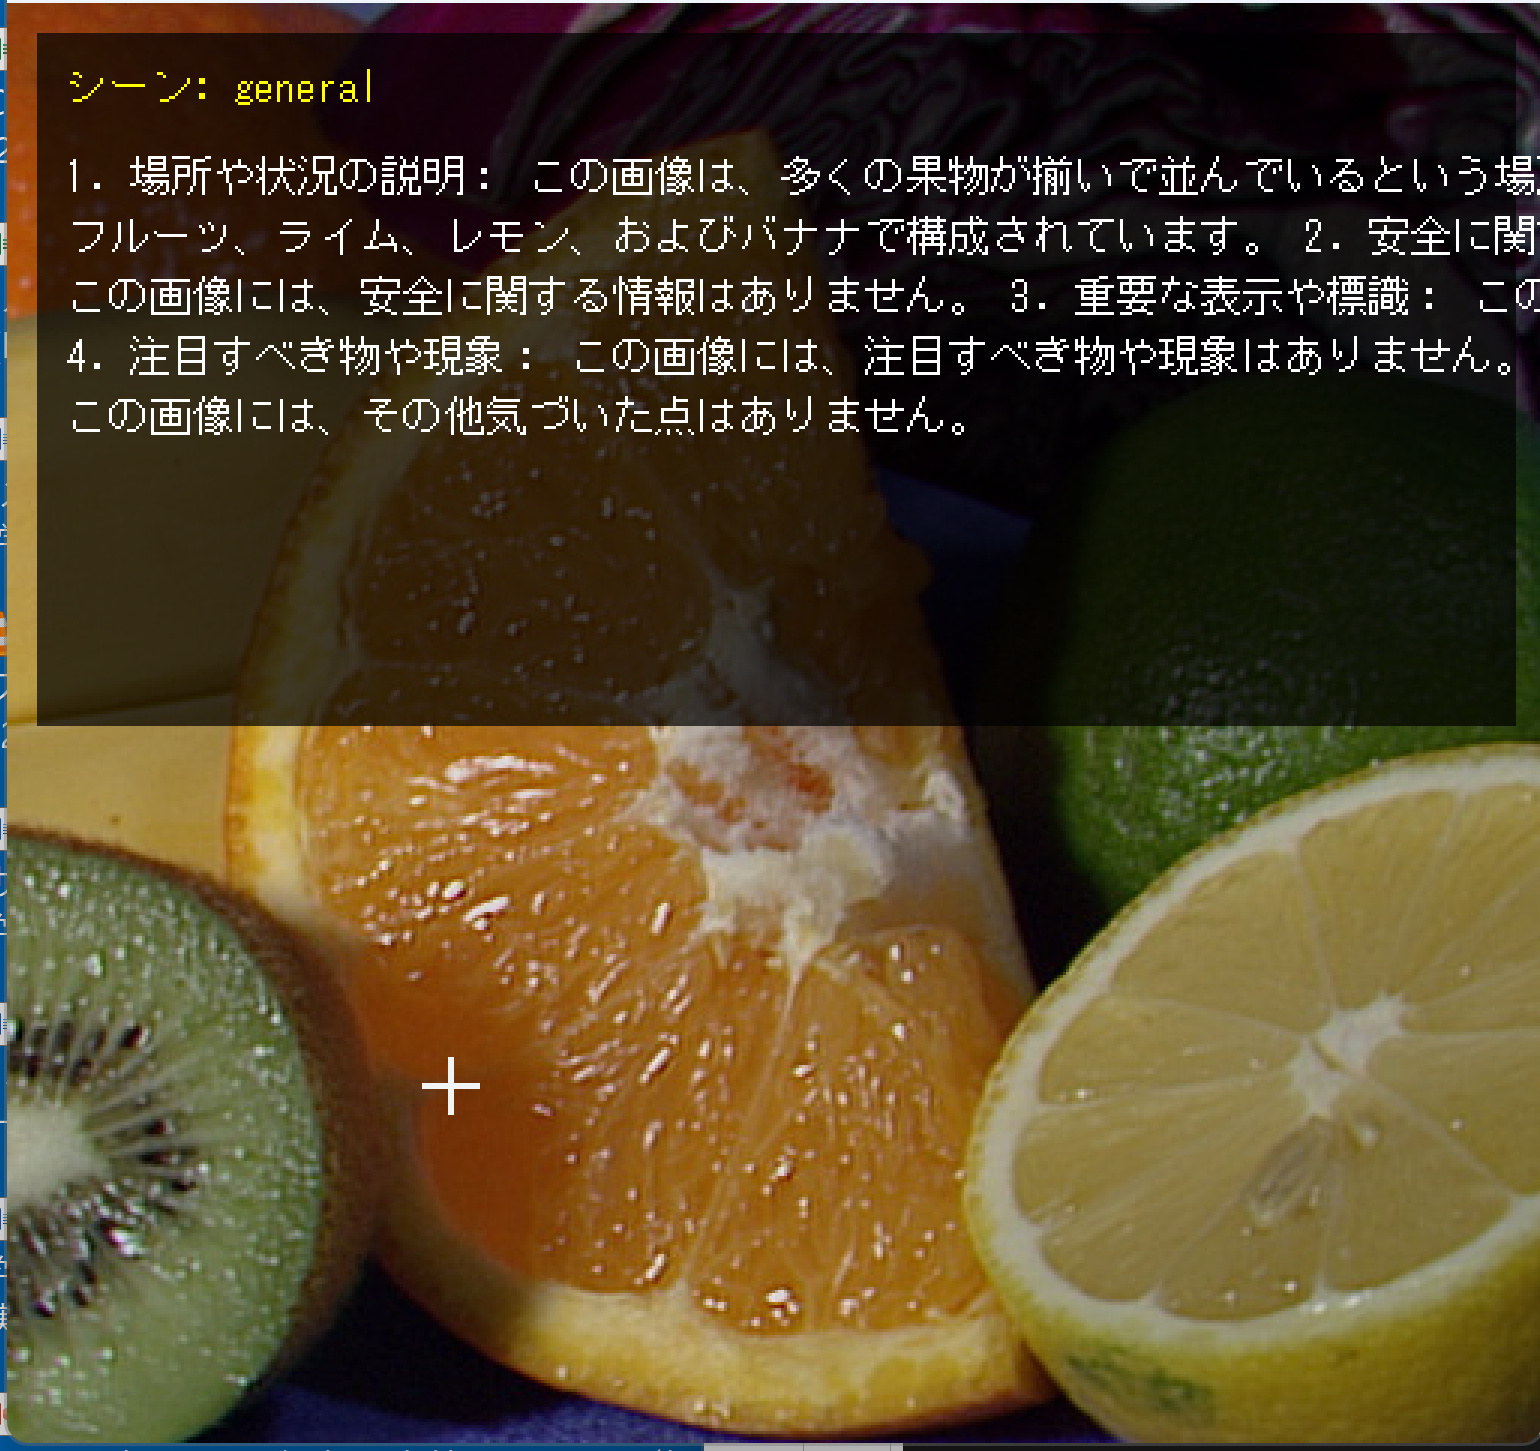
処理結果の可視化では、OpenCV画面に元画像の上に半透明の黒背景を重ねて配置し、シーンタイプと分析結果を日本語で表示する。MSゴシックフォントを使用して読みやすく折り返し表示する。
リアルタイム表示と同時に、すべての処理結果をテキストバッファに蓄積し、プログラム終了時にresult.txtファイルに保存する。ユーザーは「q」キーを押すことで次の画像に進むことができる。
5. 参考文献
[1] Liu, H., Li, C., Wu, Q., & Lee, Y. J. (2023). Visual Instruction Tuning. In Advances in Neural Information Processing Systems 36 (NeurIPS 2023). https://arxiv.org/abs/2304.08485
[2] Dettmers, T., Pagnoni, A., Holtzman, A., & Zettlemoyer, L. (2023). QLoRA: Efficient Finetuning of Quantized LLMs. arXiv preprint arXiv:2305.14314. https://arxiv.org/abs/2305.14314
ソースコード
# プログラム名: LLaVAによる画像理解プログラム
# 特徴技術名: Visual Instruction Tuning(視覚指示調整)
# 出典: Liu, Haotian et al. "Visual Instruction Tuning" NeurIPS 2023, arXiv:2304.08485
# 特徴機能: GPT-4で生成された158Kマルチモーダル指示追従データを用いた視覚エンコーダとLLMの統合学習により、画像と自然言語の双方向理解を実現
# 学習済みモデル: llava-hf/llava-1.5-7b-hf - 7Bパラメータのマルチモーダル対話モデル、GPT-4に対して85.1%の相対スコア達成、https://huggingface.co/llava-hf/llava-1.5-7b-hf
# 方式設計:
# - 関連利用技術: CLIP ViT-L/14@336px(視覚エンコーダ)、Vicuna v1.5-7B(Llama 2ベース言語モデル)、2層MLPプロジェクション行列(視覚-言語特徴空間統合)
# - 入力と出力: 入力: 静止画像(ユーザは「0:画像ファイル,1:カメラ,2:サンプル画像」のメニューで選択.0:画像ファイルの場合はtkinterで複数ファイル選択可能.1の場合はOpenCVでカメラが開き,スペースキーで撮影(複数回可能).2の場合はhttps://github.com/opencv/opencv/raw/master/samples/data/fruits.jpg とhttps://github.com/opencv/opencv/raw/master/samples/data/messi5.jpgとhttps://github.com/opencv/opencv/raw/master/samples/data/aero3.jpgを使用)、出力: 処理結果が画像化できる場合にはOpenCV画面でリアルタイムに表示.OpenCV画面内に処理結果をテキストで表示.さらに,1秒間隔で,print()で処理結果を表示.プログラム終了時にprint()で表示した処理結果をresult.txtファイルに保存し,「result.txtに保存」したことをprint()で表示.プログラム開始時に,プログラムの概要,ユーザが行う必要がある操作(もしあれば)をprint()で表示.
# - 処理手順: CLIP視覚エンコーダで画像を特徴ベクトルに変換、テキストプロンプトをトークナイザで数値列に変換、プロジェクション行列で視覚特徴を言語空間に投影、統合された特徴をVicunaで自己回帰的テキスト生成
# - 前処理、後処理: 前処理:CLIP画像正規化による視覚特徴抽出精度向上、テキストトークン化による言語理解精度向上。後処理:生成テキストのデコードによる自然言語出力、特殊トークン除去による応答品質向上
# - 追加処理: 4bit量子化(BitsAndBytesConfig)によるメモリ使用量削減(14GB→3.5GB)でWindows GPU環境対応、temperature=0.2設定による適度な創造性を持つ自然な応答生成
# - 調整を必要とする設定値: max_new_tokens(生成トークン数上限、現在メイン質問300/追加質問150設定)- 応答文の最大長度制御、値が大きいほど詳細な応答
# 将来方策: max_new_tokensの最適値決定のため、複数の画像で生成文字数の分布を収集し、ヒストグラム(横軸:文字数、縦軸:頻度)を作成して95パーセンタイル値を採用
# その他の重要事項: Windows環境での4bit量子化によりGPUメモリ制約下でも動作可能、<image>トークンをプロンプトに含めることが必須
# 前準備: pip install -U numpy torch torchvision torchaudio --index-url https://download.pytorch.org/whl/cu126
# pip install transformers pillow requests accelerate bitsandbytes opencv-python
import cv2
import tkinter as tk
from tkinter import filedialog
import urllib.request
import os
import torch
from PIL import Image, ImageDraw, ImageFont
from transformers import AutoProcessor, LlavaForConditionalGeneration, BitsAndBytesConfig
import sys
import io
import numpy as np
import textwrap
import time
# Windows文字エンコーディング設定
sys.stdout = io.TextIOWrapper(sys.stdout.buffer, encoding='utf-8')
# プログラム開始時の説明表示
print('='*60)
print('LLaVAによる画像理解プログラム')
print('='*60)
print('このプログラムは画像の内容を自然言語で説明します。')
print('画像選択後、LLaVAモデルが画像を分析し、詳細な説明を生成します。')
print('処理結果はOpenCVウィンドウに表示され、result.txtに保存されます。')
print('OpenCVウィンドウで「q」キーを押すと次の画像に進みます。')
print('='*60)
print()
# 処理結果を保存するリスト
all_results = []
# Windows対応4bit量子化設定
quantization_config = BitsAndBytesConfig(
load_in_4bit=True,
bnb_4bit_compute_dtype=torch.float16,
bnb_4bit_use_double_quant=True,
bnb_4bit_quant_type='nf4'
)
# モデルとプロセッサの自動ダウンロードと初期化
print('LLaVAモデルを初期化中...')
model_id = 'llava-hf/llava-1.5-7b-hf'
processor = AutoProcessor.from_pretrained(model_id, use_fast=True)
model = LlavaForConditionalGeneration.from_pretrained(
model_id,
quantization_config=quantization_config,
device_map='auto'
)
print('モデルの初期化が完了しました。')
print()
def detect_scene_type(text):
"""画像解析結果からシーンタイプを推定"""
text_lower = text.lower()
# 屋内施設
if any(keyword in text for keyword in ['家', 'リビング', 'キッチン', '寝室', '部屋', 'home', 'room', 'kitchen']):
return 'indoor_home'
elif any(keyword in text for keyword in ['オフィス', 'デスク', '会議', 'office', 'desk', 'meeting']):
return 'indoor_office'
elif any(keyword in text for keyword in ['店', 'ショップ', '商品', '棚', 'shop', 'store', 'product']):
return 'indoor_shop'
elif any(keyword in text for keyword in ['レストラン', '食堂', 'カフェ', 'restaurant', 'cafe']):
return 'indoor_restaurant'
elif any(keyword in text for keyword in ['駅', 'プラットフォーム', '電車', 'station', 'platform', 'train']):
return 'transport_station'
elif any(keyword in text for keyword in ['空港', 'ゲート', '飛行機', 'airport', 'gate', 'plane']):
return 'transport_airport'
# 屋外
elif any(keyword in text for keyword in ['道路', '車', '信号', '標識', 'road', 'car', 'traffic']):
return 'outdoor_road'
elif any(keyword in text for keyword in ['山', '森', '木', '自然', 'mountain', 'forest', 'nature']):
return 'outdoor_nature'
elif any(keyword in text for keyword in ['海', '川', '水', 'sea', 'river', 'water']):
return 'outdoor_water'
elif any(keyword in text for keyword in ['観光', '名所', '建物', 'tourist', 'landmark']):
return 'outdoor_tourist'
# 詳細・クローズアップ
elif any(keyword in text for keyword in ['ラベル', '表示', '文字', 'label', 'text', 'sign']):
return 'detail_text'
elif any(keyword in text for keyword in ['食品', '料理', '食べ物', 'food', 'meal']):
return 'detail_food'
return 'general'
# シーンタイプごとのプロンプトテンプレート
SCENE_PROMPTS = {
'indoor_home': 'この家庭内の画像について、以下の観点で詳しく分析してください:\n1. 安全性の問題(コンセント、配線、滑りやすい箇所、鋭利な物など)\n2. 異常や故障の兆候(水漏れ、ひび割れ、汚れなど)\n3. 整理整頓の状態\n4. 注目すべき物品や設備\n5. その他気づいた点',
'indoor_office': 'このオフィスの画像について、以下の観点で詳しく分析してください:\n1. セキュリティ関連(機密情報、アクセス制限エリアなど)\n2. 設備の状態(故障、異常など)\n3. 掲示物や重要な通知\n4. 作業環境の安全性\n5. その他気づいた点',
'indoor_shop': 'この店舗の画像について、以下の観点で詳しく分析してください:\n1. 商品情報(新商品、特売品、価格など)\n2. 営業時間やサービス情報\n3. 店内の案内表示\n4. 混雑状況\n5. その他気づいた点',
'indoor_restaurant': 'この飲食店の画像について、以下の観点で詳しく分析してください:\n1. メニューや料理情報\n2. 価格情報\n3. 営業時間や定休日\n4. 衛生状態\n5. その他気づいた点',
'transport_station': 'この駅の画像について、以下の観点で詳しく分析してください:\n1. プラットフォーム番号、路線名、行き先\n2. 時刻表、運行情報、遅延情報\n3. 出口や乗り換え案内\n4. 施設案内(トイレ、売店など)\n5. その他気づいた点',
'transport_airport': 'この空港の画像について、以下の観点で詳しく分析してください:\n1. ゲート番号、フライト情報\n2. 出発・到着時刻\n3. チェックイン、保安検査の案内\n4. 施設案内(レストラン、ショップなど)\n5. その他気づいた点',
'outdoor_road': 'この道路の画像について、以下の観点で詳しく分析してください:\n1. 交通標識や信号\n2. 道路状況(工事、渋滞、危険箇所など)\n3. 歩行者や自転車の安全\n4. 周辺の建物や施設\n5. その他気づいた点',
'outdoor_nature': 'この自然環境の画像について、以下の観点で詳しく分析してください:\n1. 道標や案内表示\n2. 危険な地形や箇所\n3. 天候や季節の状況\n4. 動植物の存在\n5. その他気づいた点',
'outdoor_water': 'この水辺の画像について、以下の観点で詳しく分析してください:\n1. 安全に関する標識や警告\n2. 水位や潮の状態\n3. 施設や設備の情報\n4. 生物や環境の特徴\n5. その他気づいた点',
'outdoor_tourist': 'この観光地の画像について、以下の観点で詳しく分析してください:\n1. 施設名や歴史的情報\n2. 営業時間、入場料などの情報\n3. 案内表示や地図\n4. 混雑状況\n5. その他気づいた点',
'detail_text': 'この文字情報の画像について、以下の観点で詳しく分析してください:\n1. 重要な日付や期限\n2. 連絡先や問い合わせ情報\n3. 注意事項や警告\n4. 価格や数値情報\n5. その他気づいた点',
'detail_food': 'この食品の画像について、以下の観点で詳しく分析してください:\n1. 商品名や内容\n2. 賞味期限や消費期限\n3. 原材料やアレルギー情報\n4. 価格や量\n5. その他気づいた点',
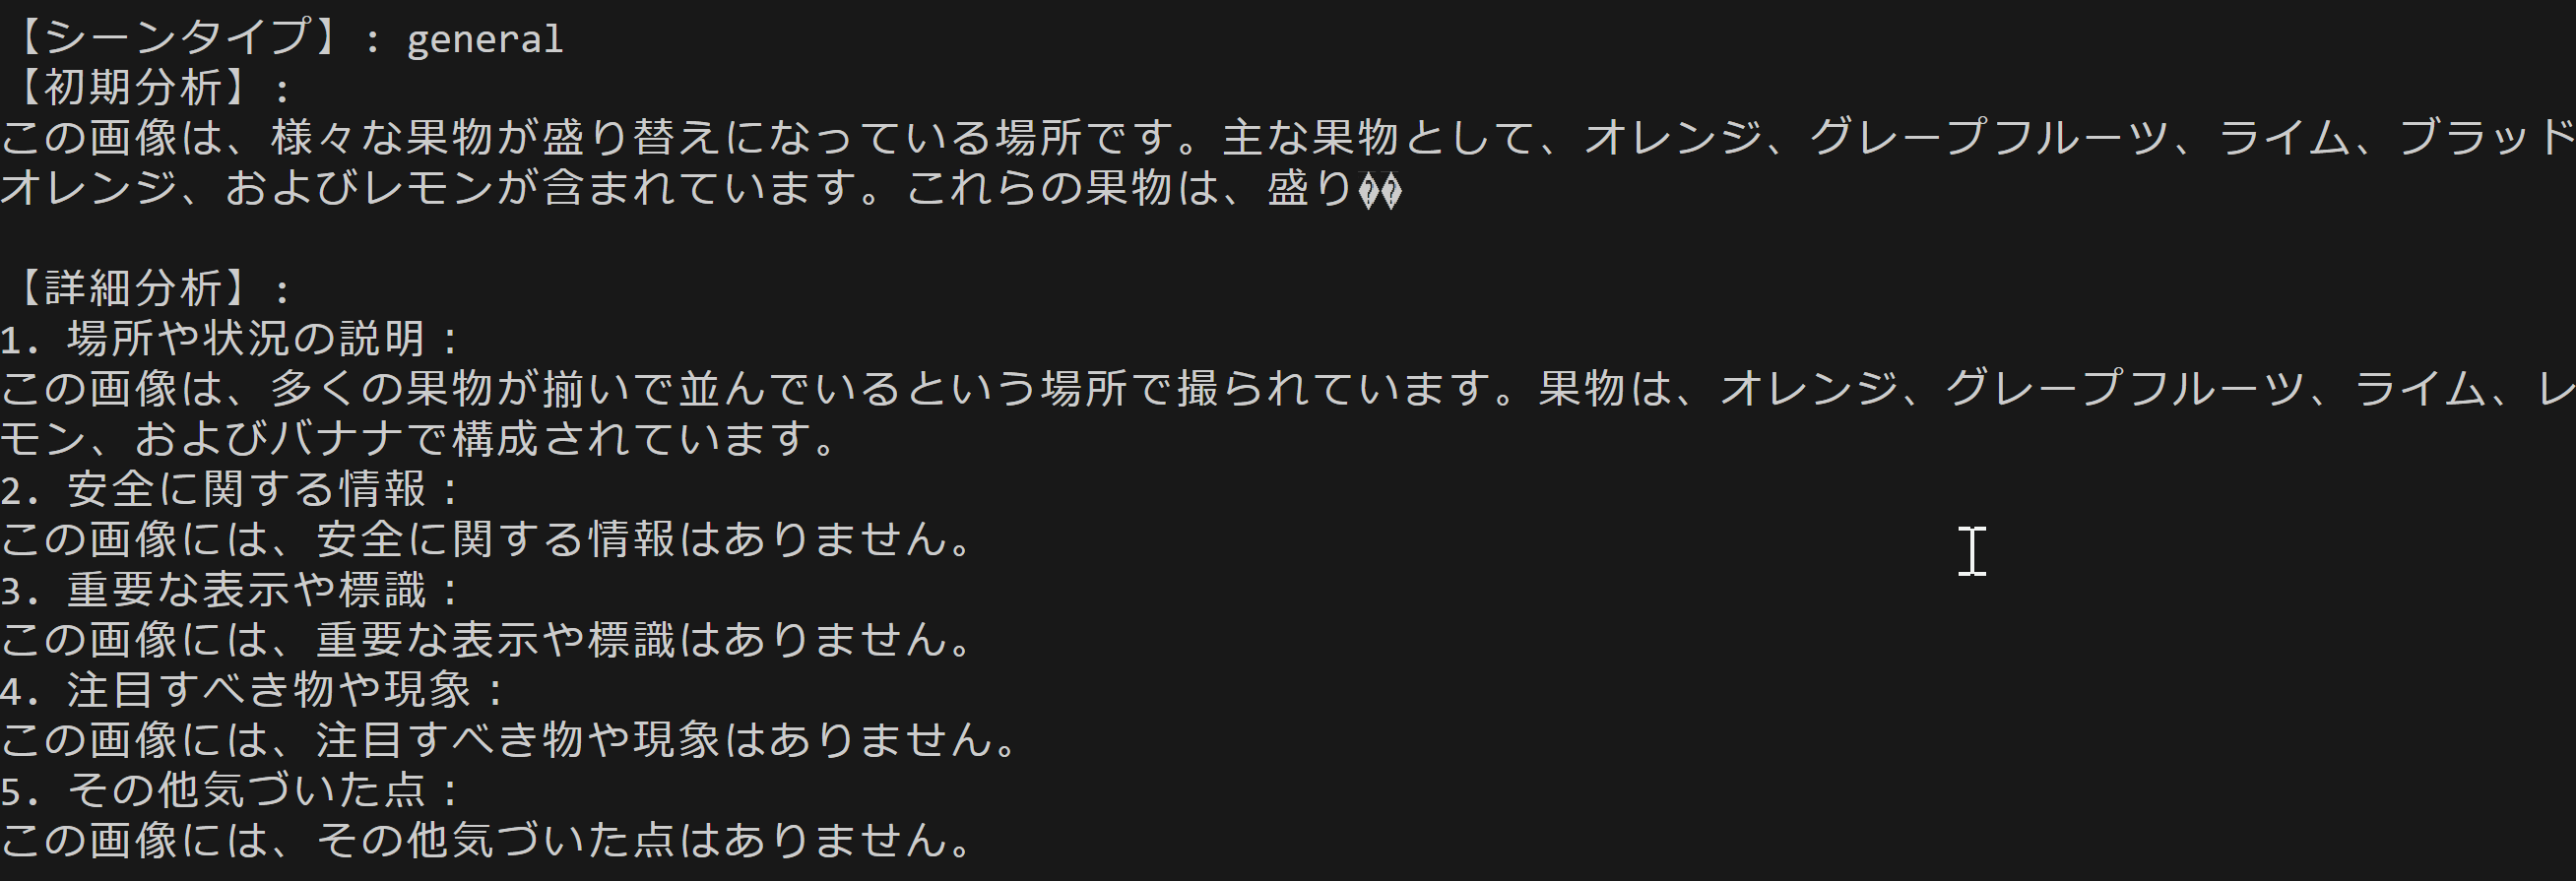
'general': 'この画像について、以下の観点で詳しく分析してください:\n1. 場所や状況の説明\n2. 安全に関する情報\n3. 重要な表示や標識\n4. 注目すべき物や現象\n5. その他気づいた点'
}
def image_processing(img):
# OpenCV画像をPIL画像に変換
img_rgb = cv2.cvtColor(img, cv2.COLOR_BGR2RGB)
pil_image = Image.fromarray(img_rgb)
# 第1段階: 基本的なシーン認識
initial_prompt = 'USER: <image>\nこの画像の場所や状況を簡潔に説明してください。\nASSISTANT:'
inputs = processor(initial_prompt, pil_image, return_tensors='pt').to(model.device)
with torch.inference_mode():
output = model.generate(
**inputs,
max_new_tokens=100,
do_sample=True,
temperature=0.2,
top_p=0.9,
pad_token_id=processor.tokenizer.eos_token_id
)
generated_text = processor.decode(output[0], skip_special_tokens=True)
initial_response = generated_text.split('ASSISTANT:')[-1].strip()
# シーンタイプの判定
scene_type = detect_scene_type(initial_response)
# 第2段階: シーン特化した詳細分析
detailed_prompt = f'USER: <image>\n{SCENE_PROMPTS[scene_type]}\nASSISTANT:'
inputs = processor(detailed_prompt, pil_image, return_tensors='pt').to(model.device)
with torch.inference_mode():
output = model.generate(
**inputs,
max_new_tokens=300,
do_sample=True,
temperature=0.2,
top_p=0.9,
pad_token_id=processor.tokenizer.eos_token_id
)
generated_text = processor.decode(output[0], skip_special_tokens=True)
detailed_response = generated_text.split('ASSISTANT:')[-1].strip()
# 結果を保存
result_text = f'【シーンタイプ】: {scene_type}\n【初期分析】:\n{initial_response}\n\n【詳細分析】:\n{detailed_response}\n'
all_results.append(result_text)
# 結果をprint表示
print(result_text)
sys.stdout.flush() # 即座に出力を表示
# OpenCV画像に結果を描画
result_img = img.copy()
height, width = result_img.shape[:2]
# 半透明の背景を追加
overlay = result_img.copy()
cv2.rectangle(overlay, (10, 10), (width-10, height//2), (0, 0, 0), -1)
cv2.addWeighted(overlay, 0.7, result_img, 0.3, 0, result_img)
# 日本語フォントの設定
font = ImageFont.truetype("C:/Windows/Fonts/msgothic.ttc", 14)
# OpenCV画像をPIL画像に変換
img_pil = Image.fromarray(cv2.cvtColor(result_img, cv2.COLOR_BGR2RGB))
draw = ImageDraw.Draw(img_pil)
# シーンタイプを表示
draw.text((20, 20), f'シーン: {scene_type}', font=font, fill=(255, 255, 0))
# テキストを折り返して描画
display_text = detailed_response
wrapped_text = textwrap.wrap(display_text, width=60)
y_offset = 50
for line in wrapped_text[:10]: # 最大10行まで表示
draw.text((20, y_offset), line, font=font, fill=(255, 255, 255))
y_offset += 20
# PIL画像をOpenCV画像に変換
result_img = cv2.cvtColor(np.array(img_pil), cv2.COLOR_RGB2BGR)
return result_img
def show_processed_image(img, window_name):
if img is None:
print('画像の読み込みに失敗しました')
return
print(f'\n処理中: {window_name}')
processed_img = image_processing(img)
# 処理完了後、ユーザーが'q'キーを押すまで画像を表示
while True:
cv2.imshow(window_name, processed_img)
key = cv2.waitKey(100) & 0xFF
if key == ord('q'):
break
print('0: 画像ファイル')
print('1: カメラ')
print('2: サンプル画像')
choice = input('選択: ')
if choice == '0':
root = tk.Tk()
root.withdraw()
paths = filedialog.askopenfilenames()
if not paths:
exit()
for path in paths:
show_processed_image(cv2.imread(path), 'Image')
elif choice == '1':
cap = cv2.VideoCapture(0, cv2.CAP_DSHOW)
print('\nカメラが起動しました。')
print('スペースキー: 撮影')
print('qキー: 終了')
try:
while True:
cap.grab()
ret, frame = cap.retrieve()
if not ret:
break
cv2.imshow('Camera', frame)
key = cv2.waitKey(1) & 0xFF
if key == ord(' '):
show_processed_image(frame, 'Image')
elif key == ord('q'):
break
finally:
cap.release()
elif choice == '2':
urls = [
'https://github.com/opencv/opencv/raw/master/samples/data/fruits.jpg',
'https://github.com/opencv/opencv/raw/master/samples/data/messi5.jpg',
'https://github.com/opencv/opencv/raw/master/samples/data/aero3.jpg'
]
downloaded_files = []
for i, url in enumerate(urls):
filename = f'sample_{i}.jpg'
try:
print(f'\nサンプル画像をダウンロード中: {url}')
urllib.request.urlretrieve(url, filename)
downloaded_files.append(filename)
show_processed_image(cv2.imread(filename), 'Sample Image')
except Exception as e:
print(f'画像のダウンロードに失敗しました: {url}')
print(f'エラー: {e}')
continue
for filename in downloaded_files:
try:
os.remove(filename)
except OSError:
pass
cv2.destroyAllWindows()
# 結果をファイルに保存
if all_results:
with open('result.txt', 'w', encoding='utf-8') as f:
f.write('\n'.join(all_results))
print('\nresult.txtに保存しました')
実験・研究スキルの基礎:Windowsで学ぶ画像理解実験
1. 実験・研究のスキル構成要素
実験や研究を行うには、以下の5つの構成要素を理解する必要がある。
1.1 実験用データ
このプログラムでは画像ファイルが実験用データである。以下の3つの入力方法から選択できる。
- 手持ちの画像ファイル(複数選択可能)
- ウェブカメラで撮影した画像
- インターネットから自動ダウンロードされるサンプル画像
1.2 実験計画
何を明らかにするために実験を行うのかを定める。
計画例:
- シーンタイプの自動判定精度を検証する(様々な画像で判定結果を記録)
- 異なるシーンタイプ(屋内、屋外、交通機関など)での説明精度を比較する
- 特定の物体(安全標識、食品ラベルなど)の認識精度を評価する
- 2段階分析の有効性を検証する(初期分析と詳細分析の内容を比較)
- 幻覚(存在しない情報の生成)の発生パターンを調査する
- 【発展】温度パラメータを変更した場合の影響を調査する(コード編集が必要)
1.3 プログラム
プログラムは実験を実施するためのツールである。LLaVA-1.5-7bモデル、CLIP視覚エンコーダ、Vicuna言語モデルを使用している。
- プログラムの機能を理解して活用することが基本である
- 基本となるプログラムを出発点として、将来、様々な機能を自分で追加することができる
- プログラムコード内のプロンプトテンプレートを編集することで、異なる種類の分析を実行できる
1.4 プログラムの機能
このプログラムは画像内容を2段階で分析し、自然言語で説明する。
第1段階(シーン認識):
- 画像に写っている場所や状況を簡潔に認識
- 13種類のシーンタイプを自動判定
- 生成トークン数:最大100トークン
第2段階(詳細分析):
- シーンタイプに特化したプロンプトテンプレートを適用
- 安全性、設備状態、案内表示、注意事項などを分析
- 生成トークン数:最大300トークン
制御パラメータ(プログラムコードを編集することで変更可能):
- 温度パラメータ(temperature):応答の創造性を制御(0.0〜1.0、デフォルト0.2)
- 最大生成トークン数(max_new_tokens):説明文の長さを制御(第1段階:100、第2段階:300)
- 上位確率閾値(top_p):生成の多様性を制御(0.0〜1.0、デフォルト0.9)
※注意:これらのパラメータを変更するには、Pythonコードを直接編集する必要がある。スライダーによるリアルタイム調整機能は実装されていない。
出力情報:
- OpenCV画面:元画像に分析結果を重ねて表示
- ターミナル出力:シーンタイプ、初期分析、詳細分析の3つの情報
- ファイル保存:すべての処理結果をresult.txtに記録
1.5 検証(結果の確認と考察)
プログラムの実行結果を観察し、モデルの性能や特性を考察する。
基本認識:
- 同じプログラムでも異なる画像を入力すると結果が変わる。その変化を観察することが実験の基本である
- 「良い結果」「悪い結果」は目的によって異なる
- AI生成の説明文には誤りや幻覚(hallucination)が含まれる可能性がある
観察のポイント:
- シーンタイプの判定は正確か
- 説明文は画像内容を正確に反映しているか
- 重要な情報(安全上の注意、文字情報など)を見逃していないか
- 存在しない物体や情報を生成していないか(幻覚の確認)
- 説明の詳しさは適切か(過不足はないか)
- 第1段階と第2段階で分析内容がどう変化するか
2. 間違いの原因と対処方法
2.1 プログラムのミス(人為的エラー)
プログラムがエラーで停止する
- 原因:構文エラーがある、または必要なライブラリがインストールされていない
- 対処方法:エラーメッセージを確認し、提供されたコードと比較するとよい。pip installコマンドで必要なライブラリをインストールする
モデルのダウンロードに時間がかかる
- 原因:初回実行時にLLaVA-1.5-7bモデル(量子化版で約3〜4GB)をダウンロードしている
- 対処方法:時間がかかることは正常な動作である。ネットワーク環境によっては10〜30分程度かかることがある。ダウンロードが完了するまで待つとよい
GPUメモリ不足エラーが発生する
- 原因:推論実行時に約3.5GBのGPUメモリを必要としている
- 対処方法:他のGPUを使用しているアプリケーションを終了するとよい。それでも解決しない場合は、より大きなGPUメモリを持つ環境で実行する
画像が表示されない
- 原因:OpenCVが正しく動作していない、または画像ファイルの読み込みに失敗している
- 対処方法:画像ファイルのパスを確認するとよい。日本語を含むパスは避ける。それでも解決しない場合は、画像を別の場所に移動する
2.2 期待と異なる結果が出る場合
※以下の対処方法でパラメータ変更が必要な場合は、Pythonコードの編集スキルが必要である。
シーンタイプの判定が明らかに間違っている
- 原因:画像が曖昧であるか、学習データに含まれていないタイプのシーンである
- 対処方法:これはモデルの限界である。別の画像で試すか、【発展】プログラムコード内のプロンプトを編集して再実験するとよい
説明文に存在しない物体や情報が含まれている(幻覚)
- 原因:言語モデルが画像内容を過度に推測している
- 対処方法:プログラムコード内のtemperatureを0.1程度まで下げて再実行するとよい。幻覚は完全には防げないため、結果を常に検証する必要がある
説明文が短すぎる、または詳しさが不足している
- 原因:最大生成トークン数が少なすぎる
- 対処方法:プログラムコード内のmax_new_tokensを500〜1000程度に変更するとよい。ただし、生成時間も増加する
説明文が毎回ほぼ同じになる
- 原因:温度パラメータが低い(デフォルト0.2)ため、説明の多様性が制限される
- 対処方法:プログラムコード内のtemperatureを0.5〜0.7程度に変更するとよい。ただし、高すぎると幻覚が増える可能性がある
重要な文字情報(看板、ラベルなど)を読み取れない
- 原因:画像の解像度が低い、文字が小さすぎる、またはモデルのOCR能力に限界がある
- 対処方法:高解像度の画像を使用するとよい。それでも読み取れない場合は、専用のOCRツールを併用する
3. 実験レポートのサンプル
シーンタイプ別の説明精度の比較
実験目的:
異なるシーンタイプ(屋内施設、屋外環境、交通機関)における説明の正確性と詳しさを比較し、モデルの得意・不得意領域を特定する。
実験計画:
各シーンタイプから3枚ずつ画像を選択し、デフォルトのパラメータ設定(temperature=0.2、max_new_tokens=100/300)で分析する。
実験方法:
以下のシーンタイプをテストする。
- 屋内施設(家庭):キッチン、リビング、寝室
- 屋外環境(道路):交差点、歩道、駐車場
- 交通機関(駅):プラットフォーム、改札口、案内板
評価基準:
- シーンタイプ判定の正確性
- 安全情報の検出率(該当する場合)
- 重要情報の検出率(案内表示、注意事項など)
- 全体的な説明の適切性(5段階評価)
実験結果:
| シーンタイプ | 判定正確率 | 安全情報検出率 | 重要情報検出率 | 説明の適切性(平均) |
|---|---|---|---|---|
| 屋内施設(家庭) | xxx%(x/x) | xxx%(x/x) | 該当事項なし | x.x |
| 屋外環境(道路) | xxx%(x/x) | xxx%(x/x) | xxx%(x/x) | x.x |
| 交通機関(駅) | xxx%(x/x) | xxx%(x/x) | xxx%(x/x) | x.x |
考察:
- (例文)屋内施設と屋外環境では、シーンタイプの判定精度が高かった(xxx%)。一方、駅の画像1枚が「屋内施設」と誤判定された
- (例文)道路シーンでは、安全情報(信号、標識、危険箇所)の検出率が最も高かった(xxx%)。これは学習データに道路画像が豊富に含まれている可能性を示唆する
- (例文)駅シーンでは、時刻表や路線名などの重要情報の検出率が最も低かった(xxx%)。小さな文字や複雑な表示の認識が課題であることが判明した
- (例文)全体的な説明の適切性は、道路シーンが最も高く(x.x)、駅シーンが最も低かった(x.x)
- (例文)第2段階の詳細分析では、シーンタイプに応じた観点(家庭では安全性、道路では交通状況、駅では運行情報)で分析が行われることを確認できた
結論:
(例文)本実験により、LLaVAモデルは道路や屋外環境の分析で高い精度を示すが、文字情報が多い駅などの交通機関では性能が低下することが確認された。(例文)実用化にあたっては、シーンタイプごとの特性を考慮し、文字情報が重要な場合は専用のOCRシステムとの併用を検討すべきである。(例文)今後の課題として、より多様な画像での検証や、幻覚の発生パターンの調査が挙げられる。