SQL 問い合わせ計画 (SQL query plan)
【概要】 SQL問い合わせ計画はSQL問い合わせがどのように実行されるかを示す計画で,SQL文の前に「EXPLAIN」を付けると表示される.SQLite3では,オペコードと呼ばれるSQLite3の仮想マシンが実行する基本命令の列である.主要なオペコードには,OpenRead(テーブル読み取り用のカーソル作成),Rewind(カーソルをテーブル先頭に位置づけ),Column(レコードの列データ取得),ResultRow(結果行の出力)などがある.カーソルはデータベーステーブル内の特定の位置を指し示すポインタで,オペコードによって操作され,テーブル内の行を順に処理するために使用される.条件付きジャンプはWHERE句の条件処理などに使用されるオペコードの機能で,レジスタの値を比較し,条件が満たされると指定されたアドレスにジャンプする.例えば「Ne 1 15 2」はレジスタ1と2の値が等しくないときにアドレス15へジャンプする.
演習で行うこと
- SQL 問い合わせ計画 (SQL Query Plan)
SQLite 3 の SQL 演習に関連する部分
- explain <SQL 問い合わせ>
SQL 文の前に「explain」を付けると,SQL は実行されずに,SQL 問い合わせ計画が表示される. 問い合わせ計画とは,SQLite 3の場合には,仮想のデータベースマシンが実行する命令列である.
【SQLite 3 の主要なオペコード (Opcode) の要点】
- OpenRead: ルート・ページが P2 であるようなテーブルのカーソルを作る. P1 にはカーソル番号を設定する. P4 には,テーブルの列数を設定するか, KeyInfo 構造体 (KeyInfo 構造体)と呼ばれる構造体へのポインタを設定する.
- Rewind: 将来の Column, Rowid, Next 命令の実行に備えて,カーソル P1 をテーブルの先頭を指し示すようにする.テーブルが空の場合には,アドレス P2 にジャンプする.
- Column: カーソル P1 (cursor P1) が指し示すレコードの P2 番目の桁 (P2-th column) からデータを取り出して,レジスタ P3 に格納する.(列番号は 0 から始まる)
- Rowid: カーソル P1 (cursor P1) が指し示すレコードの主キーの値を,レジスタ P2 に格納する.
- ResultRow: レジスタP1 から レジスタ(P1+P2-1) までの値を1行として出力する.
- Ne: レジスタP1 の値とレジスタ P3 の値が等しくないときに限り,アドレス P2 (address P2) にジャンプする.
- Next: もし,カーソル P1 (cursor P1) が指し示すレコードが末端レコードならば,次の命令に進む. もし,カーソル P1 (cursor P1) が指し示すレコードが末端レコードでなければ,カーソル P1 (cursor P1) を1つ進めて,アドレス P2 (address P2) にジャンプする.
- Goto: アドレス P2 (address P2) にジャンプする.
* SQLite 3 のオペコードの説明は http://www.hwaci.com/sw/sqlite/opcode.html にある.
* SQLite 3の SQL の説明は http://www.hwaci.com/sw/sqlite/lang.html (English Web Page) にある.
Sqliteman で既存のデータベースを開く
すでに作成済みのデータベースを,下記の手順で開くことができる.
以下の手順で,既存のデータベースファイルを開く. (Open an existing database file)
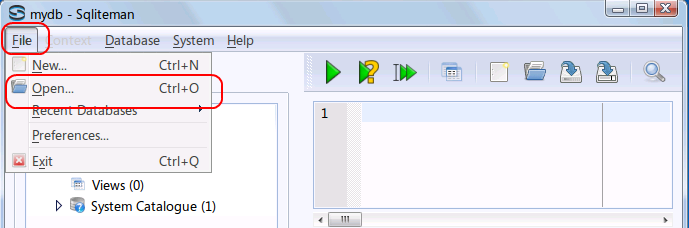
- 「File」→
「Open」
- データベースファイルを開く
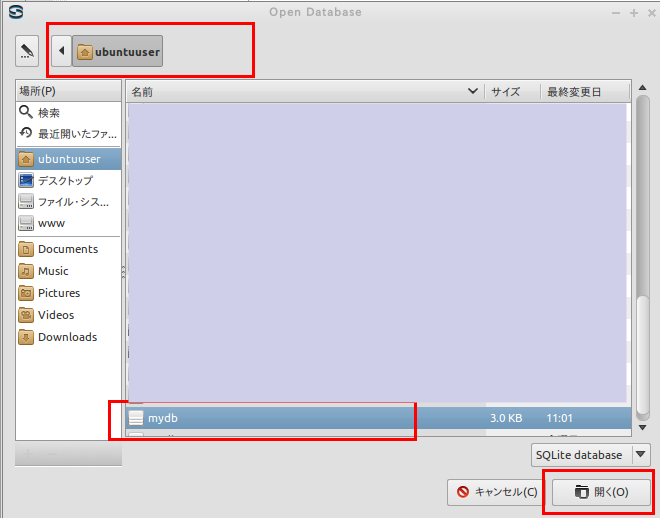
* Ubuntu での実行例(「/home/ubuntuuser/mydb」を開く場合)
データベースファイル /home/ubuntuuser/mydb を選び,
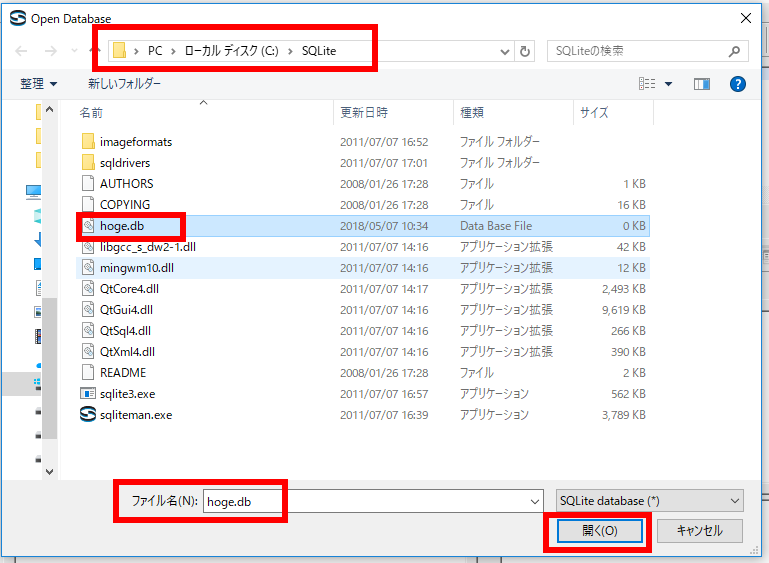
* Windows での実行例(「C:\SQLite\mydb」を開く場合)
データベースファイル C:\SQLite\mydb を選び, 「開く」をクリック
要するに,/home/<ユーザ名>/SQLite 3の下の mydb を選ぶ.
SQL を用いたテーブル定義と一貫性制約の記述
以前の授業で定義した scores テーブルを使う. scores テーブルのテーブル定義が残っている場合には,ここの操作は必要ない. scores テーブルのテーブル定義が残っていない場合には,次の手順で定義する.
リレーショナル・スキーマ (relational schema): scores( name, teacher_name, student_name, score )
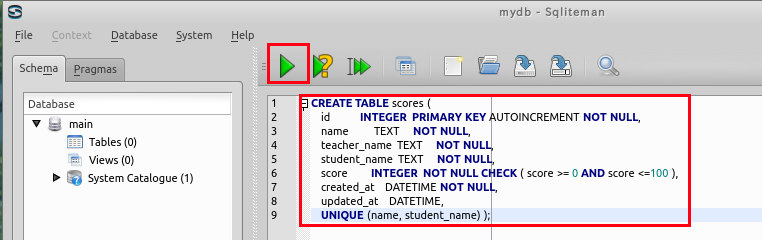
- scores テーブルの定義
次の SQL を入力し,「Run SQL」のアイコンをクリック
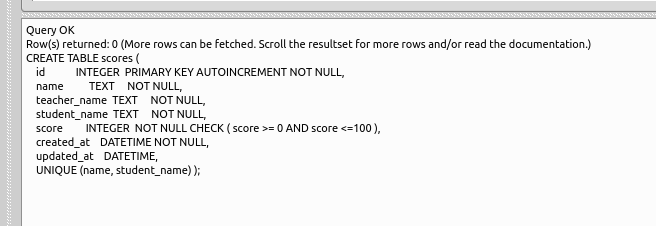
create table scores (
    id            integer  primary key autoincrement not null,
    name          text     not null,
    teacher_name  text     not null,
    student_name  text     not null,
    score         integer  not null check ( score >= 0 AND score <=100 ),
    created_at    datetime not null,
    updated_at    datetime,
    unique (name, student_name) );
* 「SQL Editor」のウインドウには,SQL プログラムを書くことができる.
- コンソールの確認
エラーメッセージが出ていないことを確認する.
SQL を用いたテーブルへの行の挿入
以前の授業で定義した scores テーブルを使う. scores テーブルが残っている場合には,ここの操作は必要ない. scores テーブルが残っていない場合には,次の手順で作成する.
以下の手順で,SQL を用いて scores テーブルへの行の挿入を行う.
- SQL プログラムの記述
「insert into ...」は行の挿入である.ここには 5つの SQL 文を書き, 「begin transaction」と「commit」で囲む. ("insert into ..." means inserting a row into a table. Four SQL statements are wrote).
begin transaction;
insert into scores values( 1, 'Database',    'K', 'KK', 85, datetime('now', 'localtime'), NULL );
insert into scores values( 2, 'Database',    'K', 'AA', 75, datetime('now', 'localtime'), NULL );
insert into scores values( 3, 'Database',    'K', 'LL', 90, datetime('now', 'localtime'), NULL );
insert into scores values( 4, 'Programming', 'A', 'KK', 85, datetime('now', 'localtime'), NULL );
insert into scores values( 5, 'Programming', 'A', 'LL', 75, datetime('now', 'localtime'), NULL );
commit;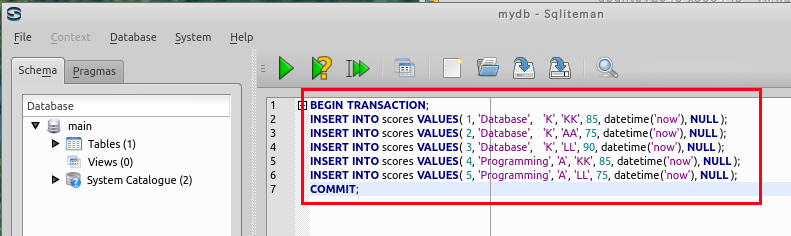
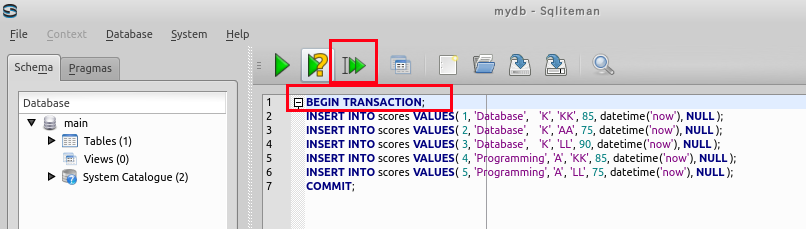
- 複数の SQL 文の一括実行
複数の SQL 文を一括実行したいので,カーソルを先頭行に移動した後に,「Run multiple SQL statements ...」のボタンをクリックする. 「Move the cursor to the top statement. Click "Run multiple SQL statements from current cursor position in one batch" icon)
- 「Script Output」ウインドウの確認
エラーメッセージが出ていないことを確認する.

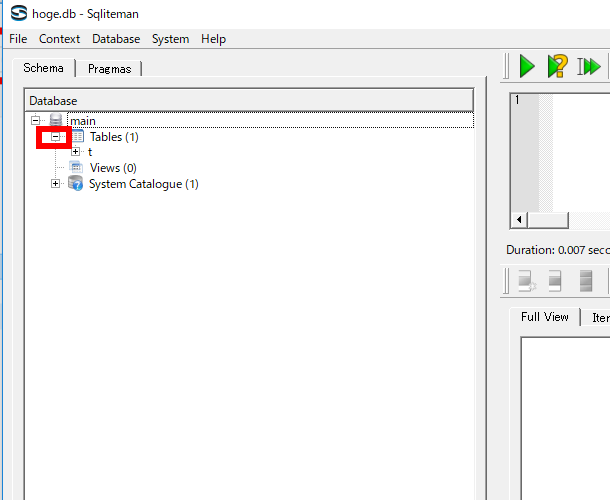
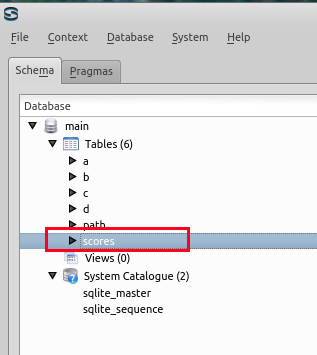
テーブル一覧の確認,データベーススキーマの確認
- 「Tables」を展開すると,テーブルの一覧 (List of Tables) が表示されるので確認する.
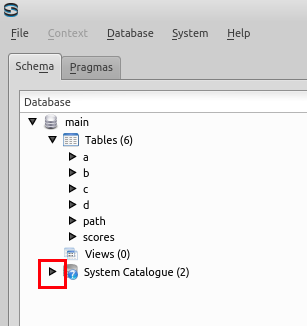
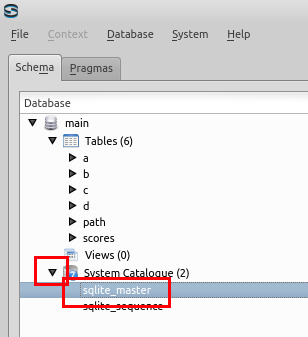
- 「System Catalogue」を展開し,「sqlite_master」をクリックすると,データベース・スキーマ (database schema) が表示されるので,scores の行を確認する.
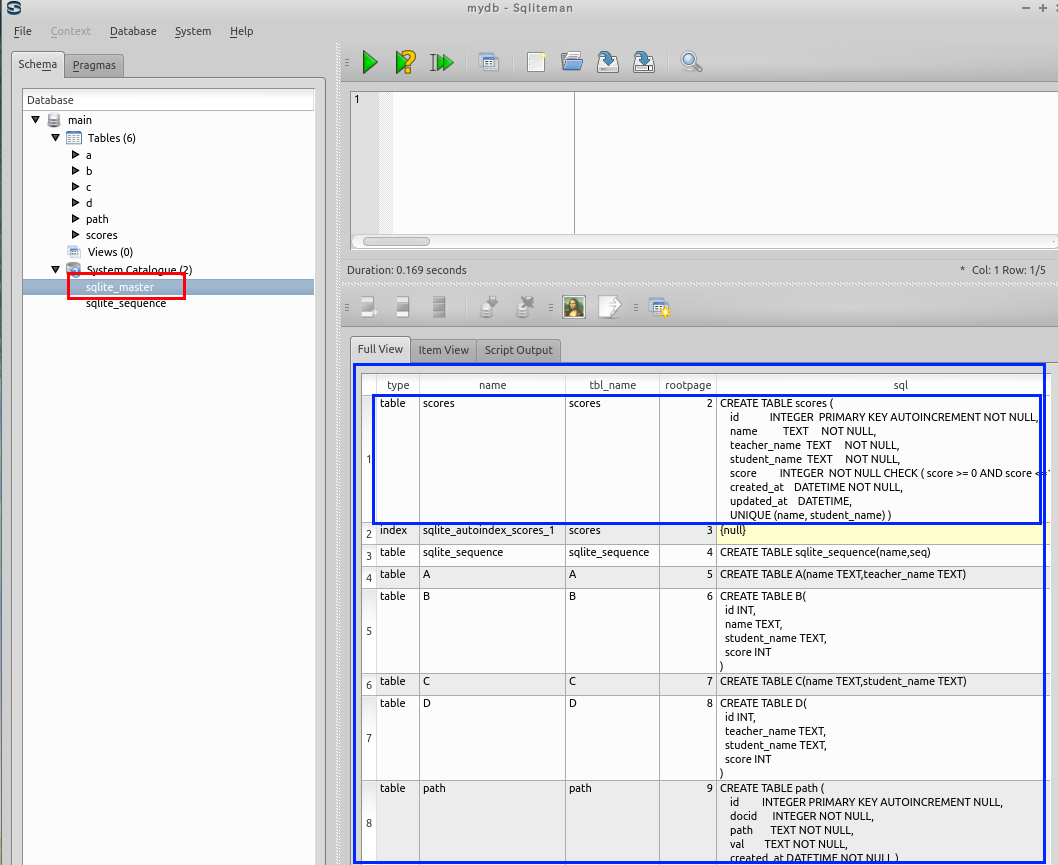
* 「2」 の部分は別の数値になっているはずである. これらは,scores テーブルのデータが置かれるページ番号に関する情報 (rootpage) であり, SQLite 3 システムが自動で決める値である.
Sqliteman を用いたデータのブラウズ
- まず,オブジェクト・ブラウザ (Object Browser) の中の「Tables」を展開する.
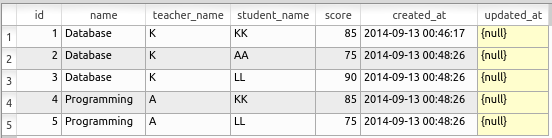
- 次に,scores テーブルをダブルクリックする.
- テーブル scoresが表示される.
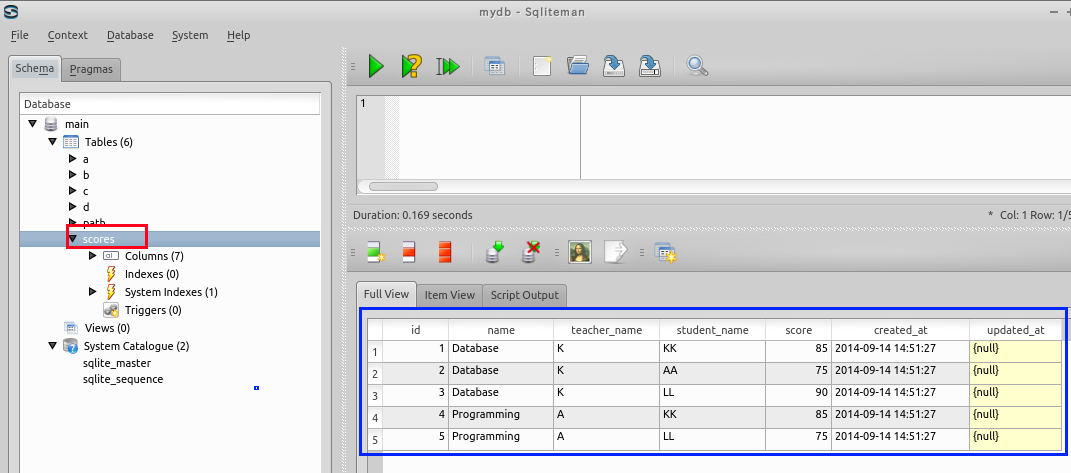
* もし,データに間違いがあれば,このウインドウで修正できる.
Sqliteman を用いた SQL 問い合わせ計画の表示
ここでは,SQL 問い合わせ計画の表示例を示す.
データベース管理システムは, SQL 文をコンパイルし,SQL 問い合わせ計画を作る. SQL 問い合わせ計画とは,データベースに関する基本的なオペレータの並びである.
SQLite 3の問い合わせ計画については,SQLite Virtual Machine Opcodes の Web ページなどを見るとよい.(please refer to https://www.sqlite.org/opcode.html for SQLite opcodes)
* テーブルの全ての行の表示
- SQL の問い合わせの発行と評価結果の確認
まずは scores テーブルを使った簡単な SQL を試す.
SELECT * FROM scores; - 問い合わせ計画の表示
今度は,SQL 文の前に「EXPLAIN」を付ける.
EXPLAIN SELECT * FROM scores;
【表示された問い合わせ計画の要点】
| アドレス (addr) | オペコード | 主なオペランド | |
| 2 | OpenRead | P2 = 2 | ルート・ページが 2 であるようなテーブル (この場合は,テーブル scores) のカーソルを作る. |
| 3 | Rewind | P2 = 13 | カーソルを,テーブルの先頭を指し示すようにする.テーブルが空の場合には,アドレス 13 (Close)にジャンプする. |
| 5, 6, 7, 8, 9, 10 | Column | P3 = 1,2,3,4,5,6, P4 = 2,3,4,5,6,7 | 列番号1,2,3,4,5,6の値を,それぞれレジスタ2,3,4,5,6,7に格納する. |
| 11 | ResultRow | P1 = 1, P2 = 7 | レジスタ 1 からレジスタ 7 までの値を1行として出力する. |
| 9 | Next | P2 = 4 | もし,カーソルが指し示すレコードが末端レコードならば,次の命令に進む. もし,カーソルが指し示すレコードが末端レコードでなければ,カーソルを1つ進めて,アドレス4 にジャンプする. |
二次索引については,今後の授業で学ぶ.そのときは, 二次索引がないとき,テーブルの本体が1行ずつ処理される.テーブルの全ての行について処理が繰り返されるということを再度確認する. (このことを「tuple at a time」ともいう)
* 条件を満足する行のみの表示
- SQL の問い合わせの発行と評価結果の確認
SELECT * FROM scores WHERE student_name='KK'; - 問い合わせ計画の表示
SQL 文の前に「EXPLAIN」を付ける.
EXPLAIN SELECT * FROM scores WHERE student_name='KK';アドレス 6 の「Ne 1 15 2 collseq(BINARY) 69」は「条件付きジャンプ」である. 条件を満たさないような行の場合には,結果を得るプログラムの部分をジャンプ (ここでは,7行目から11行めまで)するようになっている.これにより,条件を満たす行だけが得られるようになる.
最初,カーソルは先頭行にセットされる. アドレス 6 の「Ne 1 15 2 collseq(BINARY) 69」は「条件付きジャンプ」であり, SQL で指定されていた「student_name = 'KK'」の処理を行うためのものである. (true の時に限り,新しい行が評価結果に追加される) その後,カーソルは次の行へ動く. このようにして,scores テーブルの全ての行が精査される.