CImg を使う C++ プログラム例
- C++ のテンプレートクラスとして実装されている.本体のファイルは CImg.h の1つだけ.(残りのファイルは プラグインなど)
* ライセンス条項は各自で確認すること。
前準備
-
Ubuntu で OS のシステム更新を行うときは,
次のコマンドを実行.
# パッケージリストの情報を更新 sudo apt update # インストール済みのパッケージを包括的に更新 (依存関係も考慮) sudo apt full-upgrade # 変更をシステム全体に確実に反映させるために再起動 sudo shutdown -r now - CImg のインストール
◆ Ubuntu での操作手順
# パッケージリストの情報を更新
sudo apt update
sudo apt -y install cimg-dev
sudo apt -y install cimg-doc
sudo apt -y install cimg-examples
CImg.h は /usr/include/CImg.h に置かれる. 見本となるプログラムは /usr/share/doc/cimg-dev/examples に置かれる。
◆ Ubuntu での操作手順(例) (CImg の Web ページからダウンロードしてインストールする場合)
- CImg Library の Web ページを開く
- 「Download」をクリック
- 「Standard Package」をクリック
- zip ファイルをダウンロード
- 解凍してできた CImg.h を使う. CImg Library の機能はすべてこのファイルに入っている.
CImg での画像ファイル操作, 表示
画像ファイル読み込みと表示
- CImg コンストラクタ: 画像ファイルの読み込み
- display: ウインドウを開き画像を表示
◆プログラムの例
hoge.cpp を次のように作成する.
#include "CImg.h"
int main(int argc, char **argv) {
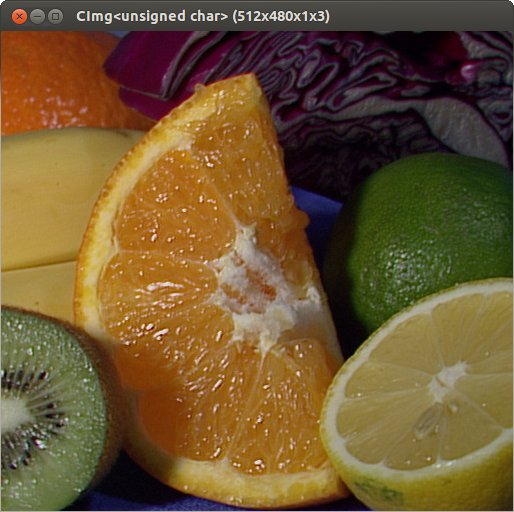
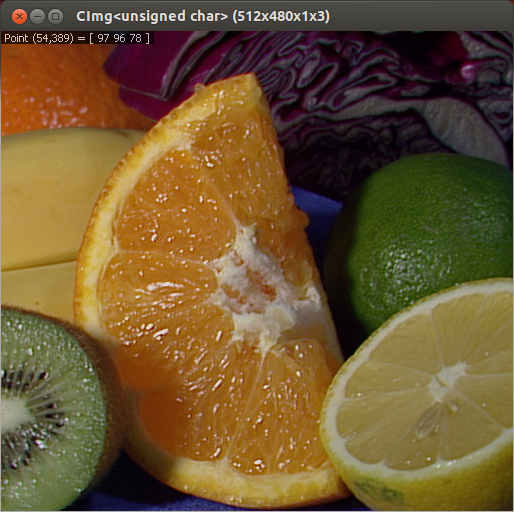
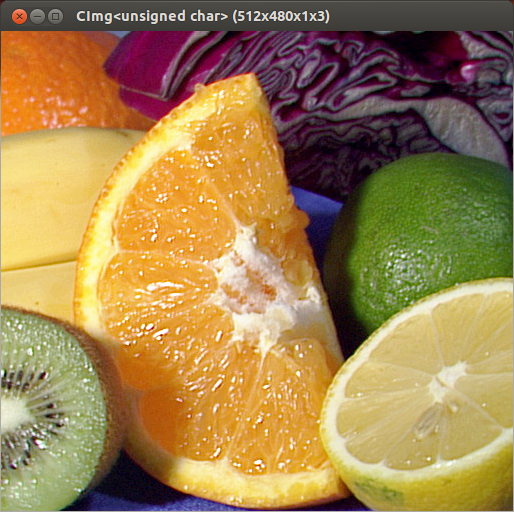
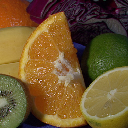
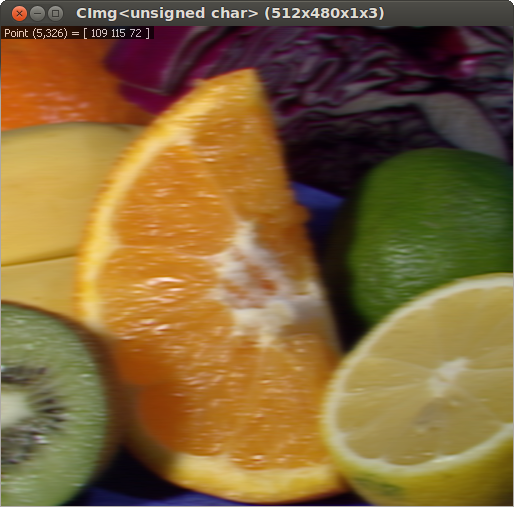
cimg_library::CImg<unsigned char> img01( /* file name */ "/usr/local/share/opencv/samples/c/fruits.jpg" );
img01.display();
return 0;
}
◆ ビルド手順の例
* 64 ビット Ubuntu での手順例を下に示す.32ビットUbuntu のときは 「x86_64」のところを 「i386」に変える.
g++ -c -o hoge.o  -Dcimg_use_vt100 -Dcimg_use_xshm -Dcimg_use_ -Dcimg_use_png -Dcimg_use_magick -Dcimg_use_fftw3 -Dcimg_use_lapack -Dcimg_use_opencv -I/usr/X11R6/include -I/usr/include/GraphicsMagick -I/usr/local/include/opencv hoge.cpp
g++ -o a.out hoge.o -lm  -L/usr/lib/x86_64-linux-gnu -lpng -lGraphicsMagick++ -lGraphicsMagickWand -lfftw3 -lopencv_core -llapack -lblas -latlas -lgfortran -lgomp -lX11 -lXext -lpthread -ldl -lquadmath

◆ 実行手順と実行結果の例
./a.out

画像ファイルへの保存,ファイル形式の変更
- save: 画像ファイルの書き出し
◆プログラムの例
hoge.cpp を次のように作成する.
#include "CImg.h"
int main(int argc, char **argv) {
  cimg_library::CImg<unsigned char> img01( /* file name */ "/usr/local/share/opencv/samples/c/fruits.jpg" );
  img01.save( "hoge.png" );
  return 0;
}
◆ ビルド手順の例
* 64 ビット Ubuntu での手順例を下に示す.32ビットUbuntu のときは 「x86_64」のところを 「i386」に変える.
g++ -c -o hoge.o  -Dcimg_use_vt100 -Dcimg_use_xshm -Dcimg_use_ -Dcimg_use_png -Dcimg_use_magick -Dcimg_use_fftw3 -Dcimg_use_lapack -Dcimg_use_opencv -I/usr/X11R6/include -I/usr/include/GraphicsMagick -I/usr/local/include/opencv hoge.cpp
g++ -o a.out hoge.o -lm  -L/usr/lib/x86_64-linux-gnu -lpng -lGraphicsMagick++ -lGraphicsMagickWand -lfftw3 -lopencv_core -llapack -lblas -latlas -lgfortran -lgomp -lX11 -lXext -lpthread -ldl -lquadmath
# (上と同じ)
◆ 実行手順と実行結果の例
./a.out

行列
- variance
- identity_matrix
- transpose
- invert
- solve
- solve_tridiagonal
- eigen
- get_eigen
- sort
- SVD
- get_SVD
- convolve
CImg での画像の基本操作
() あるいは atXYZC() を用いた画素値の操作
◆プログラムの例
hoge.cpp を次のように作成する.
#include "CImg.h"
int main(int argc, char **argv) {
  cimg_library::CImg<unsigned char> img01( /* file name */ "/usr/local/share/opencv/samples/c/fruits.jpg" );
//  img01.RGBtoXYZ();
  for ( int i = 100; i < 400; i++ ) {
    for ( int j = 100; j < 200; j++ ) {
      img01(i, j, 0, 0) = 0;
      img01(i, j, 0, 1) = 0;
      img01(i, j, 0, 2) = 0;
    }
  }

  img01.display();
  return 0;
}
atXYZC() メソッドを使う場合
#include "CImg.h"
int main(int argc, char **argv) {
  cimg_library::CImg<unsigned char> img01( /* file name */ "/usr/local/share/opencv/samples/c/fruits.jpg" );
//  img01.RGBtoXYZ();
  for ( int i = 100; i < 400; i++ ) {
    for ( int j = 100; j < 200; j++ ) {
      img01.atXYZC(i, j, 0, 0) = 0;
      img01.atXYZC(i, j, 0, 1) = 0;
      img01.atXYZC(i, j, 0, 2) = 0;
    }
  }

  img01.display();
  return 0;
}
◆ ビルド手順の例
* 64 ビット Ubuntu での手順例を下に示す.32ビットUbuntu のときは 「x86_64」のところを 「i386」に変える.
g++ -c -o hoge.o  -Dcimg_use_vt100 -Dcimg_use_xshm -Dcimg_use_ -Dcimg_use_png -Dcimg_use_magick -Dcimg_use_fftw3 -Dcimg_use_lapack -Dcimg_use_opencv -I/usr/X11R6/include -I/usr/include/GraphicsMagick -I/usr/local/include/opencv hoge.cpp
g++ -o a.out hoge.o -lm  -L/usr/lib/x86_64-linux-gnu -lpng -lGraphicsMagick++ -lGraphicsMagickWand -lfftw3 -lopencv_core -llapack -lblas -latlas -lgfortran -lgomp -lX11 -lXext -lpthread -ldl -lquadmath
# (上と同じ)
◆ 実行手順と実行結果の例
./a.out

画像情報の取得
- int width() : 画像の幅 (number of image columns)
- int height() : 画像の高さ (number of image rows)
- int depth() : 画像のスライス数 (number of image slices)
- int spectrum() : 画像のチャンネル数 (number of image channeds)
◆プログラムの例
hoge.cpp を次のように作成する.
#include "CImg.h"
int main(int argc, char **argv) {
  cimg_library::CImg<unsigned char> img01( /* file name */ "/usr/local/share/opencv/samples/c/fruits.jpg" );
  printf( "width = %d\n", img01.width() );
  printf( "height = %d\n", img01.height() );
  printf( "depth = %d\n", img01.depth() );
  printf( "spectrum = %d\n", img01.spectrum() );
  return 0;
}
◆ ビルド手順の例
g++ -c -o hoge.o  -Dcimg_use_vt100 -Dcimg_use_xshm -Dcimg_use_ -Dcimg_use_png -Dcimg_use_magick -Dcimg_use_fftw3 -Dcimg_use_lapack -Dcimg_use_opencv -I/usr/X11R6/include -I/usr/include/GraphicsMagick -I/usr/local/include/opencv hoge.cpp
g++ -o a.out hoge.o -lm  -L/usr/lib/x86_64-linux-gnu -lpng -lGraphicsMagick++ -lGraphicsMagickWand -lfftw3 -lopencv_core -llapack -lblas -latlas -lgfortran -lgomp -lX11 -lXext -lpthread -ldl -lquadmath
# (上と同じ)
◆ 実行手順と実行結果の例
./a.out

数学関数 (Mathematical Functions)
- T & max_min (R & min_val)
画素値の最大と最小
- T kth_smallest (const unsigned int k)
k番目に小さい画素値
- T median ()
メディアン(中央値)
- Tdouble sum ()
画素値の合計
- Tdouble mean ()
画素値の平均
- Tdouble variance (const unsigned int variance_method=1)
画素値の分散
- Tdouble MSE (const CImg <t> &)
MSE (Mean-Squared Error). 誤差の二乗の平均
- Tdouble PSNR (const CImg<t> &, const Tdouble max_value=255) const
2つの画像の PSNR (Peak Signal-to-Noise Ratio)
◆プログラムの例
hoge.cpp を次のように作成する.
#include "CImg.h"
int main(int argc, char **argv) {
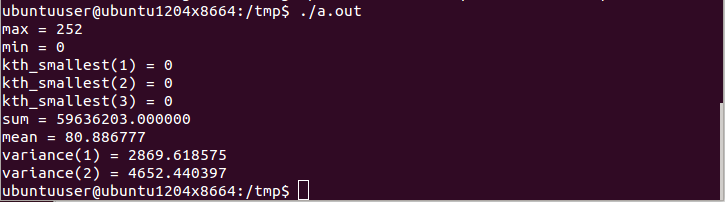
cimg_library::CImg<unsigned char> img01( /* file name */ "/usr/local/share/opencv/samples/c/fruits.jpg" );
unsigned char max, min;
max = img01.max_min( min );
printf( "max = %d\n", max );
printf( "min = %d\n", min );
printf( "kth_smallest(1) = %d\n", img01.kth_smallest(1) );
printf( "kth_smallest(2) = %d\n", img01.kth_smallest(2) );
printf( "kth_smallest(3) = %d\n", img01.kth_smallest(3) );
printf( "sum = %f\n", img01.sum() );
printf( "mean = %f\n", img01.mean() );
printf( "variance(1) = %f\n", img01.variance(1) );
printf( "variance(2) = %f\n", img01.variance(2) );
return 0;
}
◆ ビルド手順の例
* 64 ビット Ubuntu での手順例を下に示す.32ビットUbuntu のときは 「x86_64」のところを 「i386」に変える.
g++ -c -o hoge.o  -Dcimg_use_vt100 -Dcimg_use_xshm -Dcimg_use_ -Dcimg_use_png -Dcimg_use_magick -Dcimg_use_fftw3 -Dcimg_use_lapack -Dcimg_use_opencv -I/usr/X11R6/include -I/usr/include/GraphicsMagick -I/usr/local/include/opencv hoge.cpp
g++ -o a.out hoge.o -lm  -L/usr/lib/x86_64-linux-gnu -lpng -lGraphicsMagick++ -lGraphicsMagickWand -lfftw3 -lopencv_core -llapack -lblas -latlas -lgfortran -lgomp -lX11 -lXext -lpthread -ldl -lquadmath
# (上と同じ)
◆ 実行手順と実行結果の例
./a.out
画像の操作
- CImg< T > & normalize()
L2-norm (L2 ノルム) を用いた画素値の正規化
- CImg< T > & normalize (const T min_value, const T max_value)
線形式での画素値の正規化
- CImg< T > & norm (const int norm_type = 2)
L2-norm を求める
- CImg< T > & cut (const T min_value, const T max_value)
指定された範囲で画素値をカット (cut)
- CImg< T > & quantize (const unsigned int nb_levels, const bool keep_range=true)
Uniformly quantize pixel values.
- CImg< T > & threshold (const T value, const bool soft_threshold = false, const bool strict_threshold = false )
閾値処理
- CImg< T > & equalize (const unsigned int nb_levels, const T min_value=(T) 0, const T max_value=(T) 0)
ヒストグラム平坦化 (Equalize histogram of pixel values)
- CImg< T > & label (const bool is_high_connectivity=false, const Tfloat tolerance=0)
接続成分へのラベル付け (Label connected components)
◆プログラムの例
hoge.cpp を次のように作成する.
#include "CImg.h"
int main(int argc, char **argv) {
cimg_library::CImg<unsigned char> img01( /* file name */ "/usr/local/share/opencv/samples/c/fruits.jpg" );
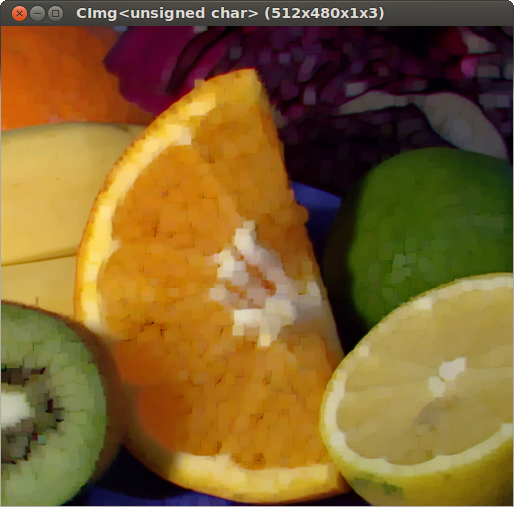
printf( "original\n" );
img01.display();
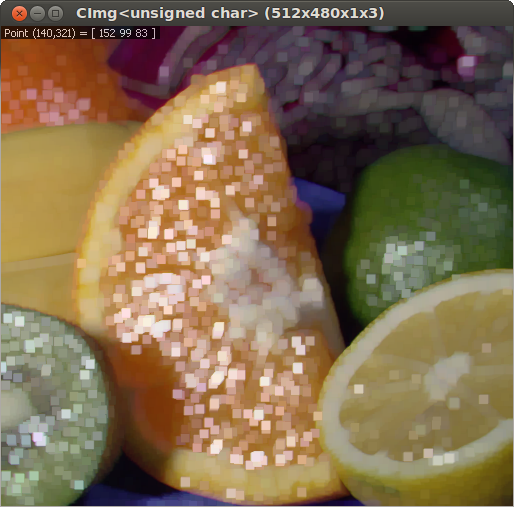
printf( "equalize\n" );
img01.equalize(64).display();
printf( "threshold\n" );
img01.threshold(30).display();
return 0;
}
◆ ビルド手順の例
* 64 ビット Ubuntu での手順例を下に示す.32ビットUbuntu のときは 「x86_64」のところを 「i386」に変える.
g++ -c -o hoge.o  -Dcimg_use_vt100 -Dcimg_use_xshm -Dcimg_use_ -Dcimg_use_png -Dcimg_use_magick -Dcimg_use_fftw3 -Dcimg_use_lapack -Dcimg_use_opencv -I/usr/X11R6/include -I/usr/include/GraphicsMagick -I/usr/local/include/opencv hoge.cpp
g++ -o a.out hoge.o -lm  -L/usr/lib/x86_64-linux-gnu -lpng -lGraphicsMagick++ -lGraphicsMagickWand -lfftw3 -lopencv_core -llapack -lblas -latlas -lgfortran -lgomp -lX11 -lXext -lpthread -ldl -lquadmath
# (上と同じ)
◆ 実行手順と実行結果の例
./a.out
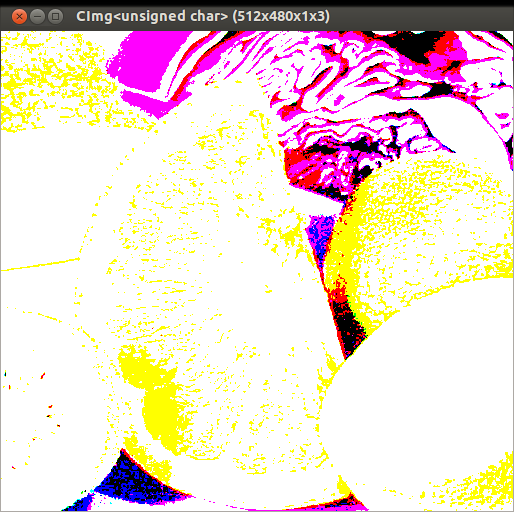
元画像
equalize (ヒストグラム平坦化) の結果(例)
threshold の結果(例)
色空間
- CImg< T > & RGBtoLab()
RGB から Lab への 変換
◆プログラムの例
hoge.cpp を次のように作成する.
#include "CImg.h"
int main(int argc, char **argv) {
  cimg_library::CImg<unsigned char> img01( /* file name */ "/usr/local/share/opencv/samples/c/fruits.jpg" );

  printf( "RGBtoLab\n" );
  img01.RGBtoLab().save("fruits.ppm");

  return 0;
}
◆ ビルド手順の例
* 64 ビット Ubuntu での手順例を下に示す.32ビットUbuntu のときは 「x86_64」のところを 「i386」に変える.
g++ -c -o hoge.o  -Dcimg_use_vt100 -Dcimg_use_xshm -Dcimg_use_ -Dcimg_use_png -Dcimg_use_magick -Dcimg_use_fftw3 -Dcimg_use_lapack -Dcimg_use_opencv -I/usr/X11R6/include -I/usr/include/GraphicsMagick -I/usr/local/include/opencv hoge.cpp
g++ -o a.out hoge.o -lm  -L/usr/lib/x86_64-linux-gnu -lpng -lGraphicsMagick++ -lGraphicsMagickWand -lfftw3 -lopencv_core -llapack -lblas -latlas -lgfortran -lgomp -lX11 -lXext -lpthread -ldl -lquadmath
# (上と同じ)
幾何操作、空間操作
- CImg< T > & resize (const int size_x, const int size_y=-100, const int size_z=-100, const int size_c=-100, const int interpolation_type=1, const unsigned int boundary_conditions=0, const float centering_x=0, const float centering_y=0, const float centering_z=0, const float centering_c=0)
画像サイズの変更
- CImg< T > & crop
CImg
& crop(const int x0, const int y0, const int x1, const int y1, const bool border_condition=false) 画像の切り取り (crop)
◆プログラムの例
hoge.cpp を次のように作成する.
#include "CImg.h"
int main(int argc, char **argv) {
  cimg_library::CImg<unsigned char> img01( /* file name */ "/usr/local/share/opencv/samples/c/fruits.jpg" );

  // resize test
  cimg_library::CImg<unsigned char> img02 = img01;
  img02.resize(128, 128, 1, 3);
  img02.save("1.png");

  // crop test
  cimg_library::CImg<unsigned char> img03 = img01;
  img03.crop(100, 40, 160, 120, /* border */ false);
  img03.save("2.png");
  return 0;
}
◆ ビルド手順の例
* 64 ビット Ubuntu での手順例を下に示す.32ビットUbuntu のときは 「x86_64」のところを 「i386」に変える.
g++ -c -o hoge.o  -Dcimg_use_vt100 -Dcimg_use_xshm -Dcimg_use_ -Dcimg_use_png -Dcimg_use_magick -Dcimg_use_fftw3 -Dcimg_use_lapack -Dcimg_use_opencv -I/usr/X11R6/include -I/usr/include/GraphicsMagick -I/usr/local/include/opencv hoge.cpp
g++ -o a.out hoge.o -lm  -L/usr/lib/x86_64-linux-gnu -lpng -lGraphicsMagick++ -lGraphicsMagickWand -lfftw3 -lopencv_core -llapack -lblas -latlas -lgfortran -lgomp -lX11 -lXext -lpthread -ldl -lquadmath
# (上と同じ)
◆ 実行手順と実行結果の例
./a.out
resize の結果(例)
crop の結果(例)

画像フィルタ,画像変換
画像を入力し、画像を出力とするような処理
- CImg< T > & erode (const unsigned int s)
画像の Erode 操作. 構造要素 (structuring element) は、指定されたサイズの正方形.
- CImg< T > & dilate (const unsigned int s)
画像の Dilate 操作. 構造要素 (structuring element) は、指定されたサイズの正方形.
- CImg< T > & watershed (const CImg< t > &priority, const bool fill_lines=true)
Watershed 変換
- CImg< T > & deriche (const float sigma, const int order=0, const char axis='x', const bool boundary_conditions=true)
再帰 Deriche フィルタ (recursive Deriche filter) の適用
- CImg< T > & blur (const float sigma_x, const float sigma_y, const float sigma_z, const bool boundary_conditions=true)
画像の Blur 操作
- CImg< T > & blur (const float sigma, const bool boundary_conditions=true)
画像の Isotropic Blur 操作
- CImg< T > & blur_anisotropic (const CImg< t > &G, const float amplitude=60, const float dl=0.8f, const float da=30, const float gauss_prec=2, const unsigned int interpolation_type=0, const bool is_fast_approx=1)
画像の Anisotropic Blur 操作. directed by a field of diffusion tensors.
- CImg< T > & blur_anisotropic (const float amplitude, const float sharpness=0.7f, const float anisotropy=0.6f, const float alpha=0.6f, const float sigma=1.1f, const float dl=0.8f, const float da=30, const float gauss_prec=2, const unsigned int interpolation_type=0, const bool is_fast_approx=true)
画像の Anisotropic Blur 操作. in an edge-preserving way.
- CImg< T > & blur_bilateral (const float sigma_x, const float sigma_y, const float sigma_z, const float sigma_r, const int bgrid_x, const int bgrid_y, const int bgrid_z, const int bgrid_r, const bool interpolation_type=true)
画像の Blur 操作 bilateral filter を用いる。
- CImg< T > & blur_bilateral (const float sigma_s, const float sigma_r, const int bgrid_s=-33, const int bgrid_r=32, const bool interpolation_type=true)
画像の Blur 操作 bilateral filter を用いる。
- CImg< T > & laplacian ()
ラプラシアン (laplacian).
- CImg< T > & displacement (const CImg< T > &source, const float smoothness=0.1f, const float precision=5.0f, const unsigned int nb_scales=0, const unsigned int iteration_max=10000, const bool is_backward=false)
2つの画像の変異場 (displacement field) を推定
- CImg< T > & distance (const T value, const unsigned int metric=2)
Compute distance to a specified value.
- static void FFT (CImg< T > &real, CImg< T > &imag, const bool is_invert=false)
Compute n-d Fast Fourier Transform.
◆プログラムの例
hoge.cpp を次のように作成する.
#include "CImg.h"
int main(int argc, char **argv) {
cimg_library::CImg<unsigned char> img01( /* file name */ "/usr/local/share/opencv/samples/c/fruits.jpg" );
// erode, dilate
cimg_library::CImg<unsigned char> img02 = img01;
img02.erode(8);
img02.display();
cimg_library::CImg<unsigned char> img03 = img01;
img03.dilate(8);
img03.display();
cimg_library::CImg<unsigned char> img04 = img01;
img04.erode(8).dilate(8);
img04.display();
// deriche
cimg_library::CImg<unsigned char> img05 = img01;
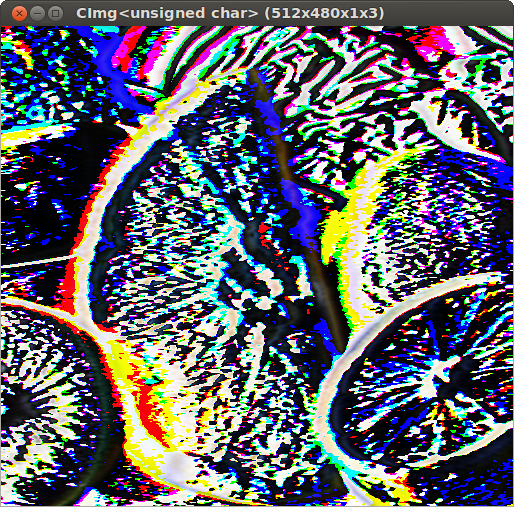
img05.deriche(4, /* order */ 0, /* axis */ 'x' );
img05.display();
cimg_library::CImg<unsigned char> img06 = img01;
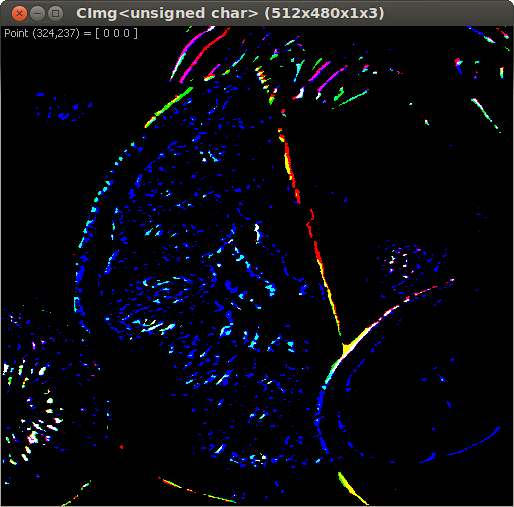
img06.deriche(4, /* order */ 1, /* axis */ 'x' );
img06.display();
cimg_library::CImg<unsigned char> img07 = img01;
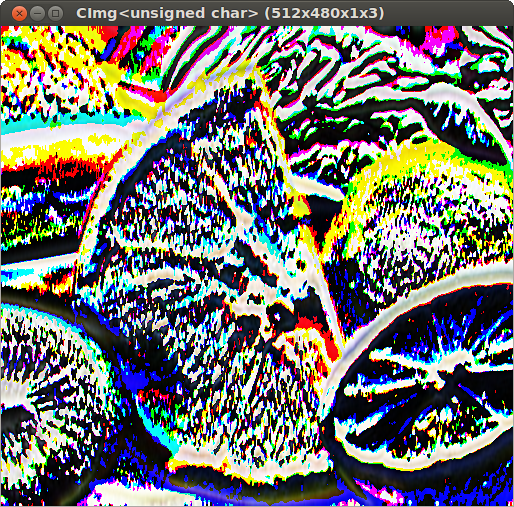
img07.deriche(4, /* order */ 2, /* axis */ 'x' );
img07.display();
cimg_library::CImg<unsigned char> img08 = img01;
img08.deriche(4, /* order */ 0, /* axis */ 'y' );
img08.display();
cimg_library::CImg<unsigned char> img09 = img01;
img09.deriche(4, /* order */ 1, /* axis */ 'y' );
img09.display();
cimg_library::CImg<unsigned char> img10 = img01;
img10.deriche(4, /* order */ 2, /* axis */ 'y' );
img10.display();
return 0;
}
◆ ビルド手順の例
* 64 ビット Ubuntu での手順例を下に示す.32ビットUbuntu のときは 「x86_64」のところを 「i386」に変える.
g++ -c -o hoge.o  -Dcimg_use_vt100 -Dcimg_use_xshm -Dcimg_use_ -Dcimg_use_png -Dcimg_use_magick -Dcimg_use_fftw3 -Dcimg_use_lapack -Dcimg_use_opencv -I/usr/X11R6/include -I/usr/include/GraphicsMagick -I/usr/local/include/opencv hoge.cpp
g++ -o a.out hoge.o -lm  -L/usr/lib/x86_64-linux-gnu -lpng -lGraphicsMagick++ -lGraphicsMagickWand -lfftw3 -lopencv_core -llapack -lblas -latlas -lgfortran -lgomp -lX11 -lXext -lpthread -ldl -lquadmath
# (上と同じ)
◆ 実行手順と実行結果の例
./a.out
erode, dilate
- img02.erode(8);

- img03.dilate(8);
- img04.erode(8).dilate(8);
deriche
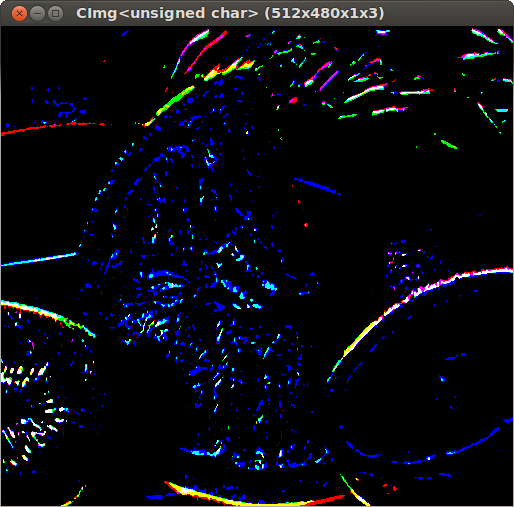
- img05.deriche(4, /* order */ 0, /* axis */ 'x' );
- img06.deriche(4, /* order */ 1, /* axis */ 'x' );
- img07.deriche(4, /* order */ 2, /* axis */ 'x' );
- img08.deriche(4, /* order */ 0, /* axis */ 'y' );

- img09.deriche(4, /* order */ 1, /* axis */ 'y' );
- img10.deriche(4, /* order */ 2, /* axis */ 'y' );
3d Objects Management
- CImg<floatT> get_isoline3d(CImgList< tf > & primitives,
const float isovalue,
const int size_x = -100,
const int size_y = -100
) const
Generate a isoline of the image instance as a 3d object.
描画 (Drawing)
- CImg< T > & draw_point (const int x0, const int y0, const tc *const color, const float opacity=1)
2次元の点の描画
- CImg< T > & draw_line (const int x0, const int y0, const int x1, const int y1, const tc *const color, const float opacity=1, const unsigned int pattern=~0U, const bool init_hatch=true)
2次元の線の描画
- CImg< T > & draw_rectangle (const int x0, const int y0, const int x1, const int y1, const tc *const color, const float opacity=1)
2次元の矩形の描画
- CImg< T > & draw_circle (const int x0, const int y0, int radius, const tc *const color, const float opacity=1)
2次元の円の描画
- CImg< T > & draw_circle (const int x0, const int y0, int radius, const tc *const color, const float opacity, const unsigned int pattern)
Draw an outlined 2d circle
参考Webページ
http://cimg.sourceforge.net/reference/structcimg__library_1_1CImg.html
#include "CImg.h"

void fade( const double pmin, const double pmax, const double angle, cimg_library::CImg<unsigned char>& img, cimg_library::CImg<unsigned char> dest )
{
  const double ca = std::cos(angle), sa = std::sin(angle);
  //
  double alpha;
  cimg_forXYZC(dest,x,y,z,k) {
    const double X = ((double)x/img.width() - 0.5)*ca + ((double)y/img.height() - 0.5)*sa;
    if (X+0.5<pmin) alpha = 0; else {
      if (X+0.5>pmax) alpha = 1; else
        alpha = (X+0.5-pmin)/(pmax-pmin);
    }
    dest(x,y,z,k) = (unsigned char)( (1 - alpha) * img(x,y,z,k) );
  }
  dest.display("Image fading");
  return;
}