SQL 問い合わせ計画 (SQL query plan)
URL: https://www.kkaneko.jp/tools/sqlitedb/6.html
演習で行うこと
- SQL 問い合わせ計画 (SQL Query Plan)
SQLite 3 の SQL 演習に関連する部分
- explain <SQL 問い合わせ>
SQL 文の前に「explain」を付けると,SQL は実行されずに,SQL 問い合わせ計画が表示される. 問い合わせ計画とは,SQLite 3の場合には,仮想のデータベースマシンが実行する命令列である.
【SQLite 3 の主要なオペコード (Opcode) の要点】
- OpenRead: ルート・ページが P2 であるようなテーブルのカーソルを作る. P1 にはカーソル番号を設定する. P4 には、テーブルの列数を設定するか, KeyInfo 構造体 (KeyInfo 構造体)と呼ばれる構造体へのポインタを設定する.
- Rewind: 将来の Column, Rowid, Next 命令の実行に備えて,カーソル P1 をテーブルの先頭を指し示すようにする.テーブルが空の場合には,アドレス P2 にジャンプする.o
- Column: カーソル P1 (cursor P1) が指し示すレコードの P2 番目の桁 (P2-th column) からデータを取り出して,レジスタ P3 に格納する.(列番号は 0 から始まる)
- Rowid: カーソル P1 (cursor P1) が指し示すレコードの主キーの値を,レジスタ P2 に格納する.
- ResultRow: レジスタP1 から レジスタ(P1+P2-1) までの値を1行として出力する
- Ne: レジスタP1 の値とレジスタ P3 の値が等しくないときに限り,アドレス P2 (address P2) にジャンプする.
- Next: もし,カーソル P1 (cursor P1) が指し示すレコードが末端レコードならば、次の命令に進む. もし,カーソル P1 (cursor P1) が指し示すレコードが末端レコードでなければ、カーソル P1 (cursor P1) を1つ進めて、アドレス P2 (address P2) にジャンプする.
- Goto: アドレス P2 (address P2) にジャンプする.
* SQLite 3 のオペコードの説明は http://www.hwaci.com/sw/sqlite/opcode.html にある.
* SQLite 3の SQL の説明は http://www.hwaci.com/sw/sqlite/lang.html (English Web Page) にある.
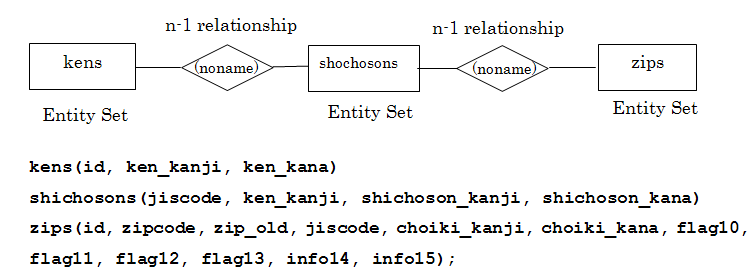
郵便番号データベース (Japanese ZIP code database)
郵便番号データベースは zips, kens, shichosons の 3 つのテーブルから構成される.
データファイルの準備 (Prepare data files)
演習では,郵便番号データファイル (SQL 形式)を使う (Use Japanese ZIP code data file to construct larger database).
【データファイル】
- 郵便番号データファイル (SQL 形式) (Japanese ZIP code data file in SQL format) : zipsutf8.sql
ファイル名は zipsutf8.sql.ファイルサイズは約 40 メガバイト.行数は 147499 行の SQL プログラム (The file name is 'zipsutf8.sql. The size of file is about 40 M-bytes. The number of rows are 147499.)
- 都道府県データファイル (SQL 形式) (Japanese Prefacture data file in SQL format) : kensutf8.sql
ファイル名は kensutf8.sql.ファイルサイズは 4 キロバイト.行数は 49 行の SQL プログラム (The file name is 'kensutf8.sql. The size of file is about 4 K-bytes. The number of rows are 49.)
- 市町村データファイル (SQL 形式) (Japanese Prefacture data file in SQL format) : shichosonsutf8.sql
ファイル名は shichosonsutf8.sql.ファイルサイズは 300 キロバイト.行数は 1943 行の SQL プログラム (The file name is 'shichosonsutf8.sql. The size of file is about 300 K-bytes. The number of rows are 1943.)
Sqliteman で既存のデータベースを開く
すでに作成済みのデータベースを,下記の手順で開くことができる.
以下の手順で,既存のデータベースファイルを開く. (Open an existing database file)
- 「File」→
「Open」
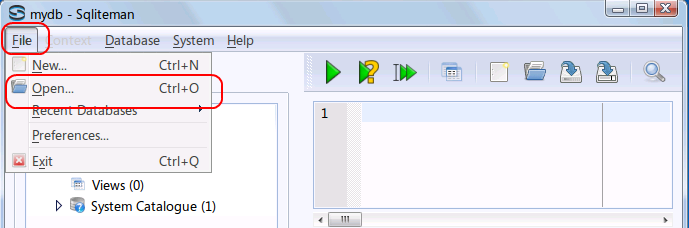
- データベースファイルを開く
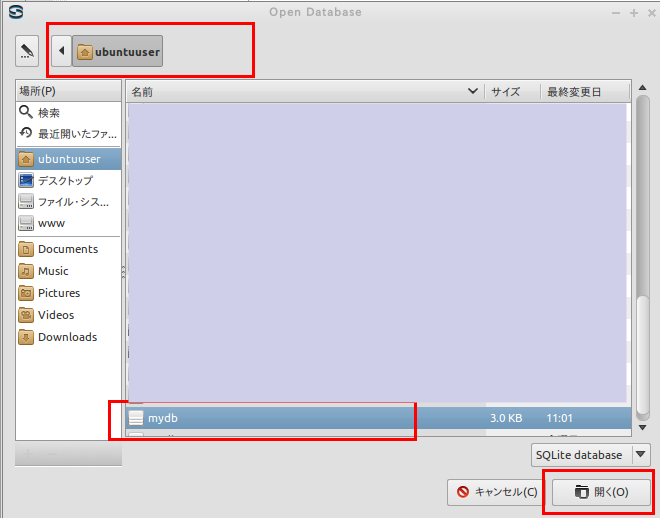
* Ubuntu での実行例(「/home/ubuntuuser/mydb」を開く場合)
データベースファイル /home/ubuntuuser/mydb を選び, 「開く」をクリック (Click '開く' after choosing the database file "/home/ubuntuuser/mydb2")
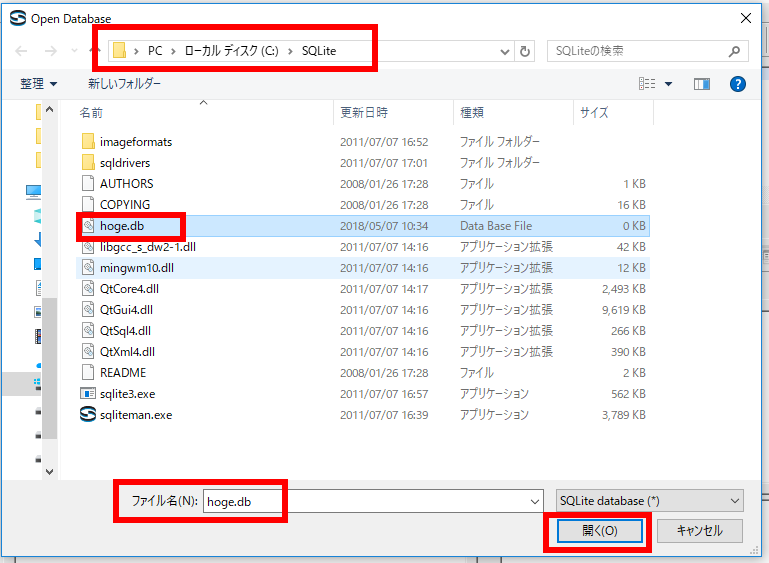
* Windows での実行例(「C:\SQLite\mydb」を開く場合)
データベースファイル C:\SQLite\mydb を選び, 「開く」をクリック (Click '開く' after choosing the database file "C:\SQLite\mydb")
要するに,/home/<ユーザ名>/SQLite 3の下の mydb を選ぶ.
SQL を用いたテーブル定義と一貫性制約の記述
SQL を用いて,products テーブルを定義し,一貫性制約を記述する. (Define 'products' table and specify integrity constrants of the table using SQL)
* 全てのテーブルに主キーがある (All tables have a primary key)
- kens, shichosons, zips テーブルの定義 (Define three tables)
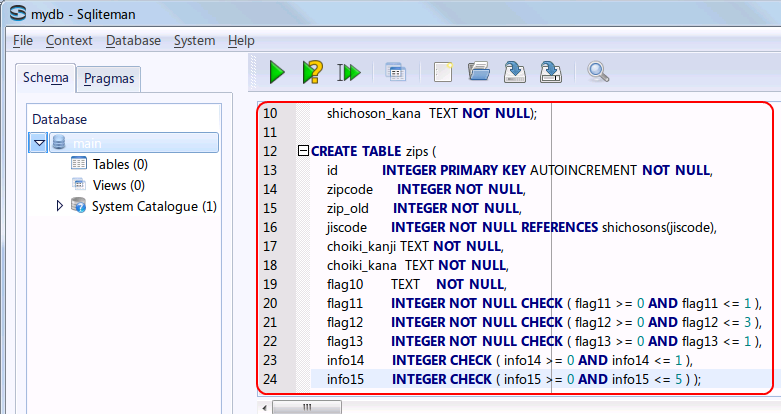
次の SQL を入力 (Write the following SQL to define tables)
create table kens (
    id        integer primary key autoincrement not null,
    ken_kanji text UNIQUE not null,
    ken_kana  text UNIQUE not null );

create table shichosons (
    jiscode         integer primary key not null check (jiscode >= 1000 AND jiscode <= 50000),
    ken_kanji       text not null,
    shichoson_kanji text not null,
    shichoson_kana  text not null);

create table zips (
    id           integer primary key autoincrement not null,
    zipcode      integer not null,
    zip_old      integer not null,
    jiscode      integer not null REFERENCES shichosons(jiscode),
    choiki_kanji text not null,
    choiki_kana  text not null,
    flag10       text    not null,
    flag11       integer not null check ( flag11 >= 0 AND flag11 <= 1 ),
    flag12       integer not null check ( flag12 >= 0 AND flag12 <= 3 ),
    flag13       integer not null check ( flag13 >= 0 AND flag13 <= 1 ),
    info14       integer check ( info14 >= 0 AND info14 <= 1 ),
    info15       integer check ( info15 >= 0 AND info15 <= 5 ) );
* 「SQL Editor」のウインドウには,SQL プログラムを書くことができる. In the 'SQL string' window, you can write down SQL program(s).
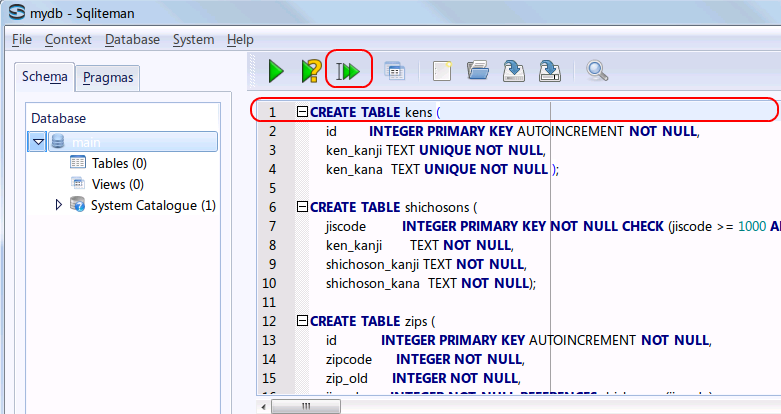
- 複数の SQL 文の一括実行
複数の SQL 文を一括実行したいので,カーソルを先頭行に移動した後に,「Run multiple SQL statements ...」のボタンをクリックする. 「Move the cursor to the top statement. Click "Run multiple SQL statements from current cursor position in one batch" icon)
- 「Script Output」ウインドウの確認(Inspect "Script Output" window)
エラーメッセージが出ていないことを確認
 * エラーメッセージが出たときは、kens, shichosons, zips テーブルを作り直す。 テーブルを作りなおしたいときは、 最初に、次のような手順で、テーブル定義を消去する (try to drop tables)
- 次の SQL を入力
(Write the following SQL to drop tables)
* 「SQL Editor」のウインドウには,SQL プログラムを書くことができる. In the 'SQL string' window, you can write down SQL program(s).
DROP TABLE zips;
DROP TABLE kens;
DROP TABLE shichosons;
- 複数の SQL 文の一括実行
複数の SQL 文を一括実行したいので,カーソルを先頭行に移動した後に,「Run multiple SQL statements ...」のボタンをクリックする. 「Move the cursor to the top statement. Click "Run multiple SQL statements from current cursor position in one batch" icon)

* kens, shichosons, zips テーブルを作成済みでない場合には,上記の操作を行うとエラーメッセージが出る.
データベースの生成 (Generate Database
- 次の操作に移る前に,起動していた Sqliteman を終了しておくこと
- SQLite 3の起動 (Execute the SQLite. The database name 'mydb' is specified.)
* Ubuntu の場合
- 端末を起動する
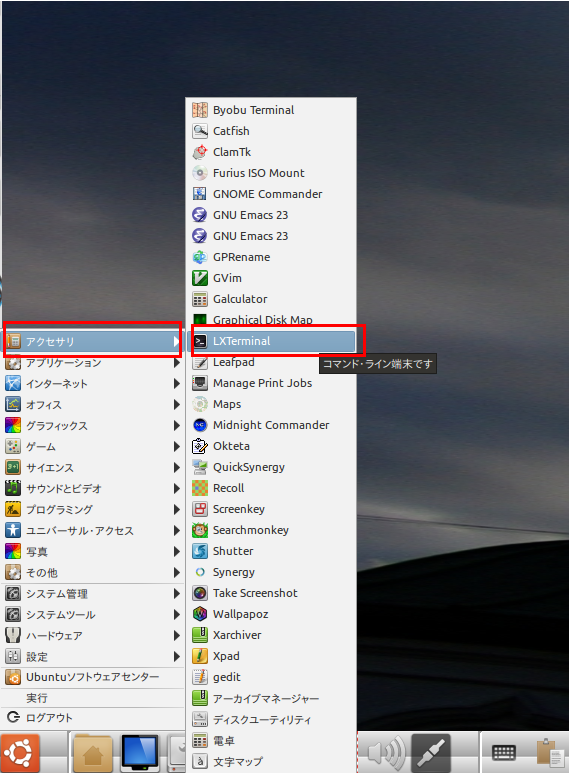
- SQLite を起動する.
このとき,データベース名として mydb を指定する.(The logical database name is 'mydb').
「sqlite」ではなく「sqlite3」であることに注意.
sqlite3 mydb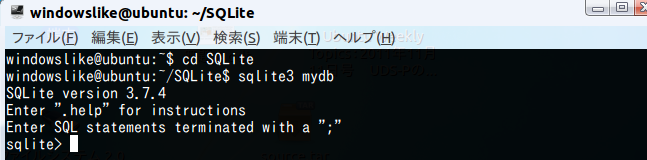
* Windows の場合
Windows のコマンドプロンプトで,次の操作を行う.(Use the Windows command prompt, and do the following).
まず,SQLite 3 のデータベース・ディレクトリ C:\SQLite に移る.
cd /d C:\SQLite

その後,SQLite を起動する.
このとき,データベース名として mydb を指定する.(The logical database name is 'mydb').
cd /d c:\SQLIte
.\sqlite3.exe mydb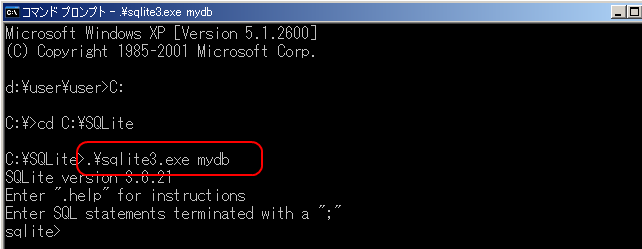
- 端末を起動する
- kensutf8.sql と shichosonsutf8.sql と zipsutf8.sql の実行 (Execute the zipsutf8.sql, kensutf8.sql and shichosonsutf8.sql)
.read kensutf8.sql
.read shichosonsutf8.sql
.read zipsutf8.sql
数秒待つ (Wait a several seconds).
* 「cannot open "zipsutf8.sql"」のようなエラーメッセージが出た場合には, 「ファイルが無い」という意味なので、 SQLite ディレクトリに zipsutf8.sqlとkensutf8.sqlとshichosonsutf8.sqlの3つのファイルを置いてから、上の操作をやりなおす。 - (オプション)各テーブルの行数の確認 (the number of rows)
select count(*) FROM kens;
select count(*) FROM shichosons;
select count(*) FROM zips;
- SQLite 3の終了
「.exit」で終了.

Sqliteman で既存のデータベースを開く
以下の手順で,既存のデータベースファイルを開く. (Open an existing database file)
- 「File」→
「Open」
- データベースファイルを開く
* Ubuntu での実行例(「/home/ubuntuuser/mydb」を開く場合)
データベースファイル /home/ubuntuuser/mydb を選び, 「開く」をクリック (Click '開く' after choosing the database file "/home/ubuntuuser/mydb2")
* Windows での実行例(「C:\SQLite\mydb」を開く場合)
データベースファイル C:\SQLite\mydb を選び, 「開く」をクリック (Click '開く' after choosing the database file "C:\SQLite\mydb")
要するに,/home/<ユーザ名>/SQLite 3の下の mydb を選ぶ.
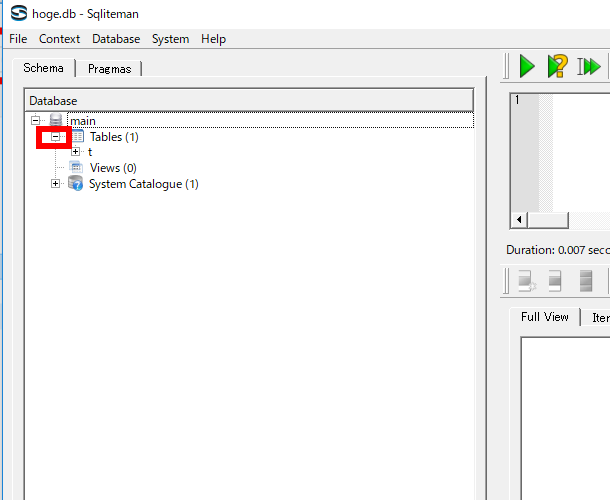
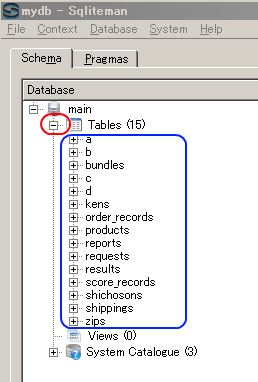
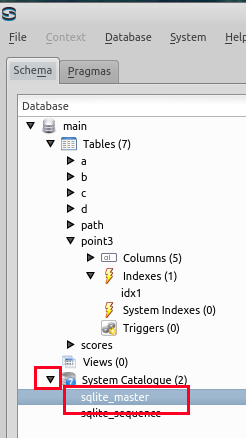
- 「Tables」を展開すると,テーブルの一覧 (List of Tables) が表示されるので確認する (List of tables appears by clicking 'Tables')
- 「System Catalogue」を展開し,「sqlite_master」をクリックすると,データベース・スキーマ (database schema) が表示されるので,kens, shichosons, zips の行を確認する (Database schema appears by clicking 'sqlite_master')
* 「55735」, 「65950」, 「66052」 の部分は別の数値になっているはずである。 これらは、テーブルのデータが置かれるページ番号に関する情報 (rootpage) であり、 SQLite 3 システムが自動で決める値である。
Sqliteman を用いたデータのブラウズ
- zips テーブル
まず,オブジェクト・ブラウザ (Object Browser) の中の「Tables」を展開 (Click 'Tables')
次に,zips テーブルを選ぶ (Select table 'zips')
テーブル zipsが表示される (table 'zips' appears)
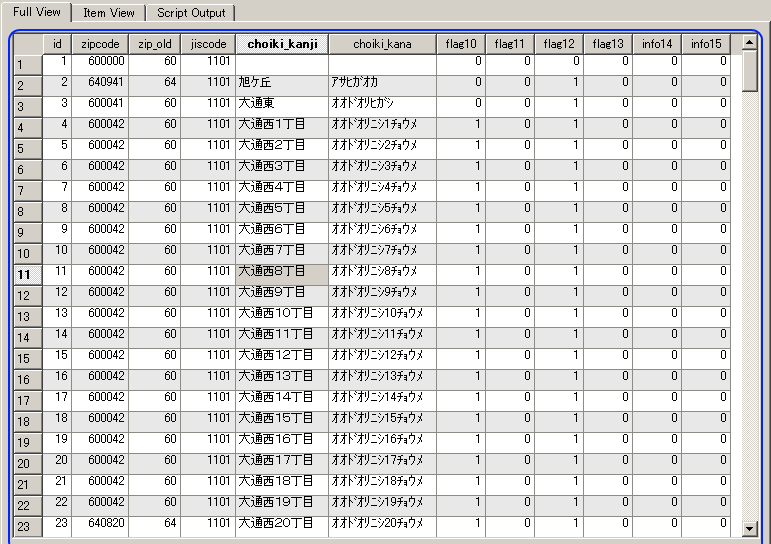
* もし,データに間違いがあれば,このウインドウで修正できる (If you find any mistakes, you can modify the data using this window).
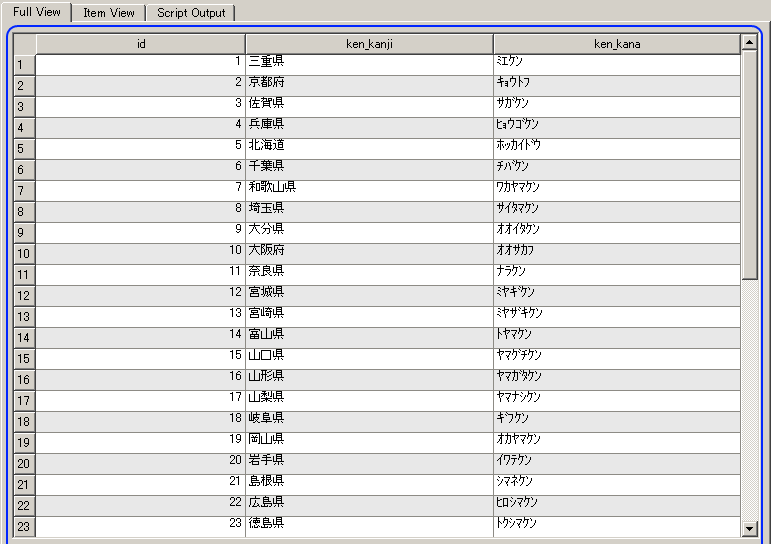
- 今度は,kens テーブル を表示 (table 'kens')
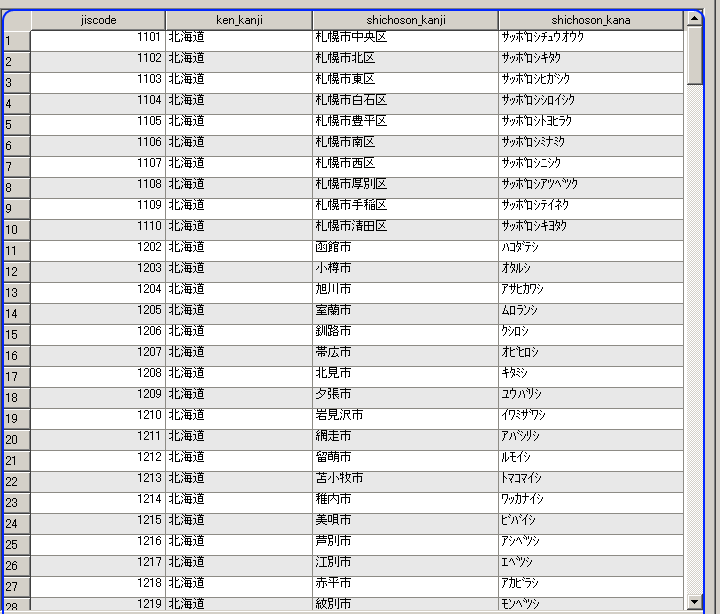
- 今度は,shichosons テーブル を表示 (table 'shichosons')
SQL 問い合わせの発行と評価結果の確認
テーブル kens に関する条件検索 (SQL squeries about the table 'ken')
テーブル kens を使用.都道府県名(ken_kanji)による条件検索などを行う. (Use the table 'kens'. Several SQL programs are issued)
-
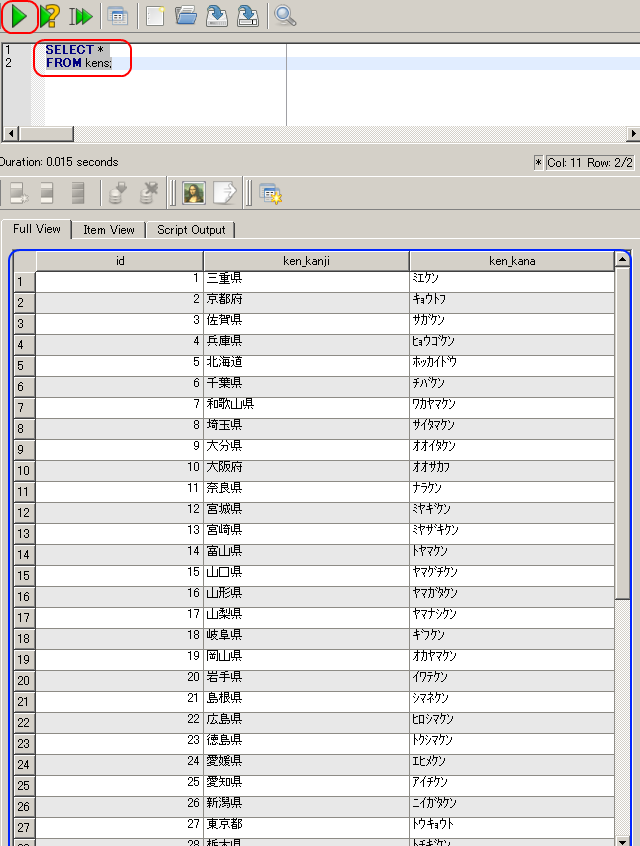
テーブル kens にある都道府県名(ken_kanji)などを全て表示
(List all rows in table 'kens'.)
SELECT * FROM kens;
-
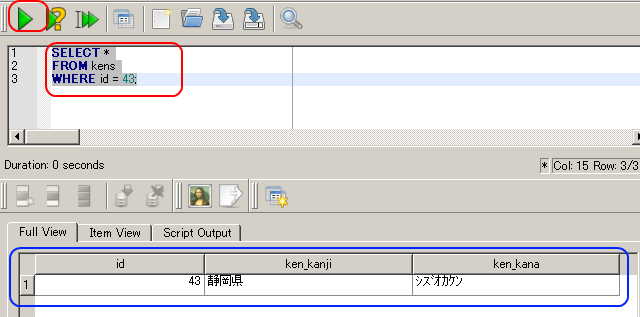
id = 43 であるような行を テーブル kens から選択し表示する
SELECT *
FROM kens
WHERE id = 43;
-
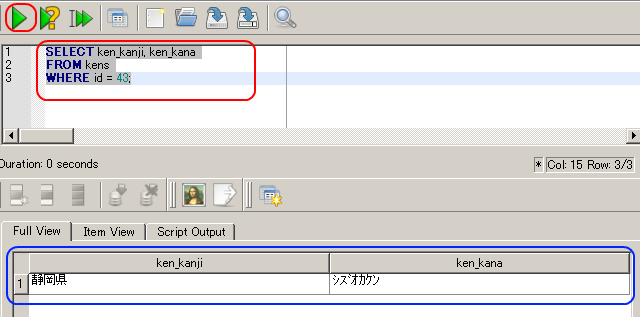
id = 43 であるような行を テーブル kens から選択し,都道府県名(ken_kanji)とその読み仮名(ken_kana)を得る.
SELECT ken_kanji, ken_kana
FROM kens
WHERE id = 43;
今度は「ken_kanji」と「ken_kana」の2つの列しか表示されない。
テーブル shichosons に関する条件検索 (SQL squeries about the table 'shichosons')
-
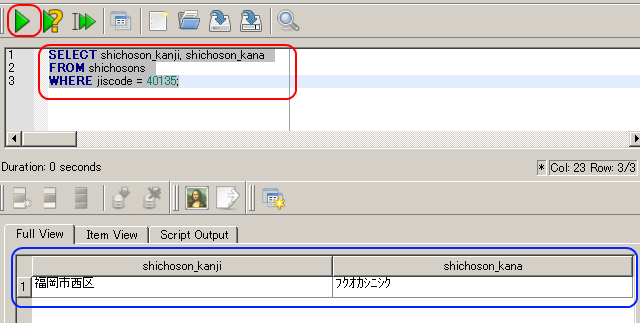
自治体コード番号(jiscode)が「40135」であるような行を テーブル shichosons から選択し表示する.
SELECT *
FROM shichosons
WHERE jiscode = 40135;
テーブル zips に関する条件検索 (SQL squeries about the table 'zips')
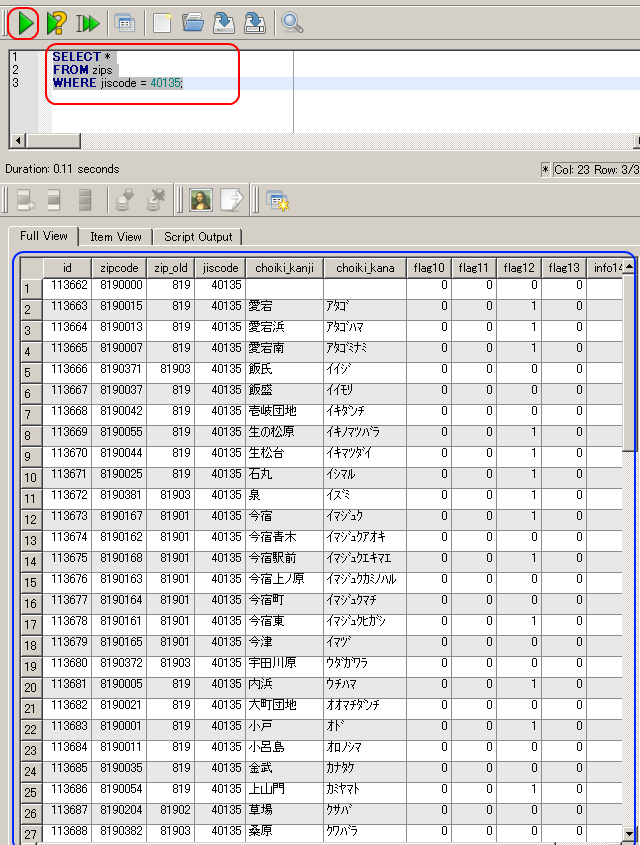
- 自治体コード番号(jiscode)が「40135」であるような行を テーブル zips から選択し表示する
* 1つの自治体コード番号でも、たくさんの郵便番号があるのが普通である。
SELECT *
FROM zips
WHERE jiscode = 40135;
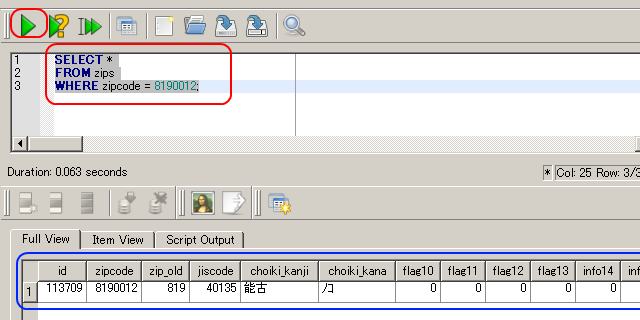
- テーブル zips を使用.郵便番号(zipcode)が「8190012」である行を選択し表示する
SELECT *
FROM zips
WHERE zipcode = 8190012;
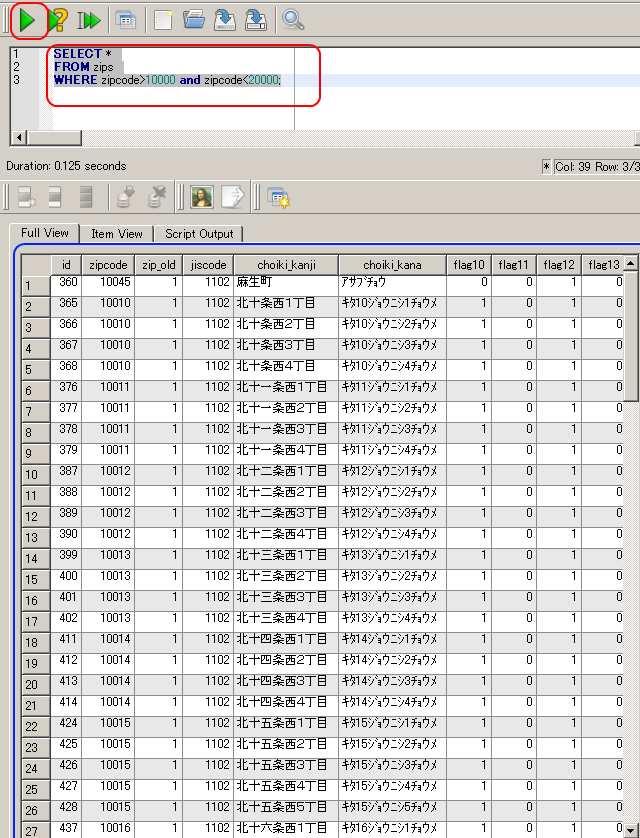
- テーブル zips を使用.郵便番号(zipcode)が「10000」より大きく、
かつ「20000」未満である行を得る.
SELECT *
FROM zips
WHERE zipcode>10000 and zipcode<20000;
テーブル kens とテーブル shichosons の結合問い合わせの例
-
都道府県名(ken_kanji)が「静岡県」であるような行を,テーブル 'shichoson' から選択し,都道府県名(ken_kanji), 市町村名(shichoson_kanji)を得る.
SELECT shichosons.ken_kanji, shichoson_kanji
FROM kens, shichosons
WHERE kens.ken_kanji = shichosons.ken_kanji
      AND kens.id = 43;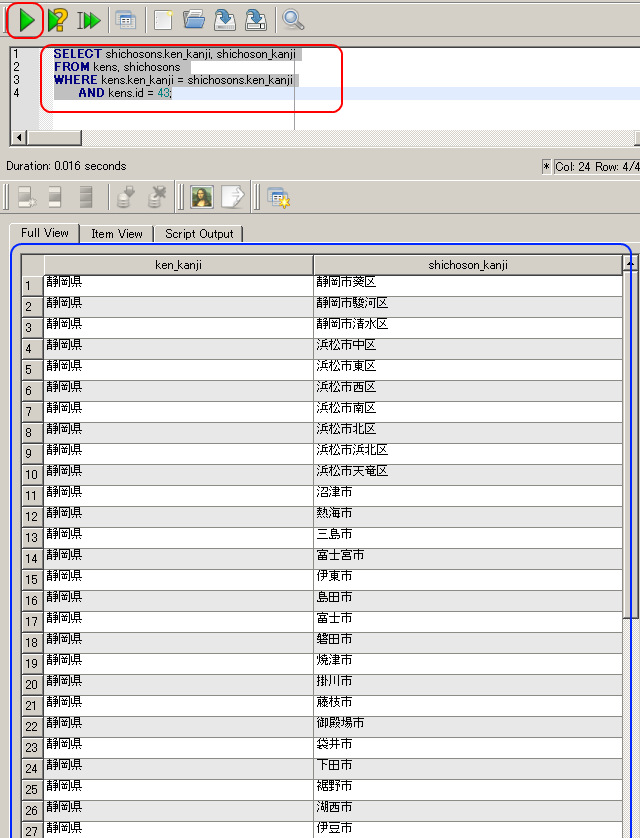
データベースの構造の確認 (Database Structure)
- sqlite_master をクリック (Click 'sqlite_master)
- テーブルと二次索引のルート・ページ番号が分かる
(Root page number of each table and secondary index)
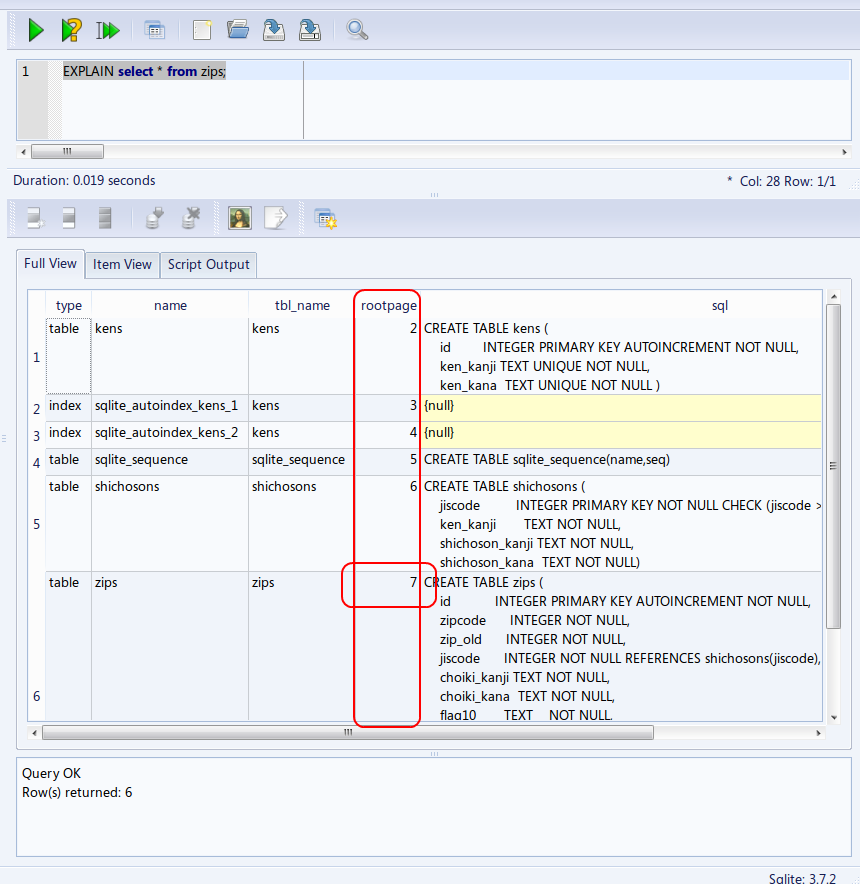
zips, kens, shichosons の 3 つのテーブルのルートページ (root page) は,この資料では,次の値になっているものとして説明を続ける.
- kens のルートページ: 2
- shichosons のルートページ: 6
- zips のルートページ: 7
* ルート・ページ番号は,SQLite 3 システムが決める値なので, 実際には,上とは違う値になっていることが多い,
(The number is automatically decided by the database management system)
Sqliteman を用いた SQL 問い合わせ計画の表示
ここでは,SQL 問い合わせ計画の表示例を示す.
データベース管理システムは, SQL 文をコンパイルし,SQL 問い合わせ計画を作る. SQL 問い合わせ計画とは,データベースに関する基本的なオペレータの並びである. (Database management system compliles a SQL statement into a SQL query plan. SQL query plan is a sequence or a tree of database operations ).
SQLite 3の問い合わせ計画については,SQLite Virtual Machine Opcodes の Web ページなどを見てください.(please refer to https://www.sqlite.org/opcode.html for SQLite opcodes)
* テーブルの全ての行の表示 (List all rows of a table)
- SQL の問い合わせの発行と評価結果の確認
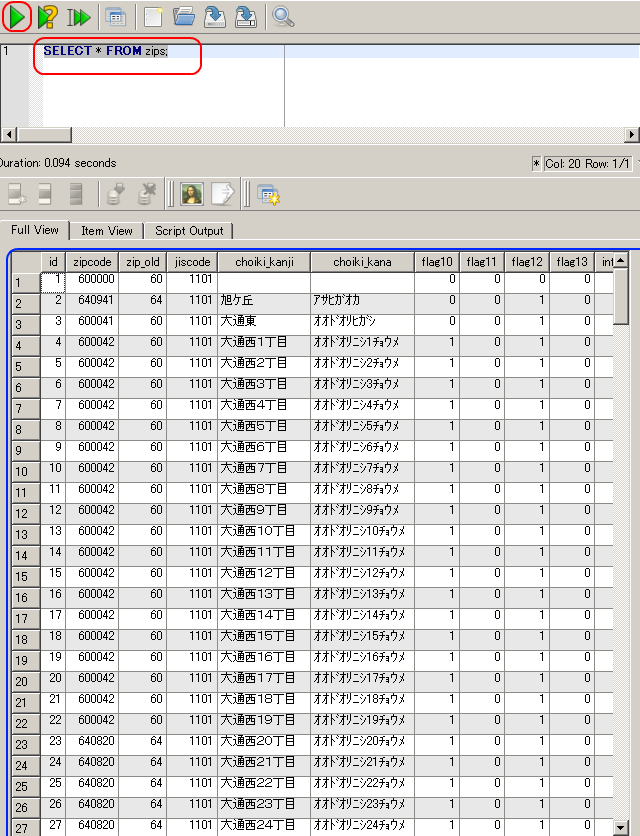
まずは zips テーブルを使った簡単な SQL を試す(ここでは「SELECT * FROM zips;」にしている)
SELECT * FROM zips;
- 問い合わせ計画の表示 (query plan)
今度は、SQL 文の前に「EXPLAIN」を付ける.(Add 'EXPLAIN' before a SQL statement)
EXPLAIN SELECT * FROM zips;
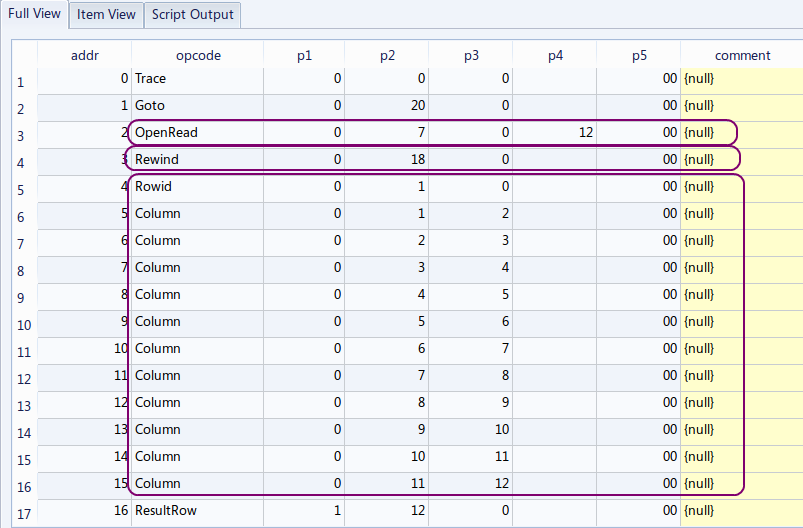

【表示された問い合わせ計画の要点】
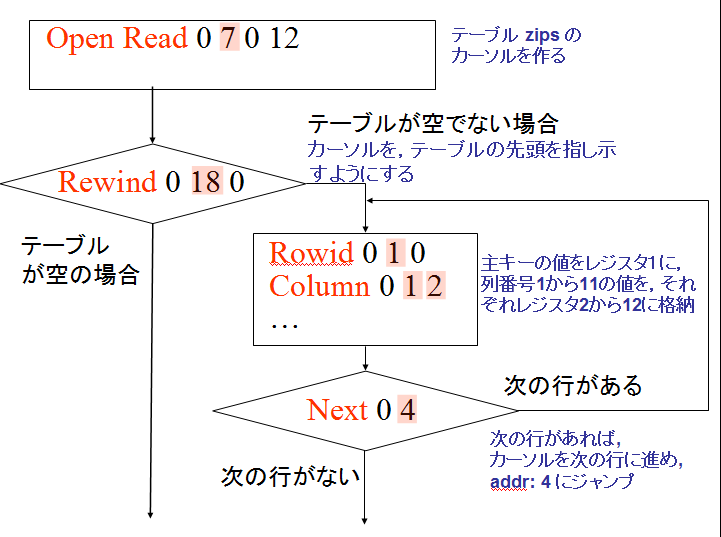
アドレス (addr) オペコード 主なオペランド 2 OpenRead P2 = 7 ルート・ページが 7 であるようなテーブル (この場合は,テーブル zips) のカーソルを作る (Open table 'zips' for read, and make a cursor) 3 Rewind P2 = 18 カーソルを,テーブルの先頭を指し示すようにする.テーブルが空の場合には,アドレス 18 (Close)にジャンプする (Use the first row. If the first row is empty then jump to '18') 4 Rowid P2 = 1 主キーの値を、レジスタ1に格納する (Primary key is #0 value. The value is stored into register) 5〜15 Column P2 = 1〜11, P3 = 2〜12 列番号1から11の値を,それぞれレジスタ2から12に格納する. (#1, #2, #3, #4, #5, #6, #7, #8, #9, #10 and #11 values are stored into registers) 16 ResultRow P1 = 1, P2 = 12 レジスタ 1 からレジスタ 12 までの値を1行として出力する (Generate output using registers) 17 Next P2 = 4 もし,カーソルが指し示すレコードが末端レコードならば、次の命令に進む. もし,カーソルが指し示すレコードが末端レコードでなければ、カーソルを1つ進めて、アドレス4 (Rowid のところ) にジャンプする. (Advance cursor to the next tow. If there are more rows, then jump to the address '4') 二次索引がないとき,テーブルの本体が1行ずつ処理 される.テーブルの全ての行について処理が繰り返される. (このことを「tuple at a time」ともいう)
* 列の絞込み
- SQL の問い合わせの発行と評価結果の確認
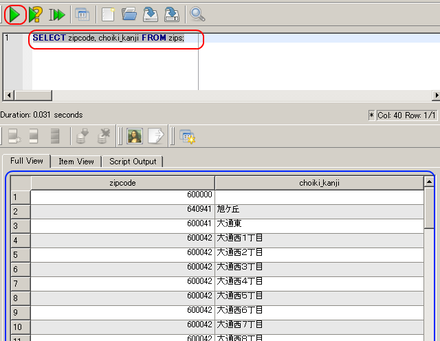
SELECT zipcode, choiki_kanji FROM zips;
- 問い合わせ計画の表示 (query plan)
SQL 文の前に「EXPLAIN」を付ける.(Add 'EXPLAIN' before a SQL statement)
EXPLAIN SELECT zipcode, choiki_kanji FROM zips;
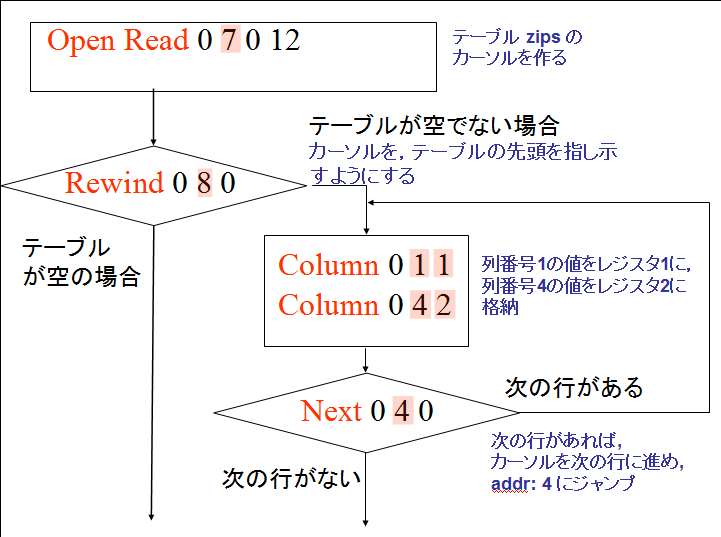
addr が 4 と 5 の行を確認して欲しい。 「Column」の数が2つに減っている。 これで、問い合わせ結果の列が,第1列と第4列の2つだけになる.
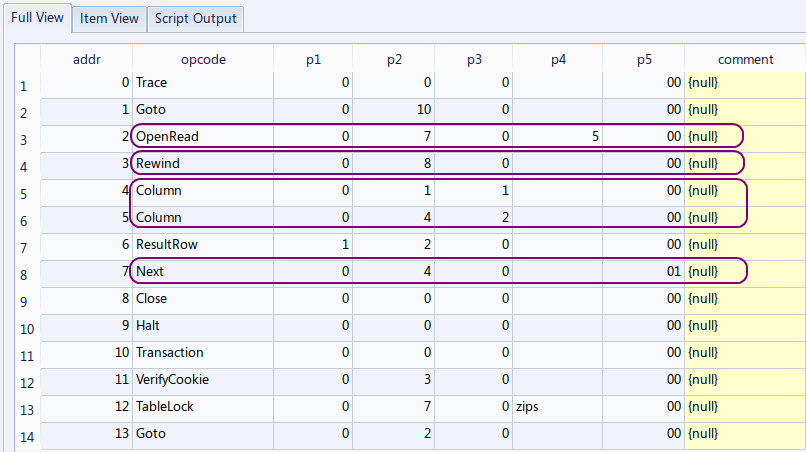
【表示された問い合わせ計画の要点】
「SELECT * FROM zips; 」と「SELECT zipcode, choiki_kanji FROM zips;」の違いを説明する.
アドレス (addr) オペコード 主なオペランド 4 Column P2 = 1, P3 = 1 列番号1の値を,レジスタ1に格納する. (#1 value is stored into registers) 5 Column P2 = 4, P3 = 2 列番号4の値を,レジスタ2に格納する. (#4 value is stored into registers) この場合も,テーブルの本体が1行ずつ処理される.テーブルの全ての行について処理が繰り返される.
* 条件を満足する行のみの表示 (List the rows which satisfy a given condition)
- SQL の問い合わせの発行と評価結果の確認
「jiscode = 40135」 は福岡市西区
SELECT zipcode, choiki_kanji FROM zips WHERE jiscode = 40135;

- 問い合わせ計画の表示 (query plan)
SQL 文の前に「EXPLAIN」を付ける.(Add 'EXPLAIN' before a SQL statement)
EXPLAIN SELECT zipcode, choiki_kanji FROM zips WHERE jiscode = 40135;
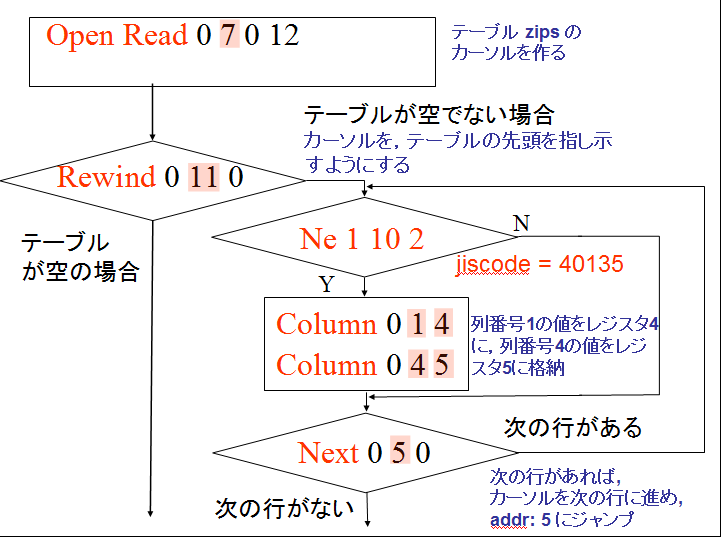
アドレス 6 の「Ne 1 10 2 collseq(BINARY) 6c」は「条件付きジャンプ」である. 条件を満たさないような行の場合には、結果を得るプログラムの部分をジャンプするようになっている。これで、条件を満たす行だけが得られるようになる。
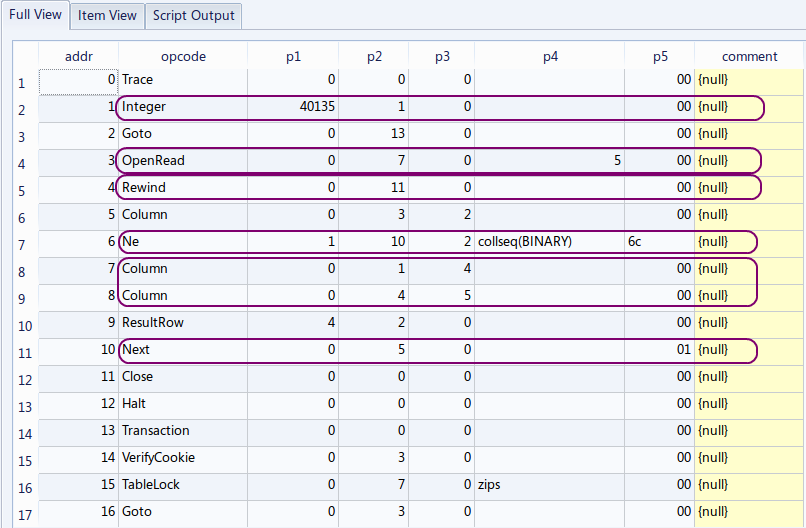
【問い合わせ計画の要点】
条件を満足しない行は出力しない (The rows which do not satisfy the query condition are not included in the query result).
最初,カーソルは先頭行にセットされる. アドレス 6 の「Ne 1 10 2 collseq(BINARY) 6c」は「条件付きジャンプ」であり,もとの SQL で指定されていた選択条件「jiscode = 40135」の処理を行うためのものである. (true の時に限り,新しい行が,評価結果に追加される) その後,カーソルは次の行へ動く. このようにして,zips テーブルの全ての行が精査される.
- 次の SQL を入力
(Write the following SQL to drop tables)