Dlib による顔検出を行う Python プログラム(Dlib, Python を使用)(Windows 上)
【概要】
本記事では,Windows 上で Dlib と Python を用いた顔検出プログラムの環境構築から実行までの手順を扱う.
Dlibは,機械学習,数値計算,画像処理,スレッド,通信,GUI など数多くの機能を持つ C++ ライブラリである.Python API もある.
Dlib には,Convolutional Neural Network (CNN) による顔検出の機能がある.
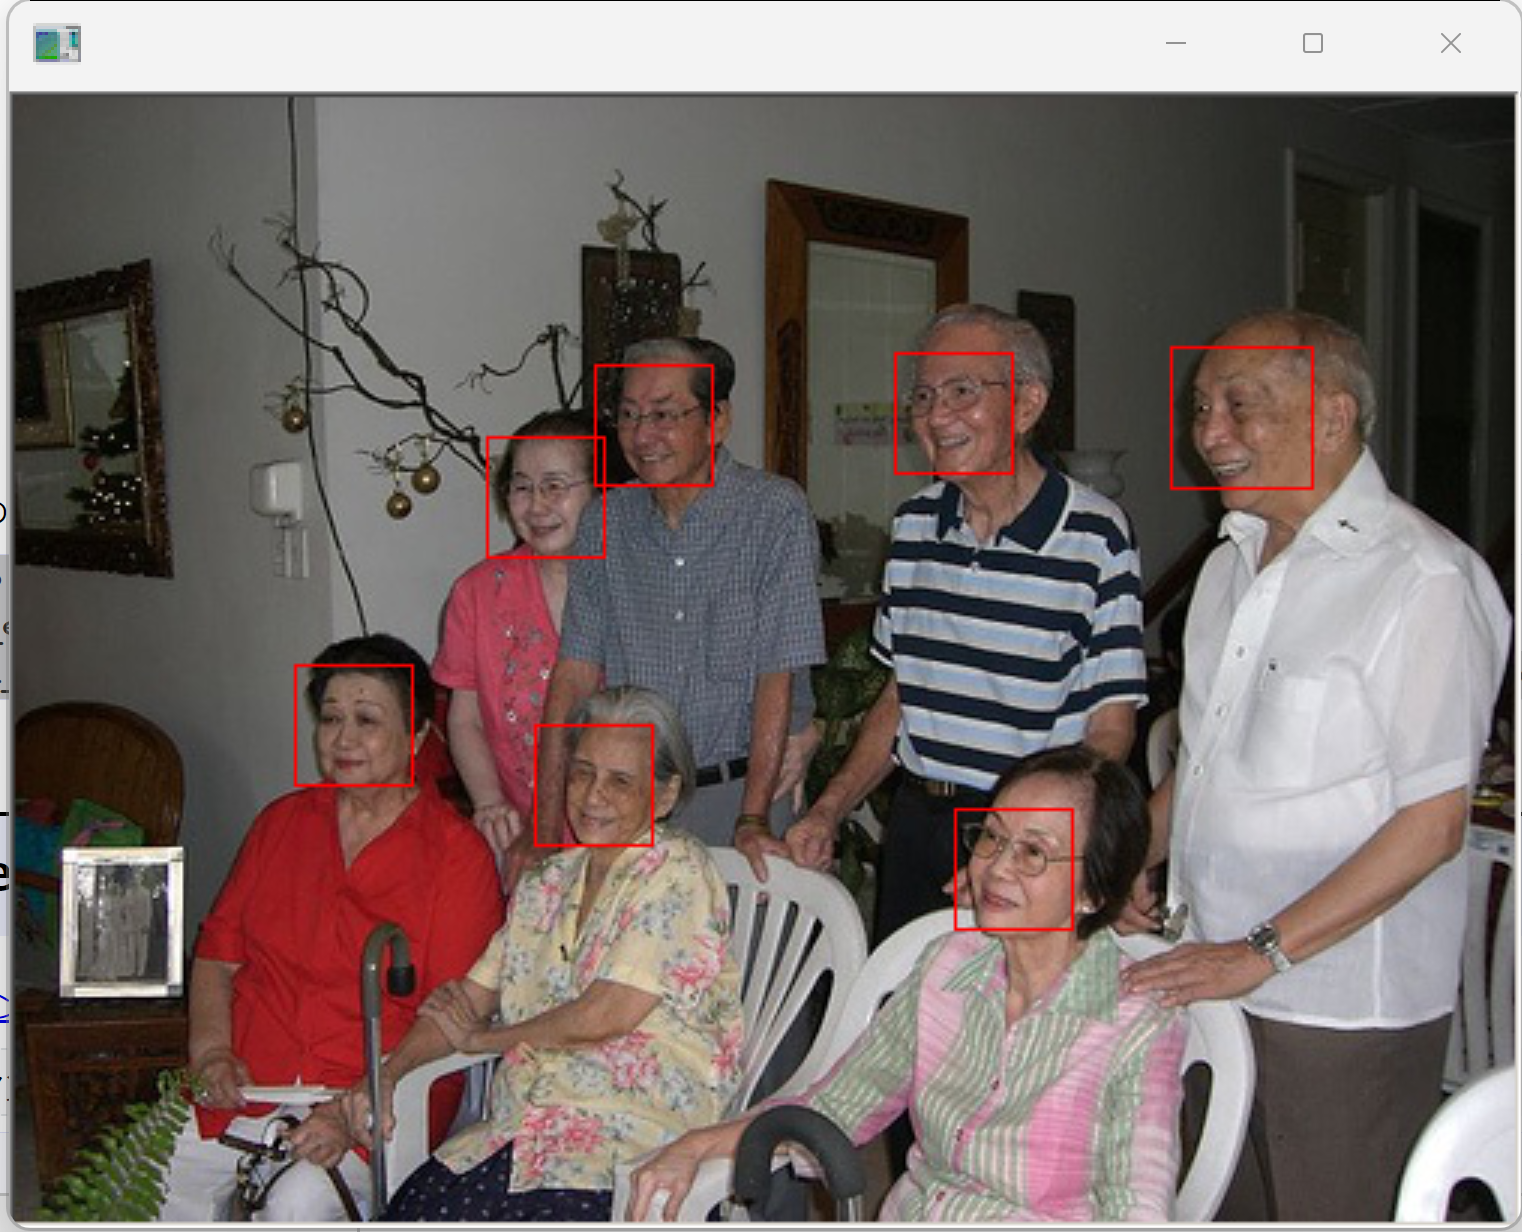
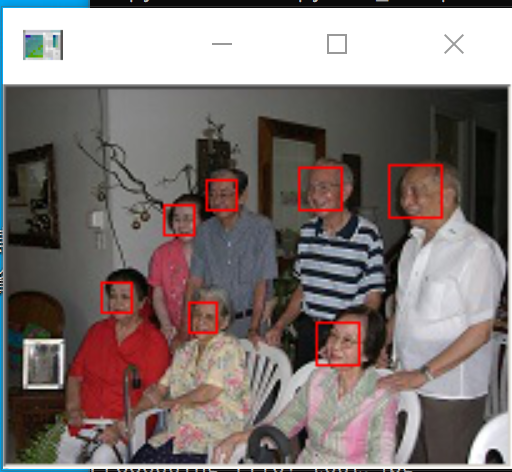
Dlib による顔検出の例
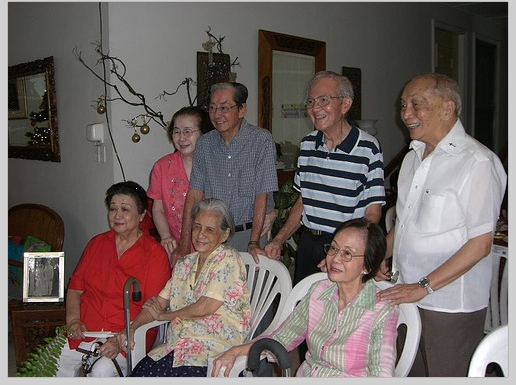
顔検出が行われ,顔を囲むバウンディングボックス (bounding box) が表示される.
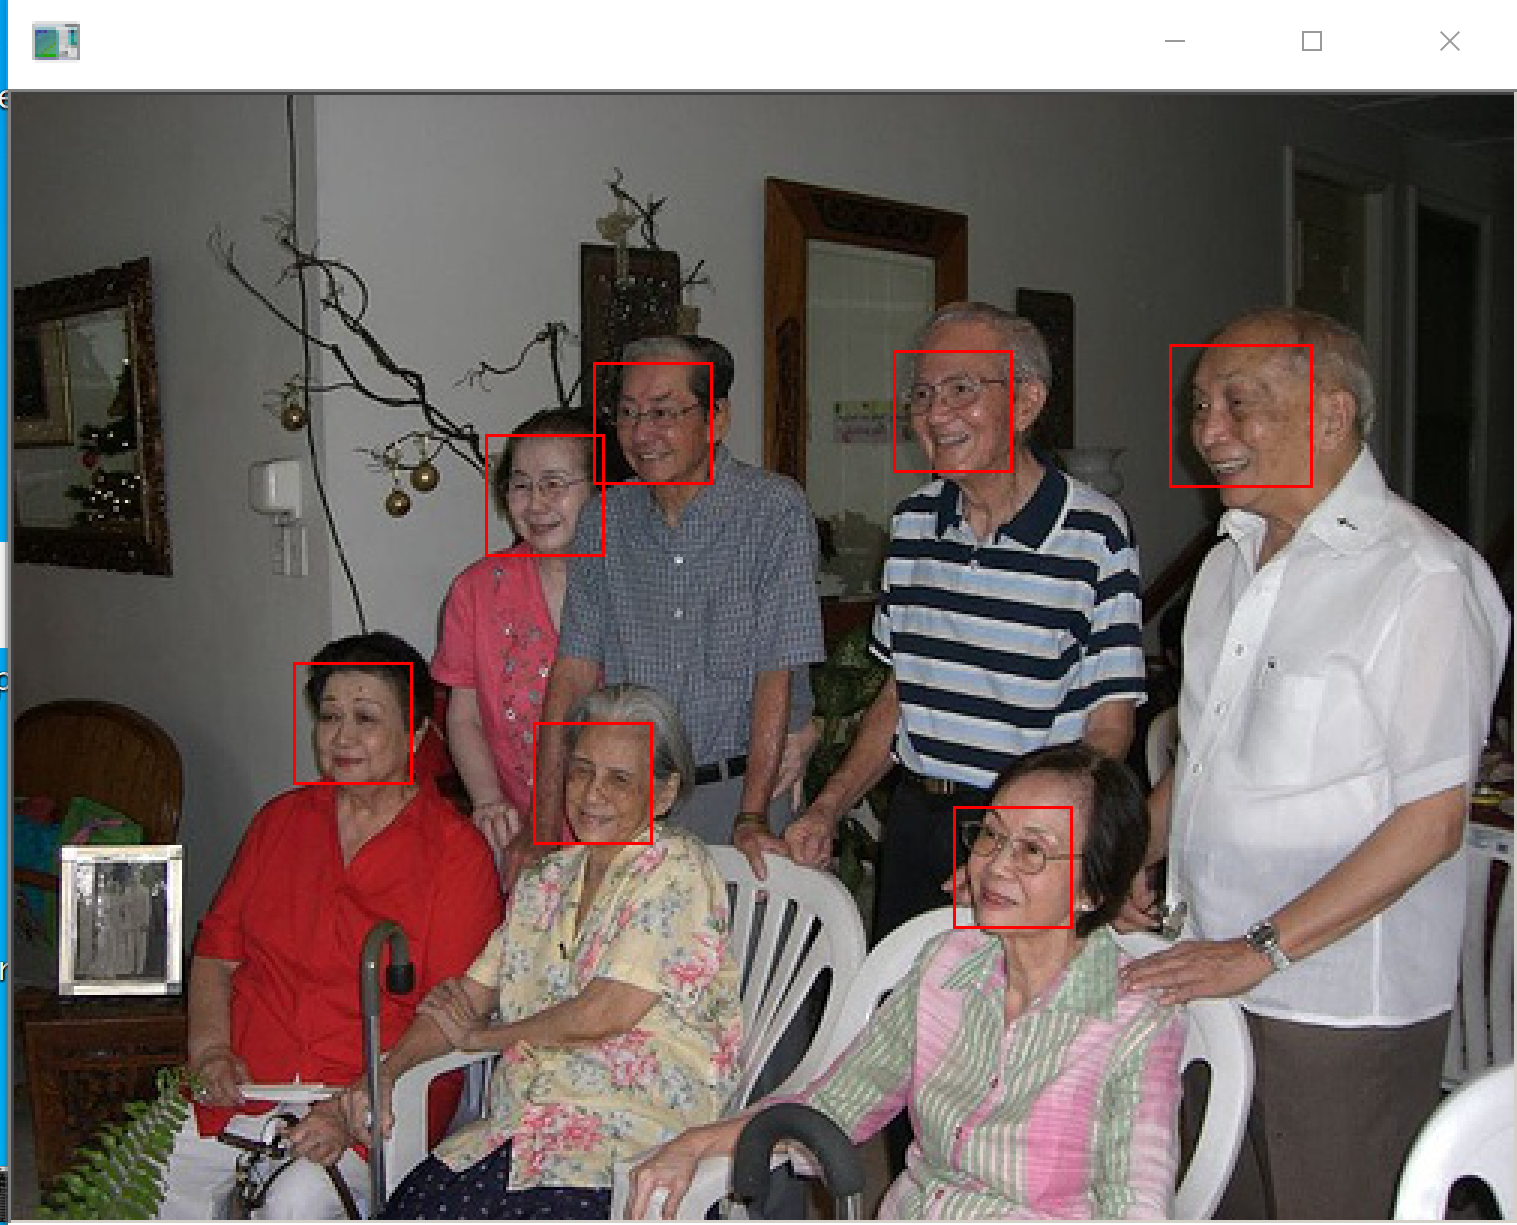
バウンディングボックスの座標値が数値データとして得られる.
本記事で扱う内容は以下のとおりである.
- Dlib 付属のプログラム(cnn_face_detector.py)を用いた顔検出
- 手持ちの画像ファイルで顔検出を行う Python プログラムの作成と実行
- パソコンのカメラでリアルタイムに顔検出を行う Python プログラムの作成と実行
【目次】
【関連する外部ページ】
なし
【サイト内の関連情報】
- 説明資料: Dlib の機能概要 [PDF], [パワーポイント]
- 顔情報処理の Python プログラム(Dlib,face_recognition を使用): 別ページ »にまとめ
- Windows で動く人工知能関係 Python アプリケーション,オープンソースソフトウエア: 別ページ »にまとめている.
前準備(必要ソフトウェアの入手)
ここでは、最低限の事前準備について説明する。機械学習や深層学習を行う場合は、NVIDIA CUDA、Visual Studio、Cursorなどを追加でインストールすると便利である。これらについては別ページ https://www.kkaneko.jp/cc/dev/aiassist.htmlで詳しく解説しているので、必要に応じて参照してください。
Build Tools for Visual Studio 2026(ビルドツール)のインストール
Build Tools for Visual Studio 2026(ビルドツール)のインストールを行い、C/C++ コードのビルド環境を整える。
Build Tools for Visual Studio は,Visual Studio の IDE を含まない C/C++ コンパイラ,ライブラリ,ビルドツール等のコマンドライン向け開発ツールセットである。インストール済みの場合,この手順は不要である。 以下のコマンドは、Build Tools が未インストールの場合は winget で新規インストールし、インストール済みの場合は 【インストールコマンドの実行方法】 管理者権限でコマンドプロンプトを起動する(手順:Windows キーまたはスタートメニュー → 上記のコマンドでは、Build Tools 本体と Visual C++ 再頒布可能パッケージをインストールし、続いて以下のコンポーネントを追加している。 上記以外の追加のコンポーネントが必要になった場合は Visual Studio Installer で個別にインストールできる。 インストール完了の確認 Visual Studio を必要とするとき Visual Studio の機能を必要とする場合は,追加インストールできる。[Build Tools for Visual Studio 2026(ビルドツール)のインストール手順を見るには、ここをクリック]
Windows での Build Tools for Visual Studio 2026 のインストール
setup.exe modify でコンポーネントを追加する(バージョンは変更しない)。cmd と入力 → 右クリック → 「管理者として実行」)。そして、コマンド全体をコマンドプロンプトにコピー&ペーストする。REM VC++ ランタイム
winget install --scope machine --id Microsoft.VCRedist.2015+.x64 -e --silent --disable-interactivity --force --accept-source-agreements --accept-package-agreements --override "/quiet /norestart"
REM ============================================================
REM Visual Studio Build Tools + Desktop development with C++
REM (VCTools、MSBuildTools、CMake連携、Clang、Windows 11 SDK)
REM ============================================================
REM 進行中のインストーラーを停止(ロック競合回避)
taskkill /F /IM vs_setup.exe /T >nul 2>&1
taskkill /F /IM vs_installer.exe /T >nul 2>&1
taskkill /F /IM vs_installerservice.exe /T >nul 2>&1
REM 未インストール時: winget で新規インストール
REM インストール済み時: setup.exe modify でコンポーネント追加(バージョンは変更しない)
winget list --id Microsoft.VisualStudio.BuildTools 2>nul | findstr /i "BuildTools" >nul 2>&1
if %ERRORLEVEL% EQU 0 (
for /f "usebackq delims=" %P in (`"C:\Program Files (x86)\Microsoft Visual Studio\Installer\vswhere.exe" -products Microsoft.VisualStudio.Product.BuildTools -property installationPath`) do start /wait "" "C:\Program Files (x86)\Microsoft Visual Studio\Installer\setup.exe" modify --installPath "%P" --add Microsoft.VisualStudio.Workload.VCTools --add Microsoft.VisualStudio.Workload.MSBuildTools --add Microsoft.VisualStudio.Component.VC.CMake.Project --add Microsoft.VisualStudio.Component.VC.Llvm.Clang --add Microsoft.VisualStudio.Component.VC.Llvm.ClangToolset --add Microsoft.VisualStudio.Component.Windows11SDK.26100 --includeRecommended --quiet --norestart --nocache
) else (
winget install --scope machine --id Microsoft.VisualStudio.BuildTools -e --silent --disable-interactivity --force --accept-source-agreements --accept-package-agreements --override "--quiet --wait --norestart --nocache --add Microsoft.VisualStudio.Workload.VCTools --includeRecommended --add Microsoft.VisualStudio.Workload.MSBuildTools --add Microsoft.VisualStudio.Component.VC.CMake.Project --add Microsoft.VisualStudio.Component.VC.Llvm.Clang --add Microsoft.VisualStudio.Component.VC.Llvm.ClangToolset --add Microsoft.VisualStudio.Component.Windows11SDK.26100"
)
REM 破損時の修復(任意、動作がおかしくなった場合)
REM "C:\Program Files (x86)\Microsoft Visual Studio\Installer\setup.exe" repair --installPath "C:\Program Files (x86)\Microsoft Visual Studio\18\BuildTools" --quiet --norestart
REM 導入確認(インストールパスが表示されれば正常)
"C:\Program Files (x86)\Microsoft Visual Studio\Installer\vswhere.exe" -products * -requires Microsoft.VisualStudio.Workload.VCTools -property installationPath
--includeRecommended により、MSVC コンパイラ、C++ AddressSanitizer、vcpkg、CMake ツール、Windows 11 SDK 等の推奨コンポーネントが含まれる)winget list Microsoft.VisualStudio.BuildTools
Python 3.12 のインストール
Pythonのインストールを行い、Pythonのプログラムを実行する環境を整える。扱う環境は、Windows搭載パソコンである。金子研究室では、Python 3.12.10を推奨する。
[Windows での Python 3.12 のインストール手順を見るには、ここをクリック]
Windows での Python 3.12 のインストール
以下のいずれかの方法でPython 3.12をインストールする。Pythonがインストール済みの場合、この手順は不要である。
方法 1:winget によるインストール
【インストールコマンドの実行方法】
管理者権限でコマンドプロンプトを起動する(手順:Windowsキーまたはスタートメニュー → cmd と入力 → 右クリック → 「管理者として実行」)。そして、コマンド全体をコマンドプロンプトにコピー&ペーストする。
--scope machine を指定することで、システム全体(全ユーザー向け)にインストールされる。このオプションの実行には管理者権限が必要である。インストール完了後、コマンドプロンプトを再起動するとPATHが反映される。
REM Python 3.12 をシステム領域にインストール
winget install --id Python.Python.3.12 -e --scope machine --silent --accept-source-agreements --accept-package-agreements --override "/quiet InstallAllUsers=1 PrependPath=1 Include_test=0 Include_pip=1 Include_launcher=1 InstallLauncherAllUsers=1 TargetDir=\"C:\Program Files\Python312\""

REM Python と Scripts を PATH 先頭に追加
powershell -NoProfile -Command "$p='C:\Program Files\Python312'; $s=\"$p\Scripts\"; $c=[Environment]::GetEnvironmentVariable('Path','Machine'); if((Test-Path $p) -and (';'+$c+';' -notlike \"*;$p;*\") -and (';'+$c+';' -notlike \"*;$s;*\")){[Environment]::SetEnvironmentVariable('Path',\"$p;$s;$c\",'Machine')}"
方法 2:インストーラーによるインストール
- Python公式サイト(https://www.python.org/downloads/)にアクセスし、「Download Python 3.x.x」ボタンからWindows用インストーラーをダウンロードする。
- ダウンロードしたインストーラーを実行する。
- 初期画面の下部に表示される「Add python.exe to PATH」にチェックを入れてから「Customize installation」を選択する。このチェックを入れ忘れると、コマンドプロンプトから
pythonコマンドを実行できない。 - 「Install Python 3.xx for all users」にチェックを入れ、「Install」をクリックする。
インストールの確認
コマンドプロンプトで以下を実行する。
python --versionバージョン番号(例:Python 3.12.x)が表示されればインストール成功である。「'python' は、内部コマンドまたは外部コマンドとして認識されていません。」と表示される場合は、インストールが正常に完了していない。
Python の開発環境 Visual Studio Code のインストールと Python 用の設定
Python の開発環境Visual Studio Code(プログラムを編集するソフトウェア。以下、VS Code)を整える。
[Windows での Visual Studio Code のインストールと Python 用の設定手順を見るには、ここをクリック]
Windows での Visual Studio Code のインストールと Python 用の設定手順
1. VS Code と拡張機能のインストール
以下のコマンドにより,既存の VS Code を削除し,全ユーザー共有の設定で再インストールしたうえで,拡張機能(VS Code に機能を追加するソフトウェア)をまとめて導入する.
【インストールコマンドの実行方法】
管理者権限でコマンドプロンプトを起動する(手順:Windows キーまたはスタートメニュー → cmd と入力 → 右クリック → 「管理者として実行」)。そして,コマンド全体をコマンドプロンプトにコピー&ペーストする。
インストールコマンド
REM ============================================================
REM Microsoft Visual Studio Code
REM ============================================================
winget uninstall -e --id Microsoft.VisualStudioCode --silent --disable-interactivity --accept-source-agreements
rmdir /s /q C:\ProgramData\vscode-extensions 2>nul
rmdir /s /q "%APPDATA%\Code" 2>nul
rmdir /s /q "%USERPROFILE%\.vscode" 2>nul
rmdir /s /q "%LOCALAPPDATA%\Microsoft\vscode-update" 2>nul

REM VS Code をシステム領域に新規インストール
winget install --scope machine --id Microsoft.VisualStudioCode -e --silent --accept-source-agreements --accept-package-agreements

REM 全ユーザー共有の拡張機能フォルダ
mkdir C:\ProgramData\vscode-extensions 2>nul
icacls "C:\ProgramData\vscode-extensions" /grant "Everyone:(OI)(CI)M" /T

REM スタートメニューのショートカットを --extensions-dir 付きで再作成
rmdir /s /q "C:\ProgramData\Microsoft\Windows\Start Menu\Programs\Visual Studio Code" 2>nul
del "C:\ProgramData\Microsoft\Windows\Start Menu\Programs\Visual Studio Code.lnk" 2>nul
powershell -NoProfile -Command "$s=New-Object -ComObject WScript.Shell; $lnk=$s.CreateShortcut('C:\ProgramData\Microsoft\Windows\Start Menu\Programs\Visual Studio Code.lnk'); $lnk.TargetPath='C:\Program Files\Microsoft VS Code\Code.exe'; $lnk.Arguments='--extensions-dir \"C:\ProgramData\vscode-extensions\"'; $lnk.Save()"
REM ショートカットの検証
powershell -NoProfile -Command "$s=New-Object -ComObject WScript.Shell; $lnk=$s.CreateShortcut('C:\ProgramData\Microsoft\Windows\Start Menu\Programs\Visual Studio Code.lnk'); Write-Host 'TargetPath:' $lnk.TargetPath; Write-Host 'Arguments:' $lnk.Arguments"

REM ファイル / フォルダ右クリックの「Code で開く」を登録
reg add "HKLM\SOFTWARE\Classes\*\shell\VSCode\command" /ve /d "\"C:\Program Files\Microsoft VS Code\Code.exe\" --extensions-dir \"C:\ProgramData\vscode-extensions\" \"%1\"" /f
reg add "HKLM\SOFTWARE\Classes\Directory\shell\VSCode\command" /ve /d "\"C:\Program Files\Microsoft VS Code\Code.exe\" --extensions-dir \"C:\ProgramData\vscode-extensions\" \"%1\"" /f
reg add "HKLM\SOFTWARE\Classes\Directory\Background\shell\VSCode\command" /ve /d "\"C:\Program Files\Microsoft VS Code\Code.exe\" --extensions-dir \"C:\ProgramData\vscode-extensions\" \"%V\"" /f

REM --extensions-dir 付きで起動する code.cmd ラッパを作成
REM (%* を echo で書くと対話的 cmd で失われるため、PowerShell で [char]37+'*' を書き出す)
powershell -NoProfile -Command "$pct=[char]37; $q=[char]34; $c='@echo off'+[char]13+[char]10+$q+'C:\Program Files\Microsoft VS Code\bin\code.cmd'+$q+' --extensions-dir '+$q+'C:\ProgramData\vscode-extensions'+$q+' '+$pct+'*'+[char]13+[char]10; [IO.File]::WriteAllText('C:\ProgramData\vscode-extensions\vscode.cmd',$c,[Text.Encoding]::ASCII)"

REM 拡張機能のインストール
set "CODE=C:\Program Files\Microsoft VS Code\bin\code.cmd"
"%CODE%" --extensions-dir "C:\ProgramData\vscode-extensions" --uninstall-extension GitHub.copilot
"%CODE%" --extensions-dir "C:\ProgramData\vscode-extensions" --uninstall-extension GitHub.copilot-chat
"%CODE%" --extensions-dir "C:\ProgramData\vscode-extensions" --install-extension ms-python.python
"%CODE%" --extensions-dir "C:\ProgramData\vscode-extensions" --install-extension ms-python.vscode-pylance
"%CODE%" --extensions-dir "C:\ProgramData\vscode-extensions" --install-extension ms-python.debugpy
"%CODE%" --extensions-dir "C:\ProgramData\vscode-extensions" --install-extension MS-CEINTL.vscode-language-pack-ja
"%CODE%" --extensions-dir "C:\ProgramData\vscode-extensions" --install-extension saoudrizwan.claude-dev
"%CODE%" --extensions-dir "C:\ProgramData\vscode-extensions" --install-extension rust-lang.rust-analyzer
"%CODE%" --extensions-dir "C:\ProgramData\vscode-extensions" --install-extension tamasfe.even-better-toml
"%CODE%" --extensions-dir "C:\ProgramData\vscode-extensions" --install-extension anthropic.claude-code
"%CODE%" --extensions-dir "C:\ProgramData\vscode-extensions" --install-extension almenon.arepl
"%CODE%" --extensions-dir "C:\ProgramData\vscode-extensions" --list-extensions --show-versions
echo === セットアップ完了 ===
2. Python インタプリタの選択
同一マシンに複数の Python がインストールされている場合,VS Code で使用する Python 本体(インタプリタ:Python プログラムを解釈・実行するソフトウェア)を選択する必要がある.
- コマンドパレット(コマンド名で機能を呼び出す VS Code の入力欄)を開く(
Ctrl+Shift+P) Python: Select Interpreterと入力する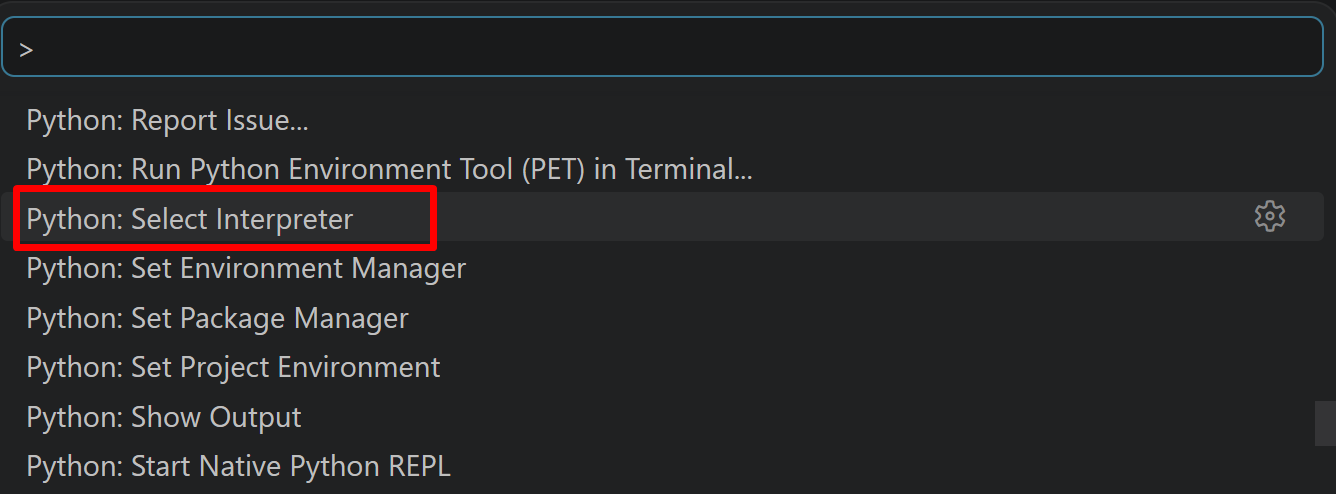
- 表示される一覧から,使用する Python(例:
C:\Program Files\Python312\python.exe)を選択する.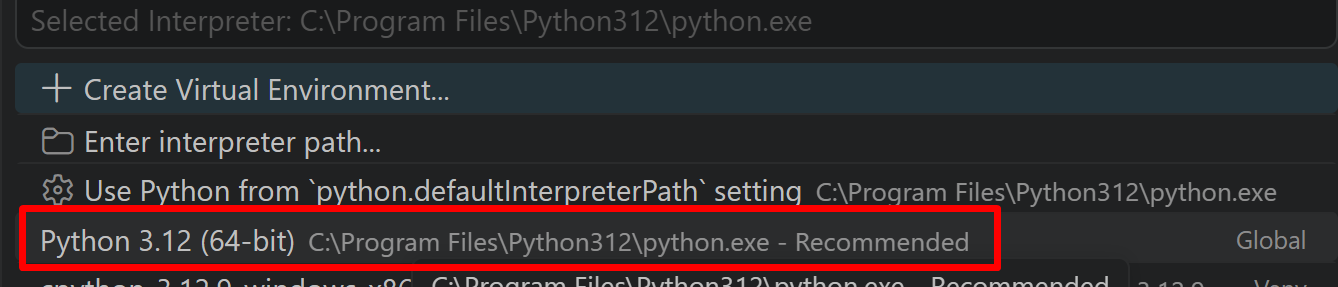
Git のインストール(Windows 上) [クリックして展開]
管理者権限でコマンドプロンプトを起動する
(手順:Windowsキーまたはスタートメニュー → cmd と入力 → 右クリック → 「管理者として実行」)。
REM Git をシステム領域にインストール
winget install --scope machine --id Git.Git -e --silent --disable-interactivity --force --accept-source-agreements --accept-package-agreements --override "/VERYSILENT /NORESTART /NOCANCEL /SP- /CLOSEAPPLICATIONS /RESTARTAPPLICATIONS /COMPONENTS=""icons,ext\reg\shellhere,assoc,assoc_sh"" /o:PathOption=Cmd /o:CRLFOption=CRLFCommitAsIs /o:BashTerminalOption=MinTTY /o:DefaultBranchOption=main /o:EditorOption=VIM /o:SSHOption=OpenSSH /o:UseCredentialManager=Enabled /o:PerformanceTweaksFSCache=Enabled /o:EnableSymlinks=Disabled /o:EnableFSMonitor=Disabled"
7-Zip のインストール(Windows 上) [クリックして展開]
管理者権限でコマンドプロンプトを起動する
(手順:Windowsキーまたはスタートメニュー → cmd と入力 → 右クリック → 「管理者として実行」)。
REM 7-Zip をシステム領域にインストール
winget install --scope machine --id 7zip.7zip -e --silent --disable-interactivity --force --accept-source-agreements --accept-package-agreements
REM 7-Zip のパス設定
powershell -NoProfile -Command "$p='C:\Program Files\7-Zip'; $c=[Environment]::GetEnvironmentVariable('Path','Machine'); if((Test-Path $p) -and $c -notlike \"*$p*\"){[Environment]::SetEnvironmentVariable('Path',\"$p;$c\",'Machine')}"
Dlib ライブラリのインストールと学習済みモデルのダウンロード [クリックして展開]
管理者権限でコマンドプロンプトを起動する
(手順:Windowsキーまたはスタートメニュー → cmd と入力 → 右クリック → 「管理者として実行」)。
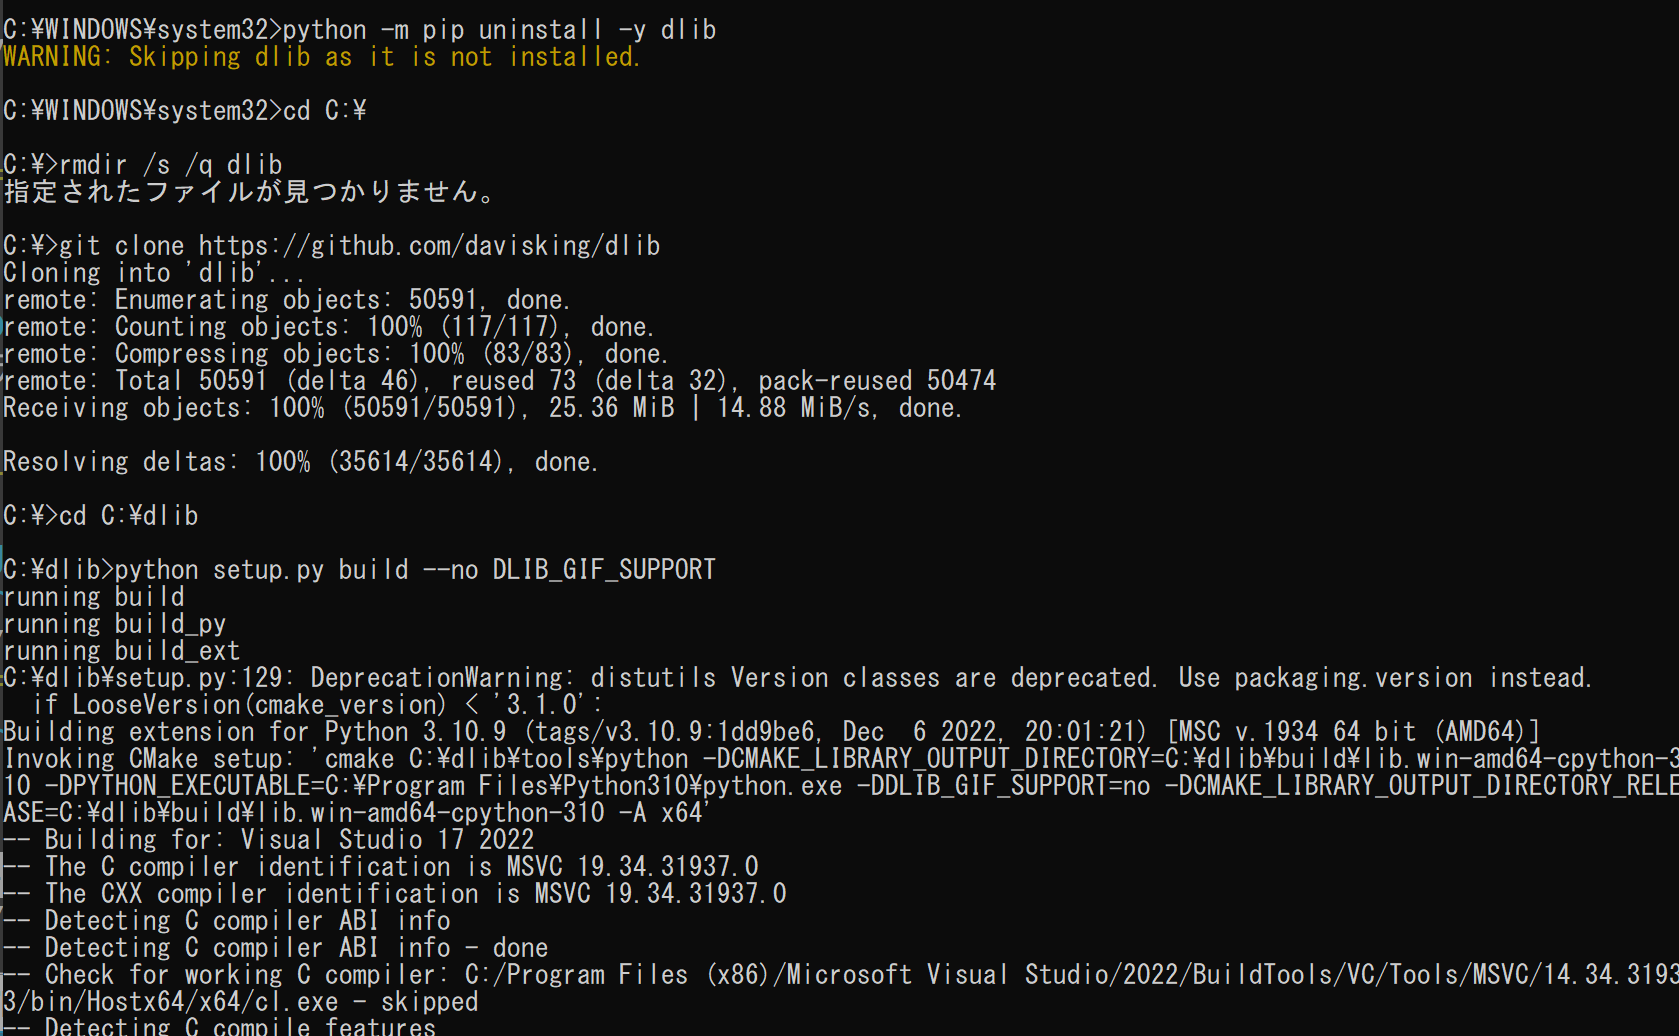
Dlib ライブラリのインストール
python -m pip uninstall -y --no-user dlib
cd C:\
rmdir /s /q dlib
git clone https://github.com/davisking/dlib
cd C:\dlib
pip install --no-user .
インストールの確認
python -c "import dlib; print( dlib.__version__ )"

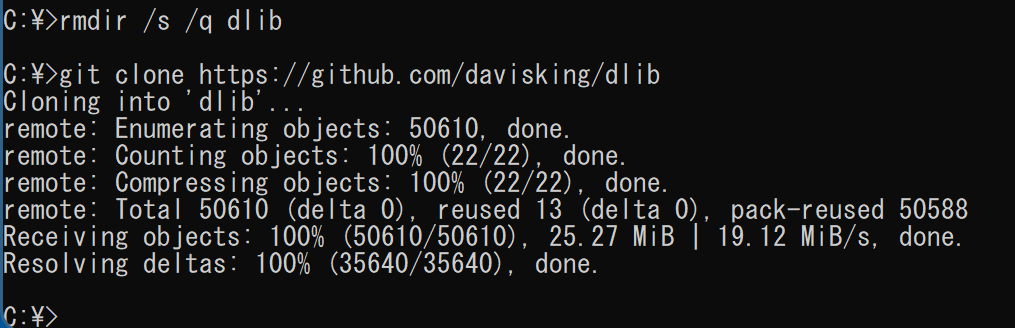
Dlib のソースコード等のダウンロード
cd C:\
rmdir /s /q dlib
git clone https://github.com/davisking/dlib
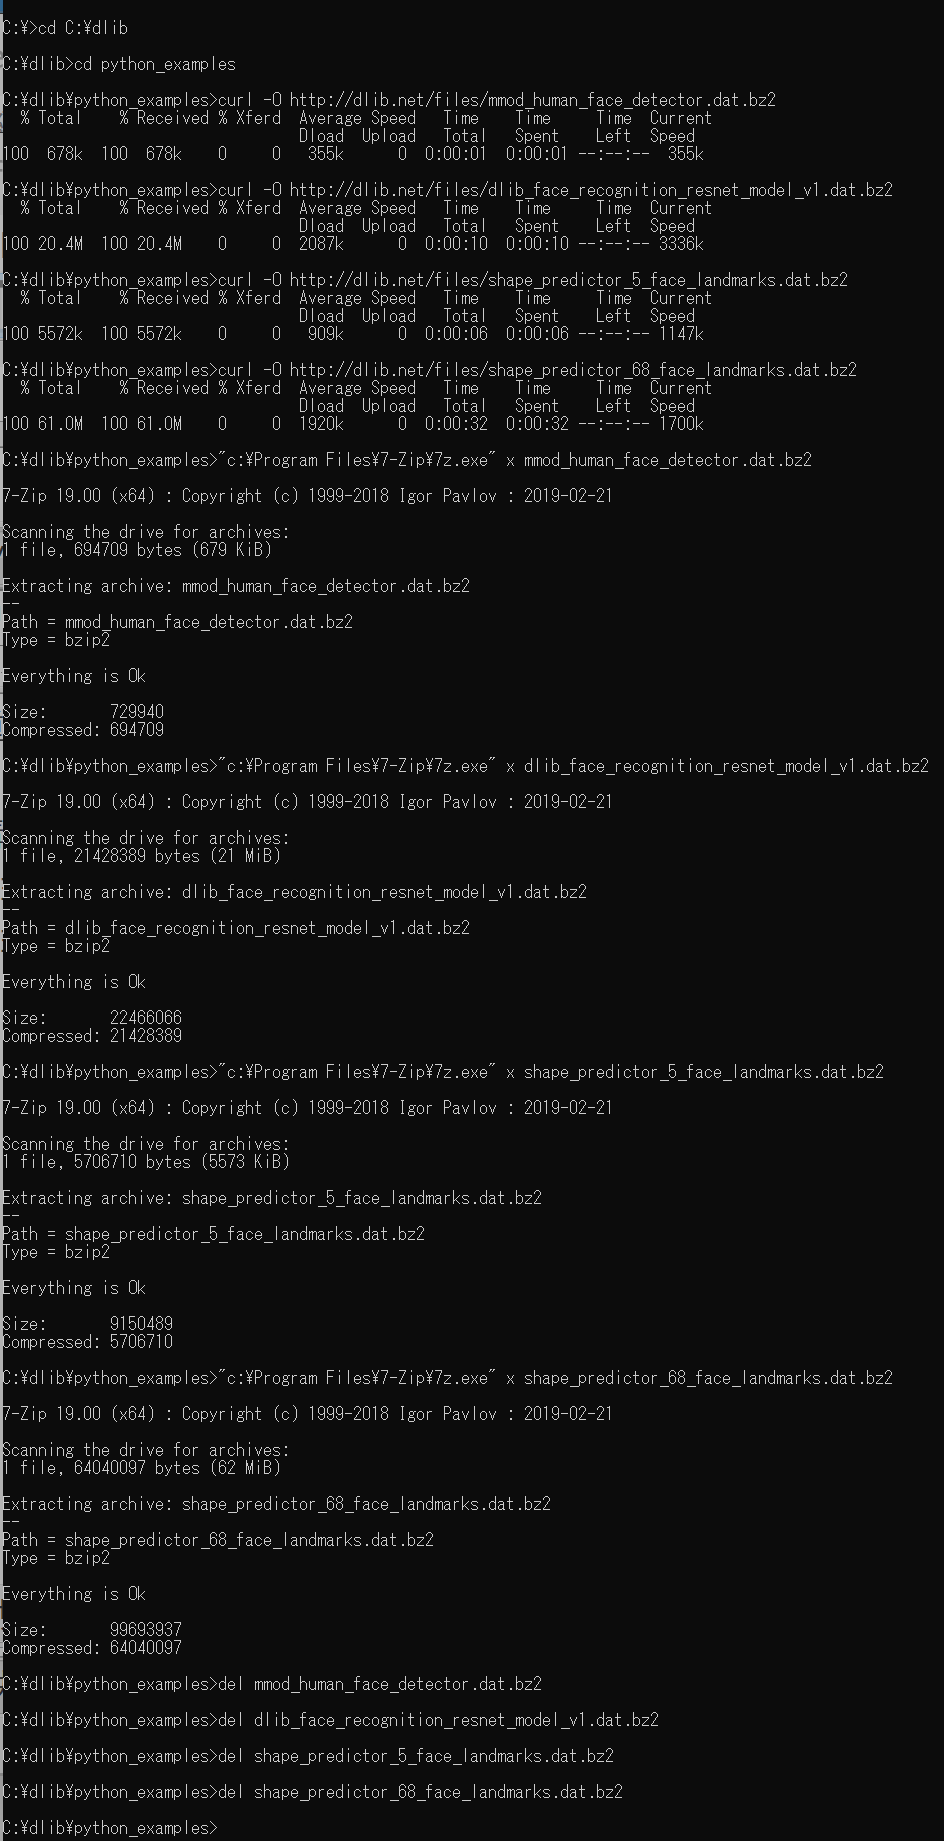
学習済みモデルのダウンロード
cd C:\dlib
cd python_examples
curl -O http://dlib.net/files/mmod_human_face_detector.dat.bz2
curl -O http://dlib.net/files/dlib_face_recognition_resnet_model_v1.dat.bz2
curl -O http://dlib.net/files/shape_predictor_5_face_landmarks.dat.bz2
curl -O http://dlib.net/files/shape_predictor_68_face_landmarks.dat.bz2
"c:\Program Files\7-Zip\7z.exe" x mmod_human_face_detector.dat.bz2
"c:\Program Files\7-Zip\7z.exe" x dlib_face_recognition_resnet_model_v1.dat.bz2
"c:\Program Files\7-Zip\7z.exe" x shape_predictor_5_face_landmarks.dat.bz2
"c:\Program Files\7-Zip\7z.exe" x shape_predictor_68_face_landmarks.dat.bz2
del mmod_human_face_detector.dat.bz2
del dlib_face_recognition_resnet_model_v1.dat.bz2
del shape_predictor_5_face_landmarks.dat.bz2
del shape_predictor_68_face_landmarks.dat.bz2
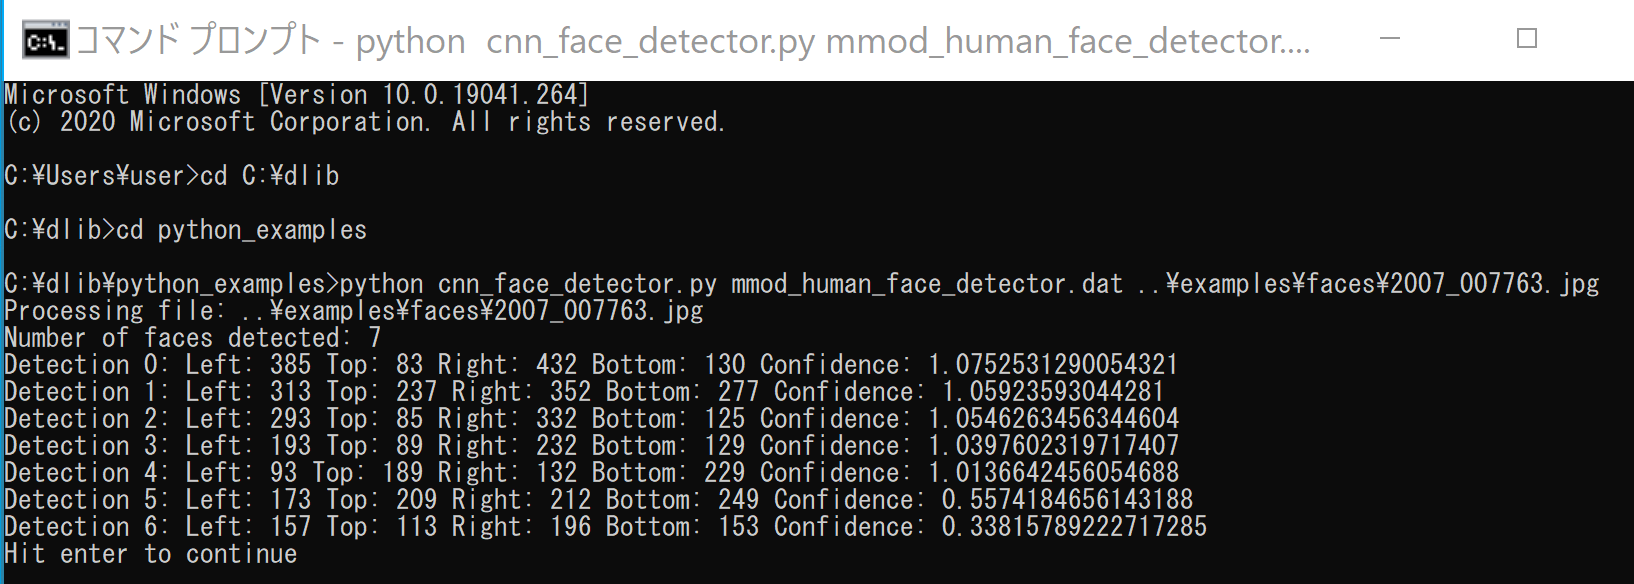
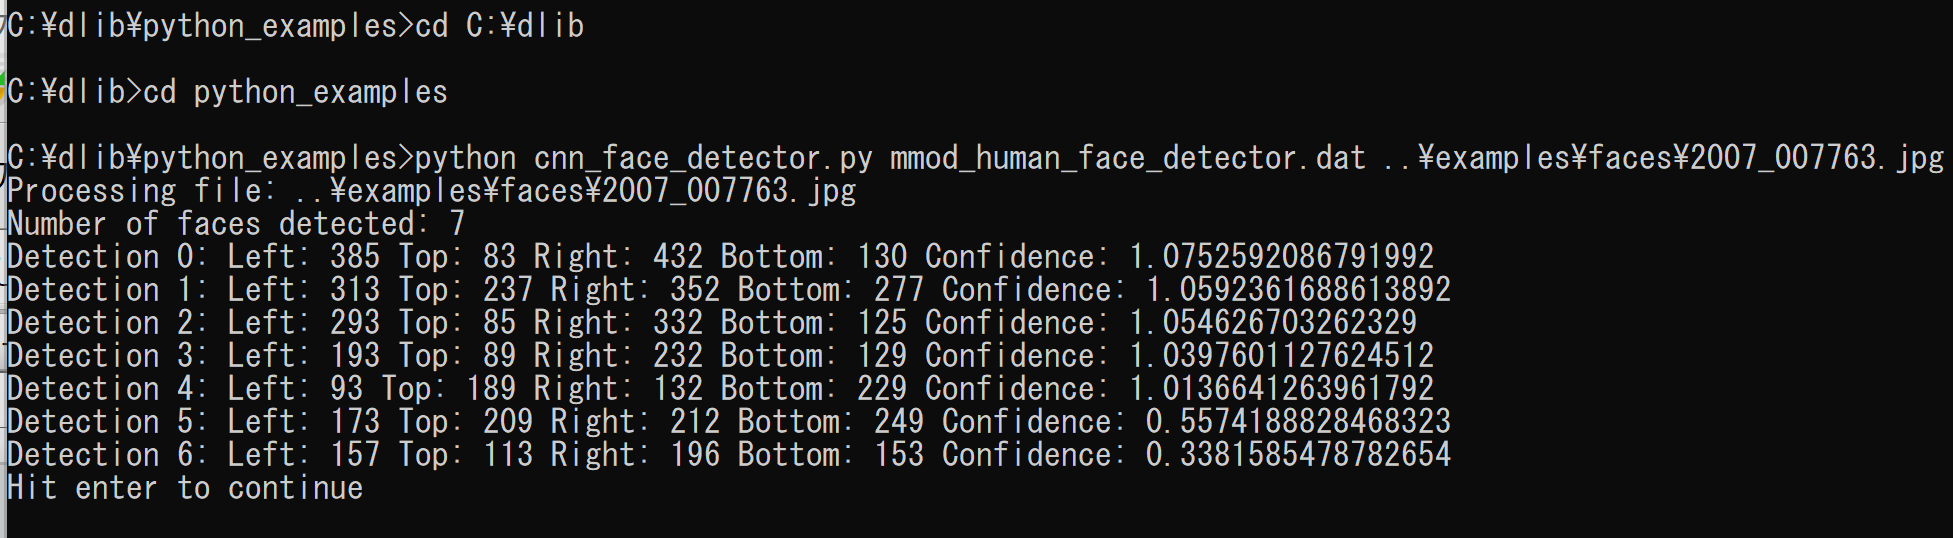
Dlib の動作確認
次を実行し,エラーメッセージが出ずに顔検出の結果が表示されれば OK とする.
cd C:\dlib
cd python_examples
python cnn_face_detector.py mmod_human_face_detector.dat ..\examples\faces\2007_007763.jpg
opencv-python ライブラリのインストール [クリックして展開]
管理者権限でコマンドプロンプトを起動する
(手順:Windowsキーまたはスタートメニュー → cmd と入力 → 右クリック → 「管理者として実行」)。
python -m pip install -U --no-user opencv-python opencv-contrib-python
実行のための準備とその確認手順(Windows 前提)
3.1 プログラムファイルの準備
本記事では2つの Python プログラムを扱う.
hoge.py(画像ファイルで顔検出を行うプログラム)
第4章のソースコードをテキストエディタ(メモ帳等)に貼り付け,hoge.py として C:\dlib\python_examples に保存する(文字コード:UTF-8).
notepad hoge.py
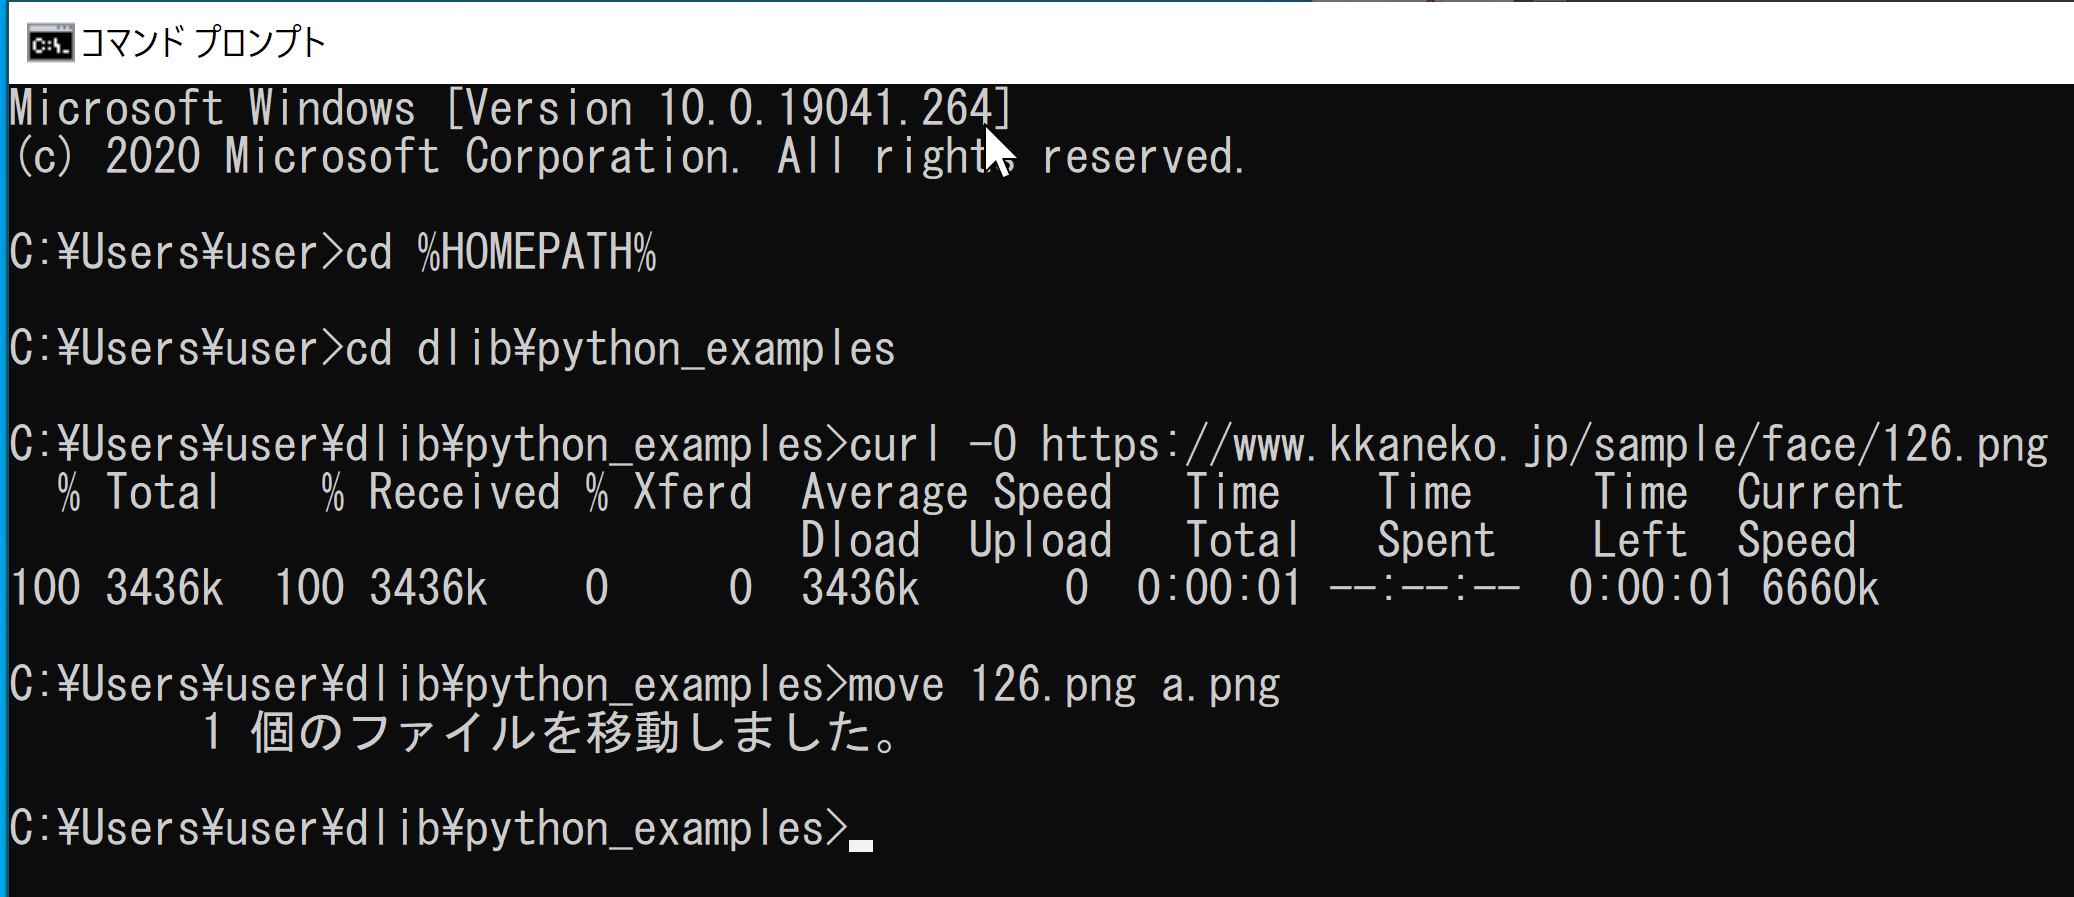
処理対象の画像ファイルを準備する.ファイル名は a.png とし,C:\dlib\python_examples に置く.
cd C:\dlib\python_examples
curl -O https://www.kkaneko.jp/sample/face/126.png
move 126.png a.png
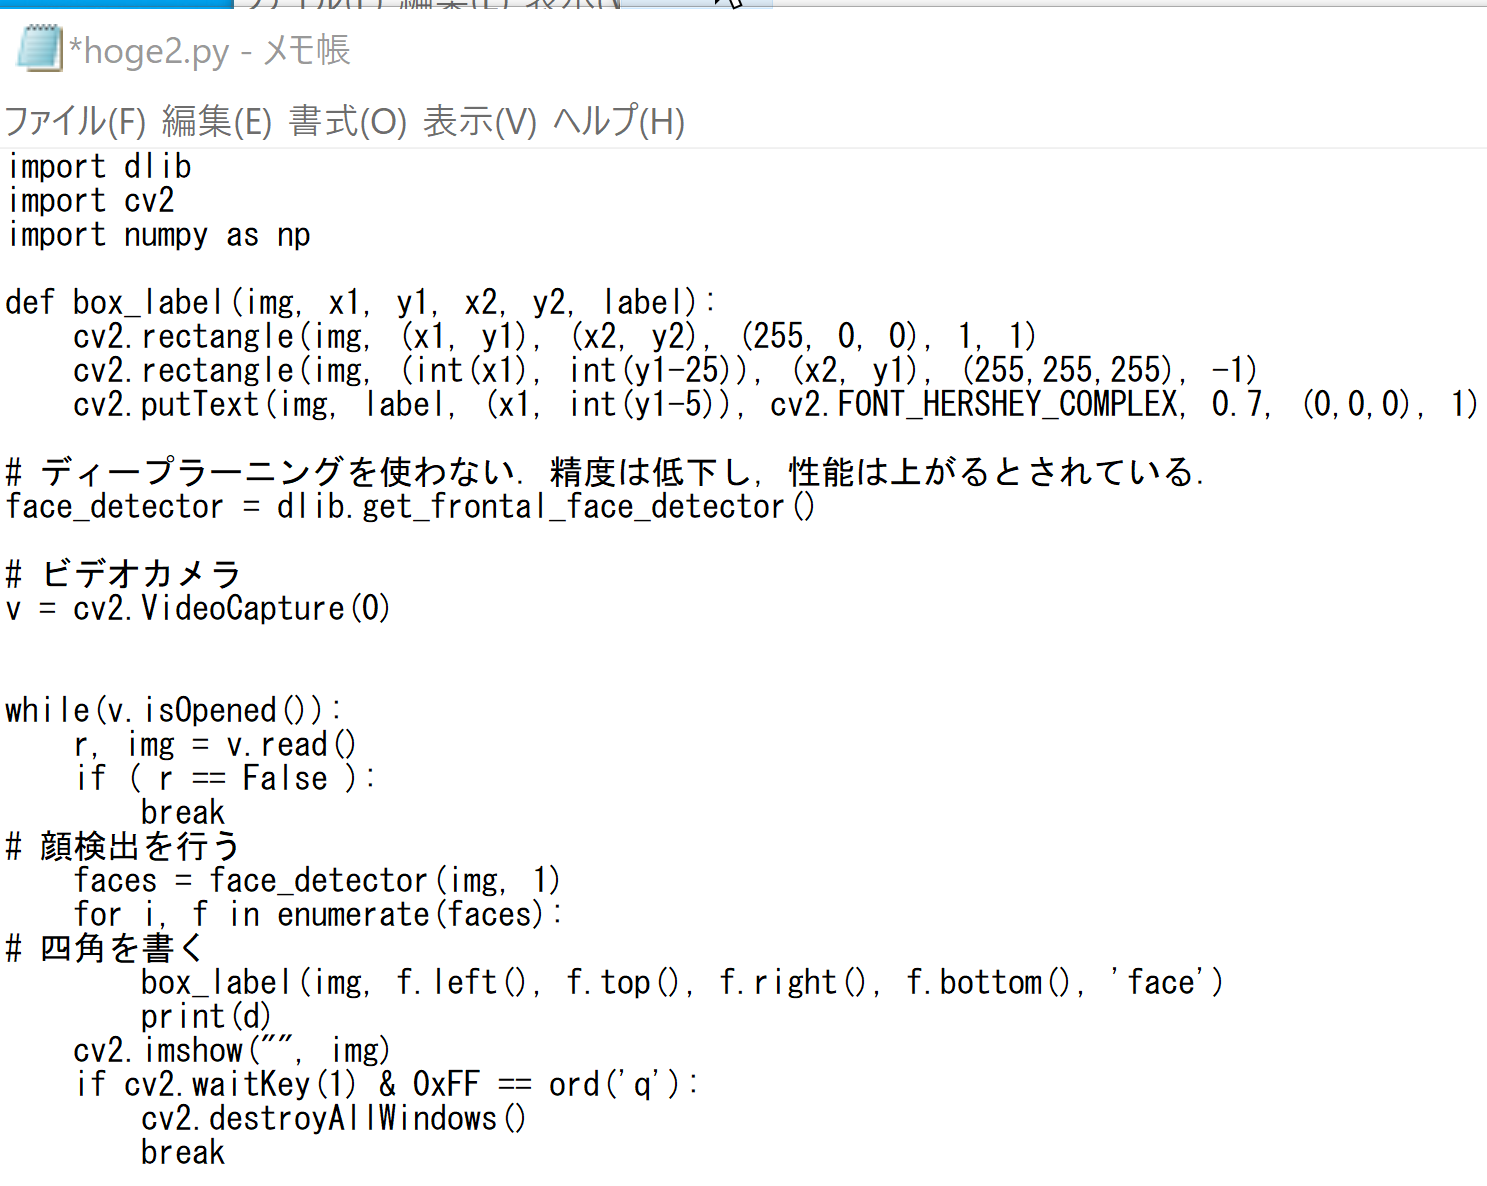
hoge2.py(パソコンのカメラで顔検出を行うプログラム)
第4章のソースコードをテキストエディタ(メモ帳等)に貼り付け,hoge2.py として C:\dlib\python_examples に保存する(文字コード:UTF-8).
notepad hoge2.py
3.2 実行コマンド
コマンドプロンプトで C:\dlib\python_examples に移動し,以下を実行する.
hoge.py の実行(画像ファイルで顔検出)
cd C:\dlib\python_examples
python hoge.py
hoge2.py の実行(カメラで顔検出)
cd C:\dlib\python_examples
python hoge2.py
3.3 動作確認チェックリスト
| 確認項目 | 期待される結果 |
|---|---|
| Dlib の動作確認(cnn_face_detector.py の実行) | エラーメッセージが出ずに,顔検出の結果が表示される |
| dlib ライブラリのバージョン確認 | python -c "import dlib; print(dlib.__version__)" でバージョン番号が表示される |
| hoge.py の実行 | 検出された顔にバウンディングボックスが描画された画面が表示され,検出数がコンソールに出力される |
| hoge.py の結果ファイル保存 | result.png にバウンディングボックス付きの画像が保存される |
| hoge2.py の実行 | カメラ映像が表示され,検出された顔にバウンディングボックスが描画され,FPS が画面左上に表示される |
| hoge2.py の終了操作 | 画面の中をクリックしてから「q」キーを押すと,プログラムが終了する |
概要・使い方・実行上の注意
Dlib 付属のプログラム(cnn_face_detector.py)による顔検出
Dlib による顔検出 を行う.
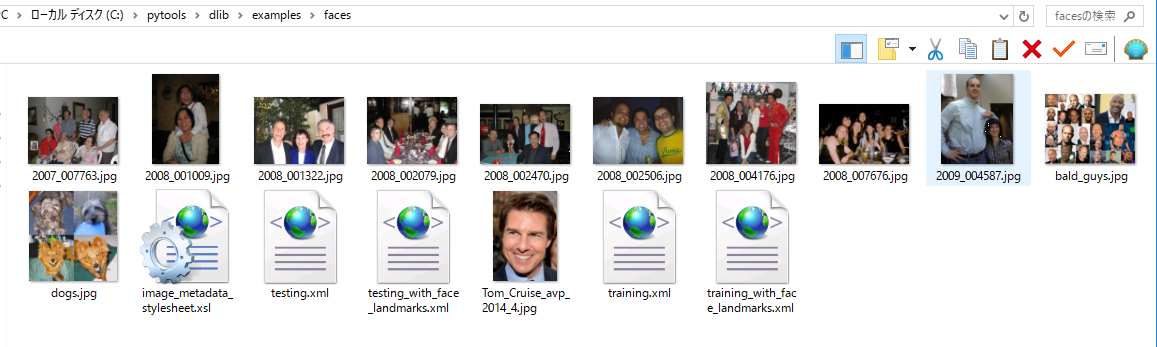
まず,Dlib に同梱の顔画像ファイルを確認する. %HOMEPATH%\dlib\examples\faces の下の顔画像のファイルを確認する.
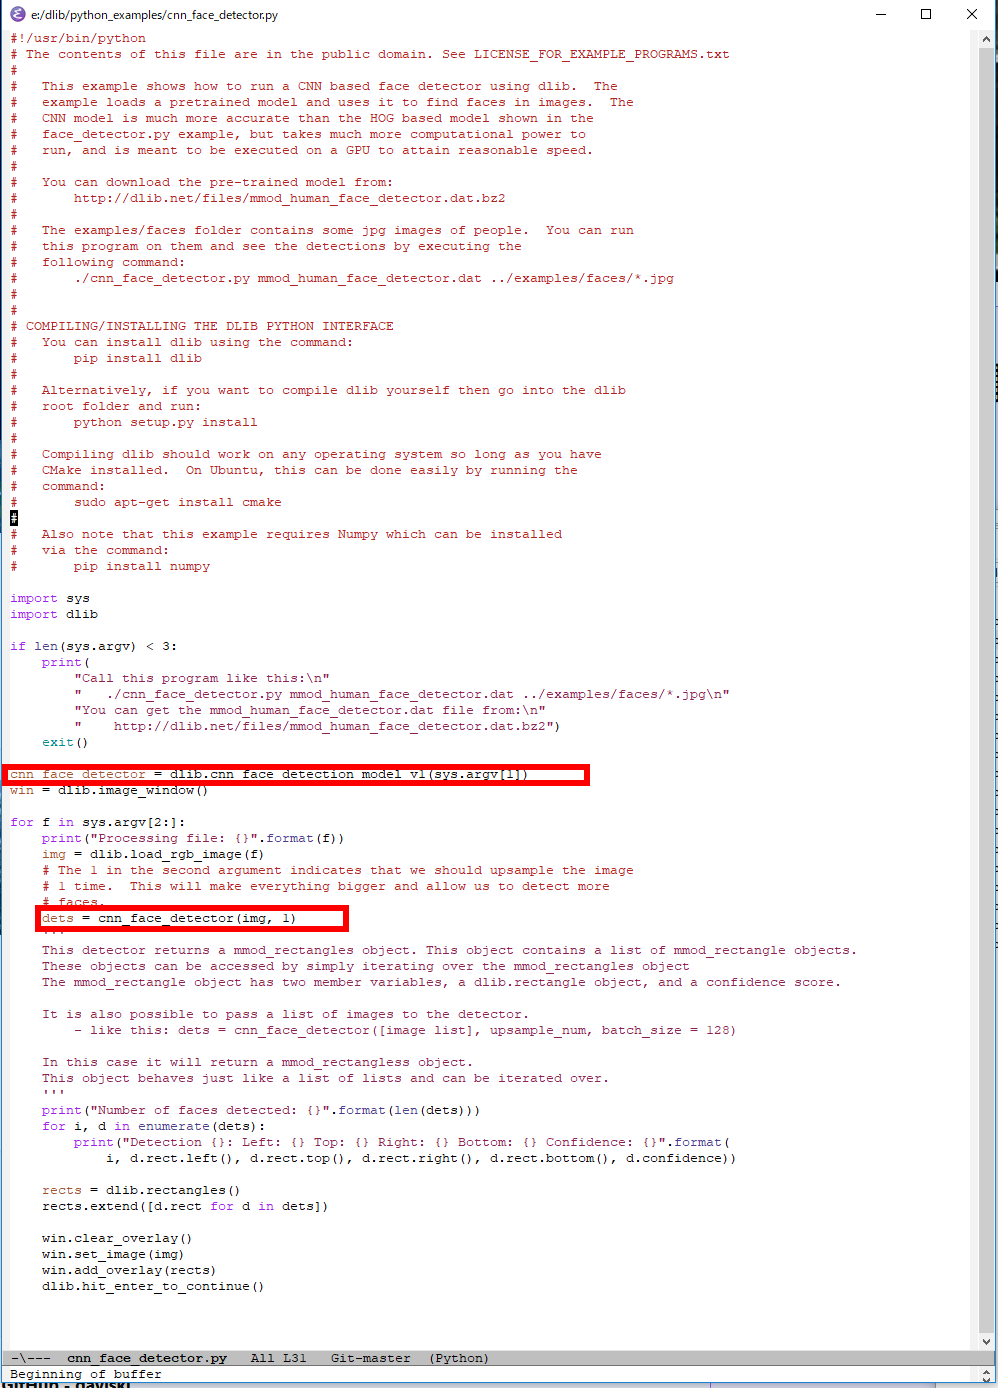
cnn_face_detector.py をエディタで開き,中身を確認する. Dlib には Convolutional Network による顔検出の機能があり,顔検出のプログラムは実質2行である. 画面を開く,画像ファイルを読み込む,画像データを表示する,顔部分を四角で描くといった操作も簡単なコマンドで実現できる.
アップサンプルによる小さな顔の検出
Dlib の学習済みデータは,顔のサイズを 80 x 80 として配布されている. より小さな顔を検出したいときはアップサンプルを行う.アップサンプルを行うと動作は遅くなる.
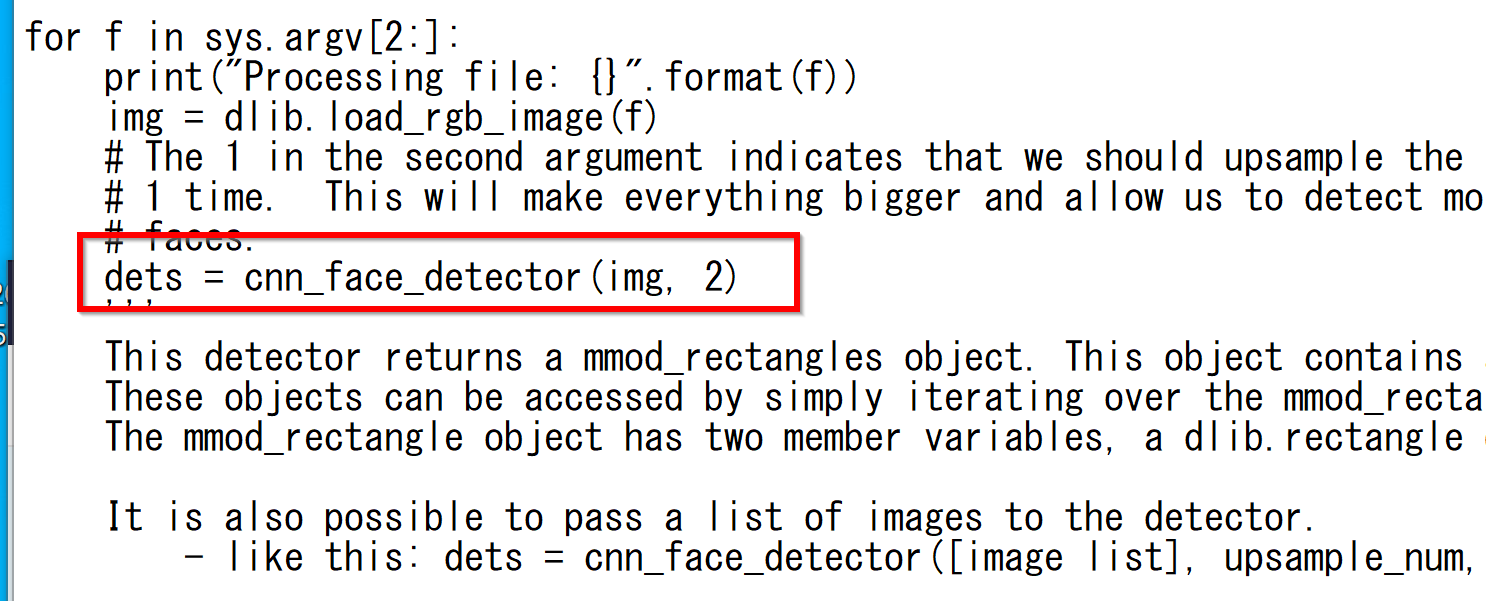
cnn_face_detector.py の「dets = cnn_face_detector(img, 1)」の「1」を「2」や「3」に変えて再実行する.
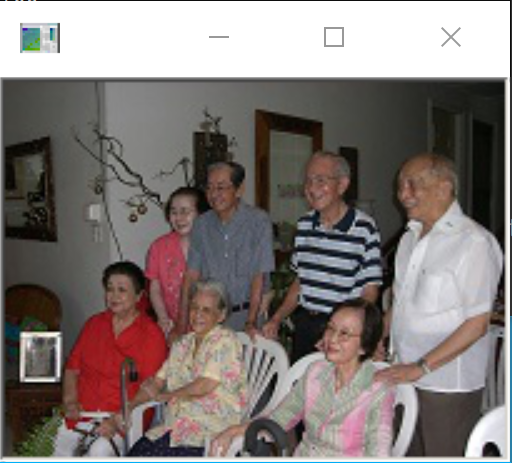
上で使用した画像を縦横 0.4 倍した画像で試した結果を以下に示す.
「dets = cnn_face_detector(img, 1)」のとき
「dets = cnn_face_detector(img, 2)」のとき
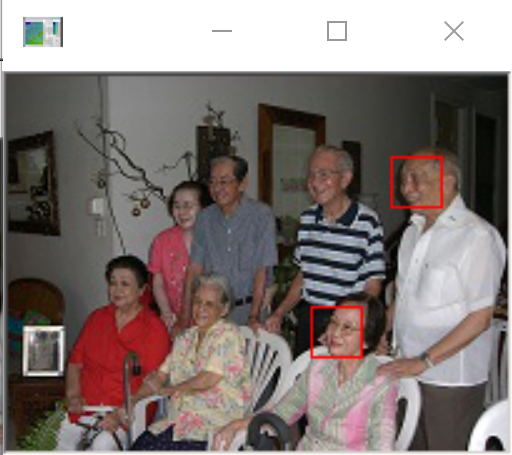
「dets = cnn_face_detector(img, 3)」のとき
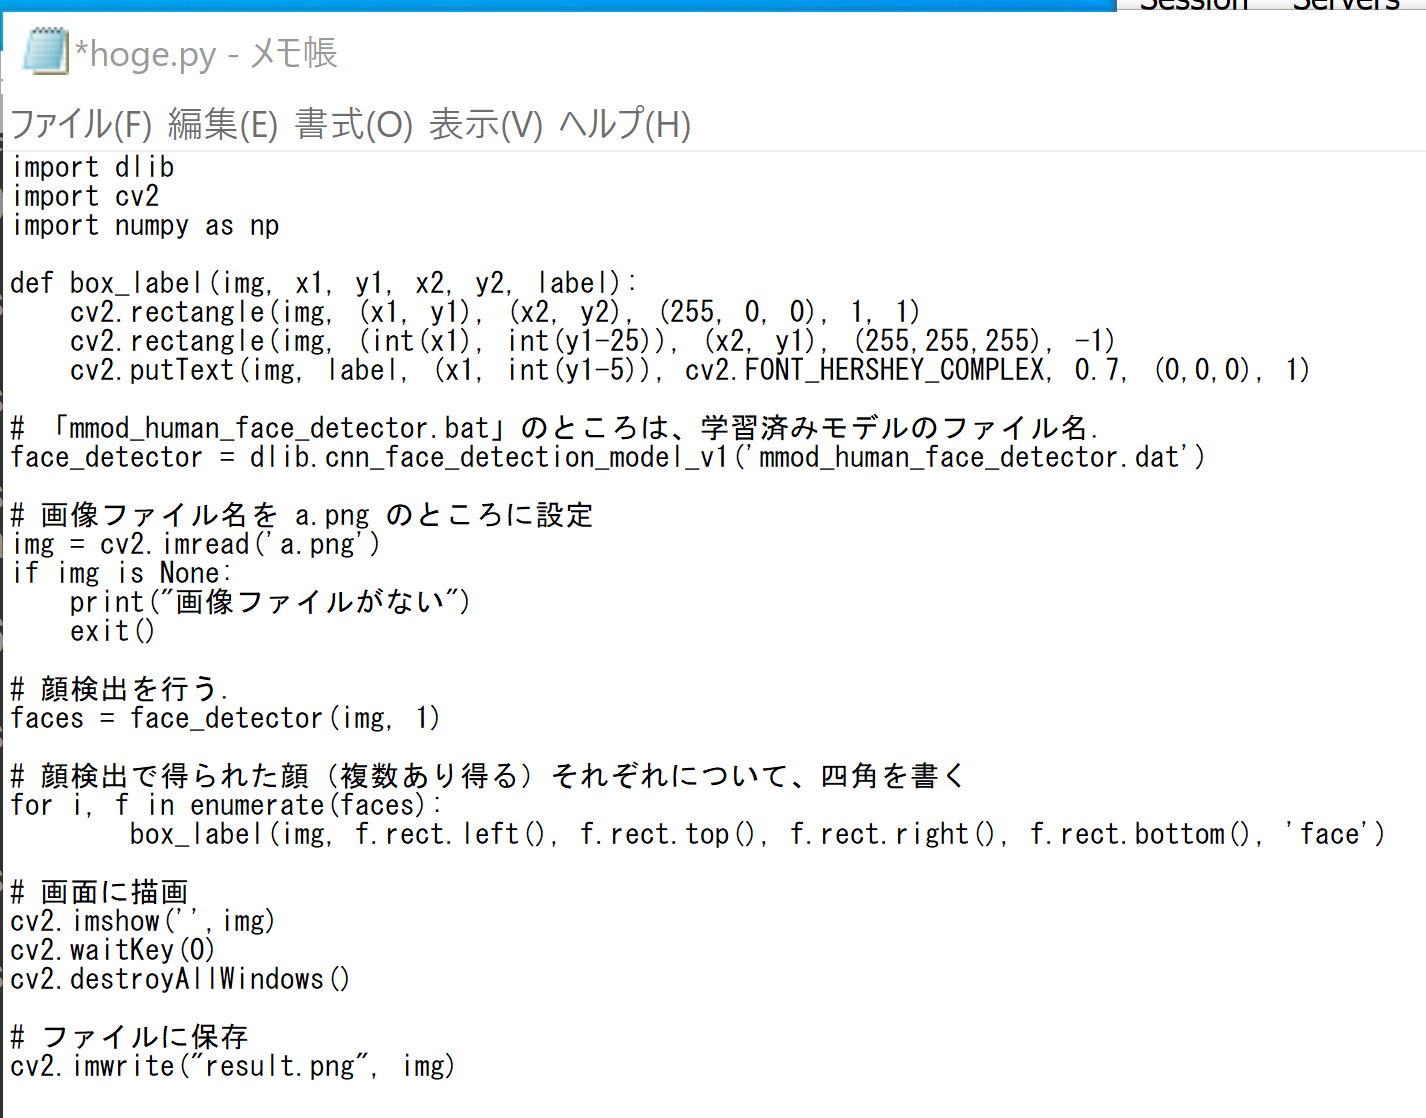
画像ファイルでの顔検出(hoge.py)
Dlib 付属の「face_detector.py」を参考に作成したプログラムである.
CNN 顔検出モデル(mmod_human_face_detector.dat)を使用し,指定した画像ファイル(a.png)に対して顔検出を行う.検出された顔それぞれにバウンディングボックスを描画して画面に表示し,result.png に保存する.検出された顔の数はコンソールに出力される.
ソースコードは第4章に掲載している.
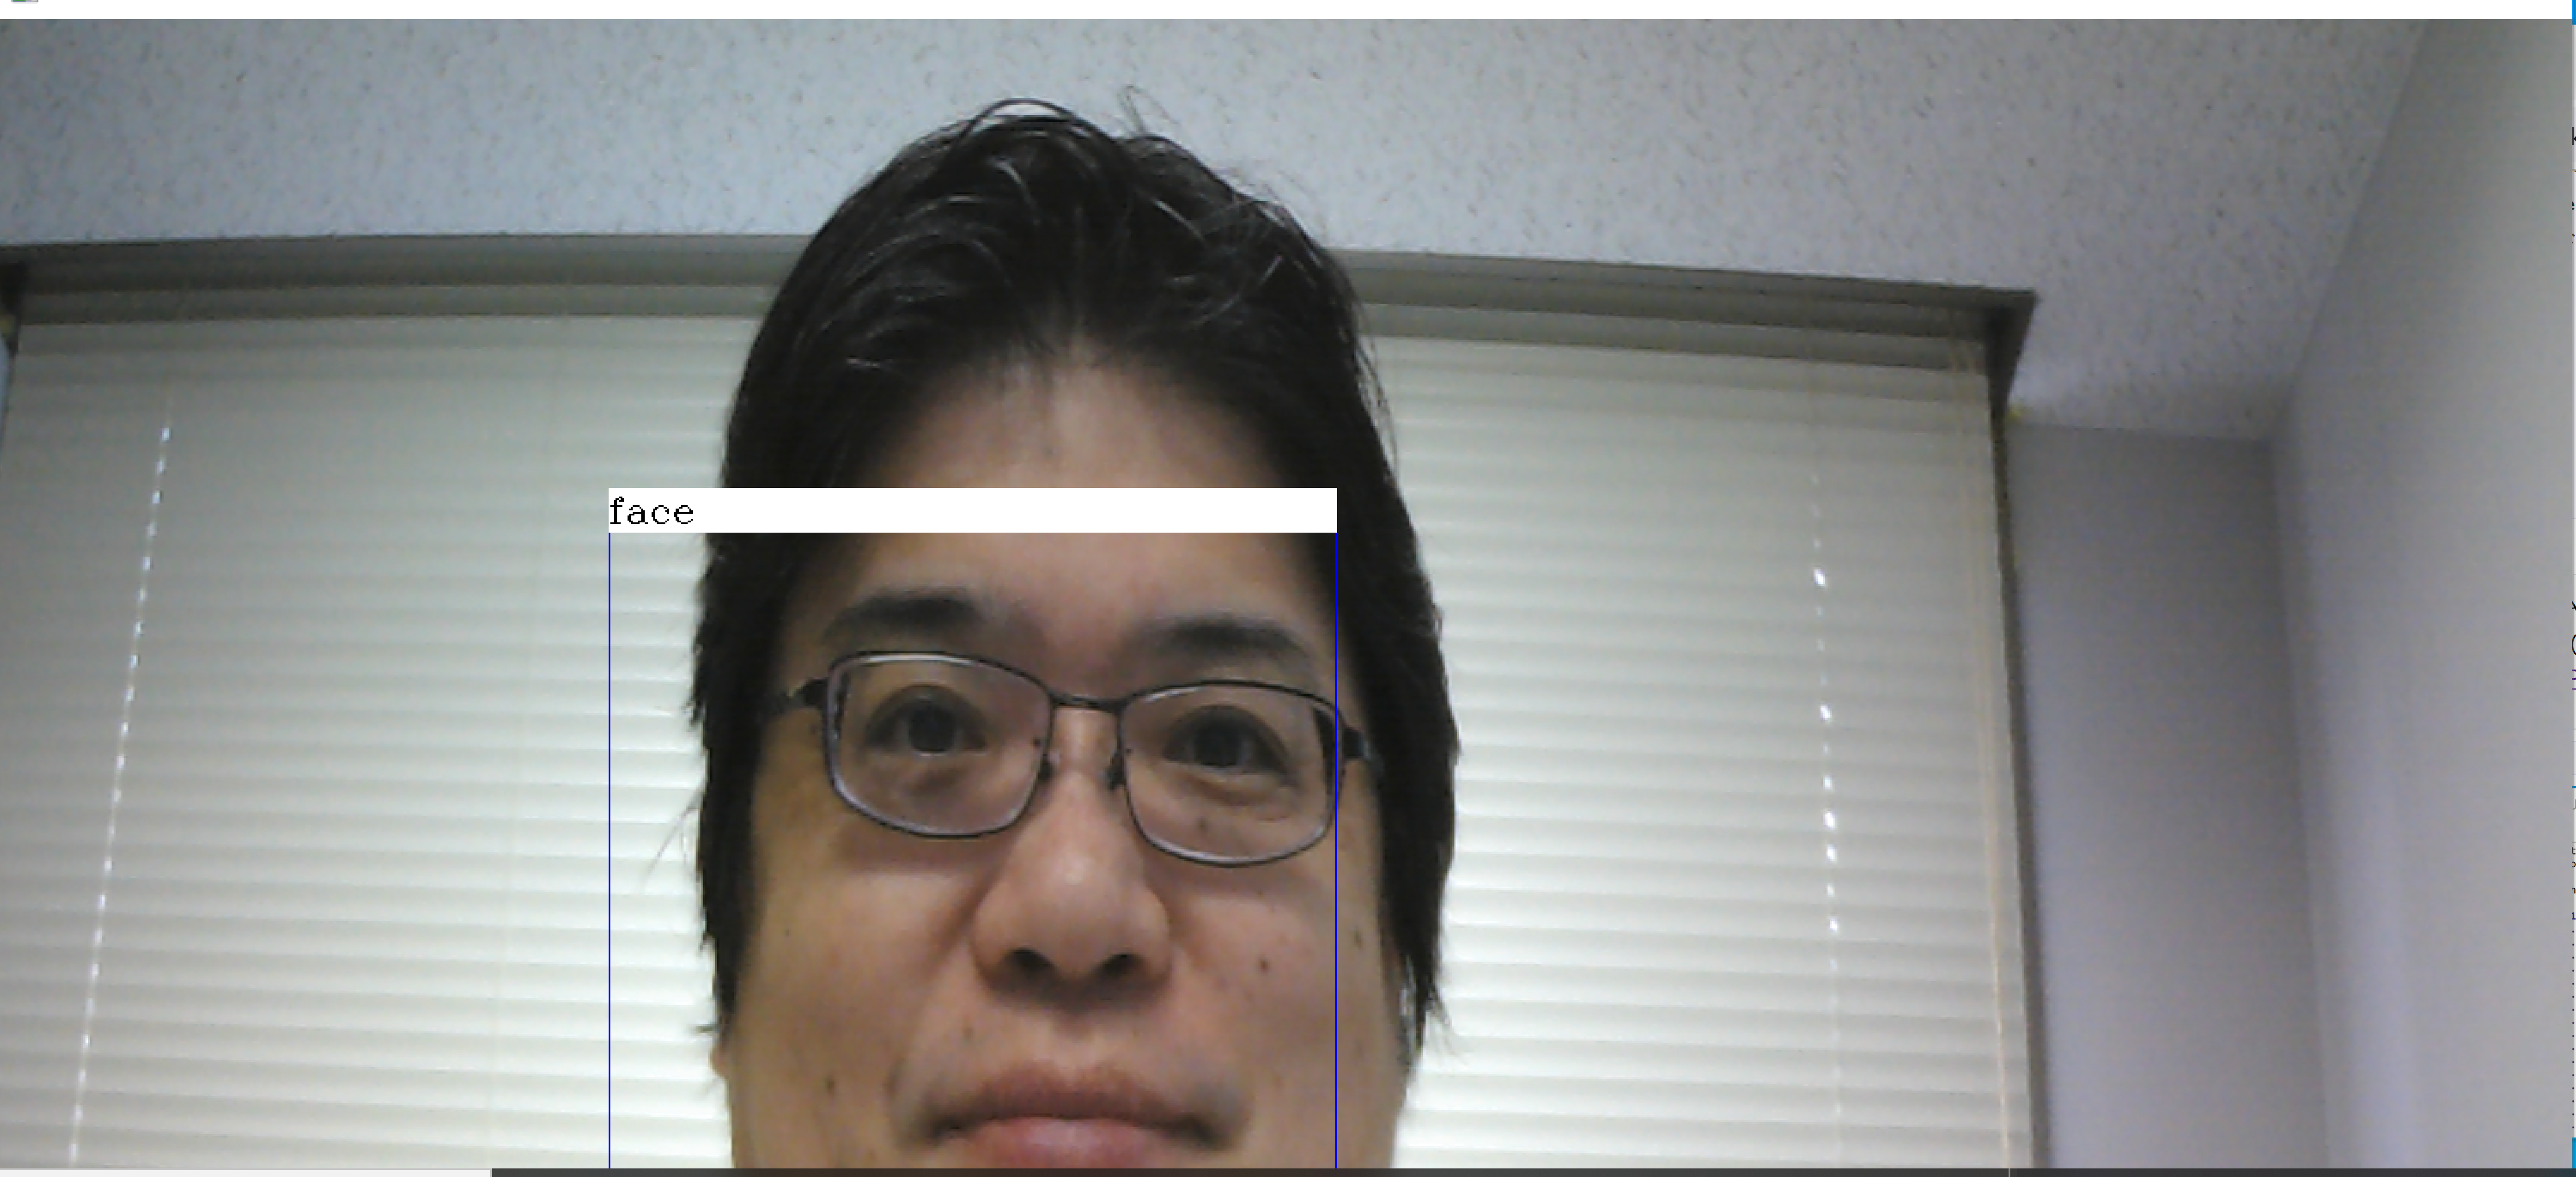
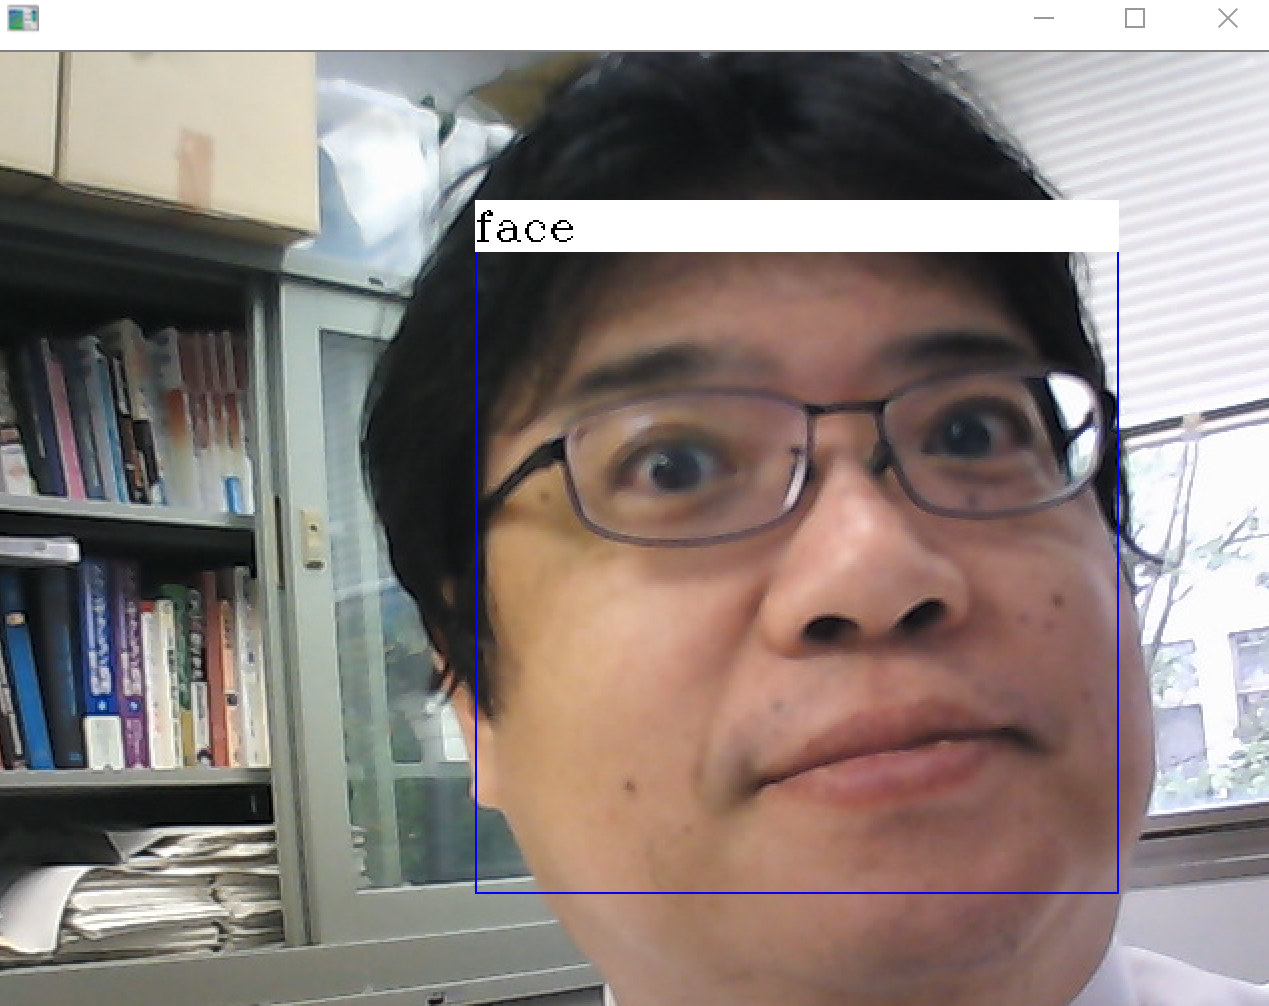
カメラでの顔検出(hoge2.py)
Dlib 付属の「face_detector.py」を参考に作成したプログラムである.
dlib.get_frontal_face_detector() を使用する.これはディープラーニングを使わない顔検出器であり,精度は低下するが処理速度は向上する.パソコンのカメラからリアルタイムに映像を取得し,顔検出を行ってバウンディングボックスを描画する.FPS(1秒あたりのフレーム数)も画面上に表示する.
* 途中で止めたいとき,右上の「x」をクリックしない.画面の中をクリックしてから,「q」キーを押して閉じる.
ソースコードは第4章に掲載している.
ソースコード
hoge.py(画像ファイルで顔検出を行うプログラム)
import dlib
import cv2

def box_label(img, x1, y1, x2, y2, label):
    cv2.rectangle(img, (x1, y1), (x2, y2), (255, 0, 0), 1, 1)
    cv2.rectangle(img, (x1, y1 - 25), (x2, y1), (255, 255, 255), -1)
    cv2.putText(img, label, (x1, y1 - 5), cv2.FONT_HERSHEY_COMPLEX, 0.7, (0, 0, 0), 1)

# 「mmod_human_face_detector.dat」のところは,学習済みモデルのファイル名
face_detector = dlib.cnn_face_detection_model_v1('mmod_human_face_detector.dat')

# 画像ファイル名を a.png のところに設定
img = cv2.imread('a.png')

# 顔検出を行う
faces = face_detector(img, 1)
print("検出された顔の数:", len(faces))

# 顔検出で得られた顔(複数あり得る)それぞれについて,四角を書く
for i, f in enumerate(faces):
    box_label(img, f.rect.left(), f.rect.top(), f.rect.right(), f.rect.bottom(), 'face')

# 画面に描画
cv2.imshow('', img)
cv2.waitKey(0)
cv2.destroyAllWindows()

# ファイルに保存
cv2.imwrite("result.png", img)
hoge2.py(パソコンのカメラで顔検出を行うプログラム)
import dlib
import cv2
import time

def box_label(img, x1, y1, x2, y2, label):
    cv2.rectangle(img, (x1, y1), (x2, y2), (255, 0, 0), 1, 1)
    cv2.rectangle(img, (x1, y1 - 25), (x2, y1), (255, 255, 255), -1)
    cv2.putText(img, label, (x1, y1 - 5), cv2.FONT_HERSHEY_COMPLEX, 0.7, (0, 0, 0), 1)

# ディープラーニングを使わない.精度は低下し,処理速度は向上するとされている.
face_detector = dlib.get_frontal_face_detector()

# ビデオカメラ
v = cv2.VideoCapture(0)
prev_time = time.time()

while v.isOpened():
    r, img = v.read()
    # 顔検出を行う
    faces = face_detector(img, 1)
    for i, f in enumerate(faces):
        # 四角を書く
        box_label(img, f.left(), f.top(), f.right(), f.bottom(), 'face')
    # FPS(1秒あたりのフレーム数)を計算して表示する
    curr_time = time.time()
    fps = 1.0 / (curr_time - prev_time)
    prev_time = curr_time
    cv2.putText(img, "FPS: {:.1f}".format(fps), (10, 30), cv2.FONT_HERSHEY_SIMPLEX, 1.0, (0, 255, 0), 2)
    cv2.imshow("", img)
    if cv2.waitKey(1) & 0xFF == ord('q'):
        break

v.release()
cv2.destroyAllWindows()
まとめ
本記事で扱った主要概念を以下に整理する.
Dlib による CNN 顔検出
Dlib には CNN による顔検出の機能がある.顔を囲むバウンディングボックスが表示され,その座標値が数値データとして得られる.
アップサンプルによる検出精度の調整
Dlib の学習済みデータは顔サイズ 80 x 80 を前提としている.アップサンプルの値を大きくすると小さな顔も検出できるが,動作は遅くなる.
CNN 顔検出器と非ディープラーニング顔検出器の使い分け
hoge.py では dlib.cnn_face_detection_model_v1 を,hoge2.py では dlib.get_frontal_face_detector() を使用している.後者はディープラーニングを使わないため,精度は低下するが処理速度は向上する.
OpenCV との連携
Dlib で顔検出を行った結果を OpenCV(cv2)で画面に描画し,ファイルに保存する.cv2.VideoCapture によりカメラからリアルタイムに映像を取得し,顔検出結果を重畳表示することもできる.
バウンディングボックスの描画
検出された顔それぞれに対し,cv2.rectangle でバウンディングボックスを描画し,cv2.putText でラベルを付与する.これにより検出結果を視覚的に確認できる.