face_recognition による顔のクラスタリングを行う Python プログラム(Dlib,ageitgey/face_recognition,Python を使用)(Windows 上)
【概要】
Dlibは,機械学習,数値計算,画像処理,GUI 等の機能を持つ C++ ライブラリ.Python API もある.
本記事では,face_recognition による顔のクラスタリングを行う Python プログラム(Dlib,ageitgey/face_recognition,Python を使用)について,Windows 上での環境構築から実行・結果確認までの手順を説明する.
このプログラムは,指定フォルダ内のすべての JPEG 画像から顔を検出し,Dlib の顔認識モデルにより 128 次元の顔特徴量ベクトルを計算する.得られた特徴量ベクトルを Dlib の chinese_whispers_clustering によりクラスタリングし,クラスタごとに分類された顔画像を 150×150 ピクセルの画像ファイルとして出力する.
【目次】
【関連する外部ページ】
ageitgey/face_recognition のページ: https://github.com/ageitgey/face_recognition
【サイト内の関連情報】
- 説明資料: Dlib の機能概要 [PDF], [パワーポイント]
- 顔情報処理の Python プログラム(Dlib,face_recognition を使用) について: 別ページ »にまとめ
- Windows で動く人工知能関係 Pythonアプリケーション,オープンソースソフトウエア: 別ページ »にまとめている.
前準備(必要ソフトウェアの入手)
ここでは、最低限の事前準備について説明する。機械学習や深層学習を行う場合は、NVIDIA CUDA、Visual Studio、Cursorなどを追加でインストールすると便利である。これらについては別ページ https://www.kkaneko.jp/cc/dev/aiassist.htmlで詳しく解説しているので、必要に応じて参照してください。
Build Tools for Visual Studio 2026(ビルドツール)のインストール
Build Tools for Visual Studio 2026(ビルドツール)のインストールを行い、C/C++ コードのビルド環境を整える。
Build Tools for Visual Studio は,Visual Studio の IDE を含まない C/C++ コンパイラ,ライブラリ,ビルドツール等のコマンドライン向け開発ツールセットである。インストール済みの場合,この手順は不要である。 以下のコマンドは、Build Tools が未インストールの場合は winget で新規インストールし、インストール済みの場合は 【インストールコマンドの実行方法】 管理者権限でコマンドプロンプトを起動する(手順:Windows キーまたはスタートメニュー → 上記のコマンドでは、Build Tools 本体と Visual C++ 再頒布可能パッケージをインストールし、続いて以下のコンポーネントを追加している。 上記以外の追加のコンポーネントが必要になった場合は Visual Studio Installer で個別にインストールできる。 インストール完了の確認 Visual Studio を必要とするとき Visual Studio の機能を必要とする場合は,追加インストールできる。[Build Tools for Visual Studio 2026(ビルドツール)のインストール手順を見るには、ここをクリック]
Windows での Build Tools for Visual Studio 2026 のインストール
setup.exe modify でコンポーネントを追加する(バージョンは変更しない)。cmd と入力 → 右クリック → 「管理者として実行」)。そして、コマンド全体をコマンドプロンプトにコピー&ペーストする。REM VC++ ランタイム
winget install --scope machine --id Microsoft.VCRedist.2015+.x64 -e --silent --disable-interactivity --force --accept-source-agreements --accept-package-agreements --override "/quiet /norestart"
REM ============================================================
REM Visual Studio Build Tools + Desktop development with C++
REM (VCTools、MSBuildTools、CMake連携、Clang、Windows 11 SDK)
REM ============================================================
REM 進行中のインストーラーを停止(ロック競合回避)
taskkill /F /IM vs_setup.exe /T >nul 2>&1
taskkill /F /IM vs_installer.exe /T >nul 2>&1
taskkill /F /IM vs_installerservice.exe /T >nul 2>&1
REM 未インストール時: winget で新規インストール
REM インストール済み時: setup.exe modify でコンポーネント追加(バージョンは変更しない)
winget list --id Microsoft.VisualStudio.BuildTools 2>nul | findstr /i "BuildTools" >nul 2>&1
if %ERRORLEVEL% EQU 0 (
for /f "usebackq delims=" %P in (`"C:\Program Files (x86)\Microsoft Visual Studio\Installer\vswhere.exe" -products Microsoft.VisualStudio.Product.BuildTools -property installationPath`) do start /wait "" "C:\Program Files (x86)\Microsoft Visual Studio\Installer\setup.exe" modify --installPath "%P" --add Microsoft.VisualStudio.Workload.VCTools --add Microsoft.VisualStudio.Workload.MSBuildTools --add Microsoft.VisualStudio.Component.VC.CMake.Project --add Microsoft.VisualStudio.Component.VC.Llvm.Clang --add Microsoft.VisualStudio.Component.VC.Llvm.ClangToolset --add Microsoft.VisualStudio.Component.Windows11SDK.26100 --includeRecommended --quiet --norestart --nocache
) else (
winget install --scope machine --id Microsoft.VisualStudio.BuildTools -e --silent --disable-interactivity --force --accept-source-agreements --accept-package-agreements --override "--quiet --wait --norestart --nocache --add Microsoft.VisualStudio.Workload.VCTools --includeRecommended --add Microsoft.VisualStudio.Workload.MSBuildTools --add Microsoft.VisualStudio.Component.VC.CMake.Project --add Microsoft.VisualStudio.Component.VC.Llvm.Clang --add Microsoft.VisualStudio.Component.VC.Llvm.ClangToolset --add Microsoft.VisualStudio.Component.Windows11SDK.26100"
)
REM 破損時の修復(任意、動作がおかしくなった場合)
REM "C:\Program Files (x86)\Microsoft Visual Studio\Installer\setup.exe" repair --installPath "C:\Program Files (x86)\Microsoft Visual Studio\18\BuildTools" --quiet --norestart
REM 導入確認(インストールパスが表示されれば正常)
"C:\Program Files (x86)\Microsoft Visual Studio\Installer\vswhere.exe" -products * -requires Microsoft.VisualStudio.Workload.VCTools -property installationPath
--includeRecommended により、MSVC コンパイラ、C++ AddressSanitizer、vcpkg、CMake ツール、Windows 11 SDK 等の推奨コンポーネントが含まれる)winget list Microsoft.VisualStudio.BuildTools
Python 3.12 のインストール
Pythonのインストールを行い、Pythonのプログラムを実行する環境を整える。扱う環境は、Windows搭載パソコンである。金子研究室では、Python 3.12.10を推奨する。
[Windows での Python 3.12 のインストール手順を見るには、ここをクリック]
Windows での Python 3.12 のインストール
以下のいずれかの方法でPython 3.12をインストールする。Pythonがインストール済みの場合、この手順は不要である。
方法 1:winget によるインストール
【インストールコマンドの実行方法】
管理者権限でコマンドプロンプトを起動する(手順:Windowsキーまたはスタートメニュー → cmd と入力 → 右クリック → 「管理者として実行」)。そして、コマンド全体をコマンドプロンプトにコピー&ペーストする。
--scope machine を指定することで、システム全体(全ユーザー向け)にインストールされる。このオプションの実行には管理者権限が必要である。インストール完了後、コマンドプロンプトを再起動するとPATHが反映される。
REM Python 3.12 をシステム領域にインストール
winget install --id Python.Python.3.12 -e --scope machine --silent --accept-source-agreements --accept-package-agreements --override "/quiet InstallAllUsers=1 PrependPath=1 Include_test=0 Include_pip=1 Include_launcher=1 InstallLauncherAllUsers=1 TargetDir=\"C:\Program Files\Python312\""

REM Python と Scripts を PATH 先頭に追加
powershell -NoProfile -Command "$p='C:\Program Files\Python312'; $s=\"$p\Scripts\"; $c=[Environment]::GetEnvironmentVariable('Path','Machine'); if((Test-Path $p) -and (';'+$c+';' -notlike \"*;$p;*\") -and (';'+$c+';' -notlike \"*;$s;*\")){[Environment]::SetEnvironmentVariable('Path',\"$p;$s;$c\",'Machine')}"
方法 2:インストーラーによるインストール
- Python公式サイト(https://www.python.org/downloads/)にアクセスし、「Download Python 3.x.x」ボタンからWindows用インストーラーをダウンロードする。
- ダウンロードしたインストーラーを実行する。
- 初期画面の下部に表示される「Add python.exe to PATH」にチェックを入れてから「Customize installation」を選択する。このチェックを入れ忘れると、コマンドプロンプトから
pythonコマンドを実行できない。 - 「Install Python 3.xx for all users」にチェックを入れ、「Install」をクリックする。
インストールの確認
コマンドプロンプトで以下を実行する。
python --versionバージョン番号(例:Python 3.12.x)が表示されればインストール成功である。「'python' は、内部コマンドまたは外部コマンドとして認識されていません。」と表示される場合は、インストールが正常に完了していない。
Python の開発環境 Visual Studio Code のインストールと Python 用の設定
Python の開発環境Visual Studio Code(プログラムを編集するソフトウェア。以下、VS Code)を整える。
[Windows での Visual Studio Code のインストールと Python 用の設定手順を見るには、ここをクリック]
Windows での Visual Studio Code のインストールと Python 用の設定手順
1. VS Code と拡張機能のインストール
以下のコマンドにより,既存の VS Code を削除し,全ユーザー共有の設定で再インストールしたうえで,拡張機能(VS Code に機能を追加するソフトウェア)をまとめて導入する.
【インストールコマンドの実行方法】
管理者権限でコマンドプロンプトを起動する(手順:Windows キーまたはスタートメニュー → cmd と入力 → 右クリック → 「管理者として実行」)。そして,コマンド全体をコマンドプロンプトにコピー&ペーストする。
インストールコマンド
REM ============================================================
REM Microsoft Visual Studio Code
REM ============================================================
winget uninstall -e --id Microsoft.VisualStudioCode --silent --disable-interactivity --accept-source-agreements
rmdir /s /q C:\ProgramData\vscode-extensions 2>nul
rmdir /s /q "%APPDATA%\Code" 2>nul
rmdir /s /q "%USERPROFILE%\.vscode" 2>nul
rmdir /s /q "%LOCALAPPDATA%\Microsoft\vscode-update" 2>nul

REM VS Code をシステム領域に新規インストール
winget install --scope machine --id Microsoft.VisualStudioCode -e --silent --accept-source-agreements --accept-package-agreements

REM 全ユーザー共有の拡張機能フォルダ
mkdir C:\ProgramData\vscode-extensions 2>nul
icacls "C:\ProgramData\vscode-extensions" /grant "Everyone:(OI)(CI)M" /T

REM スタートメニューのショートカットを --extensions-dir 付きで再作成
rmdir /s /q "C:\ProgramData\Microsoft\Windows\Start Menu\Programs\Visual Studio Code" 2>nul
del "C:\ProgramData\Microsoft\Windows\Start Menu\Programs\Visual Studio Code.lnk" 2>nul
powershell -NoProfile -Command "$s=New-Object -ComObject WScript.Shell; $lnk=$s.CreateShortcut('C:\ProgramData\Microsoft\Windows\Start Menu\Programs\Visual Studio Code.lnk'); $lnk.TargetPath='C:\Program Files\Microsoft VS Code\Code.exe'; $lnk.Arguments='--extensions-dir \"C:\ProgramData\vscode-extensions\"'; $lnk.Save()"
REM ショートカットの検証
powershell -NoProfile -Command "$s=New-Object -ComObject WScript.Shell; $lnk=$s.CreateShortcut('C:\ProgramData\Microsoft\Windows\Start Menu\Programs\Visual Studio Code.lnk'); Write-Host 'TargetPath:' $lnk.TargetPath; Write-Host 'Arguments:' $lnk.Arguments"

REM ファイル / フォルダ右クリックの「Code で開く」を登録
reg add "HKLM\SOFTWARE\Classes\*\shell\VSCode\command" /ve /d "\"C:\Program Files\Microsoft VS Code\Code.exe\" --extensions-dir \"C:\ProgramData\vscode-extensions\" \"%1\"" /f
reg add "HKLM\SOFTWARE\Classes\Directory\shell\VSCode\command" /ve /d "\"C:\Program Files\Microsoft VS Code\Code.exe\" --extensions-dir \"C:\ProgramData\vscode-extensions\" \"%1\"" /f
reg add "HKLM\SOFTWARE\Classes\Directory\Background\shell\VSCode\command" /ve /d "\"C:\Program Files\Microsoft VS Code\Code.exe\" --extensions-dir \"C:\ProgramData\vscode-extensions\" \"%V\"" /f

REM --extensions-dir 付きで起動する code.cmd ラッパを作成
REM (%* を echo で書くと対話的 cmd で失われるため、PowerShell で [char]37+'*' を書き出す)
powershell -NoProfile -Command "$pct=[char]37; $q=[char]34; $c='@echo off'+[char]13+[char]10+$q+'C:\Program Files\Microsoft VS Code\bin\code.cmd'+$q+' --extensions-dir '+$q+'C:\ProgramData\vscode-extensions'+$q+' '+$pct+'*'+[char]13+[char]10; [IO.File]::WriteAllText('C:\ProgramData\vscode-extensions\vscode.cmd',$c,[Text.Encoding]::ASCII)"

REM 拡張機能のインストール
set "CODE=C:\Program Files\Microsoft VS Code\bin\code.cmd"
"%CODE%" --extensions-dir "C:\ProgramData\vscode-extensions" --uninstall-extension GitHub.copilot
"%CODE%" --extensions-dir "C:\ProgramData\vscode-extensions" --uninstall-extension GitHub.copilot-chat
"%CODE%" --extensions-dir "C:\ProgramData\vscode-extensions" --install-extension ms-python.python
"%CODE%" --extensions-dir "C:\ProgramData\vscode-extensions" --install-extension ms-python.vscode-pylance
"%CODE%" --extensions-dir "C:\ProgramData\vscode-extensions" --install-extension ms-python.debugpy
"%CODE%" --extensions-dir "C:\ProgramData\vscode-extensions" --install-extension MS-CEINTL.vscode-language-pack-ja
"%CODE%" --extensions-dir "C:\ProgramData\vscode-extensions" --install-extension saoudrizwan.claude-dev
"%CODE%" --extensions-dir "C:\ProgramData\vscode-extensions" --install-extension rust-lang.rust-analyzer
"%CODE%" --extensions-dir "C:\ProgramData\vscode-extensions" --install-extension tamasfe.even-better-toml
"%CODE%" --extensions-dir "C:\ProgramData\vscode-extensions" --install-extension anthropic.claude-code
"%CODE%" --extensions-dir "C:\ProgramData\vscode-extensions" --install-extension almenon.arepl
"%CODE%" --extensions-dir "C:\ProgramData\vscode-extensions" --list-extensions --show-versions
echo === セットアップ完了 ===
2. Python インタプリタの選択
同一マシンに複数の Python がインストールされている場合,VS Code で使用する Python 本体(インタプリタ:Python プログラムを解釈・実行するソフトウェア)を選択する必要がある.
- コマンドパレット(コマンド名で機能を呼び出す VS Code の入力欄)を開く(
Ctrl+Shift+P) Python: Select Interpreterと入力する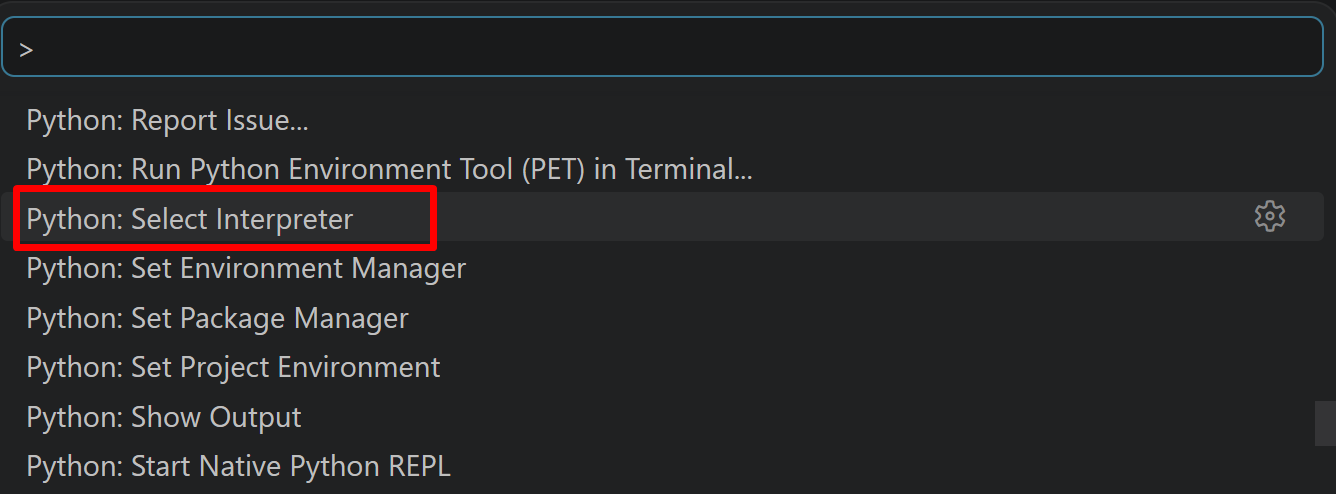
- 表示される一覧から,使用する Python(例:
C:\Program Files\Python312\python.exe)を選択する.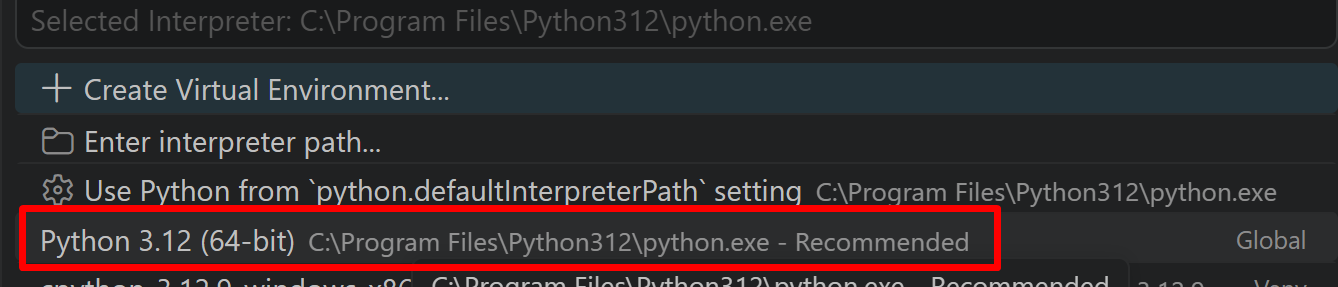
Git のインストール(Windows 上) [クリックして展開]
管理者権限でコマンドプロンプトを起動する
(手順:Windowsキーまたはスタートメニュー → cmd と入力 → 右クリック → 「管理者として実行」)。
REM Git をシステム領域にインストール
winget install --scope machine --id Git.Git -e --silent --disable-interactivity --force --accept-source-agreements --accept-package-agreements --override "/VERYSILENT /NORESTART /NOCANCEL /SP- /CLOSEAPPLICATIONS /RESTARTAPPLICATIONS /COMPONENTS=""icons,ext\reg\shellhere,assoc,assoc_sh"" /o:PathOption=Cmd /o:CRLFOption=CRLFCommitAsIs /o:BashTerminalOption=MinTTY /o:DefaultBranchOption=main /o:EditorOption=VIM /o:SSHOption=OpenSSH /o:UseCredentialManager=Enabled /o:PerformanceTweaksFSCache=Enabled /o:EnableSymlinks=Disabled /o:EnableFSMonitor=Disabled"
7-Zip のインストール(Windows 上) [クリックして展開]
管理者権限でコマンドプロンプトを起動する
(手順:Windowsキーまたはスタートメニュー → cmd と入力 → 右クリック → 「管理者として実行」)。
REM 7-Zip をシステム領域にインストール
winget install --scope machine --id 7zip.7zip -e --silent --disable-interactivity --force --accept-source-agreements --accept-package-agreements
REM 7-Zip のパス設定
powershell -NoProfile -Command "$p='C:\Program Files\7-Zip'; $c=[Environment]::GetEnvironmentVariable('Path','Machine'); if((Test-Path $p) -and $c -notlike \"*$p*\"){[Environment]::SetEnvironmentVariable('Path',\"$p;$c\",'Machine')}"
Dlib ライブラリのインストールと学習済みモデルのダウンロード [クリックして展開]
管理者権限でコマンドプロンプトを起動する
(手順:Windowsキーまたはスタートメニュー → cmd と入力 → 右クリック → 「管理者として実行」)。
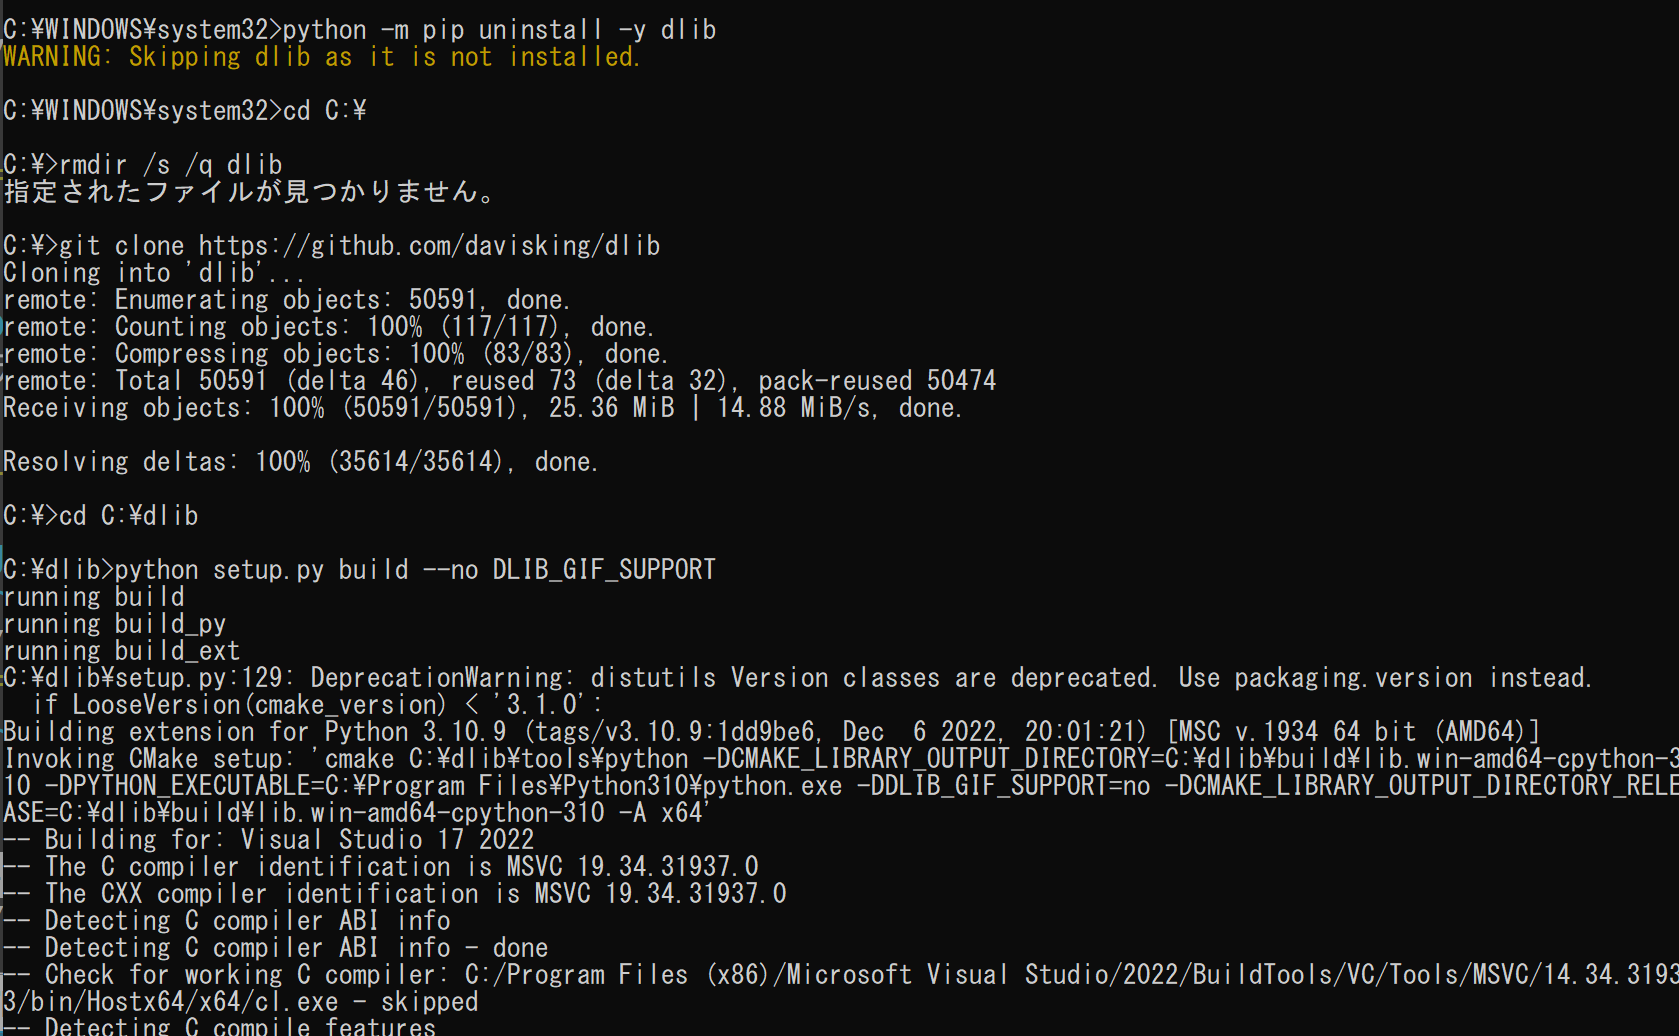
Dlib ライブラリのインストール
python -m pip uninstall -y --no-user dlib
cd C:\
rmdir /s /q dlib
git clone https://github.com/davisking/dlib
cd C:\dlib
pip install --no-user .
インストールの確認
python -c "import dlib; print( dlib.__version__ )"

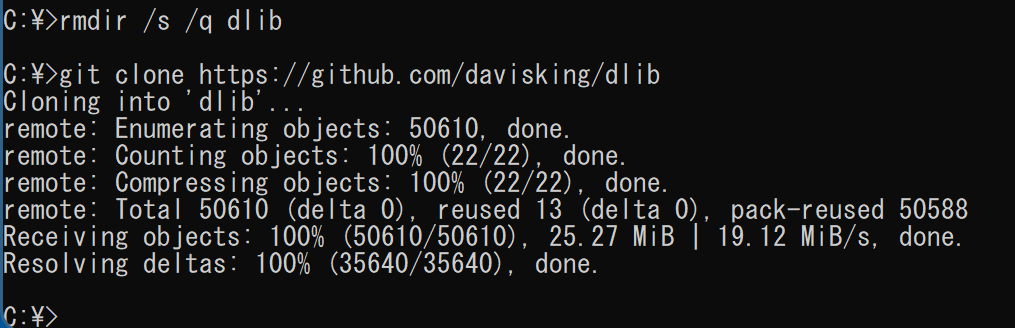
Dlib のソースコード等のダウンロード
cd C:\
rmdir /s /q dlib
git clone https://github.com/davisking/dlib
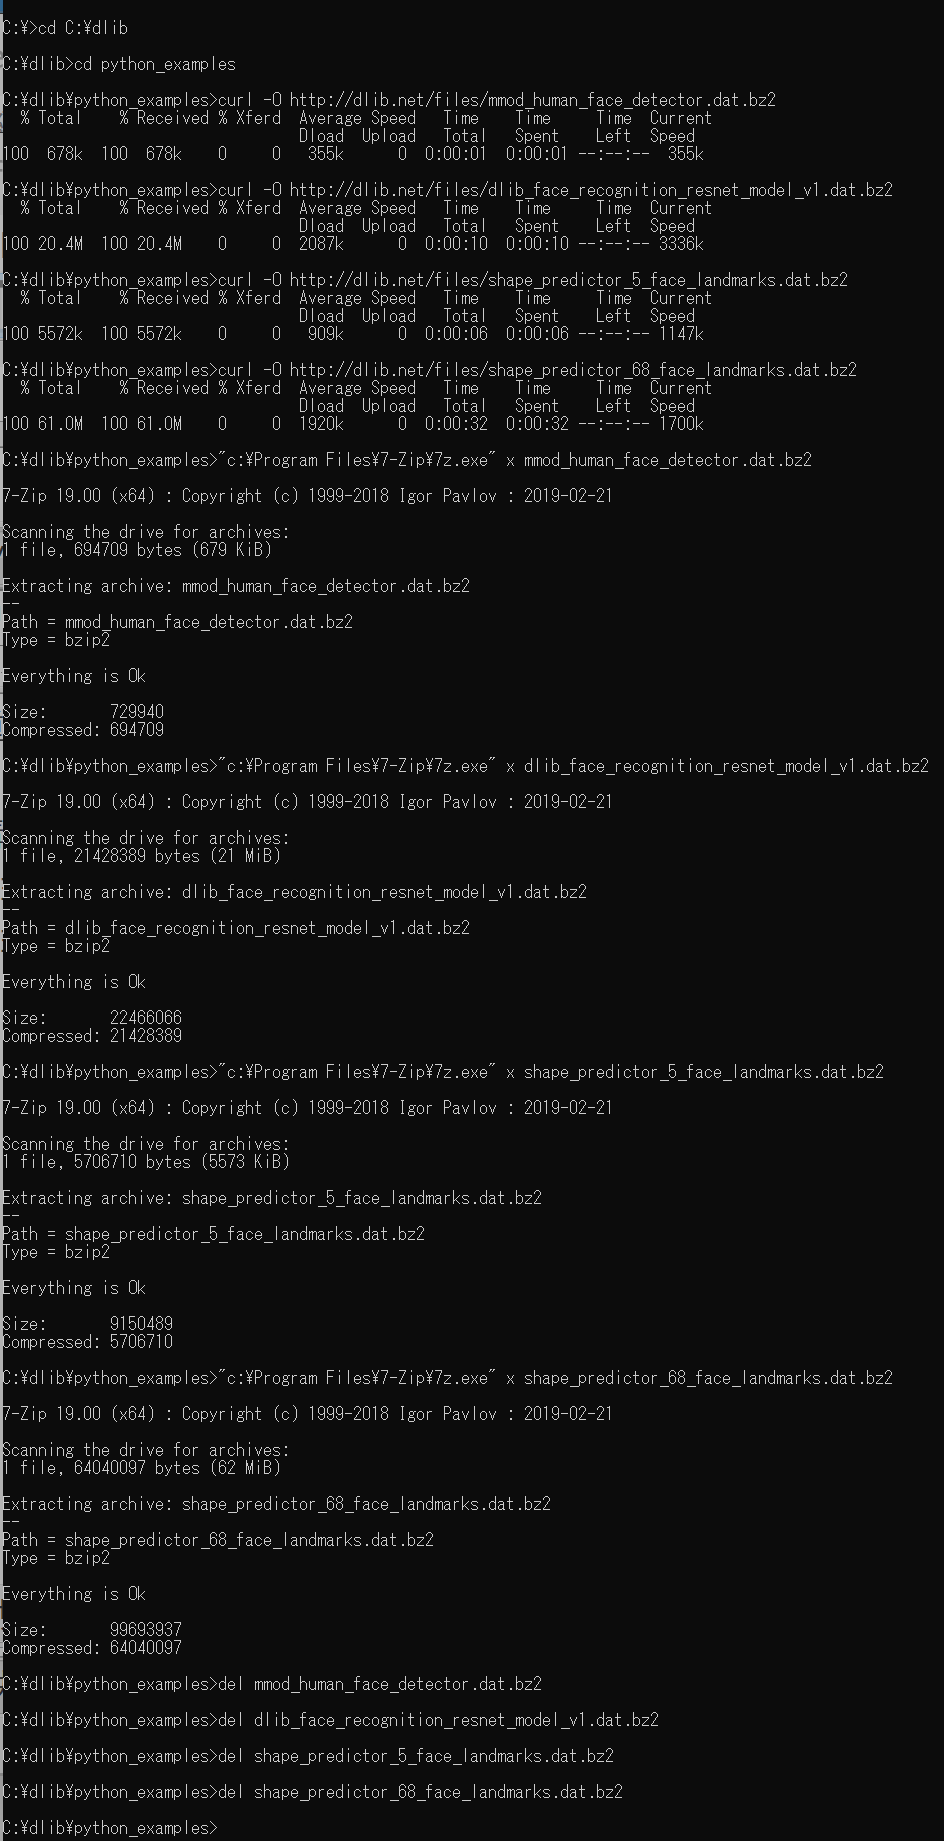
学習済みモデルのダウンロード
cd C:\dlib
cd python_examples
curl -O http://dlib.net/files/mmod_human_face_detector.dat.bz2
curl -O http://dlib.net/files/dlib_face_recognition_resnet_model_v1.dat.bz2
curl -O http://dlib.net/files/shape_predictor_5_face_landmarks.dat.bz2
curl -O http://dlib.net/files/shape_predictor_68_face_landmarks.dat.bz2
"c:\Program Files\7-Zip\7z.exe" x mmod_human_face_detector.dat.bz2
"c:\Program Files\7-Zip\7z.exe" x dlib_face_recognition_resnet_model_v1.dat.bz2
"c:\Program Files\7-Zip\7z.exe" x shape_predictor_5_face_landmarks.dat.bz2
"c:\Program Files\7-Zip\7z.exe" x shape_predictor_68_face_landmarks.dat.bz2
del mmod_human_face_detector.dat.bz2
del dlib_face_recognition_resnet_model_v1.dat.bz2
del shape_predictor_5_face_landmarks.dat.bz2
del shape_predictor_68_face_landmarks.dat.bz2
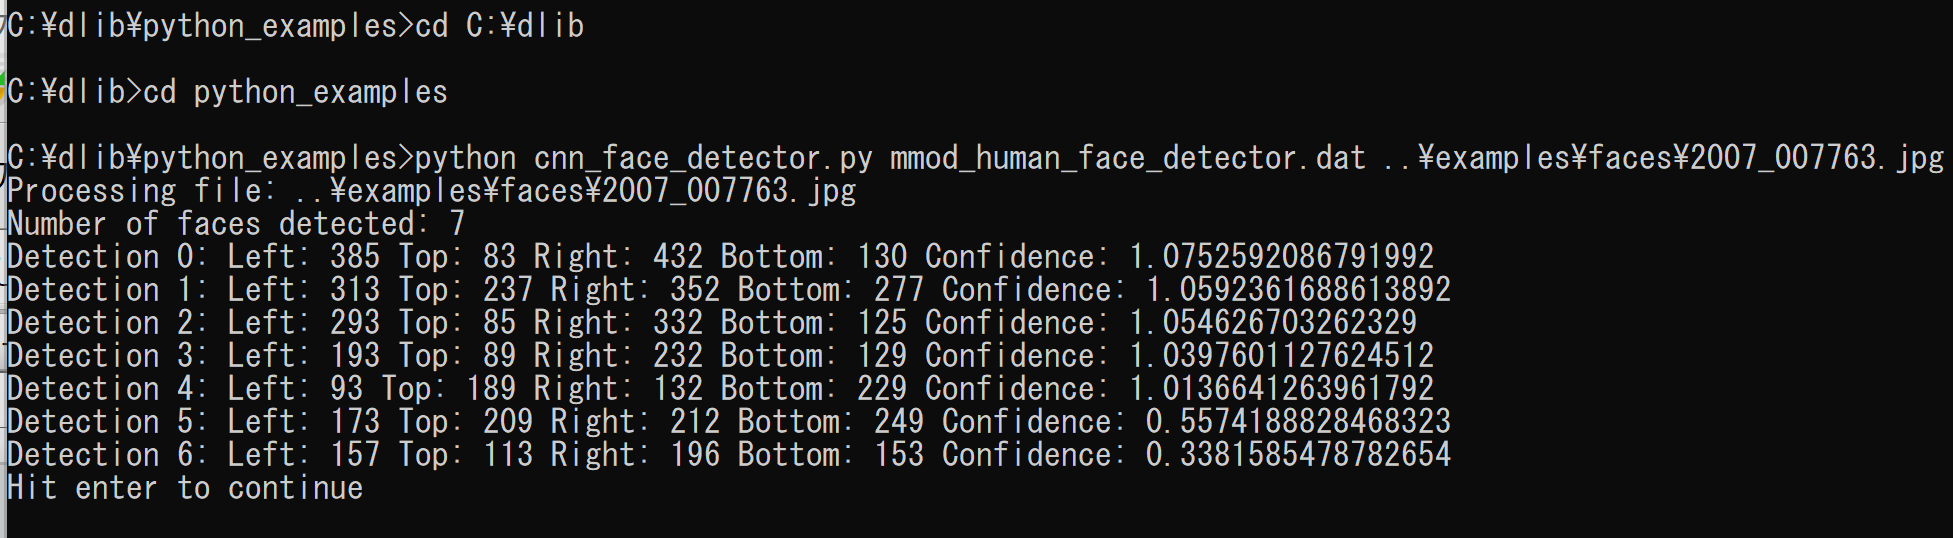
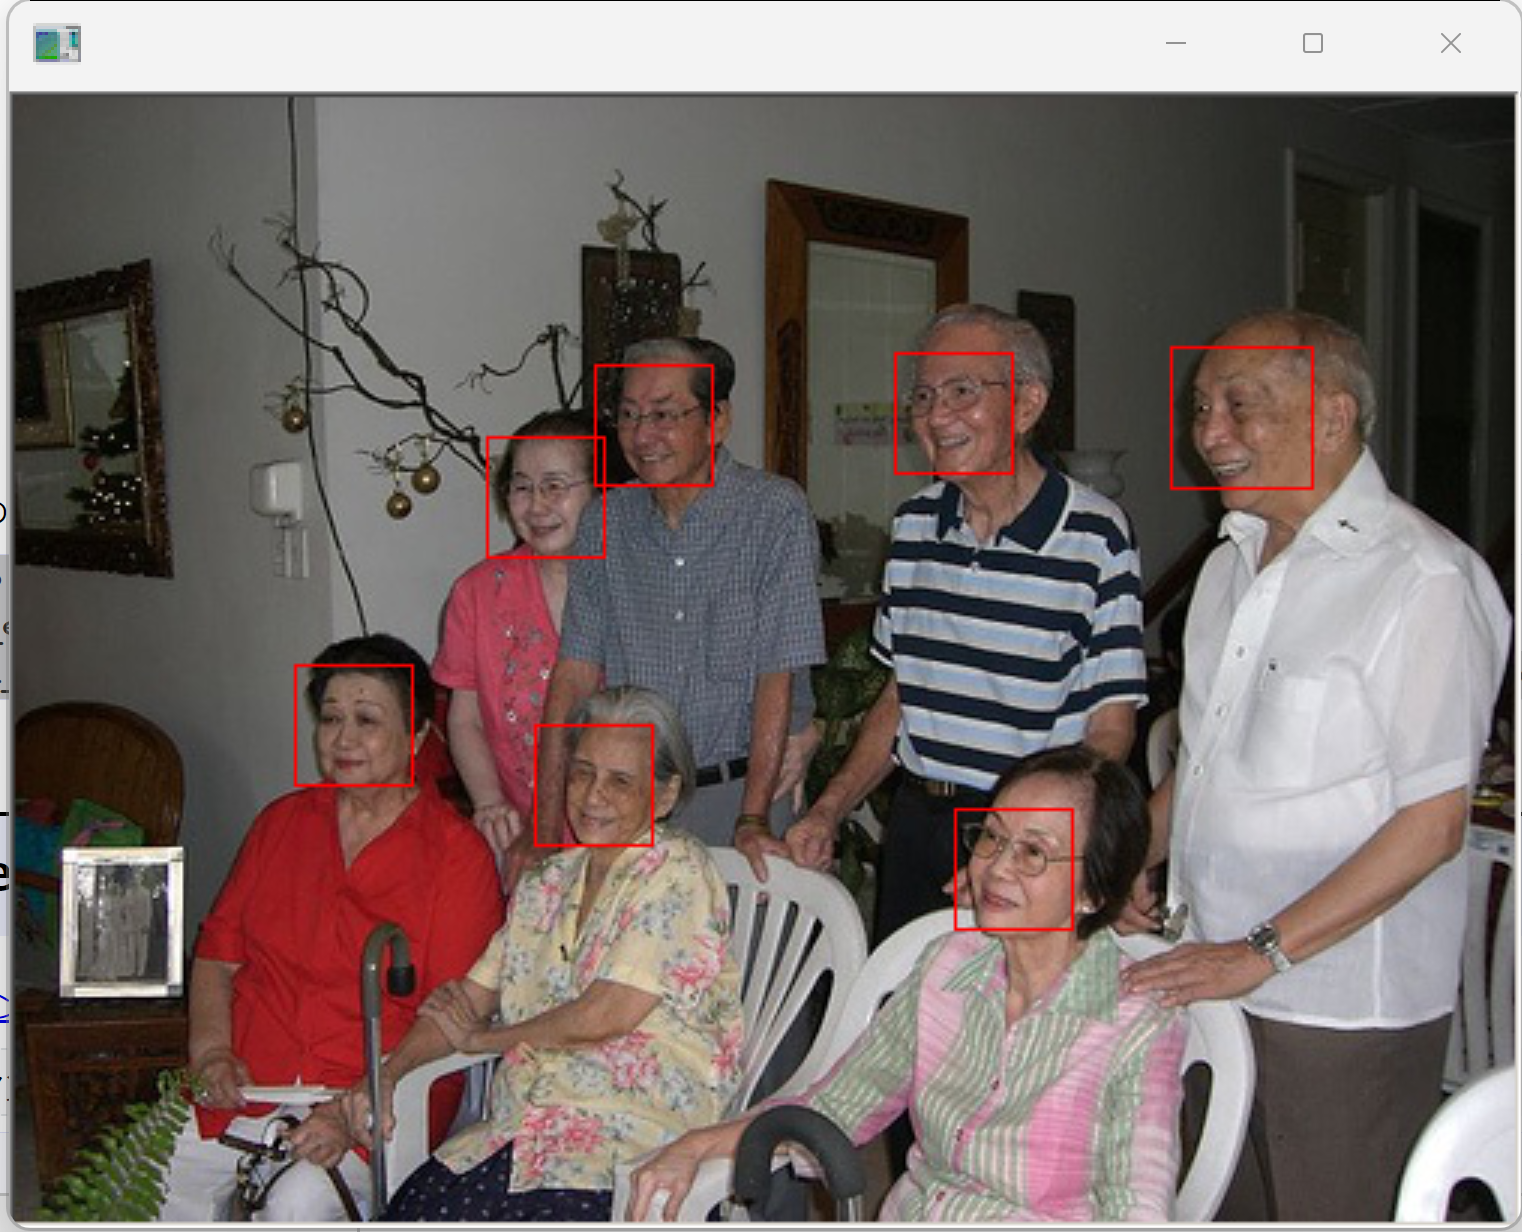
Dlib の動作確認
次を実行し,エラーメッセージが出ずに顔検出の結果が表示されれば OK とする.
cd C:\dlib
cd python_examples
python cnn_face_detector.py mmod_human_face_detector.dat ..\examples\faces\2007_007763.jpg
実行のための準備とその確認手順(Windows 前提)
2.1 プログラムファイルの準備
第4章のソースコードをテキストエディタ(メモ帳等)に貼り付け,cluster.py として保存する(文字コード:UTF-8).
保存先ディレクトリは以下のとおりである.
cd /d c:%HOMEPATH%
cd face_recognition
notepad cluster.py
2.2 実行コマンド
Windows のコマンドプロンプトを開き,ファイルの保存先ディレクトリで以下の Python プログラムを実行する.
python cluster.py ..\dlib\python_examples\shape_predictor_5_face_landmarks.dat ..\dlib\python_examples\dlib_face_recognition_resnet_model_v1.dat ..\examples\faces output_folderコマンドライン引数は順に,顔ランドマーク予測モデル,顔認識モデル,入力画像フォルダ,出力フォルダである.
2.3 動作確認チェックリスト
| 確認項目 | 期待される結果 |
|---|---|
| プログラム起動時 | 各 JPEG ファイルについて「Processing file: <ファイルパス>」と表示される |
| 顔検出処理 | 各画像について「Number of faces detected: <検出数>」と表示される |
| クラスタリング結果 | 「Number of clusters: <クラスタ数>」と表示され,各クラスタの番号が順に出力される |
| 出力フォルダ | 指定した出力フォルダ(output_folder)が作成されている |
| 出力画像ファイル | 「face_<クラスタ番号>_<クラスタ内での番号>.jpg」形式の 150×150 ピクセルの顔画像が生成されている |
| 完了メッセージ | 「Saved face chips to: <出力フォルダパス>」と表示される |
概要・使い方・実行上の注意
本プログラムは,Dlib に付属の python_examples\face_clustering.py(パブリックドメイン)を書き替えたものである.元のプログラムは最大クラスタの顔のみを出力するが,本プログラムはすべてのクラスタの顔画像を出力する.
処理の流れは以下のとおりである.
- Dlib の正面顔検出器(get_frontal_face_detector),顔ランドマーク予測器(shape_predictor),顔認識モデル(face_recognition_model_v1)を読み込む.
- 入力フォルダ内のすべての JPEG 画像(*.jpg)を順に処理する.
- 各画像で顔の矩形領域を検出し,各顔のランドマーク(特徴点)を取得する.
- 顔認識モデルにより各顔の 128 次元特徴量ベクトル(face descriptor)を計算する.
- 全特徴量ベクトルを chinese_whispers_clustering(閾値 0.5)でクラスタリングする.
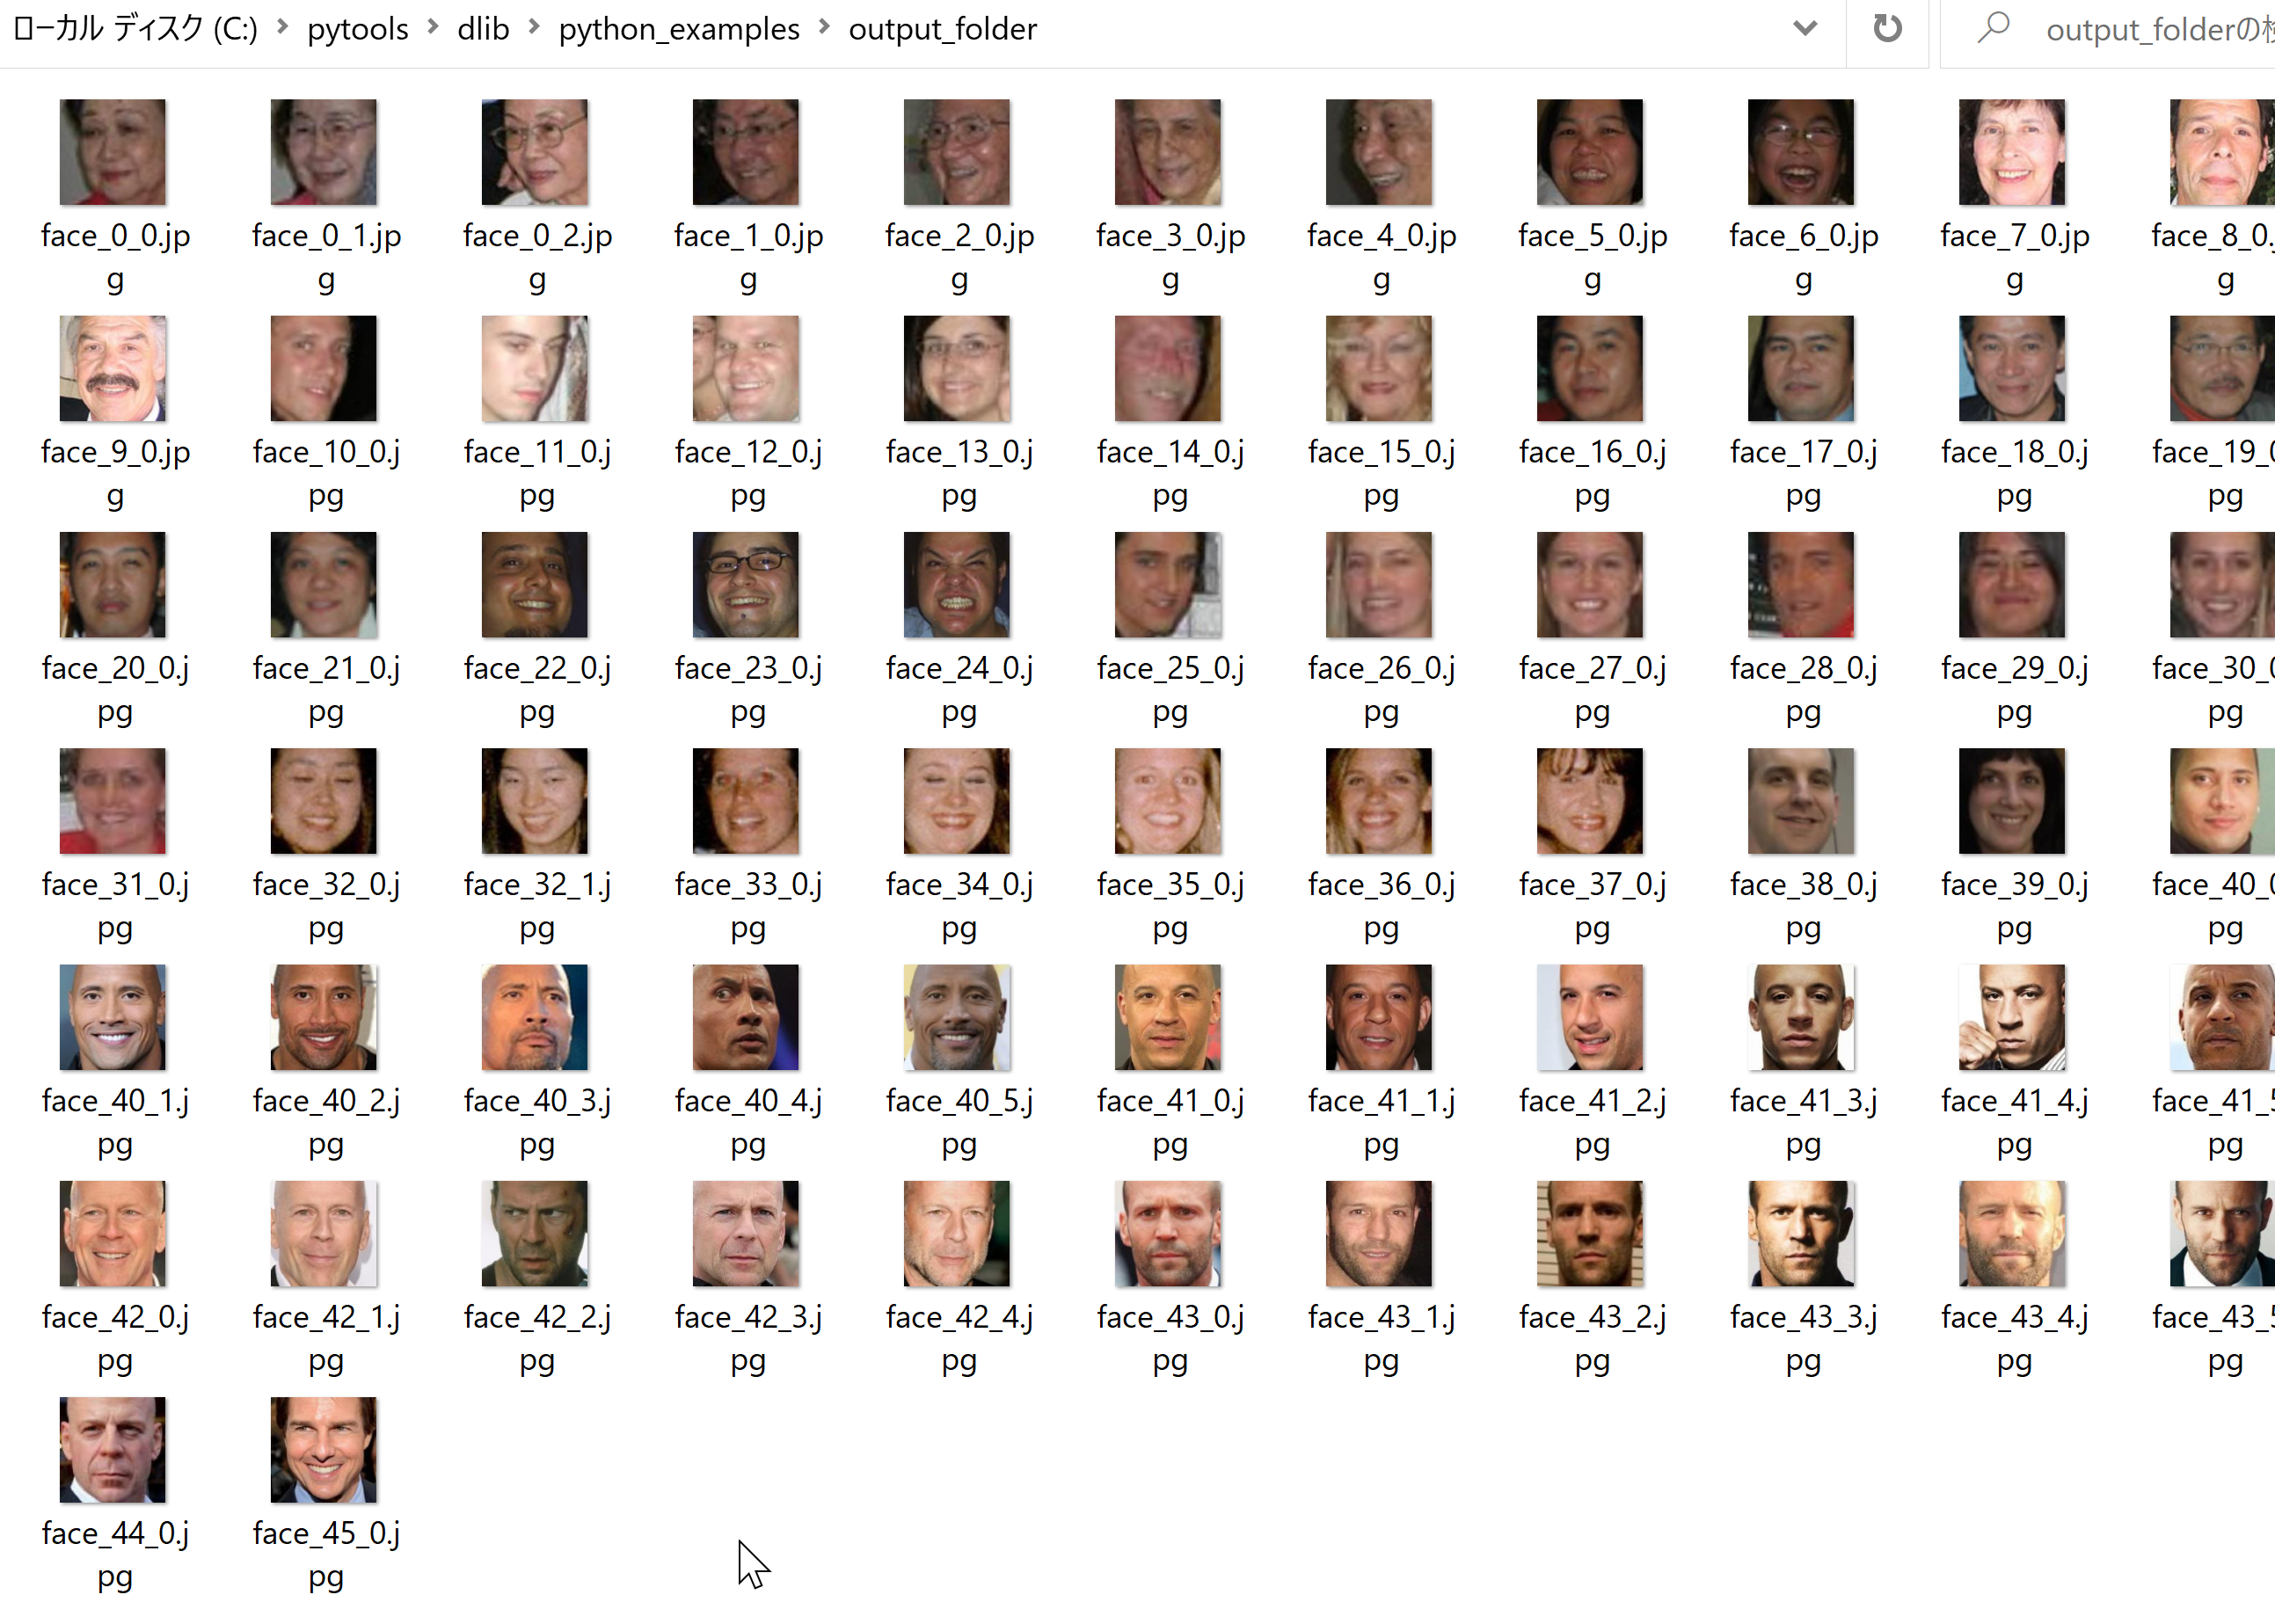
- クラスタごとに dlib.save_face_chip で 150×150 ピクセル(パディング 0.25)の画像ファイルを出力フォルダに保存する.
結果の画像ファイルは出力フォルダ(上記例では output_folder)に格納される.ファイル名は「face_<クラスタ番号>_<クラスタ内での番号>」となる.
次のような結果が得られる.
ソースコードは第4章に掲載している.
ソースコード
次のソースコードは,Dlib に付属の python_examples\face_clustering.py(パブリックドメイン)を書き替えたもの.太字が書き換え部分.顔画像のすべてを出力するように変更.
import sys
import os
import dlib
import glob

predictor_path = sys.argv[1]
face_rec_model_path = sys.argv[2]
faces_folder_path = sys.argv[3]
output_folder_path = sys.argv[4]

detector = dlib.get_frontal_face_detector()
sp = dlib.shape_predictor(predictor_path)
facerec = dlib.face_recognition_model_v1(face_rec_model_path)

descriptors = []
images = []

for f in glob.glob(os.path.join(faces_folder_path, "*.jpg")):
    print("Processing file: {}".format(f))
    img = dlib.load_rgb_image(f)
    dets = detector(img, 1)
    print("Number of faces detected: {}".format(len(dets)))
    for k, d in enumerate(dets):
        shape = sp(img, d)
        descriptors.append(facerec.compute_face_descriptor(img, shape))
        images.append((img, shape))

labels = dlib.chinese_whispers_clustering(descriptors, 0.5)
num_classes = len(set(labels))
print("Number of clusters: {}".format(num_classes))

os.makedirs(output_folder_path, exist_ok=True)

for i in range(num_classes):
    print(i)
    indices = [k for k, label in enumerate(labels) if label == i]
    for k, index in enumerate(indices):
        img, shape = images[index]
        file_path = os.path.join(output_folder_path, "face_{}_{}".format(i, k))
        dlib.save_face_chip(img, shape, file_path, size=150, padding=0.25)

print("Saved face chips to: {}".format(output_folder_path))
まとめ
Dlib の顔検出・顔認識モデル
Dlib は正面顔検出器,顔ランドマーク予測器,顔認識モデルを提供しており,本プログラムではこれら3つを組み合わせて顔の検出から特徴量計算までを行う.
128 次元顔特徴量ベクトル
顔認識モデル(face_recognition_model_v1)により各顔の 128 次元特徴量ベクトル(face descriptor)を計算する.このベクトルがクラスタリングの類似度計算の基盤となる.
chinese_whispers_clustering
Dlib の chinese_whispers_clustering を閾値 0.5 で適用し,クラスタ数を事前に指定せず顔の自動分類を行う.同一人物と推定される顔が同じクラスタにまとめられる.
クラスタリング結果の画像出力
dlib.save_face_chip により,クラスタごとの顔画像を 150×150 ピクセル(パディング 0.25)で出力する.ファイル名は「face_<クラスタ番号>_<クラスタ内での番号>」の形式となる.
Windows 上での環境構築
本プログラムの実行には,Build Tools for Visual Studio 2026,Python 3.12,Git,7-Zip,Dlib のインストールおよび Dlib の学習済みモデルのダウンロードが必要である.