face_recognition による顔検出,顔のランドマーク,顔検証の Python プログラム(Dlib,ageitgey/face_recognition,Python を使用)(Windows 上)
1. エグゼクティブサマリー
本記事では,face_recognition による顔検出,顔のランドマーク,顔検証の Python プログラム(Dlib,ageitgey/face_recognition,Python を使用)について,Windows 上での環境構築からプログラムの実行までを解説する.
Dlibは,数多くの機能を持つ C++ ライブラリである.機能には,機械学習,数値計算,グラフィカルモデル推論,画像処理,スレッド,通信,GUI,データ圧縮・一貫性,テスト,さまざまなユーティリティなどがある.Python API もある.
本記事で扱うプログラムは以下の通りである.
- 顔検出:画像から顔の位置を検出し,座標を出力する
- 顔検出と画像表示:検出した顔を矩形で囲んで表示する
- 顔ランドマーク:chin, left_eyebrow, right_eyebrow, nose_bridge, left_eye, right_eye の情報を出力する
- 顔ランドマークと画像表示:ランドマーク点を画像上に描画する
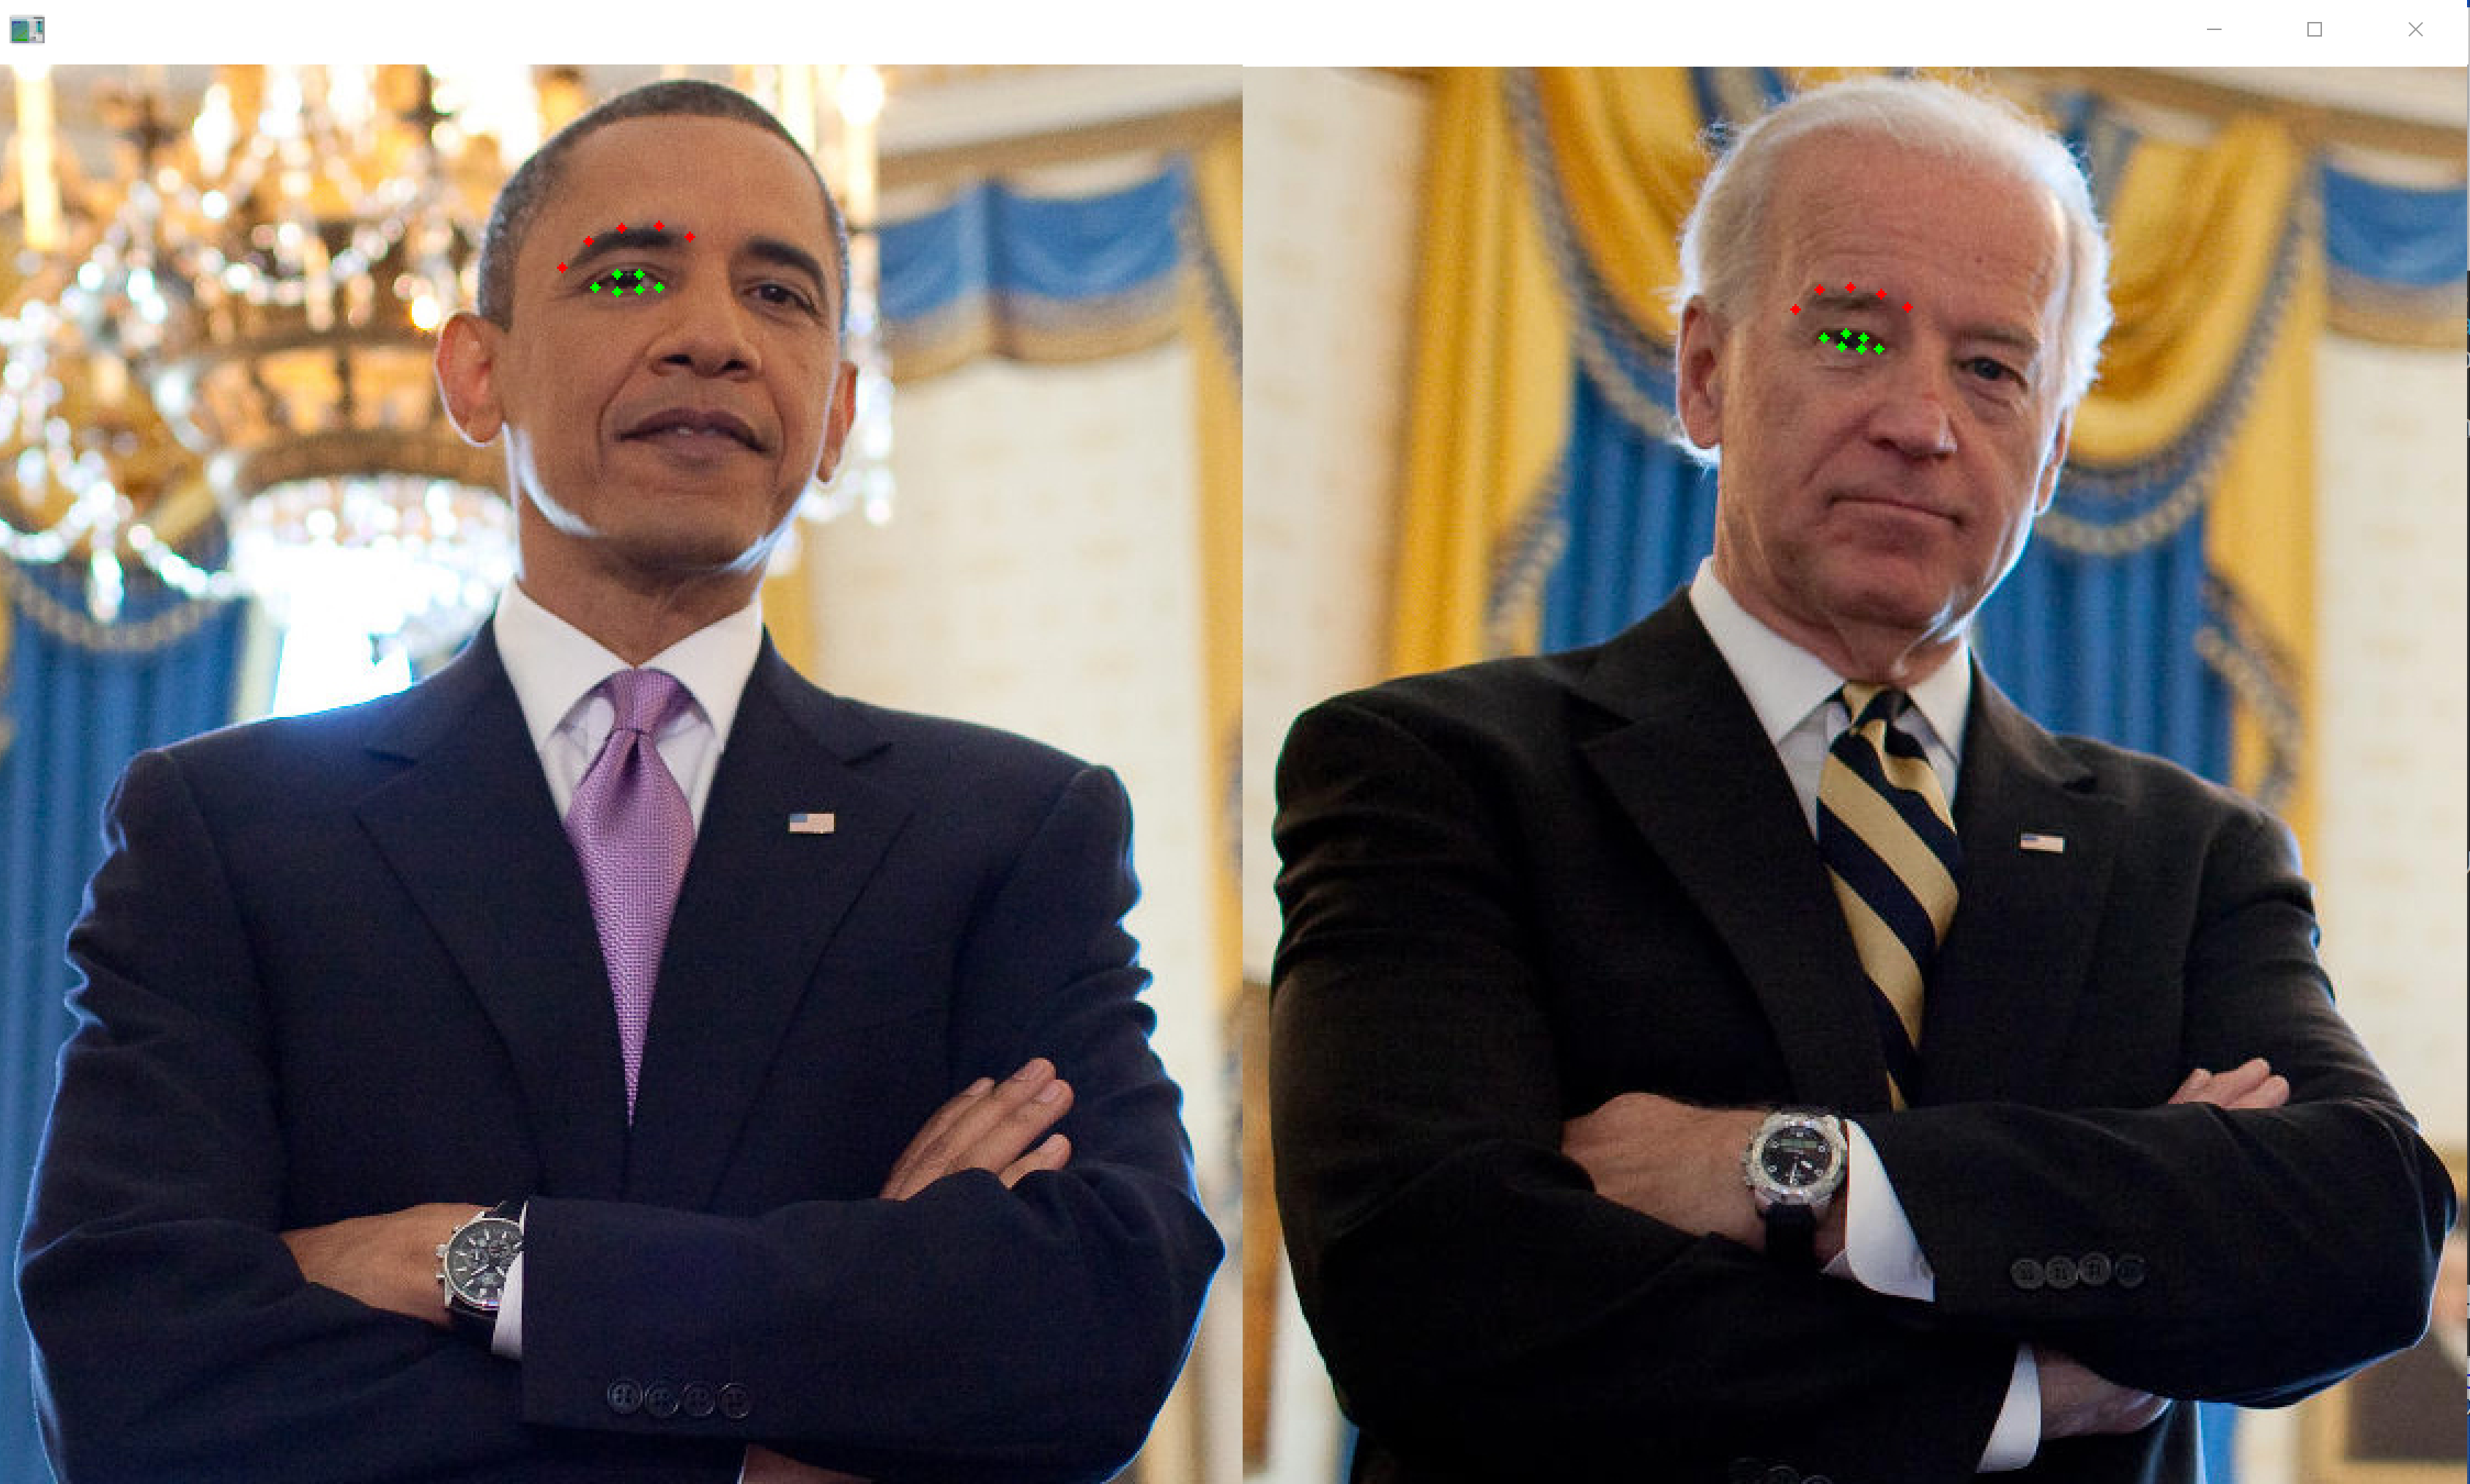
- left_eye と left_eyebrow の表示:左目と左眉のランドマークを色分けして描画する
- 顔検証 (face verification):2つの顔画像が同一人物か判定する
- 説明資料: Dlib の機能概要 [PDF], [パワーポイント]
- 顔情報処理の Python プログラム(Dlib,face_recognition を使用) について: 別ページ »にまとめ
- Windows で動く人工知能関係 Pythonアプリケーション,オープンソースソフトウエア: 別ページ »にまとめている.
2. 前準備(必要ソフトウェアの入手)
ここでは、最低限の事前準備について説明する。機械学習や深層学習を行う場合は、NVIDIA CUDA、Visual Studio、Cursorなどを追加でインストールすると便利である。これらについては別ページ https://www.kkaneko.jp/cc/dev/aiassist.htmlで詳しく解説しているので、必要に応じて参照してください。
Build Tools for Visual Studio 2026 のインストール(Windows 上) [クリックして展開]
Build Tools for Visual Studio は,Visual Studio の IDE を含まない C/C++ コンパイラ,ライブラリ,ビルドツール等のコマンドライン向け開発ツールセットである。インストール済みの場合、この手順は不要である。
管理者権限のコマンドプロンプトで以下を実行する。管理者権限のコマンドプロンプトを起動するには、Windows キーまたはスタートメニューから「cmd」と入力し、表示された「コマンドプロンプト」を右クリックして「管理者として実行」を選択する。
REM VC++ ランタイム
winget install --scope machine --id Microsoft.VCRedist.2015+.x64 -e --silent --disable-interactivity --force --accept-source-agreements --accept-package-agreements --override "/quiet /norestart"

REM Build Tools + Desktop development with C++(VCTools)+ 追加コンポーネント(一括)
winget list --id Microsoft.VisualStudio.BuildTools 2>nul | findstr /i "BuildTools" >nul 2>&1
if %ERRORLEVEL% EQU 0 (
    for /f "delims=" %P in ('"C:\Program Files (x86)\Microsoft Visual Studio\Installer\vswhere.exe" -products * -property installationPath') do start /wait "" "C:\Program Files (x86)\Microsoft Visual Studio\Installer\setup.exe" modify --installPath "%P" --add Microsoft.VisualStudio.Workload.VCTools --add Microsoft.VisualStudio.Workload.MSBuildTools --add Microsoft.VisualStudio.Component.VC.CMake.Project --add Microsoft.VisualStudio.Component.VC.Llvm.Clang --add Microsoft.VisualStudio.Component.VC.Llvm.ClangToolset --add Microsoft.VisualStudio.Component.Windows11SDK.26100 --includeRecommended --quiet --norestart
) else (
    winget install --scope machine --id Microsoft.VisualStudio.BuildTools -e --silent --disable-interactivity --force --accept-source-agreements --accept-package-agreements --override "--quiet --wait --norestart --nocache --add Microsoft.VisualStudio.Workload.VCTools --includeRecommended --add Microsoft.VisualStudio.Workload.MSBuildTools --add Microsoft.VisualStudio.Component.VC.CMake.Project --add Microsoft.VisualStudio.Component.VC.Llvm.Clang --add Microsoft.VisualStudio.Component.VC.Llvm.ClangToolset --add Microsoft.VisualStudio.Component.Windows11SDK.26100"
)
REM  何らかの理由で BuildTools の動作がおかしくなった場合は,以下を実行すると,既存のインストールのファイル破損・欠損を修復し正常な状態に復元する効果がある.
REM "C:\Program Files (x86)\Microsoft Visual Studio\Installer\setup.exe" repair --installPath "C:\Program Files (x86)\Microsoft Visual Studio\18\BuildTools" --quiet --norestart
REM 以下で正常であることを確認する.パスが表示されれば正常である.
REM "C:\Program Files (x86)\Microsoft Visual Studio\Installer\vswhere.exe" -products * -requires Microsoft.VisualStudio.Workload.VCTools -property installationPath
--add で追加されるコンポーネント
上記のコマンドでは,まず Build Tools 本体と Visual C++ 再頒布可能パッケージをインストールし,次に setup.exe を用いて以下のコンポーネントを追加している。
VCTools:C++ デスクトップ開発ワークロード(--includeRecommendedにより、MSVC コンパイラ、C++ AddressSanitizer、vcpkg、CMake ツール、Windows 11 SDK 等の推奨コンポーネントが含まれる)VC.Llvm.Clang:Windows 向け C++ Clang コンパイラClangCL:clang-cl ツールセットを含むコンポーネントグループ(MSBuild から Clang を使用するために必要)VC.CMake.Project:Windows 向け C++ CMake ツールWindows11SDK.26100:Windows 11 SDK(ビルド 10.0.26100)
インストール完了の確認
winget list Microsoft.VisualStudio.BuildTools上記以外の追加のコンポーネントが必要になった場合は Visual Studio Installer で個別にインストールできる。
Visual Studio の機能を必要とする場合は、追加インストールできる。
Python 3.12 のインストール(Windows 上) [クリックして展開]
以下のいずれかの方法で Python 3.12 をインストールする。Python がインストール済みの場合、この手順は不要である。
方法1:winget によるインストール
管理者権限のコマンドプロンプトで以下を実行する。管理者権限のコマンドプロンプトを起動するには、Windows キーまたはスタートメニューから「cmd」と入力し、表示された「コマンドプロンプト」を右クリックして「管理者として実行」を選択する。
winget install --id Python.Python.3.12 -e --scope machine --silent --accept-source-agreements --accept-package-agreements --override "/quiet InstallAllUsers=1 PrependPath=1 Include_test=0 Include_pip=1 Include_launcher=1 InstallLauncherAllUsers=1 TargetDir=\"C:\Program Files\Python312\""
powershell -Command "$p='C:\Program Files\Python312'; $s=\"$p\Scripts\"; $m=[Environment]::GetEnvironmentVariable('Path','Machine'); if($m -notlike \"*$s*\") { [Environment]::SetEnvironmentVariable('Path', \"$p;$s;$m\", 'Machine') }"
--scope machine を指定することで、システム全体(全ユーザー向け)にインストールされる。このオプションの実行には管理者権限が必要である。インストール完了後、コマンドプロンプトを再起動すると PATH が自動的に設定される。
方法2:インストーラーによるインストール
- Python 公式サイト(https://www.python.org/downloads/)にアクセスし、「Download Python 3.x.x」ボタンから Windows 用インストーラーをダウンロードする。
- ダウンロードしたインストーラーを実行する。
- 初期画面の下部に表示される「Add python.exe to PATH」に必ずチェックを入れてから「Customize installation」を選択する。このチェックを入れ忘れると、コマンドプロンプトから
pythonコマンドを実行できない。 - 「Install Python 3.xx for all users」にチェックを入れ、「Install」をクリックする。
インストールの確認
コマンドプロンプトで以下を実行する。
python --versionバージョン番号(例:Python 3.12.x)が表示されればインストール成功である。「'python' は、内部コマンドまたは外部コマンドとして認識されていません。」と表示される場合は、インストールが正常に完了していない。
AIエディタ Windsurf のインストール(Windows 上) [クリックして展開]
Pythonプログラムの編集・実行には、AIエディタの利用を推奨する。ここでは、Windsurfのインストールを説明する。Windsurf がインストール済みの場合、この手順は不要である。
管理者権限のコマンドプロンプトで以下を実行する。管理者権限のコマンドプロンプトを起動するには、Windows キーまたはスタートメニューから「cmd」と入力し、表示された「コマンドプロンプト」を右クリックして「管理者として実行」を選択する。
winget install --scope machine --id Codeium.Windsurf -e --silent --disable-interactivity --force --accept-source-agreements --accept-package-agreements --custom "/SP- /SUPPRESSMSGBOXES /NORESTART /CLOSEAPPLICATIONS /DIR=""C:\Program Files\Windsurf"" /MERGETASKS=!runcode,addtopath,associatewithfiles,!desktopicon"
powershell -Command "$env:Path=[System.Environment]::GetEnvironmentVariable('Path','Machine')+';'+[System.Environment]::GetEnvironmentVariable('Path','User'); windsurf --install-extension MS-CEINTL.vscode-language-pack-ja --force; windsurf --install-extension ms-python.python --force; windsurf --install-extension Codeium.windsurfPyright --force"
--scope machine を指定することで、システム全体(全ユーザー向け)にインストールされる。このオプションの実行には管理者権限が必要である。インストール完了後、コマンドプロンプトを再起動すると PATH が自動的に設定される。
【関連する外部ページ】
Windsurf の公式ページ: https://windsurf.com/
Git のインストール(Windows 上) [クリックして展開]
管理者権限のコマンドプロンプトで以下を実行する。管理者権限のコマンドプロンプトを起動するには、Windows キーまたはスタートメニューから「cmd」と入力し、表示された「コマンドプロンプト」を右クリックして「管理者として実行」を選択する。
REM Git をシステム領域にインストール
winget install --scope machine --id Git.Git -e --silent --disable-interactivity --force --accept-source-agreements --accept-package-agreements --override "/VERYSILENT /NORESTART /NOCANCEL /SP- /CLOSEAPPLICATIONS /RESTARTAPPLICATIONS /COMPONENTS=""icons,ext\reg\shellhere,assoc,assoc_sh"" /o:PathOption=Cmd /o:CRLFOption=CRLFCommitAsIs /o:BashTerminalOption=MinTTY /o:DefaultBranchOption=main /o:EditorOption=VIM /o:SSHOption=OpenSSH /o:UseCredentialManager=Enabled /o:PerformanceTweaksFSCache=Enabled /o:EnableSymlinks=Disabled /o:EnableFSMonitor=Disabled"
7-Zip のインストール(Windows 上) [クリックして展開]
管理者権限のコマンドプロンプトで以下を実行する。管理者権限のコマンドプロンプトを起動するには、Windows キーまたはスタートメニューから「cmd」と入力し、表示された「コマンドプロンプト」を右クリックして「管理者として実行」を選択する。
REM 7-Zip をシステム領域にインストール
winget install --scope machine --id 7zip.7zip -e --silent --disable-interactivity --force --accept-source-agreements --accept-package-agreements
REM 7-Zip のパス設定
powershell -NoProfile -Command "$p='C:\Program Files\7-Zip'; $c=[Environment]::GetEnvironmentVariable('Path','Machine'); if((Test-Path $p) -and $c -notlike \"*$p*\"){[Environment]::SetEnvironmentVariable('Path',\"$p;$c\",'Machine')}"
Dlib ライブラリのインストールと学習済みモデルのダウンロード [クリックして展開]
管理者権限のコマンドプロンプトで以下を実行する。管理者権限のコマンドプロンプトを起動するには、Windows キーまたはスタートメニューから「cmd」と入力し、表示された「コマンドプロンプト」を右クリックして「管理者として実行」を選択する。
Dlib ライブラリのインストール
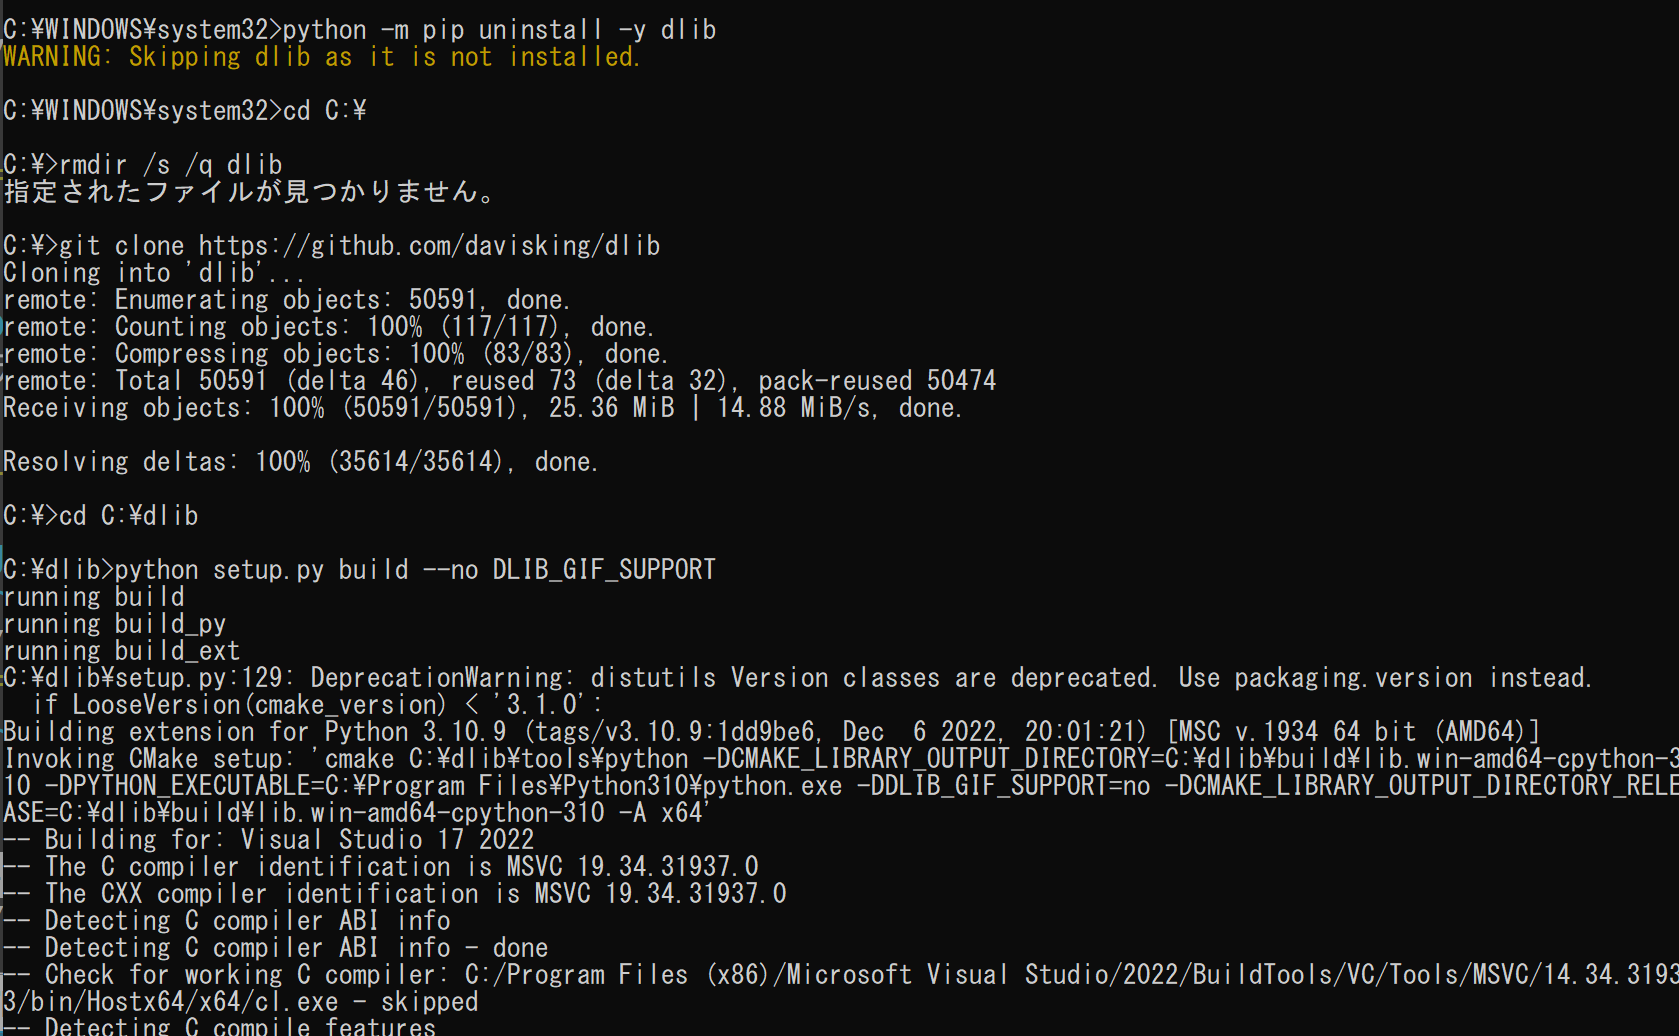
python -m pip uninstall -y dlib
cd C:\
rmdir /s /q dlib
git clone https://github.com/davisking/dlib
cd C:\dlib
python setup.py build --no DLIB_GIF_SUPPORT
python setup.py install --no DLIB_GIF_SUPPORT
インストールの確認
python -c "import dlib; print( dlib.__version__ )"

Dlib のソースコード等のダウンロード
cd C:\
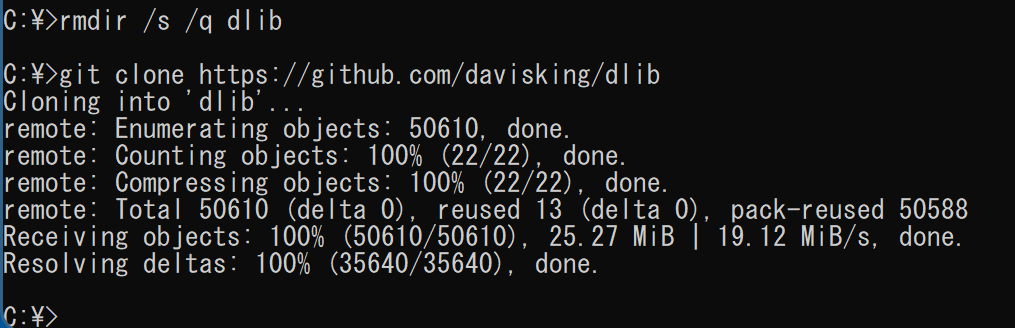
rmdir /s /q dlib
git clone https://github.com/davisking/dlib
学習済みモデルのダウンロード
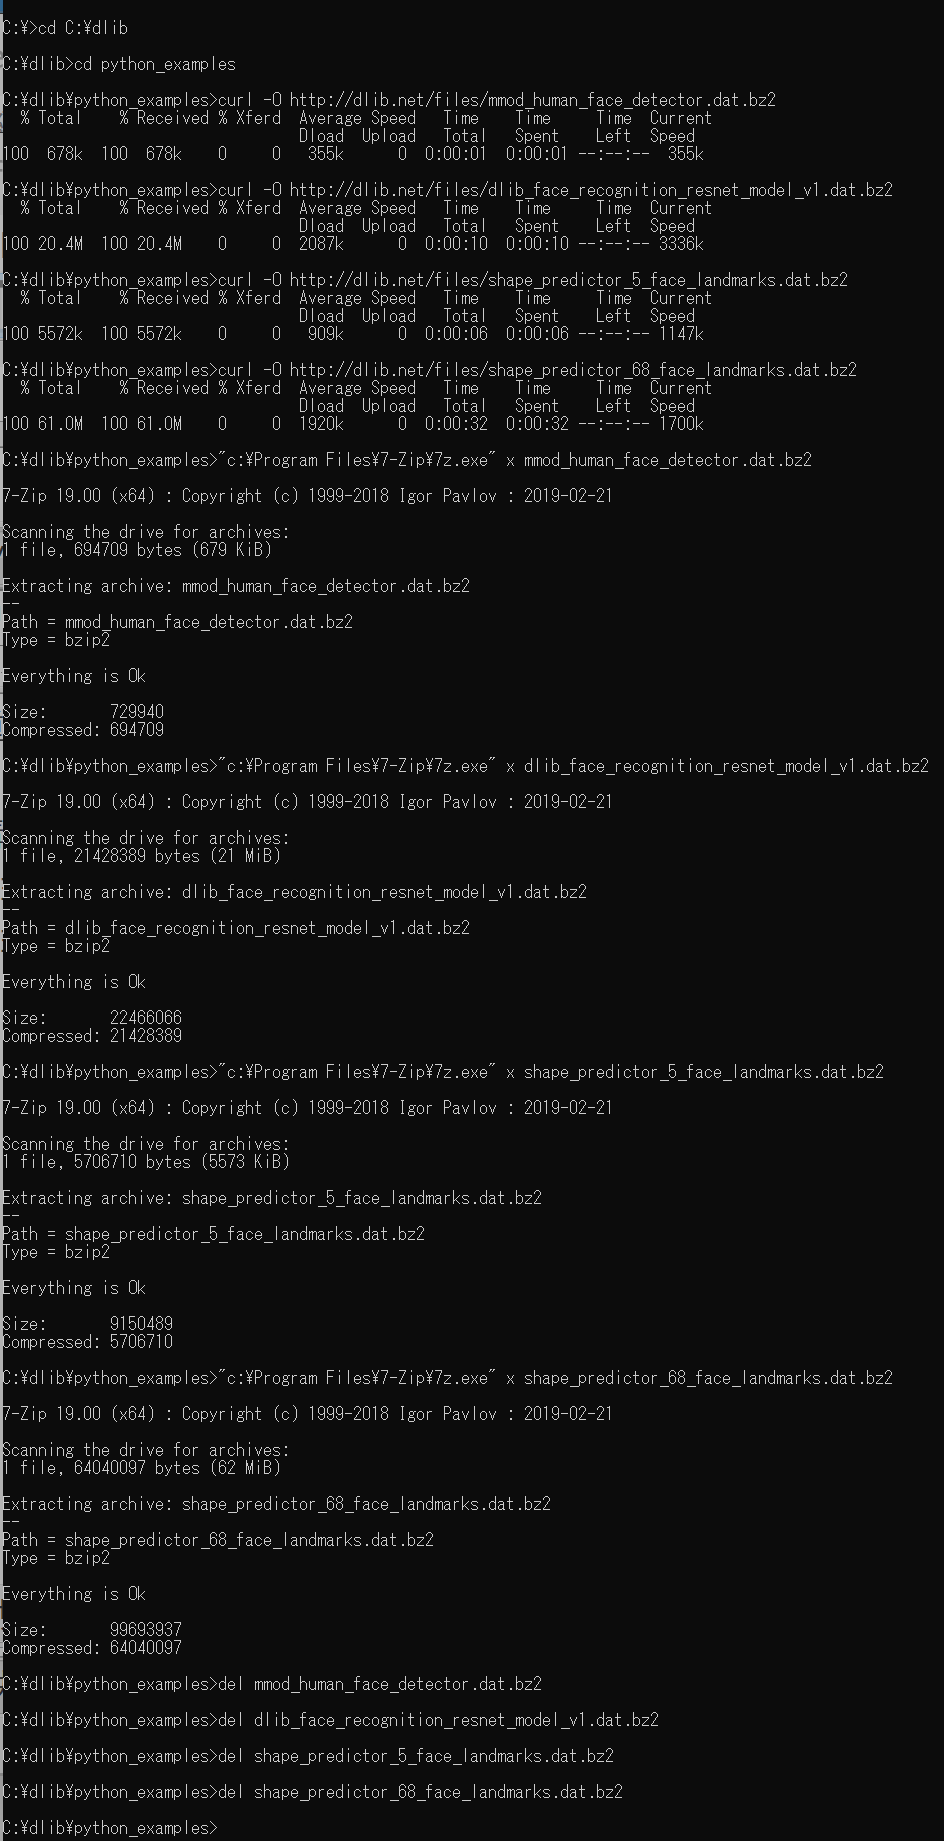
cd C:\dlib
cd python_examples
curl -O http://dlib.net/files/mmod_human_face_detector.dat.bz2
curl -O http://dlib.net/files/dlib_face_recognition_resnet_model_v1.dat.bz2
curl -O http://dlib.net/files/shape_predictor_5_face_landmarks.dat.bz2
curl -O http://dlib.net/files/shape_predictor_68_face_landmarks.dat.bz2
"c:\Program Files\7-Zip\7z.exe" x mmod_human_face_detector.dat.bz2
"c:\Program Files\7-Zip\7z.exe" x dlib_face_recognition_resnet_model_v1.dat.bz2
"c:\Program Files\7-Zip\7z.exe" x shape_predictor_5_face_landmarks.dat.bz2
"c:\Program Files\7-Zip\7z.exe" x shape_predictor_68_face_landmarks.dat.bz2
del mmod_human_face_detector.dat.bz2
del dlib_face_recognition_resnet_model_v1.dat.bz2
del shape_predictor_5_face_landmarks.dat.bz2
del shape_predictor_68_face_landmarks.dat.bz2
Dlib の動作確認
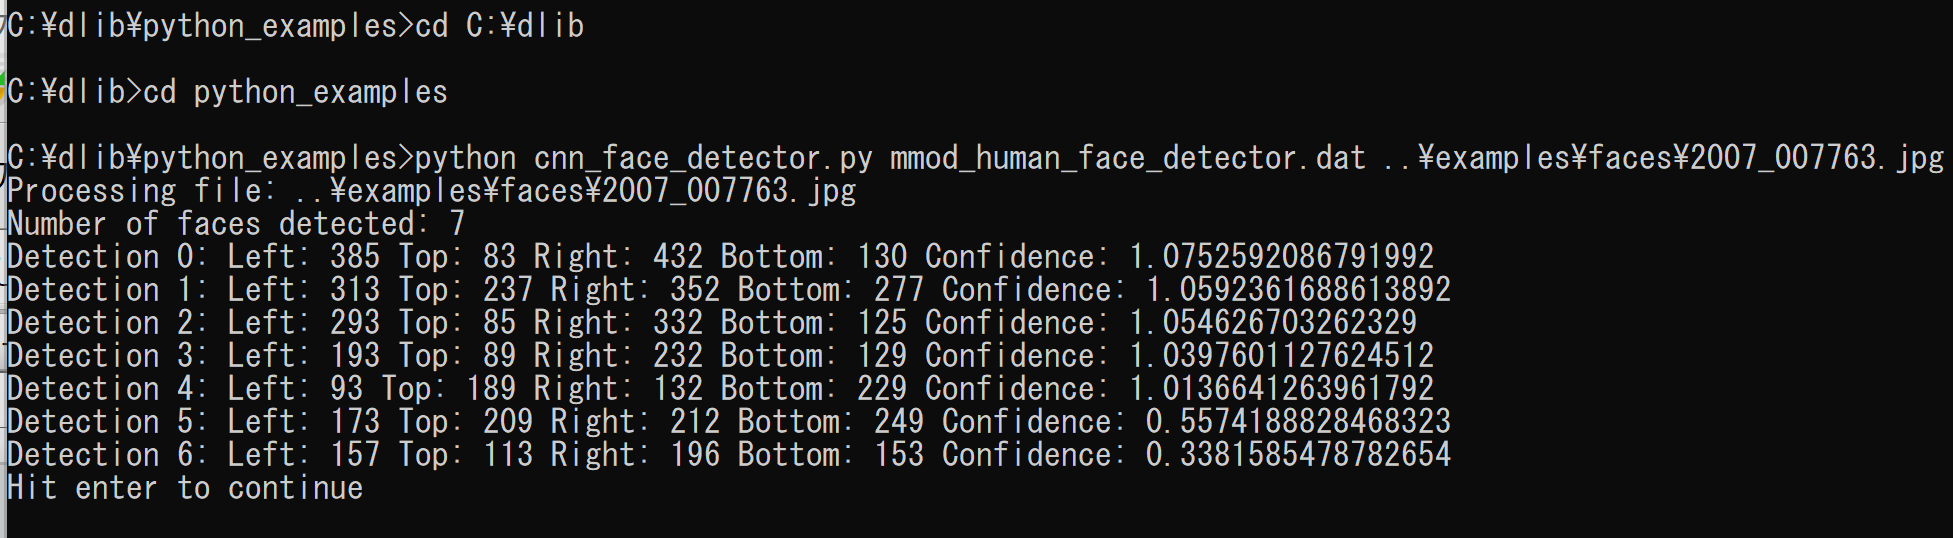
次を実行し,エラーメッセージが出ずに顔検出の結果が表示されれば OK とする.
cd C:\dlib
cd python_examples
python cnn_face_detector.py mmod_human_face_detector.dat ..\examples\faces\2007_007763.jpg
必要なライブラリのインストール [クリックして展開]
管理者権限のコマンドプロンプトで以下を実行する。管理者権限のコマンドプロンプトを起動するには、Windows キーまたはスタートメニューから「cmd」と入力し、表示された「コマンドプロンプト」を右クリックして「管理者として実行」を選択する。
python -m pip install -U opencv-python opencv-contrib-python numpy scikit-image scikit-learn
ageitgey の face_recognition のインストール [クリックして展開]
管理者権限のコマンドプロンプトで以下を実行する。管理者権限のコマンドプロンプトを起動するには、Windows キーまたはスタートメニューから「cmd」と入力し、表示された「コマンドプロンプト」を右クリックして「管理者として実行」を選択する。
cd /d c:%HOMEPATH%
rmdir /s /q face_recognition
git clone https://github.com/ageitgey/face_recognition
cd face_recognition
copy C:\dlib\python_examples\shape_predictor_68_face_landmarks.dat .
python setup.py build
python setup.py install
インストール確認
バージョン番号が表示されればインストール成功である.
python -c "import face_recognition; print(face_recognition.__version__)"
3. 実行のための準備とその確認手順(Windows 前提)
3.1 プログラムファイルの準備
第5章に掲載するソースコード(画像表示を伴うプログラム)をテキストエディタ(メモ帳等)に貼り付け,a.py として %HOMEPATH%\face_recognition ディレクトリに保存する(文字コード:UTF-8).
cd /d c:%HOMEPATH%
cd face_recognition
notepad a.py
対話的に実行するプログラム(顔検出,顔ランドマーク,顔検証)は,Python インタプリタ上で直接入力して実行する.
また,以下の手順でファイルとディレクトリを準備する.
- Windows のコマンドプロンプトを開く
- 2つのディレクトリ known_people, unknown_pictures を作る
mkdir %HOMEPATH%\face_recognition\known_people
mkdir %HOMEPATH%\face_recognition\unknown_pictures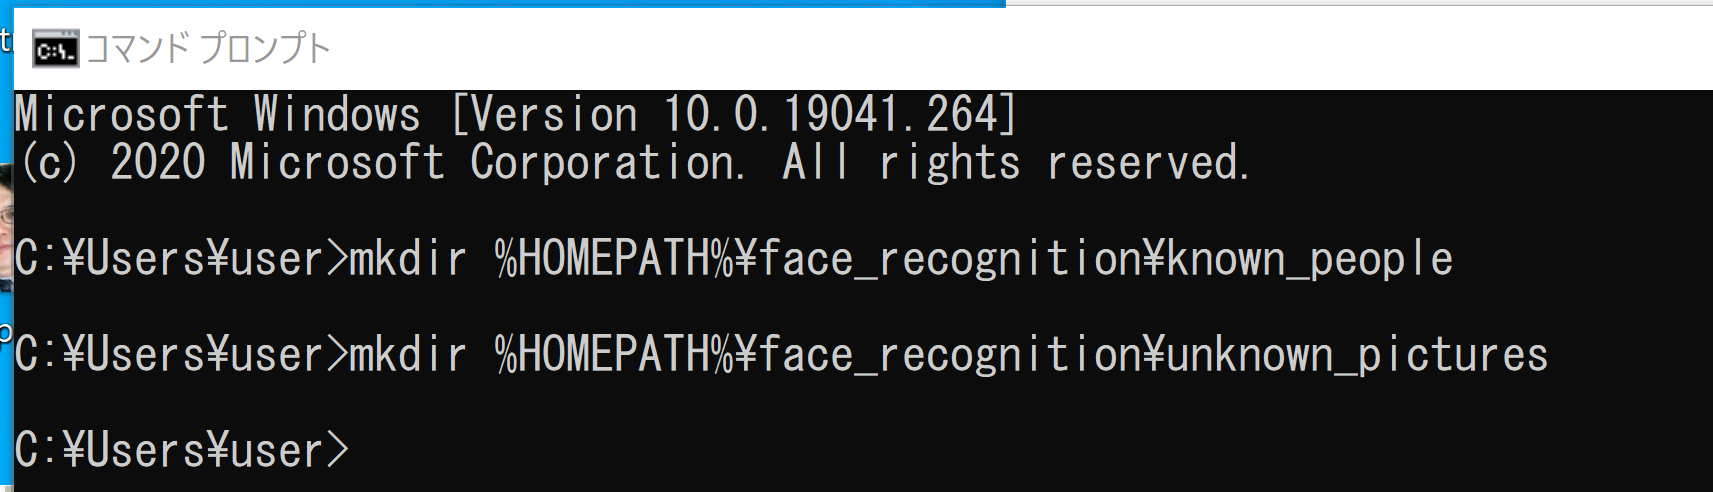
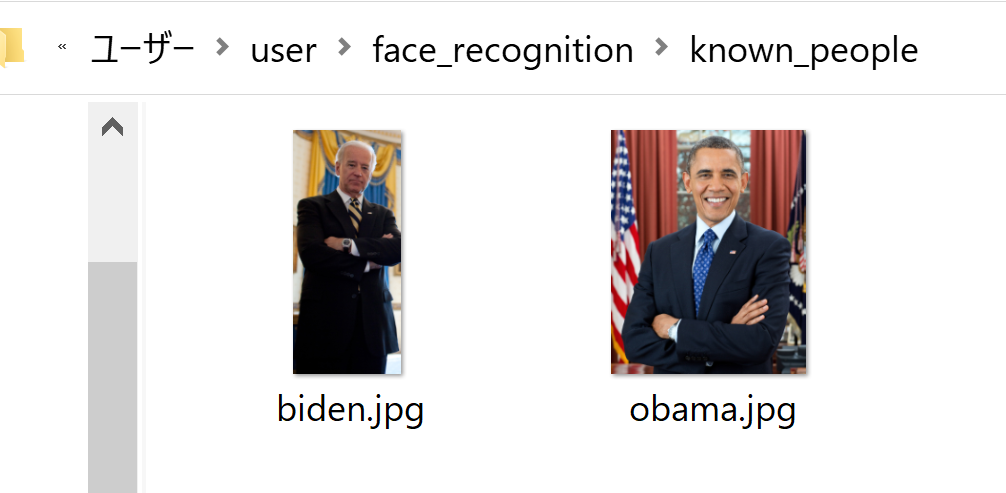
- %HOMEPATH%\face_recognition\examples にある顔画像ファイル「biden.jpg」と「obama.jpg」を,ディレクトリ known_people の下にコピーする
copy %HOMEPATH%\face_recognition\examples\biden.jpg %HOMEPATH%\face_recognition\known_people
copy %HOMEPATH%\face_recognition\examples\obama.jpg %HOMEPATH%\face_recognition\known_people
- ディレクトリ known_people の下に 2つの画像ファイルがあることを確認する
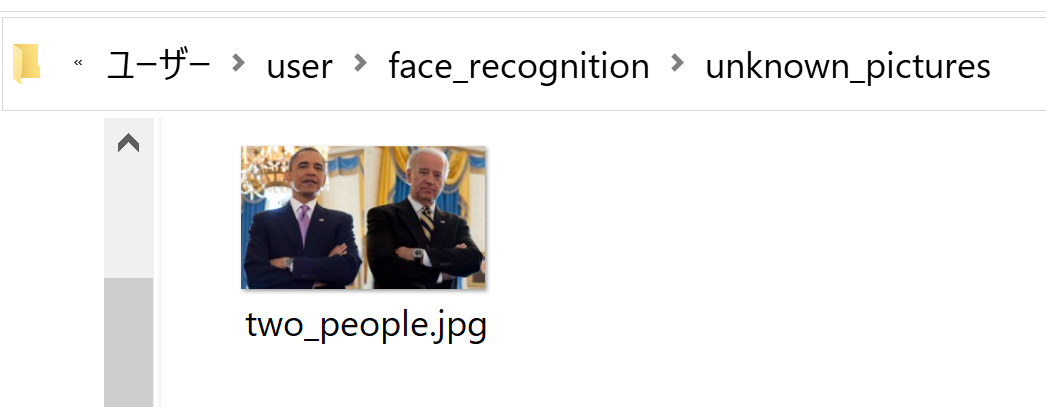
- 同様に「two_people.jpg」を,ディレクトリ unknown_pictures の下にコピーする
copy %HOMEPATH%\face_recognition\examples\two_people.jpg %HOMEPATH%\face_recognition\unknown_pictures
- ディレクトリ unknown_pictures の下に画像ファイルがあることを確認する
3.2 実行コマンド
対話的プログラムは,コマンドプロンプトでホームディレクトリに移動してから Python インタプリタを起動し実行する.
cd /d c:%HOMEPATH%
python
ファイルとして保存したプログラム(a.py)は以下で実行する.
cd /d c:%HOMEPATH%
cd face_recognition
python a.py
3.3 動作確認チェックリスト
| 確認項目 | 期待される結果 |
|---|---|
| 顔検出プログラムの実行 | 顔の位置座標(top, right, bottom, left のタプル)が出力される |
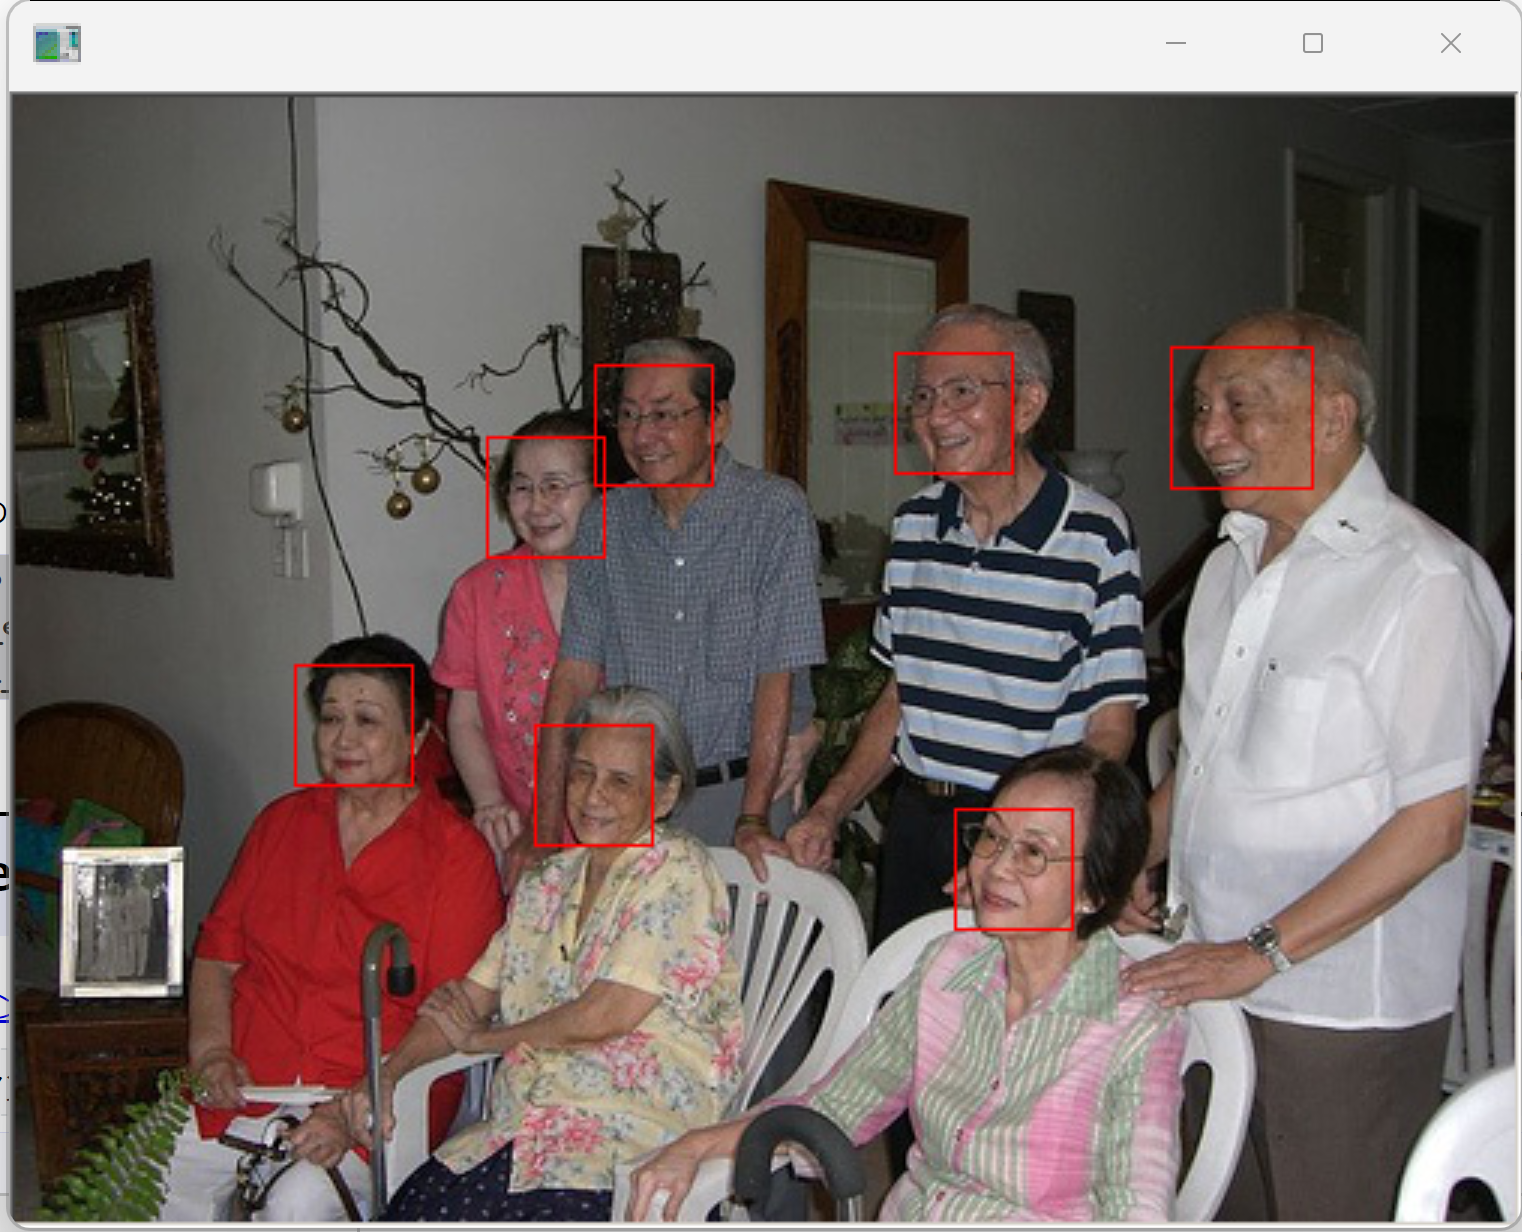
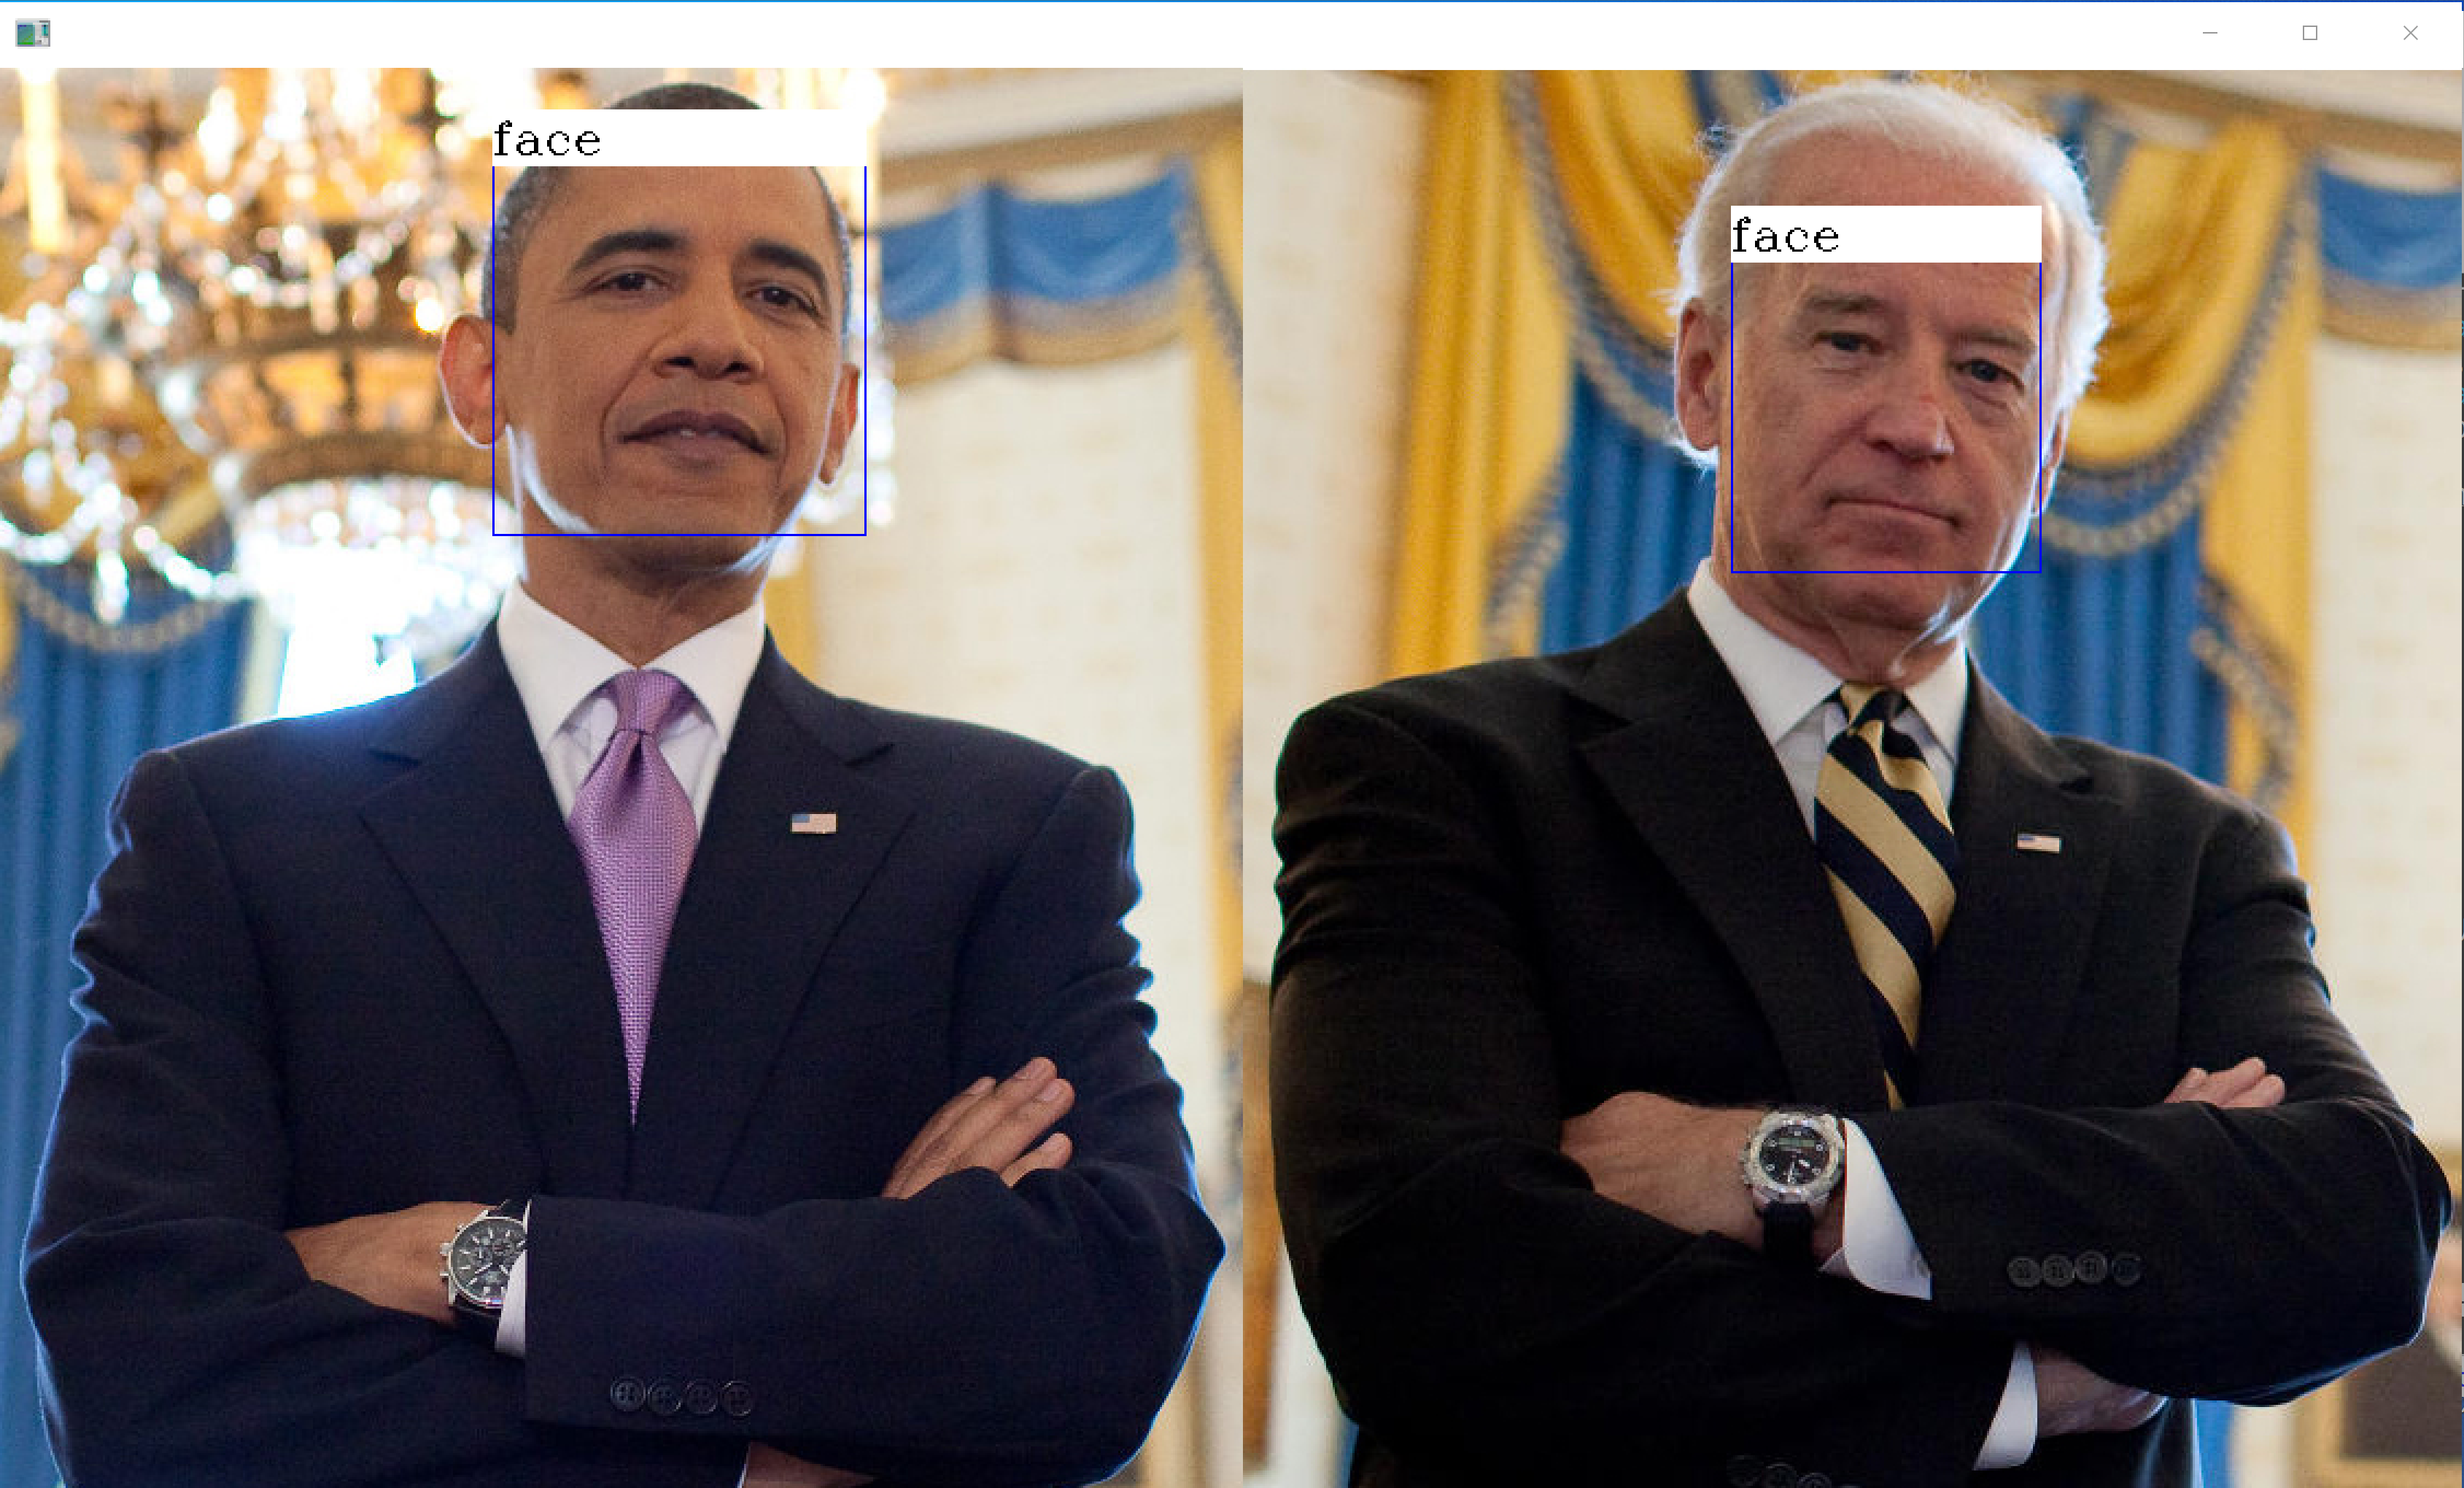
| 顔検出と画像表示プログラムの実行 | 検出された顔の数がコンソールに表示され,顔を矩形で囲んだ画像ウインドウが表示される |
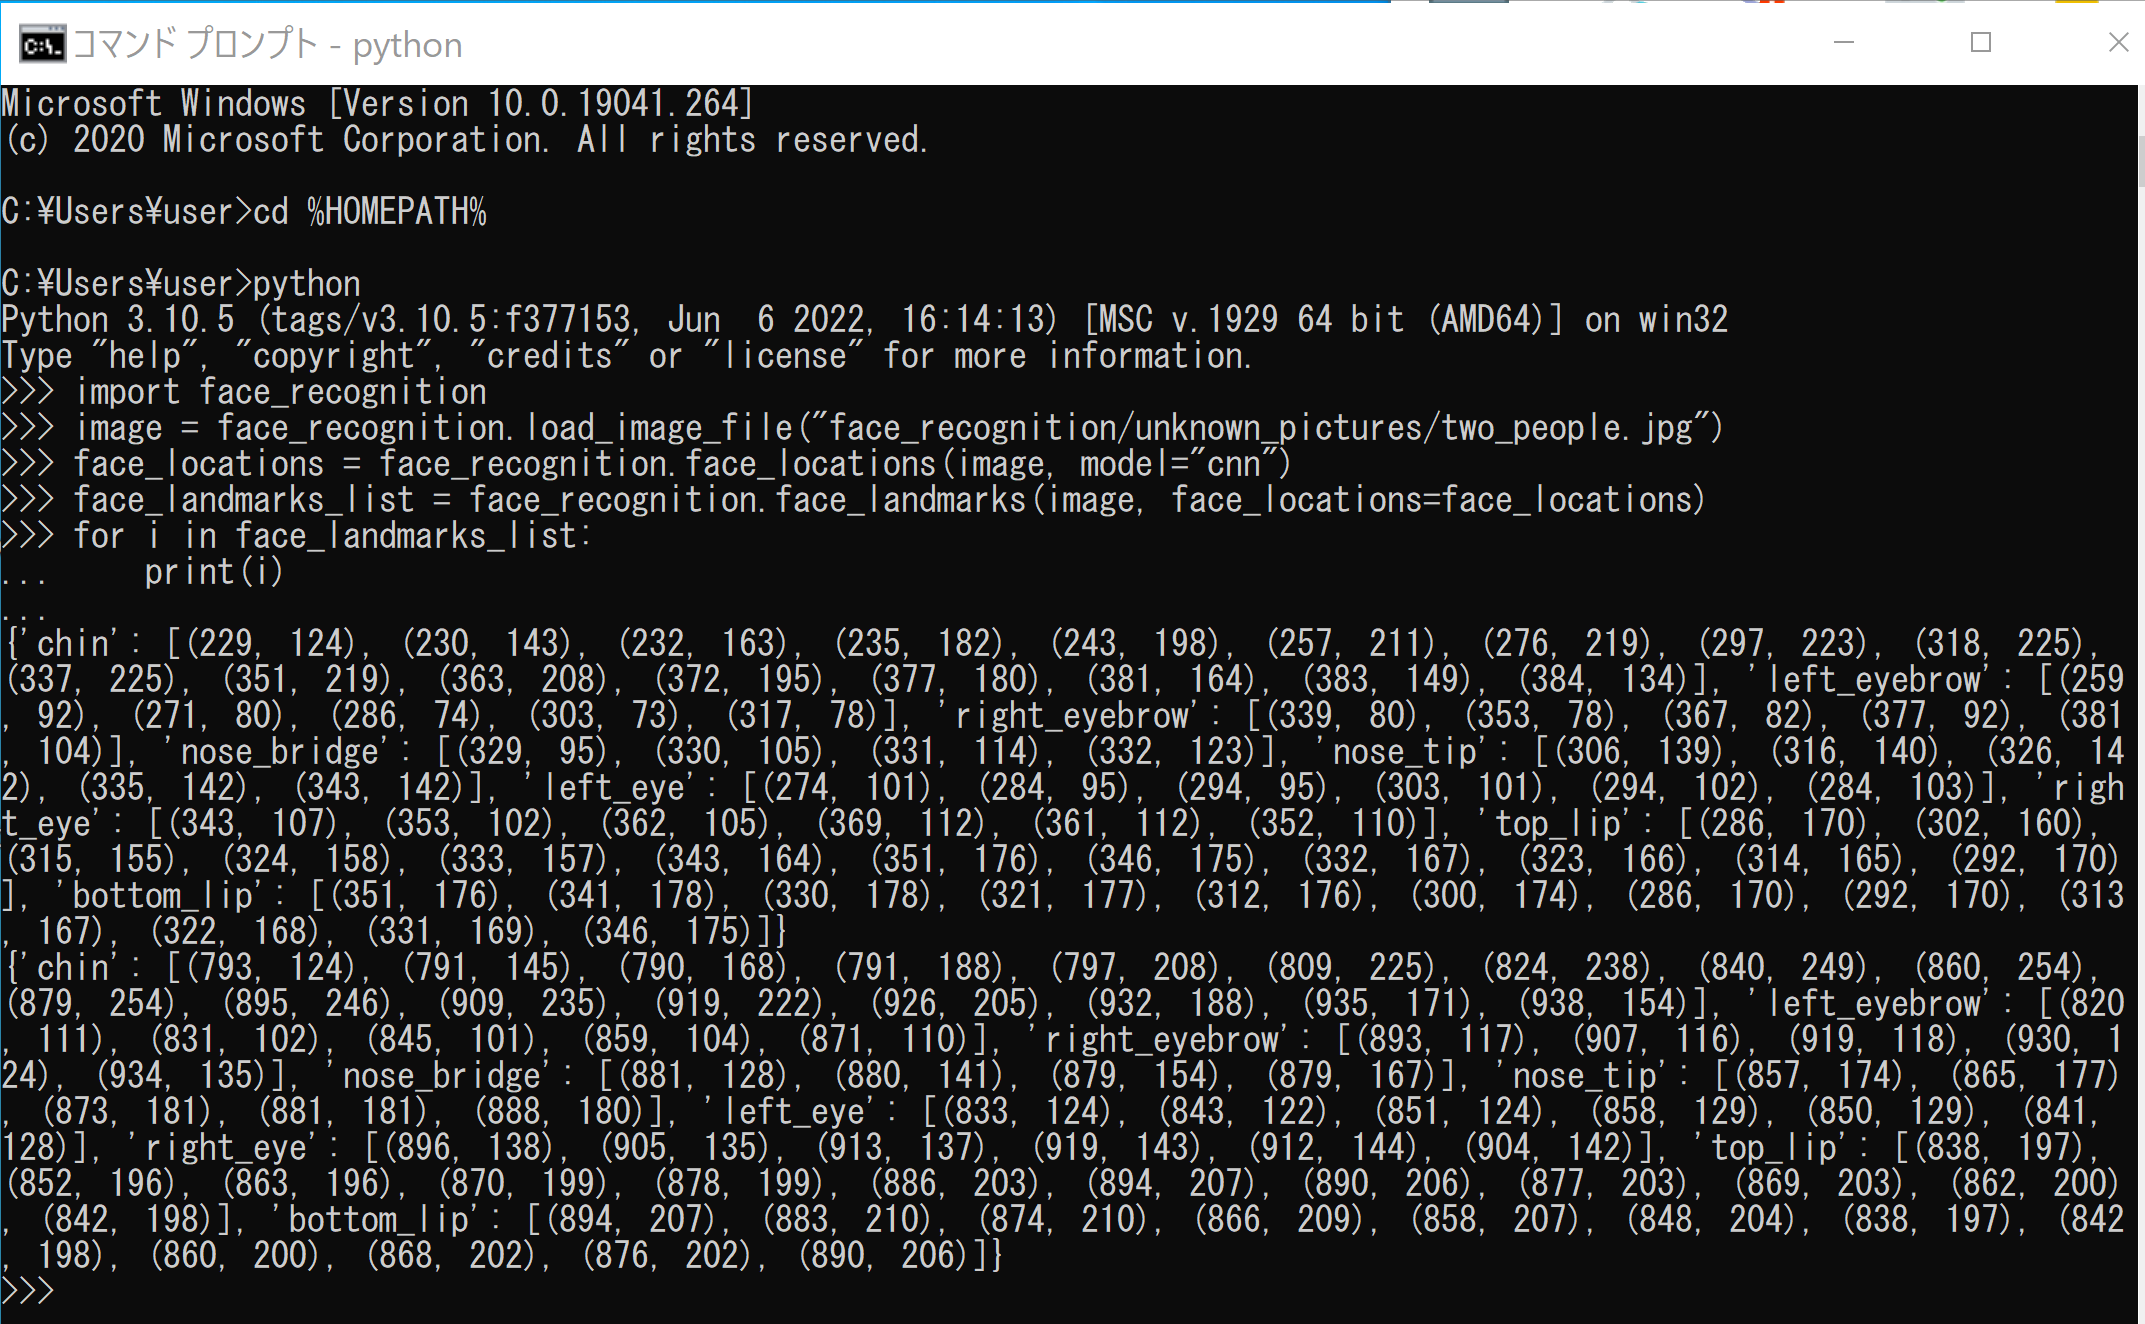
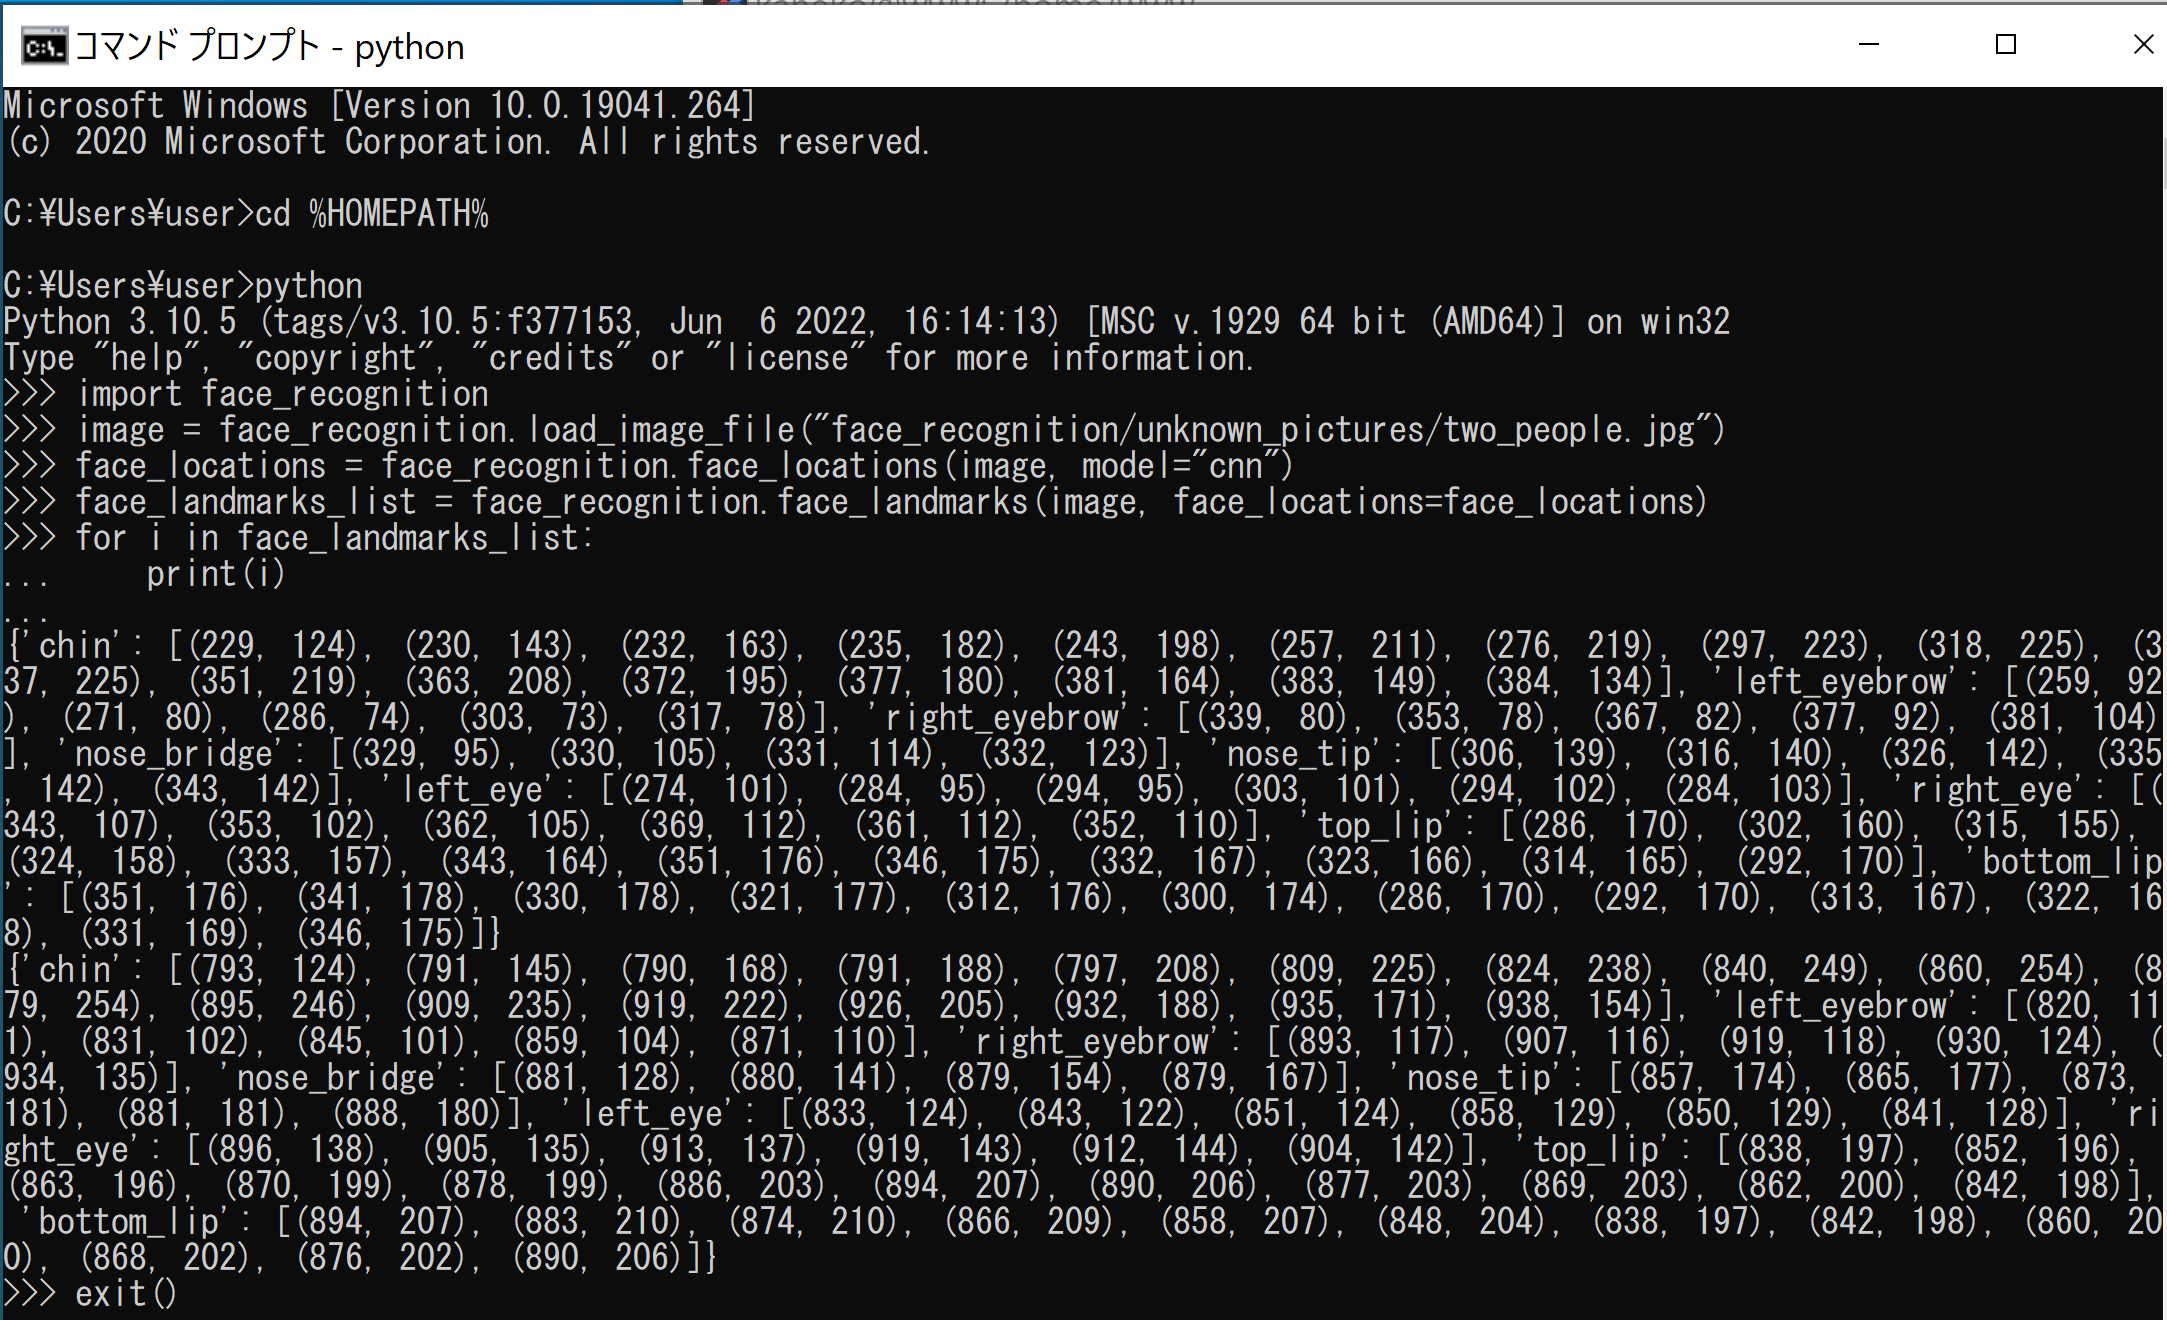
| 顔ランドマークプログラムの実行 | chin, left_eyebrow, right_eyebrow, nose_bridge, left_eye, right_eye の情報が表示される |
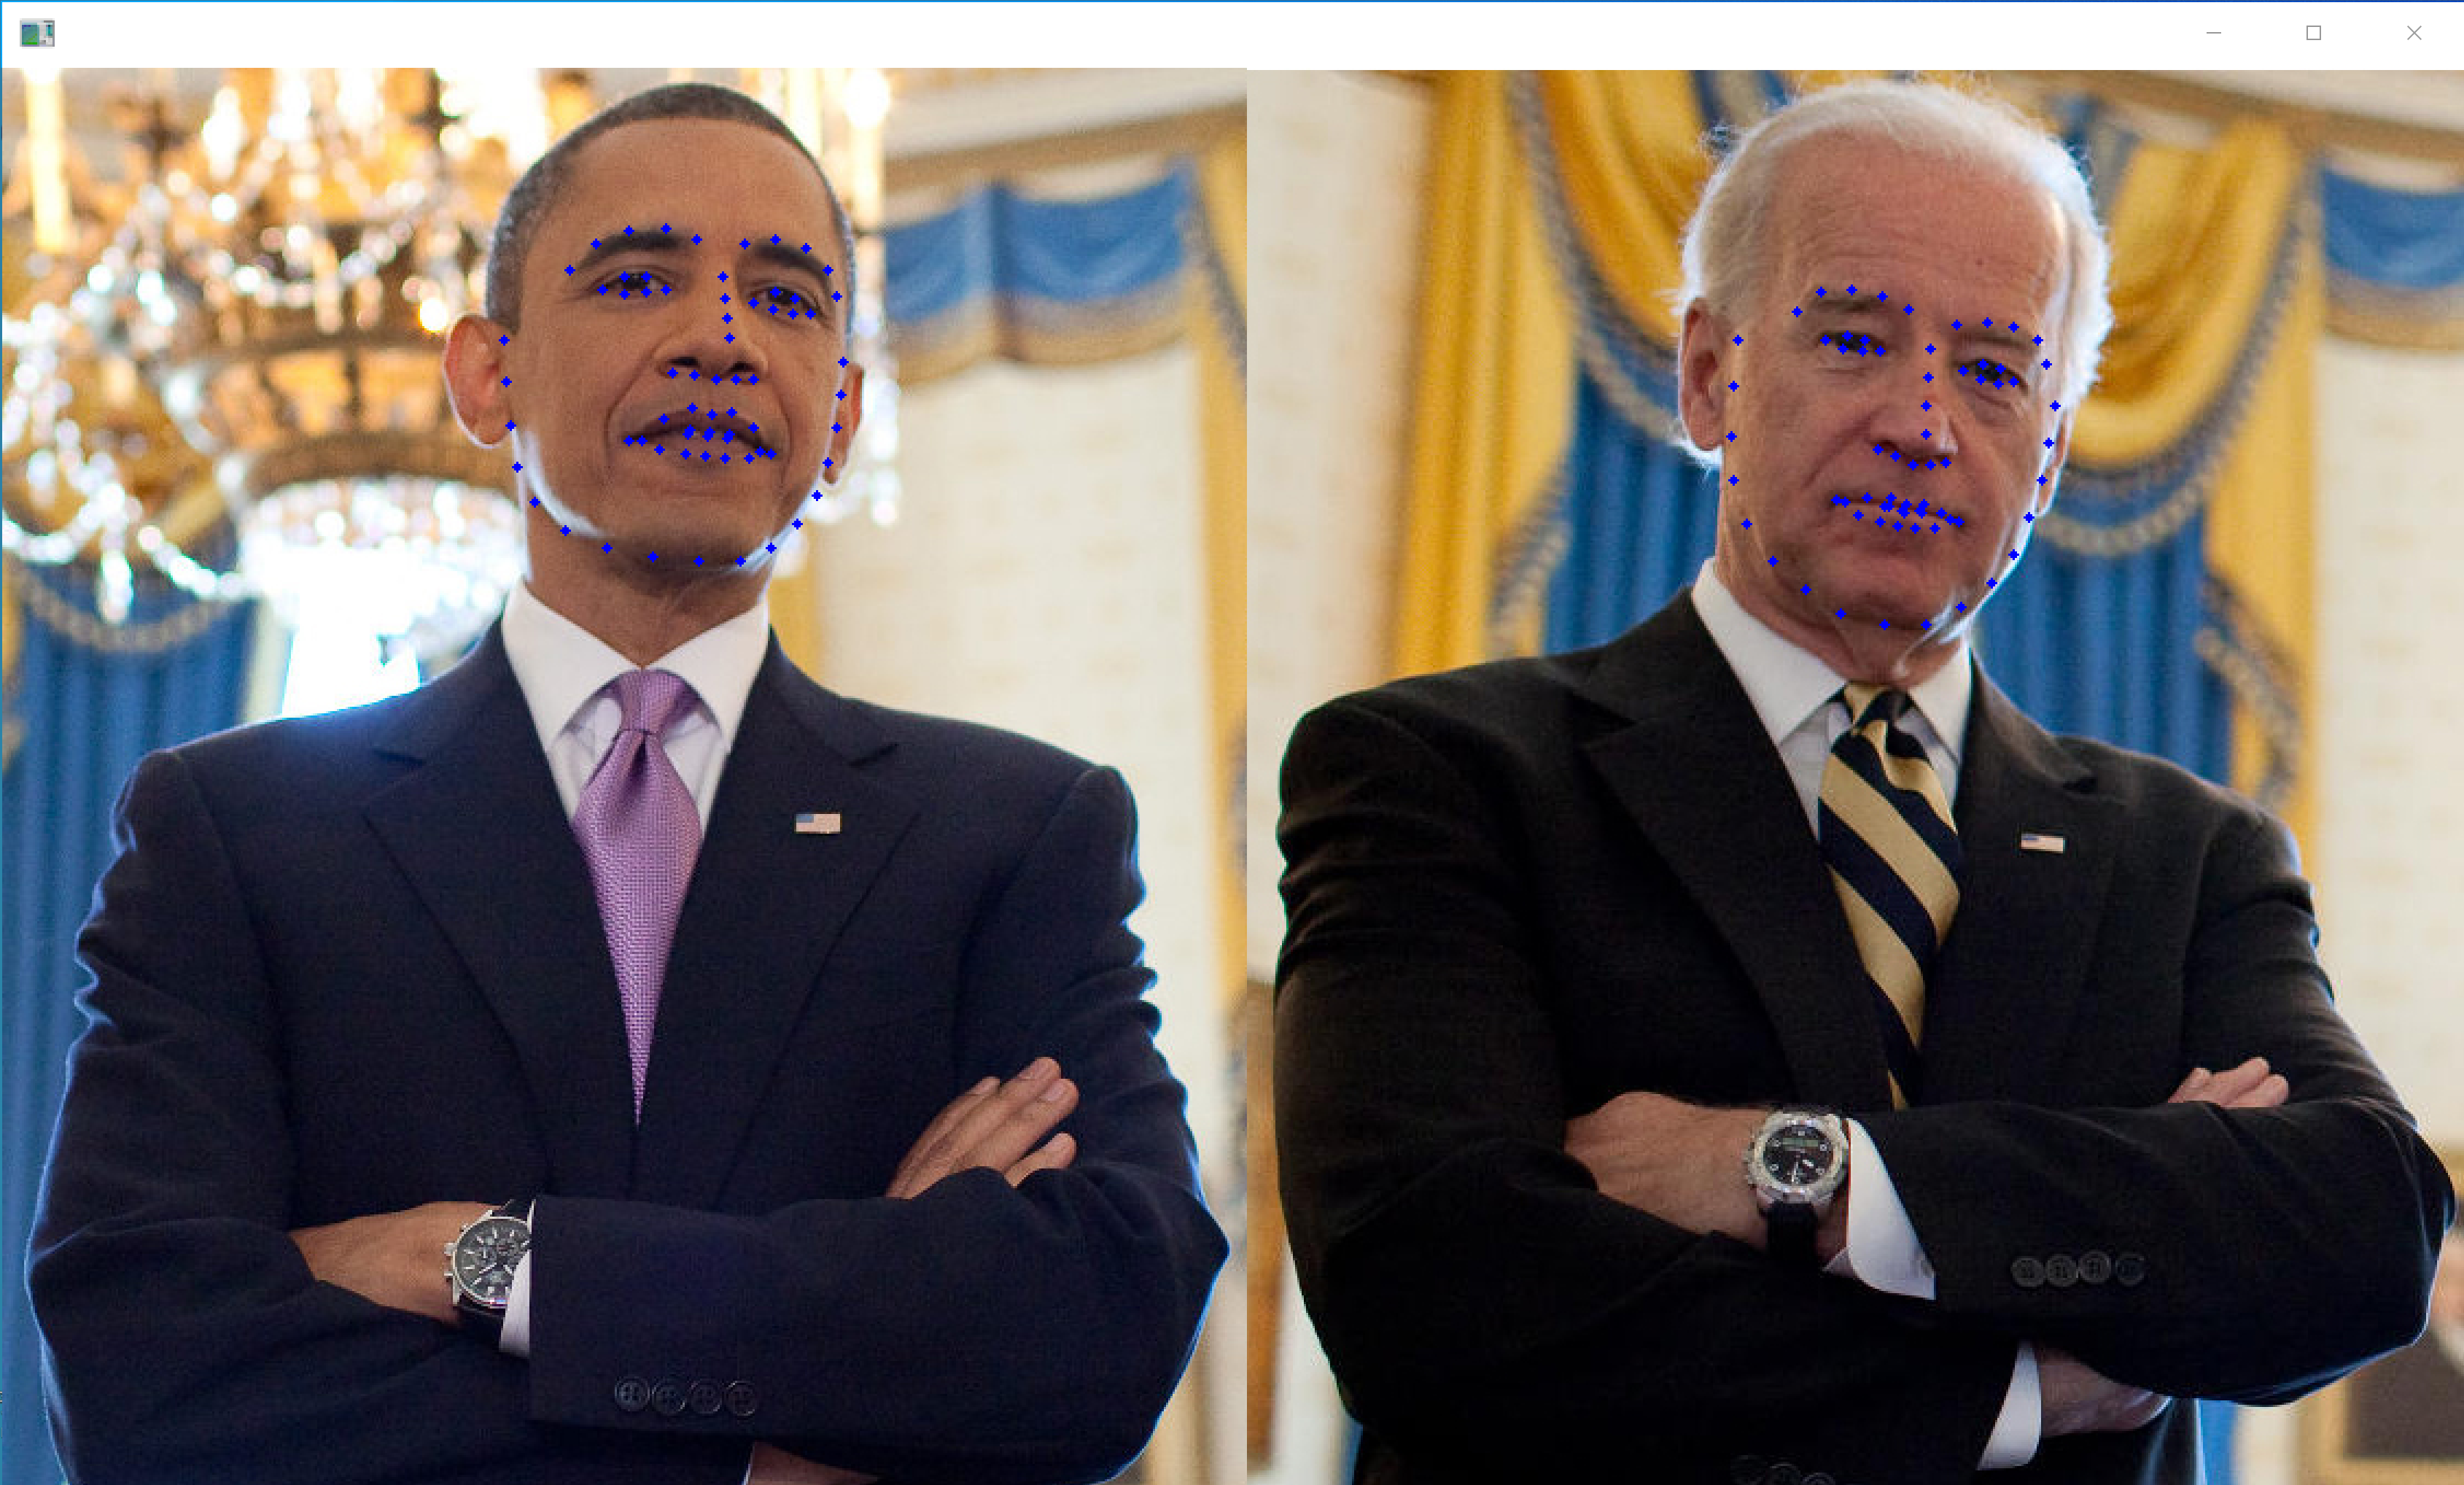
| 顔ランドマークと画像表示プログラムの実行 | ランドマーク点が描画されたウインドウが表示される |
| left_eye / left_eyebrow ランドマーク表示の実行 | 左目(緑色)と左眉(赤色)のランドマーク点が描画されたウインドウが表示される |
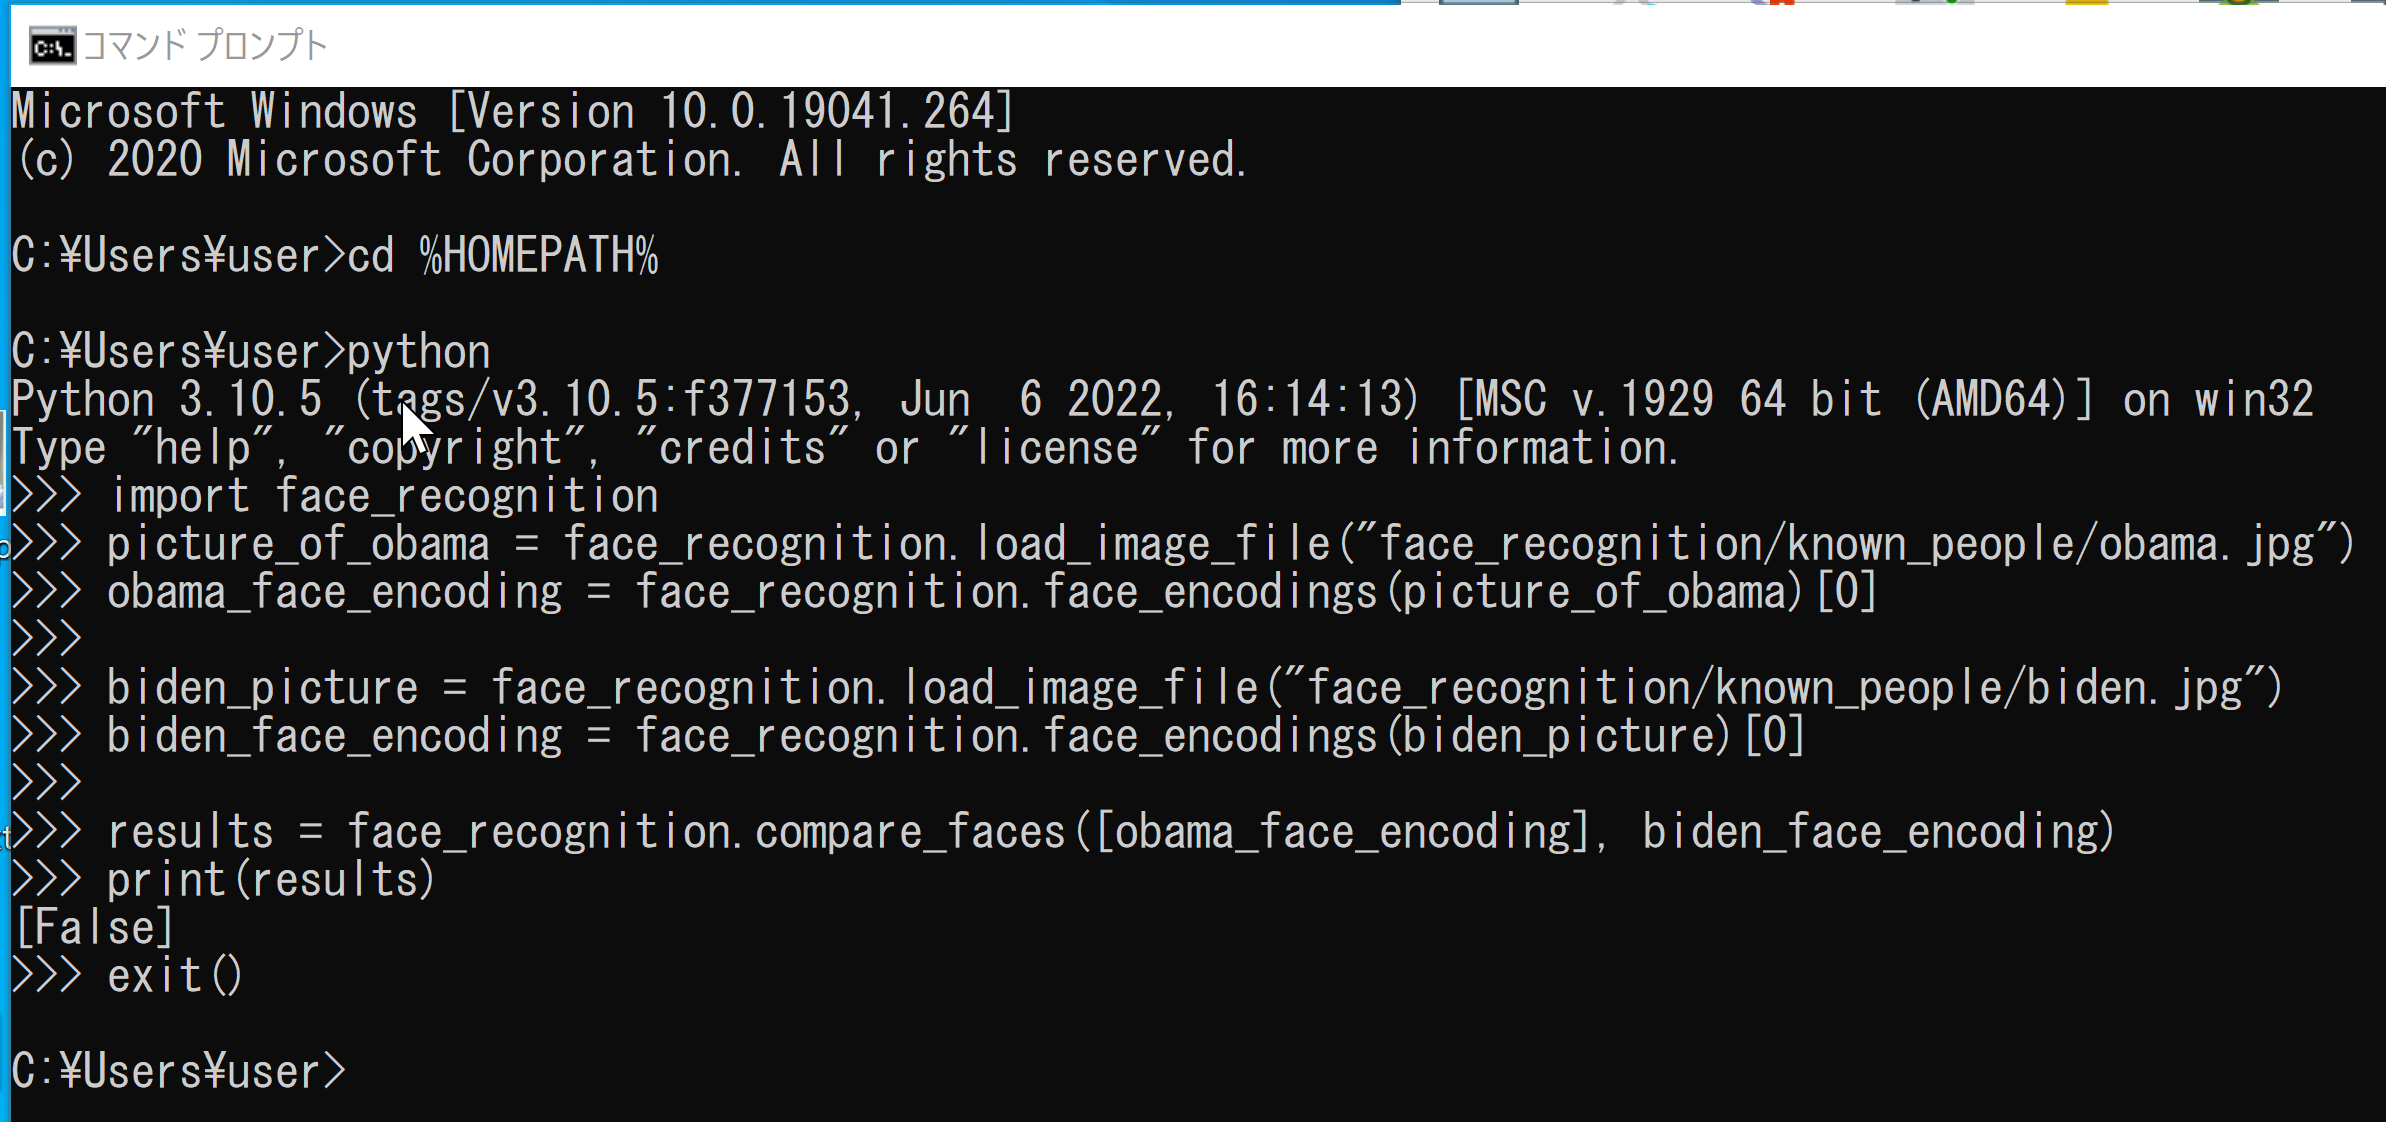
| 顔検証プログラム(異なる人物)の実行 | [False] と顔間のユークリッド距離が出力される |
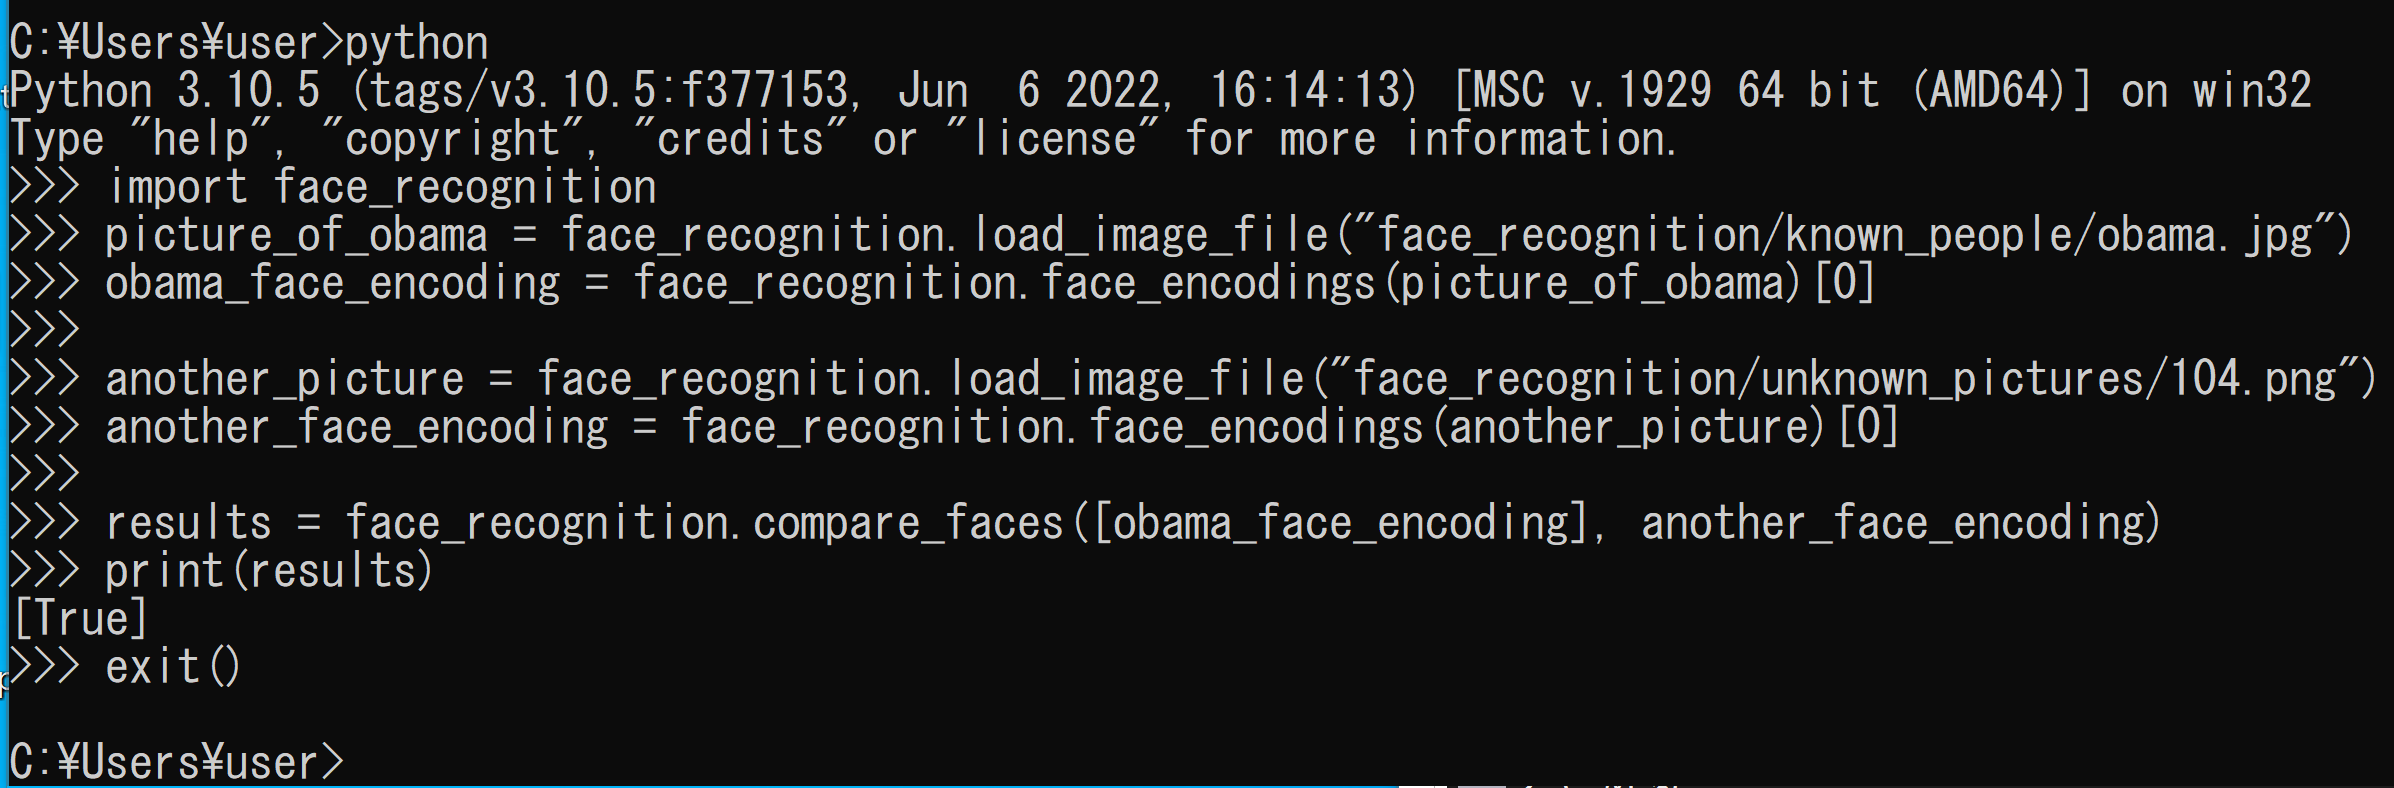
| 顔検証プログラム(同一人物)の実行 | [True] と顔間のユークリッド距離が出力される |
| 画像表示ウインドウの終了 | 画面の中をクリックしてからキーを押すとウインドウが閉じる(右上の「x」はクリックしない) |
4. 概要・使い方・実行上の注意
本章の各プログラムについて,対話的に実行するものは Python インタプリタ上で直接入力する.ファイルとして実行するもの(a.py)のソースコードは第5章に掲載する.パス中のディレクトリ区切りに「\」でなく「/」を使うのは Python の流儀である.実際の環境に合わせてディレクトリパスを書き換えて実行すること.
画像表示を伴うプログラムでは,ウインドウの右上の「x」をクリックしない.画面の中をクリックしてから,何かのキーを押して閉じる.
顔検出
face_recognition.face_locations に model="cnn" を指定し,CNN ベースの顔検出を行う.

顔検出と画像表示
プログラムは,https://github.com/ageitgey/face_recognition/blob/master/examples/find_faces_in_picture.py を一部変更したものである.
顔ランドマーク
chin, left_eyebrow, right_eyebrow, nose_bridge, left_eye, right_eye の情報が表示される.
顔ランドマークと画像表示
プログラムは,https://github.com/ageitgey/face_recognition/blob/master/examples/find_faces_in_picture.py を一部変更したものである.
left_eye と left_eyebrow のランドマーク表示
left_eye と left_eyebrow のランドマーク画像表示
プログラムは,https://github.com/ageitgey/face_recognition/blob/master/examples/find_faces_in_picture.py を一部変更したものである.
顔検証 (face verification)
2つの顔画像が同一人物か判定する
別の顔で動かす
https://github.com/ageitgey/face_recognition に掲載の写真から切り取った,次の写真を使う.
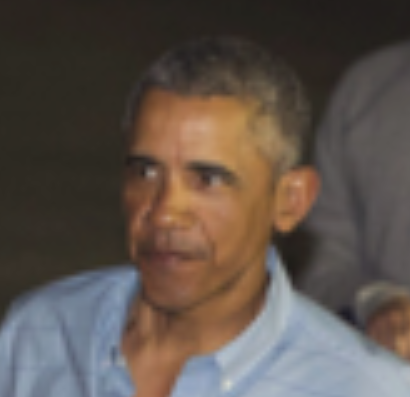
画像ファイルを unknown_pictures の下に 104.png として保存する.
cd /d c:%HOMEPATH%
curl -O https://www.kkaneko.jp/ai/dlib/104.png
copy 104.png face_recognition\unknown_pictures
python
今度は True と表示される.
5. ソースコード
顔検出
import face_recognition
image = face_recognition.load_image_file("face_recognition/unknown_pictures/two_people.jpg")
face_locations = face_recognition.face_locations(image, model="cnn")
print(face_locations)
exit()
顔検出と画像表示(a.py)
import face_recognition
import cv2

F = "unknown_pictures/two_people.jpg"
image = face_recognition.load_image_file(F)
face_locations = face_recognition.face_locations(image, model="cnn")
print("検出された顔の数:", len(face_locations))

bgr = cv2.imread(F)
for top, right, bottom, left in face_locations:
    cv2.rectangle(bgr, (left, top), (right, bottom), (255, 0, 0), 1)
    cv2.rectangle(bgr, (left, top - 25), (right, top), (255, 255, 255), -1)
    cv2.putText(bgr, 'face', (left, top - 5), cv2.FONT_HERSHEY_COMPLEX, 0.7, (0, 0, 0), 1)

cv2.imshow('', bgr)
cv2.waitKey(0)
cv2.destroyAllWindows()
顔ランドマーク
import face_recognition
image = face_recognition.load_image_file("face_recognition/unknown_pictures/two_people.jpg")
face_locations = face_recognition.face_locations(image, model="cnn")
face_landmarks_list = face_recognition.face_landmarks(image, face_locations=face_locations)
for i in face_landmarks_list:
    print(i)

exit()
顔ランドマークと画像表示(a.py)
import face_recognition
import cv2

F = "unknown_pictures/two_people.jpg"
image = face_recognition.load_image_file(F)
face_locations = face_recognition.face_locations(image, model="cnn")
face_landmarks_list = face_recognition.face_landmarks(image, face_locations=face_locations)

bgr = cv2.imread(F)
for i in face_landmarks_list:
    for j in i.keys():
        for k in i[j]:
            cv2.circle(bgr, (k[0], k[1]), 2, (255, 0, 0), -1)

cv2.imshow('', bgr)
cv2.waitKey(0)
cv2.destroyAllWindows()
left_eye と left_eyebrow のランドマーク表示
import face_recognition
image = face_recognition.load_image_file("face_recognition/unknown_pictures/two_people.jpg")
face_locations = face_recognition.face_locations(image, model="cnn")
face_landmarks_list = face_recognition.face_landmarks(image, face_locations=face_locations)
for i in face_landmarks_list:
    print(i['left_eye'])
    print(i['left_eyebrow'])

exit()
left_eye と left_eyebrow のランドマーク画像表示(a.py)
import face_recognition
import cv2

F = "unknown_pictures/two_people.jpg"
image = face_recognition.load_image_file(F)
face_locations = face_recognition.face_locations(image, model="cnn")
face_landmarks_list = face_recognition.face_landmarks(image, face_locations=face_locations)

bgr = cv2.imread(F)
for i in face_landmarks_list:
    for j in i['left_eye']:
        cv2.circle(bgr, (j[0], j[1]), 2, (0, 255, 0), -1)
    for j in i['left_eyebrow']:
        cv2.circle(bgr, (j[0], j[1]), 2, (0, 0, 255), -1)

cv2.imshow('', bgr)
cv2.waitKey(0)
cv2.destroyAllWindows()
顔検証(異なる人物の比較)
import face_recognition
picture_of_obama = face_recognition.load_image_file("face_recognition/known_people/obama.jpg")
obama_face_encoding = face_recognition.face_encodings(picture_of_obama)[0]

biden_picture = face_recognition.load_image_file("face_recognition/known_people/biden.jpg")
biden_face_encoding = face_recognition.face_encodings(biden_picture)[0]

results = face_recognition.compare_faces([obama_face_encoding], biden_face_encoding)
distance = face_recognition.face_distance([obama_face_encoding], biden_face_encoding)
print(results)
print("顔間のユークリッド距離:", distance)
exit()
顔検証(同一人物の比較)
import face_recognition
picture_of_obama = face_recognition.load_image_file("face_recognition/known_people/obama.jpg")
obama_face_encoding = face_recognition.face_encodings(picture_of_obama)[0]

another_picture = face_recognition.load_image_file("face_recognition/unknown_pictures/104.png")
another_face_encoding = face_recognition.face_encodings(another_picture)[0]

results = face_recognition.compare_faces([obama_face_encoding], another_face_encoding)
distance = face_recognition.face_distance([obama_face_encoding], another_face_encoding)
print(results)
print("顔間のユークリッド距離:", distance)
exit()
6. まとめ
本記事で扱った主要概念を以下に整理する.
顔検出
face_recognition.face_locations に model="cnn" を指定することで,CNN ベースの顔検出を行う.画像から顔の位置座標(top, right, bottom, left)を取得し,OpenCV の cv2.rectangle で矩形を描画できる.
顔ランドマーク
face_recognition.face_landmarks により,chin, left_eyebrow, right_eyebrow, nose_bridge, left_eye, right_eye 等の顔ランドマーク情報を取得できる.取得した座標を OpenCV の cv2.circle で描画することも可能である.
顔検証 (face verification)
face_recognition.face_encodings で顔の特徴量を取得し,face_recognition.compare_faces で2つの顔画像が同一人物か判定する.face_recognition.face_distance により顔間のユークリッド距離も確認できる.
Dlib と face_recognition の環境構築
Dlib は数多くの機能を持つ C++ ライブラリであり,Python API もある.Build Tools for Visual Studio によるコンパイル環境の準備,Dlib のソースコードからのビルドとインストール,学習済みモデルのダウンロードが必要である.ageitgey の face_recognition は Dlib をベースとした Python ライブラリであり,numpy, scikit-image, scikit-learn とあわせてインストールする.
画像表示ウインドウの操作
OpenCV の cv2.imshow で表示されるウインドウは,右上の「x」をクリックせず,画面の中をクリックしてからキーを押して閉じる.cv2.waitKey(0) がキー入力を待機し,cv2.destroyAllWindows() がウインドウを破棄する.