chen0040/keras-face のインストールと動作確認(顔認識)(TensorFlow 1.15.5,Python 3.7 を使用)(Windows 上)
次で配布されているソフトウェア
https://github.com/chen0040/keras-face
これは,顔検証と顔識別のソフトウェア.DeepFace, VGG16 + Siamese を使用.
手順の要点: 前準備として,NVIDIA CUDA 10.0, NVIDIA cuDNN 7.6.5, Python 3.7, TensorFlow 1.15.5 等をインストール.
ソフトウェア等の利用条件等は,利用者で確認すること.
謝辞:ソフトウェアの作者に感謝します
前準備
Python 3.7 のインストール(Windows 上)
Pythonは,プログラミング言語の1つ.
【手順】
- Windows で,管理者権限でコマンドプロンプトを起動(手順:Windowsキーまたはスタートメニュー >
cmdと入力 > 右クリック > 「管理者として実行」)。次のコマンドを実行
winget install --scope machine Python.Python.3.7
AI エディタ Windsurf のインストール
Pythonプログラムの編集・実行には、AI エディタの利用を推奨する。ここでは,Windsurfのインストールを説明する。
管理者権限でコマンドプロンプトを起動(手順:Windowsキーまたはスタートメニュー > cmd と入力 > 右クリック > 「管理者として実行」)し、以下を実行して、Windsurfをシステム全体にインストールする。管理者権限は、wingetの--scope machineオプションでシステム全体にソフトウェアをインストールするために必要となる。
winget install --scope machine --id Codeium.Windsurf -e --silent --accept-source-agreements --accept-package-agreements【関連する外部ページ】
Windsurf の公式ページ: https://windsurf.com/
Gitのインストール
管理者権限でコマンドプロンプトを起動(手順:Windowsキーまたはスタートメニュー > cmd と入力 > 右クリック > 「管理者として実行」)し、以下を実行する。管理者権限は、wingetの--scope machineオプションでシステム全体にソフトウェアをインストールするために必要となる。
REM Git をシステム領域にインストール
winget install --scope machine --id Git.Git -e --silent --accept-source-agreements --accept-package-agreements
REM Git のパス設定
set "GIT_PATH=C:\Program Files\Git\cmd"
if exist "%GIT_PATH%" (
    echo "%PATH%" | find /i "%GIT_PATH%" >nul
    if errorlevel 1 setx PATH "%PATH%;%GIT_PATH%" /M >nul
)
TensorFlow 1.15.5, Keras 2.3.1 のインストール
コマンドプロンプトを管理者として実行し,次のコマンドを実行
C:\venv\py37\Scripts\activate.bat
python -m pip uninstall -y tensorflow tensorflow-cpu tensorflow-gpu tensorflow-intel tensorflow-text tensorflow-estimator tf-models-official tf_slim tensorflow_datasets tensorflow-hub keras keras-tuner keras-visualizer scipy pandas matplotlib
# TensorFlow 1.15.5 のため numpy, protobuf の古いバージョンを使用.エラーが出にくいと考えられる numpy 1.16.2, protobuf 3.19.4 を使用
python -m pip install -U numpy==1.16.2 protobuf==3.19.4 tensorflow-gpu==1.15.5 keras==2.3.1 scipy==1.5.4
chen0040/keras-face のインストールと動作確認(顔認識)(TensorFlow 1.15.5,Python 3.7 を使用)(Windows 上)
Windows での手順を下に示す.Ubuntu でも同様の手順になる.
- Windows で,コマンドプロンプトを管理者として実行.
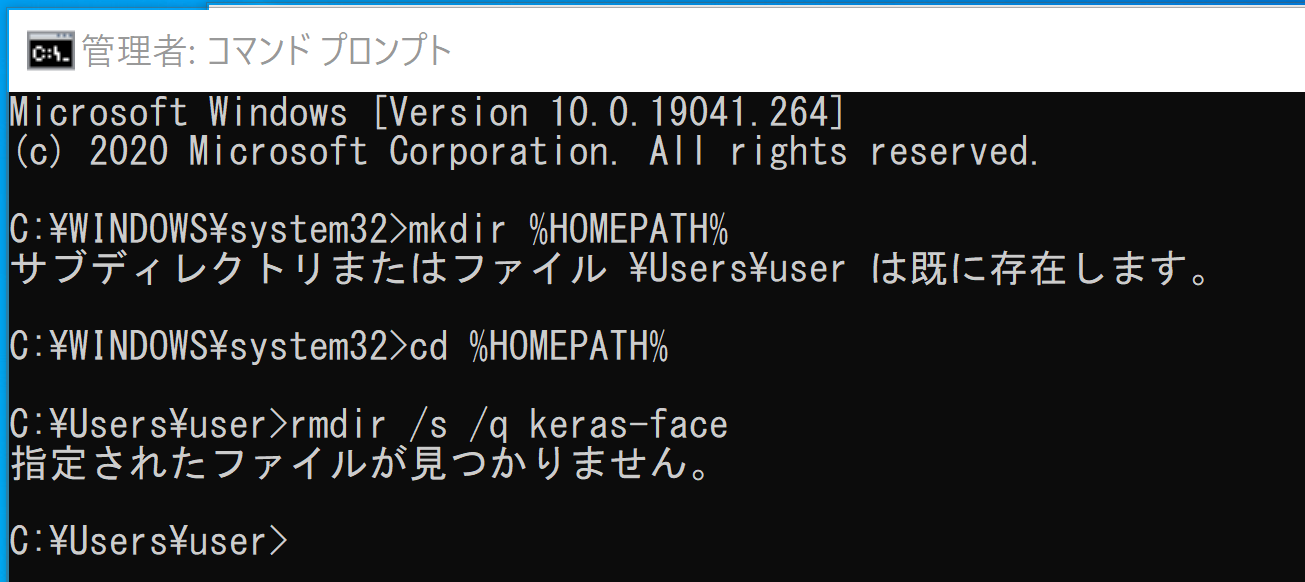
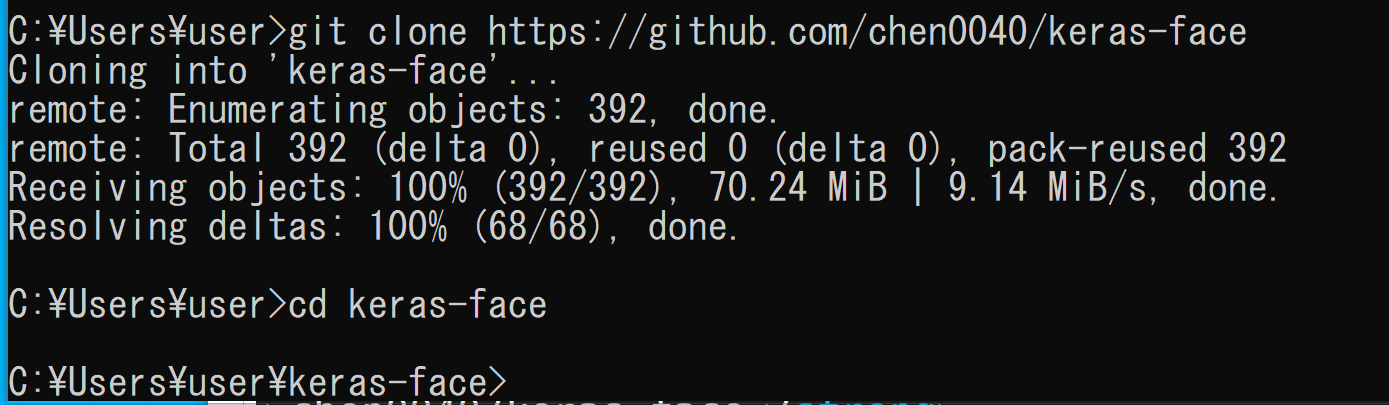
- chen0040/keras-face のダウンロード
mkdir %HOMEPATH%
cd /d c:%HOMEPATH%
rmdir /s /q keras-face
git clone https://github.com/chen0040/keras-face
cd keras-face
- 前提パッケージのインストール
C:\venv\py37\Scripts\activate.bat
python -m pip install -U numpy==1.16.2 matplotlib
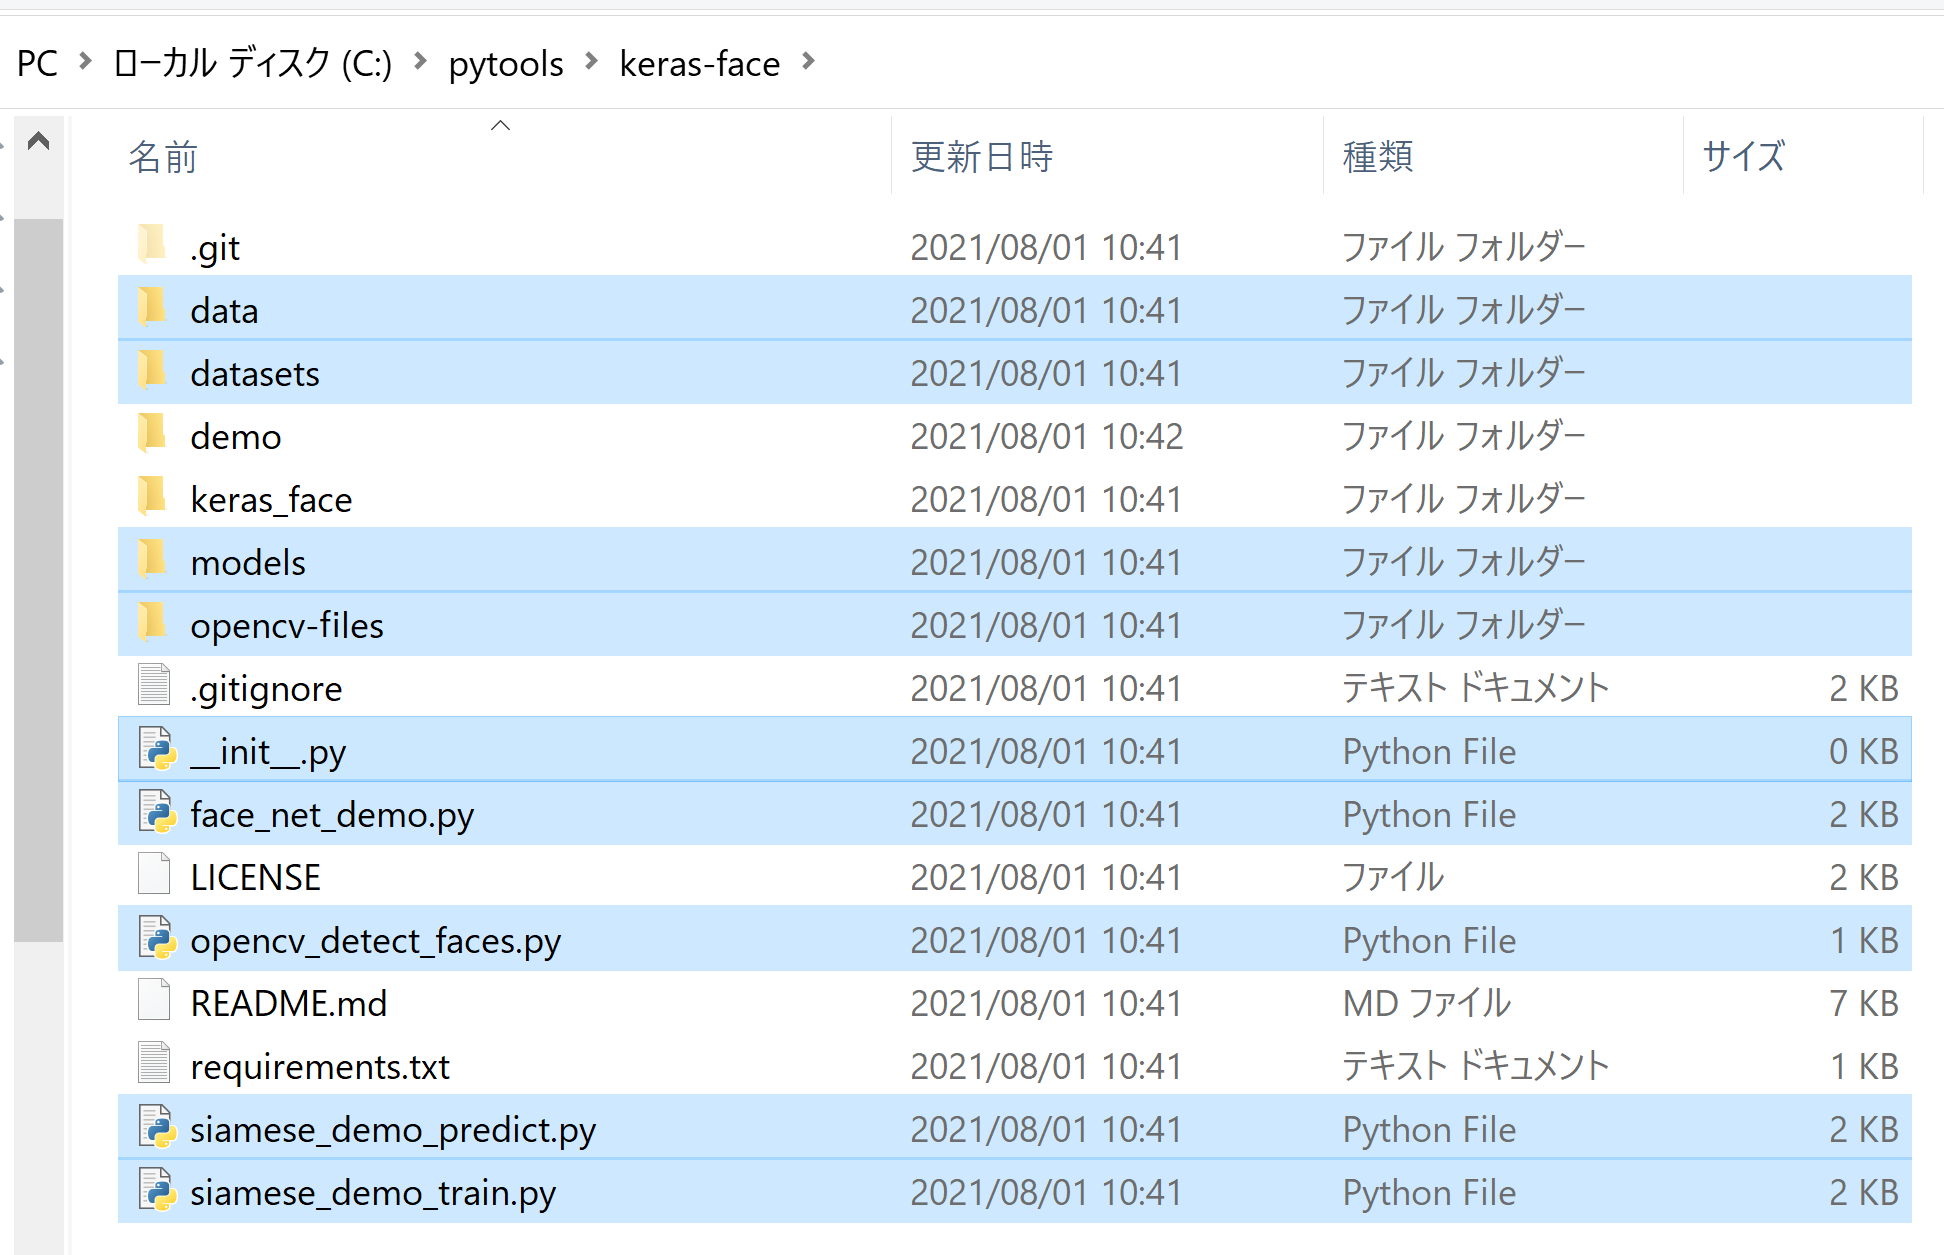
- ファイルの移動
%HOMEPATH%\keras-face\demo にあるファイルを丸ごと、 %HOMEPATH%\keras-faceに移動
その結果、次のようになる
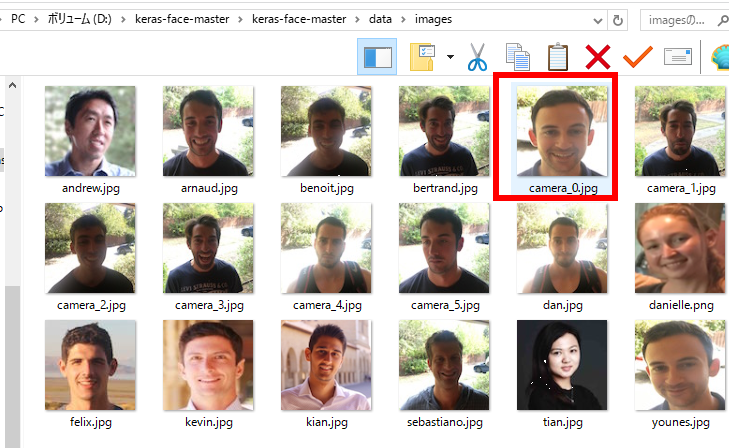
- data\images の下に、顔写真のファイルがあるので確認する

- ファイルの編集
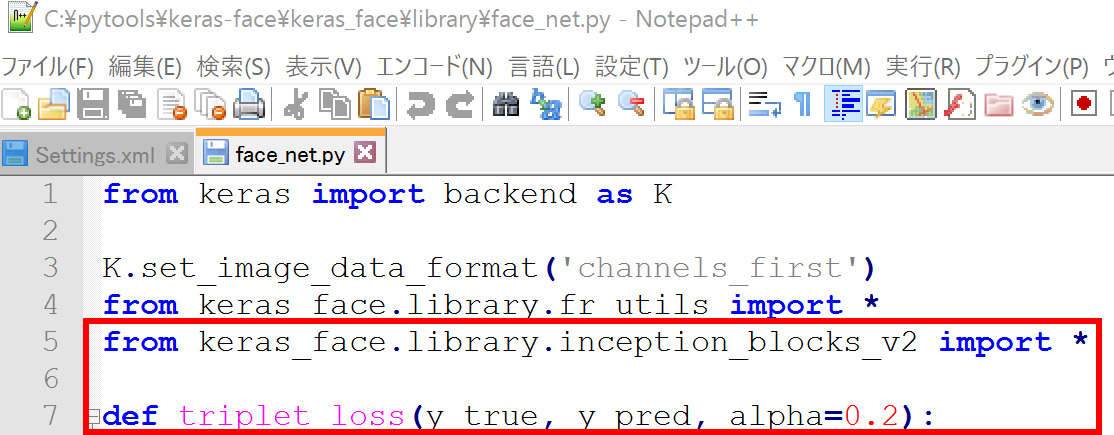
エラーの回避のため.keras_face\library\face_net.py を次のように書き換える
「np.set_printoptions(threshold=np.nan)」を削除
- ディレクトリの移動
cd /d c:%HOMEPATH%
cd keras-face

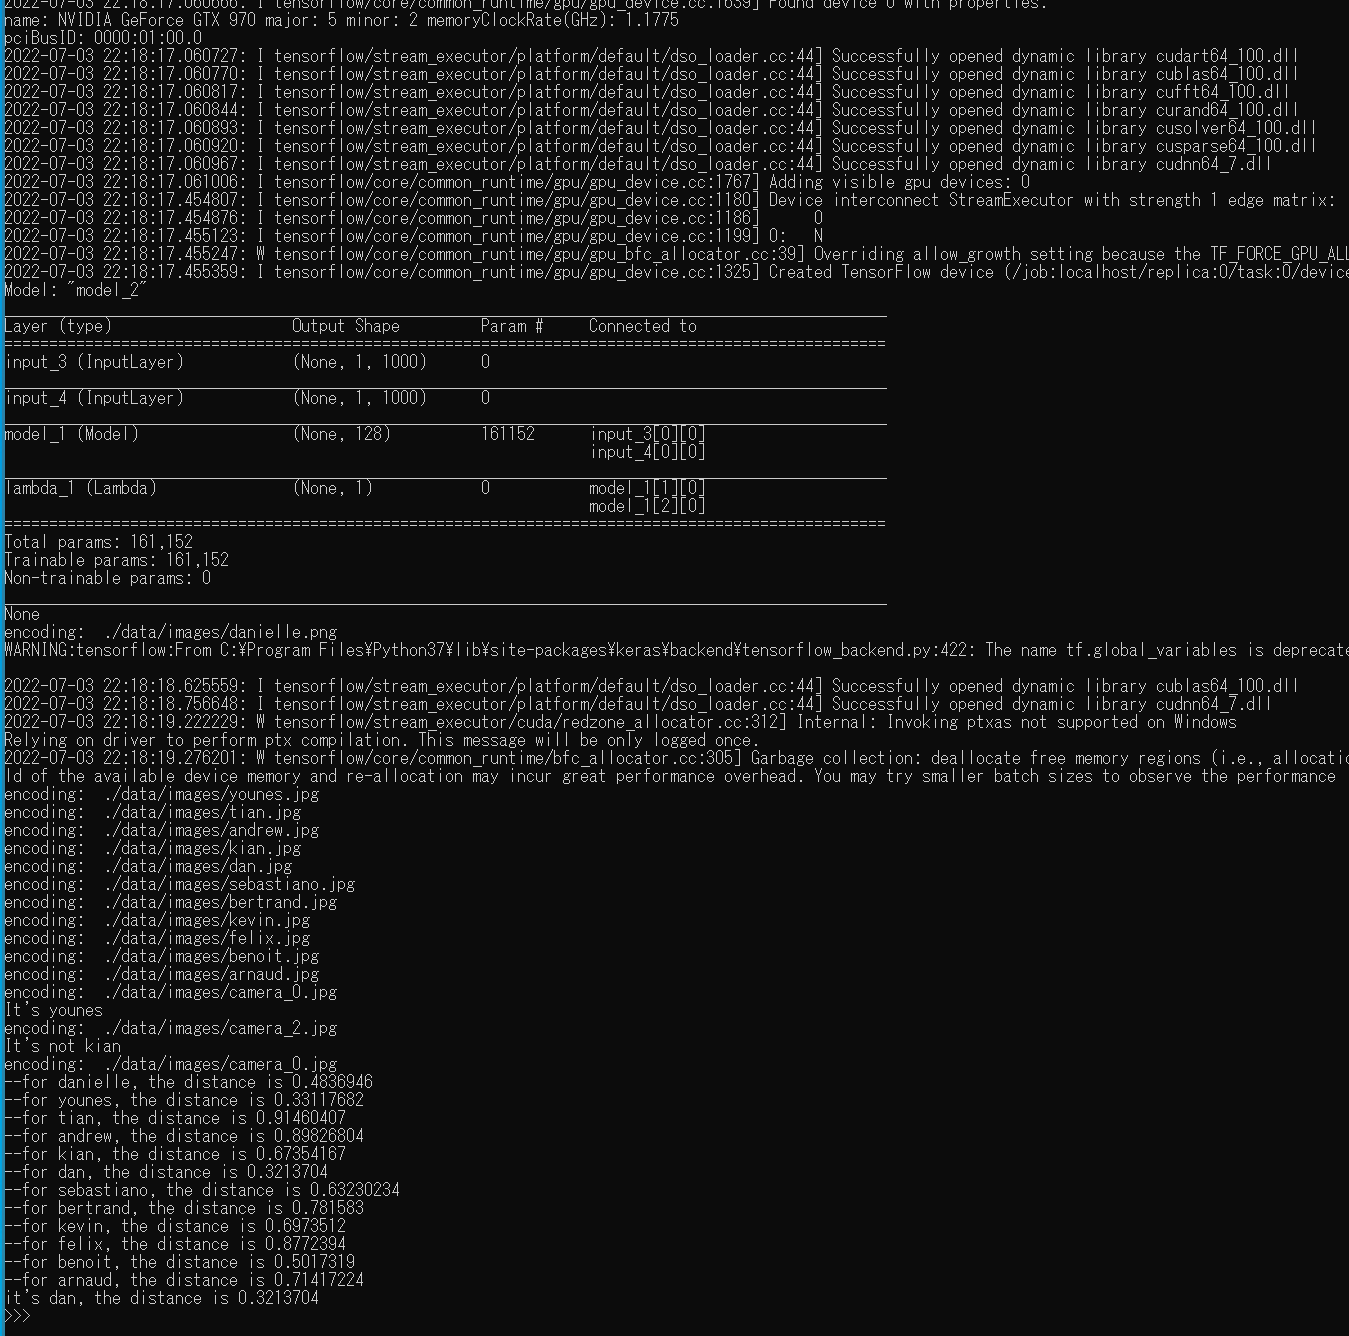
- デモプログラム DeepFace を実行
このプログラムは camera_0.jpg が誰なのかを顔認識する。
GitHub の chen0040/keras-face の Web ページに記載されている次のプログラムを使用
次のPython プログラムを実行する
from keras_face.library.face_net import FaceNet

def main():
    model_dir_path = './models'
    image_dir_path = "./data/images"
    #
    fnet = FaceNet()
    fnet.load_model(model_dir_path)
    #
    database = {}
    database["danielle"] = fnet.img_to_encoding(image_dir_path + "/danielle.png")
    database["younes"] = fnet.img_to_encoding(image_dir_path + "/younes.jpg")
    database["tian"] = fnet.img_to_encoding(image_dir_path + "/tian.jpg")
    database["andrew"] = fnet.img_to_encoding(image_dir_path + "/andrew.jpg")
    database["kian"] = fnet.img_to_encoding(image_dir_path + "/kian.jpg")
    database["dan"] = fnet.img_to_encoding(image_dir_path + "/dan.jpg")
    database["sebastiano"] = fnet.img_to_encoding(image_dir_path + "/sebastiano.jpg")
    database["bertrand"] = fnet.img_to_encoding(image_dir_path + "/bertrand.jpg")
    database["kevin"] = fnet.img_to_encoding(image_dir_path + "/kevin.jpg")
    database["felix"] = fnet.img_to_encoding(image_dir_path + "/felix.jpg")
    database["benoit"] = fnet.img_to_encoding(image_dir_path + "/benoit.jpg")
    database["arnaud"] = fnet.img_to_encoding(image_dir_path + "/arnaud.jpg")
    #
    # verifies whether a particular camera image is a person in the image database
    dist, is_valid = fnet.verify(image_dir_path + "/camera_0.jpg", "younes", database)
    print('camera_0.jpg is' + (' ' if is_valid else ' not ') + 'yournes')
    dist, is_valid = fnet.verify(image_dir_path + "/camera_2.jpg", "kian", database)
    print('camera_0.jpg is' + (' ' if is_valid else ' not ') + 'yournes')
    #
    # whether a particular camera image is which person in the image database (or not at all)
    dist, identity = fnet.who_is_it(image_dir_path + "/camera_0.jpg", database)
    if identity is None:
        print('camera_0.jpg is not found in database')
    else:
        print('camera_0.jpg is ' + str(identity))

if __name__ == '__main__':
    main()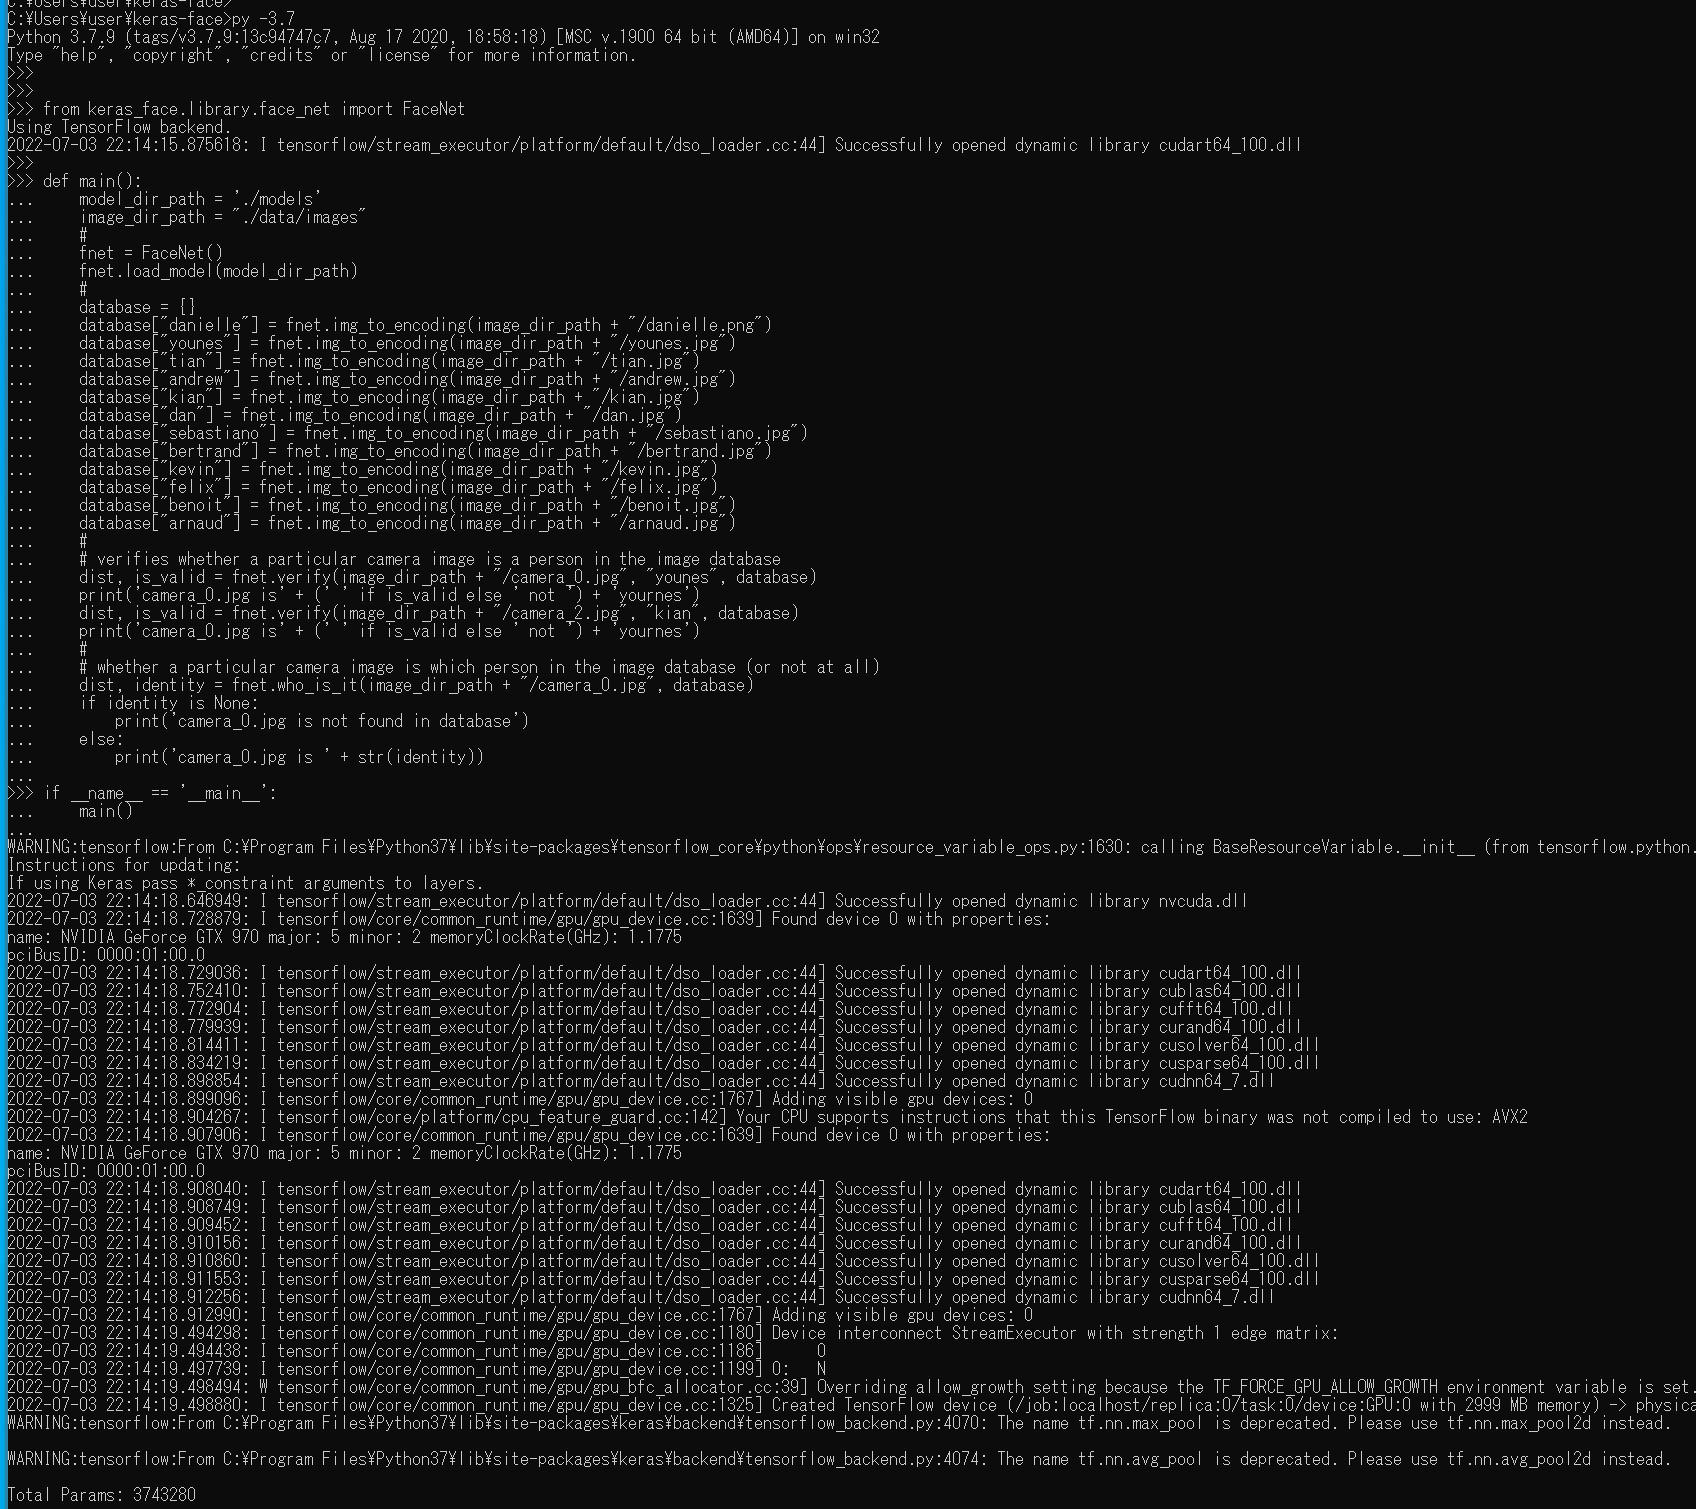
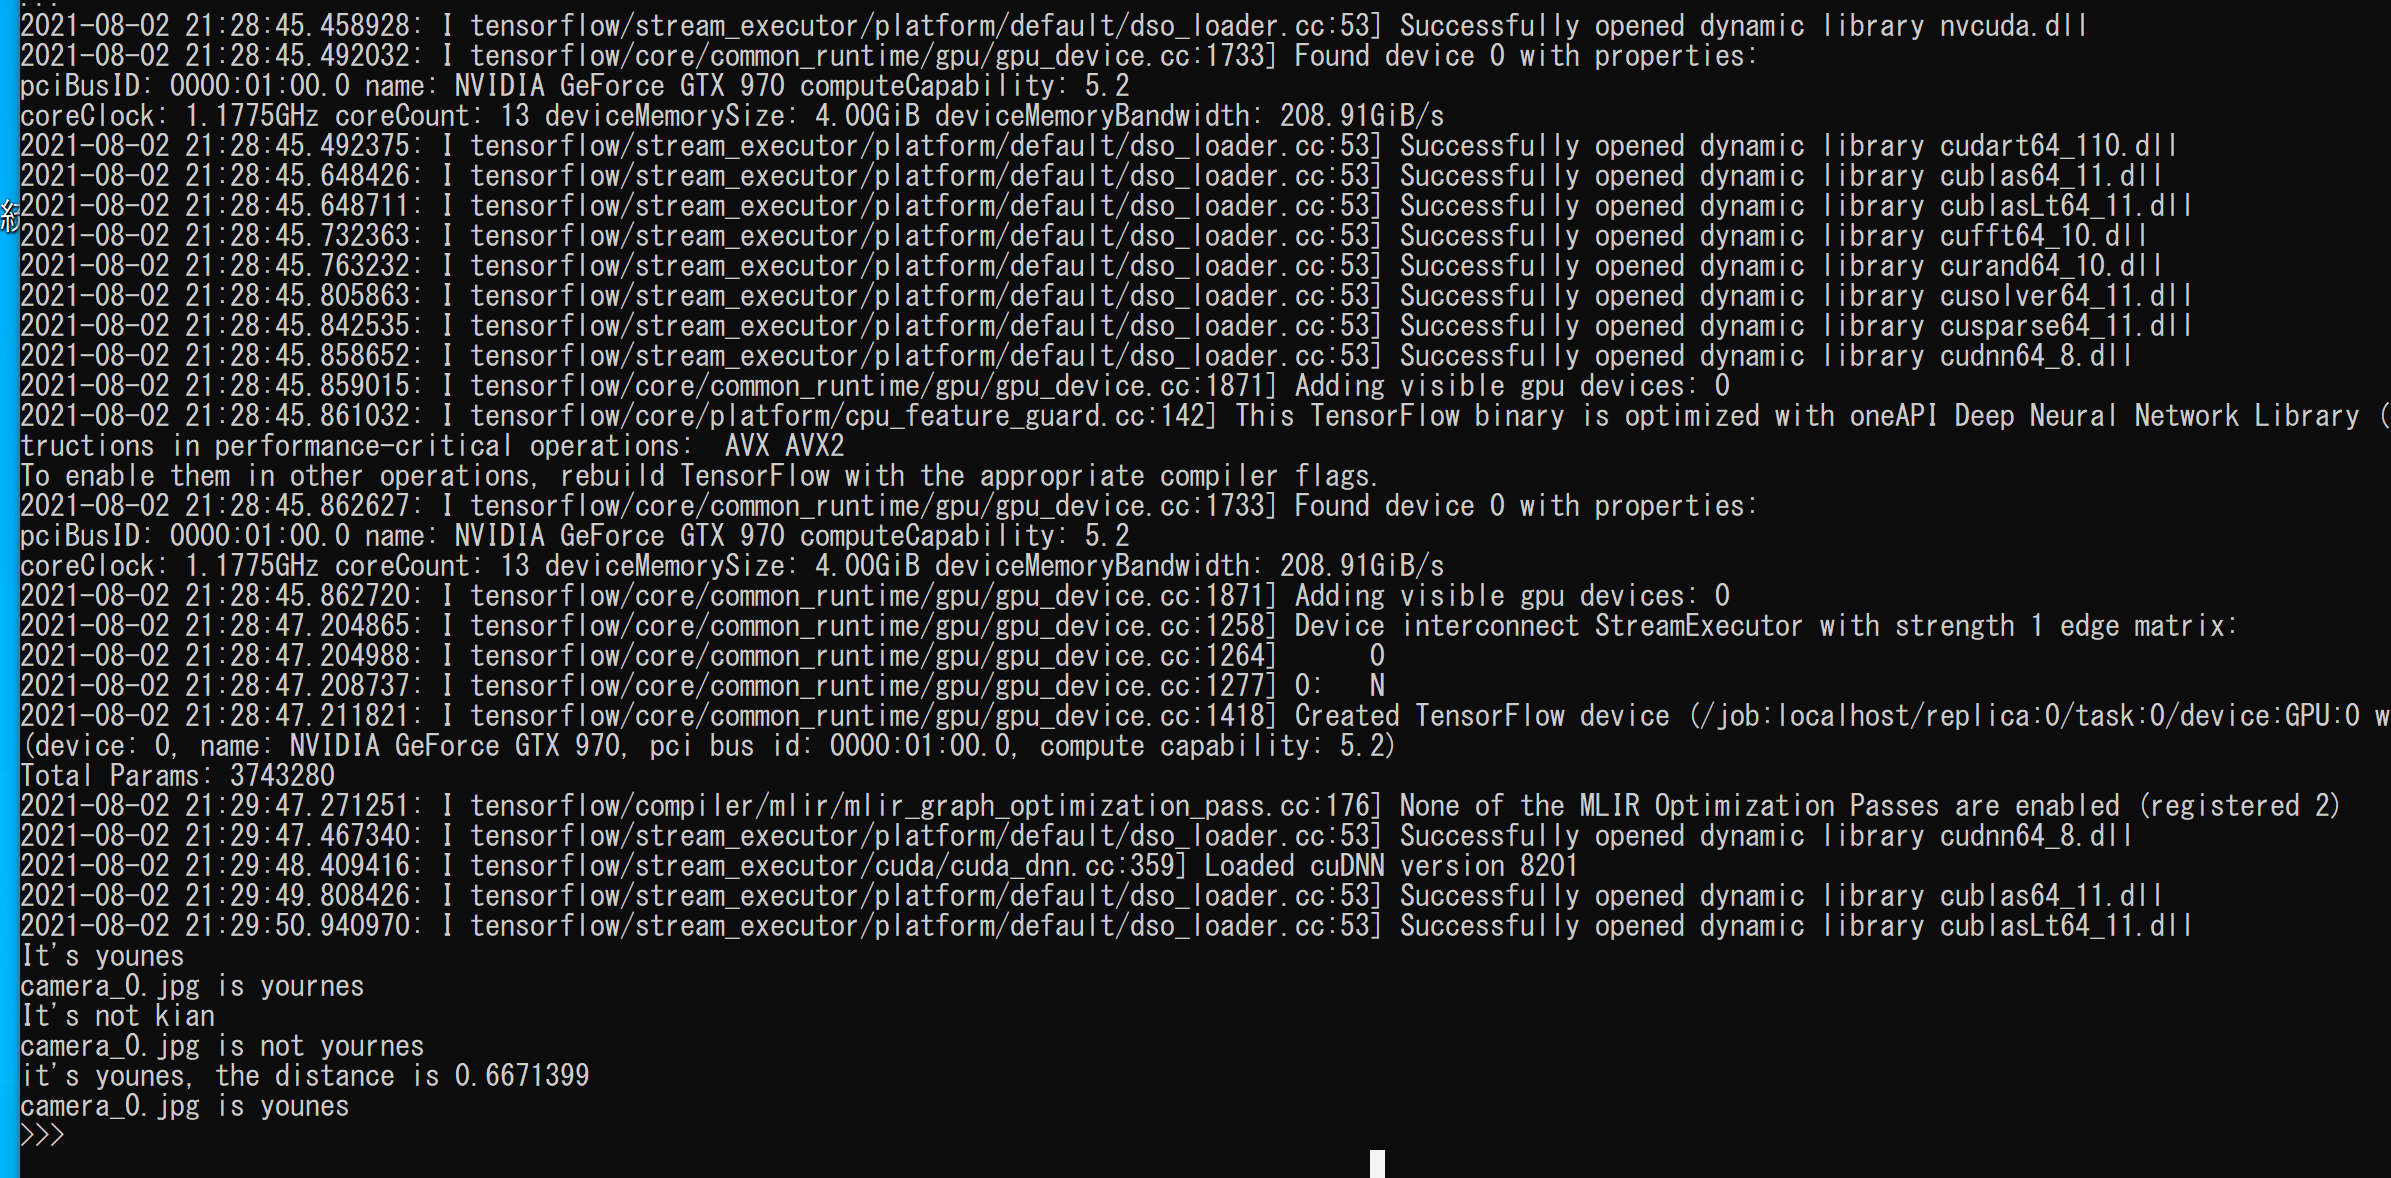
- 実行結果を確認する
顔認識の結果が表示される
- デモプログラム VGG16 + Siamese の学習 を実行
このプログラムは、VGG16 + Siamese の学習を行うプログラムである。
* 1つ前のプログラムは、DeepFace 法(つまり別もの)
データのダウンロードと、学習を行うので時間がかかる
次のPython プログラムを実行する
py -3.7 を使用.
from keras_face.library.siamese import SiameseFaceNet

def main():
    fnet = SiameseFaceNet()
    fnet.vgg16_include_top = True # default is False
    #
    model_dir_path = './models'
    image_dir_path = "./data/images"
    #
    database = dict()
    database["danielle"] = [fnet.img_to_encoding(image_dir_path + "/danielle.png")]
    database["younes"] = [fnet.img_to_encoding(image_dir_path + "/younes.jpg")]
    database["tian"] = [fnet.img_to_encoding(image_dir_path + "/tian.jpg")]
    database["andrew"] = [fnet.img_to_encoding(image_dir_path + "/andrew.jpg")]
    database["kian"] = [fnet.img_to_encoding(image_dir_path + "/kian.jpg")]
    database["dan"] = [fnet.img_to_encoding(image_dir_path + "/dan.jpg")]
    database["sebastiano"] = [fnet.img_to_encoding(image_dir_path + "/sebastiano.jpg")]
    database["bertrand"] = [fnet.img_to_encoding(image_dir_path + "/bertrand.jpg")]
    database["kevin"] = [fnet.img_to_encoding(image_dir_path + "/kevin.jpg")]
    database["felix"] = [fnet.img_to_encoding(image_dir_path + "/felix.jpg")]
    database["benoit"] = [fnet.img_to_encoding(image_dir_path + "/benoit.jpg")]
    database["arnaud"] = [fnet.img_to_encoding(image_dir_path + "/arnaud.jpg")]
    #
    fnet.fit(database=database, model_dir_path=model_dir_path)

if __name__ == '__main__':
    main()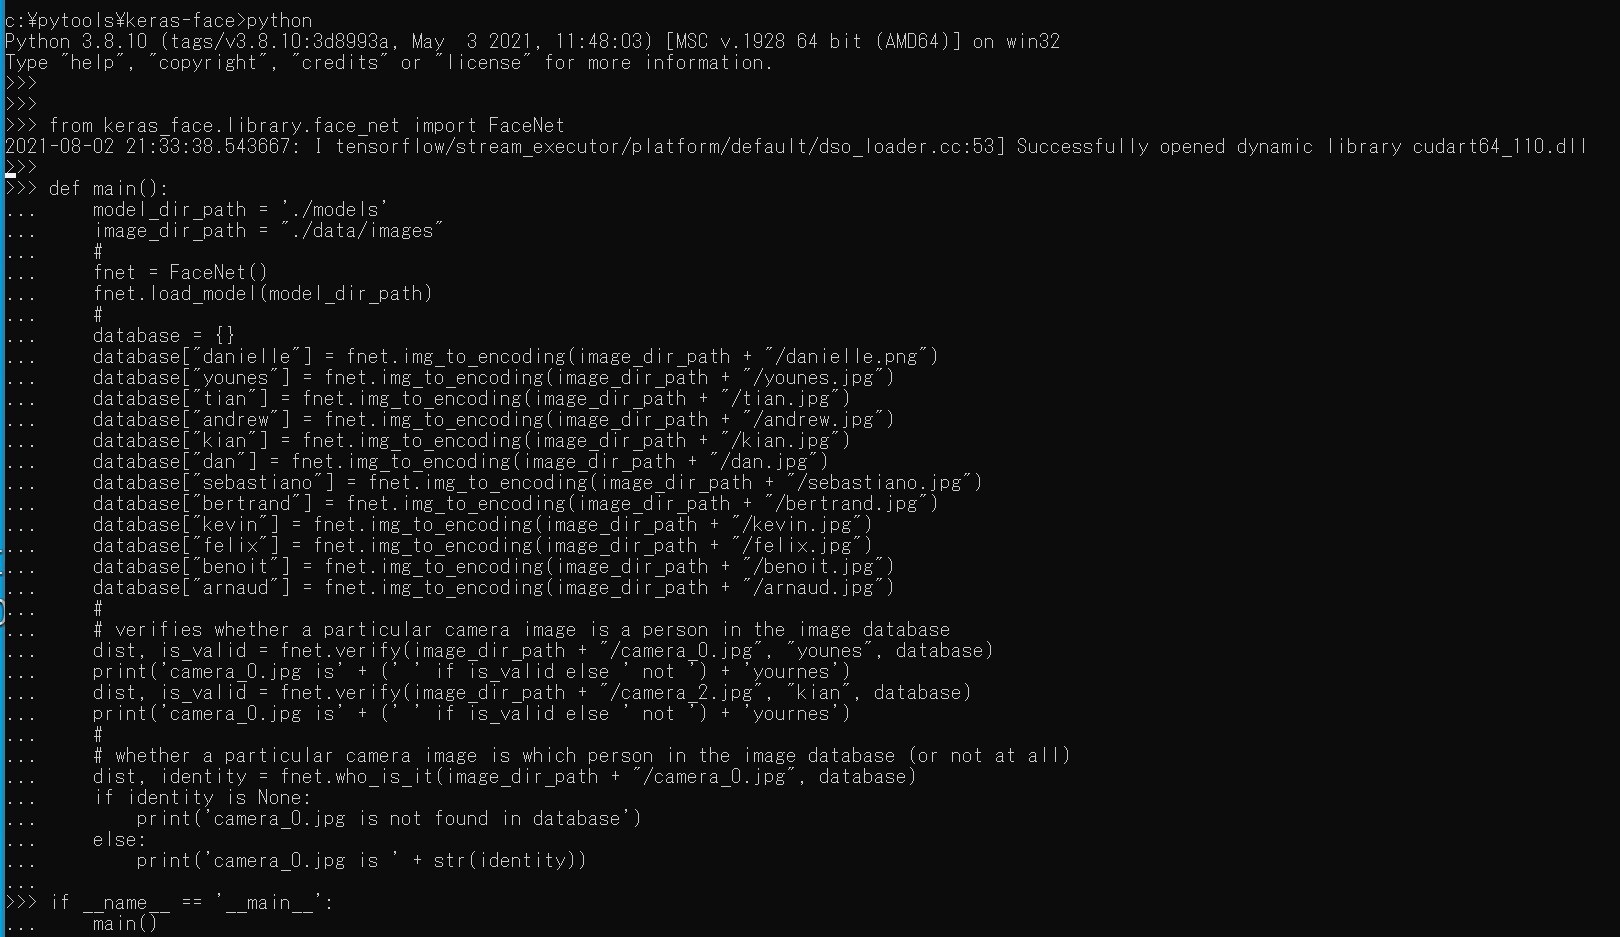
- 実行結果を確認する

- デモプログラム VGG16 + Siamese による顔認識 を実行
このプログラムは、VGG16 + Siamese の学習の結果を使うもの
このプログラムも camera_0.jpg が誰なのかを顔認識する。
次のPython プログラムを実行する
from keras_face.library.siamese import SiameseFaceNet
from functools import partial
import numpy as np
np.load = partial(np.load, allow_pickle=True)
def main():
    fnet = SiameseFaceNet()
    #
    model_dir_path = './models'
    image_dir_path = "./data/images"
    fnet.load_model(model_dir_path)
    #
    database = dict()
    database["danielle"] = [fnet.img_to_encoding(image_dir_path + "/danielle.png")]
    database["younes"] = [fnet.img_to_encoding(image_dir_path + "/younes.jpg")]
    database["tian"] = [fnet.img_to_encoding(image_dir_path + "/tian.jpg")]
    database["andrew"] = [fnet.img_to_encoding(image_dir_path + "/andrew.jpg")]
    database["kian"] = [fnet.img_to_encoding(image_dir_path + "/kian.jpg")]
    database["dan"] = [fnet.img_to_encoding(image_dir_path + "/dan.jpg")]
    database["sebastiano"] = [fnet.img_to_encoding(image_dir_path + "/sebastiano.jpg")]
    database["bertrand"] = [fnet.img_to_encoding(image_dir_path + "/bertrand.jpg")]
    database["kevin"] = [fnet.img_to_encoding(image_dir_path + "/kevin.jpg")]
    database["felix"] = [fnet.img_to_encoding(image_dir_path + "/felix.jpg")]
    database["benoit"] = [fnet.img_to_encoding(image_dir_path + "/benoit.jpg")]
    database["arnaud"] = [fnet.img_to_encoding(image_dir_path + "/arnaud.jpg")]
    #
    fnet.verify(image_dir_path + "/camera_0.jpg", "younes", database)
    fnet.verify(image_dir_path + "/camera_2.jpg", "kian", database)
    fnet.who_is_it(image_dir_path + "/camera_0.jpg", database)

if __name__ == '__main__':
    main()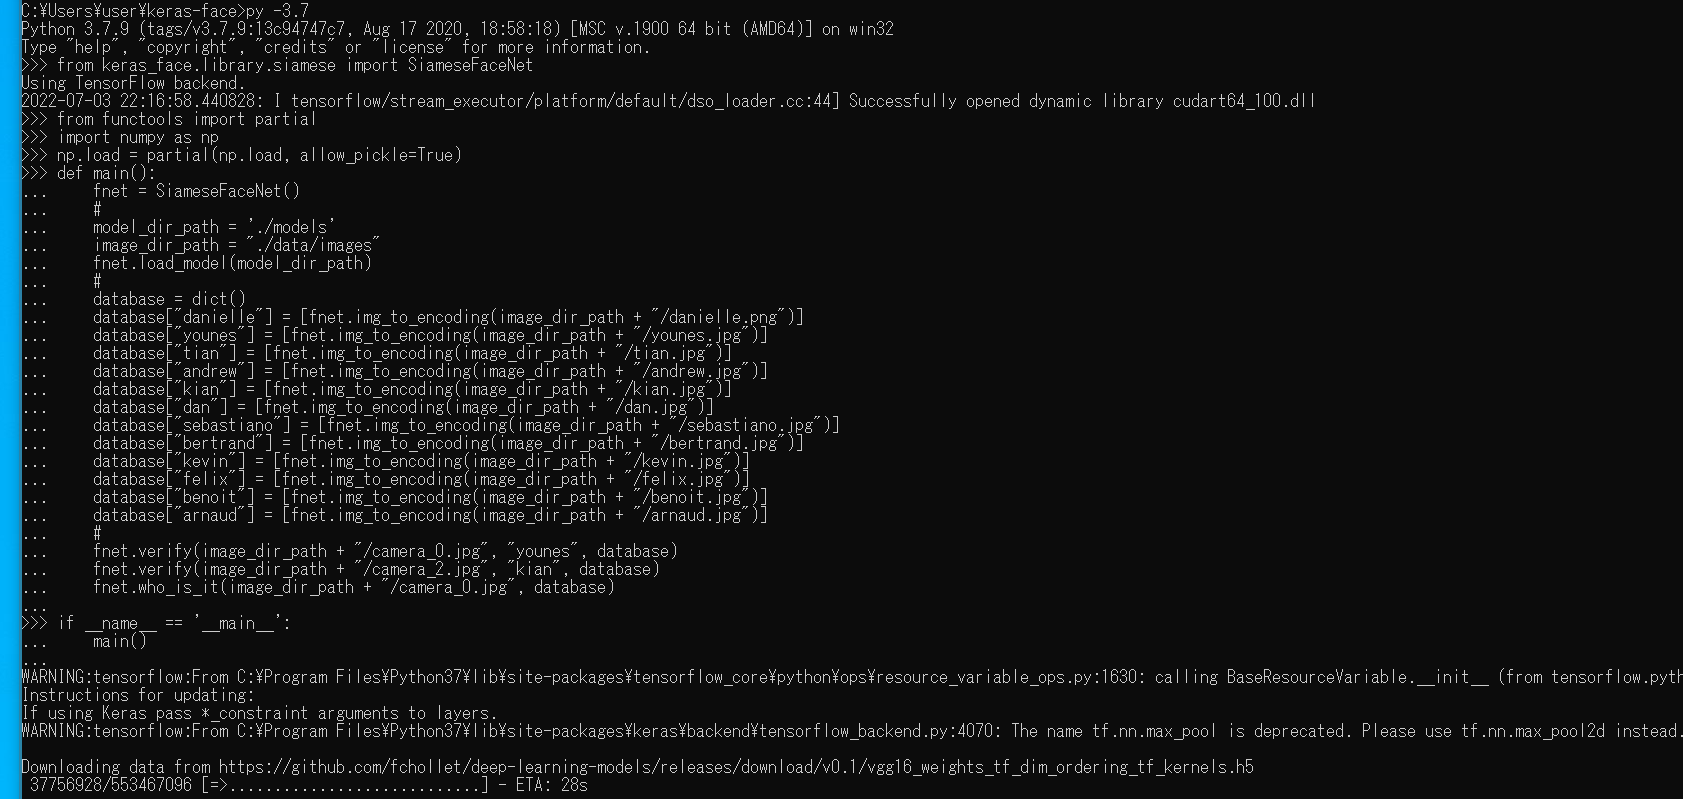
- 実行結果を確認する
顔認識の結果が表示される