Dlib による顔検出を行う Python プログラム(Dlib, Python を使用)(Windows 上)
【目次】
- 前準備
- Dlib Python のインストール,Dlib のソースコード等と,Dlib の学習済みモデルのダウンロード
- Dlib による顔検出を行う Python プログラム(Dlib に付属のプログラムを使用)
- Dlib による顔検出を行う Python プログラム(手持ちの画像ファイルや,パソコンのカメラで顔検出を行う)
【サイト内の関連ページ】
- 説明資料: Dlib の機能概要 [PDF], [パワーポイント]
- 顔情報処理の Python プログラム(Dlib,face_recognition を使用) について: 別ページ »にまとめ
- Windows で動く人工知能関係 Pythonアプリケーション,オープンソースソフトウエア): 別ページ »にまとめている.
【用語説明】
1. 前準備
Python のインストール(Windows上)
注:既にPython(バージョン3.12を推奨)がインストール済みの場合は,この手順は不要である.
winget(Windowsパッケージマネージャー)を使用してインストールを行う
- Windowsで,コマンドプロンプトを管理者権限で起動する(例:Windowsキーを押し,「cmd」と入力し,「管理者として実行」を選択)
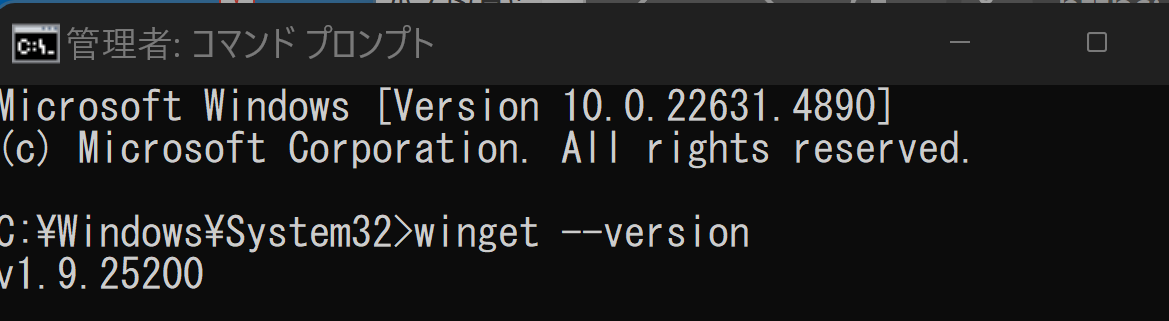
- winget(Windowsパッケージマネージャー)が利用可能か確認する:
winget --version
- Pythonのインストール(下のコマンドにより Python 3.12 がインストールされる).
- Python詳細ガイド:Pythonまとめ »
- コマンドラインからのビルドなど、C++コンパイラ機能のみが必要な場合:
- Visual Studioのエディタやデバッガなどの統合開発環境機能が必要な場合、あるいは、どちらをインストールすべきかよく分からない場合:
Visual Studio Community (または他のエディション) をインストール します.
Visual Studio 2022 をインストールする際に,「C++ によるデスクトップ開発」ワークロードを選択することで,必要なBuild Toolsの機能も一緒にインストールされます.
- Windows で,コマンドプロンプトを管理者権限で起動します(例:Windowsキーを押し,「cmd」と入力し,「管理者として実行」を選択)。
以下の
wingetコマンドを実行します。wingetはWindows標準のパッケージマネージャーです。--scope machineオプションはシステム全体にインストールすることを意味します。次のコマンドは,Build Tools for Visual Studio 2022と、多くのプログラムで必要とされるVC++ 2015以降の再頒布可能パッケージをインストールします.
- Build Tools for Visual Studio 2022 で C++ によるデスクトップ開発関連コンポーネントのインストール
CUDA開発には、標準のC++開発ツールに加えて、特定のコンポーネントが必要になる場合があります。
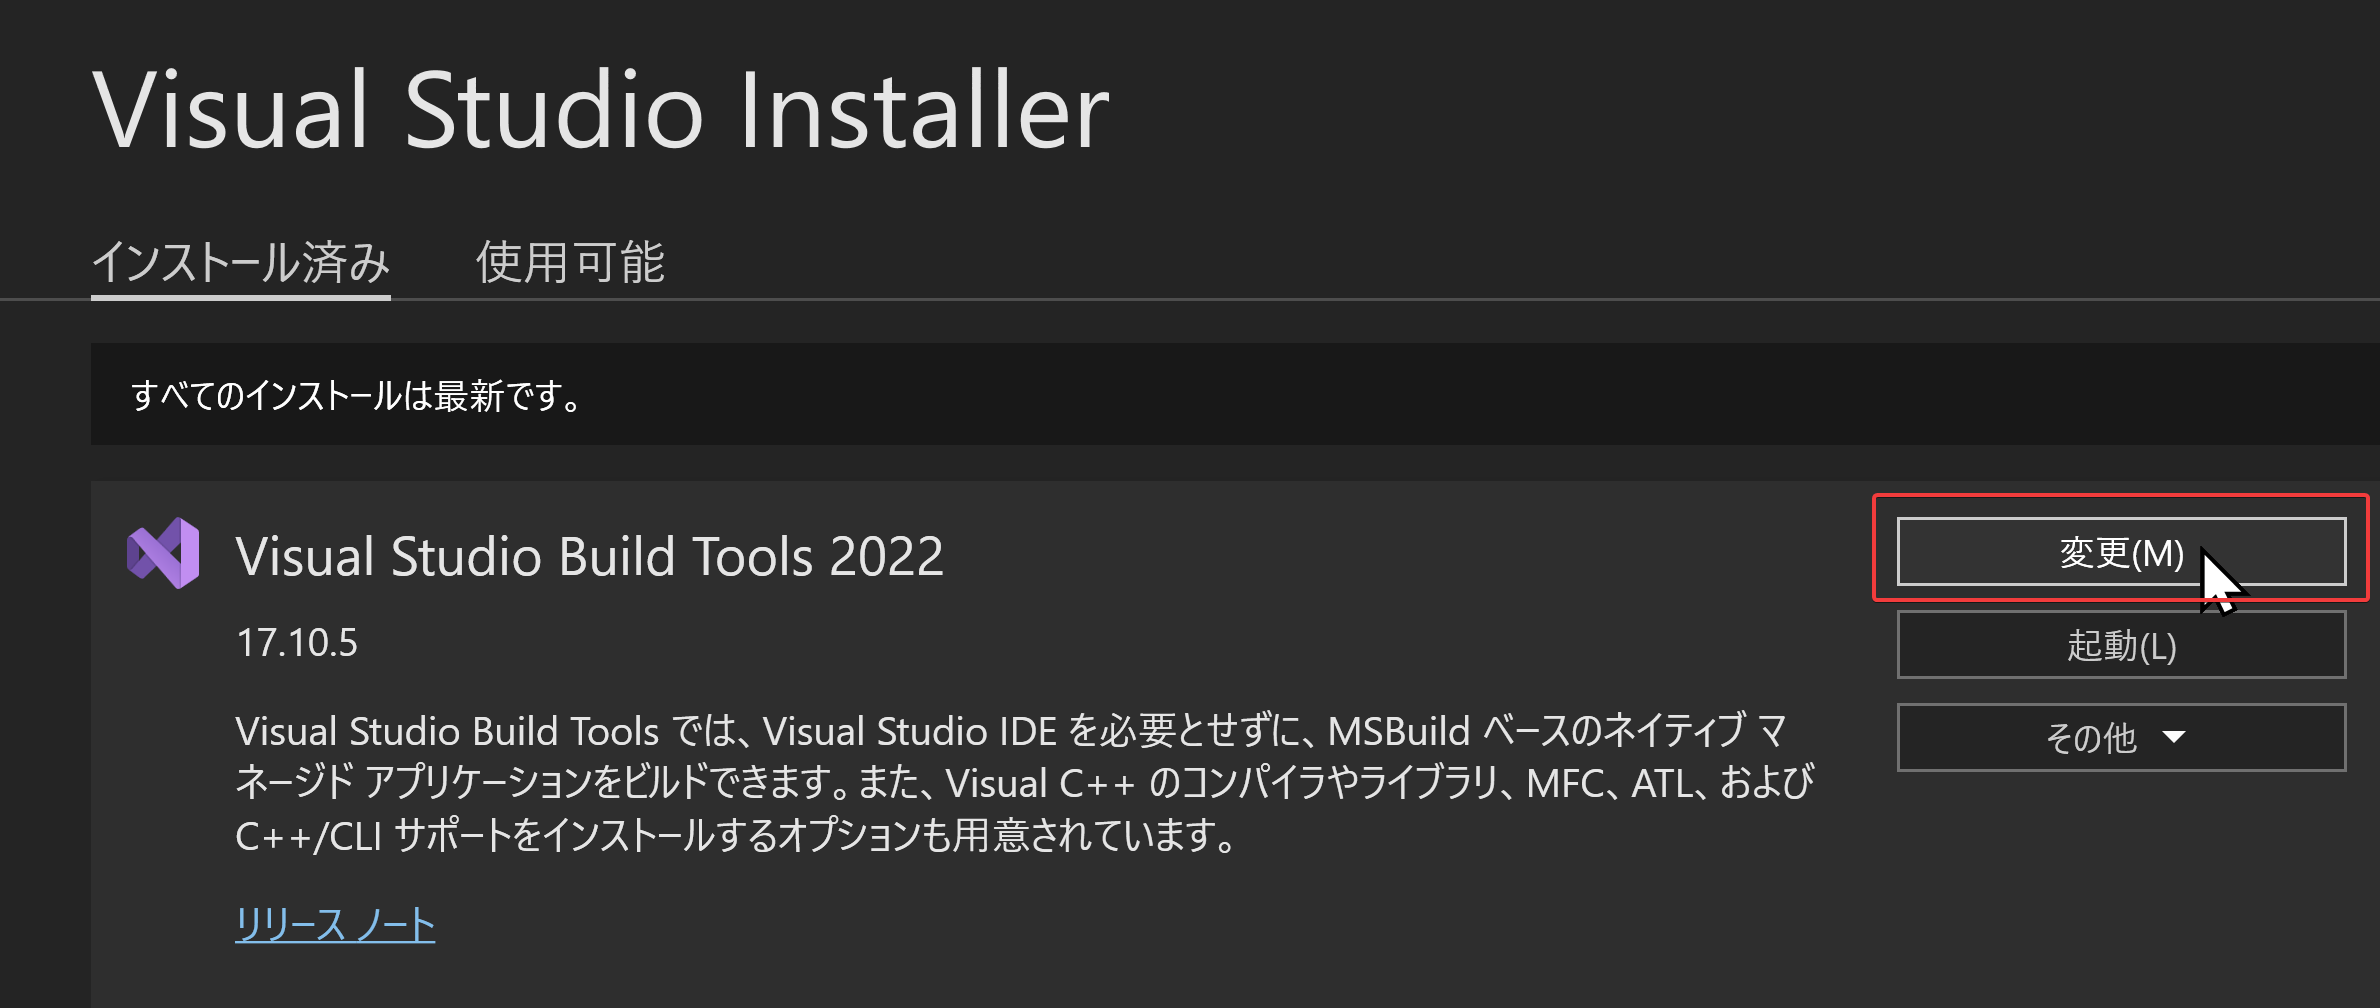
- Visual Studio Installer を起動します。
起動方法: スタートメニューから「Visual Studio Installer」を探して実行します.
- Visual Studio Build Tools 2022 の項目で「変更」ボタンをクリックします.
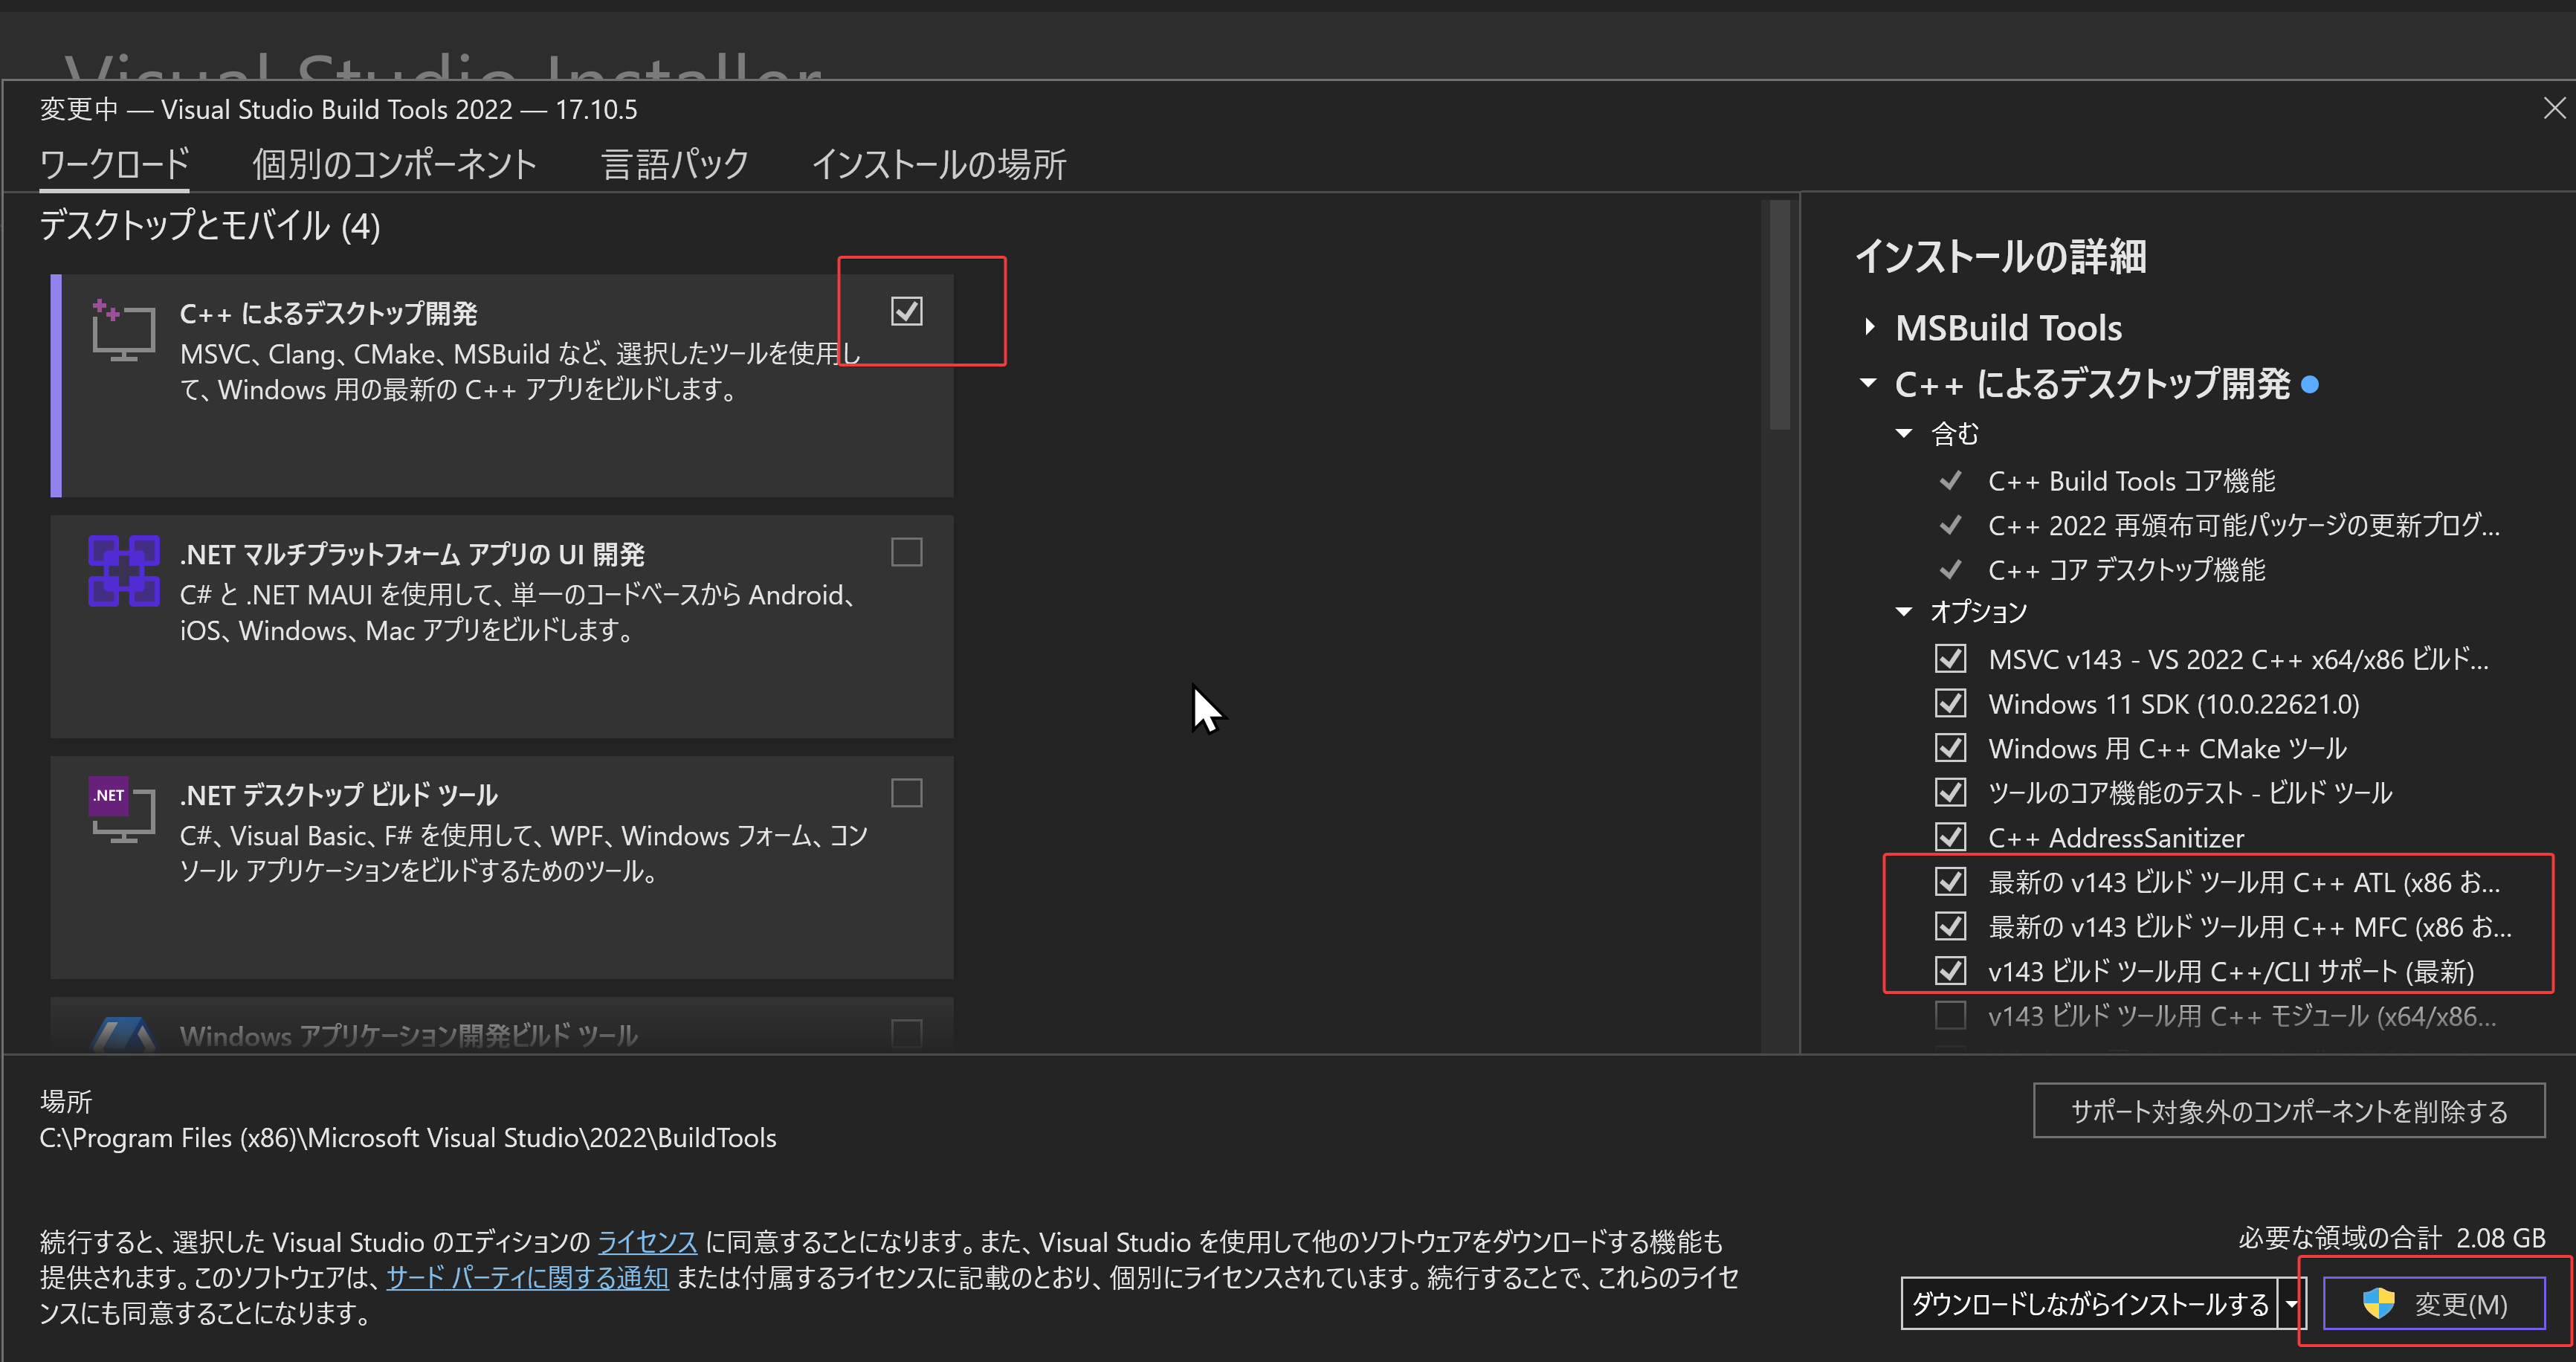
- 「ワークロード」タブで「C++ によるデスクトップ開発」をクリックして選択します。画面右側の「インストールの詳細」で、必要に応じて「v143 ビルドツール用 C++/CLI サポート(最新)」、「ATL」、「MFC」などをチェックします(これらは一般的なC++開発や特定のプロジェクトタイプで必要になる場合があります)。その後、「変更」をクリックしてインストールまたは変更を適用します.
- Visual Studio Installer を起動します。
- Windows で,コマンドプロンプトを管理者権限で起動します。
- インストールコマンドの実行
以下の
wingetコマンドを実行します。--override "--add ..."部分で、インストールするワークロードやコンポーネントを指定しています。winget install Microsoft.VisualStudio.2022.Community --scope machine --override "--add Microsoft.VisualStudio.Workload.NativeDesktop Microsoft.VisualStudio.ComponentGroup.NativeDesktop.Core Microsoft.VisualStudio.Component.VC.CLI.Support Microsoft.VisualStudio.Component.CoreEditor Microsoft.VisualStudio.Component.NuGet Microsoft.VisualStudio.Component.Roslyn.Compiler Microsoft.VisualStudio.Component.TextTemplating Microsoft.VisualStudio.Component.Windows.SDK.Latest Microsoft.VisualStudio.Component.VC.Tools.x86.x64 Microsoft.VisualStudio.Component.VC.ATL Microsoft.VisualStudio.Component.VC.ATLMFC" winget install Microsoft.VisualStudio.2022.Community --scope machine Microsoft.VCRedist.2015+.x64
インストールされる主要なコンポーネントの説明:
NativeDesktop(C++によるデスクトップ開発): CUDA開発に必要なC++コンパイラ(VC.Tools.x86.x64)やWindows SDK (Windows.SDK.Latest)など、基本的な開発ツール一式を含みます。CoreEditor: Visual Studioの基本的なコードエディタ機能を提供します。VC.CLI.Support: C++/CLIを用いた開発サポート(通常、純粋なCUDA C++開発では不要な場合もあります)。NuGet: .NETライブラリ管理用(C++プロジェクトでも利用されることがあります)。VC.ATL/VC.ATLMFC: 特定のWindowsアプリケーション開発フレームワーク(通常、CUDA開発自体には直接必要ありません)。
システム要件と注意事項:
- 管理者権限でのインストールが必須です。
- 必要ディスク容量:10GB以上(選択するコンポーネントにより変動)。
- 推奨メモリ:8GB以上のRAM。
- インストール過程でシステムの再起動が要求される可能性があります。
- 安定したインターネット接続環境が必要です。
後から追加のコンポーネントが必要になった場合は,Visual Studio Installerを使用して個別にインストールすることが可能です.
- インストール完了の確認
インストールが成功したか確認するには、管理者権限のコマンドプロンプトで以下のコマンドを実行します。
winget list Microsoft.VisualStudio.2022.Community
リストに表示されればインストールされています。
トラブルシューティング:
インストール失敗時は,以下のログファイルを確認すると原因究明の手がかりになります:
%TEMP%\dd_setup_
.log %TEMP%\dd_bootstrapper_ .log (
- (オプション) Visual Studio Installer での確認と変更
wingetでのインストール後も、Visual Studio Installerを使ってインストール内容を確認・変更できます。- Visual Studio Installer を起動します。
- Visual Studio Community 2022 の項目で「変更」をクリックします。
- 「ワークロード」タブで「C++ によるデスクトップ開発」がチェックされていることを確認します。必要であれば、「個別のコンポーネント」タブで特定のツール(例: 特定バージョンのMSVCコンパイラ、CMakeツールなど)を追加・削除できます。「インストールの詳細」で「v143 ビルドツール用 C++/CLI サポート(最新)」などが選択されているかも確認できます。変更後、「変更」または「インストール」をクリックします。
- Windows で,コマンドプロンプトを管理者権限で起動する(例:Windowsキーを押し,「cmd」と入力し,「管理者として実行」を選択)
- 次のコマンドを実行
次のコマンドは,7-Zipをインストールするものである.
winget install --scope machine 7zip.7zip
powershell -command "$oldpath = [System.Environment]::GetEnvironmentVariable(\"Path\", \"Machine\"); $oldpath += \";c:\Program Files\7-Zip\"; [System.Environment]::SetEnvironmentVariable(\"Path\", $oldpath, \"Machine\")"
- 7-Zip の公式ページ: https://7-zip.opensource.jp/
- Windows で,コマンドプロンプトを管理者権限で起動する(例:Windowsキーを押し,「cmd」と入力し,「管理者として実行」を選択)
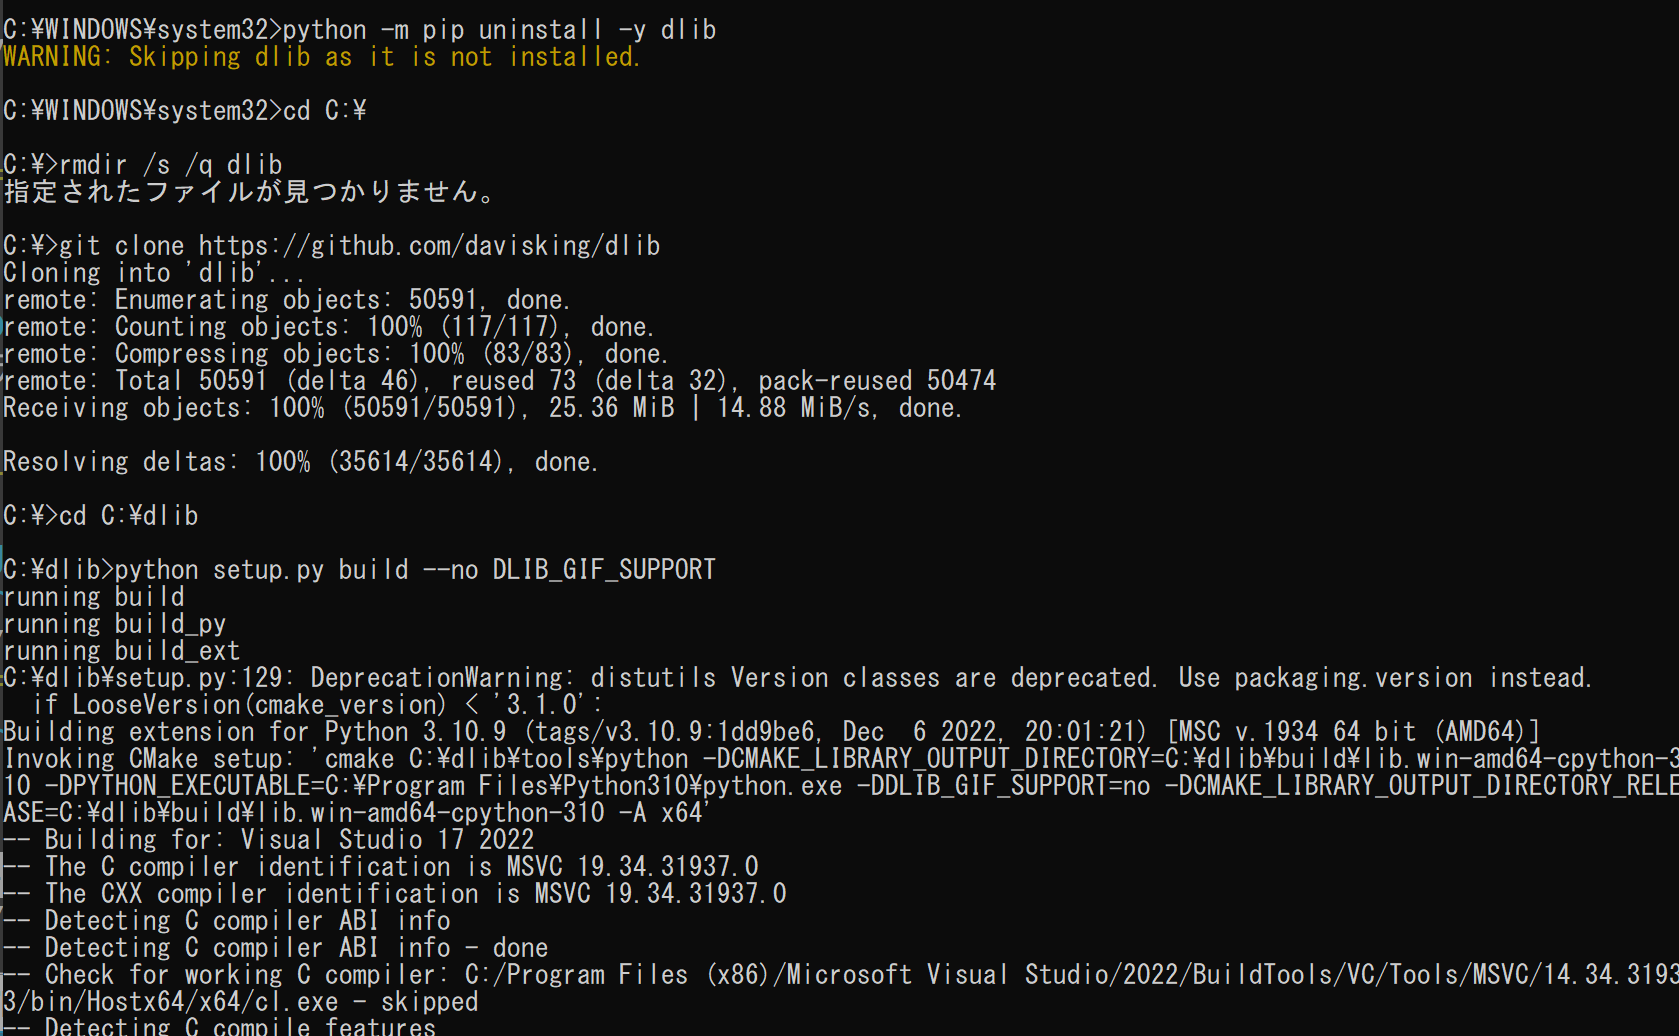
- Dlib のパッケージのインストール
次のコマンドを実行.
python -m pip uninstall -y dlib
cd C:\
rmdir /s /q dlib
git clone https://github.com/davisking/dlib
cd C:\dlib
python setup.py build --no DLIB_GIF_SUPPORT
python setup.py install --no DLIB_GIF_SUPPORT
- Python の dlib パッケージがインストールできたことの確認
バージョン番号が表示されれば OK.下の図とは違うバージョンが表示されることがある.
python -c "import dlib; print( dlib.__version__ )"

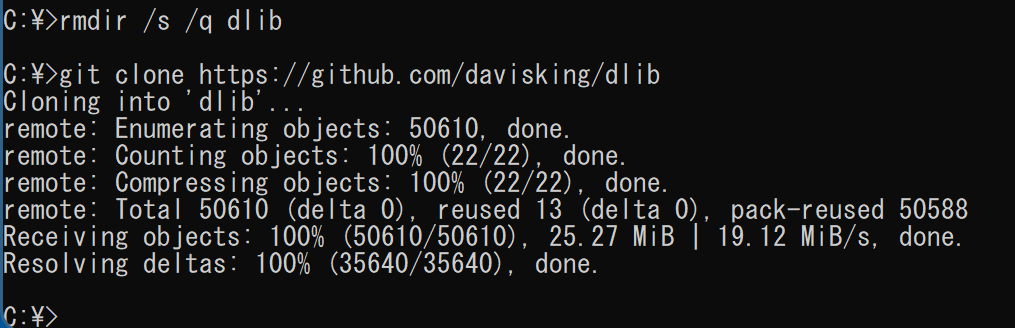
- Dlib のソースコード等のダウンロード
次のコマンドを実行.
cd C:\
rmdir /s /q dlib
git clone https://github.com/davisking/dlib
- Dlib の学習済みモデルのダウンロード
次のコマンドを実行.
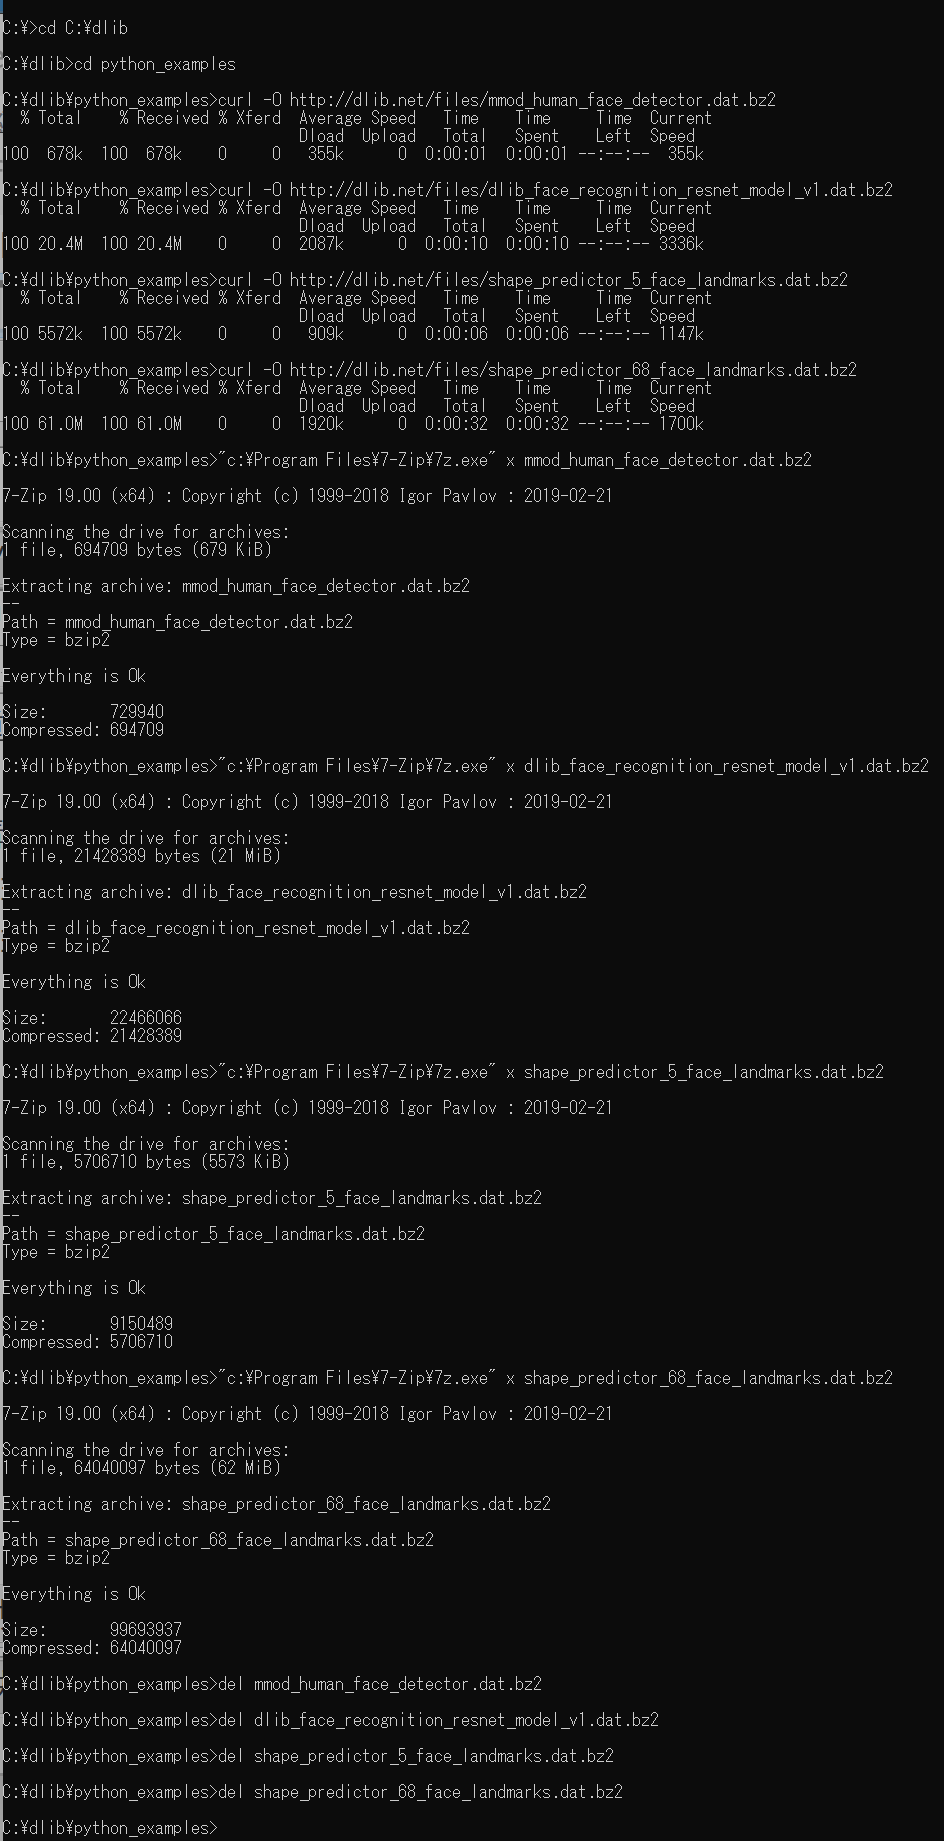
cd C:\dlib
cd python_examples
curl -O http://dlib.net/files/mmod_human_face_detector.dat.bz2
curl -O http://dlib.net/files/dlib_face_recognition_resnet_model_v1.dat.bz2
curl -O http://dlib.net/files/shape_predictor_5_face_landmarks.dat.bz2
curl -O http://dlib.net/files/shape_predictor_68_face_landmarks.dat.bz2
"c:\Program Files\7-Zip\7z.exe" x mmod_human_face_detector.dat.bz2
"c:\Program Files\7-Zip\7z.exe" x dlib_face_recognition_resnet_model_v1.dat.bz2
"c:\Program Files\7-Zip\7z.exe" x shape_predictor_5_face_landmarks.dat.bz2
"c:\Program Files\7-Zip\7z.exe" x shape_predictor_68_face_landmarks.dat.bz2
del mmod_human_face_detector.dat.bz2
del dlib_face_recognition_resnet_model_v1.dat.bz2
del shape_predictor_5_face_landmarks.dat.bz2
del shape_predictor_68_face_landmarks.dat.bz2
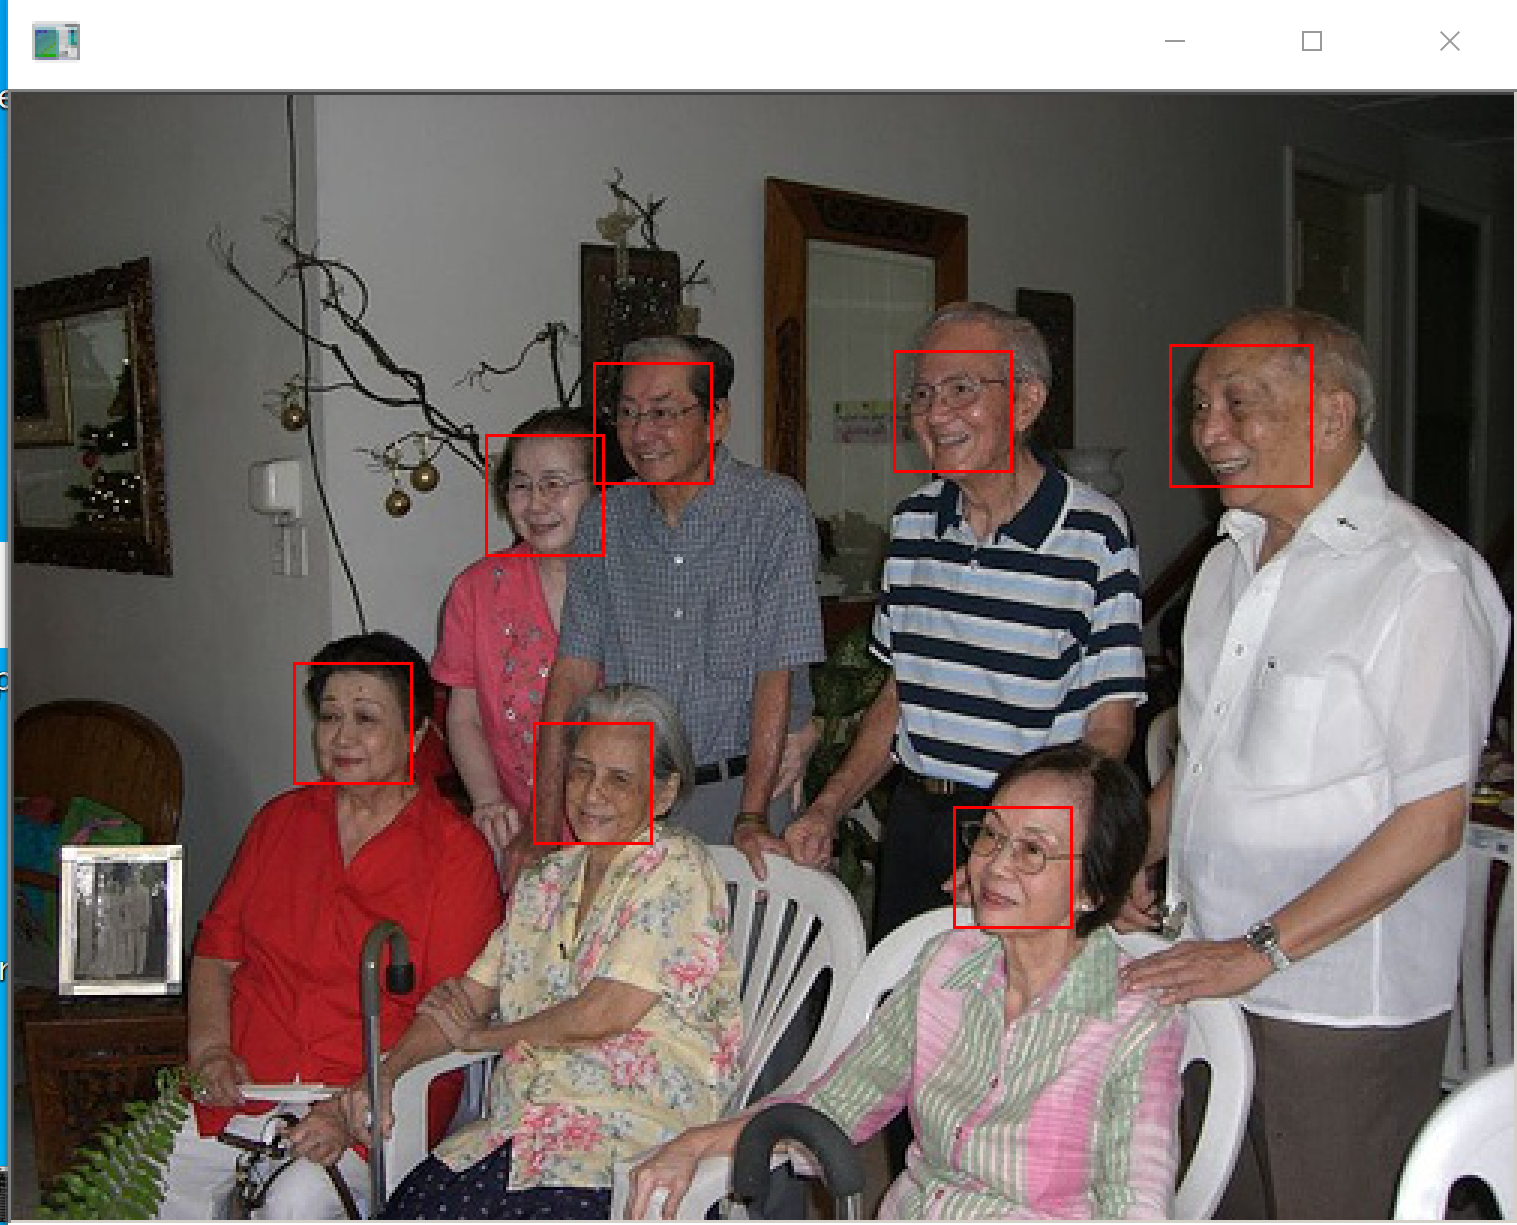
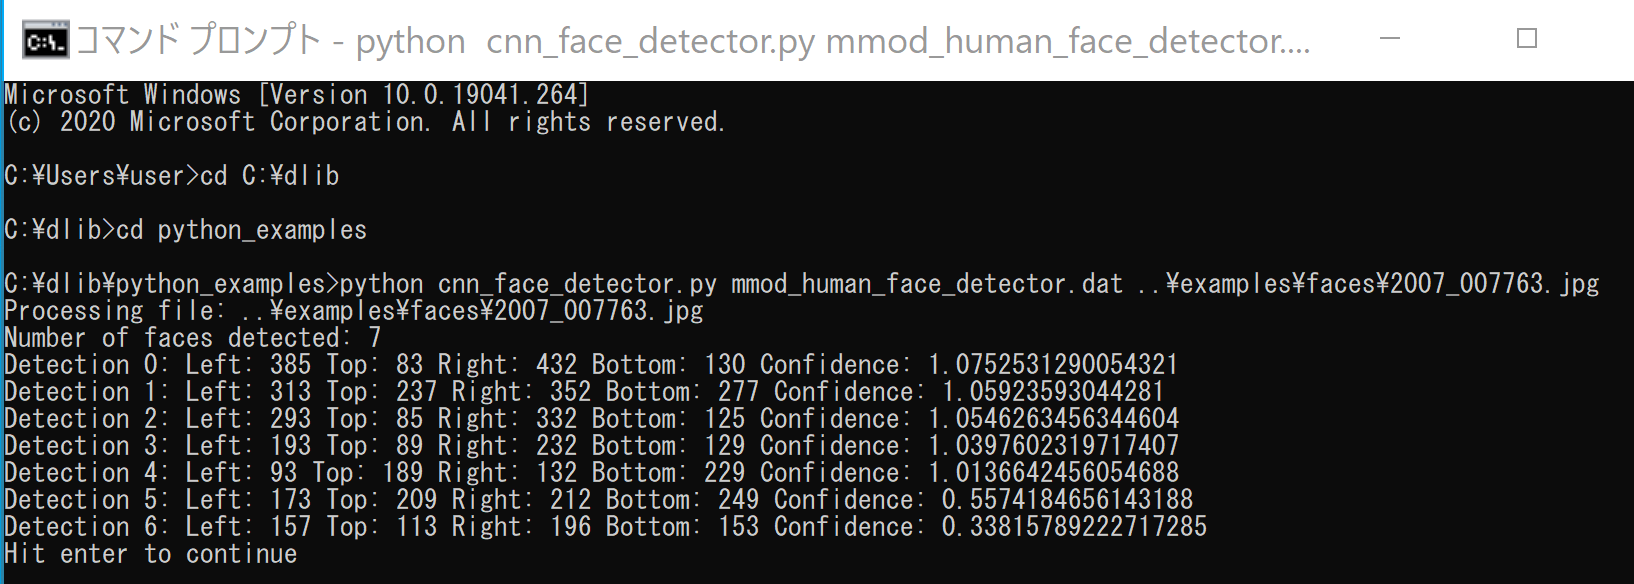
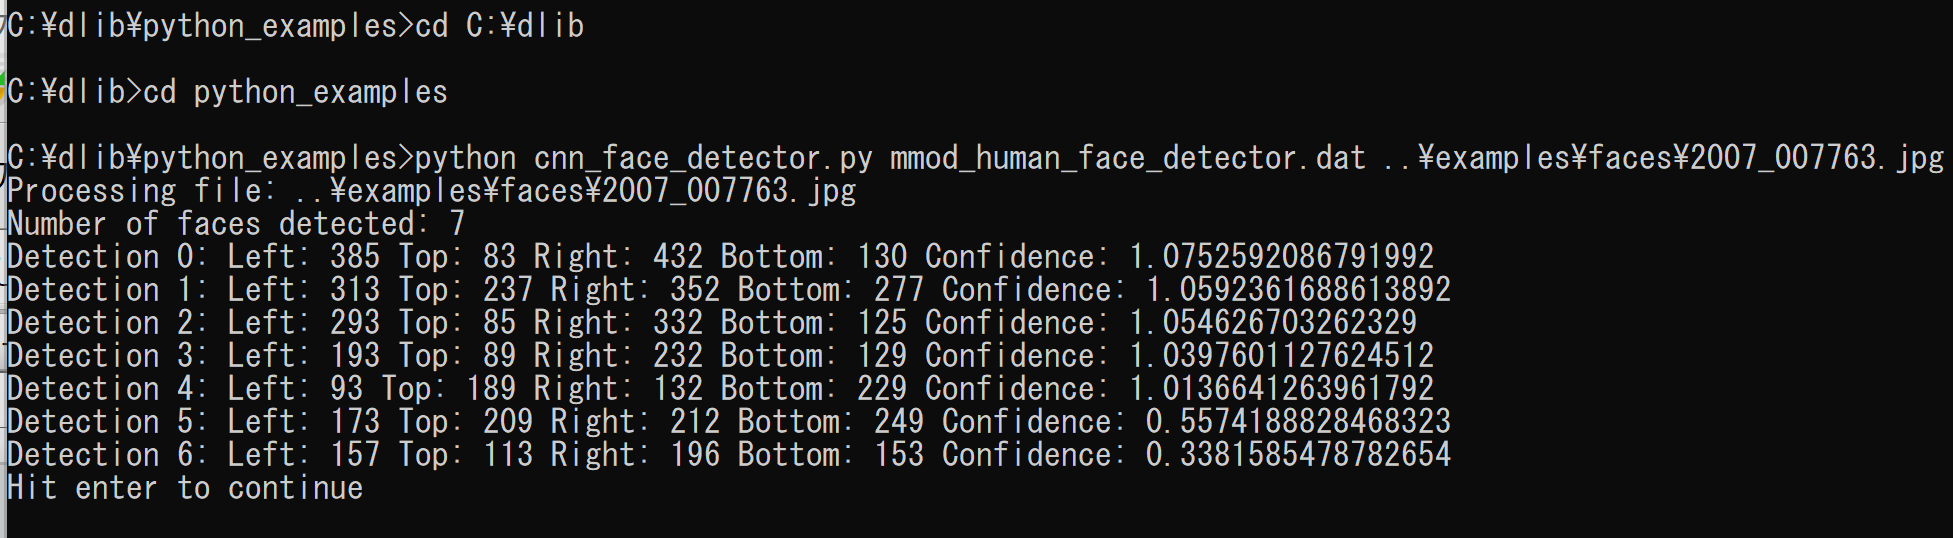
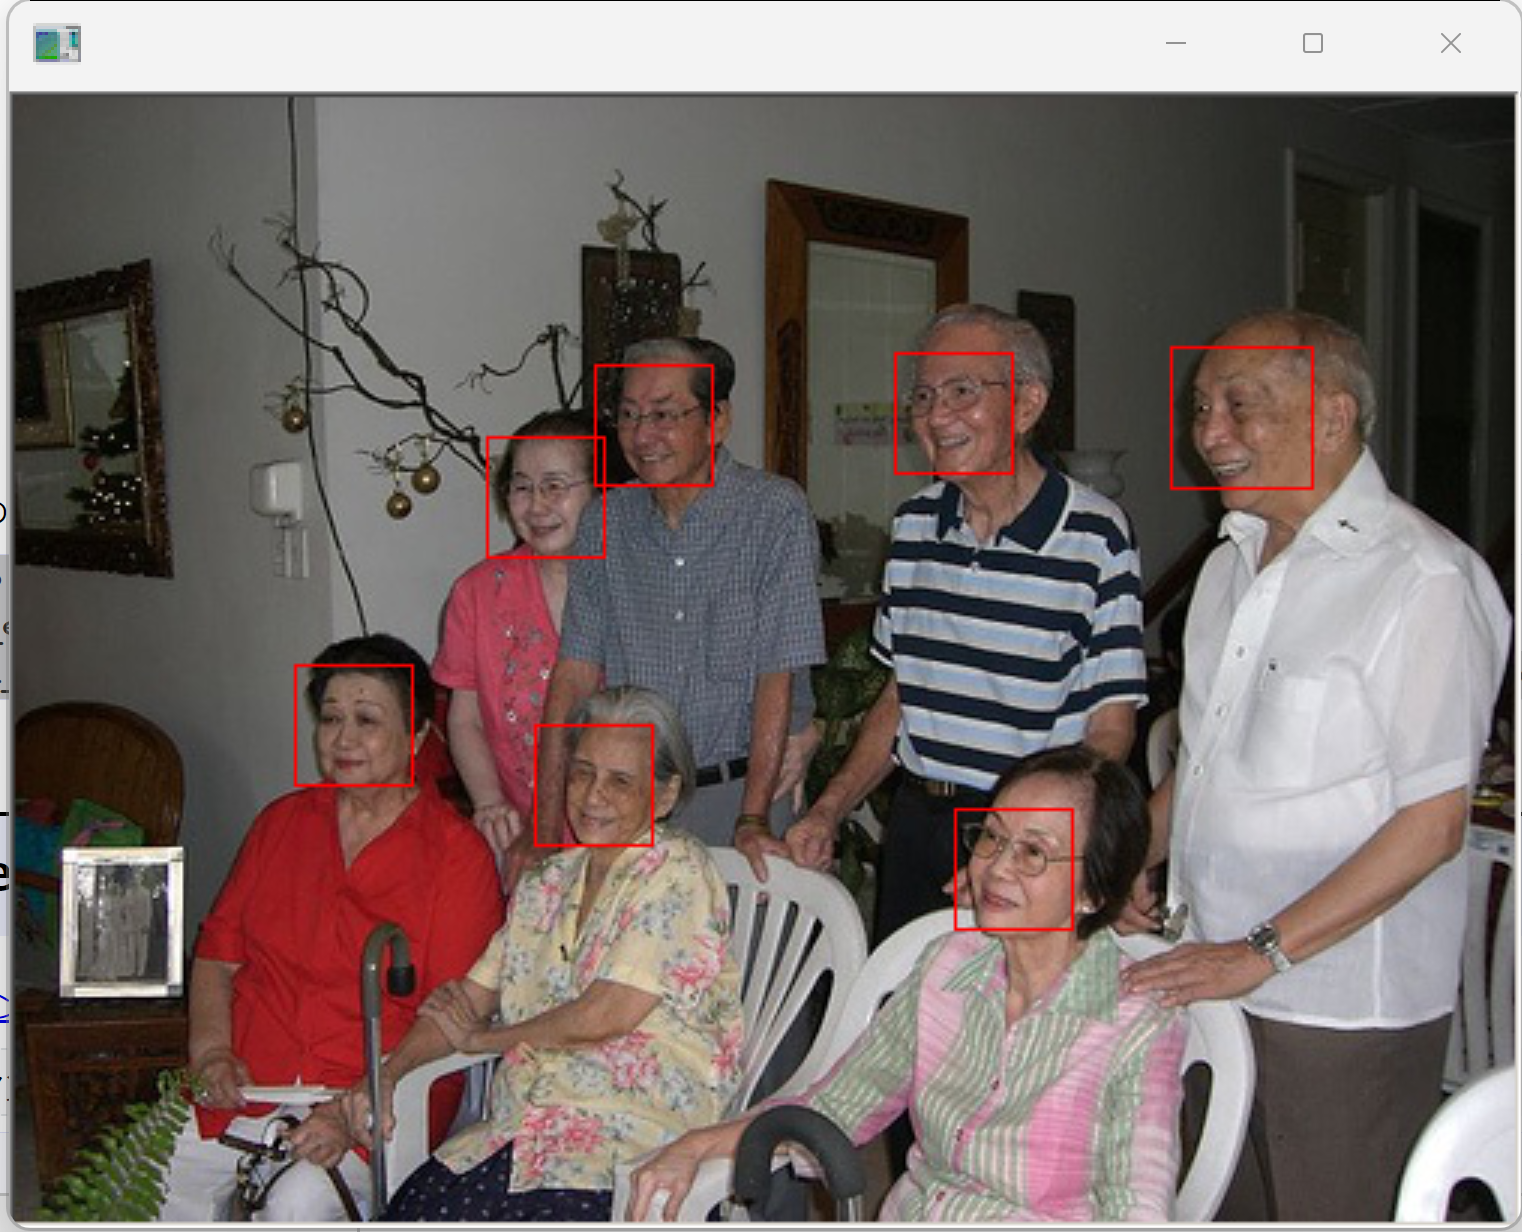
- Dlib の動作確認のため,次を実行.エラーメッセージが出ずに,顔検出の結果が表示されれば OK とする.
cd C:\dlib
cd python_examples
python cnn_face_detector.py mmod_human_face_detector.dat ..\examples\faces\2007_007763.jpg
- python: python
- pip: python -m pip または pip
- Jupyter Qt Console: jupyter qtconsole
- Jupyter ノートブック (Jupyter Notebook): jupyter notebook
- Jupyter Lab: jupyter lab あるいは python -m jupyter lab
- Nteract: jupyter nteract あるいは python -m jupyter nteract
- Spyder: spyder
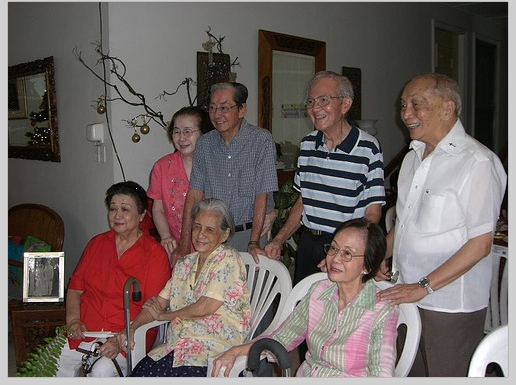
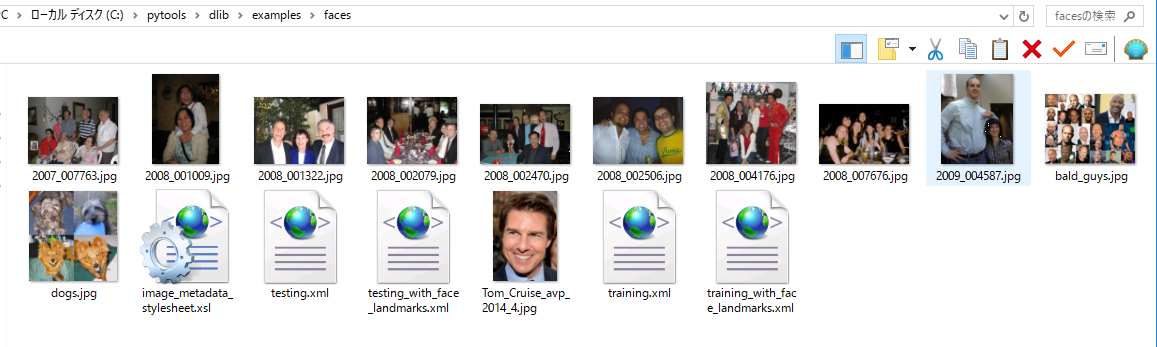
- まずは、DLib に同封の顔画像ファイルに何があるかを、簡単にみておく
%HOMEPATH%\dlib\examples\faces の下の顔画像のファイルを確認する
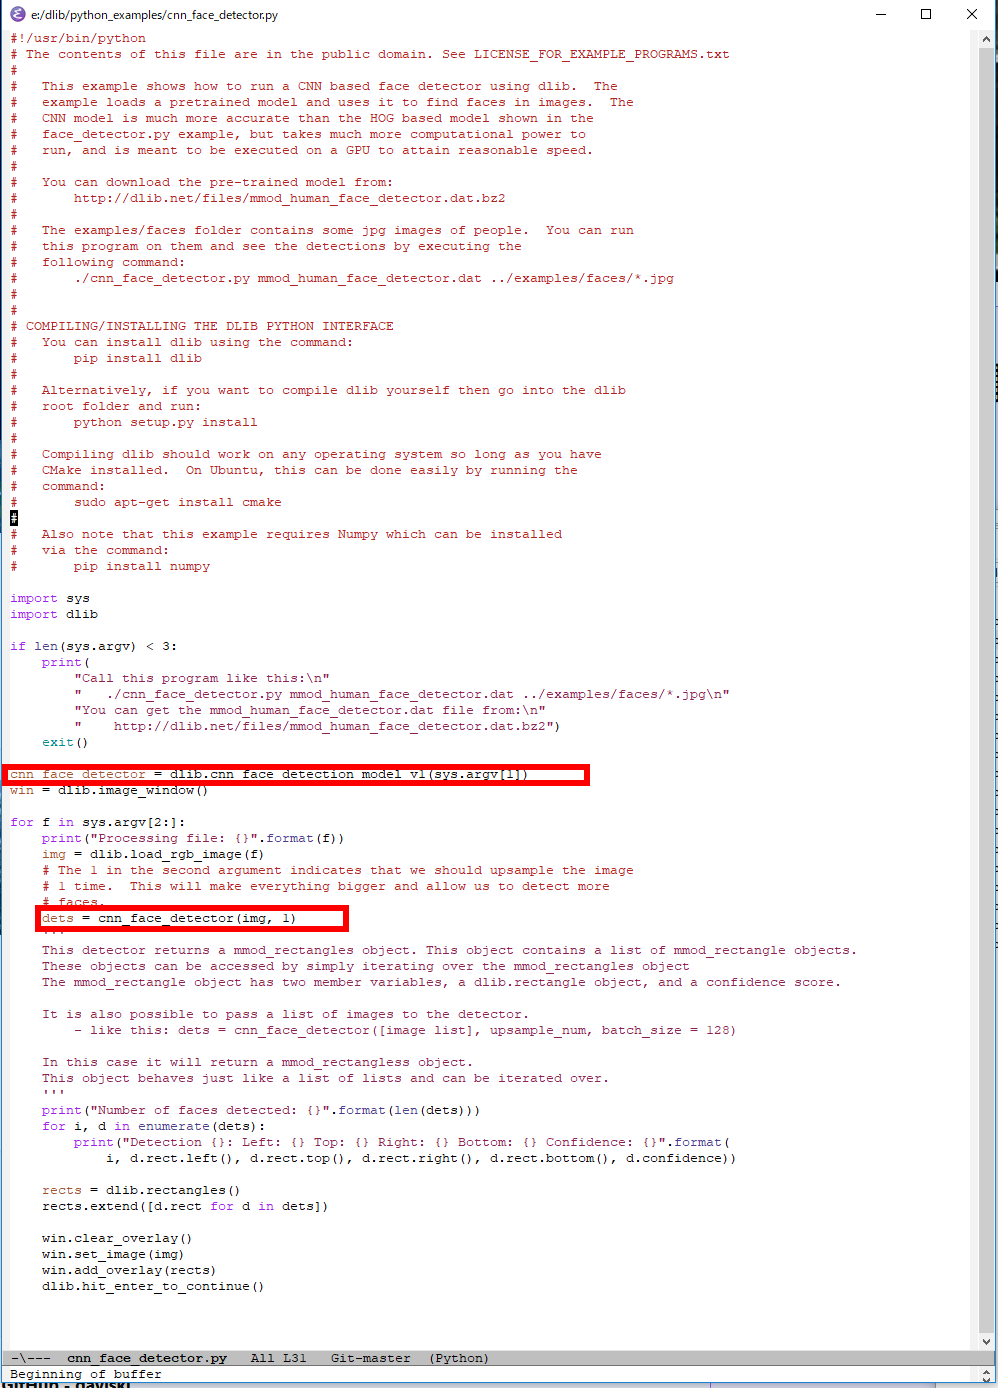
- cnn_face_detector.py をエディタなどで開いて、中身を確認
Dlib には Convolutional Network による顔検出の機能があり、顔検出させるためのプログラムは実質2行. 画面を開く、画像ファイルを読み込む、画像データを表示する、顔部分を四角で描くといったことも簡単なコマンド.
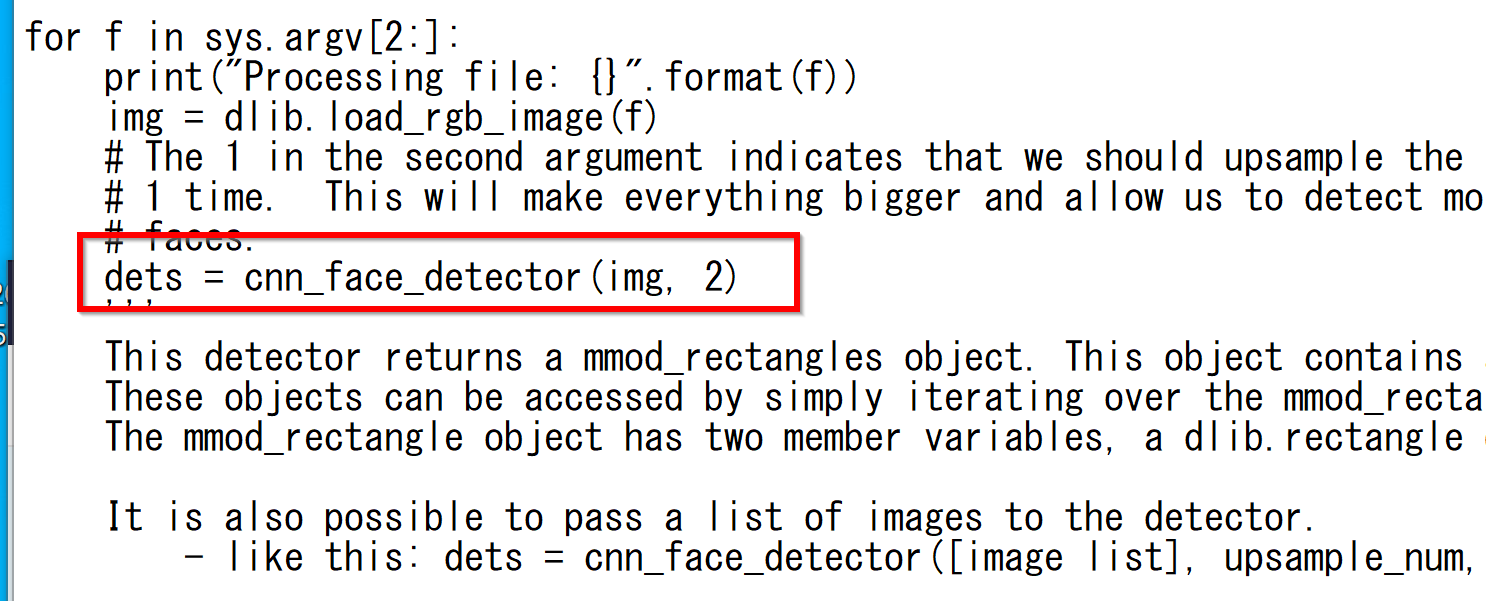
- Dlib では、顔のサイズは 80 x 80 であるとして、学習済みデータが配布されている。
より小さな顔を検出したいときは、アップサンプルを行う。アップサンプルを行うと、動作は遅くなる。
cnn_face_detector.py の「dets = cnn_face_detector(img, 1)」の「1」を「2」や「3」に変える。 そして、再び、cnn_face_detector.py を実行する。
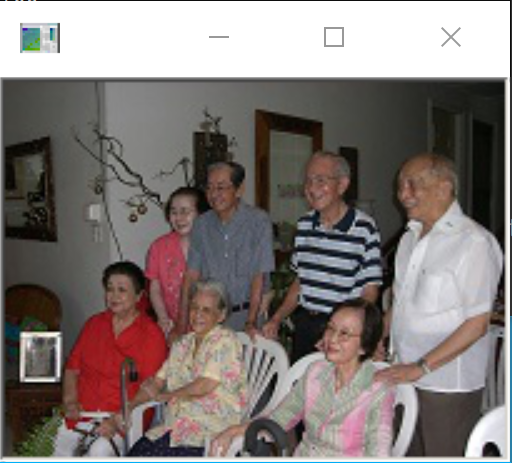
上で使用した画像を、縦、横 0.4 倍した画像で試してみる。 まず、「dets = cnn_face_detector(img, 1)」のとき
「dets = cnn_face_detector(img, 2)」のとき
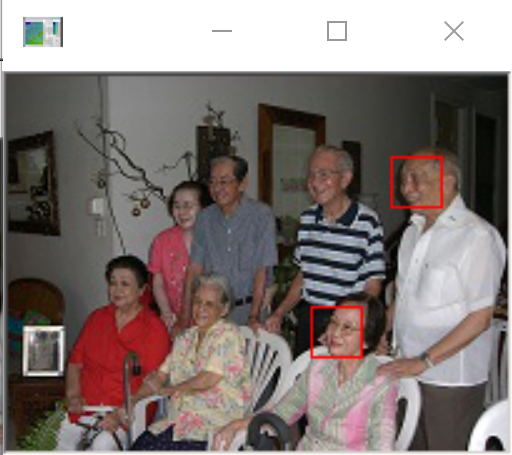
「dets = cnn_face_detector(img, 3)」のとき
- Windows で,コマンドプロンプトを管理者権限で起動する(例:Windowsキーを押し,「cmd」と入力し,「管理者として実行」を選択)
- opencv-python のインストール
* 「pip install ...」は,Python パッケージをインストールするための操作
python -m pip install -U opencv-python opencv-contrib-python
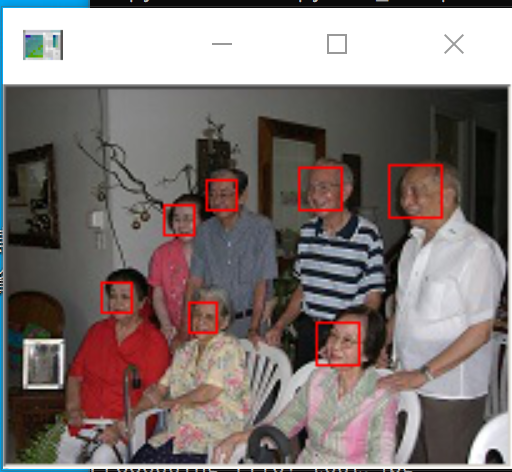
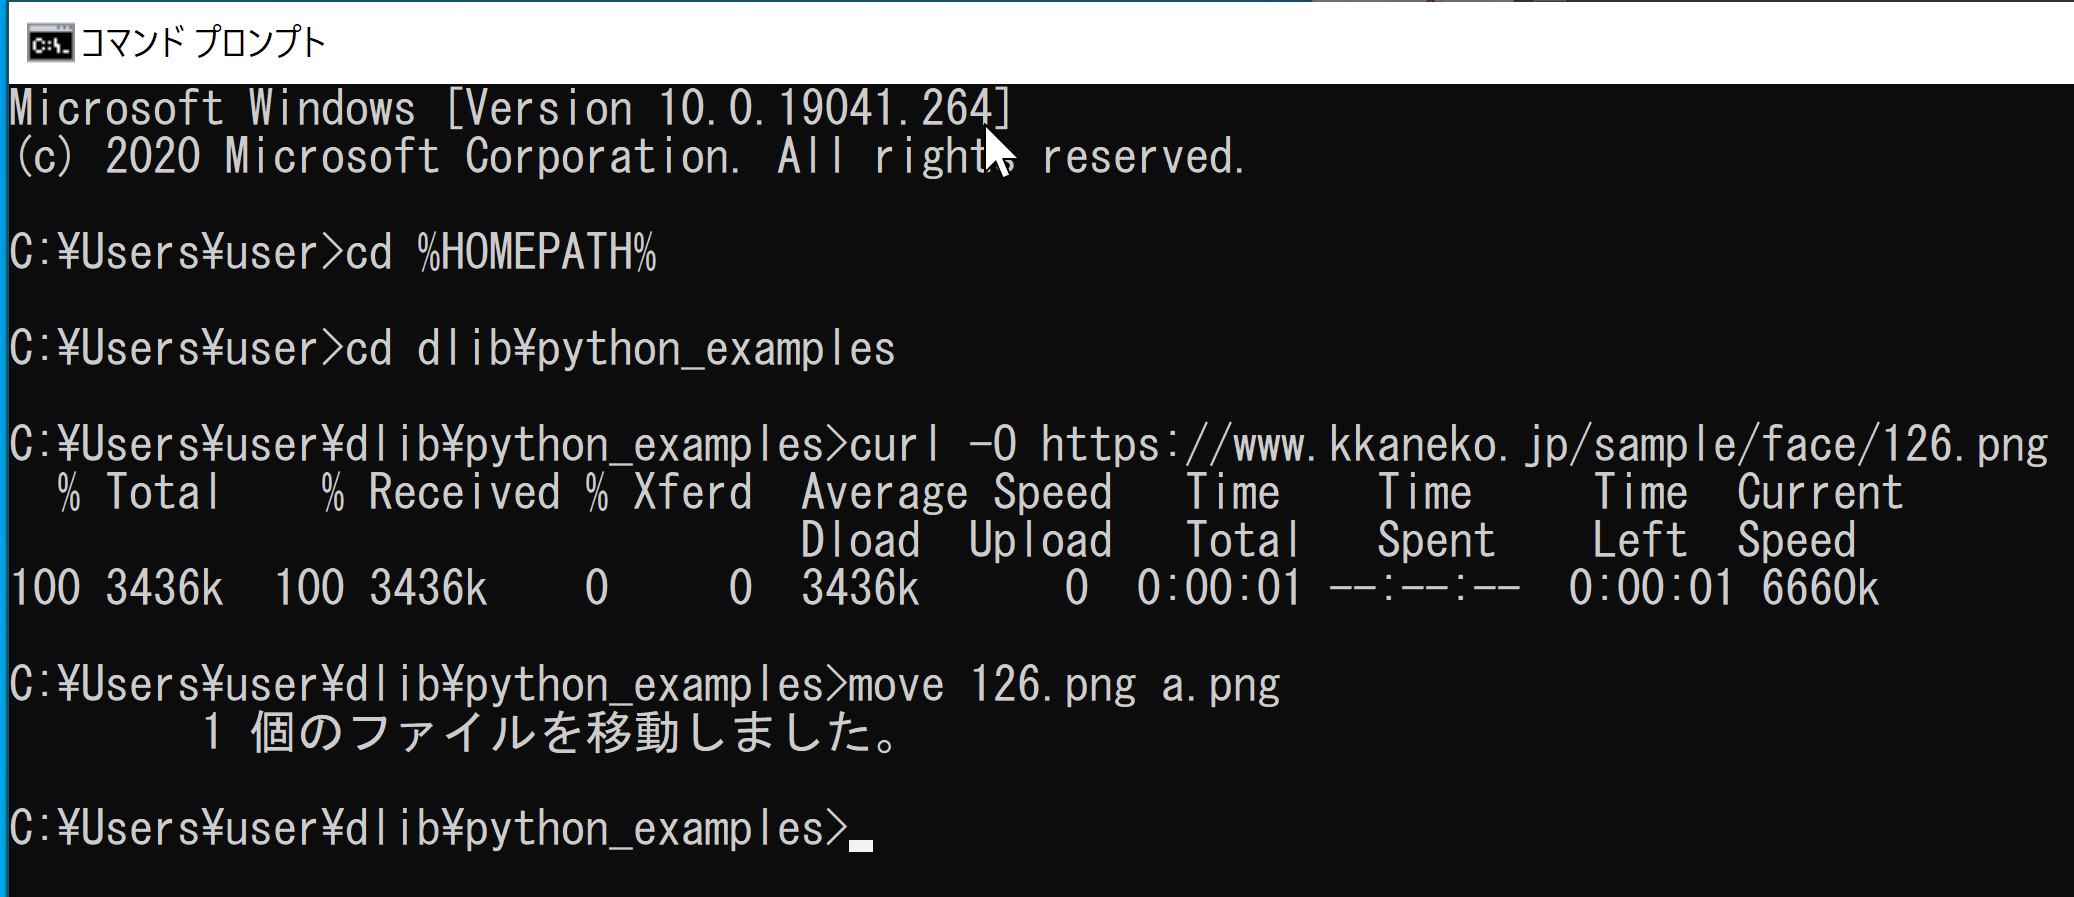
- 処理したい画像ファイルを準備
ファイル名は a.png にする. %HOMEPATH%\dlib\python_examples に置く.
cd C:\dlib\python_examples
curl -O https://www.kkaneko.jp/sample/face/126.png
move 126.png a.png
- Python プログラムファイルの作成
notepad hoge.py
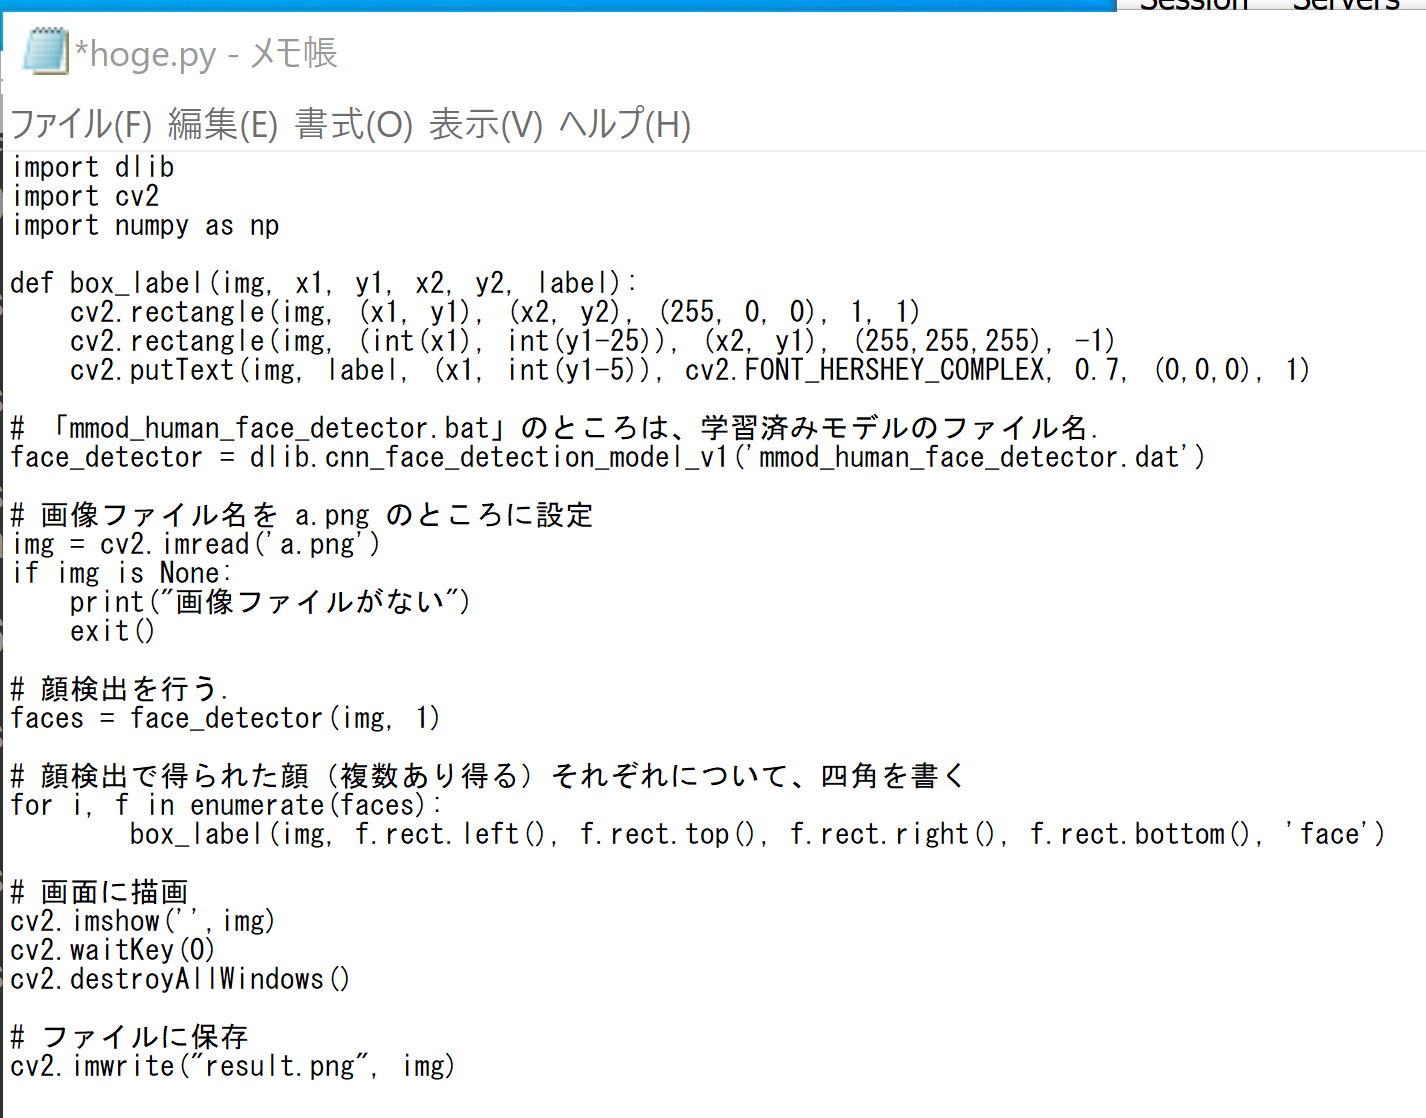
ソースコードは次の通り.
import dlib import cv2 import numpy as np def box_label(img, x1, y1, x2, y2, label): cv2.rectangle(img, (x1, y1), (x2, y2), (255, 0, 0), 1, 1) cv2.rectangle(img, (int(x1), int(y1-25)), (x2, y1), (255,255,255), -1) cv2.putText(img, label, (x1, int(y1-5)), cv2.FONT_HERSHEY_COMPLEX, 0.7, (0,0,0), 1) # 「mmod_human_face_detector.bat」のところは、学習済みモデルのファイル名. face_detector = dlib.cnn_face_detection_model_v1('mmod_human_face_detector.dat') # 画像ファイル名を a.png のところに設定 img = cv2.imread('a.png') if img is None: print("画像ファイルがない") exit() # 顔検出を行う. faces = face_detector(img, 1) # 顔検出で得られた顔(複数あり得る)それぞれについて、四角を書く for i, f in enumerate(faces): box_label(img, f.rect.left(), f.rect.top(), f.rect.right(), f.rect.bottom(), 'face') # 画面に描画 cv2.imshow('',img) cv2.waitKey(0) cv2.destroyAllWindows() # ファイルに保存 cv2.imwrite("result.png", img) - Python プログラムの実行
python hoge.py
- Python プログラムファイルの作成
notepad hoge2.py
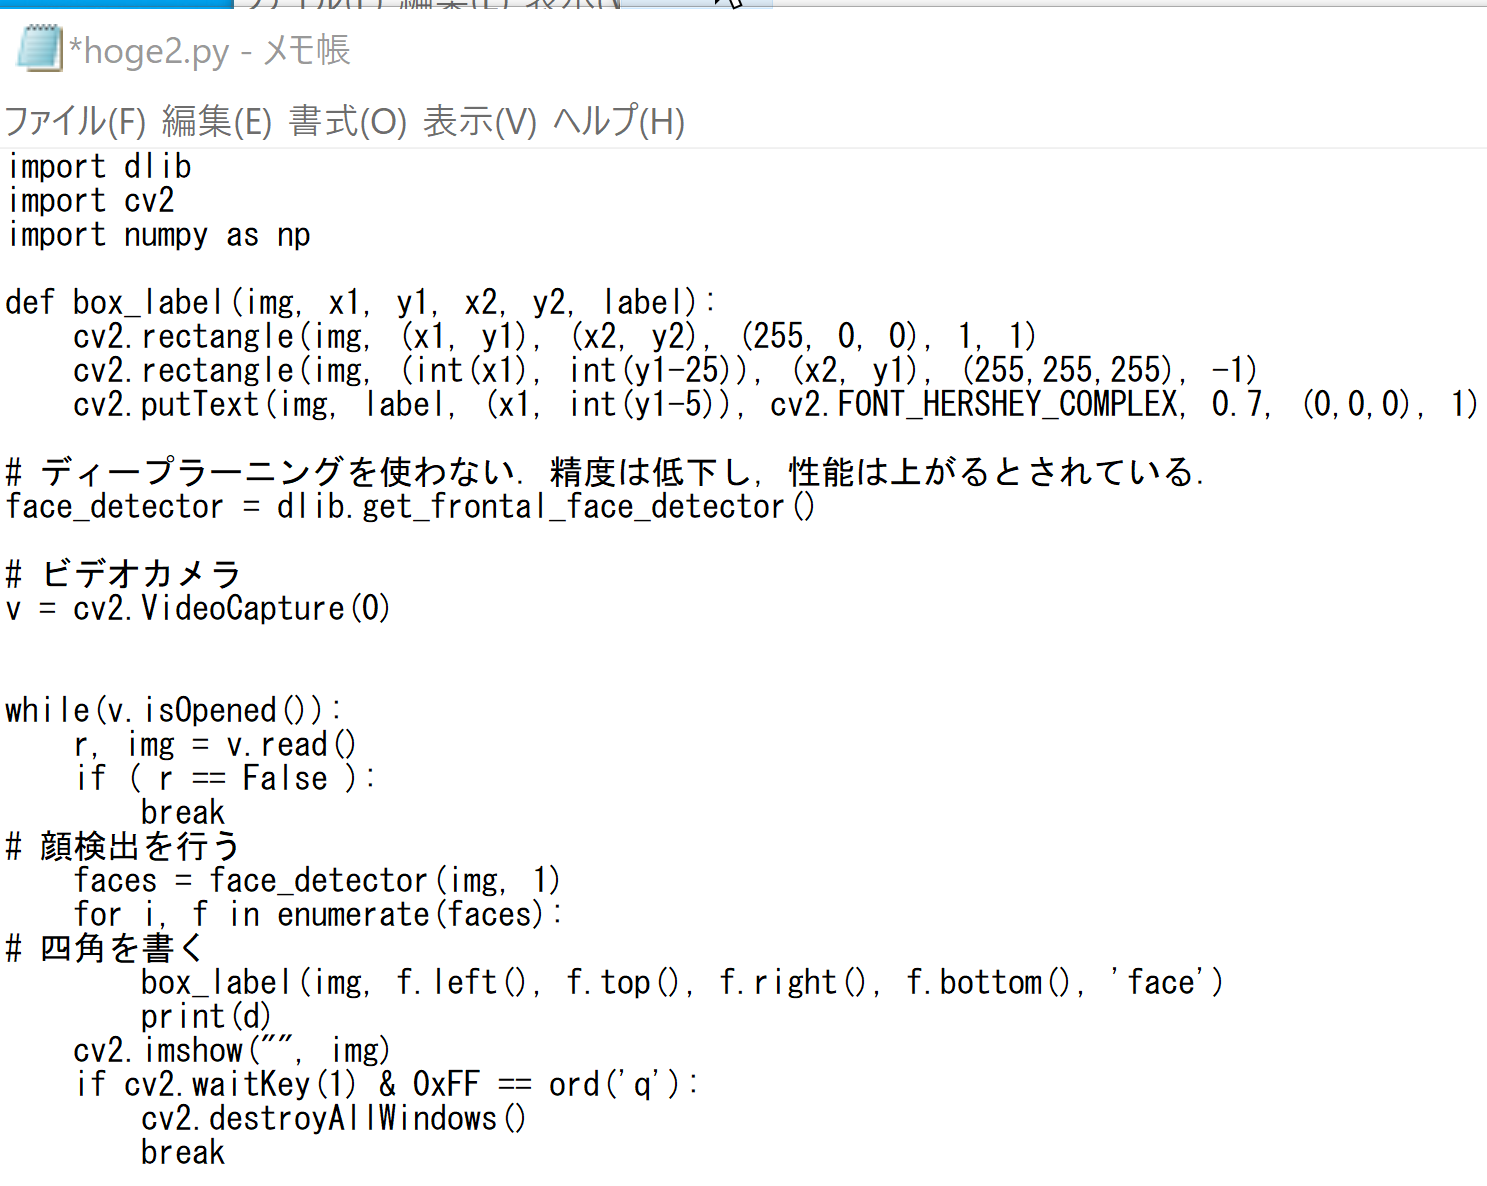
ソースコードは次の通り.
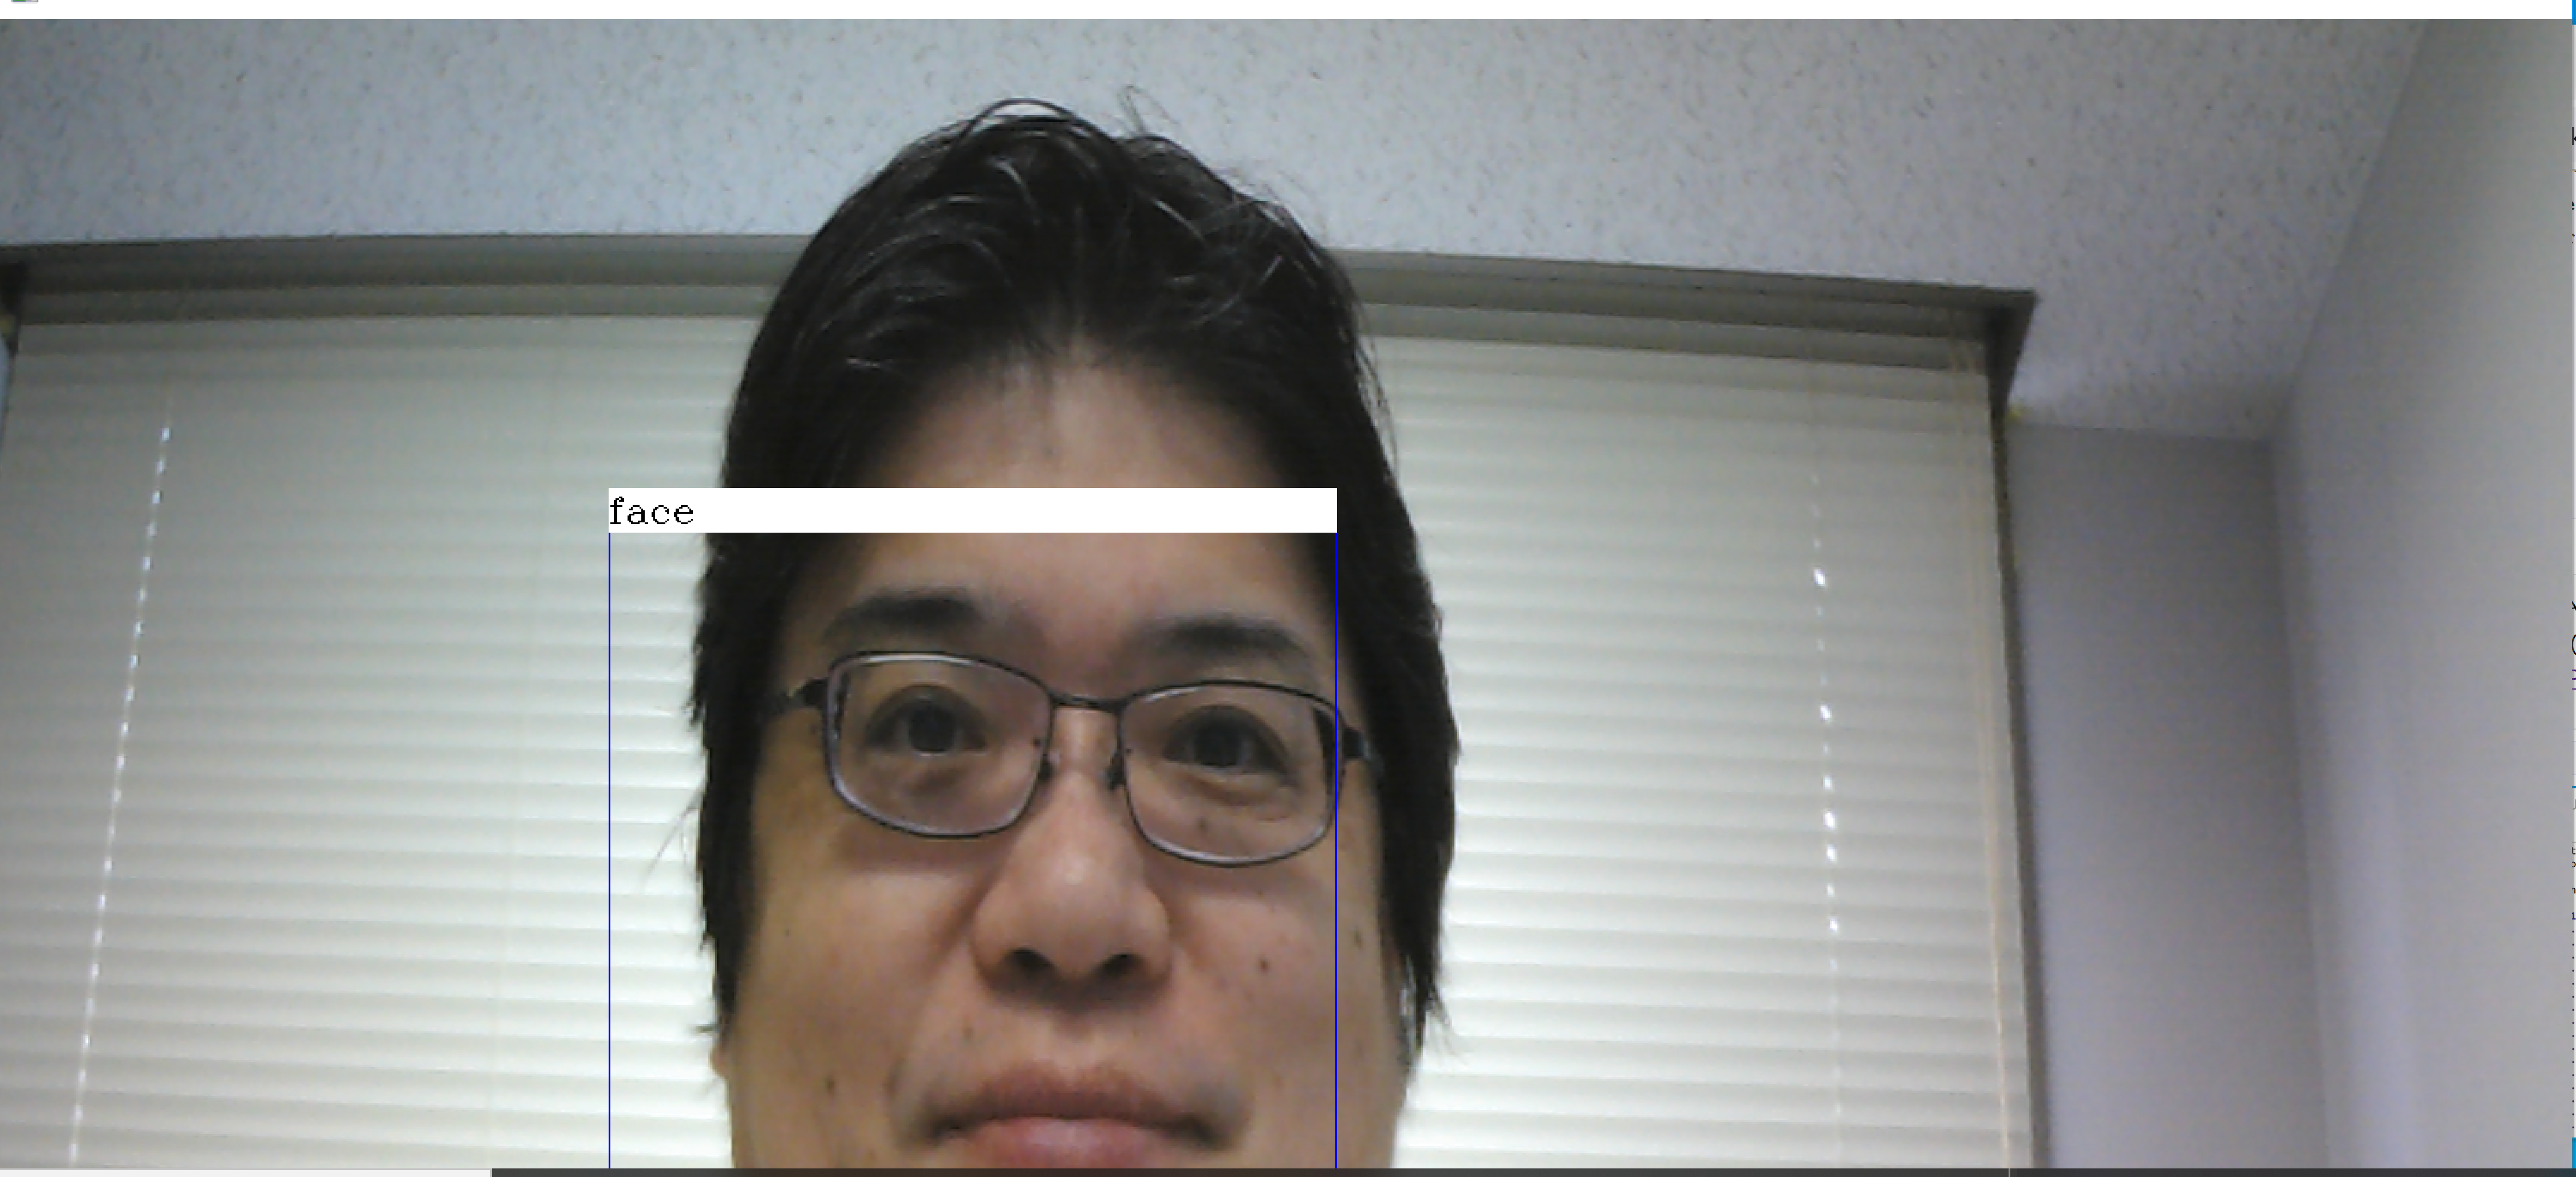
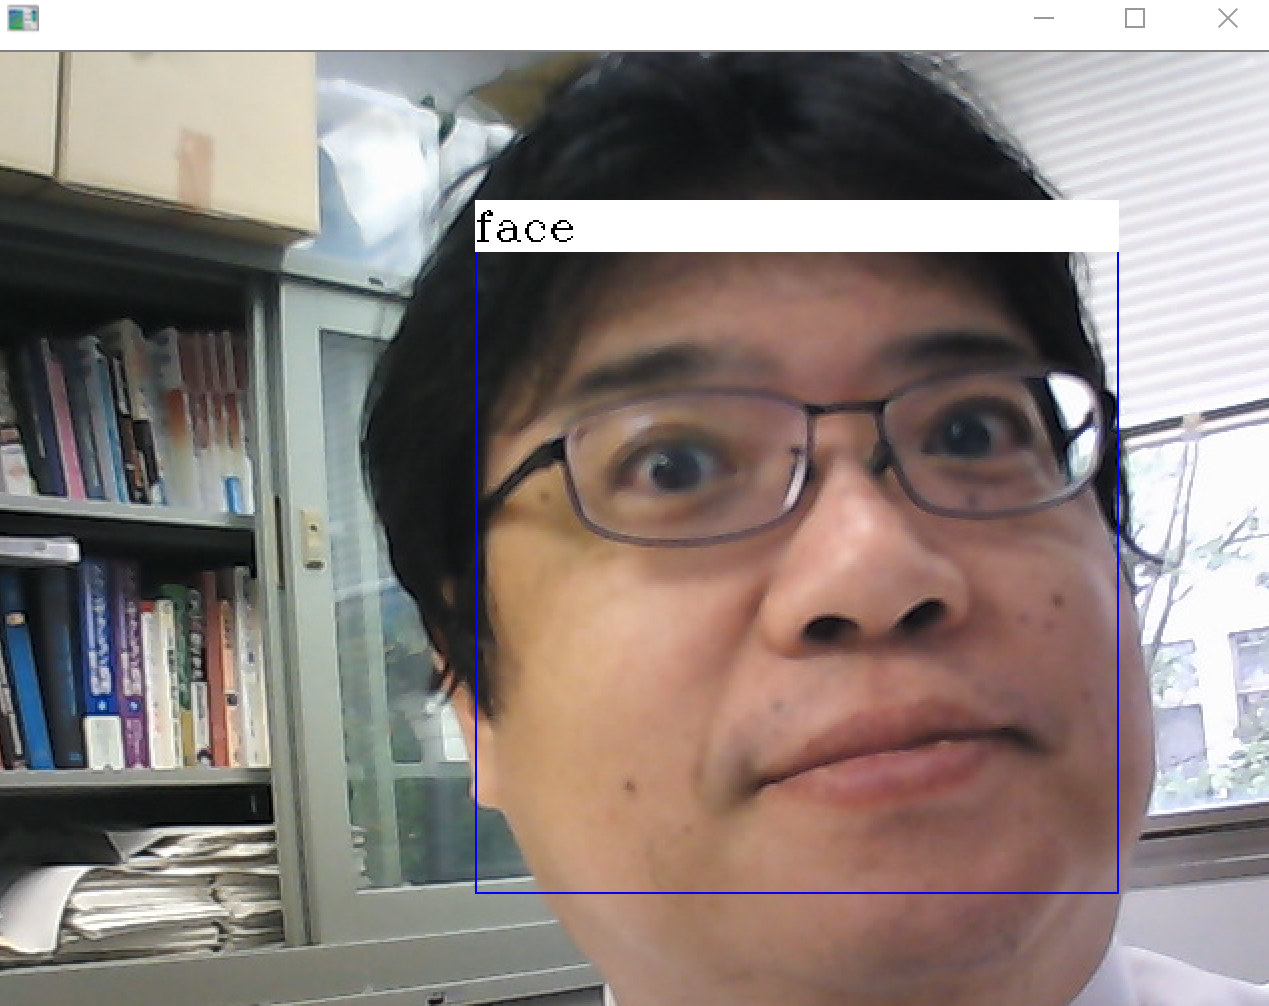
import dlib import cv2 import numpy as np def box_label(img, x1, y1, x2, y2, label): cv2.rectangle(img, (x1, y1), (x2, y2), (255, 0, 0), 1, 1) cv2.rectangle(img, (int(x1), int(y1-25)), (x2, y1), (255,255,255), -1) cv2.putText(img, label, (x1, int(y1-5)), cv2.FONT_HERSHEY_COMPLEX, 0.7, (0,0,0), 1) # ディープラーニングを使わない.精度は低下し,性能は上がるとされている. face_detector = dlib.get_frontal_face_detector() # ビデオカメラ v = cv2.VideoCapture(0) while(v.isOpened()): r, img = v.read() if ( r == False ): break # 顔検出を行う faces = face_detector(img, 1) for i, f in enumerate(faces): # 四角を書く box_label(img, f.left(), f.top(), f.right(), f.bottom(), 'face') print(d) cv2.imshow("", img) if cv2.waitKey(1) & 0xFF == ord('q'): cv2.destroyAllWindows() break - Python プログラムの実行
python hoge2.py
* 途中で止めたいとき,右上の「x」をクリックしない.画面の中をクリックしてから,「q」のキーを押して閉じる
【関連する外部サイト】
【サイト内の関連ページ】
Build Tools for Visual Studio 2022 (ビルドツール for Visual Studio 2022)または Visual Studio 2022 のインストール(Windows 上)
CUDAツールキットは、GPU上でコードをコンパイルするためにC++コンパイラを必要とします。そのため、事前にMicrosoft C++ Build Tools または Visual Studio (C++開発ワークロードを含む) をインストールしておく必要があります。
【インストールの判断】 Build Tools for Visual Studio は,C++コンパイラなどを含む開発ツールセットです. Visual Studio は統合開発環境であり,いくつかのエディションがあり,Build Tools for Visual Studioの機能を含むか連携して使用します.インストールは以下の基準で判断してください:
不明な点がある場合は,Visual Studio 全体をインストール する方が、後で機能を追加する手間が省ける場合があります.
Build Tools for Visual Studio 2022 のインストール(Windows 上)
Visual Studio Community 2022 のインストール(Windows 上)
Git のインストール(Windows 上)
Gitは,バージョン管理システム.ソースコードの管理や複数人での共同に役立つ.
【サイト内の関連ページ】 Windows での Git のインストール: 別ページ »で説明
【関連する外部ページ】 Git の公式ページ: https://git-scm.com/
7-Zip のインストール(Windows 上)
7-Zipは,ファイル圧縮・展開(解凍)ツール
【関連する外部ページ】
2. Dlib Python のインストール,Dlib のソースコード等と,Dlib の学習済みモデルのダウンロード
Dlib による顔検出を行う Python プログラム(Dlib に付属のプログラムを使用)
Dlib による顔検出 を行う.
Python プログラムの実行(Windows 上)
Dlib による顔検出を行う Python プログラム(手持ちの画像ファイルや,パソコンのカメラで顔検出を行う)
Python の opencv-python のインストール
手持ちの画像ファイルで顔検出を行う.
dlib に付属の「face_detector.py」を参考にして、次のプログラムを作成してみた.
パソコンのカメラで顔検出を行う.
dlib に付属の「face_detector.py」を参考にして、次のプログラムを作成してみた.