ArtyZiff35/3D_Reconstruction_From_Stereo_Images のインストールとステレオ画像からの3次元モデルの生成(ステレオ画像,深度マップ,色付き3次元点群)(Python を使用)(Windows 上)
ArtyZiff35/3D_Reconstruction_From_Stereo_Images をインストールする. これは,ステレオ画像についての画像補正,ステレオマッチング,視差マップ (disparity map),深度マップ (depth map),カラーの3次元点群の生成を行う.
【関連する外部ページ】
GitHub のページ: https://github.com/ArtyZiff35/3D_Reconstruction_From_Stereo_Images
1. 前準備
Python 3.12,Git のインストール(Windows 上)
Pythonは,プログラミング言語の1つ. Gitは,分散型のバージョン管理システム.
【手順】
- Windows で,管理者権限でコマンドプロンプトを起動(手順:Windowsキーまたはスタートメニュー >
cmdと入力 > 右クリック > 「管理者として実行」)。次のコマンドを実行
次のコマンドは,Python ランチャーとPython 3.12とGitをインストールし,Gitにパスを通すものである.
次のコマンドでインストールされるGitは 「git for Windows」と呼ばれるものであり, Git,MinGW などから構成されている.
reg add "HKLM\SYSTEM\CurrentControlSet\Control\FileSystem" /v LongPathsEnabled /t REG_DWORD /d 1 /f
REM Python, Git をシステム領域にインストール
winget install --scope machine --id Python.Python.3.12 --id Python.Launcher --id Git.Git -e --silent
REM Python のパス
set "INSTALL_PATH=C:\Program Files\Python312"
echo "%PATH%" | find /i "%INSTALL_PATH%" >nul
if errorlevel 1 setx PATH "%PATH%;%INSTALL_PATH%" /M >nul
echo "%PATH%" | find /i "%INSTALL_PATH%\Scripts" >nul
if errorlevel 1 setx PATH "%PATH%;%INSTALL_PATH%\Scripts" /M >nul
REM Git のパス
set "NEW_PATH=C:\Program Files\Git\cmd"
if exist "%NEW_PATH%" echo "%PATH%" | find /i "%NEW_PATH%" >nul
if exist "%NEW_PATH%" if errorlevel 1 setx PATH "%PATH%;%NEW_PATH%" /M >nul
【関連する外部ページ】
- Python の公式ページ: https://www.python.org/
- Git の公式ページ: https://git-scm.com/
【サイト内の関連ページ】
【関連項目】 Python, Git バージョン管理システム, Git の利用
2. ArtyZiff35/3D_Reconstruction_From_Stereo_Images のインストール
- Windows で,管理者権限でコマンドプロンプトを起動(手順:Windowsキーまたはスタートメニュー >
cmdと入力 > 右クリック > 「管理者として実行」)。 - pip の更新と,ArtyZiff35/3D_Reconstruction_From_Stereo_Images のインストール
* 「 python -m pip install ...」は,Python パッケージをインストールするためのコマンド.
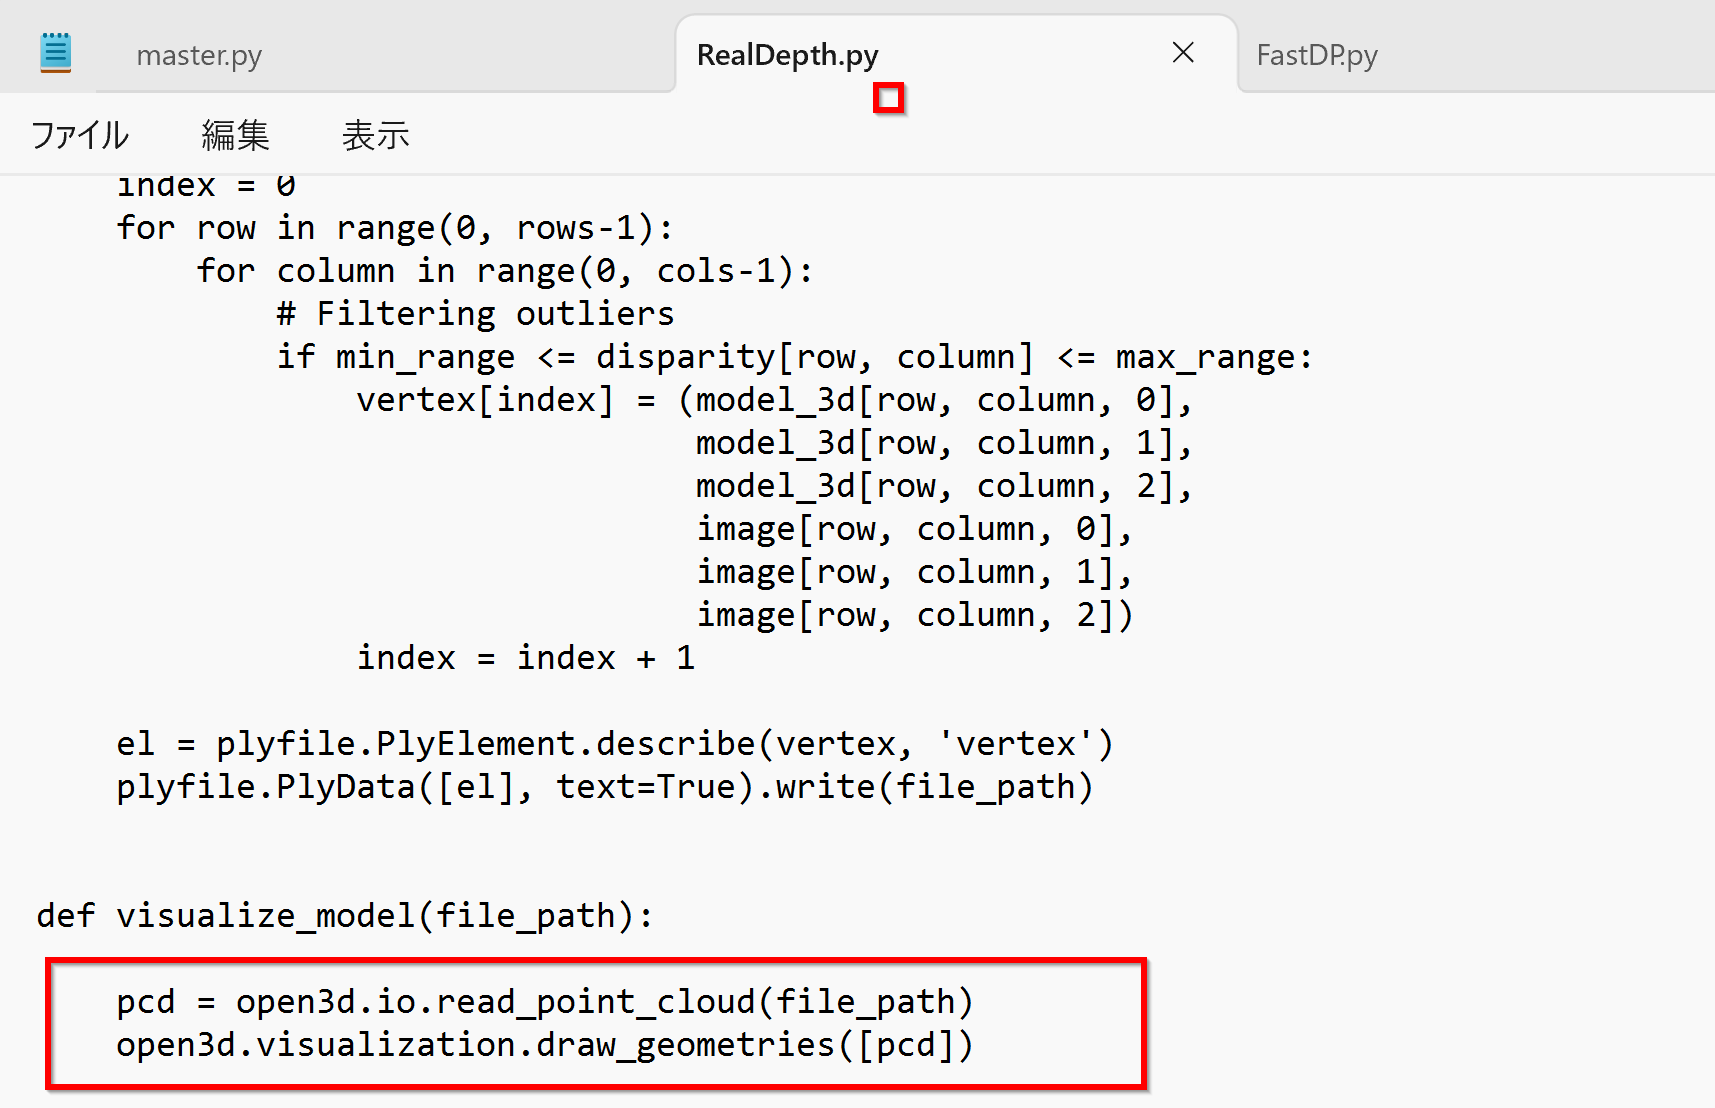
python -m pip install -U --ignore-installed pip pip install -U matplotlib seaborn plyfile open3d cd /d c:%HOMEPATH% rmdir /s /q 3D_Reconstruction_From_Stereo_Images git clone --recursive https://github.com/ArtyZiff35/3D_Reconstruction_From_Stereo_Images cd 3D_Reconstruction_From_Stereo_Images - ソースコード src\RealDepth.py の書き換え(2か所)
cd /d c:%HOMEPATH%
cd 3D_Reconstruction_From_Stereo_Images
notepad src\RealDepth.py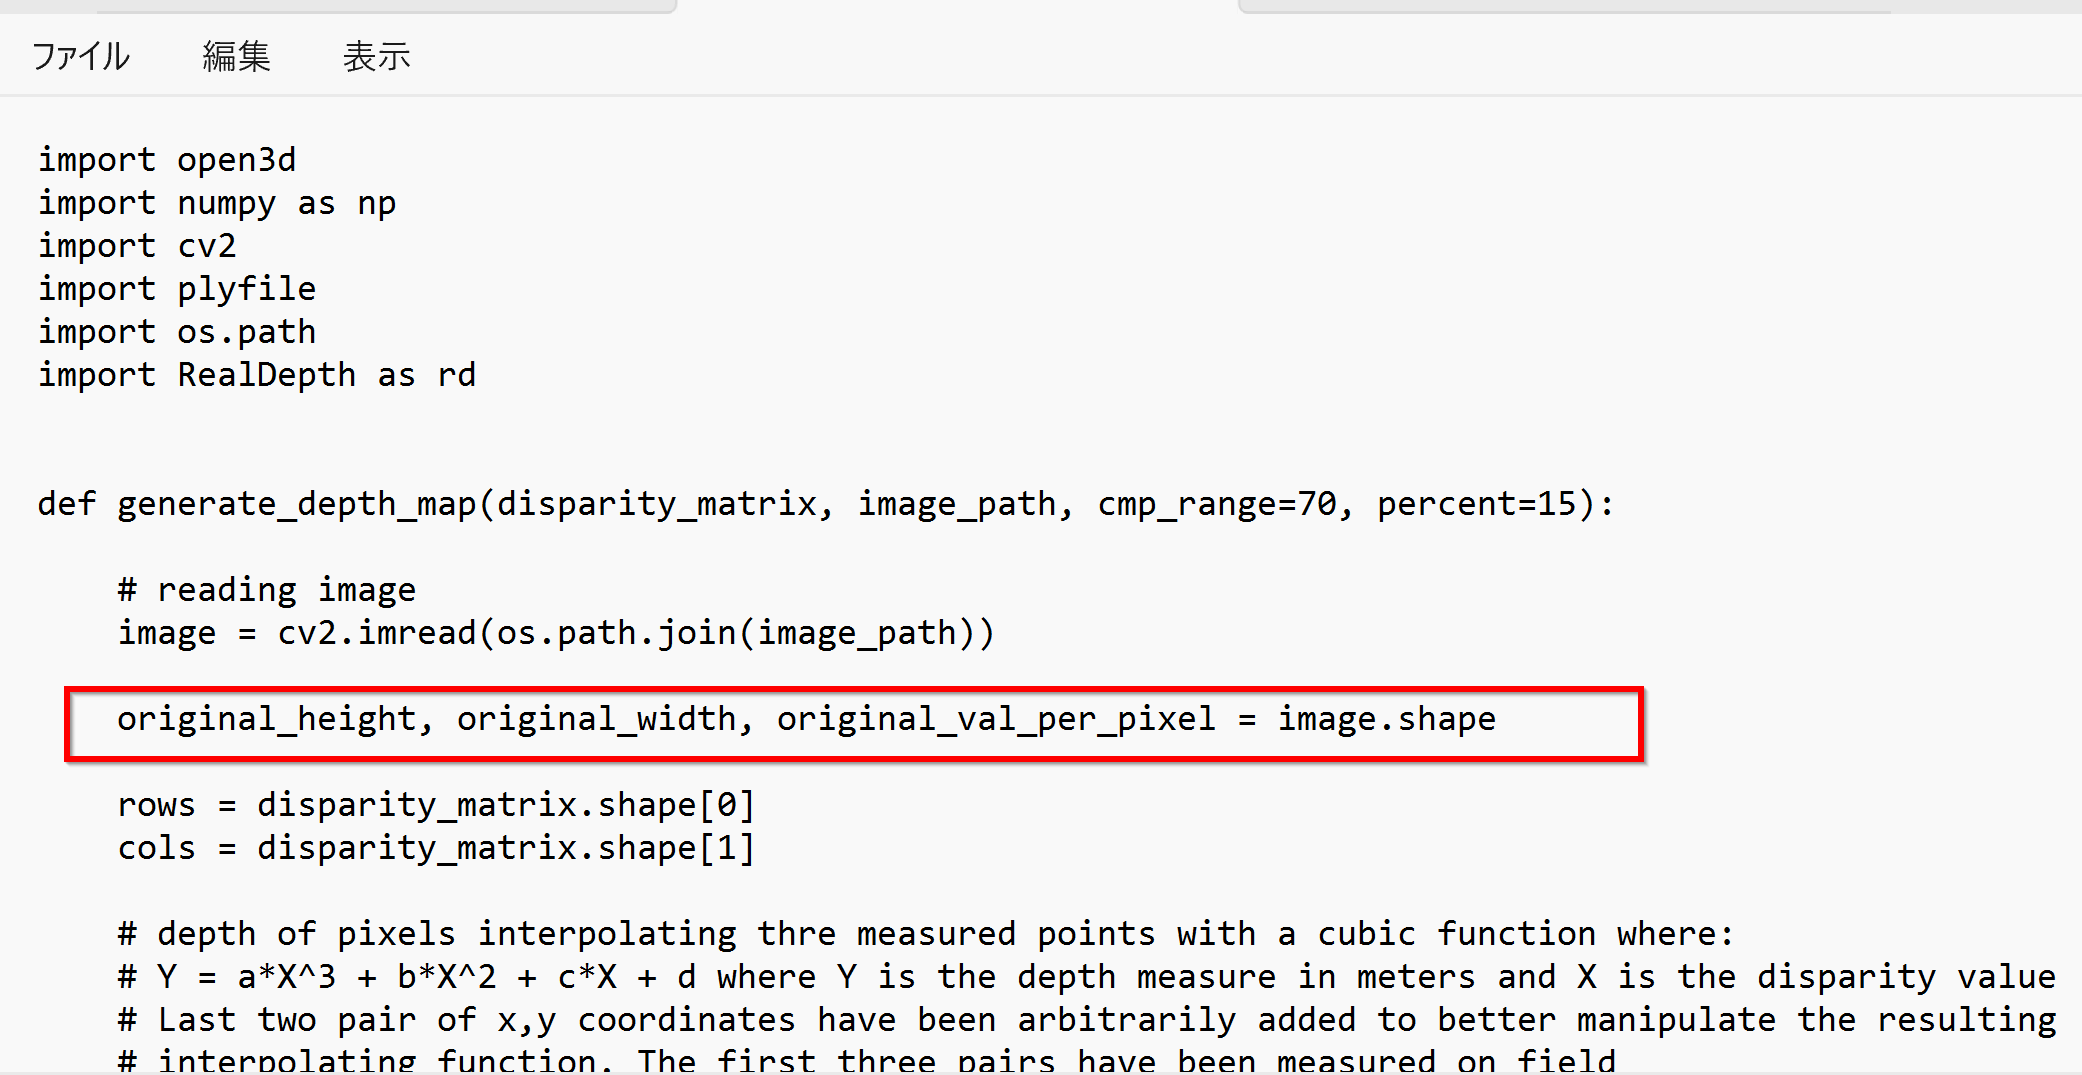
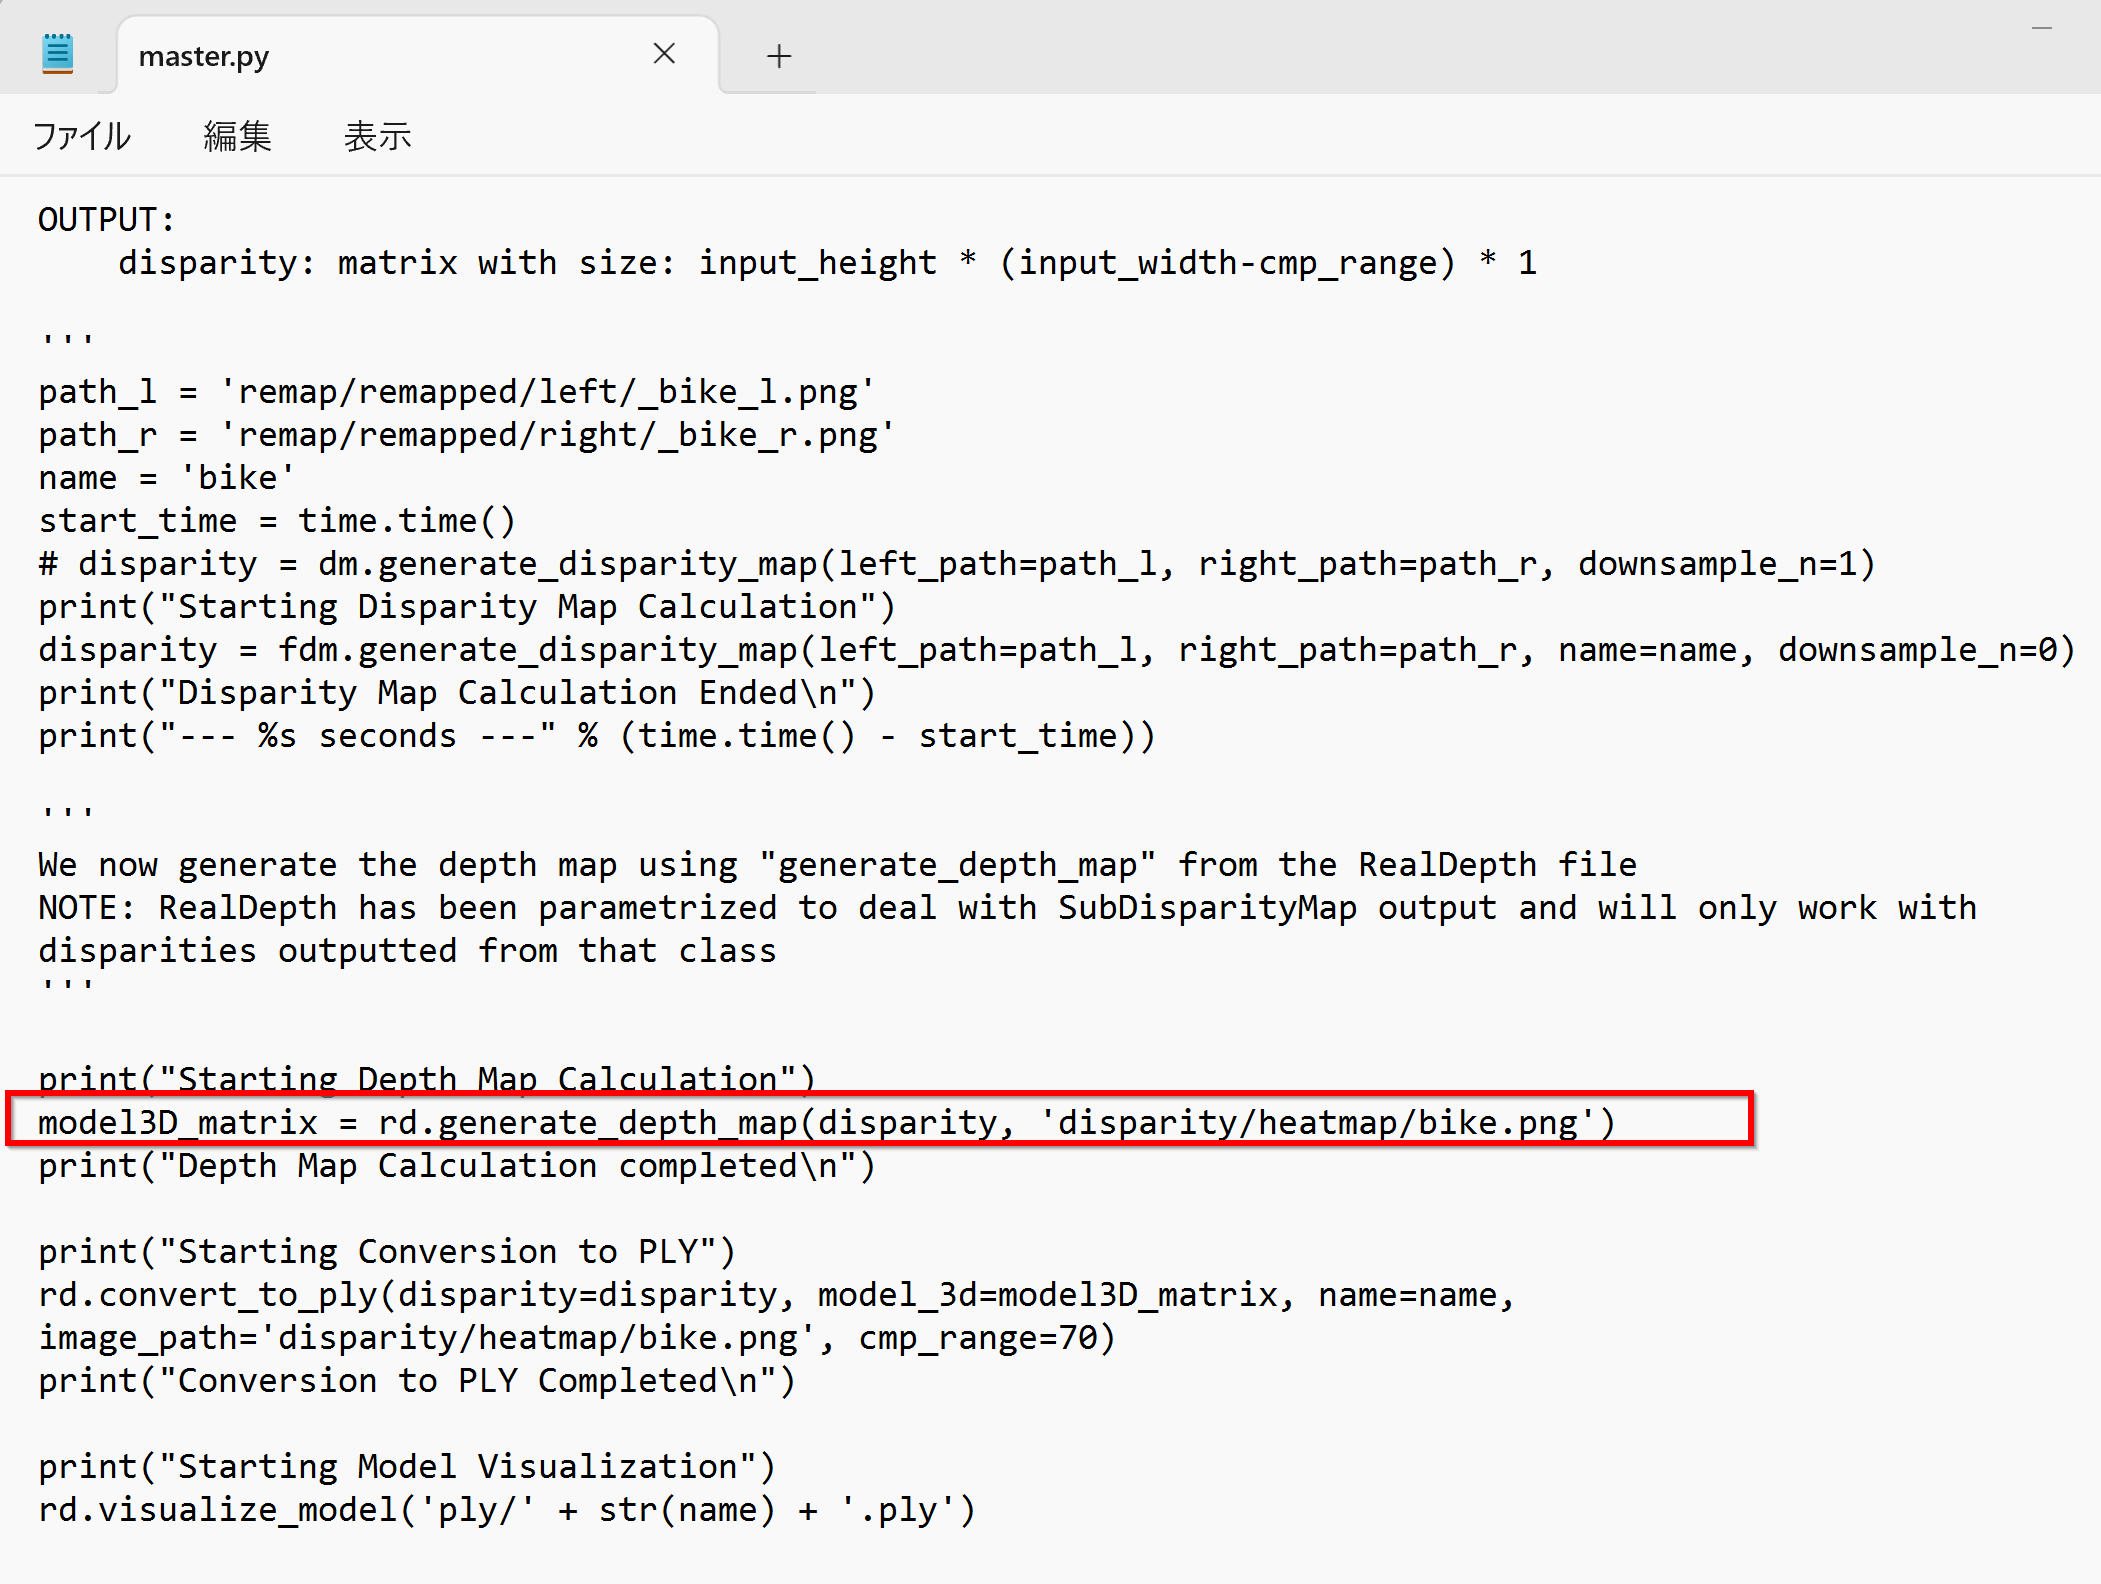
- ソースコード src\master.py の書き換え(1か所)
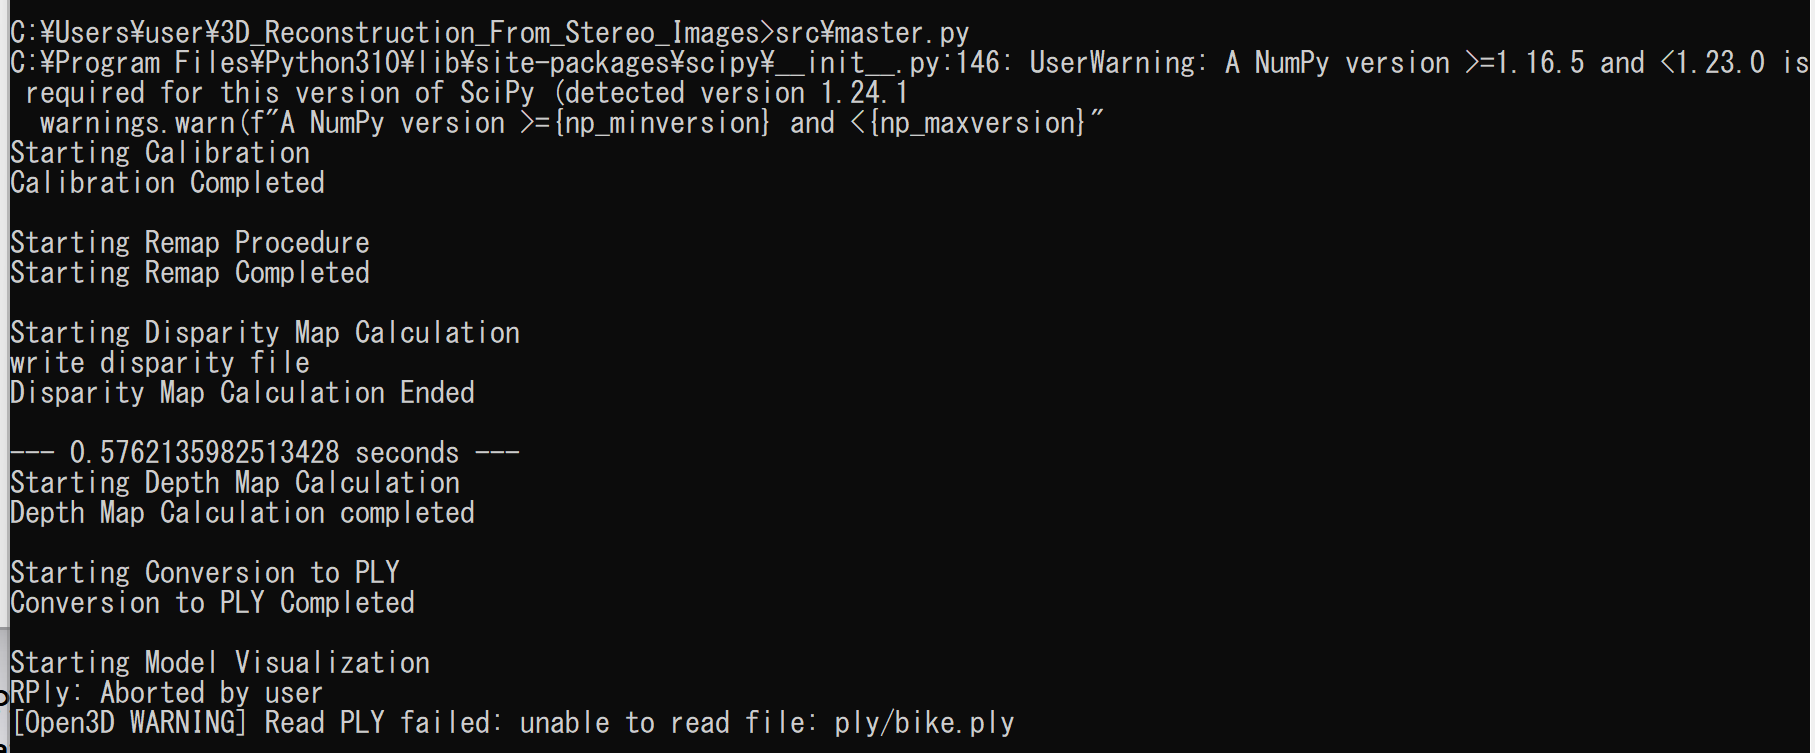
- src\master.py を実行することにより動作確認
実行の前に,ディレクトリの作成,所定のディレクトリに所定の画像を置くなどの作業を行っている.
cd /d c:%HOMEPATH% cd 3D_Reconstruction_From_Stereo_Images mkdir remap mkdir remap\remapped mkdir remap\remapped\left mkdir remap\remapped\right copy sampleRectified\left\_bike_l.png remap\remapped\left copy sampleRectified\right\_bike_r.png remap\remapped\right mkdir diparity mkdir disparity\heatmap mkdir ply src\master.py - 実行の結果,エラーメッセージが出ないことを確認
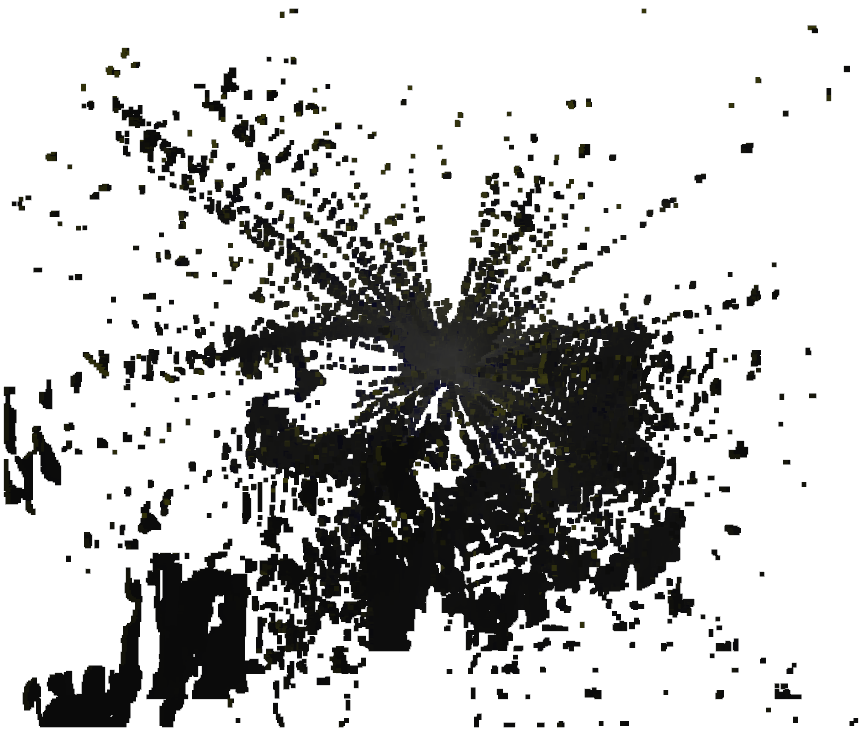
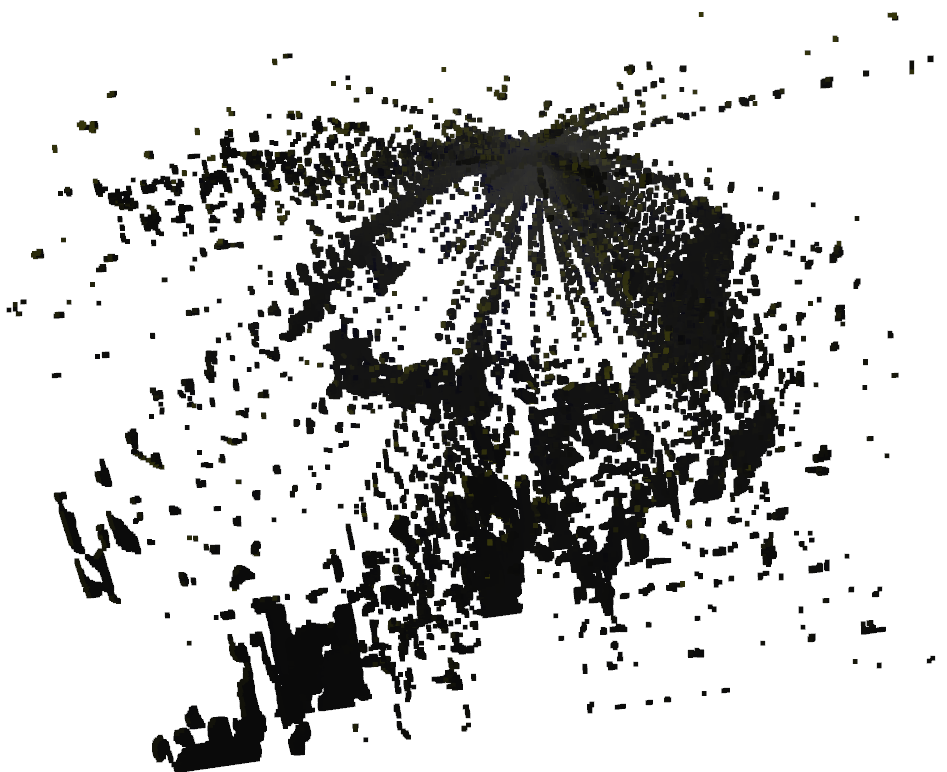
- 3次元モデルが表示される.
マウスで回転などができる.
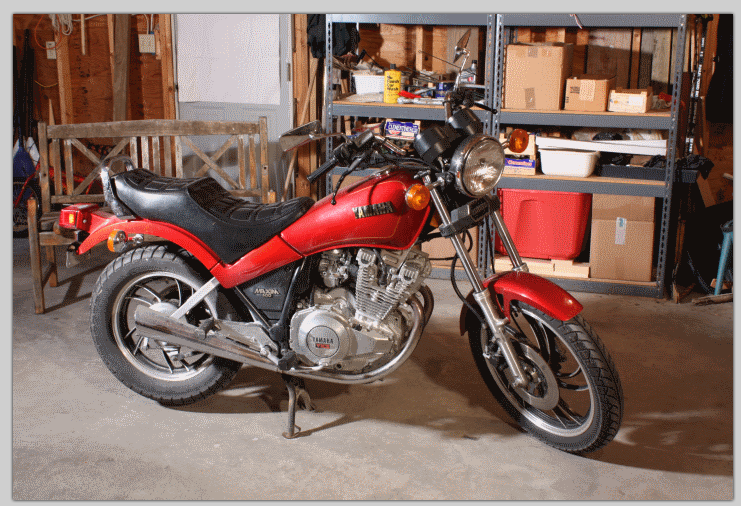
- 次のコマンドで,使用したステレオ画像を表示
remap\remapped\left\_bike_l.png
remap\remapped\right\_bike_r.png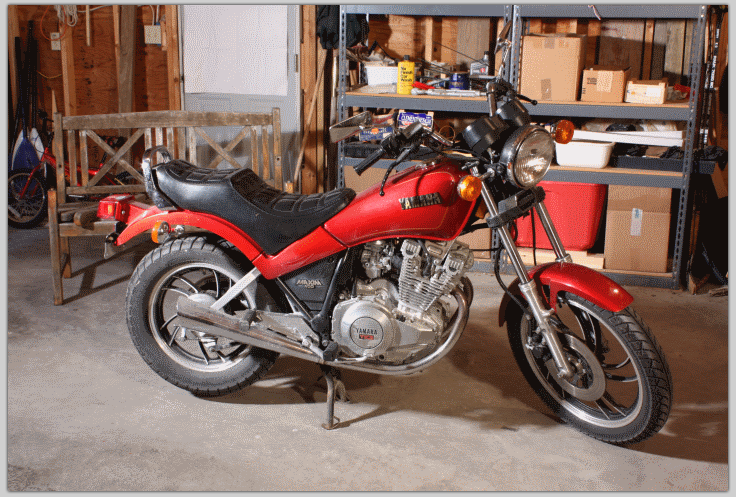
- 次のコマンドで,視差マップ (disparity map) を表示
disparity\heatmap\bike.png
別の画像で試してみる.
以下書きかけ
- src\left, src\right 下に png 形式の画像を準備
cd /d c:%HOMEPATH% cd 3D_Reconstruction_From_Stereo_Images cd src mkdir remap mkdir remap\remapped mkdir remap\remapped\left mkdir remap\remapped\right cd remap\remapped cd left curl -O https://raw.githubusercontent.com/opencv/opencv/master/samples/data/aloeL.jpg cd .. cd right curl -O https://raw.githubusercontent.com/opencv/opencv/master/samples/data/aloeR.jpg - png に変換
- disparity map
次の Python プログラムを実行cd /d c:%HOMEPATH% cd 3D_Reconstruction_From_Stereo_Images cd src mkdir disparity mkdir disparity\heatmap mkdir plyimport FastDP as fdm path_l = 'remap/remapped/left/aloeL.jpg' path_r = 'remap/remapped/right/aloeR.jpg' name = 'aloe' disparity = fdm.generate_disparity_map(left_path=path_l, right_path=path_r, name=name, downsample_n=0) exit() -
disparity\heatmap\aloe.png - depth map
import FastDP as fdm
import RealDepth as rd

path_l = 'remap/remapped/left/aloeL.jpg'
path_r = 'remap/remapped/right/aloeR.jpg'
name = 'aloe'
disparity = fdm.generate_disparity_map(left_path=path_l, right_path=path_r, name=name, downsample_n=0)

model3D_matrix = rd.generate_depth_map(disparity, 'disparity/heatmap/aloe.png')
rd.convert_to_ply(disparity=disparity, model_3d=model3D_matrix, name=name, image_path='disparity/heatmap/aloe.png', cmp_range=70)
rd.visualize_model('ply/' + str(name) + '.ply')