PythonのDlibライブラリ、face_recognitionのインストール PythonのDlibライブラリ、face_recognitionのインストールと動作確認(顔検出,顔ランドマーク,顔識別)(Python を使用)(Windows 上)
- 前準備
- Python の Dlib ライブラリのインストール,Dlib のソースコード等と,Dlib の学習済みモデルのダウンロード
- Dlib に付属のサンプルプログラム(example 下)のビルド
- 画像分類,物体検出,トラッキング・ビジョン,犬の顔画像について眼鏡をあてはめる(Dlib に付属のサンプルプログラムを使用)
- Dlib による顔検出(Python を使用)
- Dlib による顔ランドマークの検出(Python を使用)
- Dlib による顔のアラインメント,顔データのデータ拡張,5ランドマーク,68 ランドマーク,顔のコード化(5ランドマークを使用),顔のコード化(68 ランドマークを使用)(Python を使用)
- ageitgey/ageitgey の face_recognition のインストール
- ageitgey の face_recognition で顔識別を行ってみる(Python を使用)
【サイト内の関連ページ】
- 説明資料: Dlib の機能概要 [PDF], [パワーポイント]
- 顔情報処理の Python プログラム(Dlib,face_recognition を使用) について: 別ページ »にまとめ
- Windows で動く人工知能関係 Pythonアプリケーション,オープンソースソフトウエア): 別ページ »にまとめている.
【用語説明】
- Dlib
Dlibは,数多くの機能を持つ C++ ライブラリ.機能には,機械学習,数値計算,グラフィカルモデル推論,画像処理,スレッド,通信,GUI,データ圧縮・一貫性,テスト,さまざまなユーティリティなどがある.Python API もある.
- 顔検出 (face detection):
Dlib には,Convolutional Neural Network (CNN) による顔検出の機能がある.
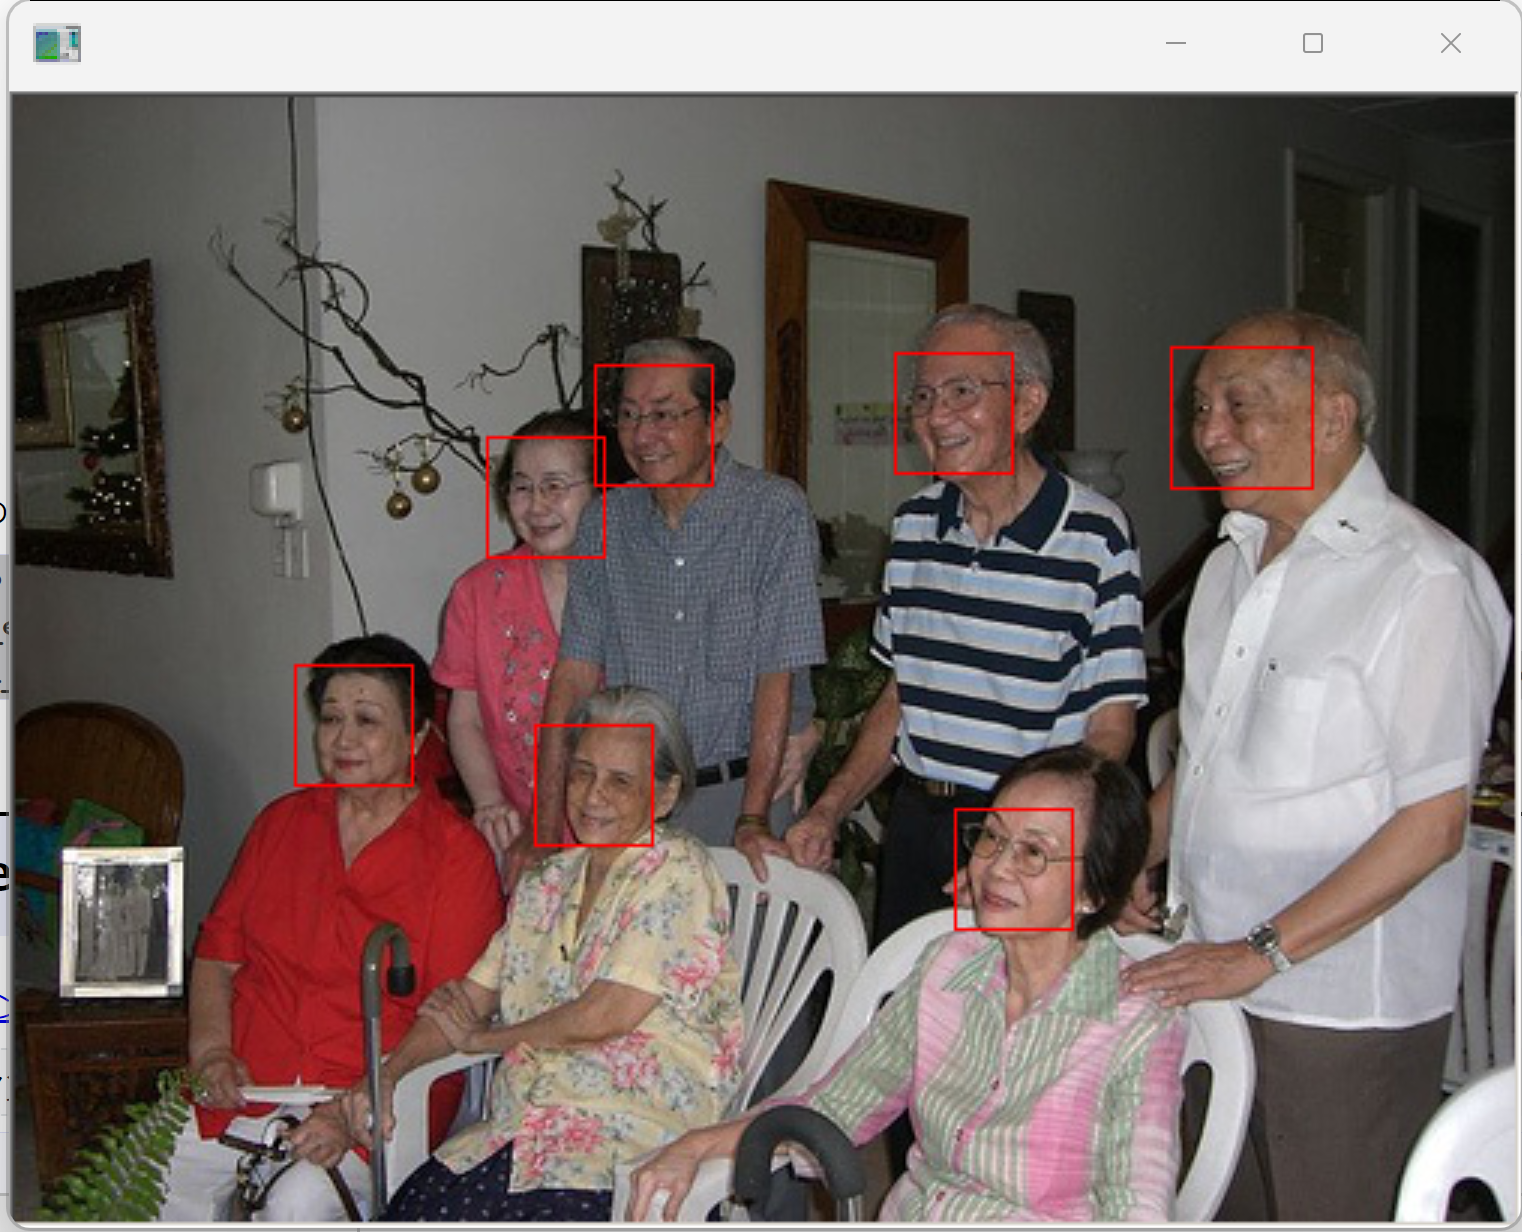
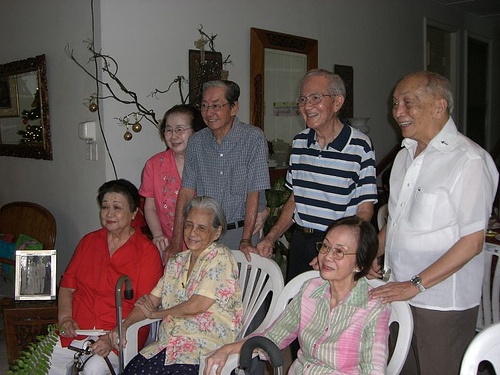
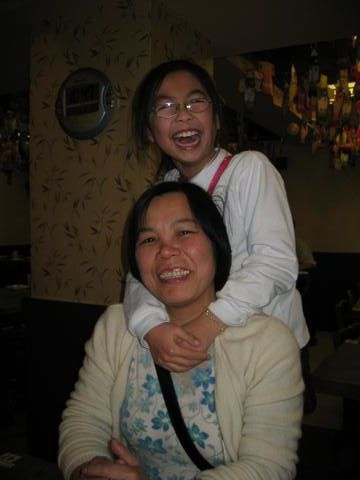
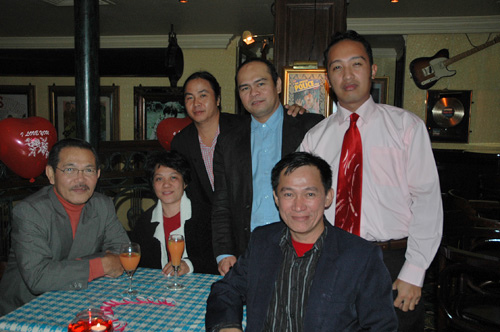
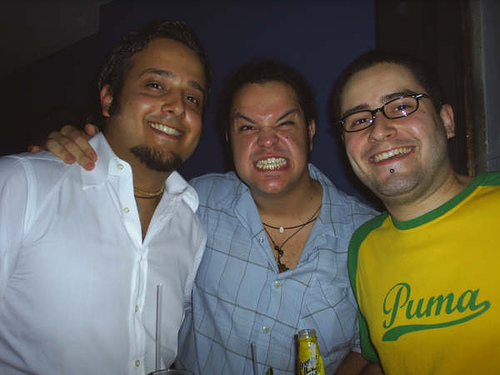
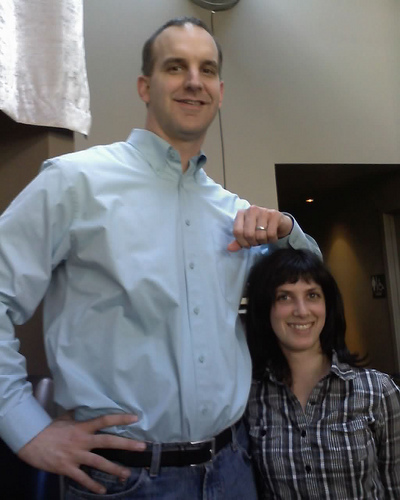
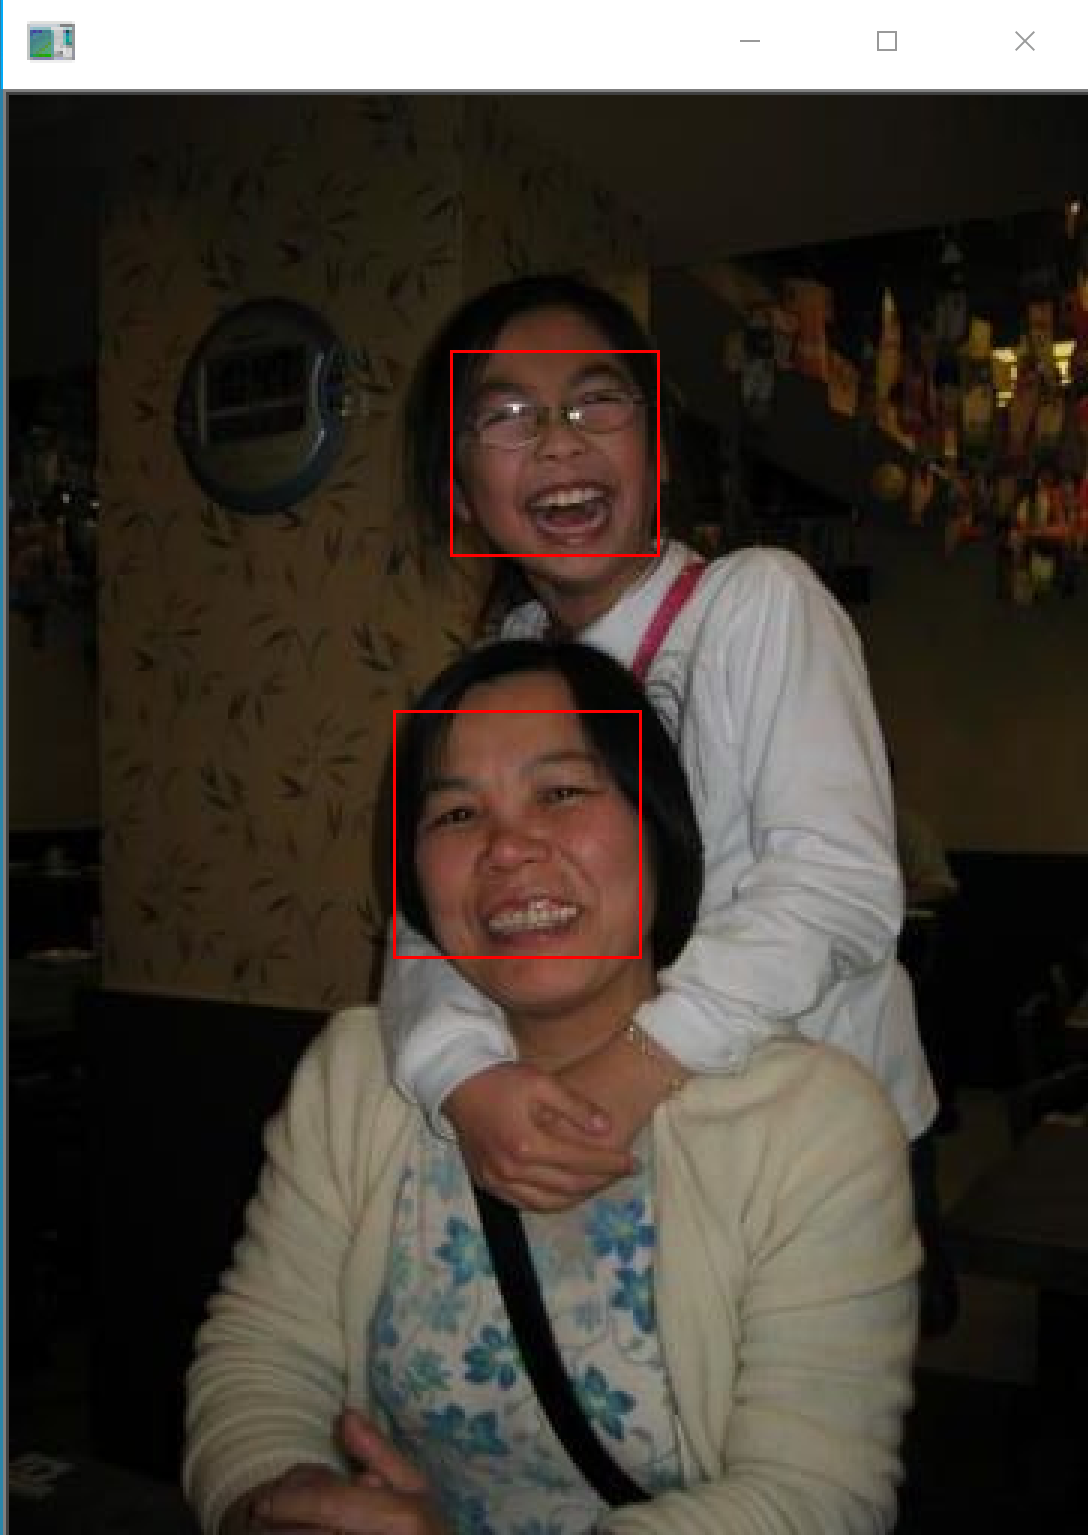
Dlib による顔検出の例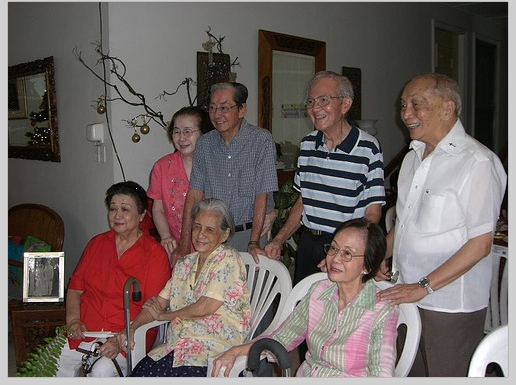
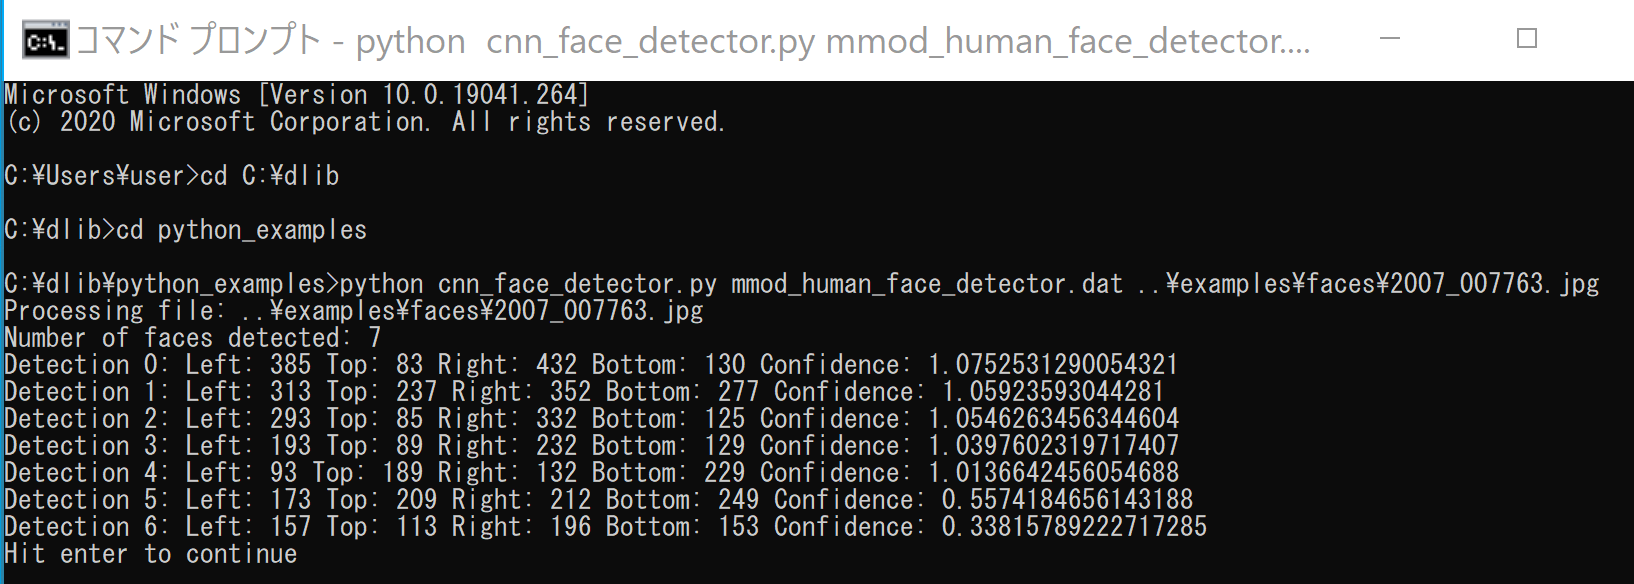
顔検出が行われ,顔を囲むようなバウンディングボックス (bounding box) が表示される.
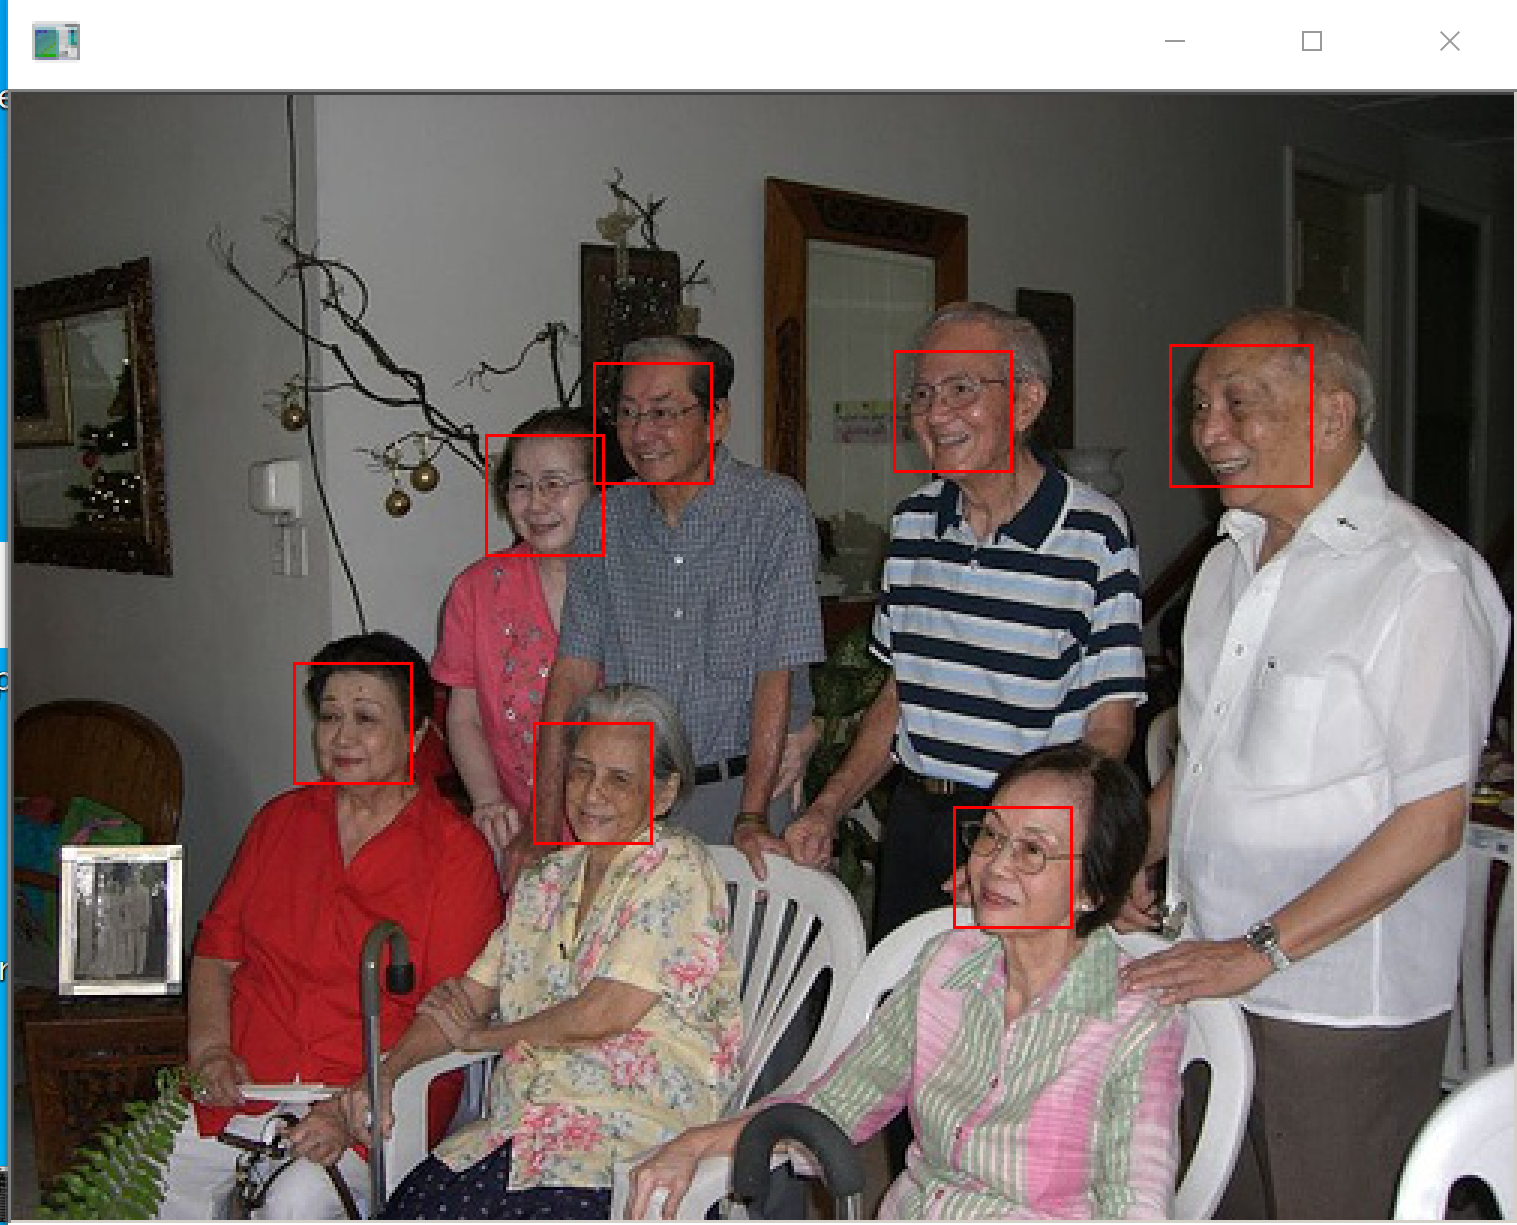
バウンディングボックスの座標値が数値データとして得られる
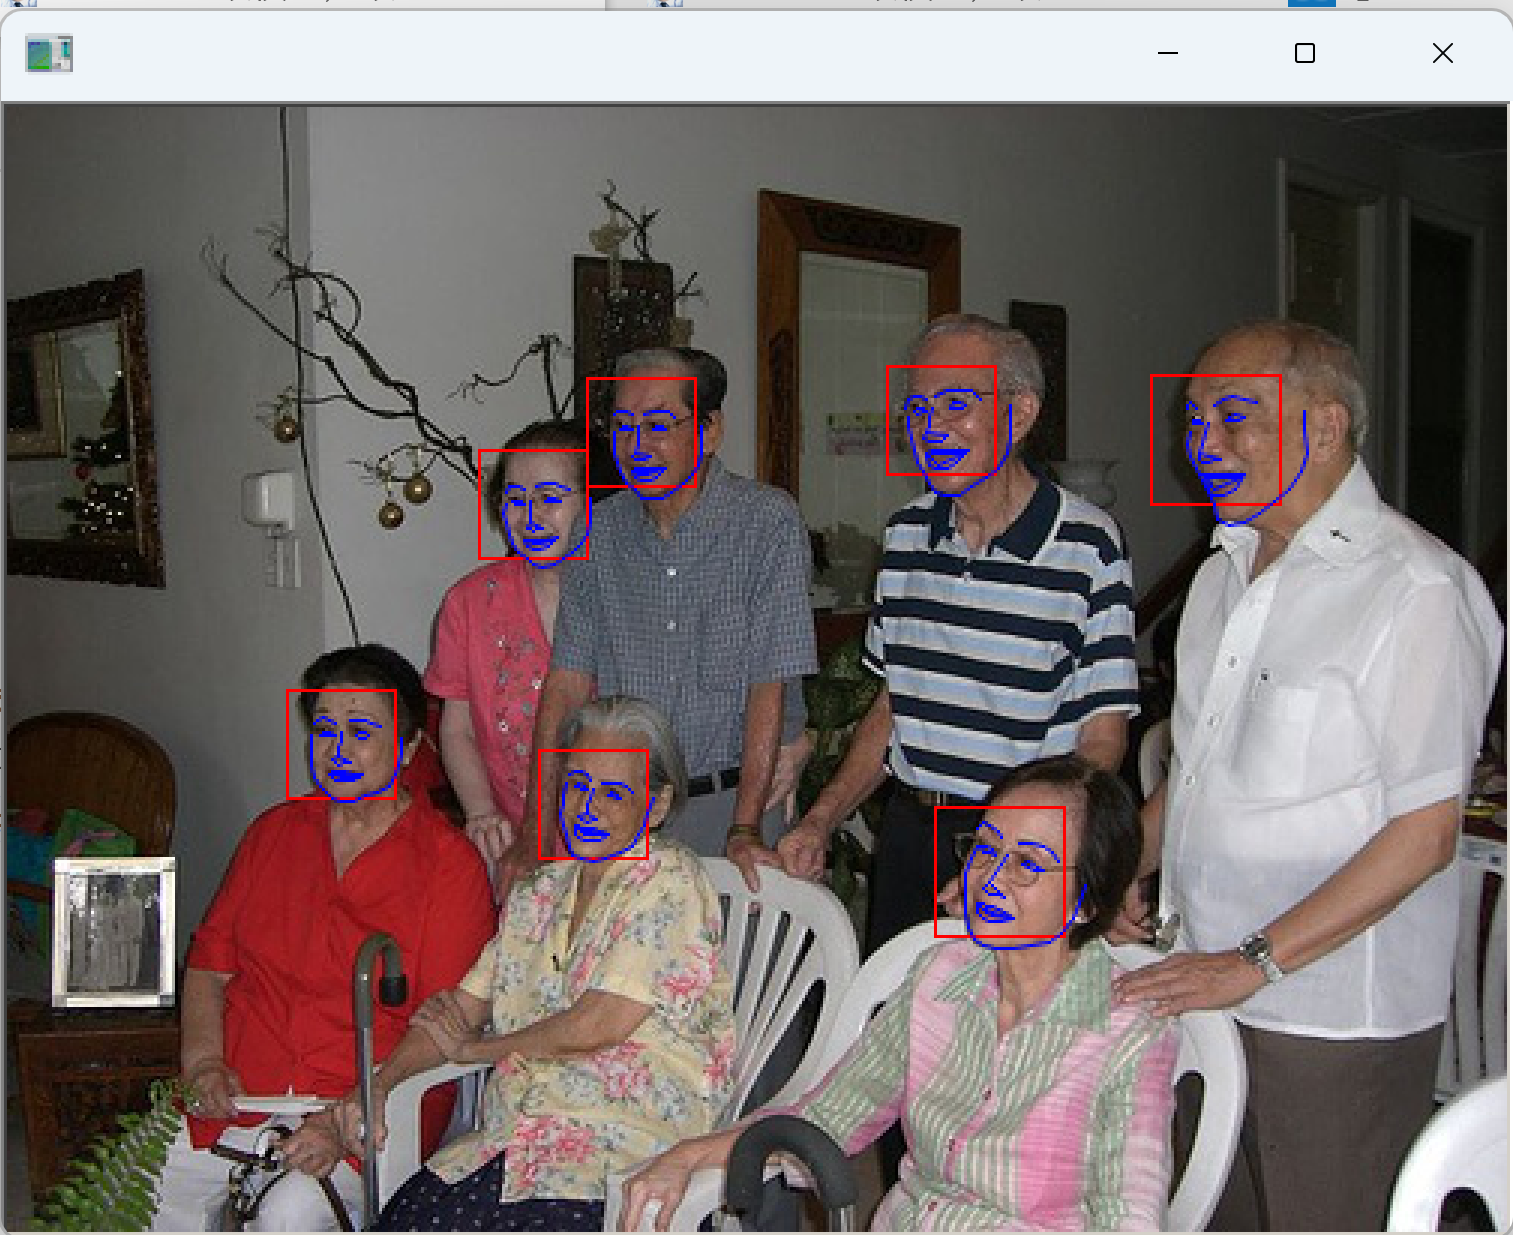
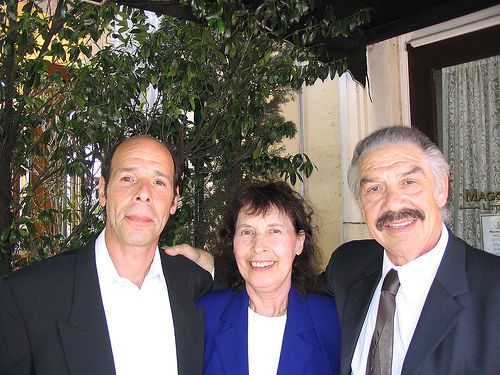
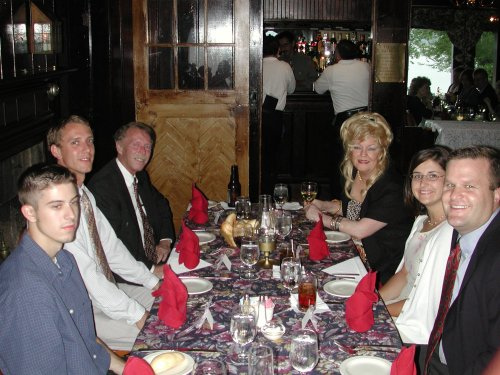
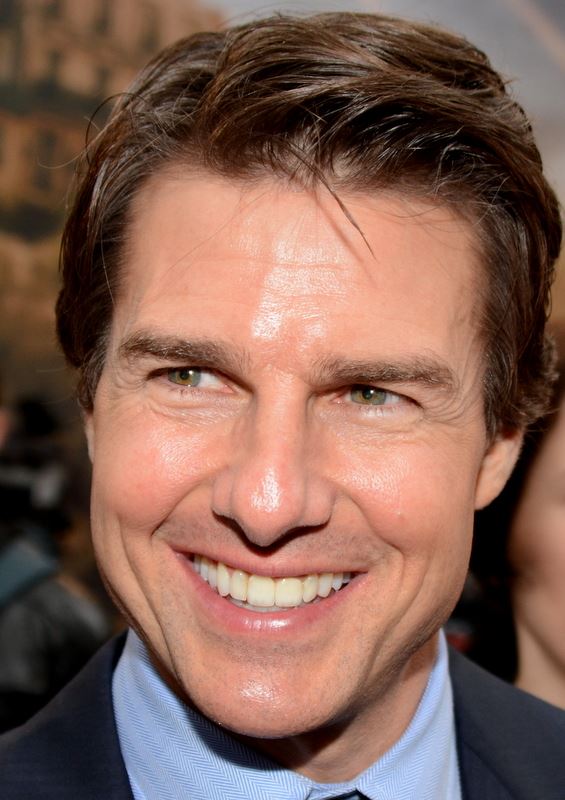
顔のランドマーク検知が行われ,顔を囲むようなバウンディングボックス (bounding box) と,顔のランドマークが表示される.
1. 前準備
Build Tools for Visual Studio 2026 のインストール(Windows 上) [クリックして展開]
Build Tools for Visual Studio は,Visual Studio の IDE を含まない C/C++ コンパイラ,ライブラリ,ビルドツール等のコマンドライン向け開発ツールセットである。インストール済みの場合、この手順は不要である。
管理者権限のコマンドプロンプトで以下を実行する。管理者権限のコマンドプロンプトを起動するには、Windows キーまたはスタートメニューから「cmd」と入力し、表示された「コマンドプロンプト」を右クリックして「管理者として実行」を選択する。
REM VC++ ランタイム
winget install --scope machine --id Microsoft.VCRedist.2015+.x64 -e --silent --disable-interactivity --force --accept-source-agreements --accept-package-agreements --override "/quiet /norestart"

REM Build Tools + Desktop development with C++(VCTools)+ 追加コンポーネント(一括)
winget list --id Microsoft.VisualStudio.BuildTools 2>nul | findstr /i "BuildTools" >nul 2>&1
if %ERRORLEVEL% EQU 0 (
    for /f "delims=" %P in ('"C:\Program Files (x86)\Microsoft Visual Studio\Installer\vswhere.exe" -products * -property installationPath') do start /wait "" "C:\Program Files (x86)\Microsoft Visual Studio\Installer\setup.exe" modify --installPath "%P" --add Microsoft.VisualStudio.Workload.VCTools --add Microsoft.VisualStudio.Workload.MSBuildTools --add Microsoft.VisualStudio.Component.VC.CMake.Project --add Microsoft.VisualStudio.Component.VC.Llvm.Clang --add Microsoft.VisualStudio.Component.VC.Llvm.ClangToolset --add Microsoft.VisualStudio.Component.Windows11SDK.26100 --includeRecommended --quiet --norestart
) else (
    winget install --scope machine --id Microsoft.VisualStudio.BuildTools -e --silent --disable-interactivity --force --accept-source-agreements --accept-package-agreements --override "--quiet --wait --norestart --nocache --add Microsoft.VisualStudio.Workload.VCTools --includeRecommended --add Microsoft.VisualStudio.Workload.MSBuildTools --add Microsoft.VisualStudio.Component.VC.CMake.Project --add Microsoft.VisualStudio.Component.VC.Llvm.Clang --add Microsoft.VisualStudio.Component.VC.Llvm.ClangToolset --add Microsoft.VisualStudio.Component.Windows11SDK.26100"
)
REM  何らかの理由で BuildTools の動作がおかしくなった場合は,以下を実行すると,既存のインストールのファイル破損・欠損を修復し正常な状態に復元する効果がある.
REM "C:\Program Files (x86)\Microsoft Visual Studio\Installer\setup.exe" repair --installPath "C:\Program Files (x86)\Microsoft Visual Studio\18\BuildTools" --quiet --norestart
REM 以下で正常であることを確認する.パスが表示されれば正常である.
REM "C:\Program Files (x86)\Microsoft Visual Studio\Installer\vswhere.exe" -products * -requires Microsoft.VisualStudio.Workload.VCTools -property installationPath
--add で追加されるコンポーネント
上記のコマンドでは,まず Build Tools 本体と Visual C++ 再頒布可能パッケージをインストールし,次に setup.exe を用いて以下のコンポーネントを追加している。
VCTools:C++ デスクトップ開発ワークロード(--includeRecommendedにより、MSVC コンパイラ、C++ AddressSanitizer、vcpkg、CMake ツール、Windows 11 SDK 等の推奨コンポーネントが含まれる)VC.Llvm.Clang:Windows 向け C++ Clang コンパイラClangCL:clang-cl ツールセットを含むコンポーネントグループ(MSBuild から Clang を使用するために必要)VC.CMake.Project:Windows 向け C++ CMake ツールWindows11SDK.26100:Windows 11 SDK(ビルド 10.0.26100)
インストール完了の確認
winget list Microsoft.VisualStudio.BuildTools上記以外の追加のコンポーネントが必要になった場合は Visual Studio Installer で個別にインストールできる。
Visual Studio の機能を必要とする場合は、追加インストールできる。
Python 3.12 のインストール(Windows 上) [クリックして展開]
以下のいずれかの方法で Python 3.12 をインストールする。Python がインストール済みの場合、この手順は不要である。
方法1:winget によるインストール
管理者権限のコマンドプロンプトで以下を実行する。管理者権限のコマンドプロンプトを起動するには、Windows キーまたはスタートメニューから「cmd」と入力し、表示された「コマンドプロンプト」を右クリックして「管理者として実行」を選択する。
winget install --id Python.Python.3.12 -e --scope machine --silent --accept-source-agreements --accept-package-agreements --override "/quiet InstallAllUsers=1 PrependPath=1 Include_test=0 Include_pip=1 Include_launcher=1 InstallLauncherAllUsers=1 TargetDir=\"C:\Program Files\Python312\""
powershell -Command "$p='C:\Program Files\Python312'; $s=\"$p\Scripts\"; $m=[Environment]::GetEnvironmentVariable('Path','Machine'); if($m -notlike \"*$s*\") { [Environment]::SetEnvironmentVariable('Path', \"$p;$s;$m\", 'Machine') }"
--scope machine を指定することで、システム全体(全ユーザー向け)にインストールされる。このオプションの実行には管理者権限が必要である。インストール完了後、コマンドプロンプトを再起動すると PATH が自動的に設定される。
方法2:インストーラーによるインストール
- Python 公式サイト(https://www.python.org/downloads/)にアクセスし、「Download Python 3.x.x」ボタンから Windows 用インストーラーをダウンロードする。
- ダウンロードしたインストーラーを実行する。
- 初期画面の下部に表示される「Add python.exe to PATH」に必ずチェックを入れてから「Customize installation」を選択する。このチェックを入れ忘れると、コマンドプロンプトから
pythonコマンドを実行できない。 - 「Install Python 3.xx for all users」にチェックを入れ、「Install」をクリックする。
インストールの確認
コマンドプロンプトで以下を実行する。
python --versionバージョン番号(例:Python 3.12.x)が表示されればインストール成功である。「'python' は、内部コマンドまたは外部コマンドとして認識されていません。」と表示される場合は、インストールが正常に完了していない。
Git のインストール(Windows 上) [クリックして展開]
管理者権限のコマンドプロンプトで以下を実行する.管理者権限は,winget の --scope machine オプションでシステム全体にインストールするために必要となる.
REM Git をシステム領域にインストール
winget install --scope machine --id Git.Git -e --silent --disable-interactivity --force --accept-source-agreements --accept-package-agreements --override "/VERYSILENT /NORESTART /NOCANCEL /SP- /CLOSEAPPLICATIONS /RESTARTAPPLICATIONS /COMPONENTS=""icons,ext\reg\shellhere,assoc,assoc_sh"" /o:PathOption=Cmd /o:CRLFOption=CRLFCommitAsIs /o:BashTerminalOption=MinTTY /o:DefaultBranchOption=main /o:EditorOption=VIM /o:SSHOption=OpenSSH /o:UseCredentialManager=Enabled /o:PerformanceTweaksFSCache=Enabled /o:EnableSymlinks=Disabled /o:EnableFSMonitor=Disabled"
CMakeのインストール(Windows 上) [クリックして展開]
管理者権限のコマンドプロンプトで以下を実行する。管理者権限のコマンドプロンプトを起動するには、Windows キーまたはスタートメニューから「cmd」と入力し、表示された「コマンドプロンプト」を右クリックして「管理者として実行」を選択する。
REM CMake をシステム領域にインストール
winget install --scope machine --id Kitware.CMake -e --silent --disable-interactivity --force --accept-source-agreements --accept-package-agreements --override "/qn /norestart ADD_CMAKE_TO_PATH=System"
7-Zip のインストール(Windows 上) [クリックして展開]
管理者権限のコマンドプロンプトで以下を実行する。管理者権限のコマンドプロンプトを起動するには、Windows キーまたはスタートメニューから「cmd」と入力し、表示された「コマンドプロンプト」を右クリックして「管理者として実行」を選択する。
REM 7-Zip をシステム領域にインストール
winget install --scope machine --id 7zip.7zip -e --silent --disable-interactivity --force --accept-source-agreements --accept-package-agreements
REM 7-Zip のパス設定
powershell -NoProfile -Command "$p='C:\Program Files\7-Zip'; $c=[Environment]::GetEnvironmentVariable('Path','Machine'); if((Test-Path $p) -and $c -notlike \"*$p*\"){[Environment]::SetEnvironmentVariable('Path',\"$p;$c\",'Machine')}"
NVIDIA CUDA Toolkit 12.8のインストール
- 前提条件(NVIDIA CUDA Toolkit インストール前): NVIDIA GPU,NVIDIA ドライバ,および Build Tools for Visual Studio もしくは Visual Studio が必要である.
- インストール中の注意: なるべく他のウインドウはすべて閉じておくこと.
以下のコマンドを管理者権限のコマンドプロンプトで実行する
(手順:Windowsキーまたはスタートメニュー → cmd と入力 → 右クリック → 「管理者として実行」)。
REM NVIDIA CUDA Toolkit 12.8 をシステム領域にインストール
winget install --scope machine --id Nvidia.CUDA --version 12.8 -e --silent --disable-interactivity --force --uninstall-previous --accept-source-agreements --accept-package-agreements --override "-s -n"

REM 環境変数TEMP, TMPの設定(一時ファイルの保存先を短いパスに変更)
mkdir C:\TEMP
set "TEMP_PATH=C:\TEMP"
setx TEMP "%TEMP_PATH%" /M >nul
setx TMP "%TEMP_PATH%" /M >nul
2. Python の Dlib ライブラリのインストール,Dlib のソースコード等と,Dlib の学習済みモデルのダウンロード
- 以下の手順を管理者権限のコマンドプロンプトで実行する
(手順:Windowsキーまたはスタートメニュー →
cmdと入力 → 右クリック → 「管理者として実行」)。 - Python の Dlib ライブラリのインストール
次のコマンドを実行.
「python -m pip install -U dlib」はエラーが出やすい可能性があるため, よりエラーが出にくいと思われる,次の手順でインストールする.
python -m pip uninstall -y dlib
cd C:\
rmdir /s /q dlib
git clone https://github.com/davisking/dlib
cd C:\dlib
python setup.py build --no DLIB_GIF_SUPPORT
python setup.py install --no DLIB_GIF_SUPPORT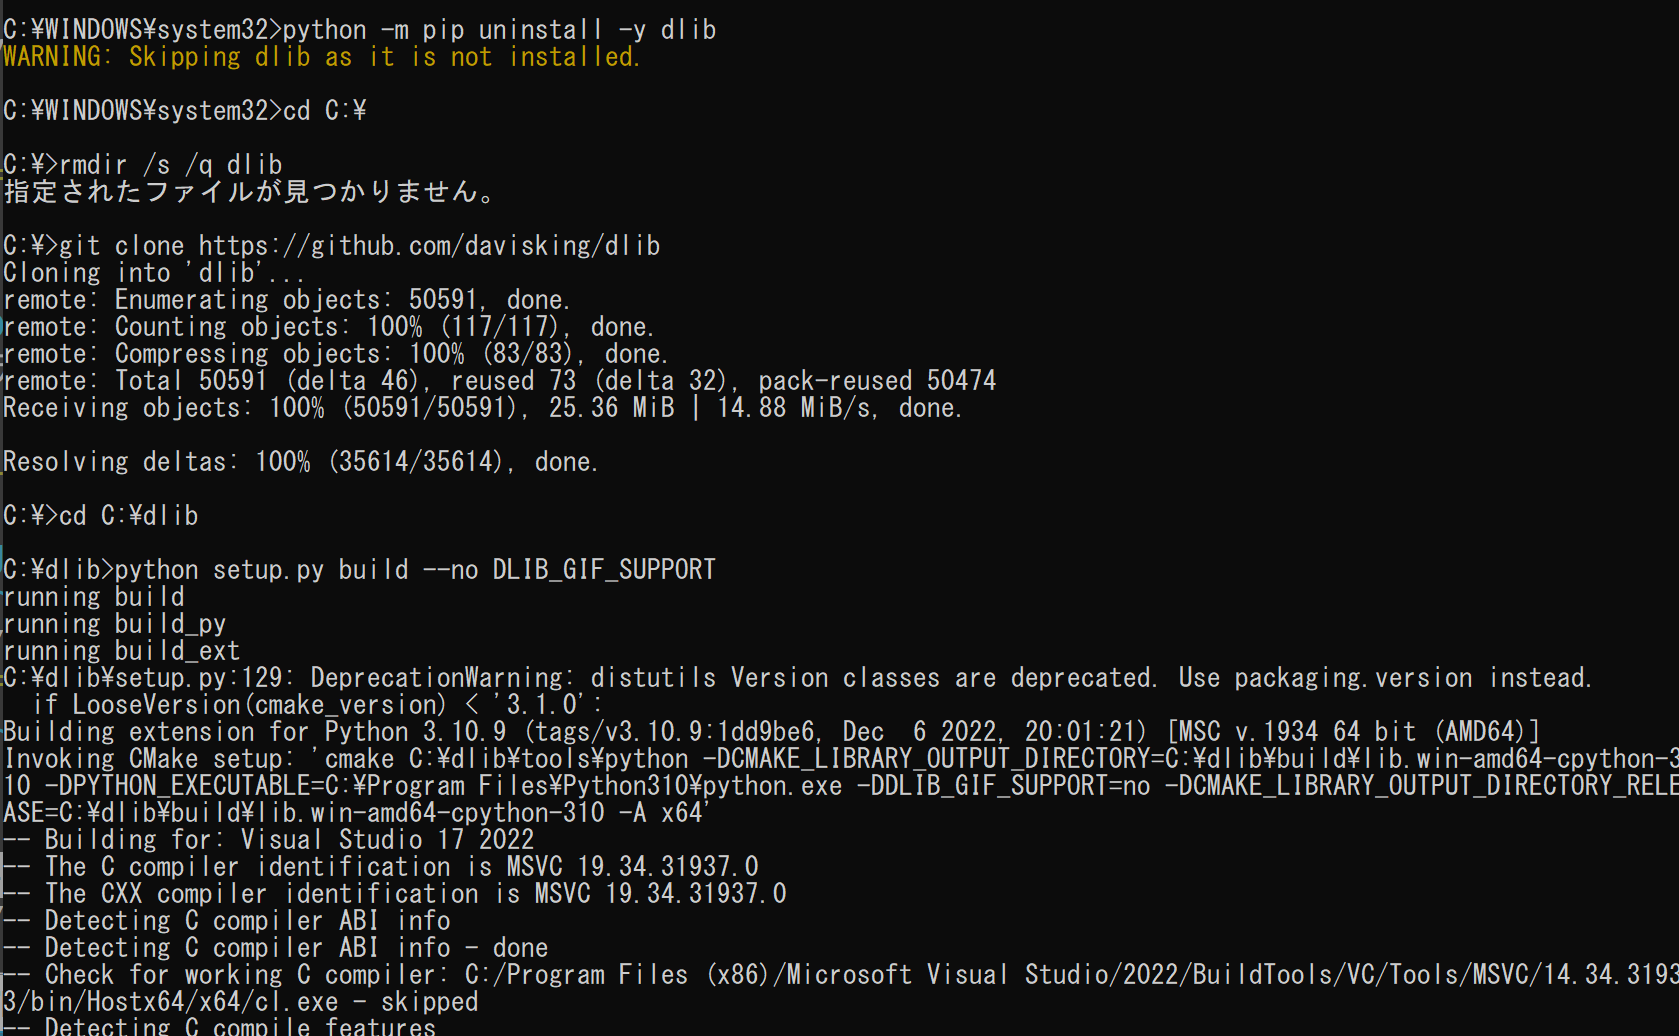
(以下省略) - Python のdlib ライブラリがインストールできたことの確認
バージョン番号が表示されれば OK.下の図とは違うバージョンが表示されることがある.
python -c "import dlib; print( dlib.__version__ )"
- Dlib の学習済みモデルのダウンロード
次のコマンドを実行.
cd C:\dlib
cd python_examples
curl -O http://dlib.net/files/mmod_human_face_detector.dat.bz2
curl -O http://dlib.net/files/dlib_face_recognition_resnet_model_v1.dat.bz2
curl -O http://dlib.net/files/shape_predictor_5_face_landmarks.dat.bz2
curl -O http://dlib.net/files/shape_predictor_68_face_landmarks.dat.bz2
"c:\Program Files\7-Zip\7z.exe" x mmod_human_face_detector.dat.bz2
"c:\Program Files\7-Zip\7z.exe" x dlib_face_recognition_resnet_model_v1.dat.bz2
"c:\Program Files\7-Zip\7z.exe" x shape_predictor_5_face_landmarks.dat.bz2
"c:\Program Files\7-Zip\7z.exe" x shape_predictor_68_face_landmarks.dat.bz2
del mmod_human_face_detector.dat.bz2
del dlib_face_recognition_resnet_model_v1.dat.bz2
del shape_predictor_5_face_landmarks.dat.bz2
del shape_predictor_68_face_landmarks.dat.bz2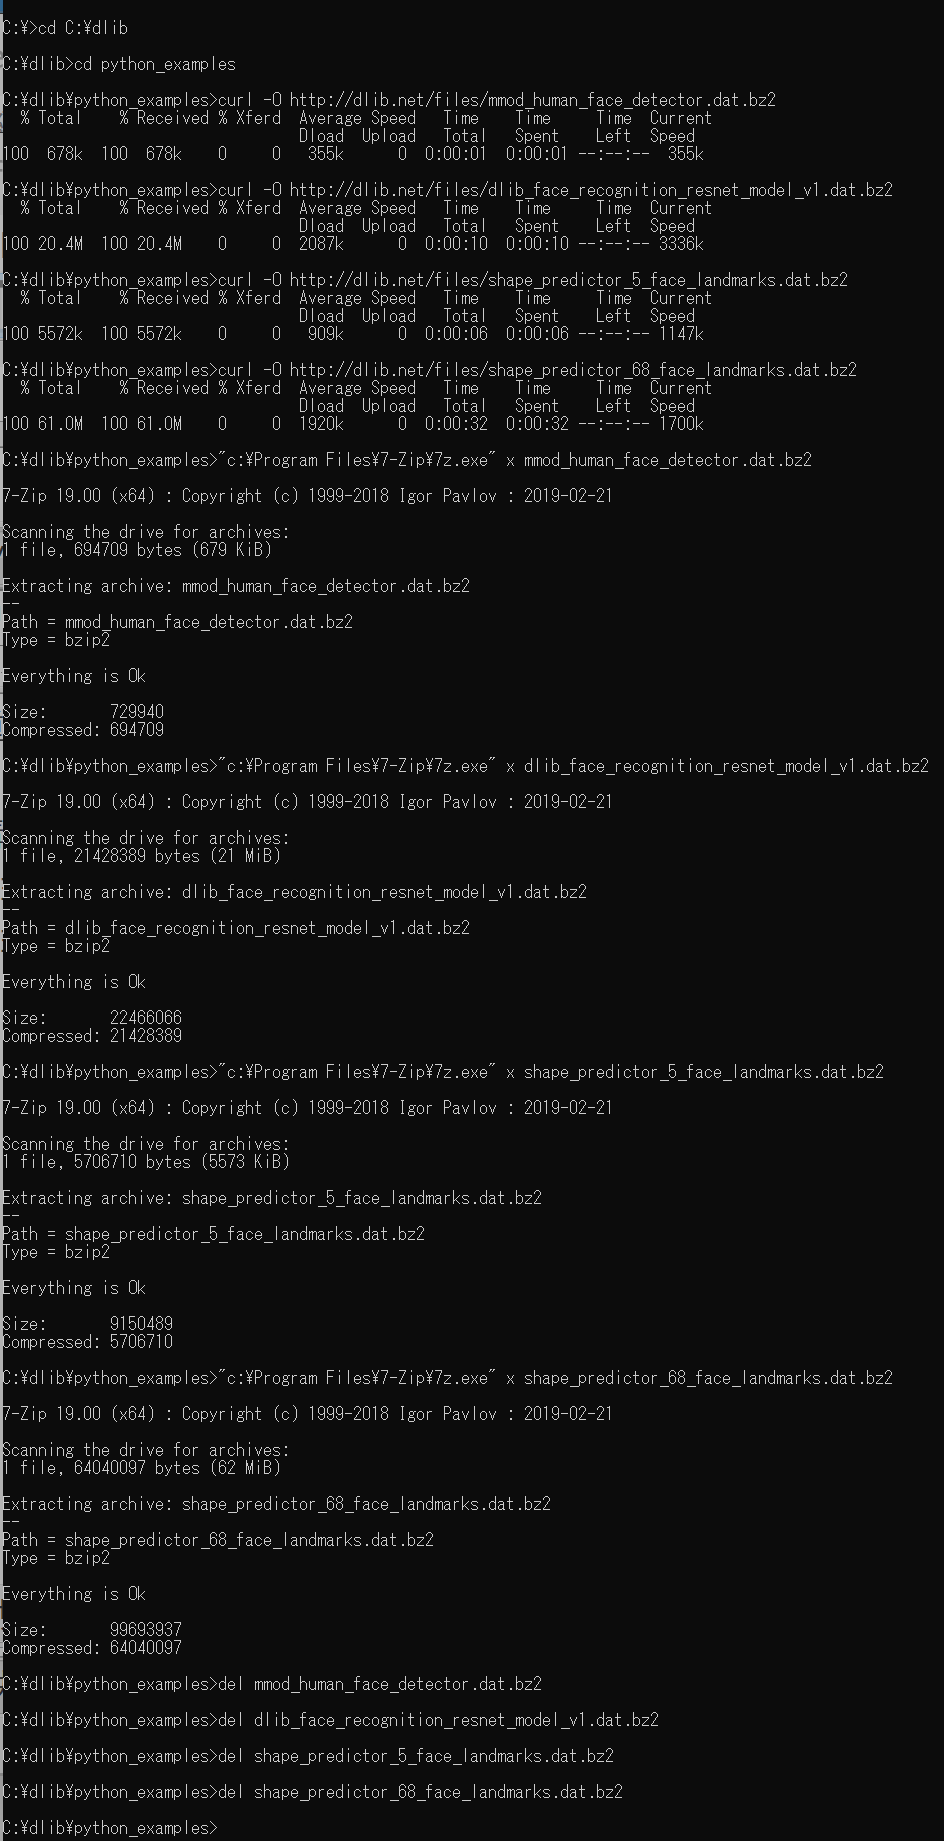
- Dlib の動作確認のため,次を実行.エラーメッセージが出ずに,顔検出の結果が表示されれば OK とする.
cd C:\dlib
cd python_examples
python cnn_face_detector.py mmod_human_face_detector.dat ..\examples\faces\2007_007763.jpg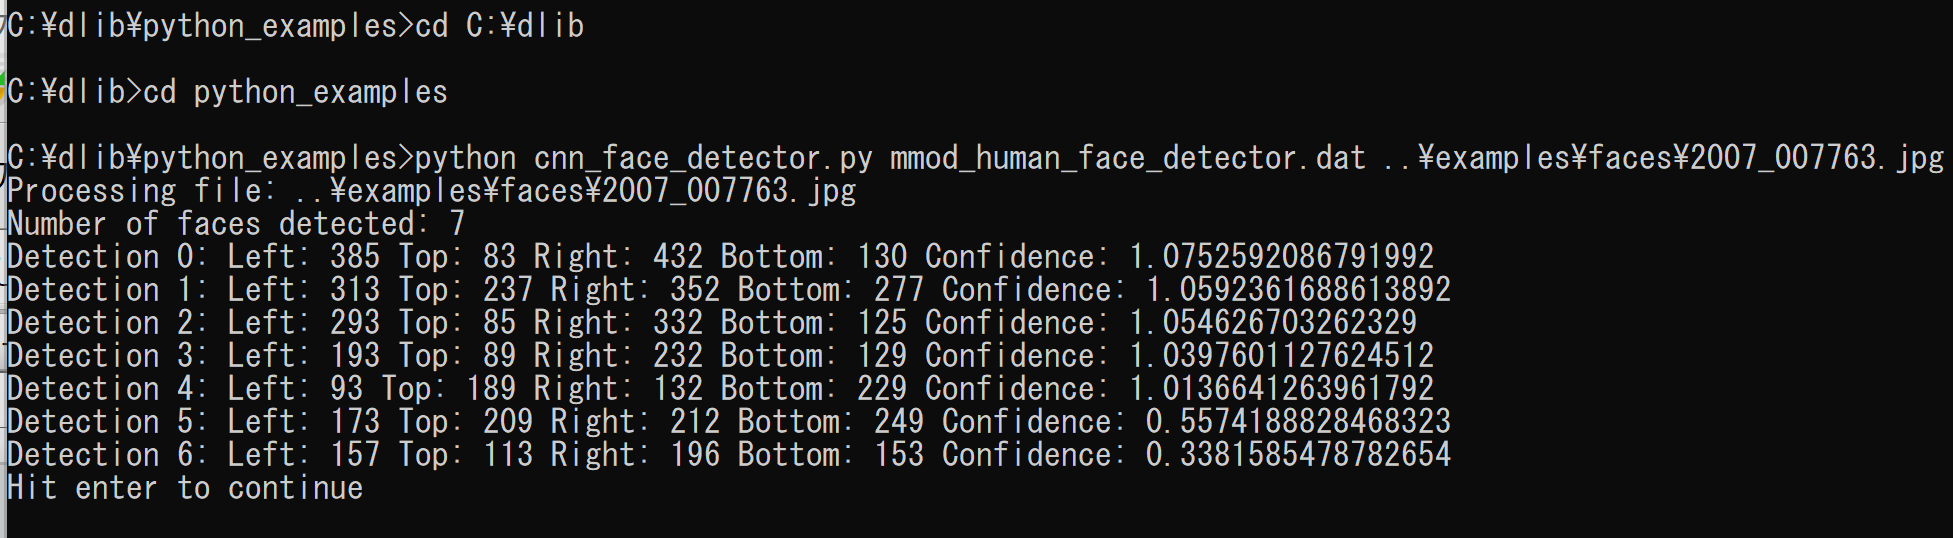
3. Dlib に付属のサンプルプログラム(example 下)のビルド
Dlib に付属のサンプルプログラムは,examplesの下にある.次の手順でビルドする.
http://dlib.net/compile.html の記述に従う
- 以下の操作を管理者権限のコマンドプロンプトで実行する
(手順:Windowsキーまたはスタートメニュー →
cmdと入力 → 右クリック → 「管理者として実行」)。cd C:\dlib cd examples rmdir /s /q build mkdir build cd build cmake .. -A x64 -T host=x64 ^ -DCUDA_SDK_ROOT_DIR="c:/Program Files/NVIDIA GPU Computing Toolkit/CUDA/v12.8" ^ -DCUDA_TOOLKIT_ROOT_DIR="c:/Program Files/NVIDIA GPU Computing Toolkit/CUDA/v12.8" ^ -DCUDA_NVCC_FLAGS="-allow-unsupported-compiler" ^ -DCUDA_NVCC_FLAGS_DEBUG="-allow-unsupported-compiler" ^ -DCMAKE_INSTALL_PREFIX=c:/dlib ^ -DDLIB_GIF_SUPPORT=OFF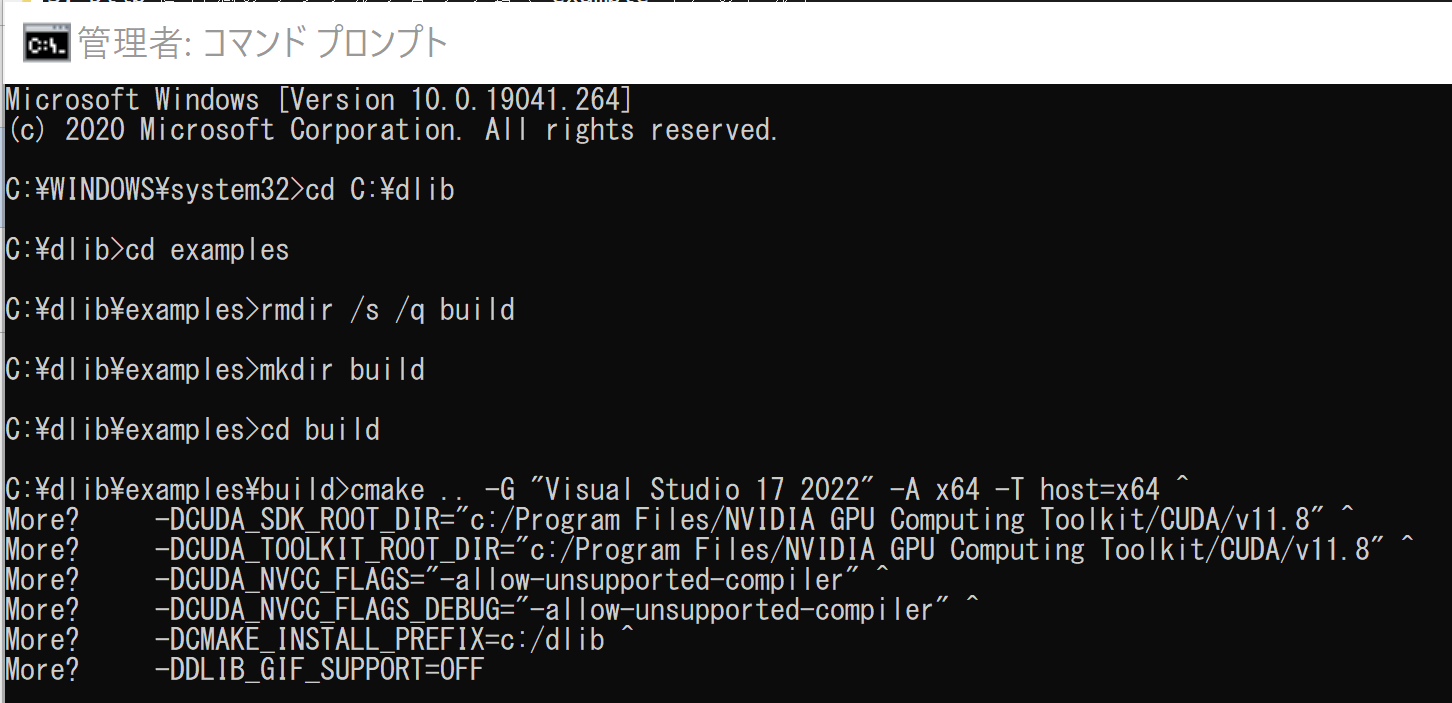
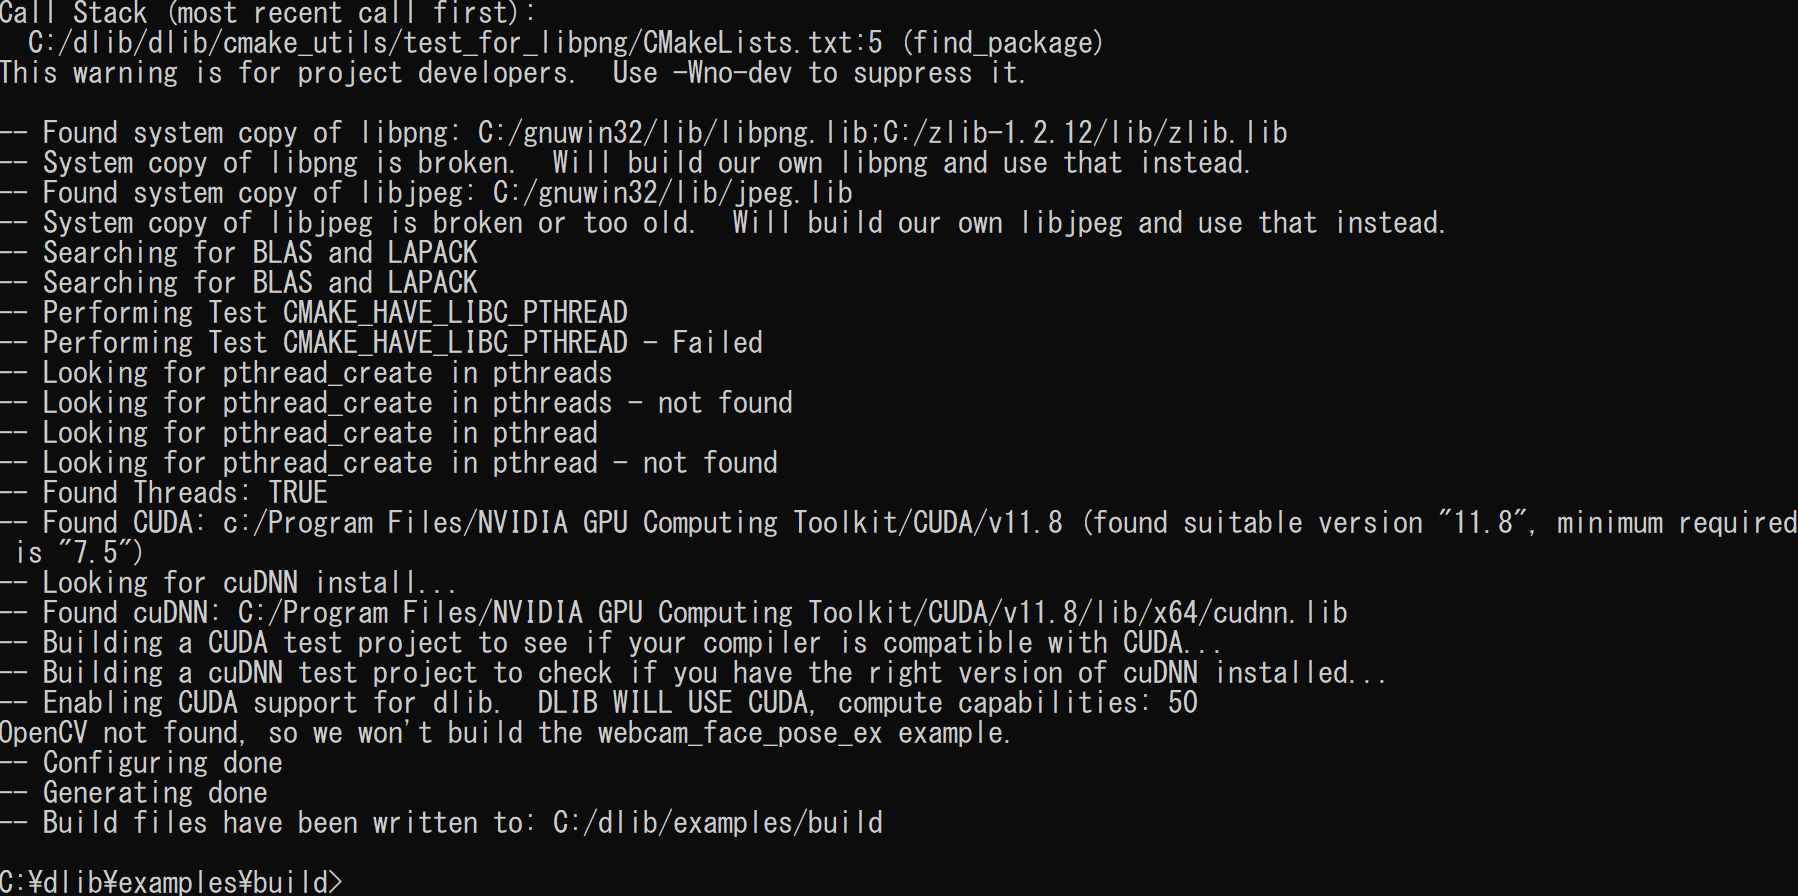
- 結果の確認
エラーメッセージが出ていないこと
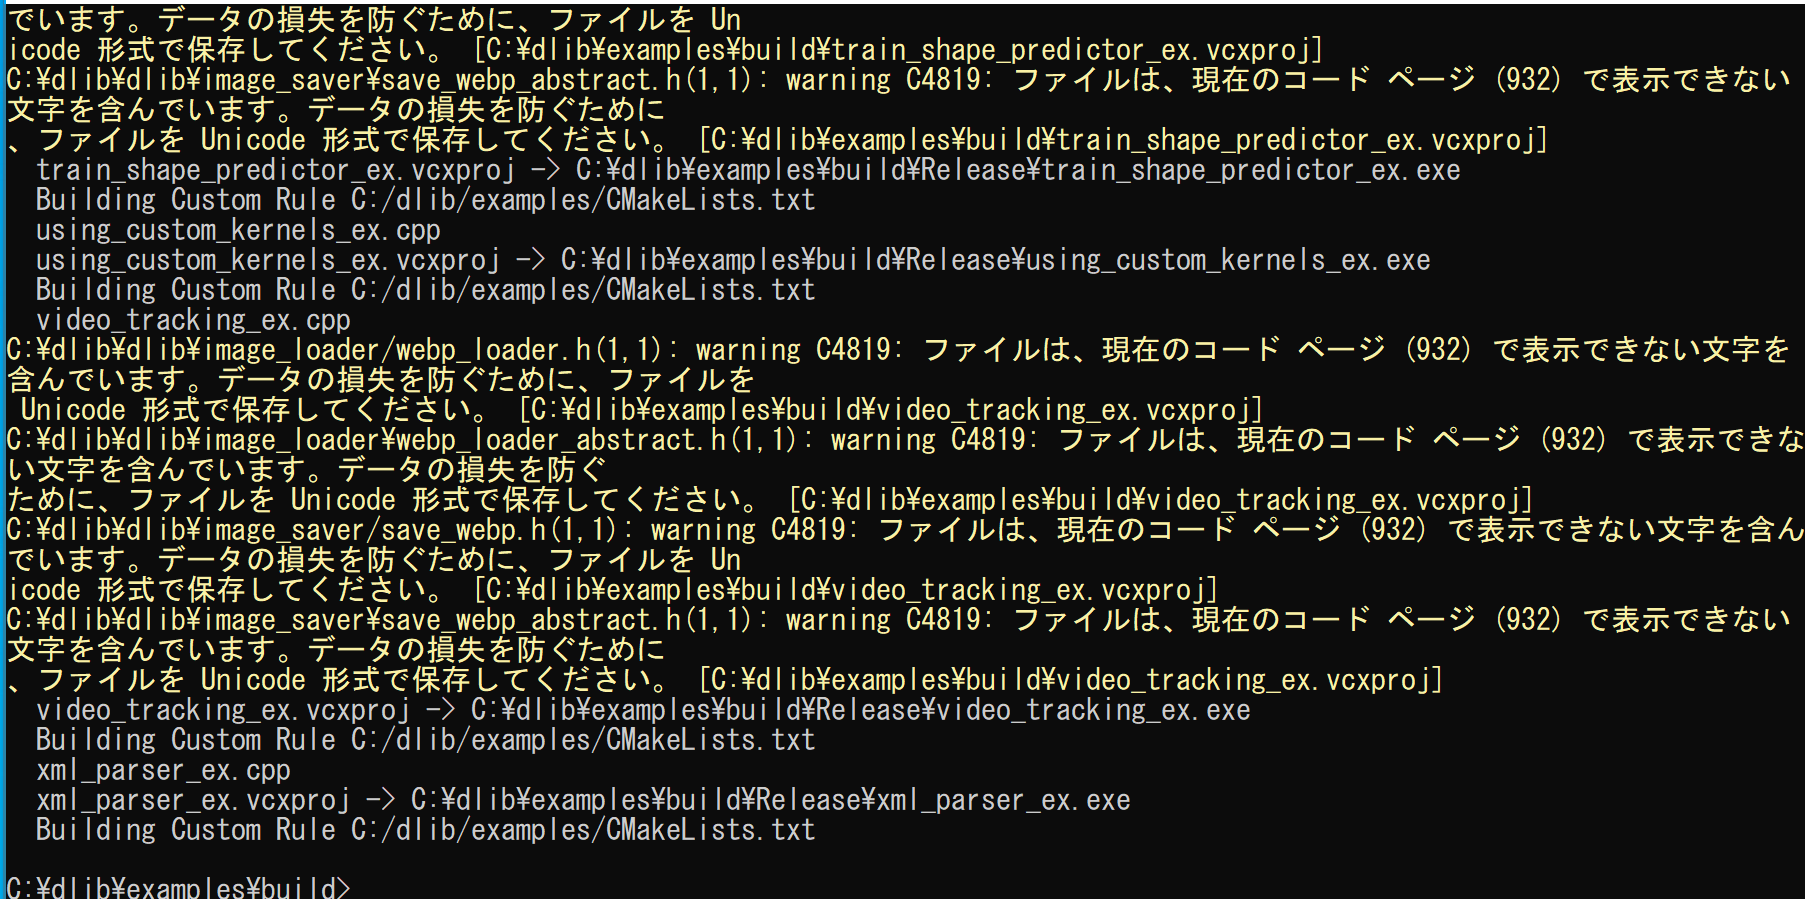
- ビルド操作
cmake --build . --config Release
- 結果を確認.エラーメッセージが出ていないこと
4. 画像分類,物体検出,トラッキング・ビジョン,犬の顔画像について眼鏡をあてはめる(Dlib に付属のサンプルプログラムを使用)
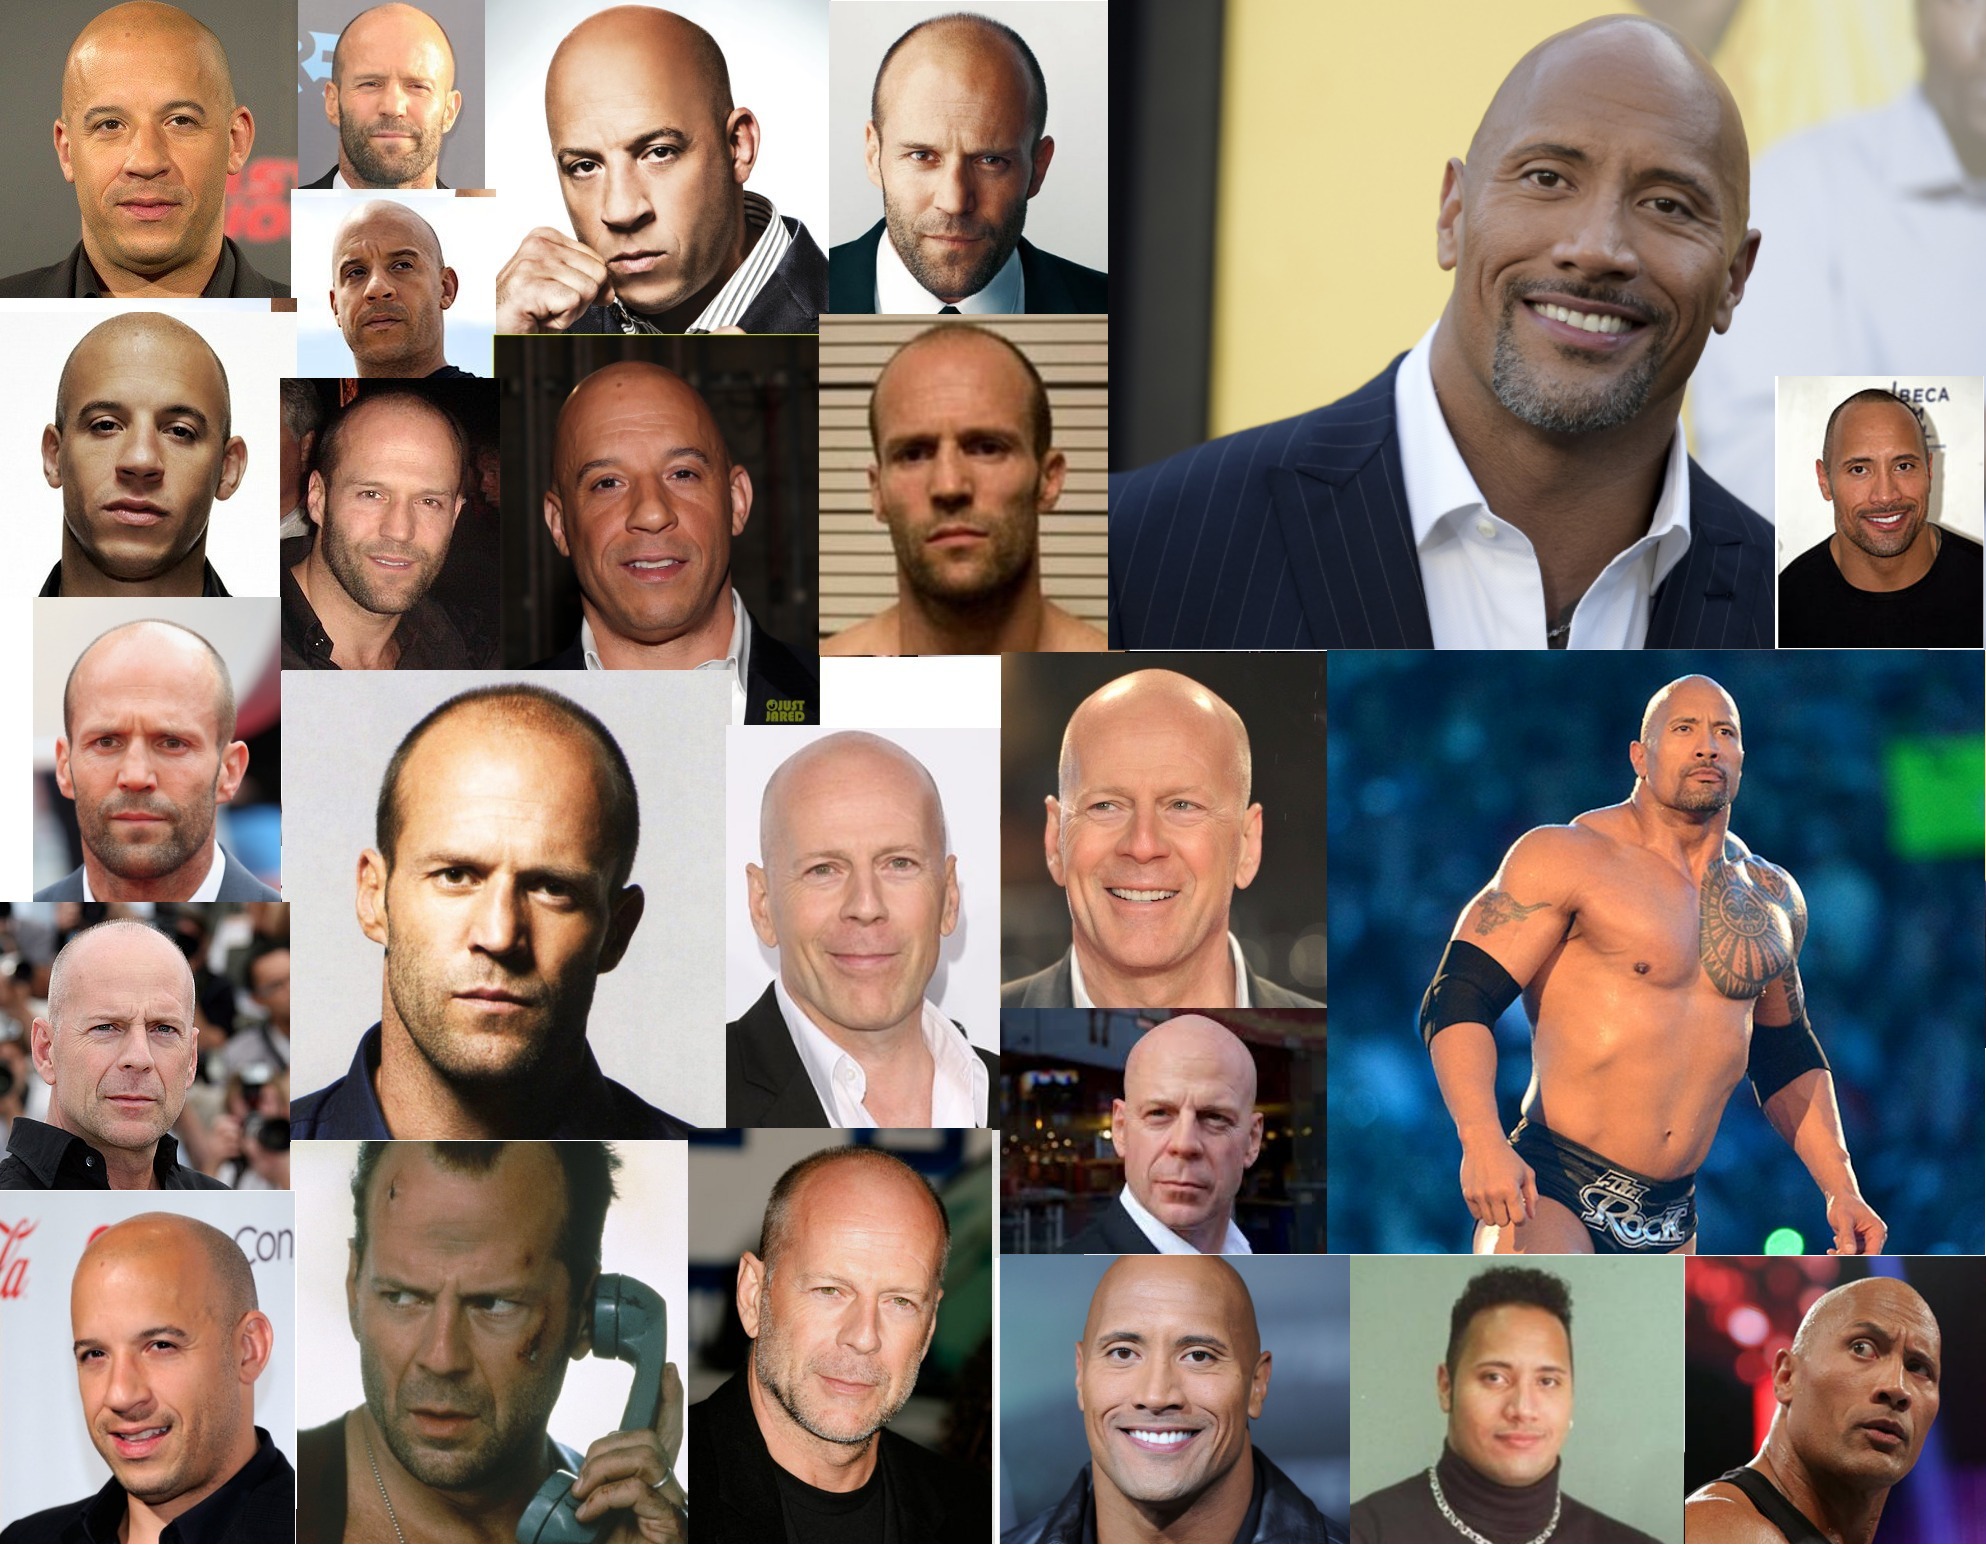
画像分類
- 学習済みモデルのダウンロード
curl でなく wget を使いたいときは, 「wget http://dlib.net/files/resnet34_1000_imagenet_classifier.dnn.bz2」のように操作する.
cd C:\dlib
cd examples\build
curl -O http://dlib.net/files/resnet34_1000_imagenet_classifier.dnn.bz2
"c:\Program Files\7-Zip\7z.exe" x resnet34_1000_imagenet_classifier.dnn.bz2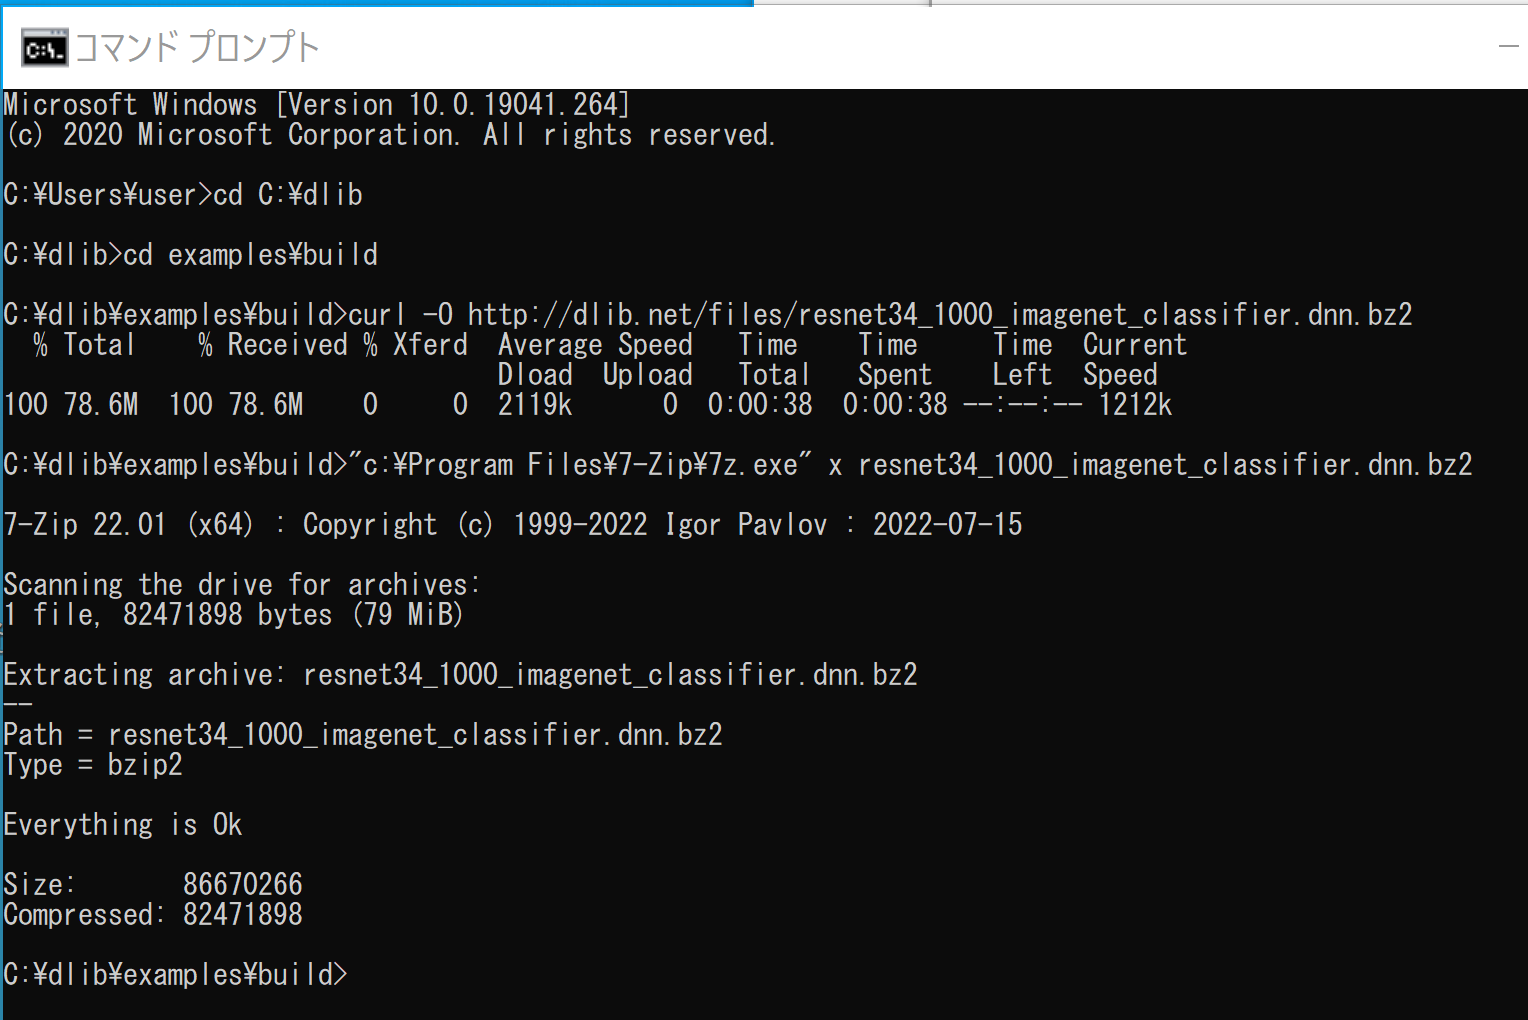
- 画像分類の実行
画像分類される画像は,「faces\*.jpg」で指定している.
cd C:\dlib
cd examples\build
for %i in (..\faces\*.jpg) do .\release\dnn_imagenet_ex %i
画像分類される画像
物体検出(Max-Margin Object Detection by Davis E. King を使用)
物体検出:画像から、ある種類の物体を検出し、その位置と大きさを得る。1つの画像の中に、物体が複数あることもある。
Max-Margin 物体検出法が利用されている(文献は次の通り) それにより,Dlib による文体検出が行われる.
Davis E. King, Max-Margin Object Detection, CoRR, abs/1502.00046, 2015.
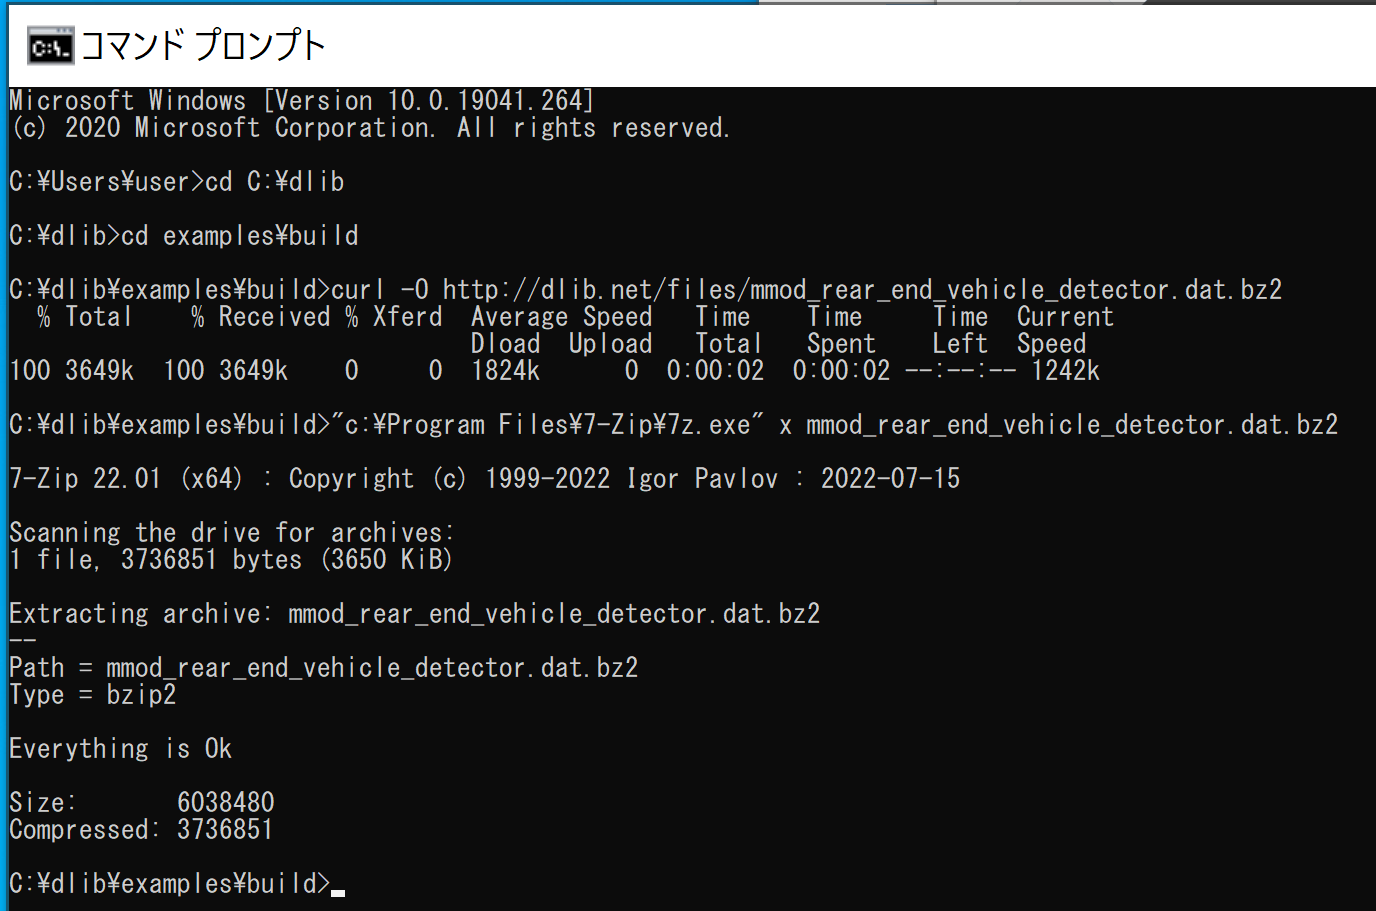
学習済みモデルのダウンロード
cd C:\dlib
cd examples\build
curl -O http://dlib.net/files/mmod_rear_end_vehicle_detector.dat.bz2
"c:\Program Files\7-Zip\7z.exe" x mmod_rear_end_vehicle_detector.dat.bz2
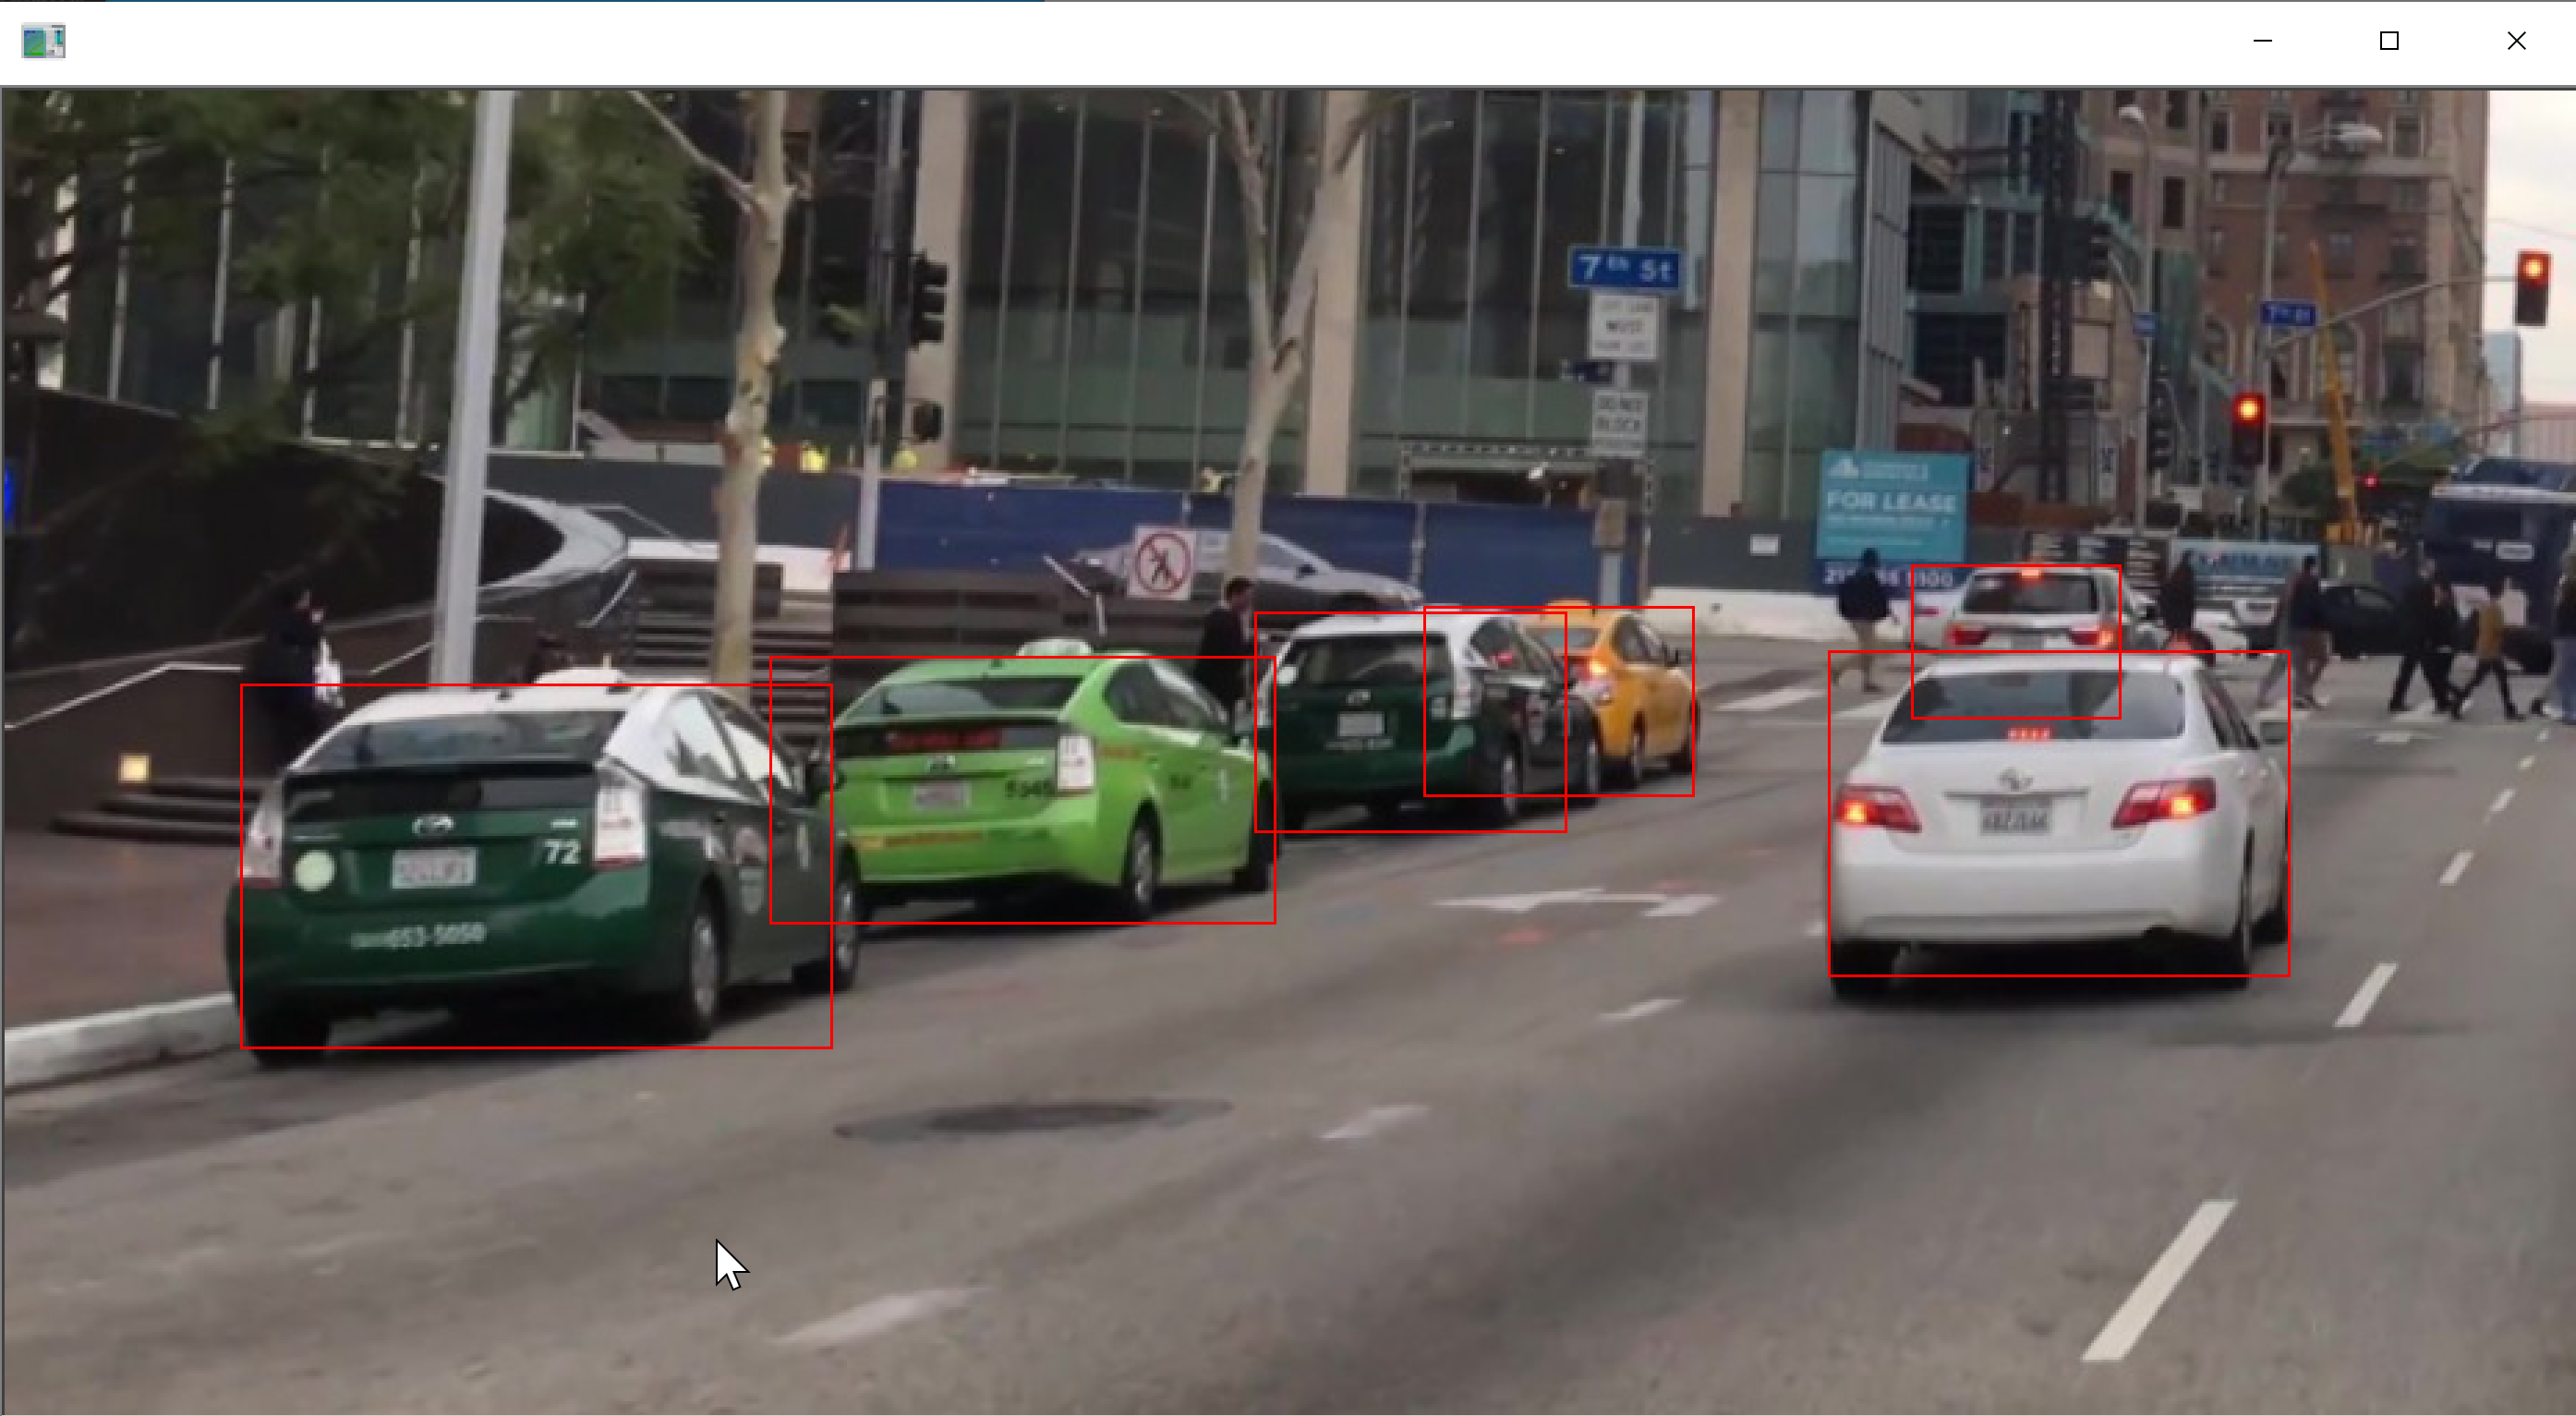
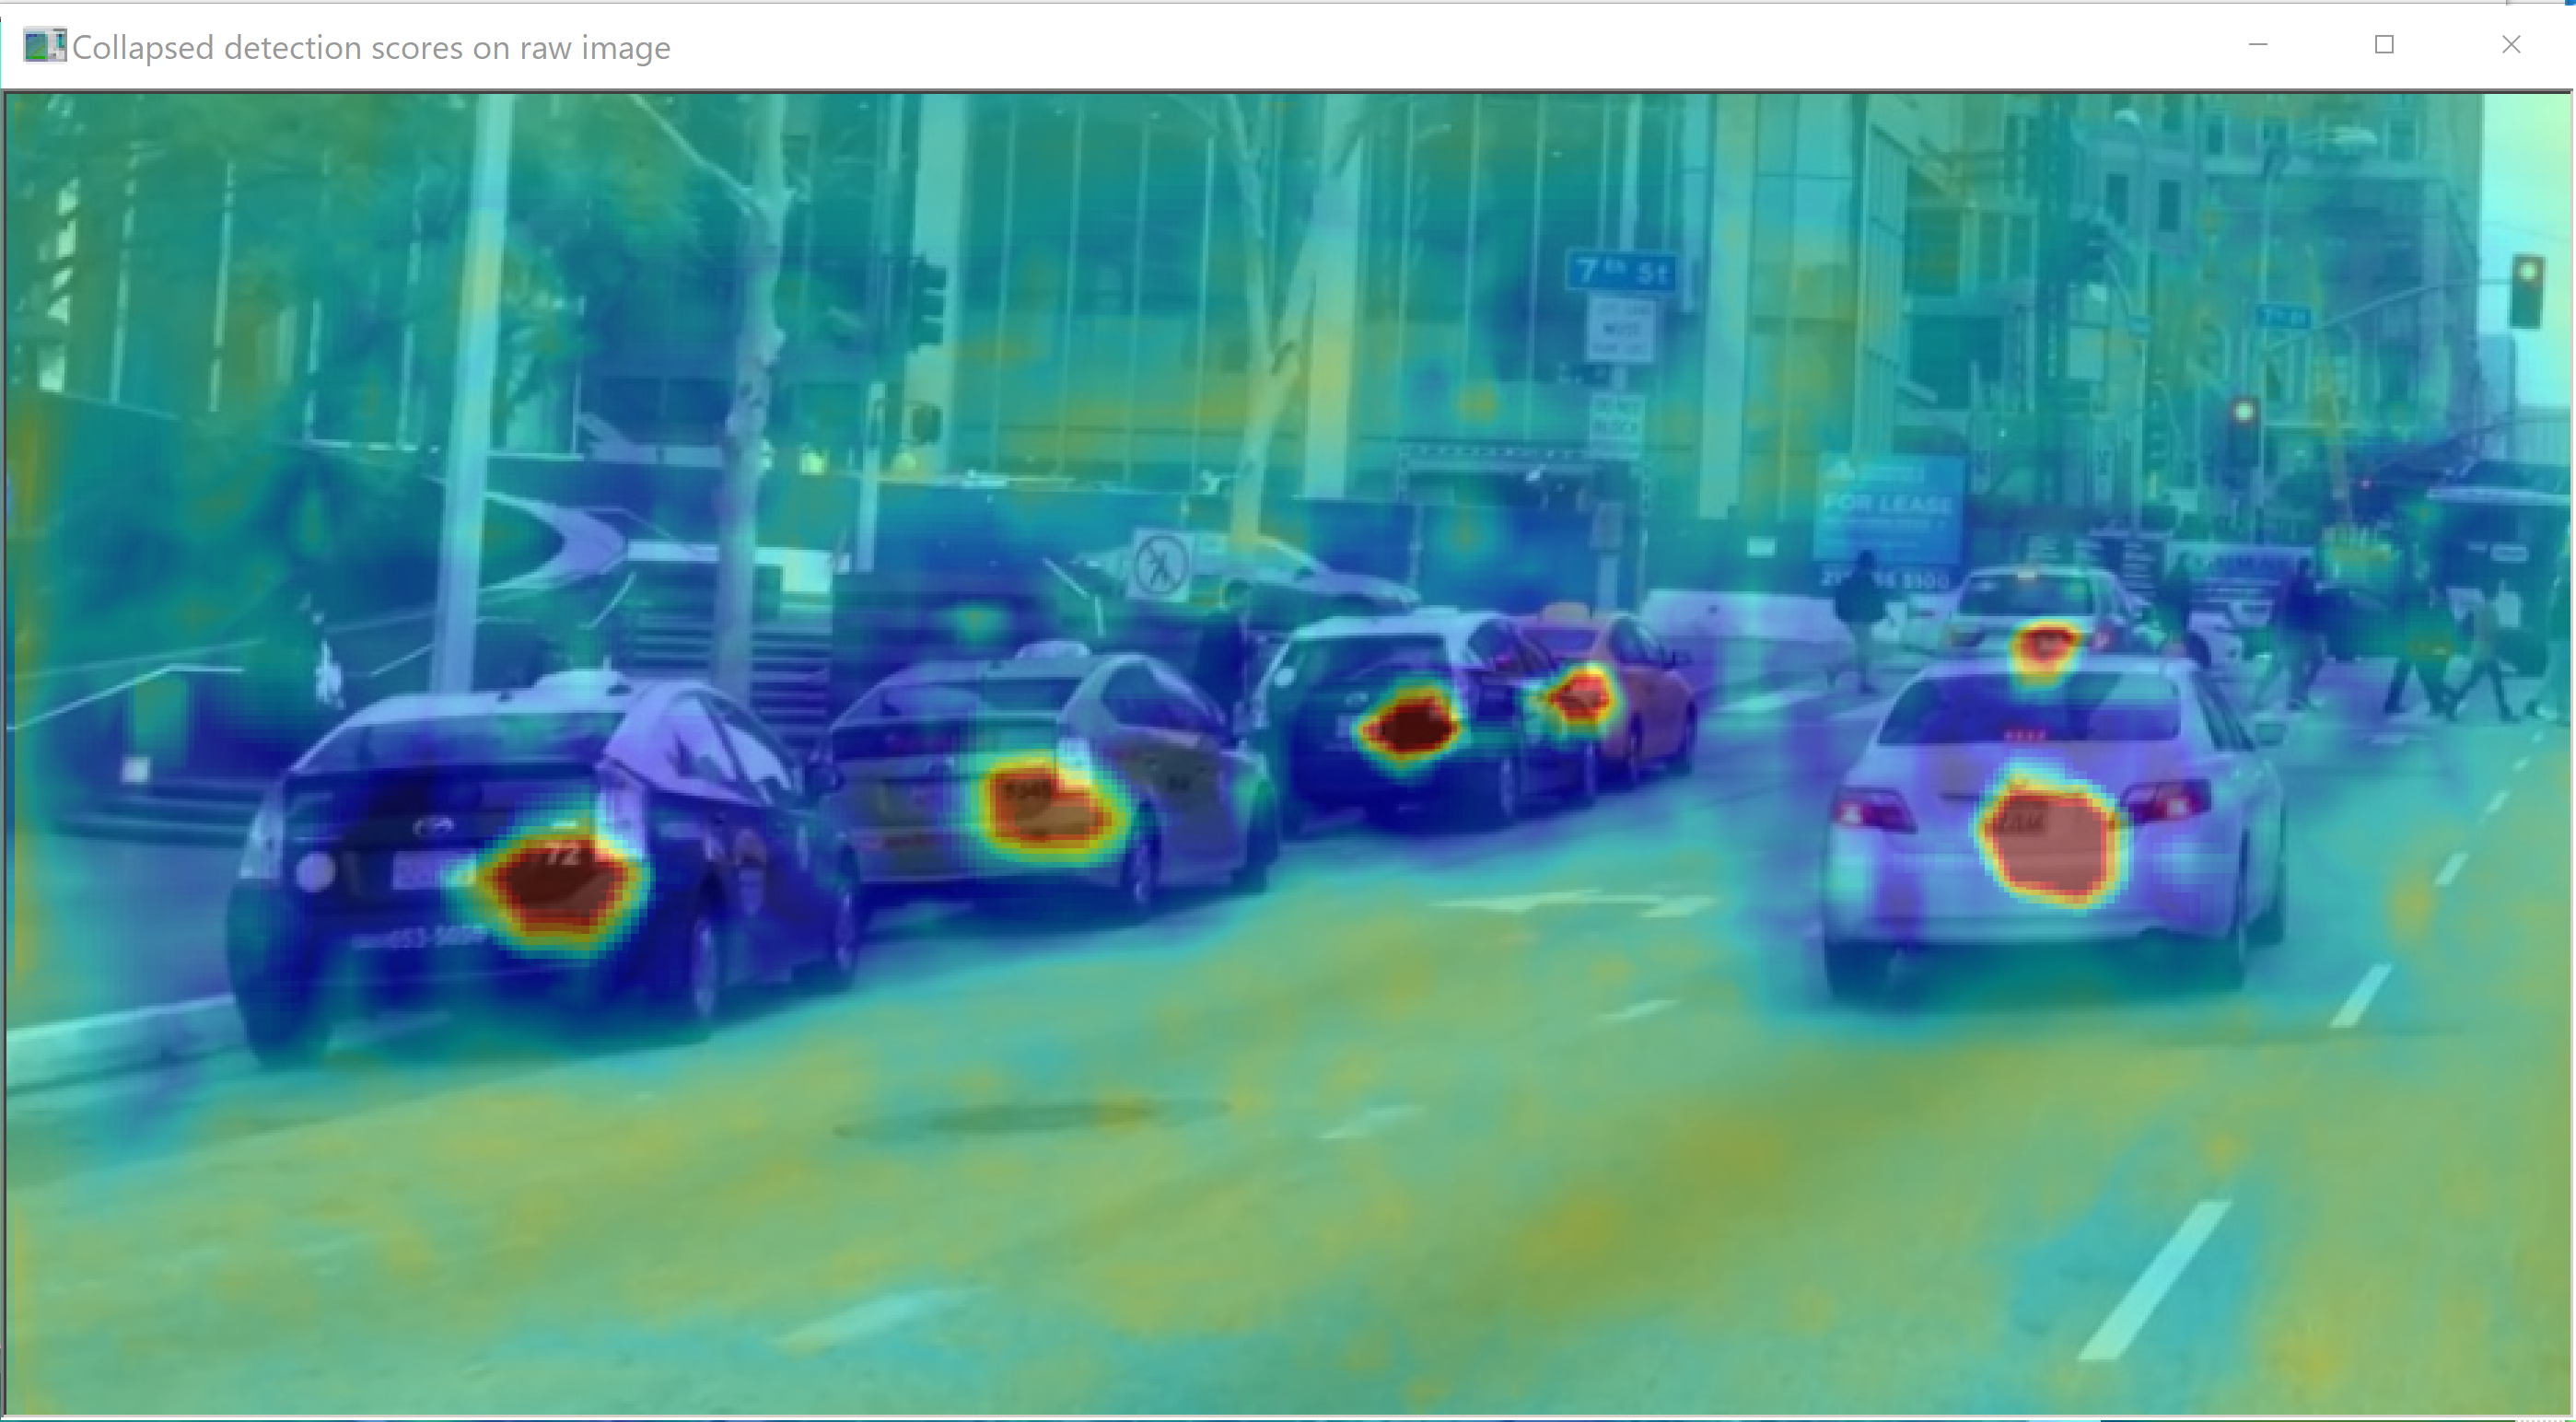
物体検出の実行(車の正面)
cd C:\dlib
cd examples\build
.\release\dnn_mmod_find_cars_ex
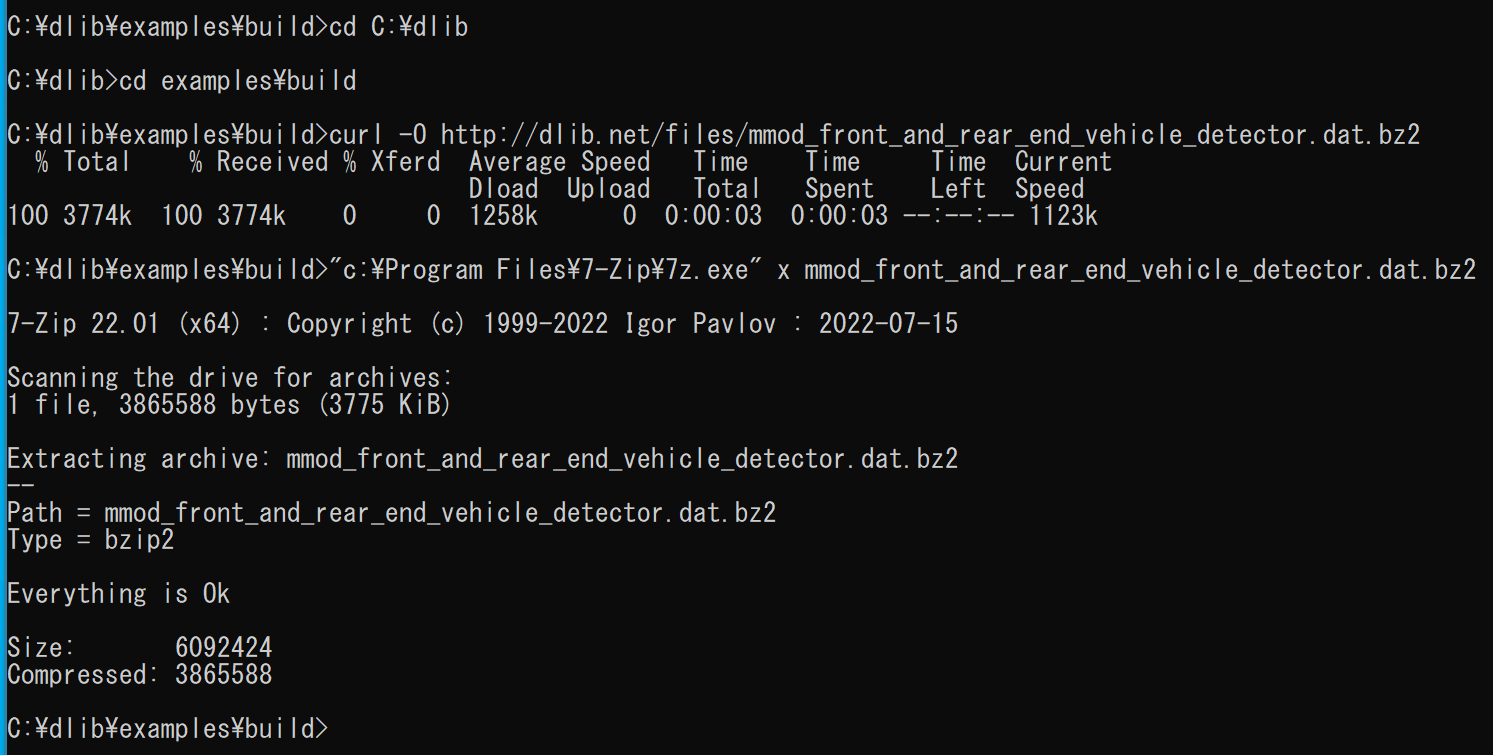
学習済みモデルのダウンロード
cd C:\dlib
cd examples\build
curl -O http://dlib.net/files/mmod_front_and_rear_end_vehicle_detector.dat.bz2
"c:\Program Files\7-Zip\7z.exe" x mmod_front_and_rear_end_vehicle_detector.dat.bz2
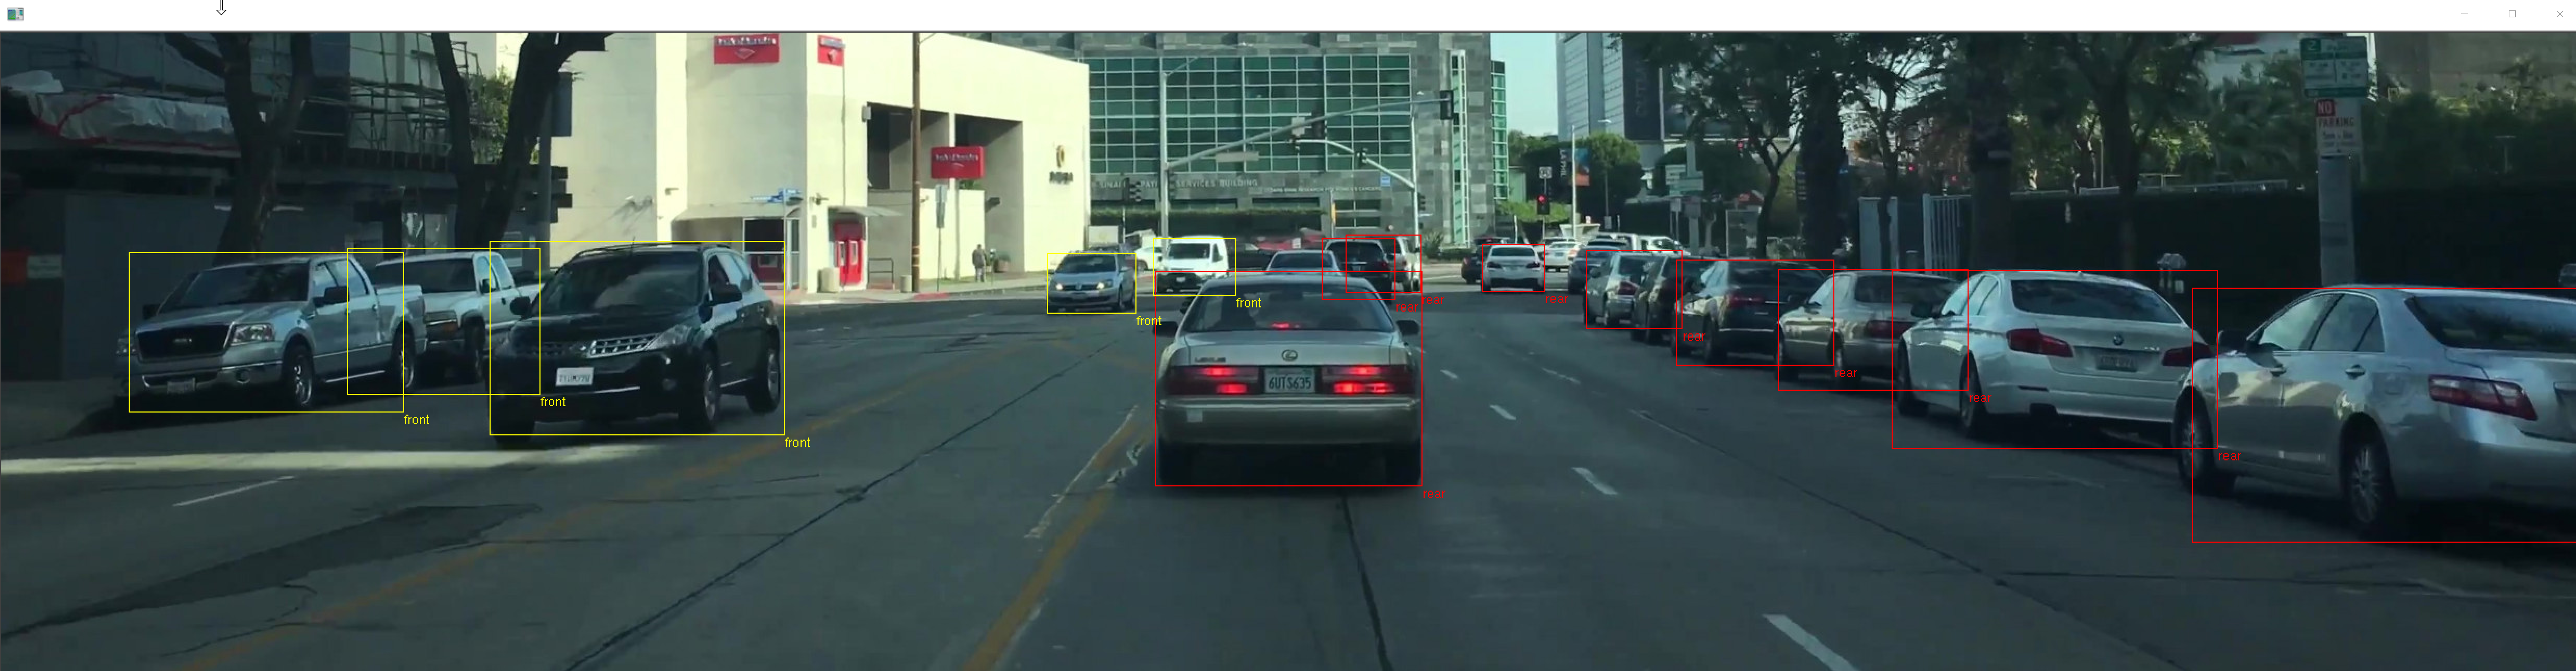
物体検出の実行(車の正面と背面)
cd C:\dlib
cd examples\build
.\release\dnn_mmod_find_cars2_ex
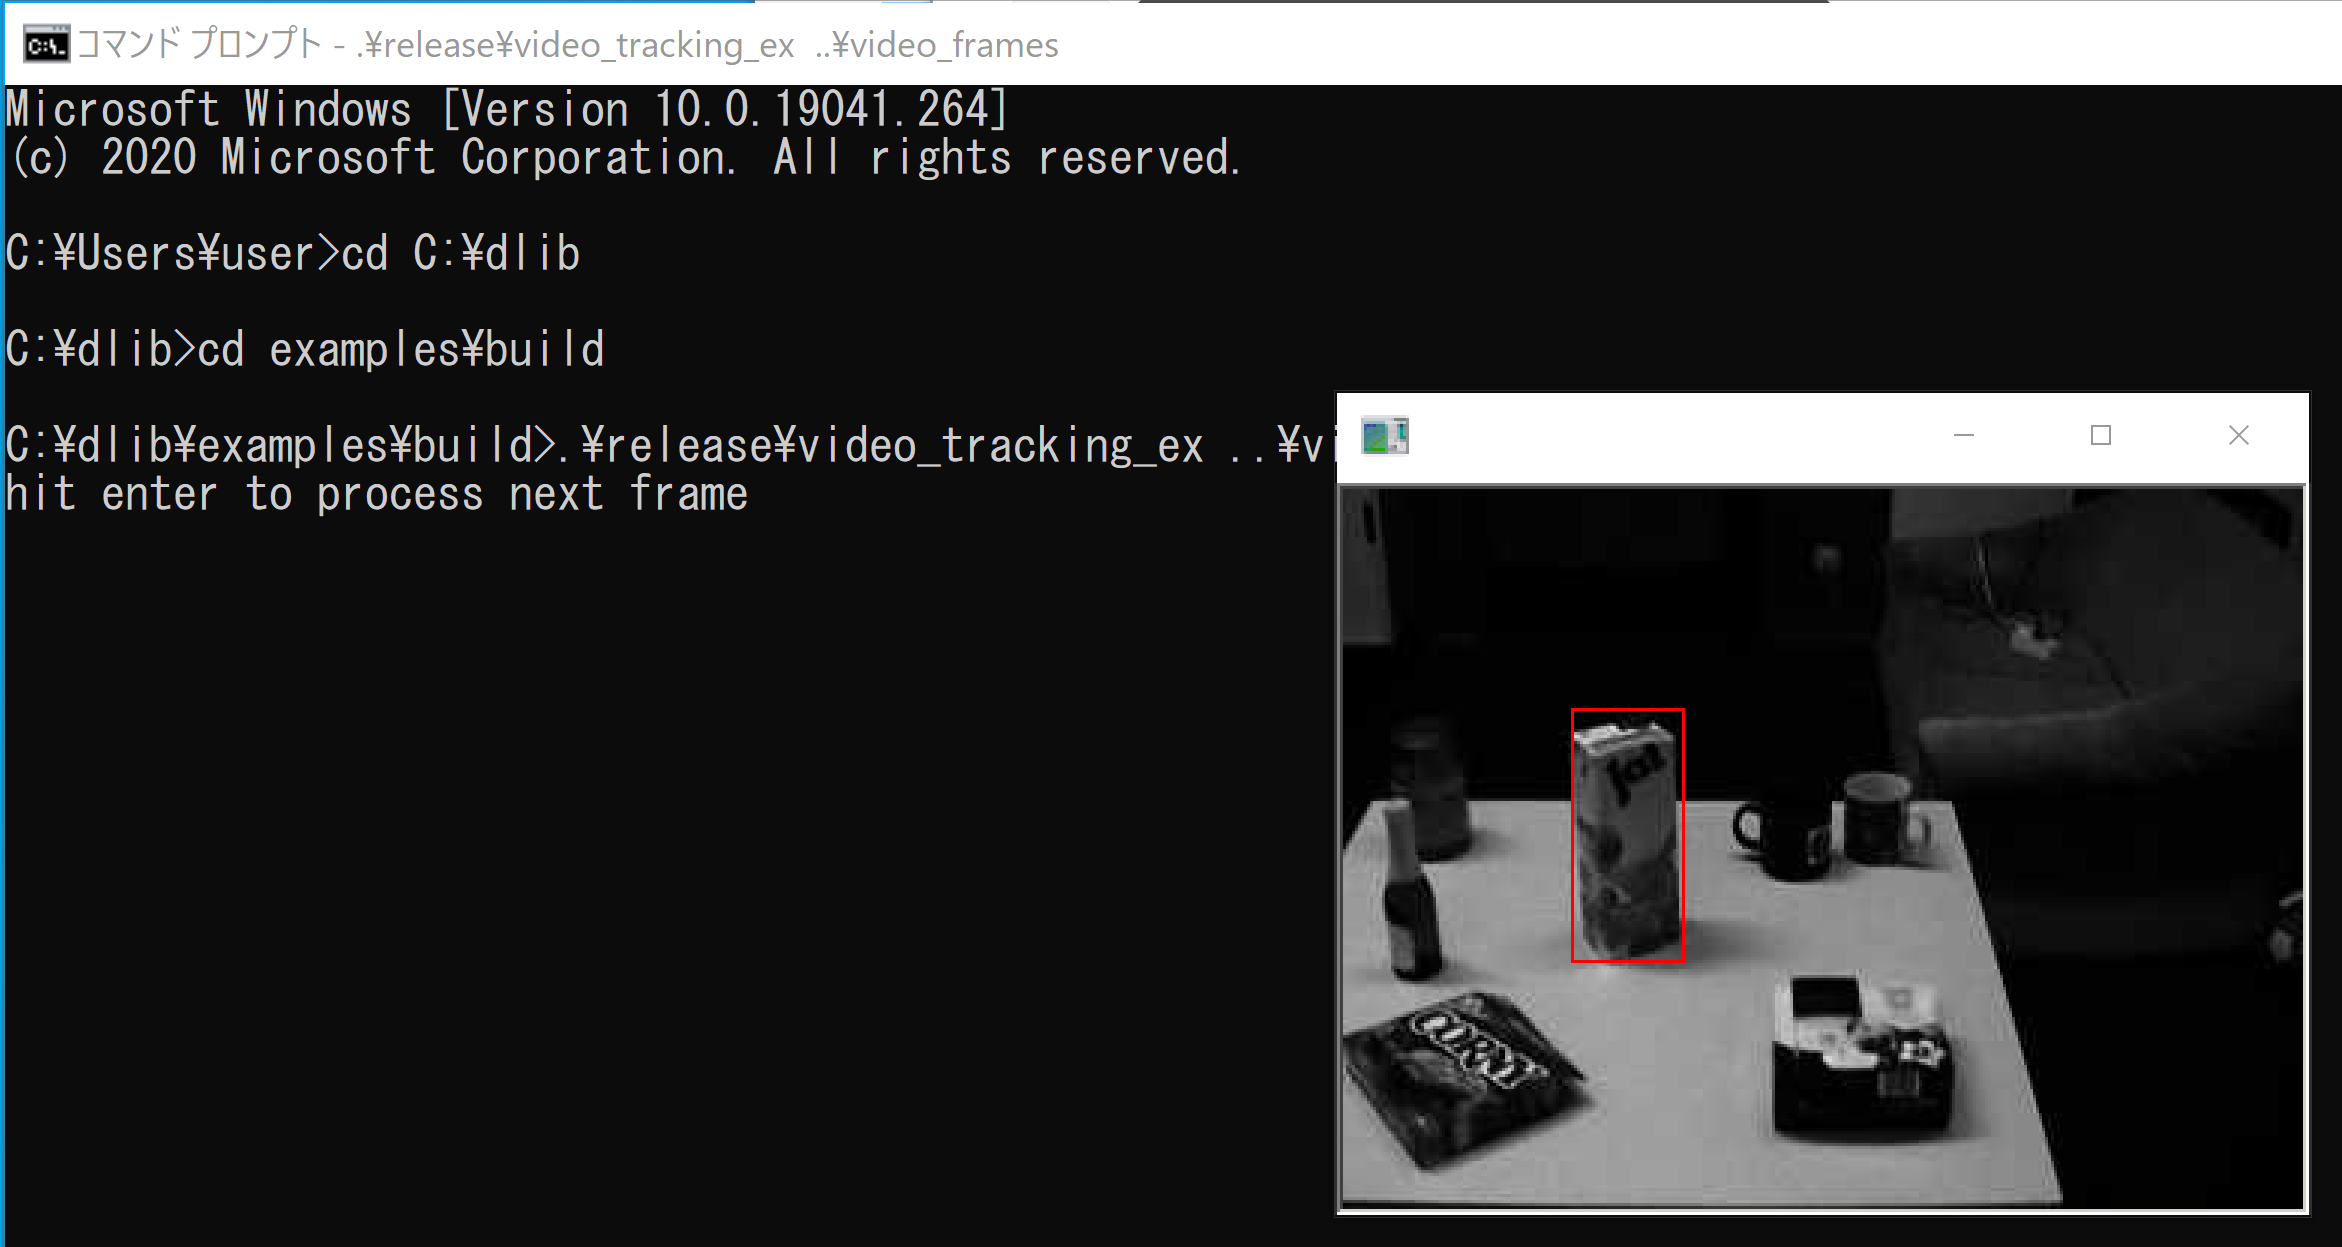
トラッキング・ビジョン(correlation_tracker を使用)
cd C:\dlib
cd examples\build
.\release\video_tracking_ex ..\video_frames
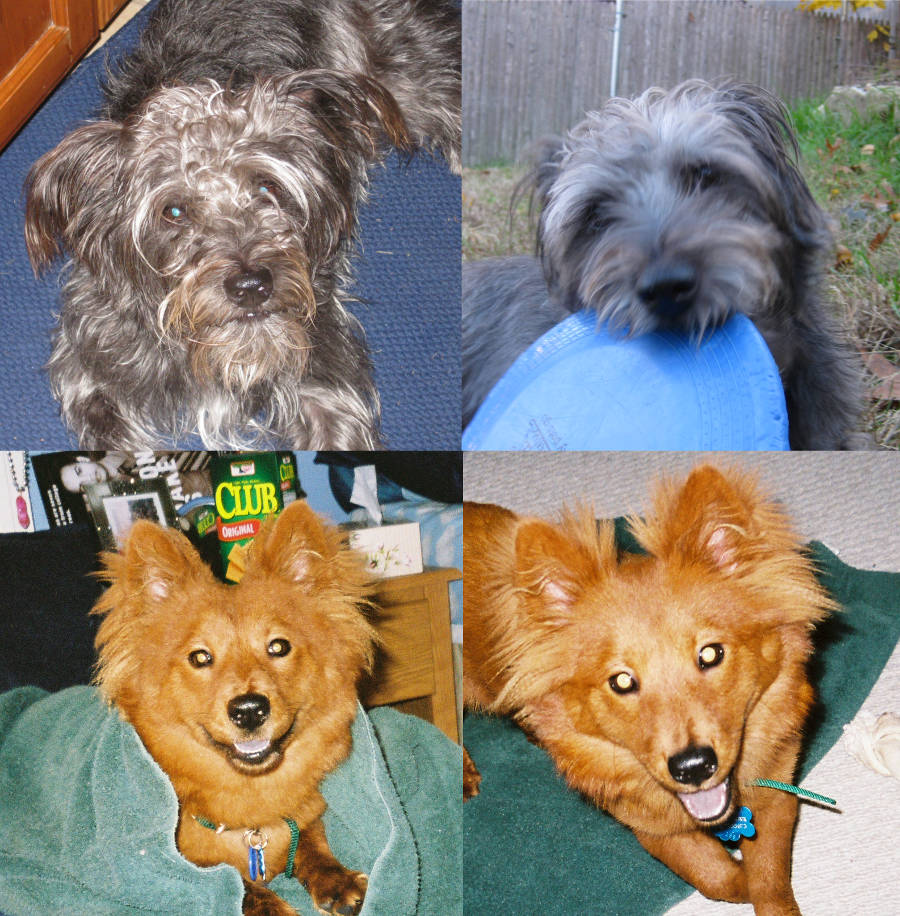
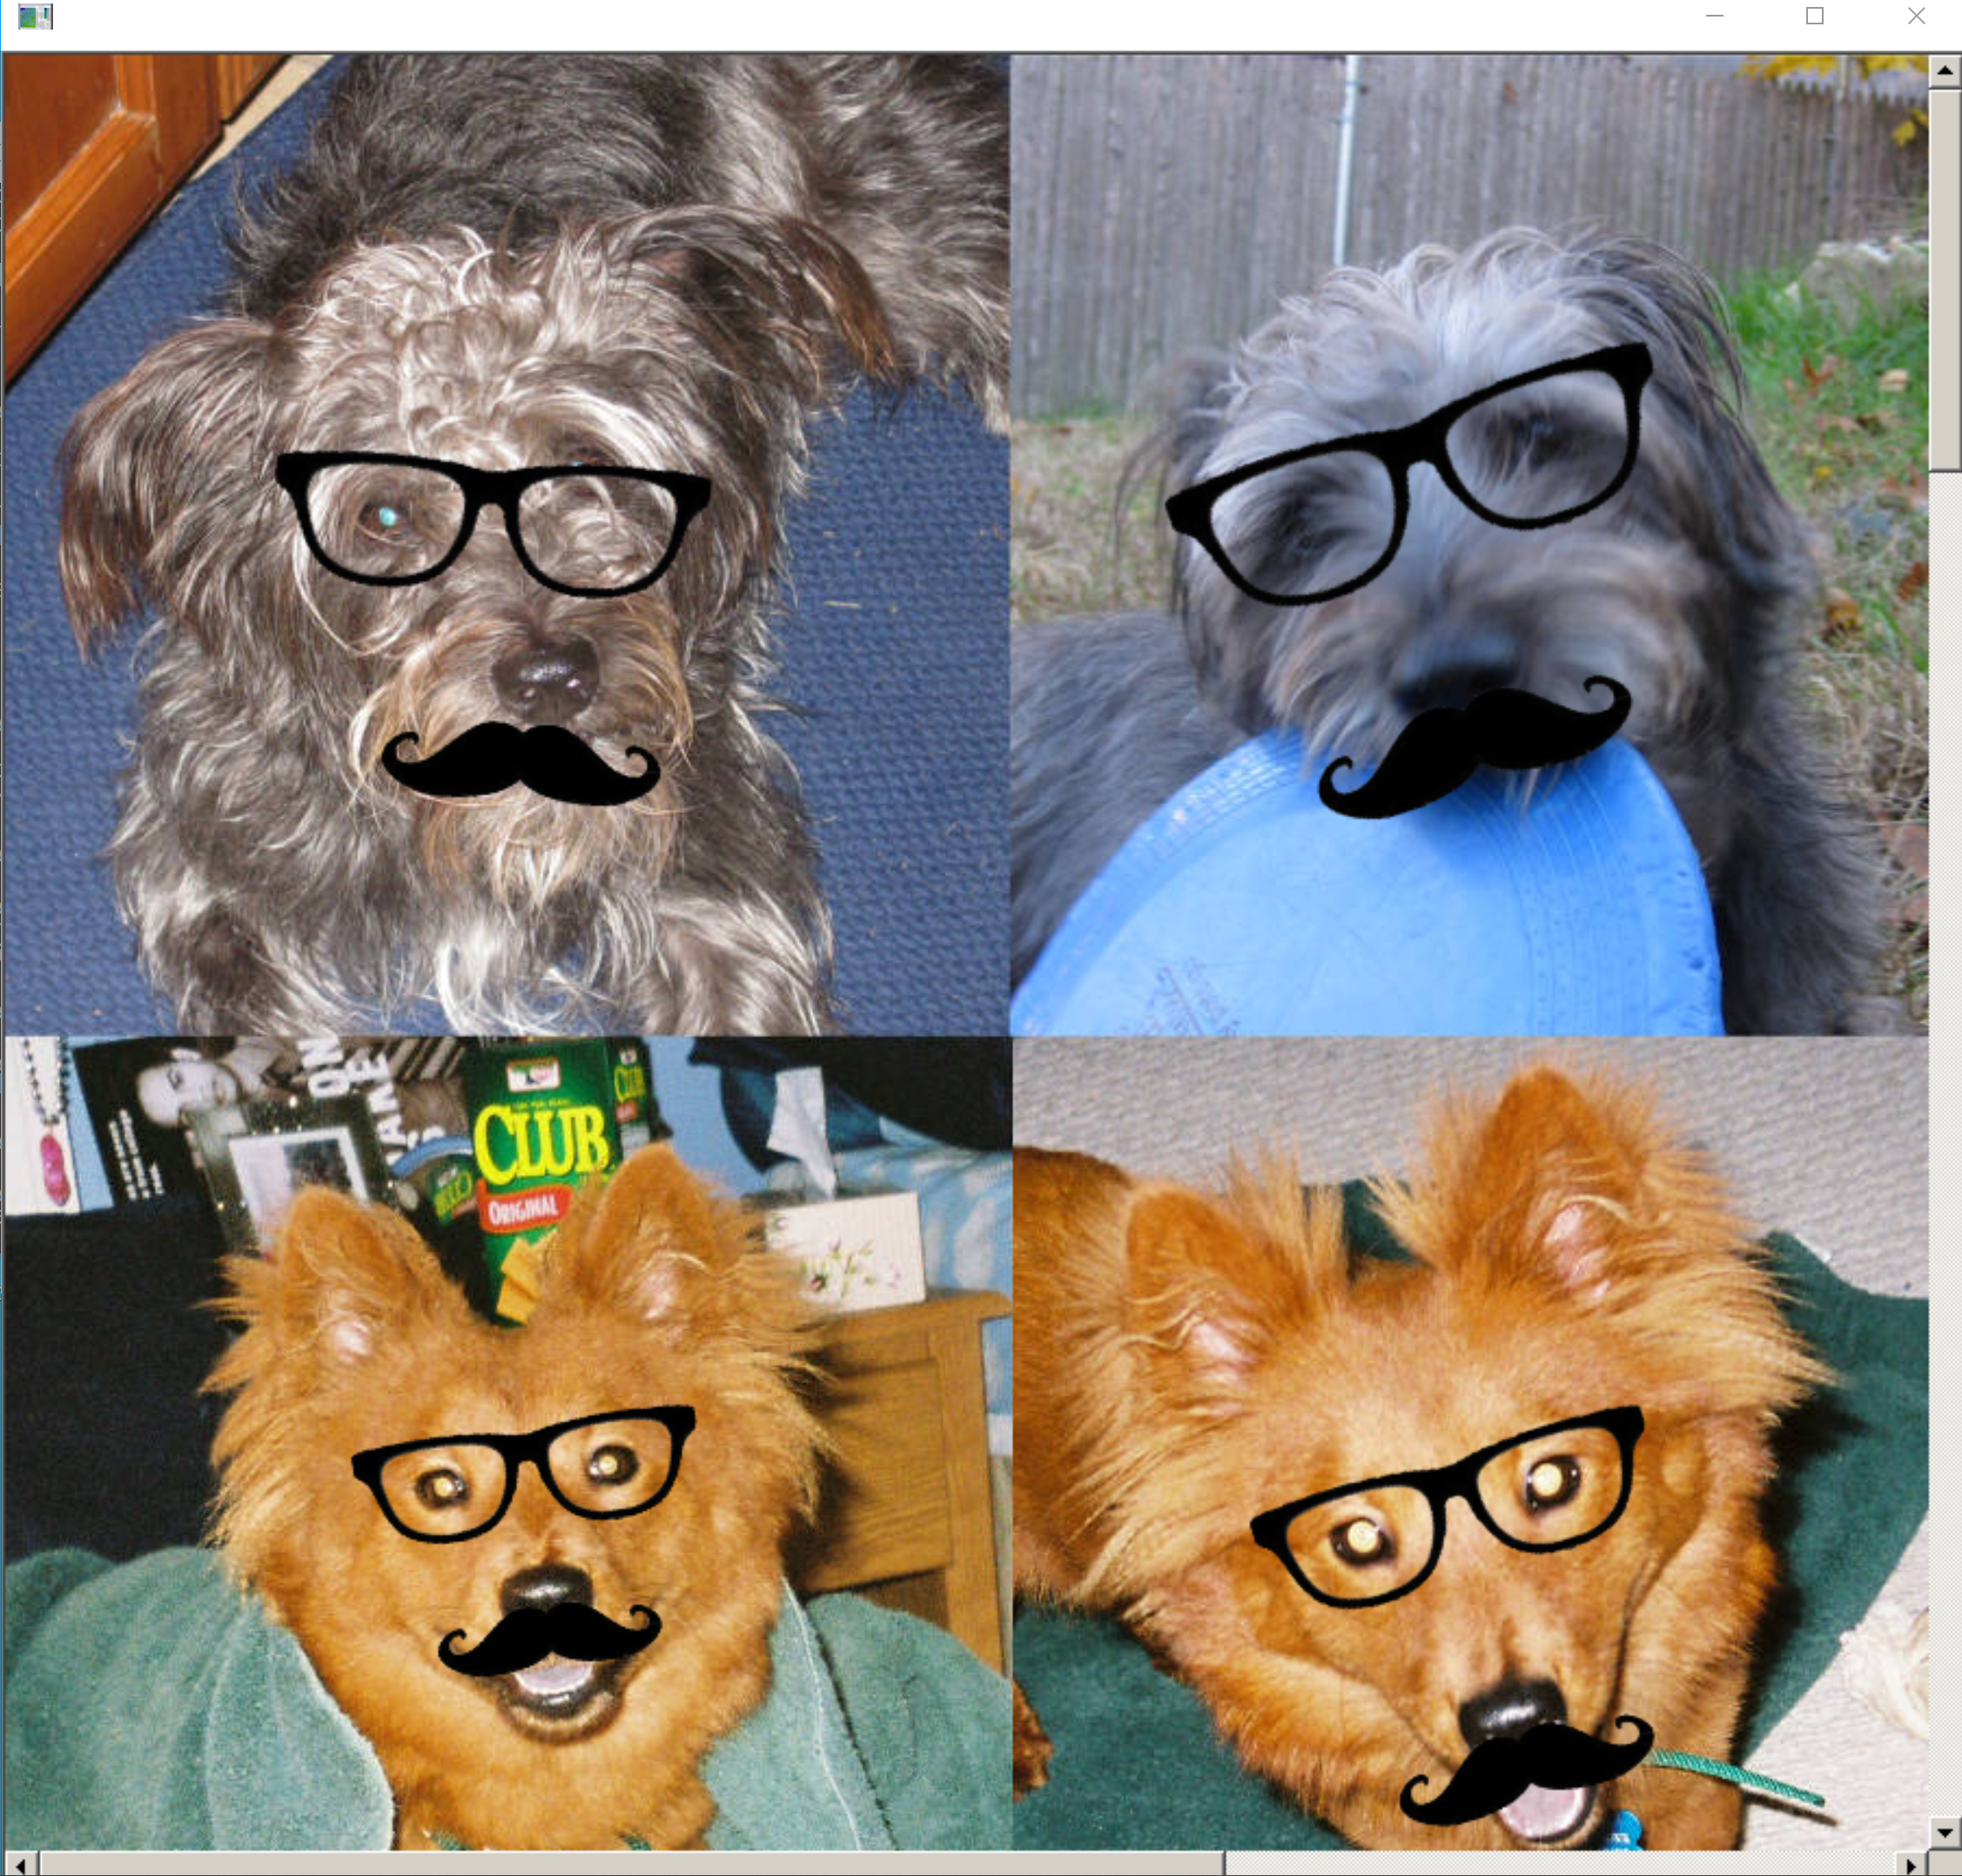
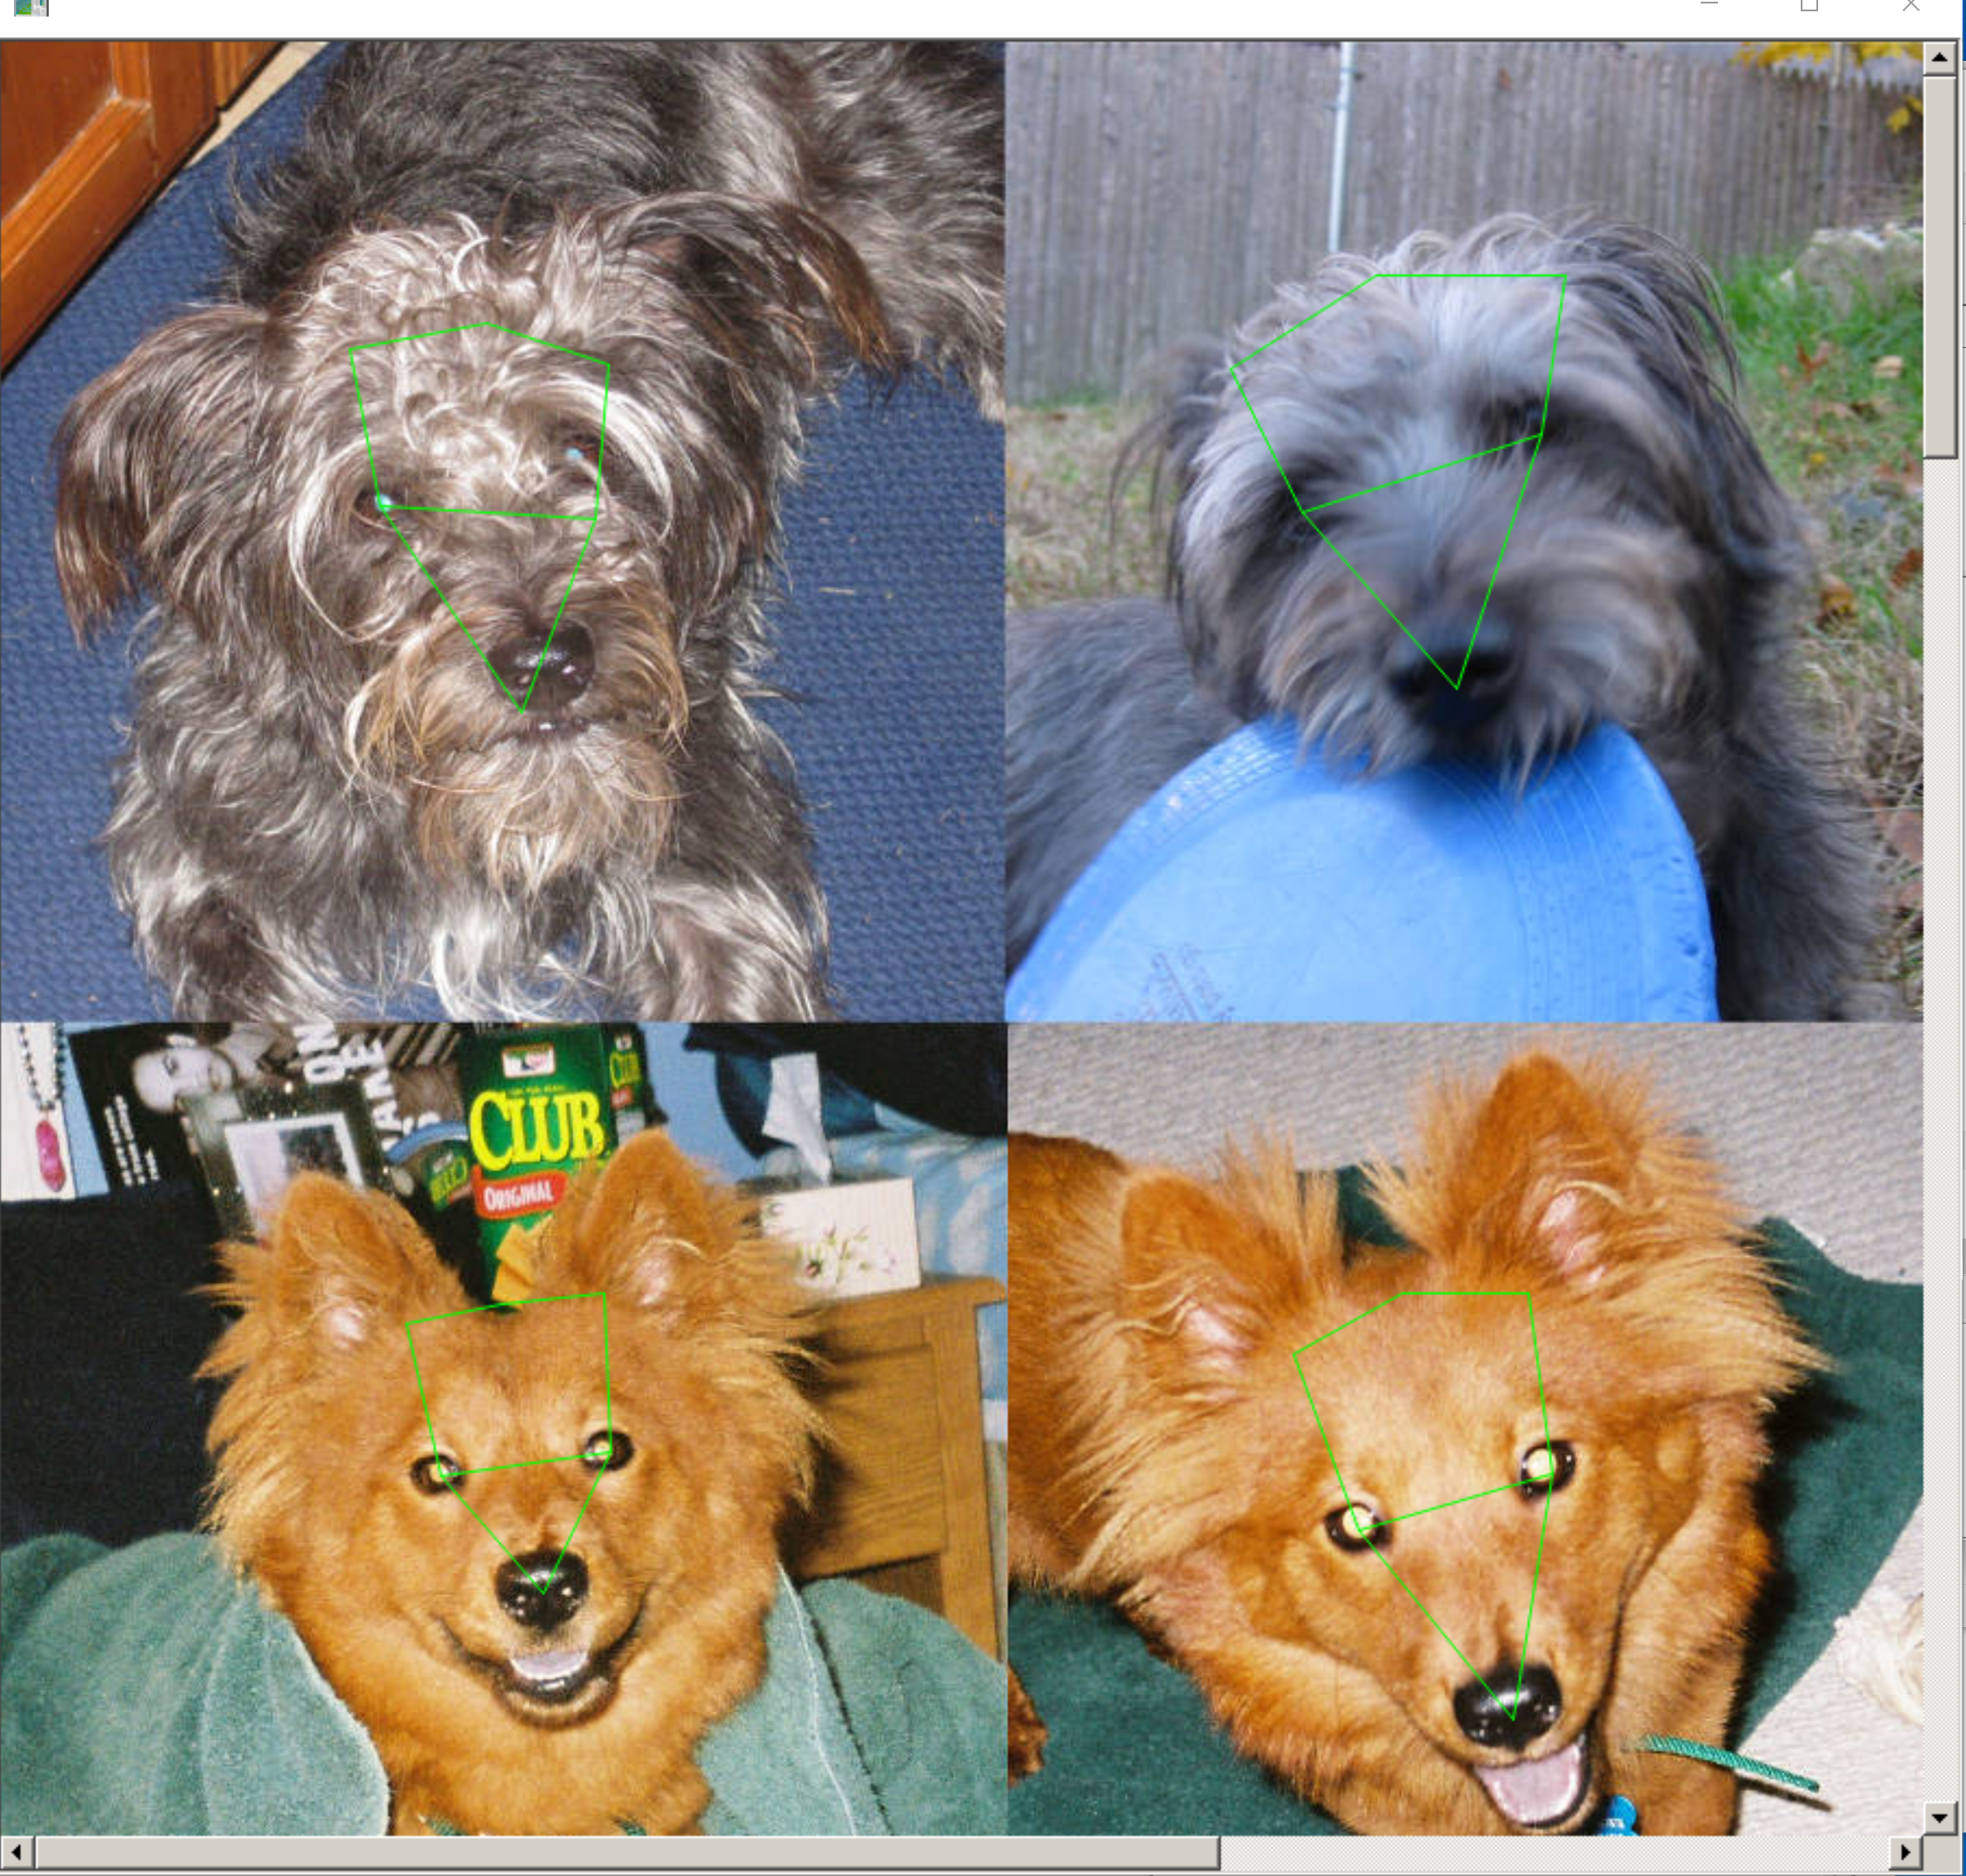
犬の顔画像について眼鏡をあてはめる(顔のランドマーク検出による)
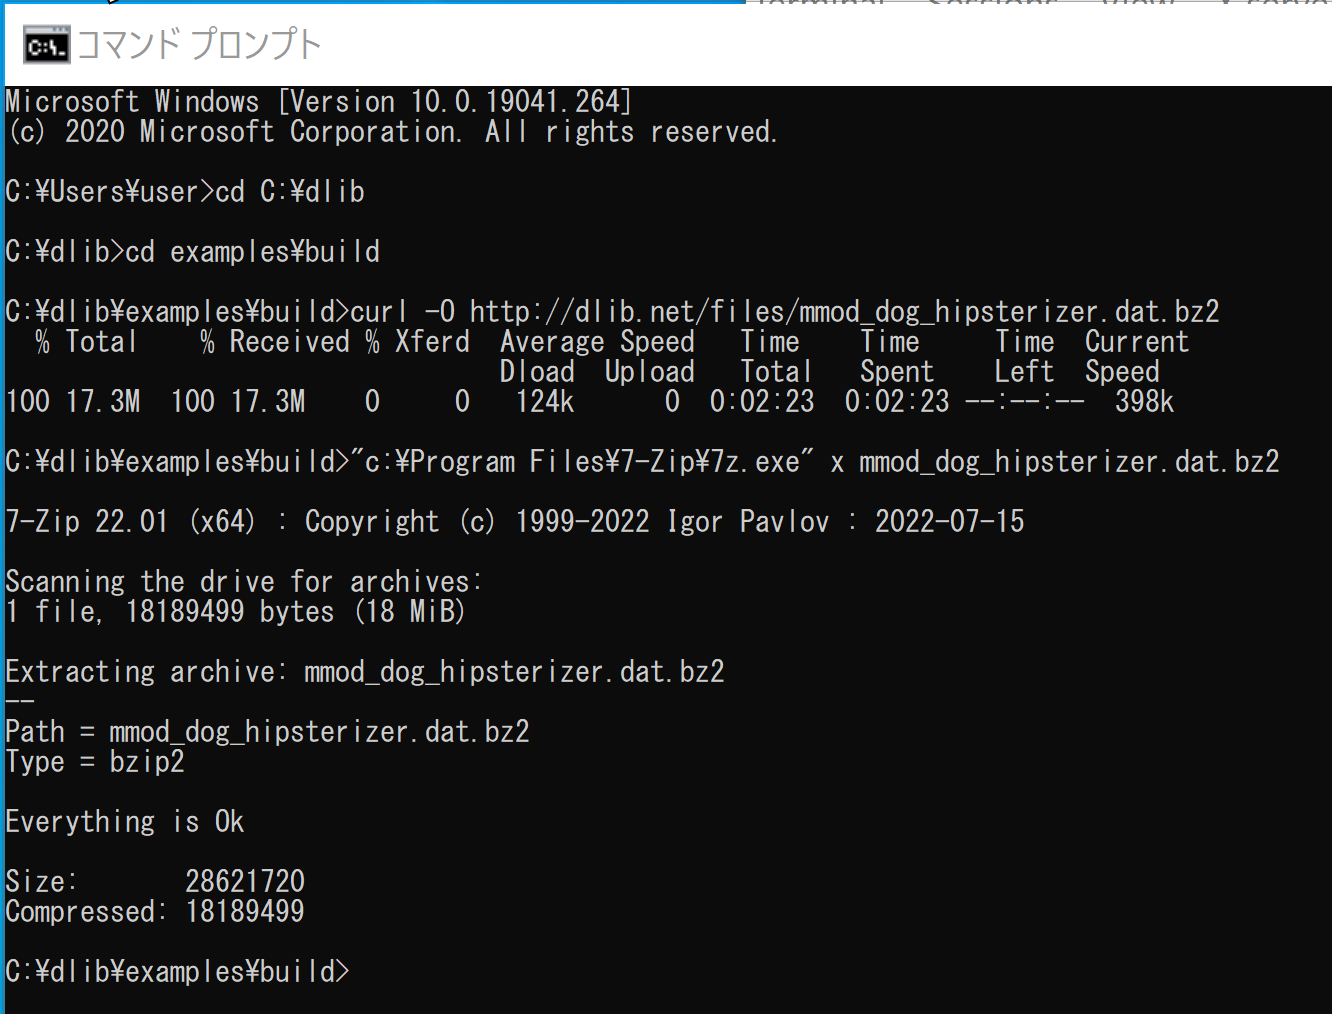
学習済みモデルのダウンロード
cd C:\dlib
cd examples\build
curl -O http://dlib.net/files/mmod_dog_hipsterizer.dat.bz2
"c:\Program Files\7-Zip\7z.exe" x mmod_dog_hipsterizer.dat.bz2
実行してみる
cd C:\dlib
cd examples\build
.\release\dnn_mmod_dog_hipsterizer mmod_dog_hipsterizer.dat ..\faces\dogs.jpg
5. Dlib による顔検出(Python を使用)
Dlib による顔検出 を行う.
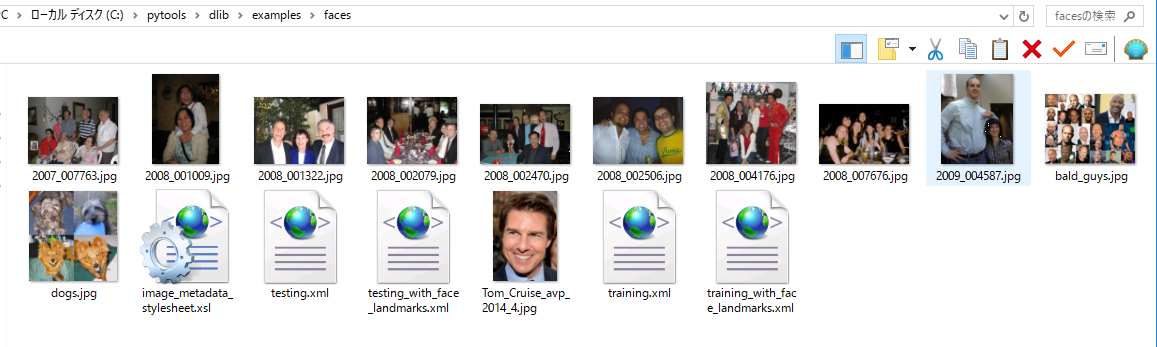
- まずは、DLib に同封の顔画像ファイルに何があるかを、簡単にみておく
%HOMEPATH%\dlib\examples\faces の下の顔画像のファイルを確認する
- Windows のコマンドプロンプトを開く
- Python プログラムの実行
cd C:\dlib
cd python_examples
python cnn_face_detector.py mmod_human_face_detector.dat ..\examples\faces\2007_007763.jpg
結果が表示されるまで少し待つ
- 別の画像で試してみる
cd C:\dlib
cd python_examples
python cnn_face_detector.py mmod_human_face_detector.dat ..\examples\faces\2008_001009.jpg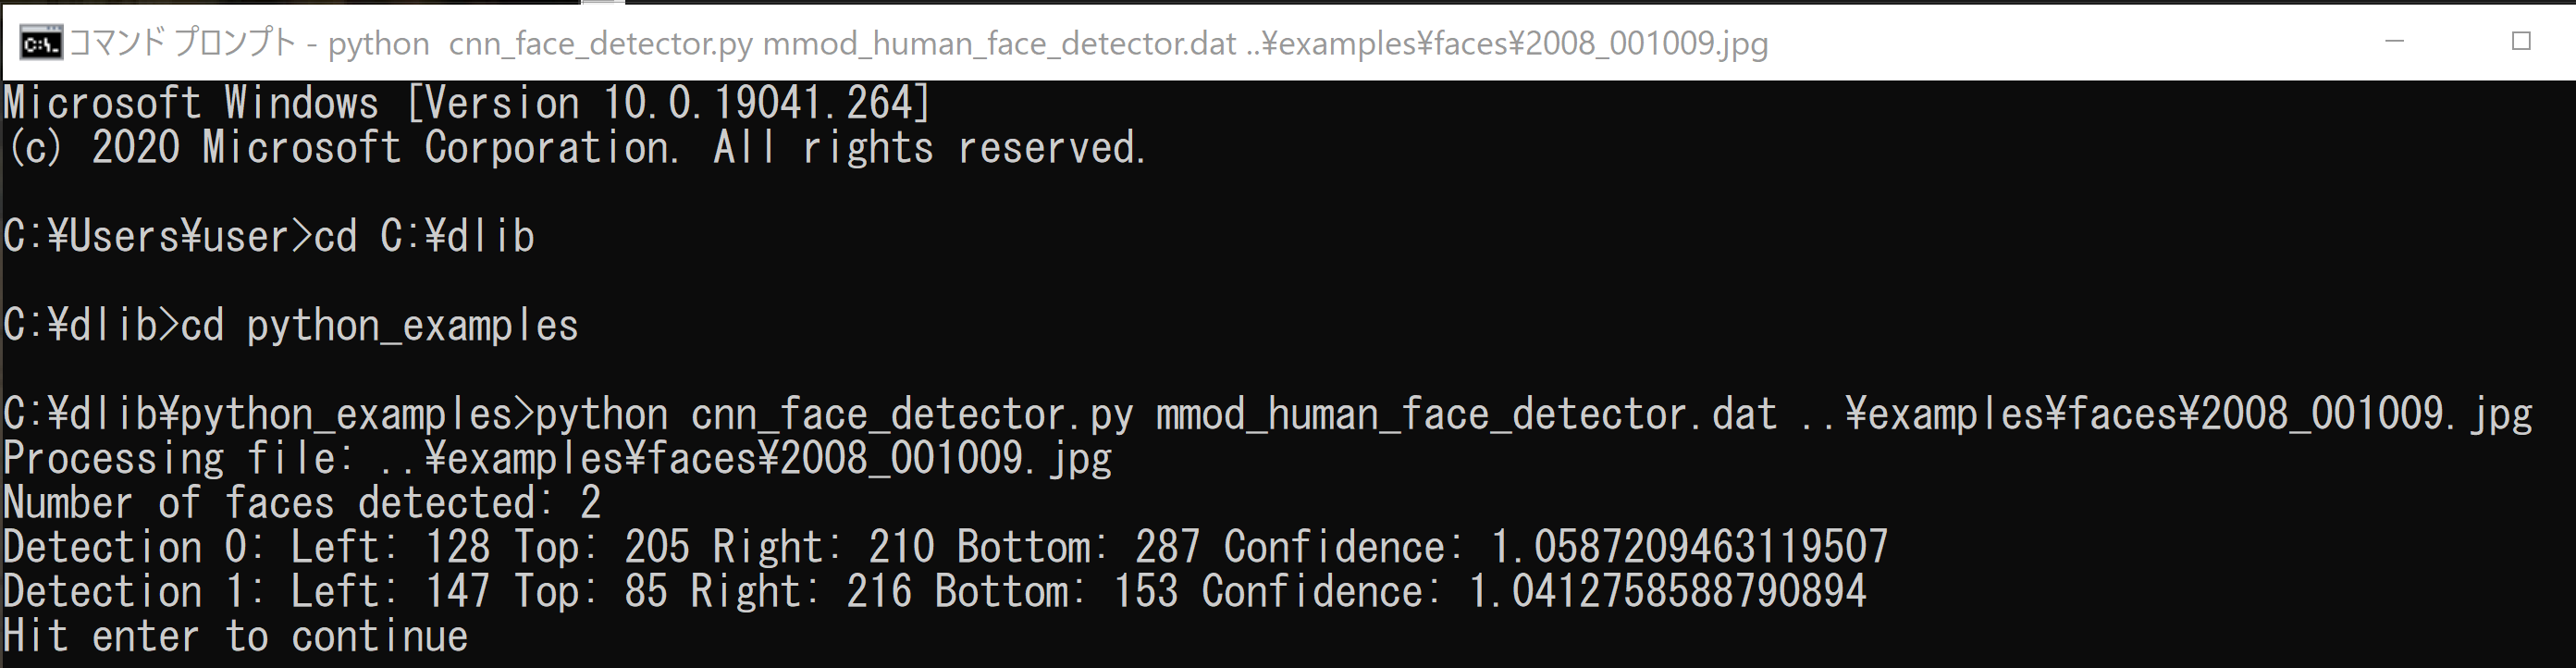
- さらに別の画像で試してみる
cd C:\dlib
cd python_examples
python cnn_face_detector.py mmod_human_face_detector.dat ..\examples\faces\2008_001322.jpg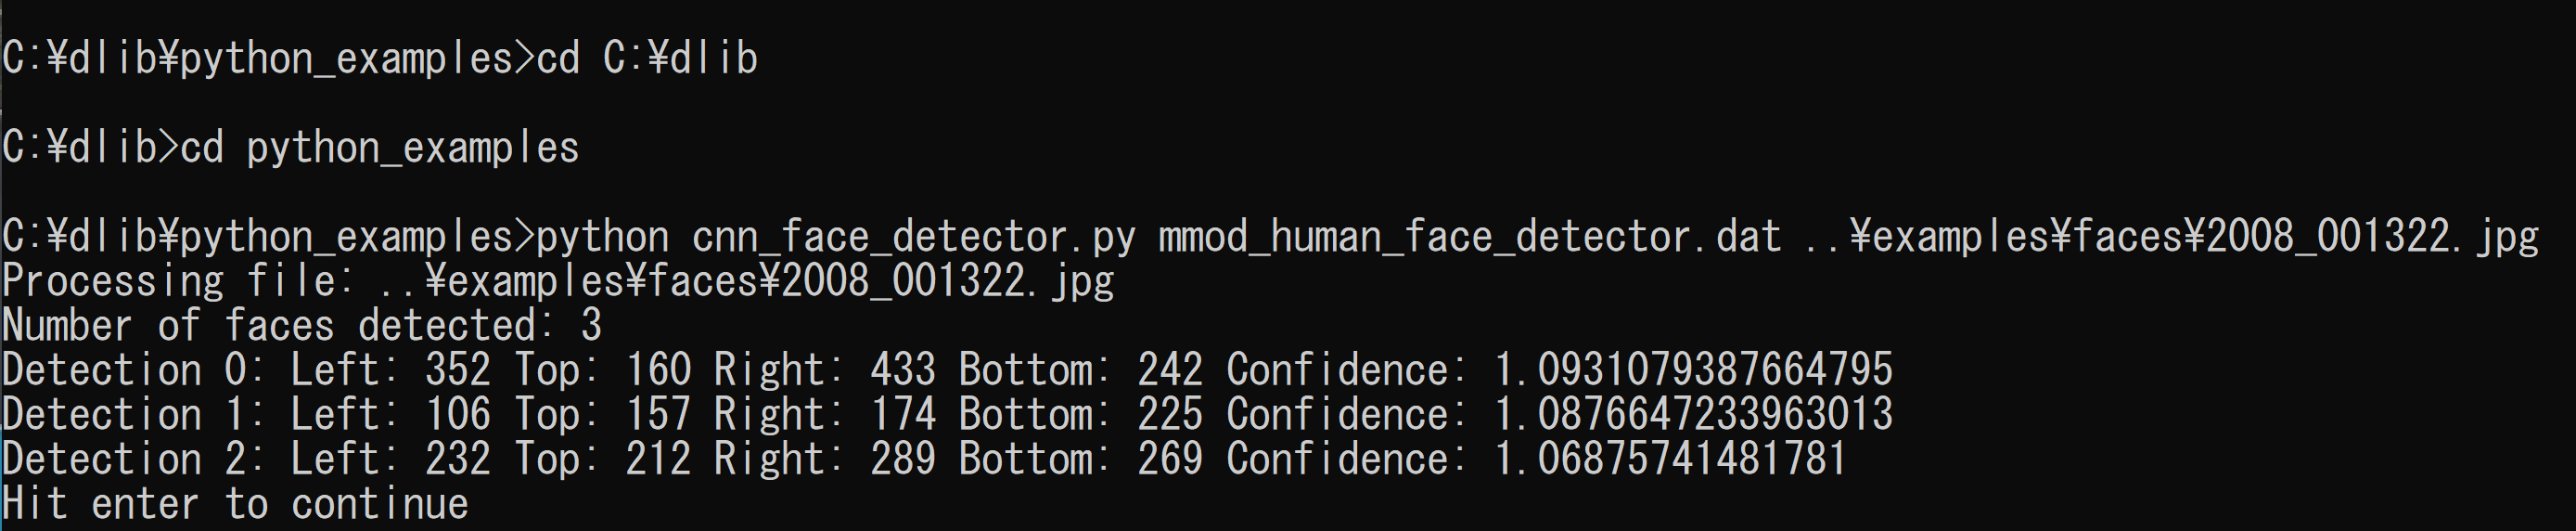


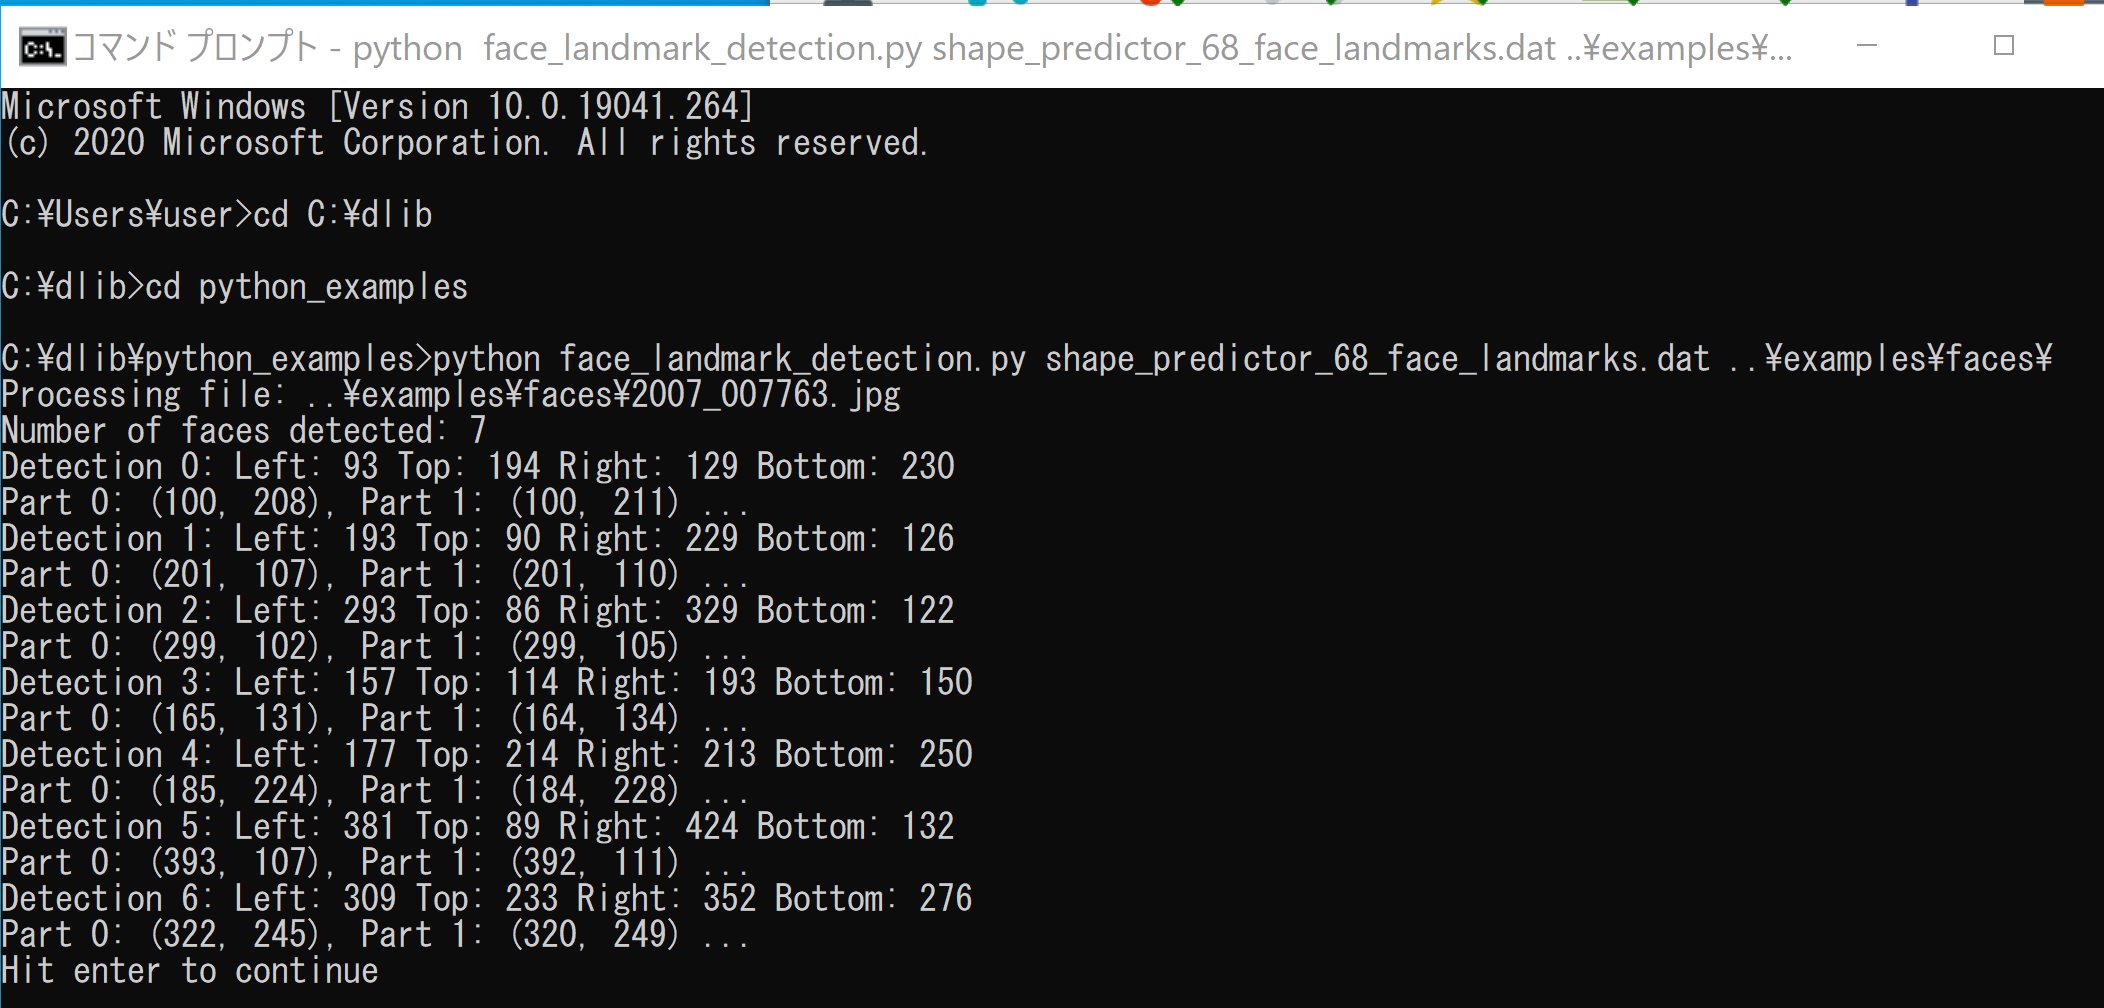
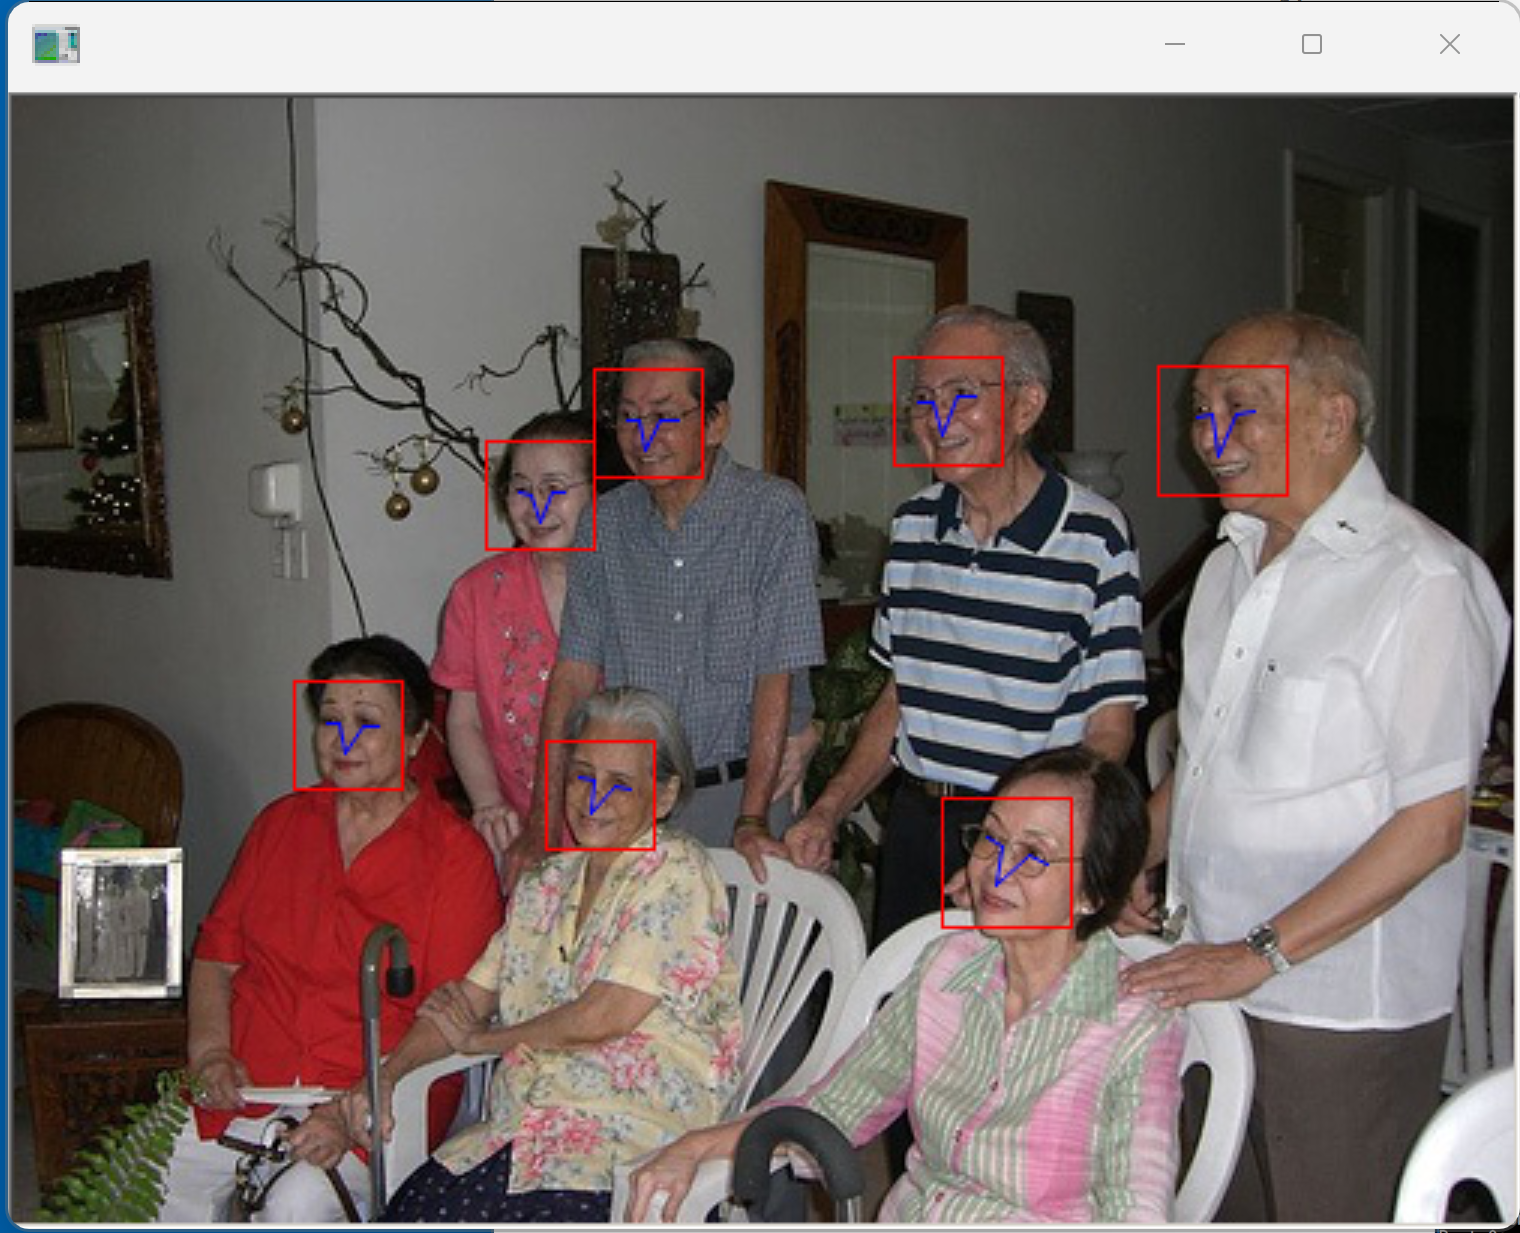
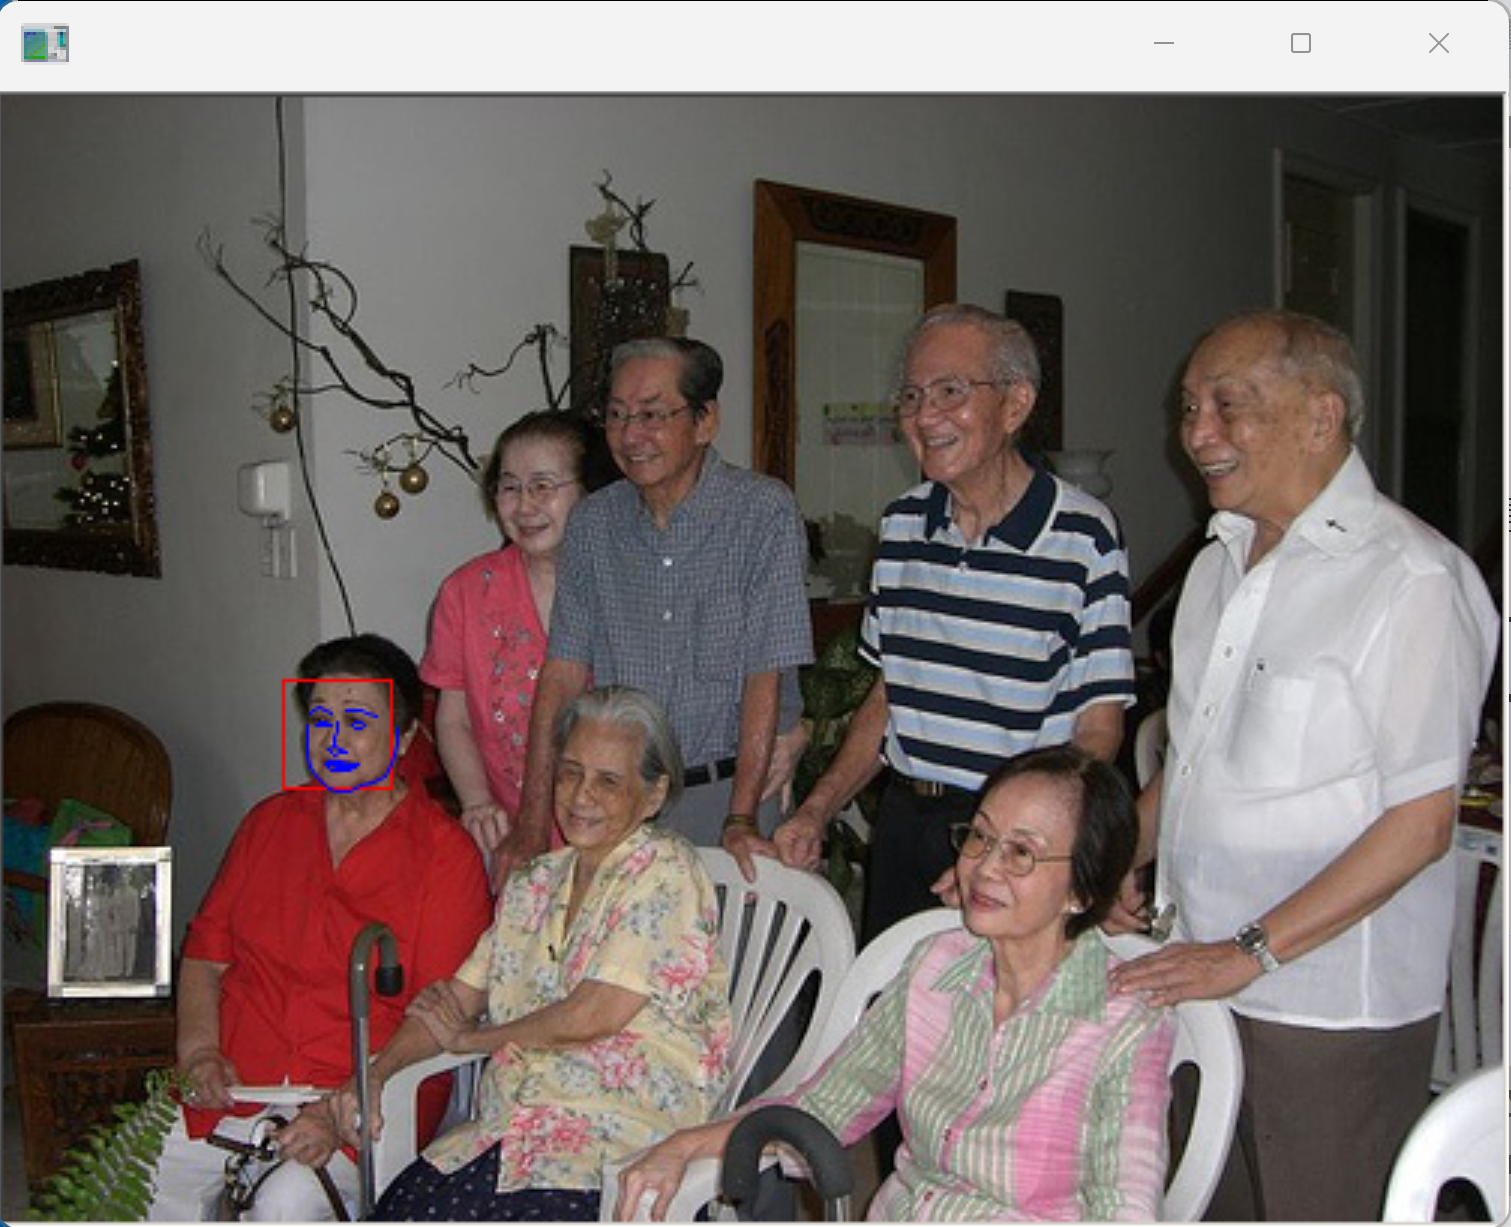
6. Dlib による顔ランドマークの検出(Python を使用)
顔ランドマークの検出 (face landmark detector) のサンプルプログラムを実行してみる
顔ごとに,最大で 68 のランドマーク (68 landmarks) が得られる.
cd C:\dlib
cd python_examples
python face_landmark_detection.py shape_predictor_68_face_landmarks.dat ..\examples\faces\
7. Dlib による顔のアラインメント,顔データのデータ拡張,5ランドマーク,68 ランドマーク,顔のコード化(5ランドマークを使用),顔のコード化(68 ランドマークを使用)(Python を使用)
顔のアラインメント
利用条件などは各自で確認のこと
- Windows のコマンドプロンプトを開く
- Python プログラムの実行
cd C:\dlib
cd python_examples
python face_alignment.py shape_predictor_68_face_landmarks.dat ..\examples\faces\2007_007763.jpg
- Enter キーを複数回押して、結果を確認
顔データのデータ拡張
増量は、学習で重要となる
- 実行してみる
cd C:\dlib
cd python_examples
python face_jitter.py shape_predictor_68_face_landmarks.dat
元画像として何を使うかは、プログラム中で設定されている

- Enter キーを複数回押して、結果を確認
5ランドマーク
- 実行してみる
cd C:\dlib
cd python_examples
python face_landmark_detection.py shape_predictor_5_face_landmarks.dat ..\examples\faces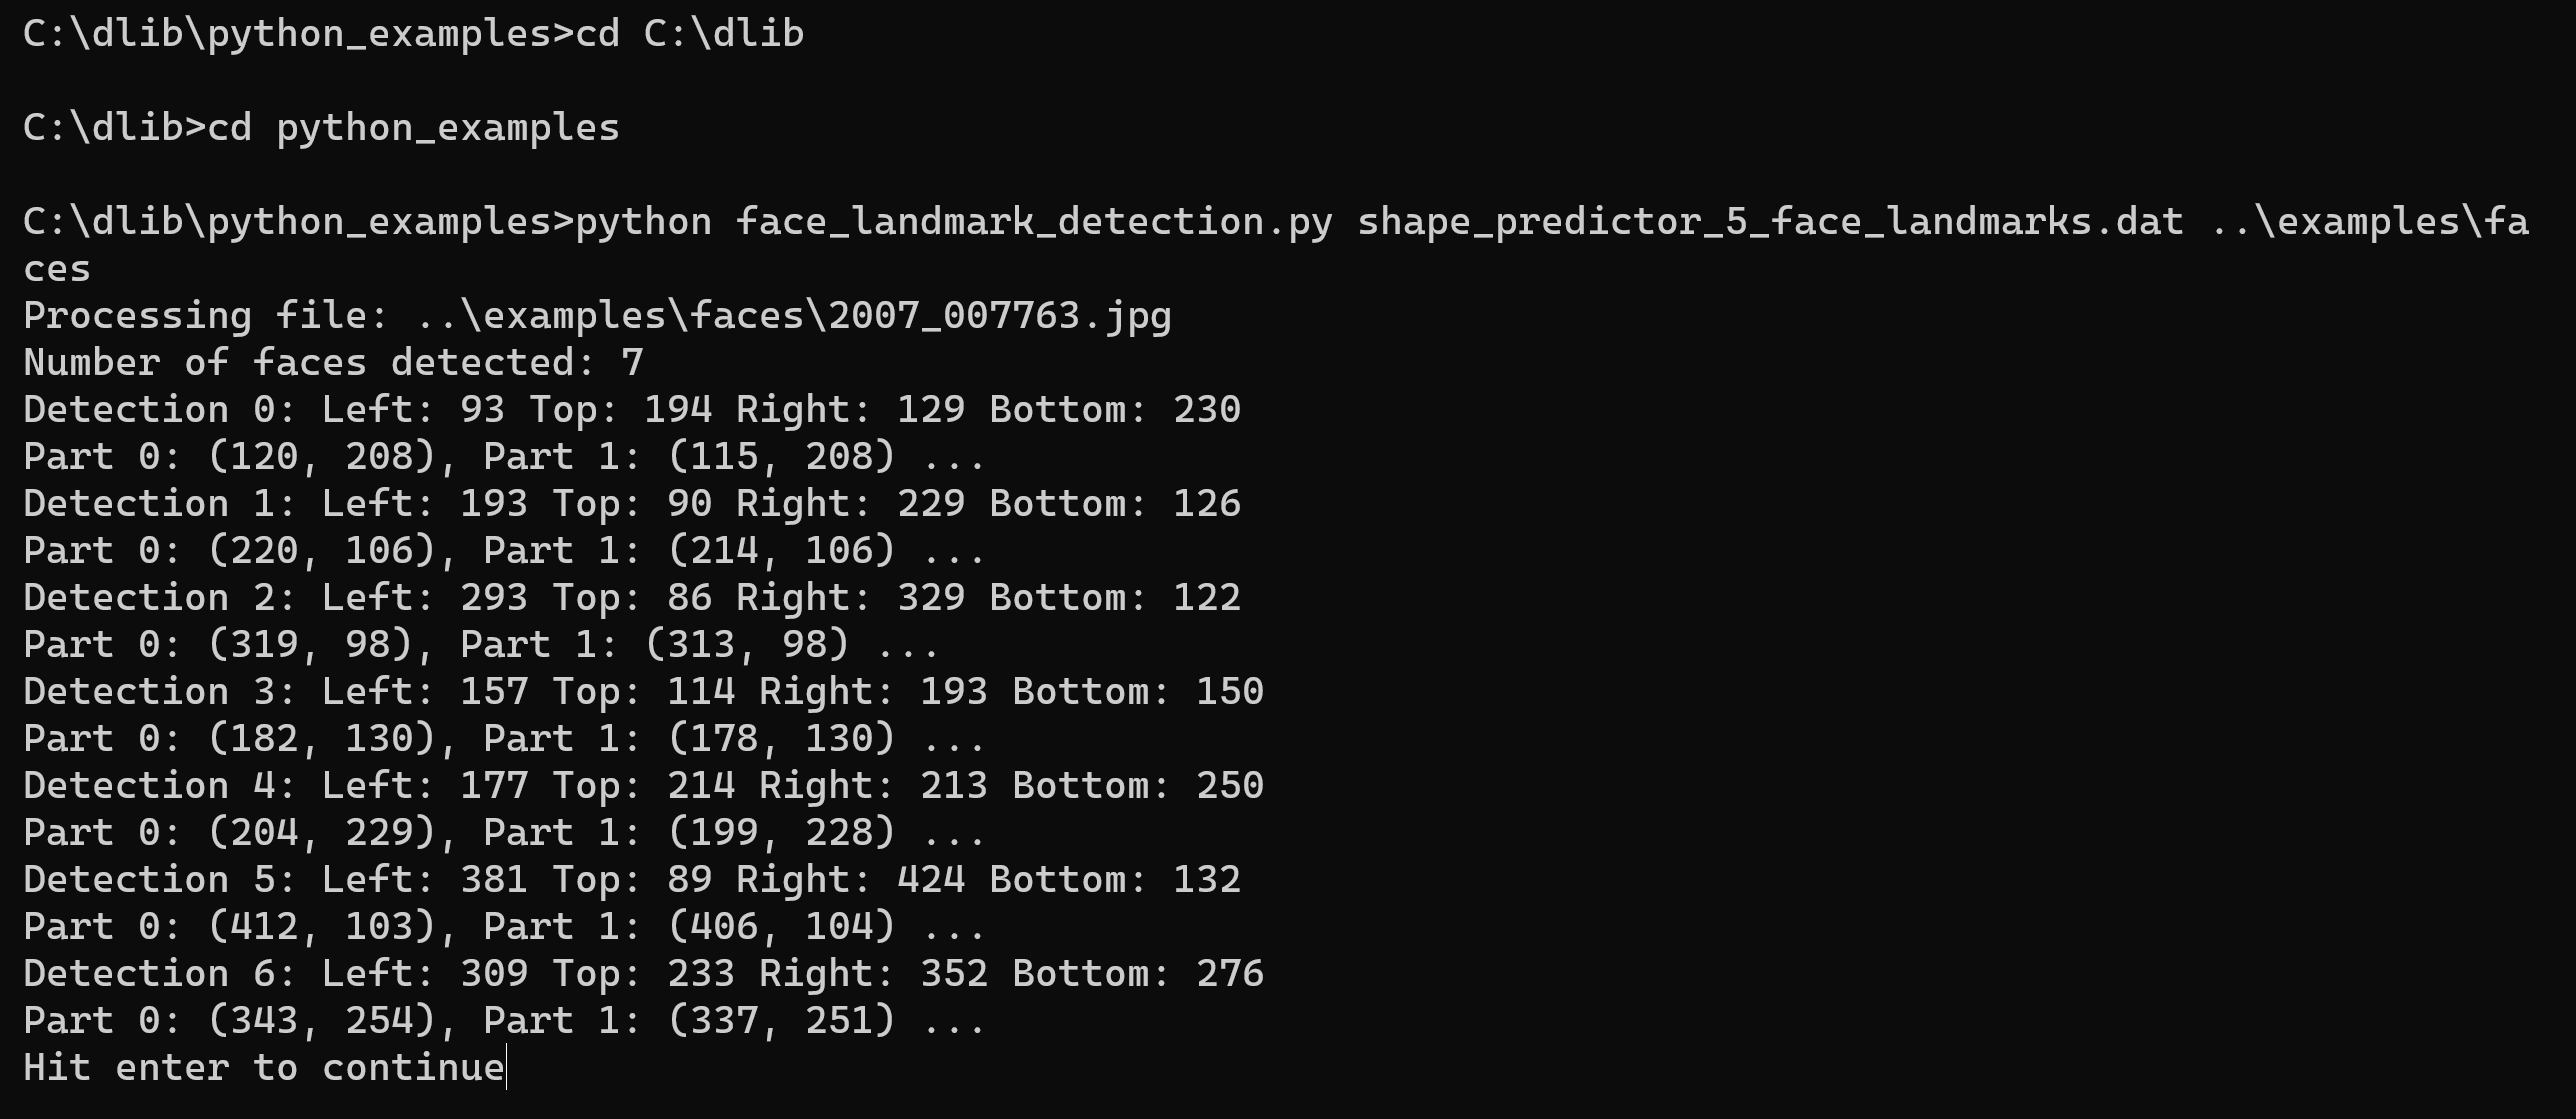
- Enter キーを複数回押して、結果を確認
68 ランドマーク
- 実行してみる
cd C:\dlib
cd python_examples
python face_landmark_detection.py shape_predictor_68_face_landmarks.dat ..\examples\faces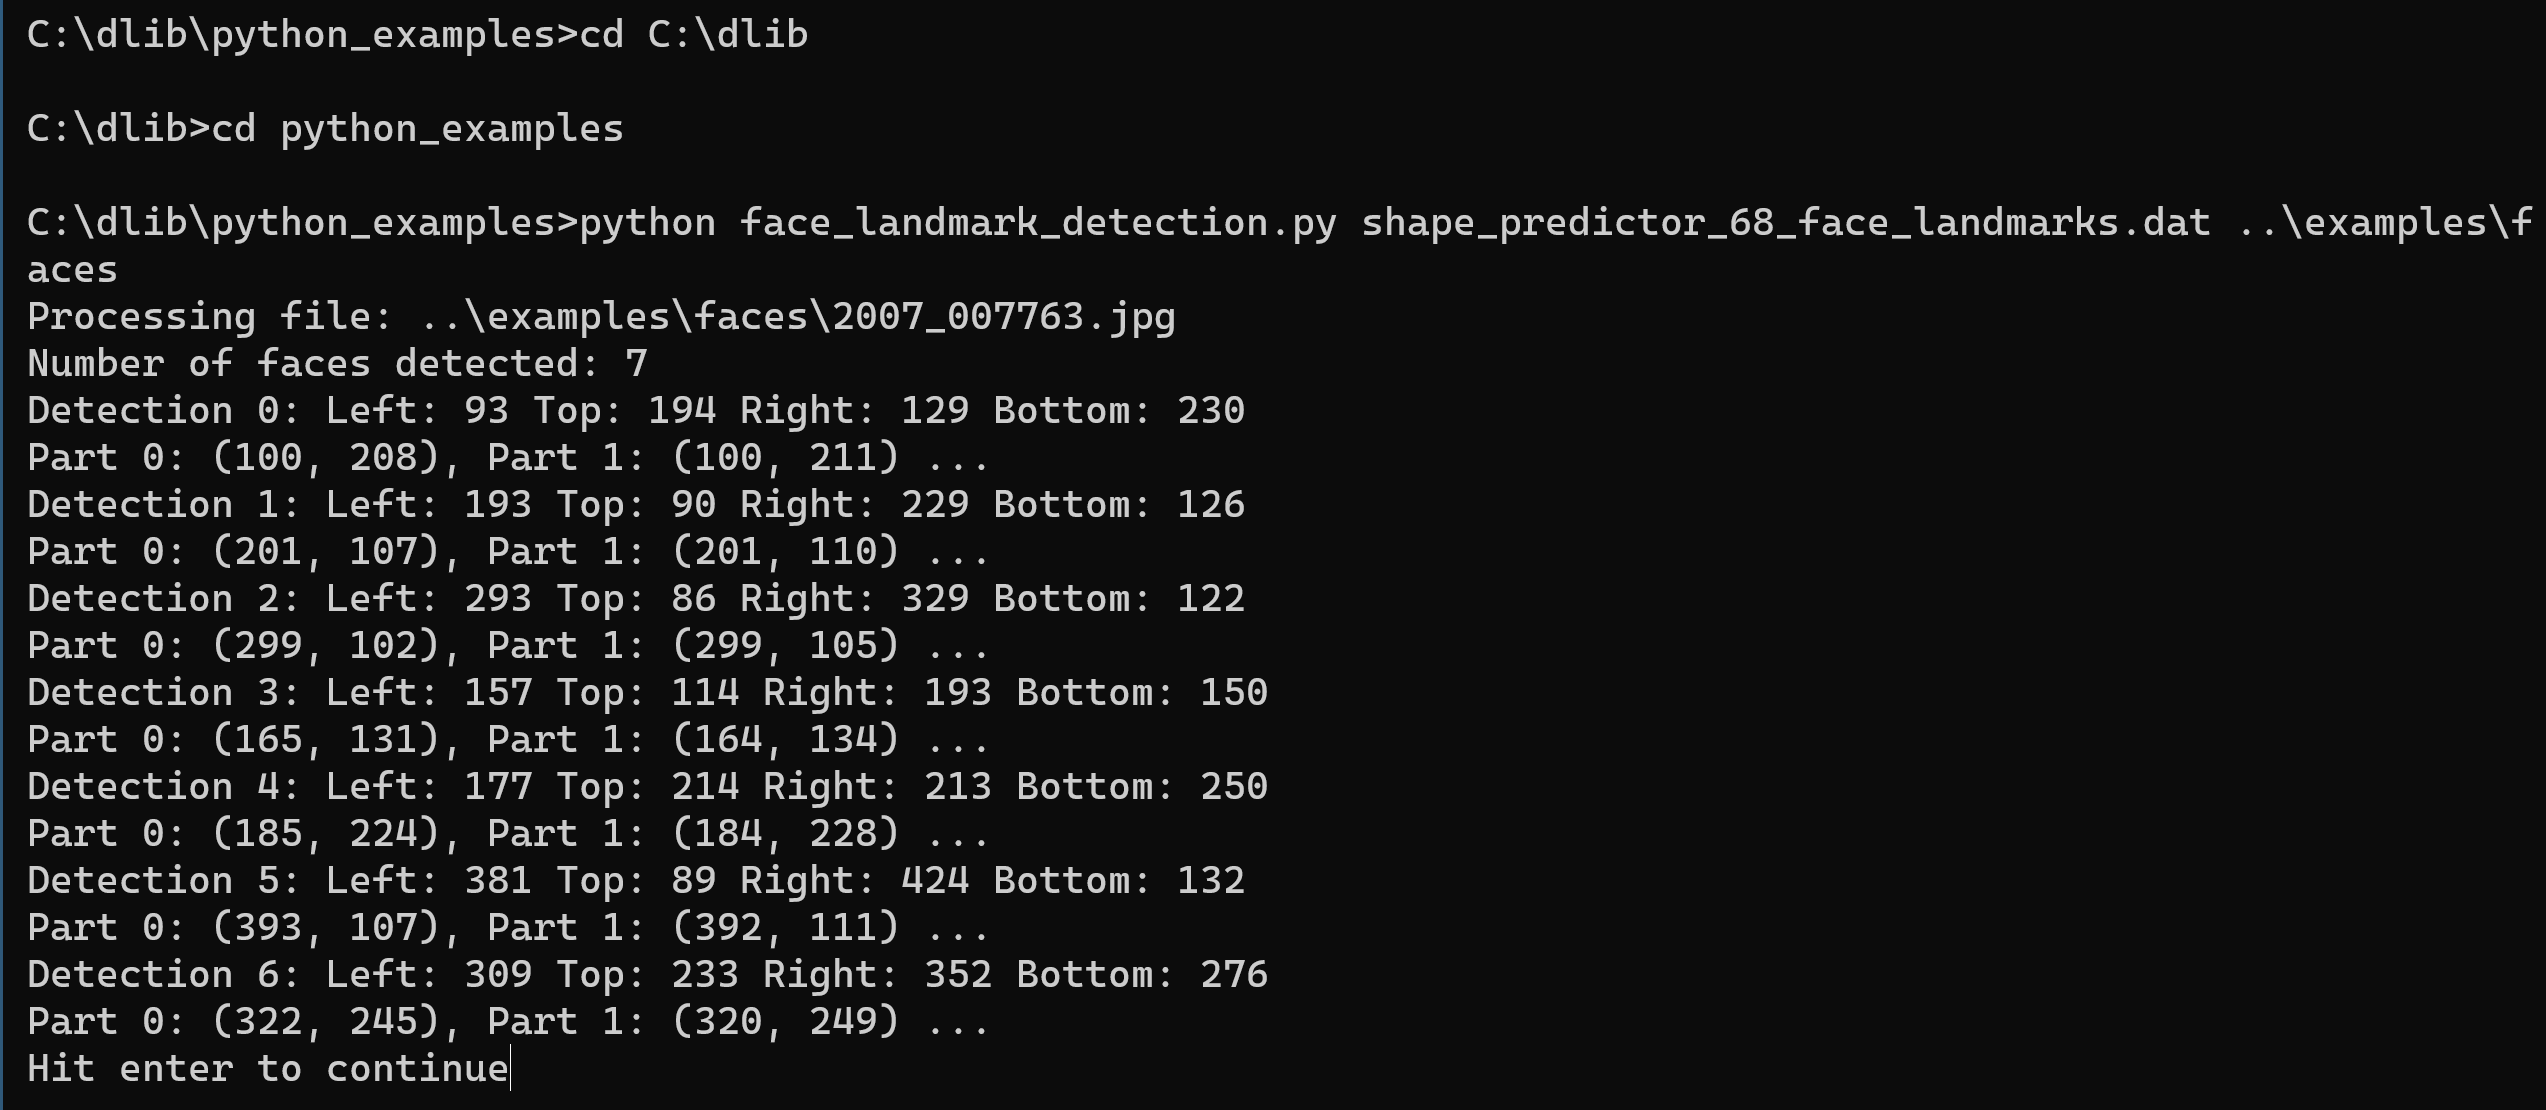
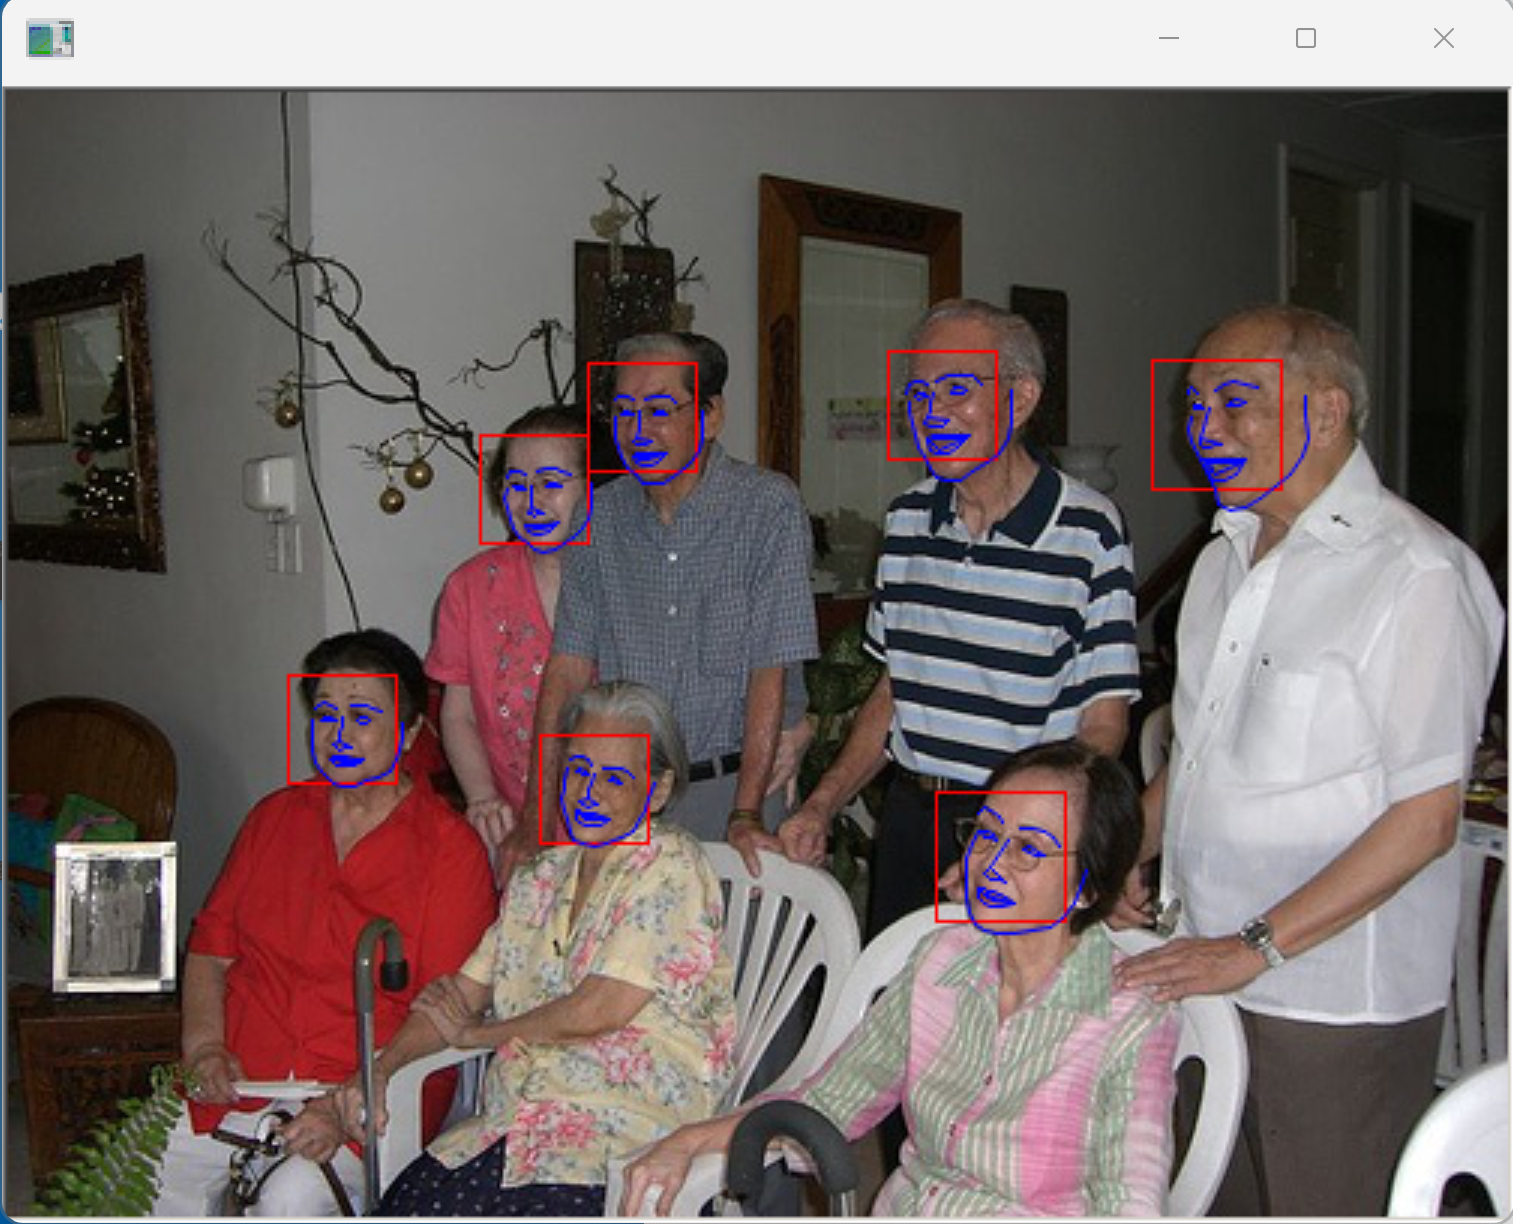
- Enter キーを複数回押して、結果を確認
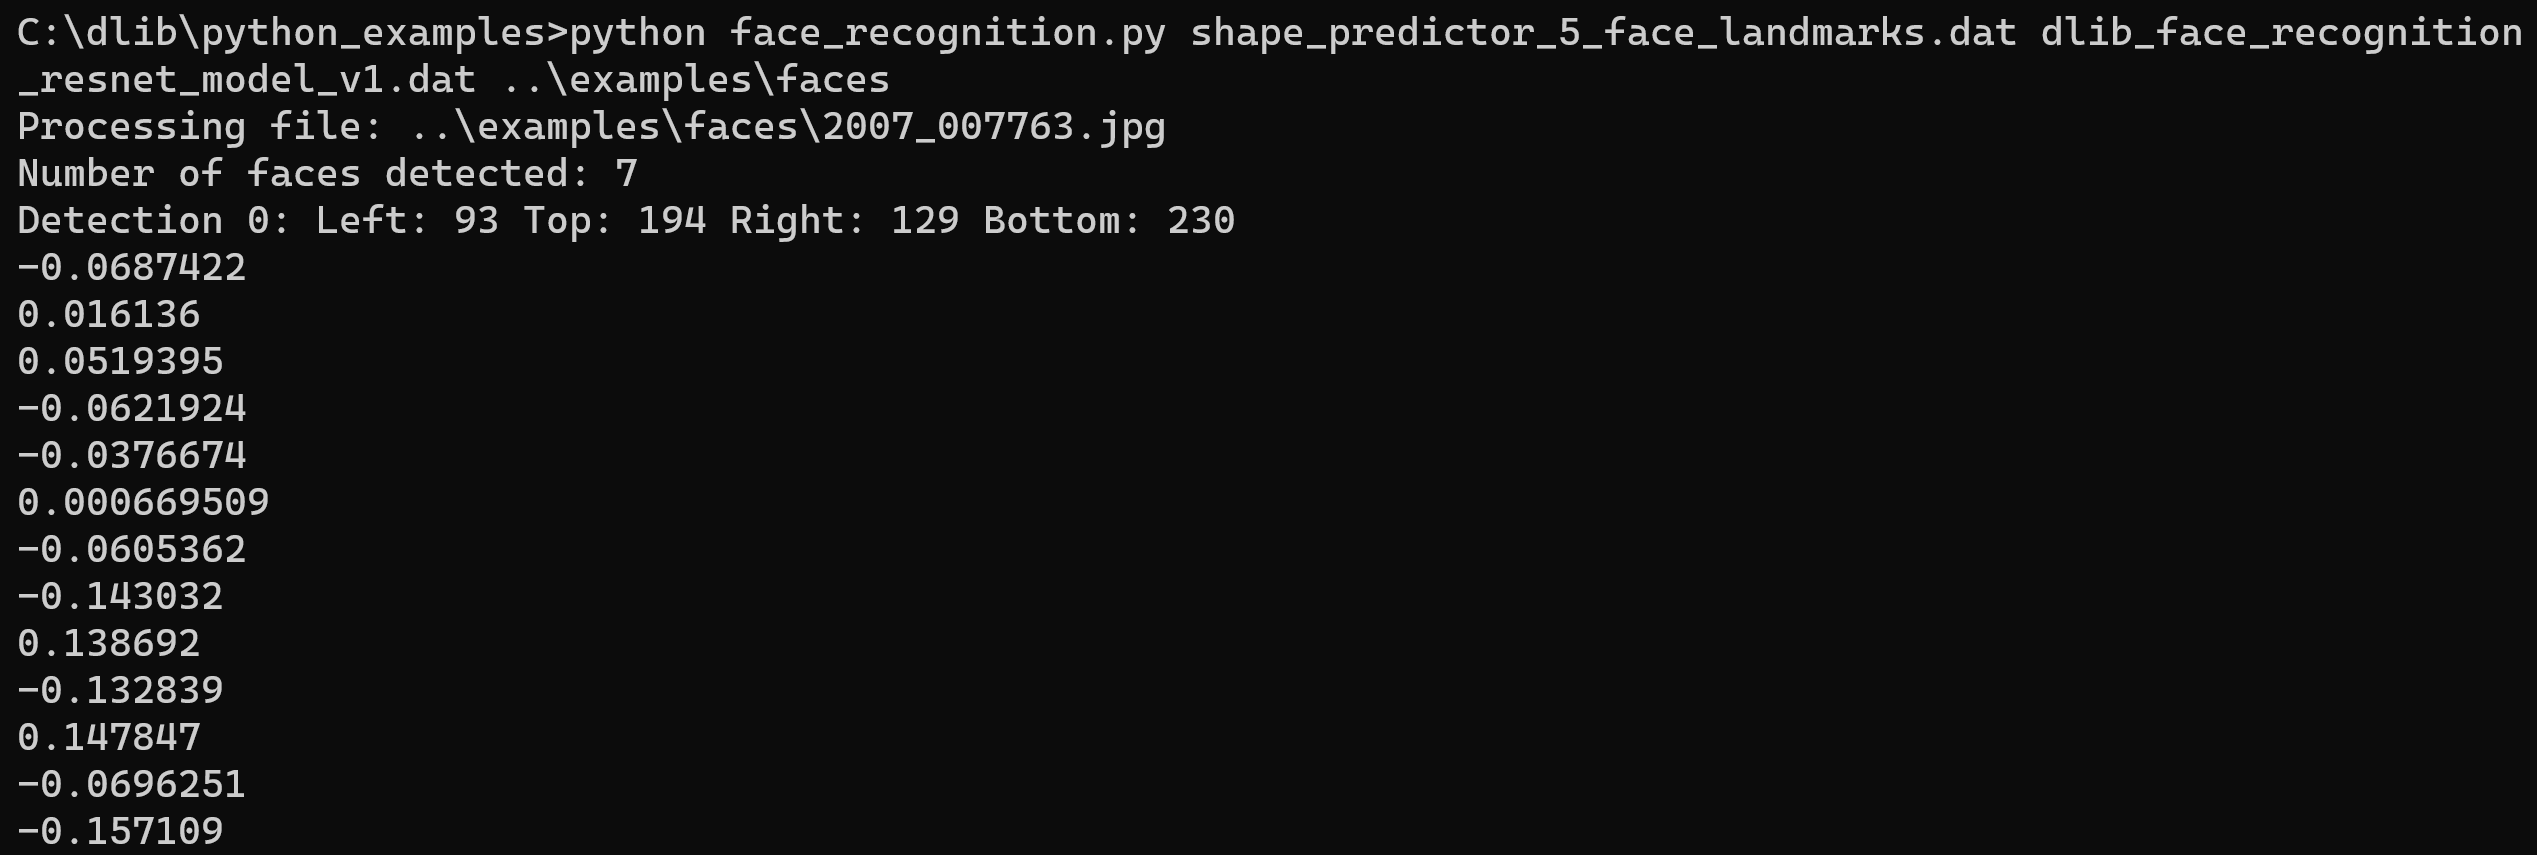
顔のコード化(5ランドマークを使用)
- 実行してみる
cd C:\dlib
cd python_examples
python face_recognition.py shape_predictor_5_face_landmarks.dat dlib_face_recognition_resnet_model_v1.dat ..\examples\faces
顔ごとに 128個の数値(特徴量ベクトル)が得られることを確認
- Enter キーを複数回押して、結果を確認
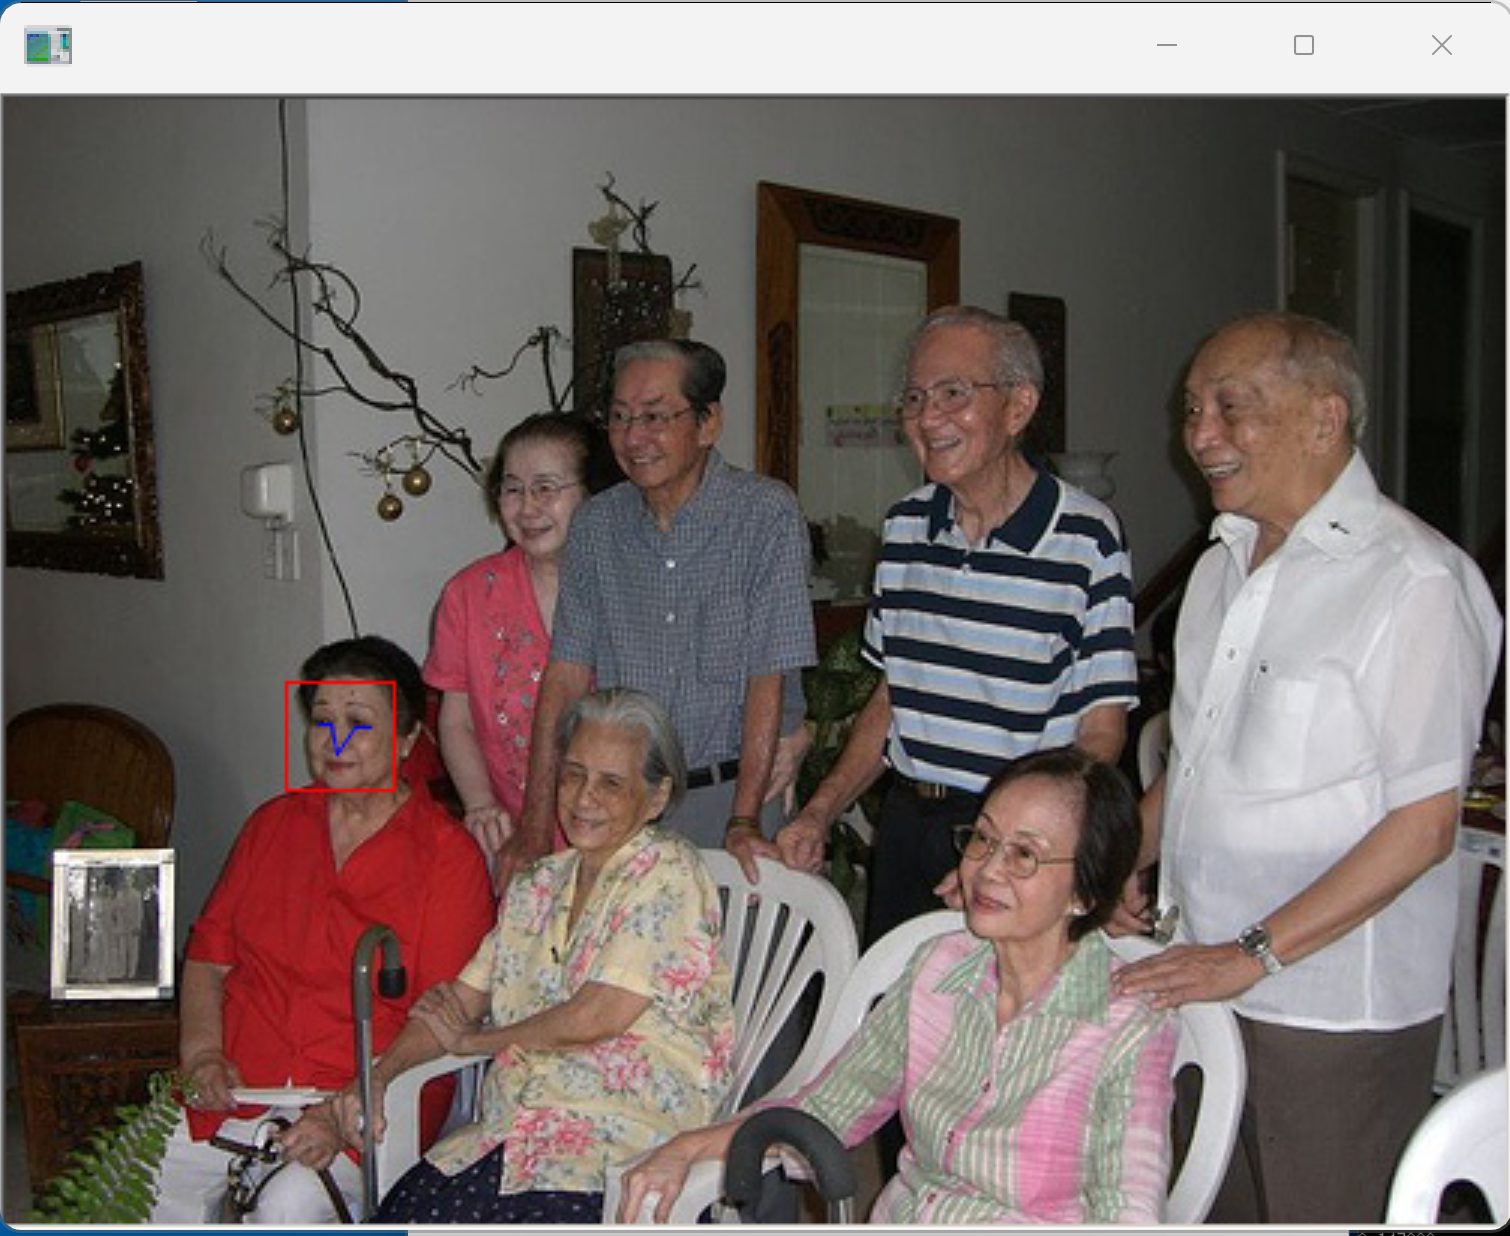
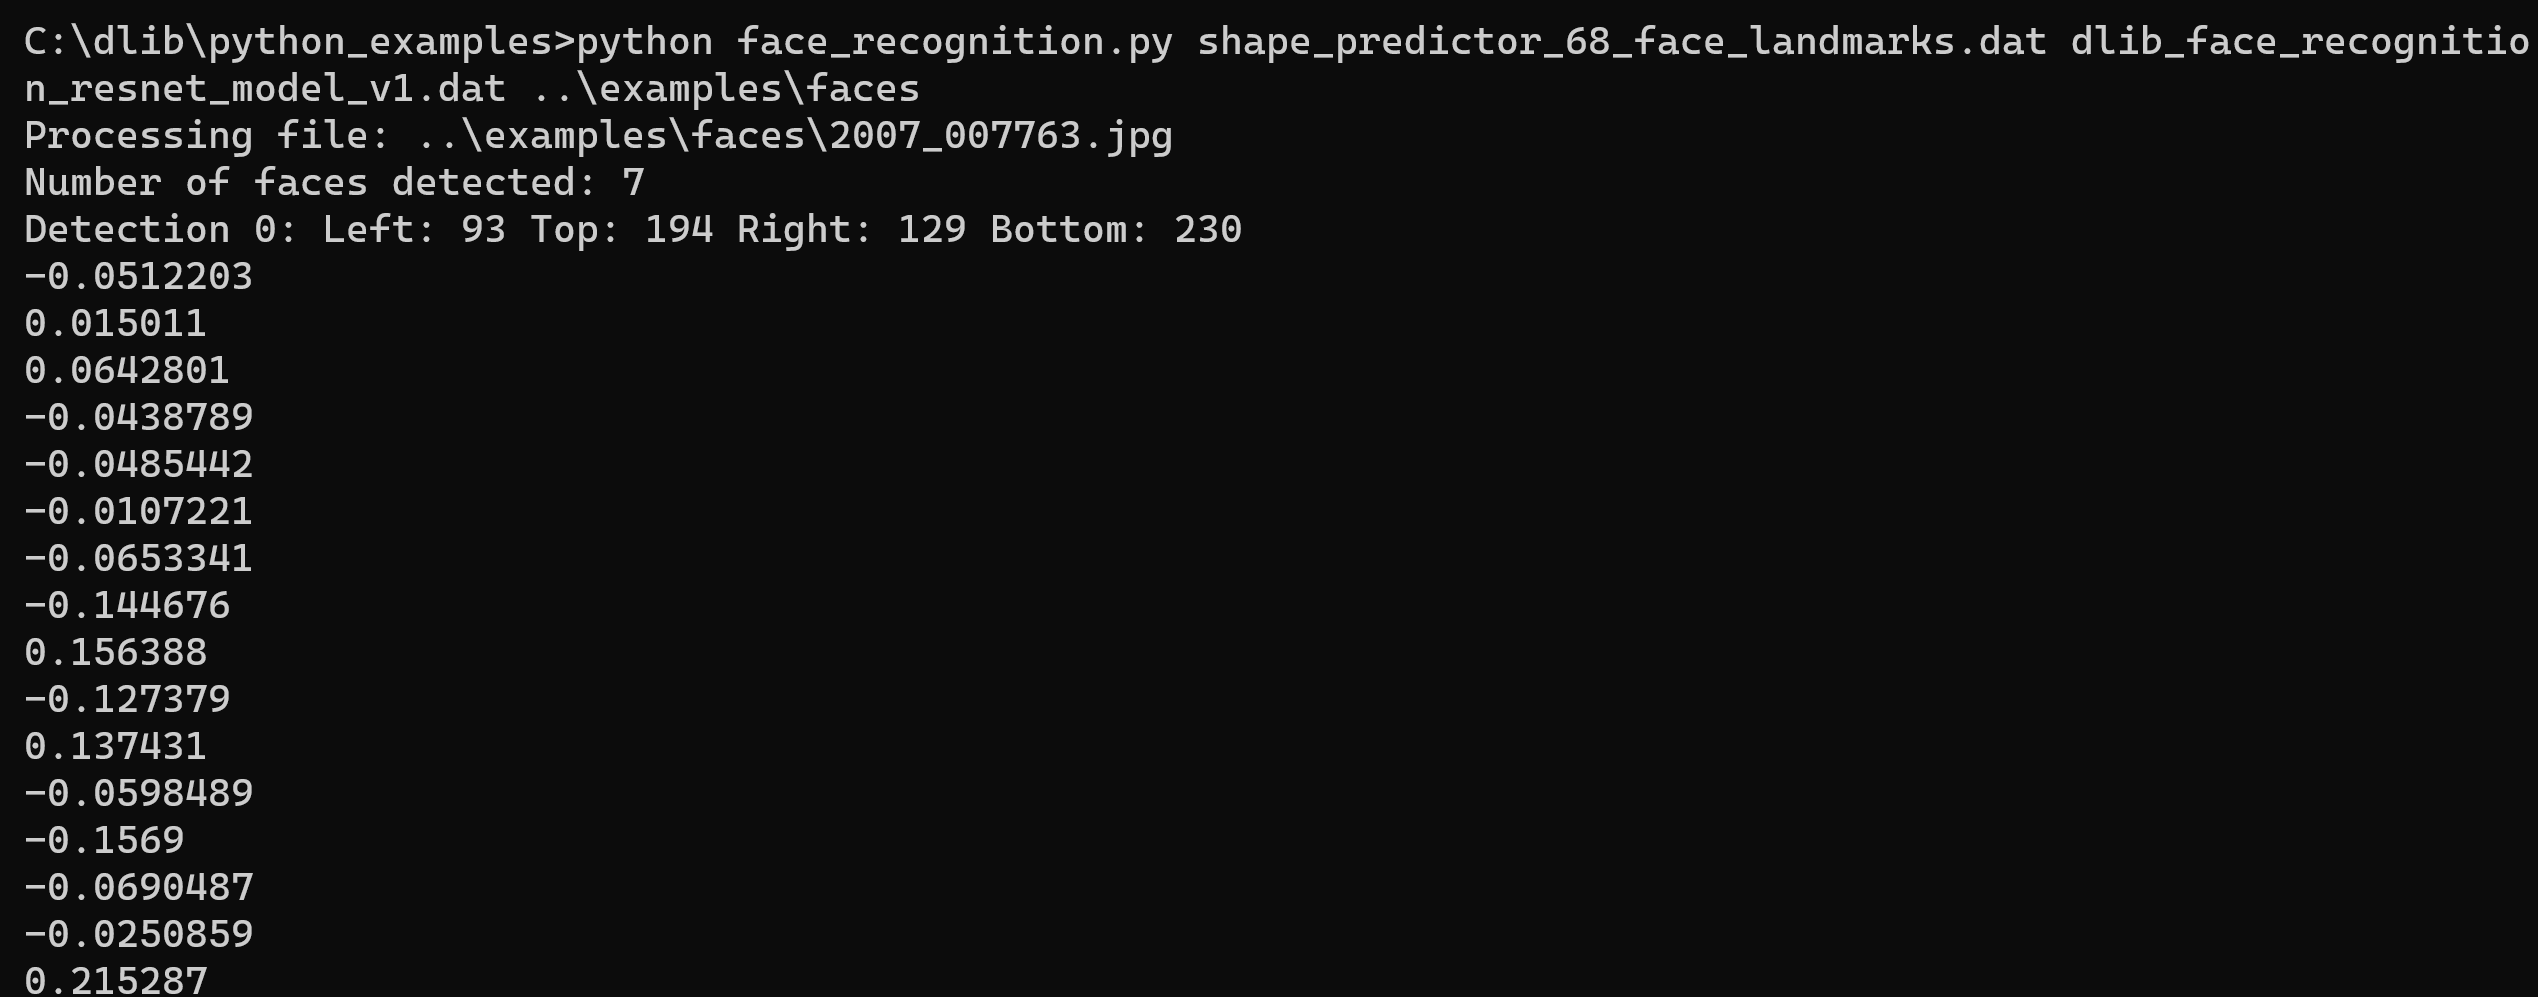
顔のコード化(68 ランドマークを使用)
- 実行してみる
cd C:\dlib
cd python_examples
python face_recognition.py shape_predictor_68_face_landmarks.dat dlib_face_recognition_resnet_model_v1.dat ..\examples\faces
顔ごとに 128個の数値(特徴量ベクトル)が得られることを確認
- Enter キーを複数回押して、結果を確認
8. ageitgey/ageitgey の face_recognition のインストール
- 以下の手順を管理者権限のコマンドプロンプトで実行する
(手順:Windowsキーまたはスタートメニュー →
cmdと入力 → 右クリック → 「管理者として実行」)。 - numpy, scikit-image, scikit-learn のインストール
次のコマンドを実行する.
python -m pip install -U numpy scikit-image scikit-learn - face_recognition のインストール
cd /d c:%HOMEPATH%
rmdir /s /q face_recognition
git clone https://github.com/ageitgey/face_recognition
cd face_recognition
copy C:\dlib\python_examples\shape_predictor_68_face_landmarks.dat .
python setup.py build
python setup.py install
9. ageitgey の face_recognition で顔識別を行ってみる(Python を使用)
ファイルとディレクトリの準備
- Windows のコマンドプロンプトを開く
- 2つのディレクトリ known_people, unknown_pictures を作る
コマンドプロンプトで次のコマンドを実行
mkdir %HOMEPATH%\face_recognition\known_people
mkdir %HOMEPATH%\face_recognition\unknown_pictures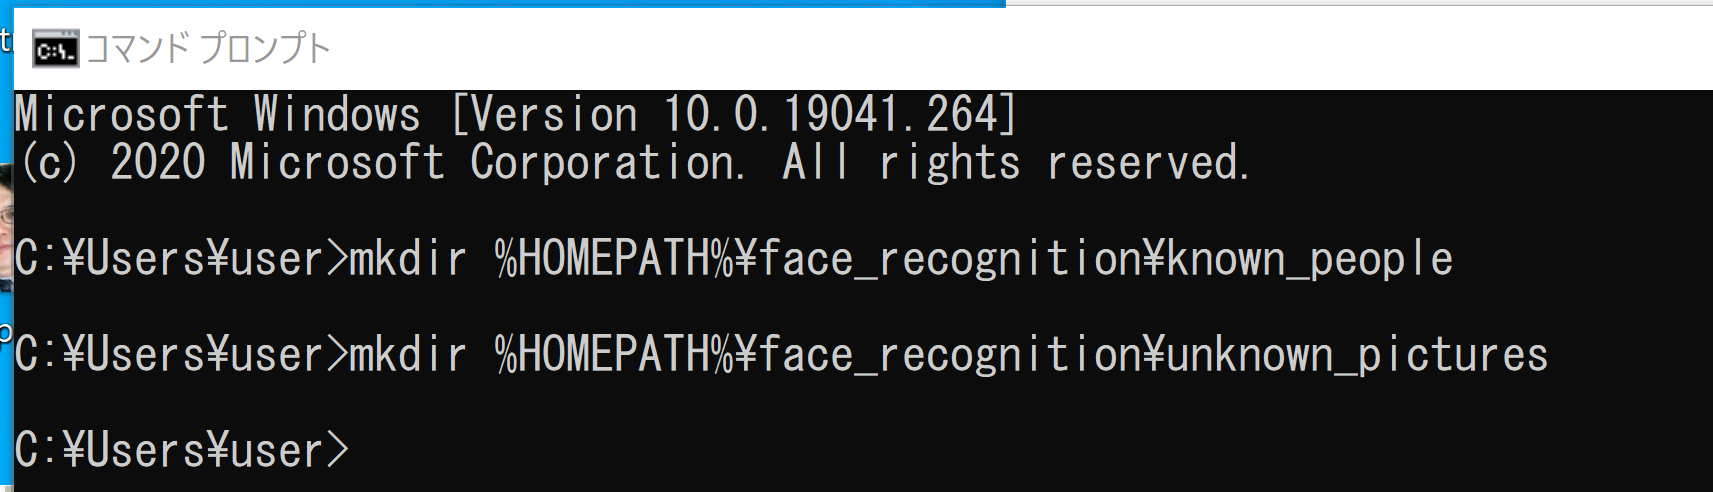
- 顔画像の準備
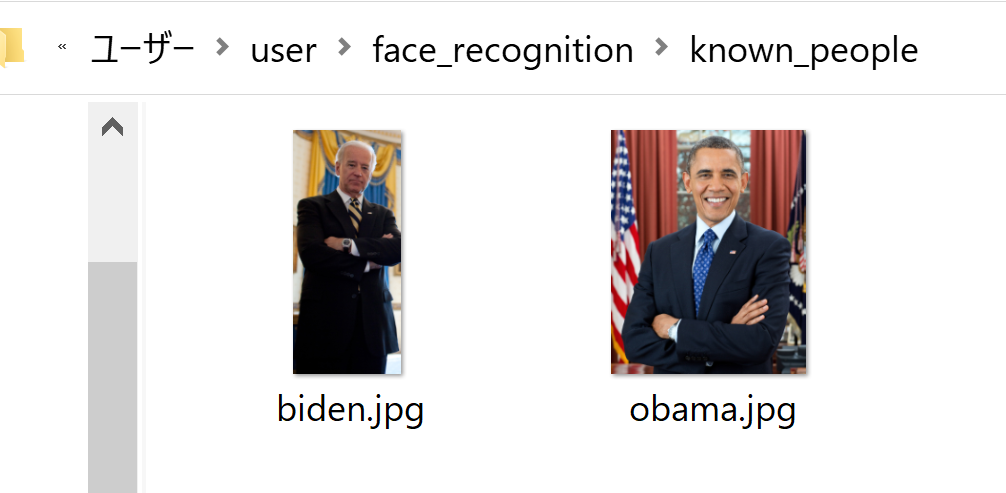
%HOMEPATH%\face_recognition\examples にある顔画像のファイル 「biden.jpg」と「obama.jpg」を,先ほど作成した ディレクトリ known_people の下にコピー
copy %HOMEPATH%\face_recognition\examples\biden.jpg %HOMEPATH%\face_recognition\known_people
copy %HOMEPATH%\face_recognition\examples\obama.jpg %HOMEPATH%\face_recognition\known_people
- Windows で、ディレクトリ known_people の下に 2つの画像ファイルがあることを確認
-
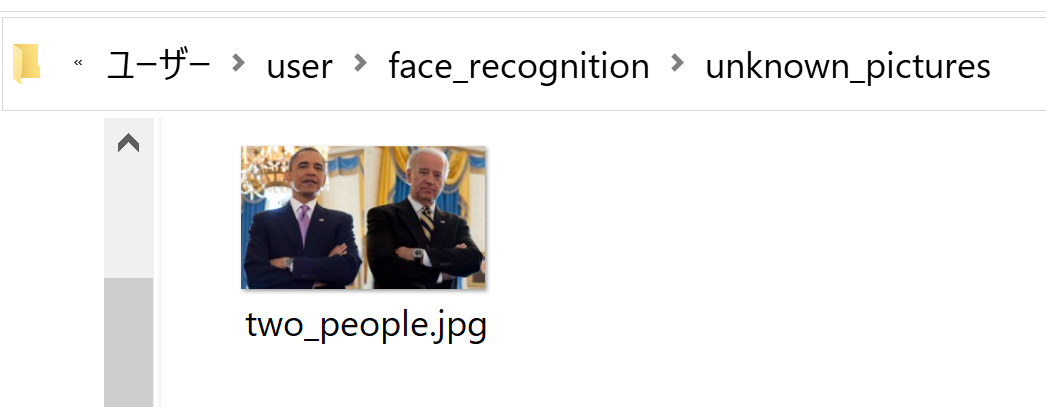
%HOMEPATH%\face_recognition\examples
にある顔画像のファイル
「two_people.jpg」を,先ほど作成した
ディレクトリ unknown_pictures の下にコピー
copy %HOMEPATH%\face_recognition\examples\two_people.jpg %HOMEPATH%\face_recognition\unknown_pictures
- Windows で、ディレクトリ unknown_pictures の下に画像ファイルがあることを確認
顔検出を行ってみる
cd /d c:%HOMEPATH%\face_recognition
face_detection --model cnn unknown_pictures
表示される4つの数字は、顔領域の座標値

顔識別を行ってみる
unknown_pictures の下にある画像ファイルを、 known_people 下の画像ファイルを照合して顔識別を行うコマンド
cd /d c:%HOMEPATH%\face_recognition
face_recognition --show-distance true known_people unknown_pictures
