Open 3D Engine のインストール(Windows 上)
【概要】
Open 3D Engine(O3DE)は,オープンソースの3次元ゲームエンジンである。Amazon の Amazon Lumberyard の後継である。Apache 2.0 ライセンスで公開されている。このページでは,GitHub からソースコードを取得し,Windows 上でビルドしてインストールする手順を説明する。
【目次】
- 前準備
- Git LFS のダウンロード,インストール
- Git のパーソナルアクセストークンの発行
- Git 資格情報マネージャーのインストール
- Open 3D Engine のビルド
- 新しいプロジェクトの作成
【関連する外部ページ】
o3de の GitHub リポジトリ: https://github.com/o3de/o3de
Windows でのビルド手順(公式): https://www.docs.o3de.org/docs/welcome-guide/setup/setup-from-github/building-windows/
【サイト内の関連情報】
Windows でのインストールと動作確認(3次元関係): 3次元のページにまとめている。
前準備
Build Tools for Visual Studio 2026(ビルドツール)のインストール
Build Tools for Visual Studio 2026(ビルドツール)のインストールを行い、C/C++ コードのビルド環境を整える。
Build Tools for Visual Studio は,Visual Studio の IDE を含まない C/C++ コンパイラ,ライブラリ,ビルドツール等のコマンドライン向け開発ツールセットである。インストール済みの場合,この手順は不要である。 以下のコマンドは、Build Tools が未インストールの場合は winget で新規インストールし、インストール済みの場合は 【インストールコマンドの実行方法】 管理者権限でコマンドプロンプトを起動する(手順:Windows キーまたはスタートメニュー → 上記のコマンドでは、Build Tools 本体と Visual C++ 再頒布可能パッケージをインストールし、続いて以下のコンポーネントを追加している。 上記以外の追加のコンポーネントが必要になった場合は Visual Studio Installer で個別にインストールできる。 インストール完了の確認 Visual Studio を必要とするとき Visual Studio の機能を必要とする場合は,追加インストールできる。[Build Tools for Visual Studio 2026(ビルドツール)のインストール手順を見るには、ここをクリック]
Windows での Build Tools for Visual Studio 2026 のインストール
setup.exe modify でコンポーネントを追加する(バージョンは変更しない)。cmd と入力 → 右クリック → 「管理者として実行」)。そして、コマンド全体をコマンドプロンプトにコピー&ペーストする。REM VC++ ランタイム
winget install --scope machine --id Microsoft.VCRedist.2015+.x64 -e --silent --disable-interactivity --force --accept-source-agreements --accept-package-agreements --override "/quiet /norestart"
REM ============================================================
REM Visual Studio Build Tools + Desktop development with C++
REM (VCTools、MSBuildTools、CMake連携、Clang、Windows 11 SDK)
REM ============================================================
REM 進行中のインストーラーを停止(ロック競合回避)
taskkill /F /IM vs_setup.exe /T >nul 2>&1
taskkill /F /IM vs_installer.exe /T >nul 2>&1
taskkill /F /IM vs_installerservice.exe /T >nul 2>&1
REM 未インストール時: winget で新規インストール
REM インストール済み時: setup.exe modify でコンポーネント追加(バージョンは変更しない)
winget list --id Microsoft.VisualStudio.BuildTools 2>nul | findstr /i "BuildTools" >nul 2>&1
if %ERRORLEVEL% EQU 0 (
for /f "usebackq delims=" %P in (`"C:\Program Files (x86)\Microsoft Visual Studio\Installer\vswhere.exe" -products Microsoft.VisualStudio.Product.BuildTools -property installationPath`) do start /wait "" "C:\Program Files (x86)\Microsoft Visual Studio\Installer\setup.exe" modify --installPath "%P" --add Microsoft.VisualStudio.Workload.VCTools --add Microsoft.VisualStudio.Workload.MSBuildTools --add Microsoft.VisualStudio.Component.VC.CMake.Project --add Microsoft.VisualStudio.Component.VC.Llvm.Clang --add Microsoft.VisualStudio.Component.VC.Llvm.ClangToolset --add Microsoft.VisualStudio.Component.Windows11SDK.26100 --includeRecommended --quiet --norestart --nocache
) else (
winget install --scope machine --id Microsoft.VisualStudio.BuildTools -e --silent --disable-interactivity --force --accept-source-agreements --accept-package-agreements --override "--quiet --wait --norestart --nocache --add Microsoft.VisualStudio.Workload.VCTools --includeRecommended --add Microsoft.VisualStudio.Workload.MSBuildTools --add Microsoft.VisualStudio.Component.VC.CMake.Project --add Microsoft.VisualStudio.Component.VC.Llvm.Clang --add Microsoft.VisualStudio.Component.VC.Llvm.ClangToolset --add Microsoft.VisualStudio.Component.Windows11SDK.26100"
)
REM 破損時の修復(任意、動作がおかしくなった場合)
REM "C:\Program Files (x86)\Microsoft Visual Studio\Installer\setup.exe" repair --installPath "C:\Program Files (x86)\Microsoft Visual Studio\18\BuildTools" --quiet --norestart
REM 導入確認(インストールパスが表示されれば正常)
"C:\Program Files (x86)\Microsoft Visual Studio\Installer\vswhere.exe" -products * -requires Microsoft.VisualStudio.Workload.VCTools -property installationPath
--includeRecommended により、MSVC コンパイラ、C++ AddressSanitizer、vcpkg、CMake ツール、Windows 11 SDK 等の推奨コンポーネントが含まれる)winget list Microsoft.VisualStudio.BuildTools
Git のインストール(Windows 上)
Git は,バージョン管理システムである。O3DE のソースコードを GitHub から取得するために必要である。
【サイト内の関連ページ】 Windows での Git のインストール: 別ページ »で説明
【関連する外部ページ】 Git の公式ページ: https://git-scm.com/
CMake のインストール(Windows 上) [クリックして展開]
管理者権限でコマンドプロンプトを起動する
(手順:Windowsキーまたはスタートメニュー → cmd と入力 → 右クリック → 「管理者として実行」)。
REM CMake をシステム領域にインストール
winget install --scope machine --id Kitware.CMake -e --silent --disable-interactivity --force --accept-source-agreements --accept-package-agreements --override "/qn /norestart ADD_CMAKE_TO_PATH=System"
Git LFS のダウンロード,インストール
Git LFS(Git Large File Storage)は,Git で大容量ファイルを扱うための拡張である。O3DE のリポジトリには大容量ファイルが含まれるため必要となる。
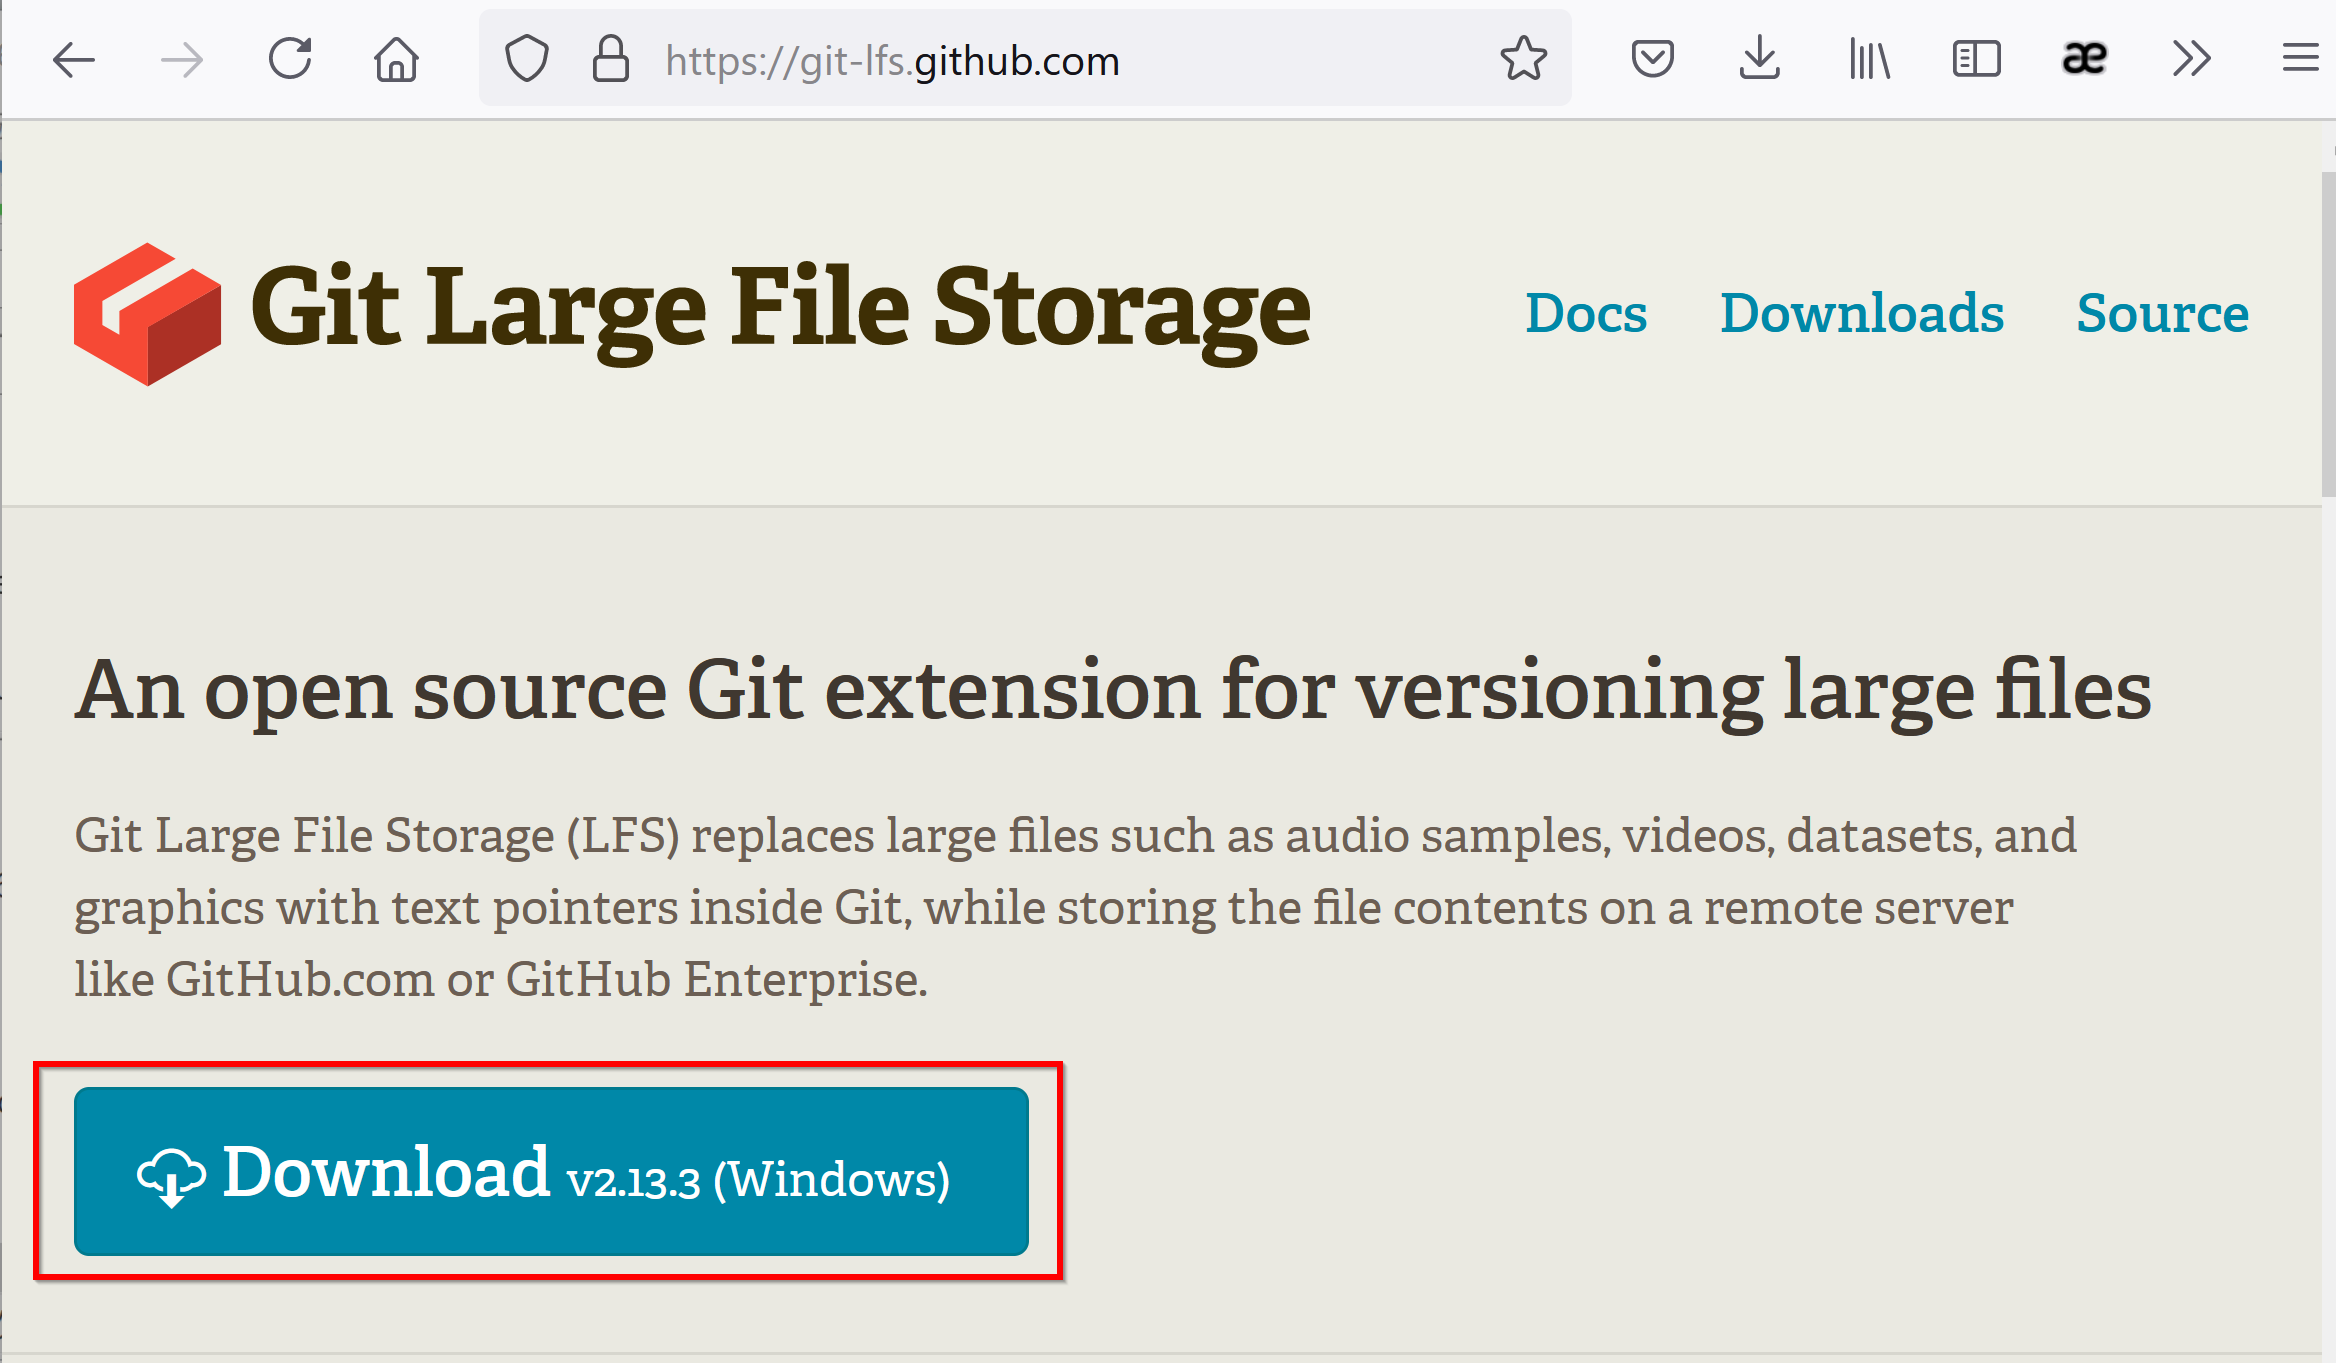
- Git LFS のページを開く
- 「Download」をクリック
- 「Download」をクリック
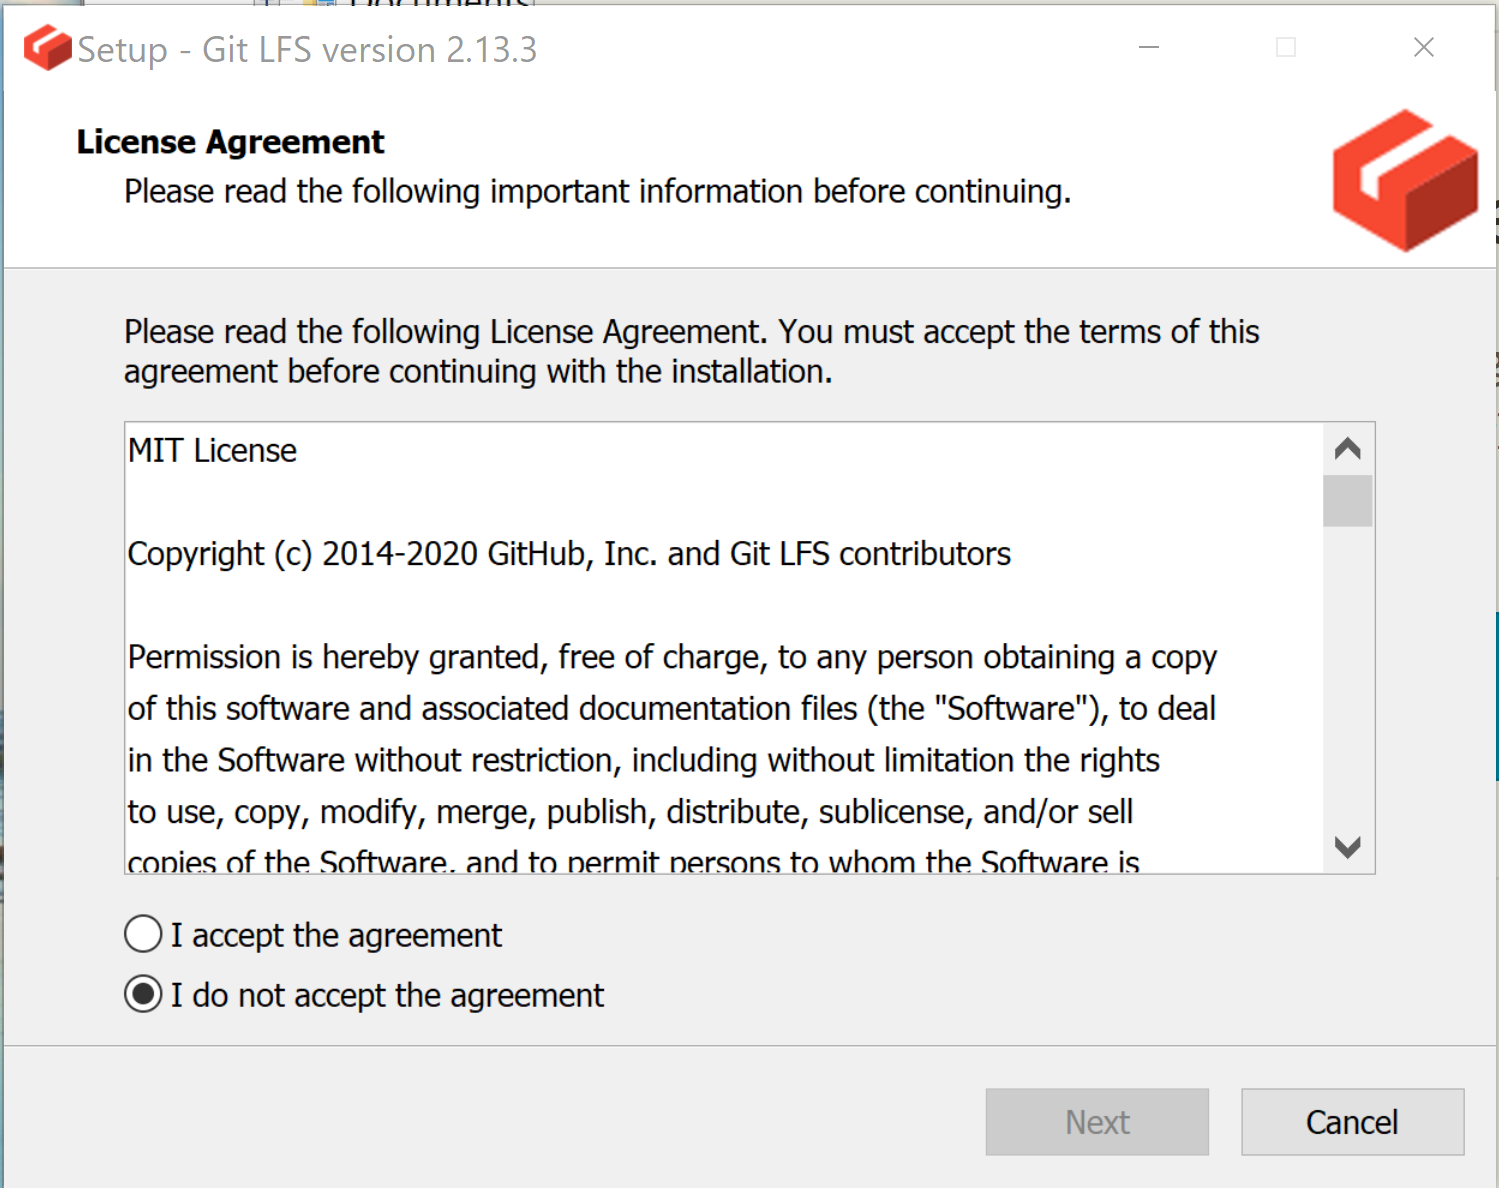
- ライセンス条項の確認

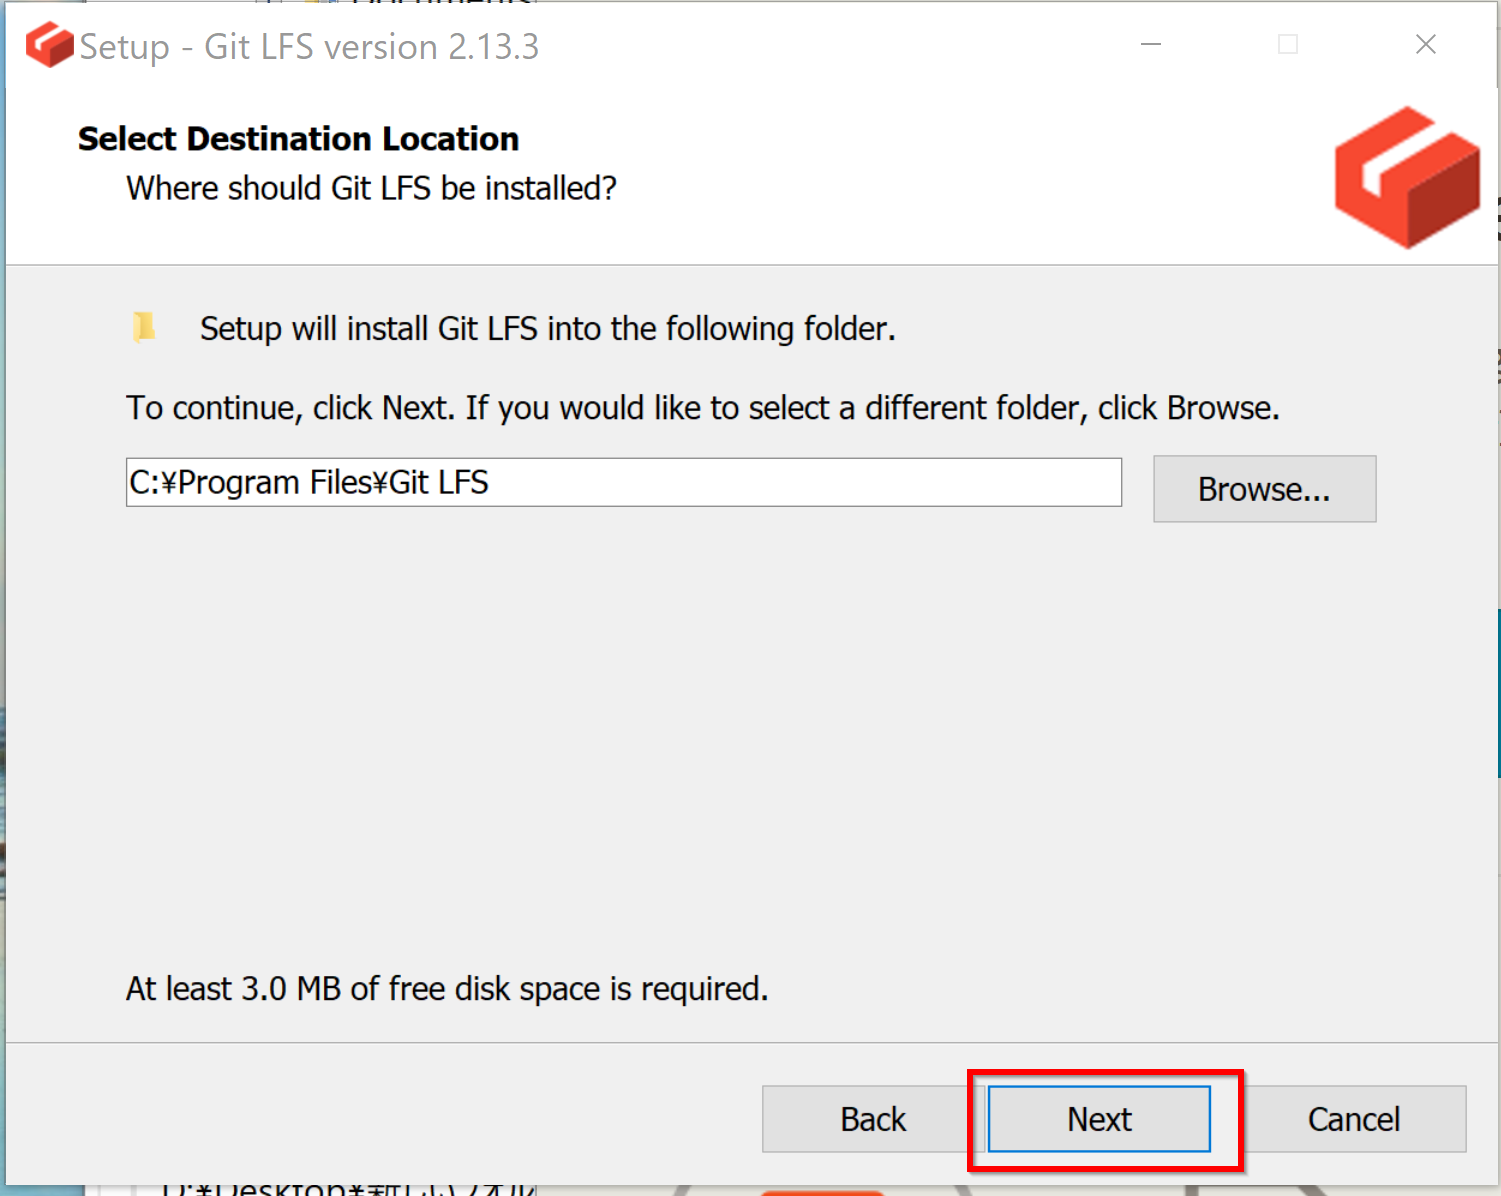
- インストールディレクトリの設定
既定(デフォルト)のままでよい。「Next」をクリックする。
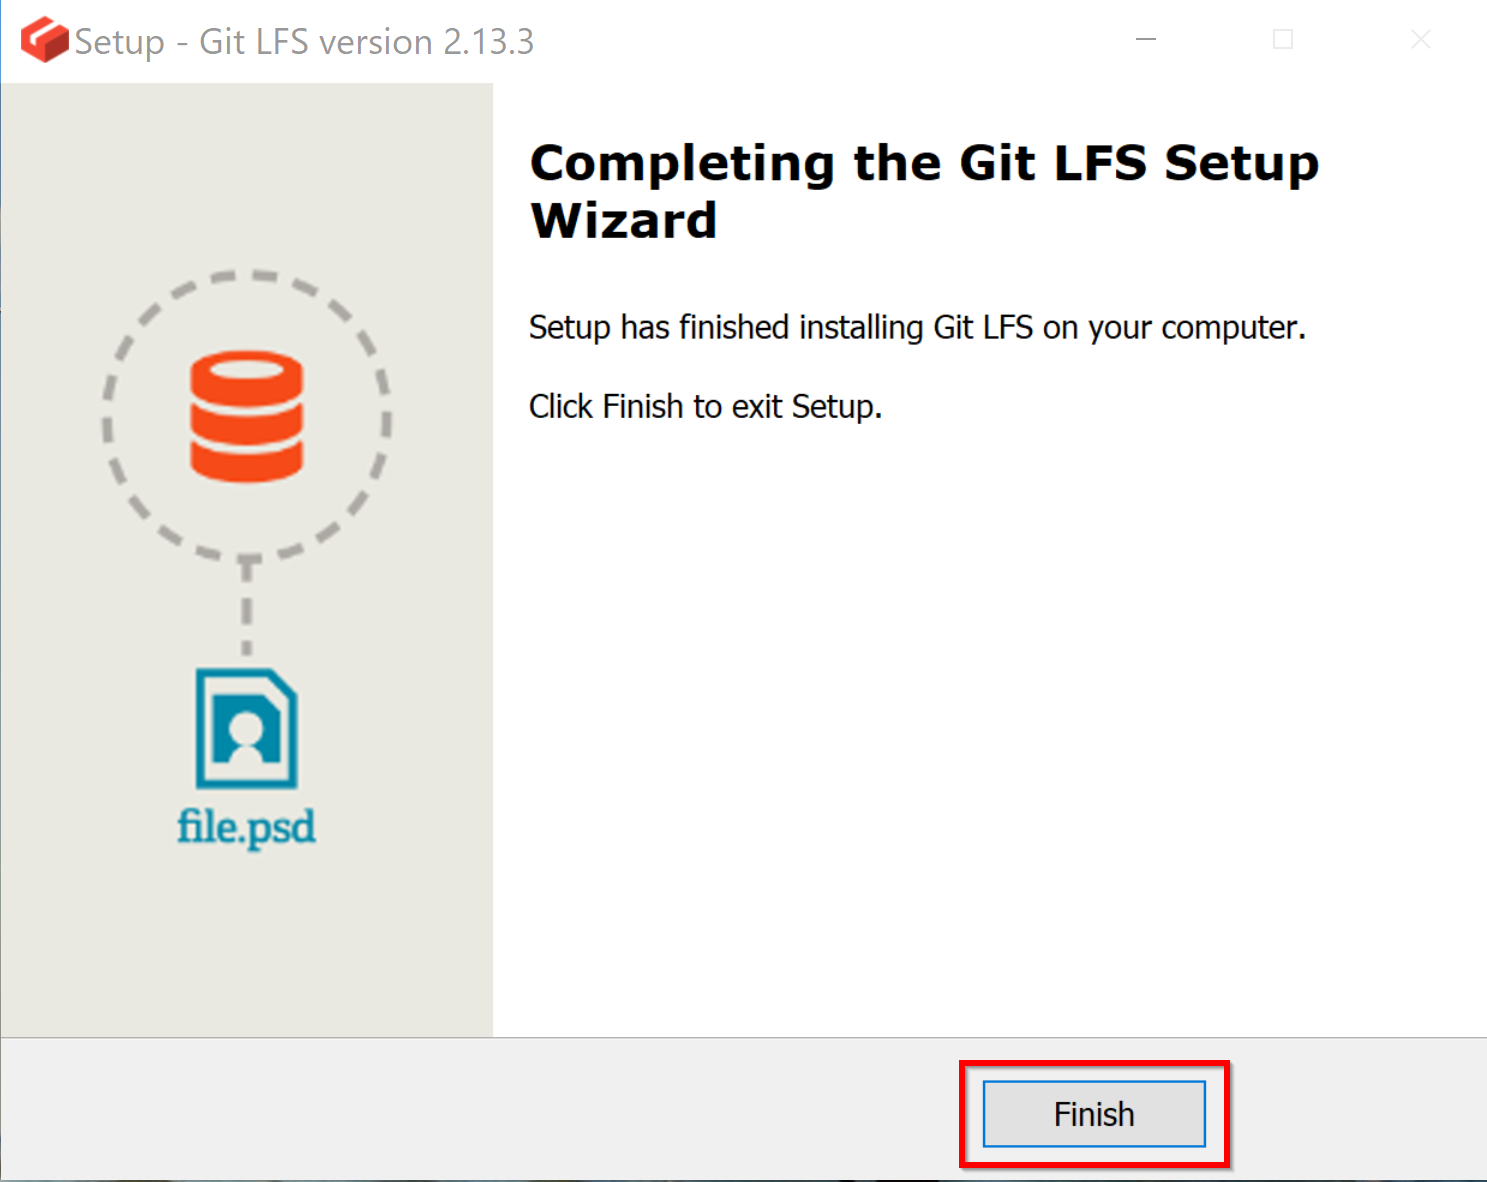
- インストール終了の確認
- Git フックのインストール
管理者権限でコマンドプロンプトを起動する (手順:Windowsキーまたはスタートメニュー →
cmdと入力 → 右クリック → 「管理者として実行」)。次のコマンドを実行する。git lfs install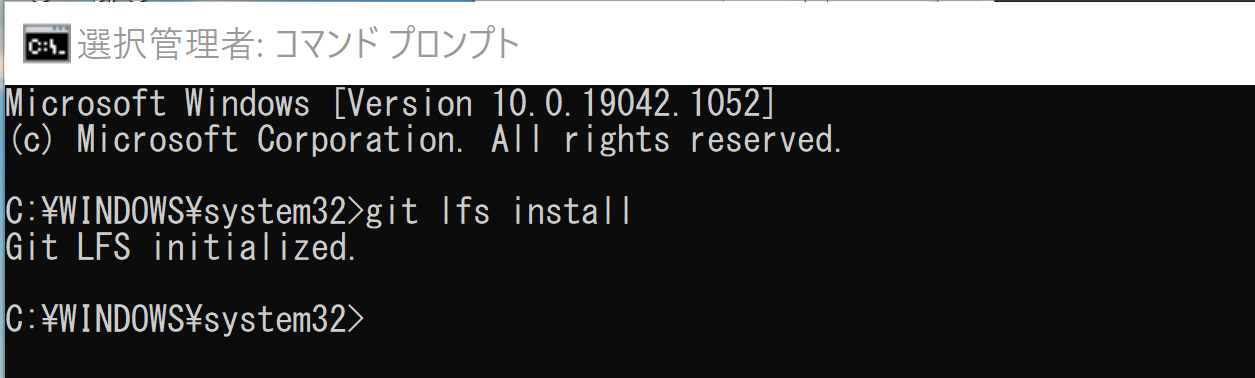
Git のパーソナルアクセストークンの発行
次のページの手順による。
https://docs.github.com/en/authentication/keeping-your-account-and-data-secure/managing-your-personal-access-tokens
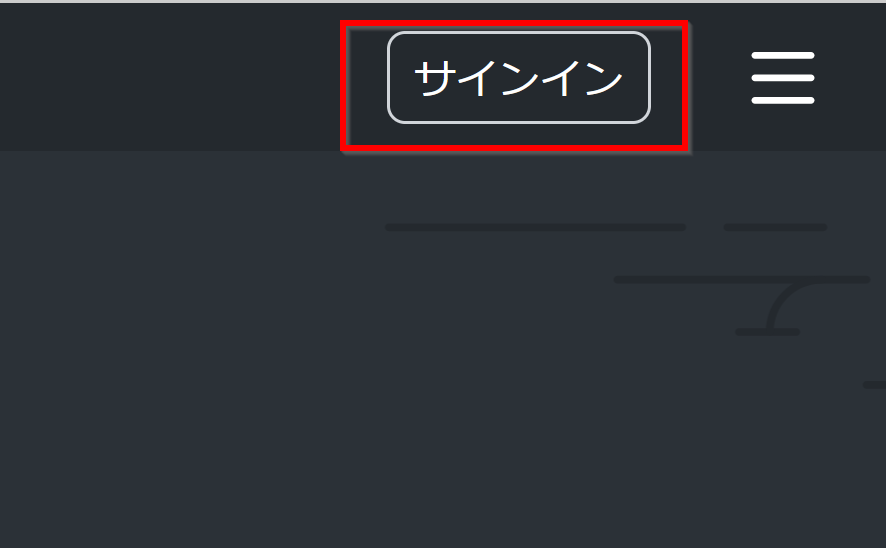
- GitHub のページを開く
- サインインする
 GitHub に未登録のときは,サインインの前に GitHub への登録を行う。
 - 電子メールアドレスの確認(ベリファイ)をまだ行っていない場合には,次の手順で電子メールアドレスの確認を行う。
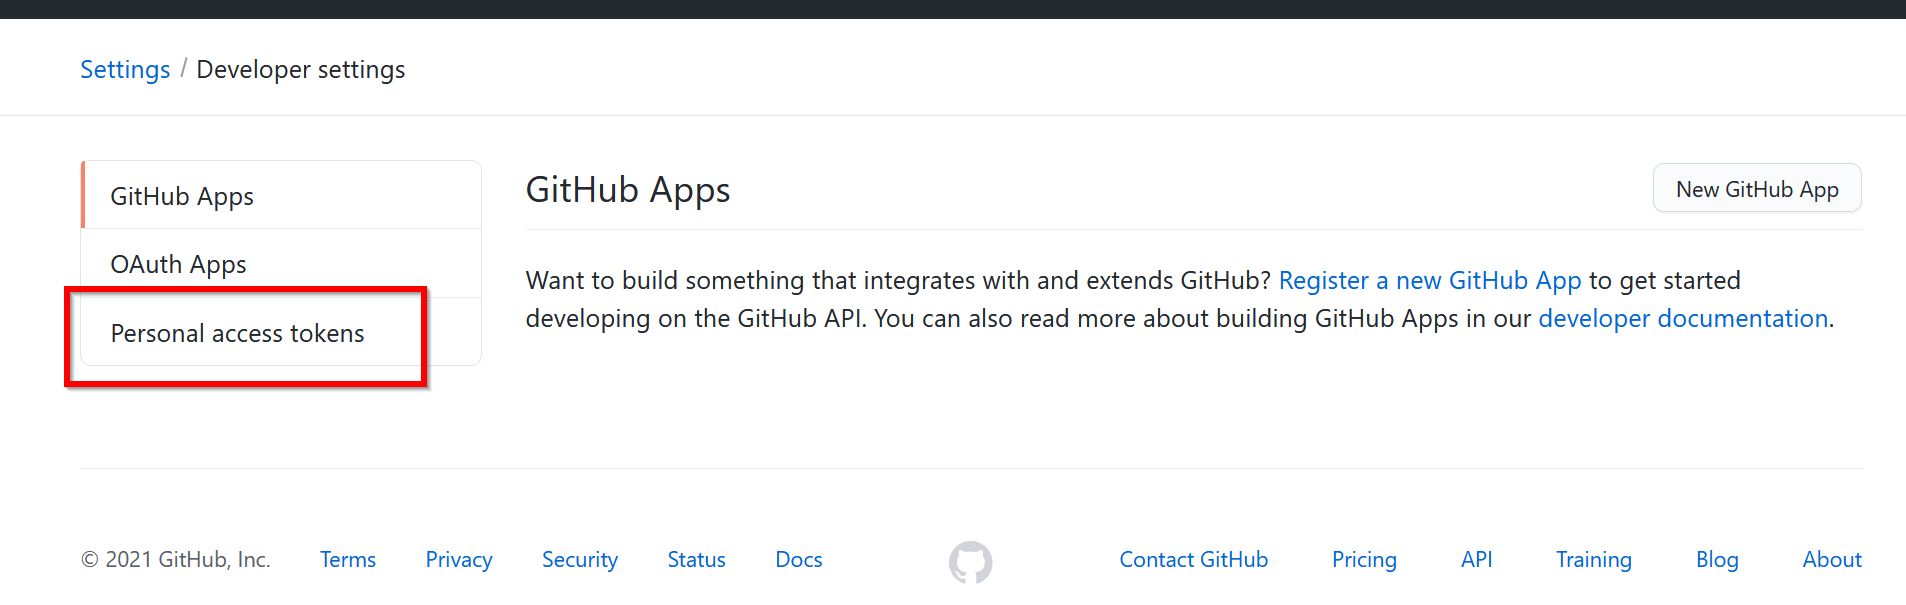
- メニューで「Settings」を選ぶ。
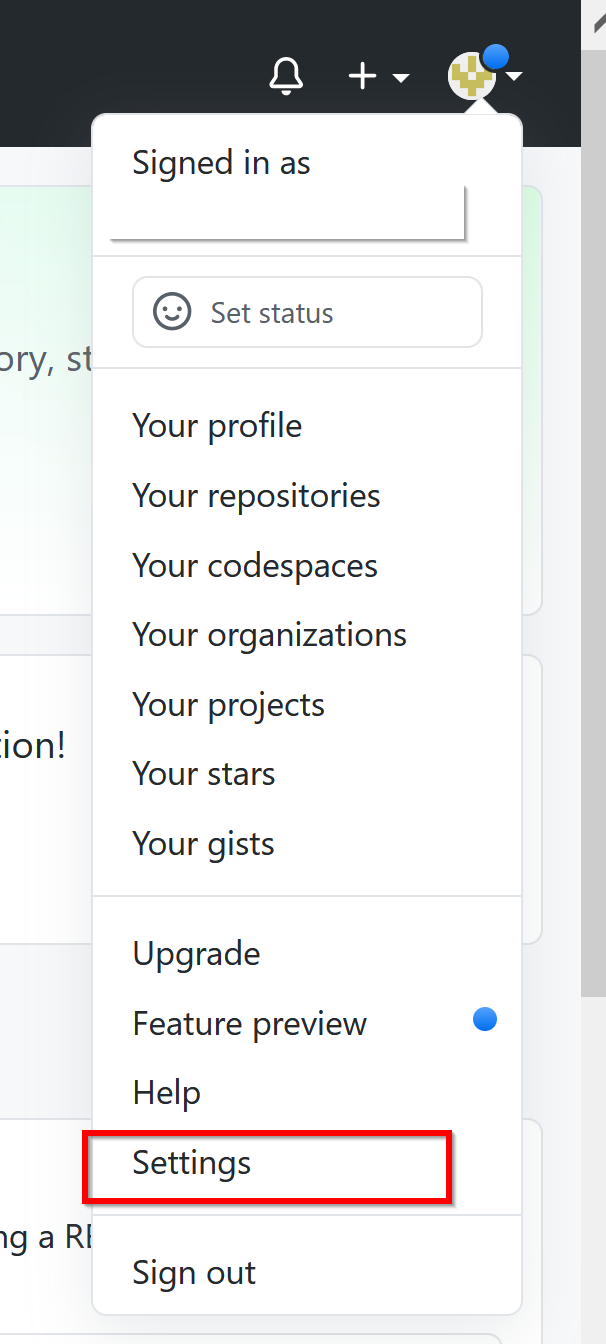
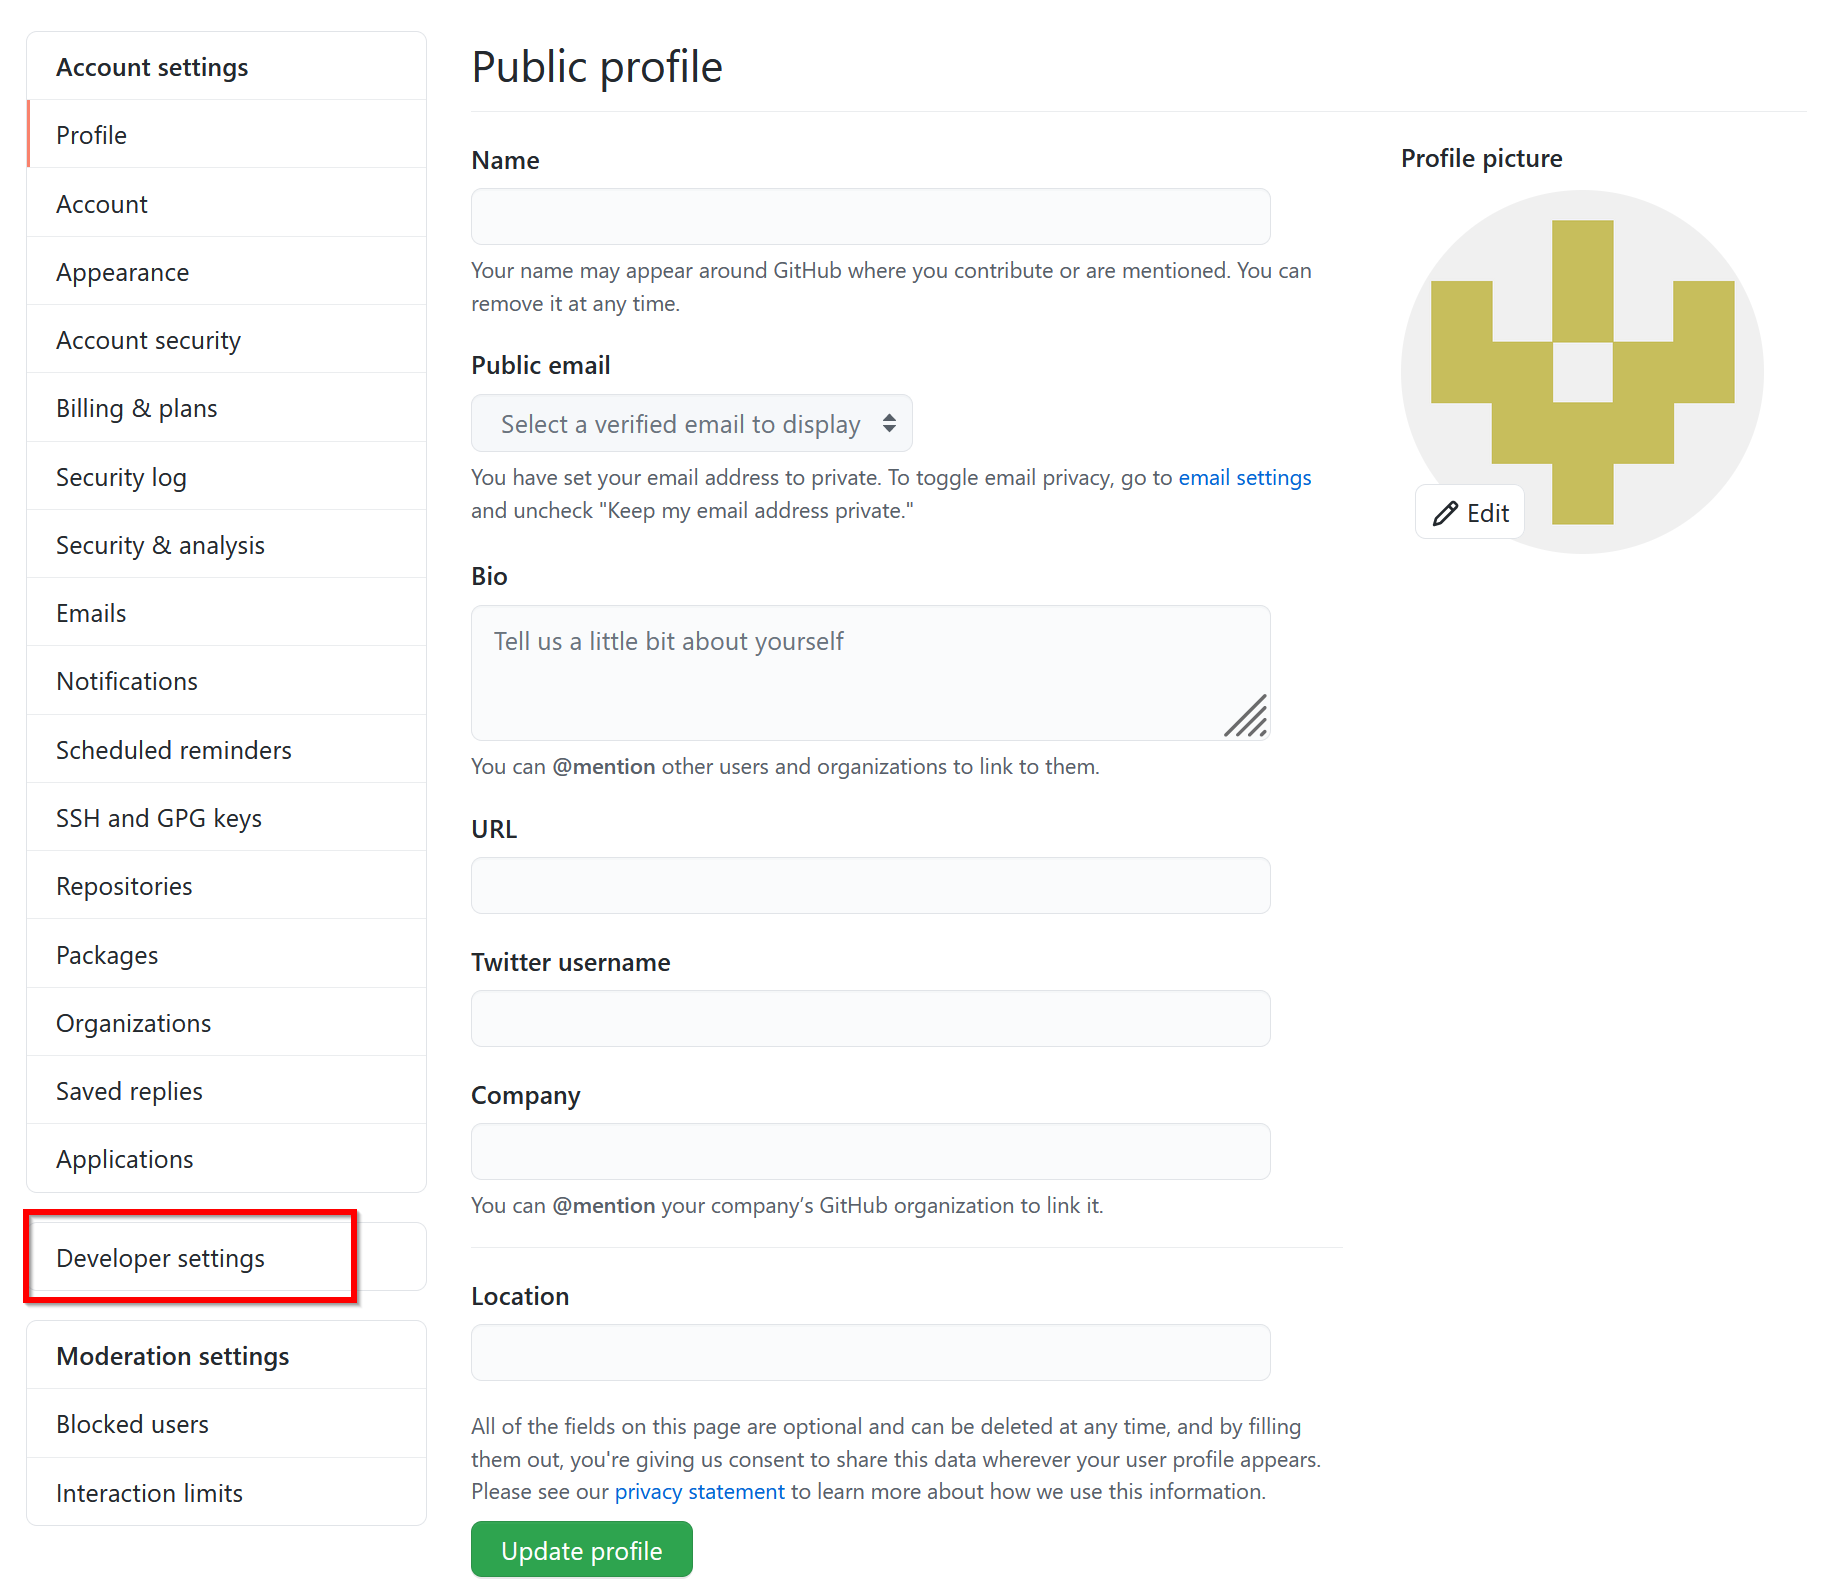
- 「Developer settings」をクリック
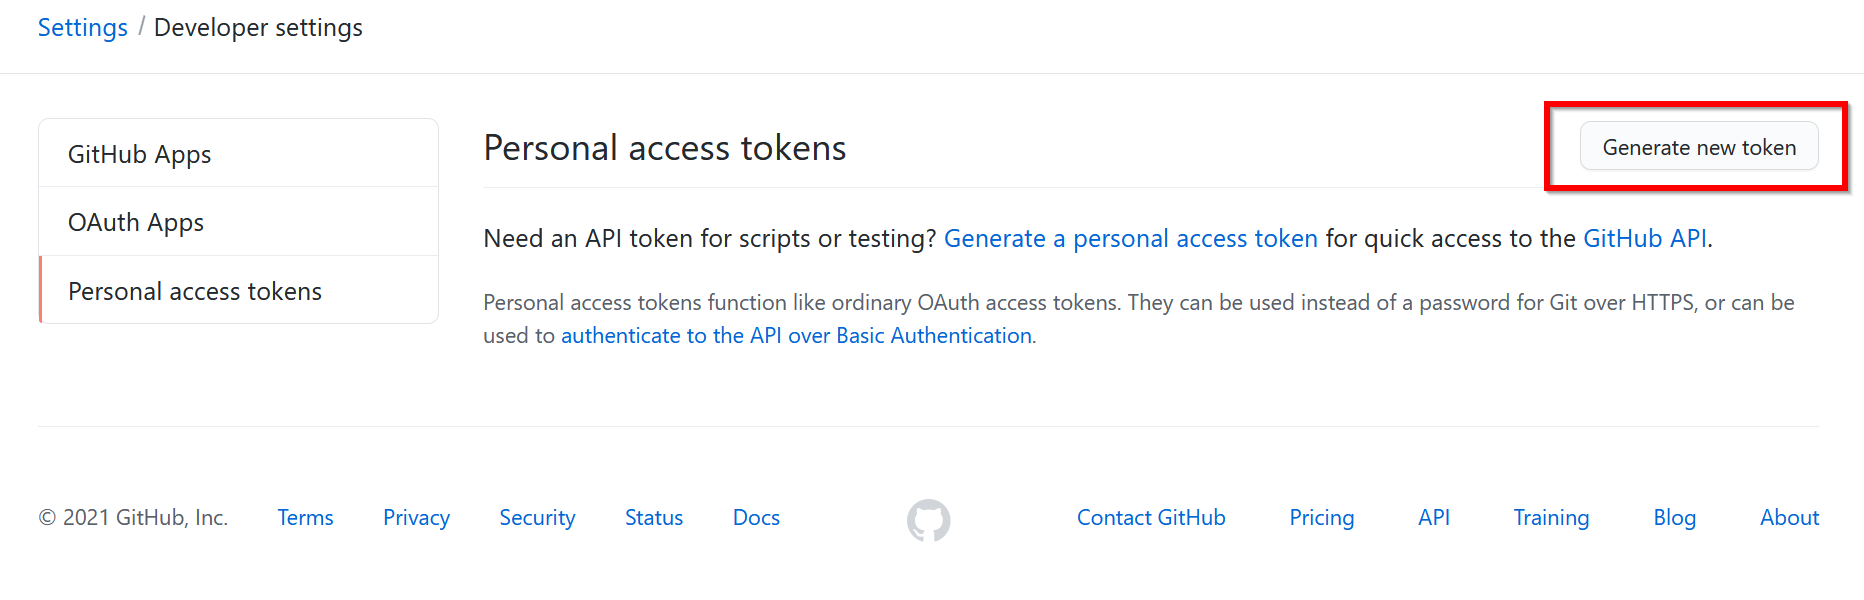
- 「Personal access tokens」の「Tokens (classic)」をクリック
- 「Generate new token」から「Generate new token (classic)」をクリック
- Note のところに記入する
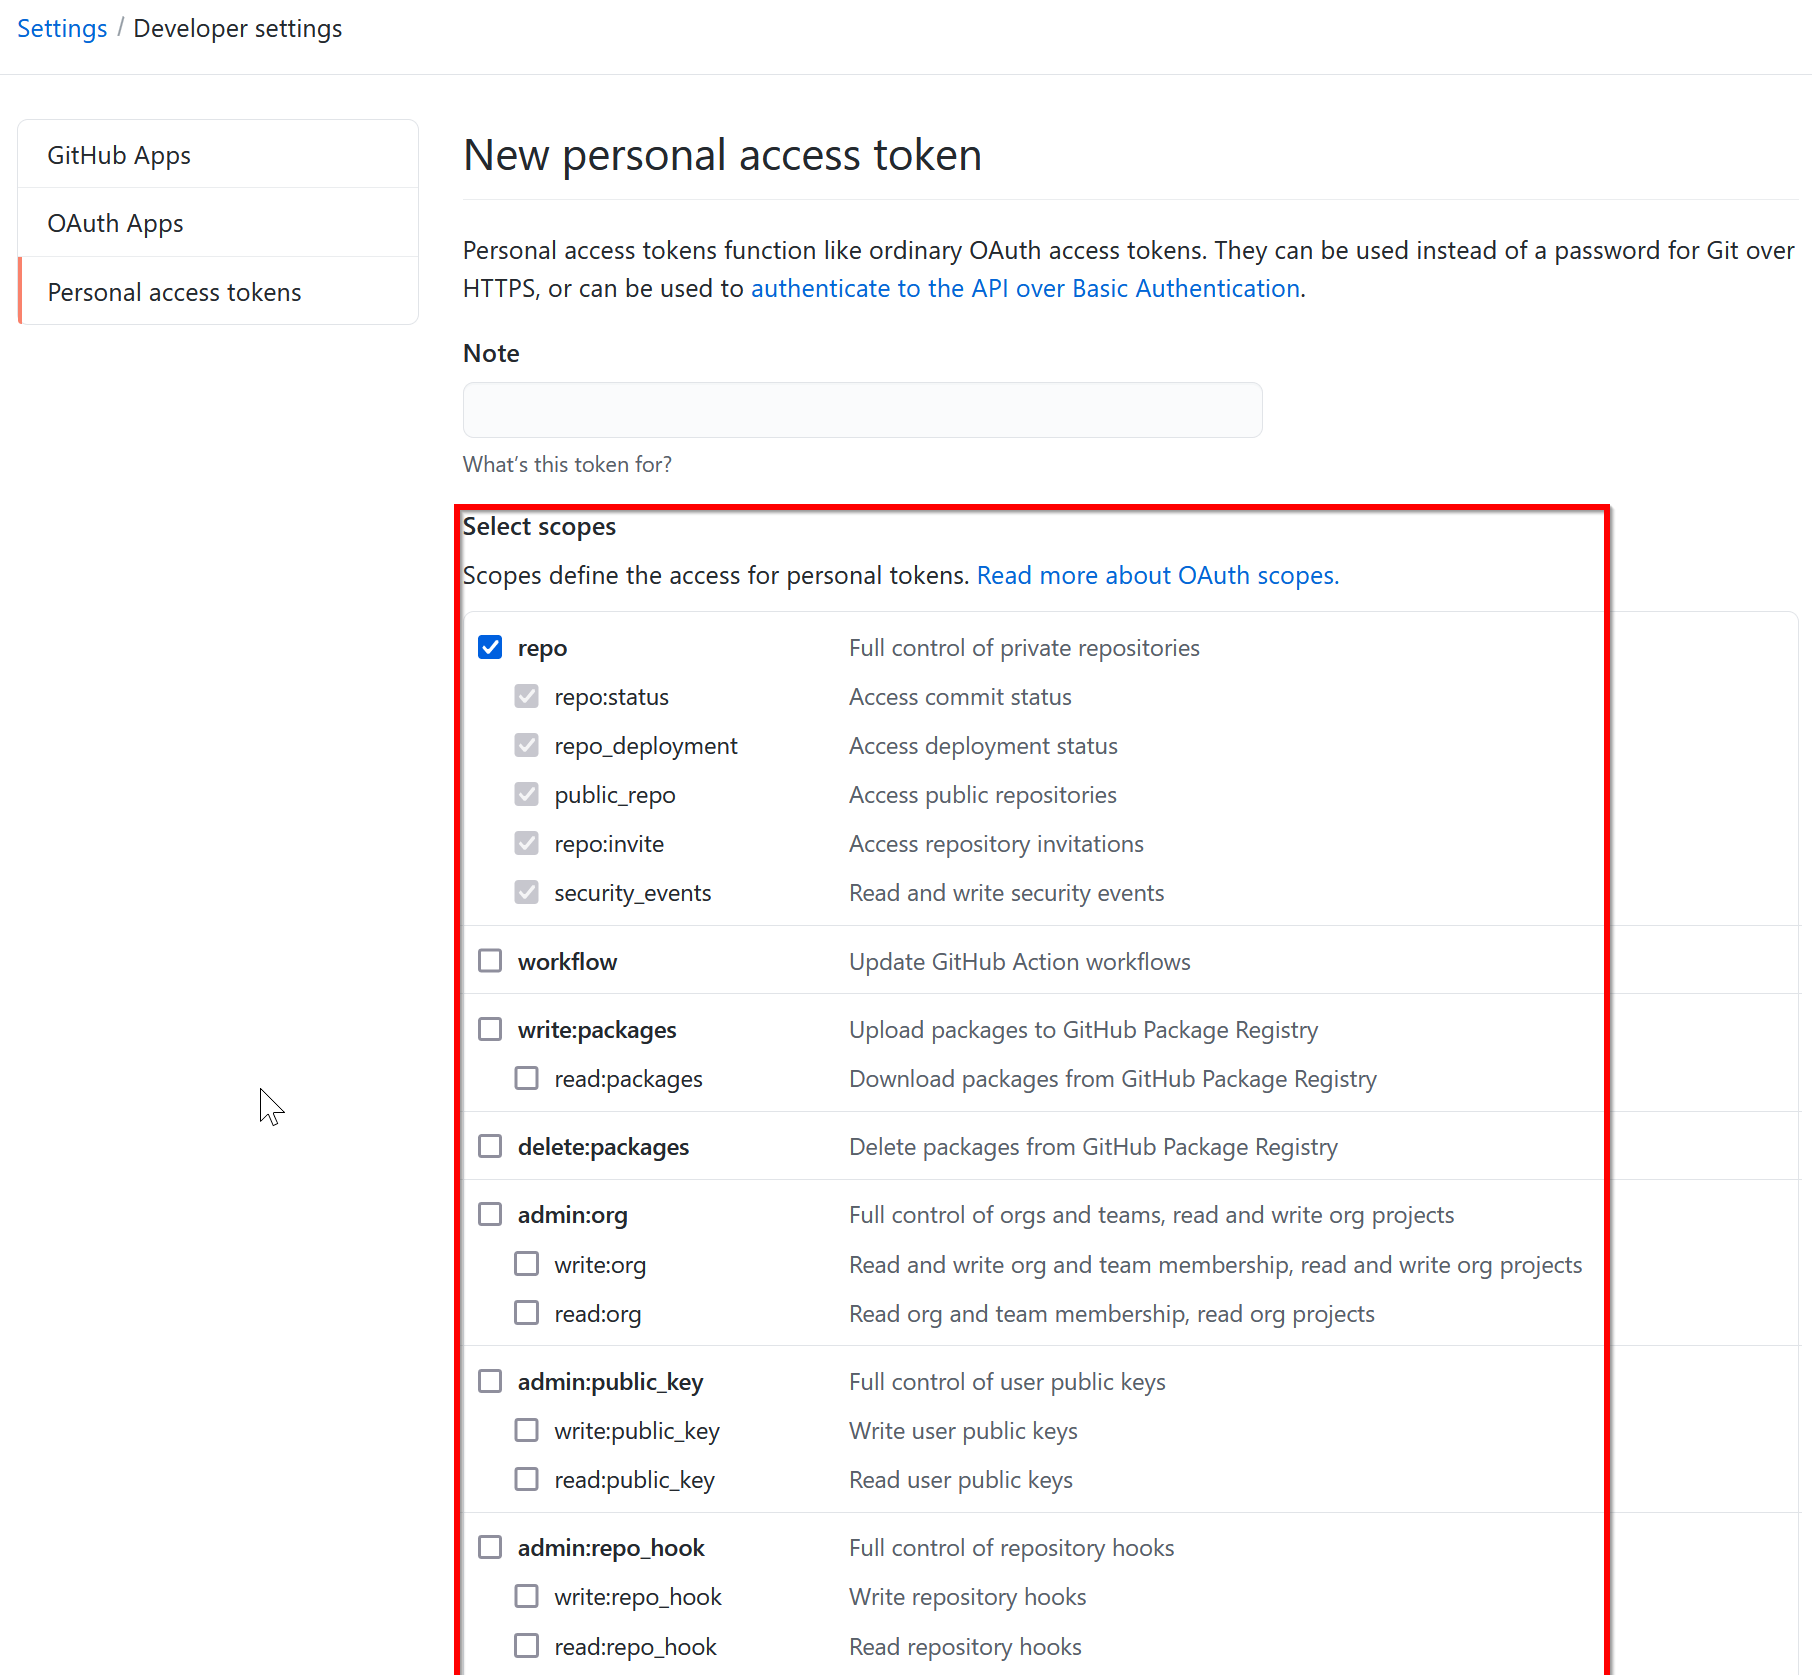
- 範囲(スコープ)を選ぶ
ここでは,「repo」にチェックしている。
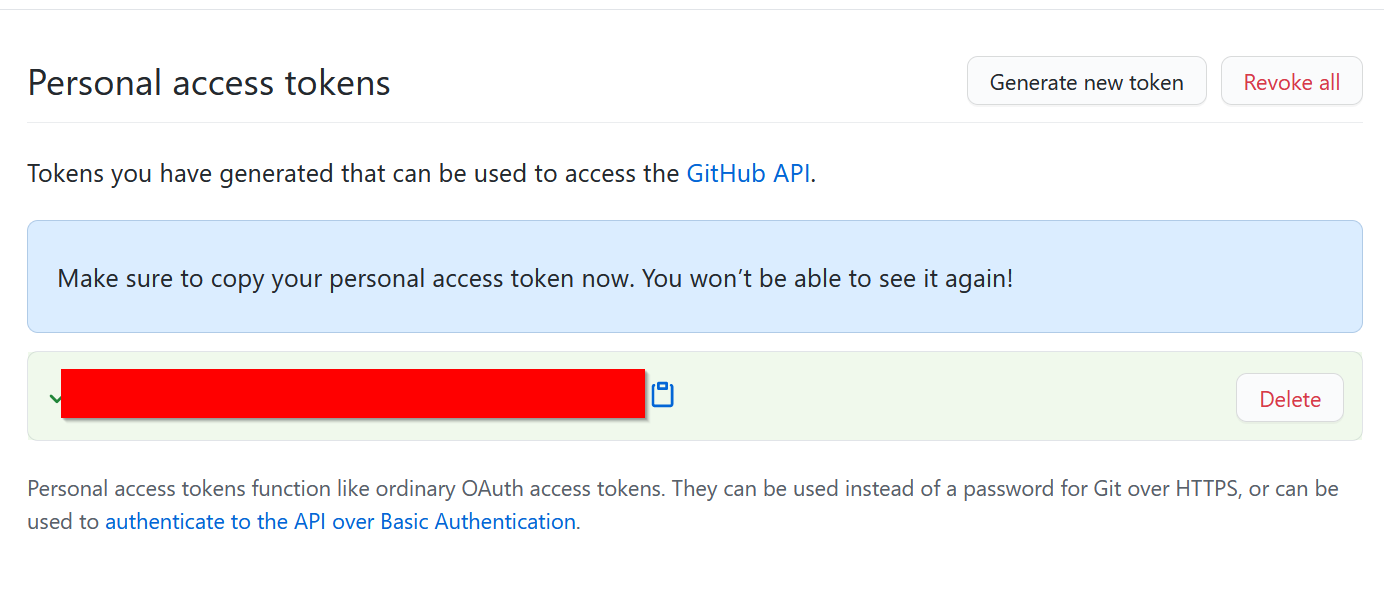
- 「Generate token」をクリック
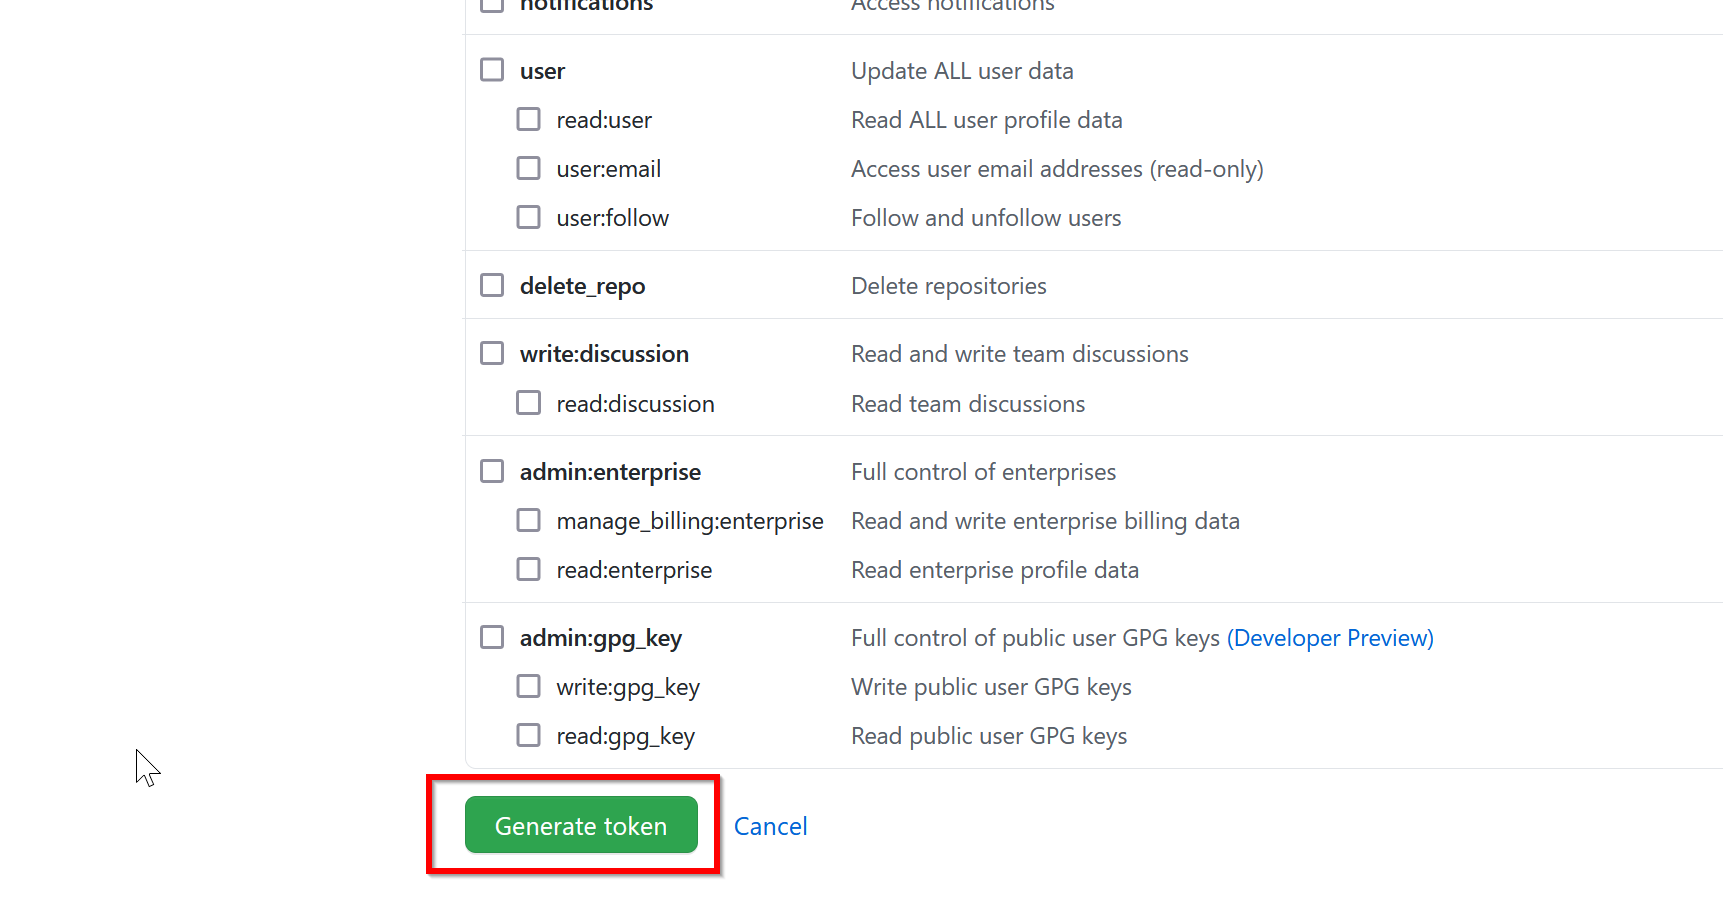
- トークンが表示される。手元に保存する。これは再びオンラインで表示できない。自分で管理し,公開しない。
- メニューで「Settings」を選ぶ。
Git 資格情報マネージャーのインストール
Git 資格情報マネージャー(Git Credential Manager)は,GitHub 等への認証情報を安全に管理するツールである。
- 次のページを開く
- Windows 向けのリンクをクリックする。
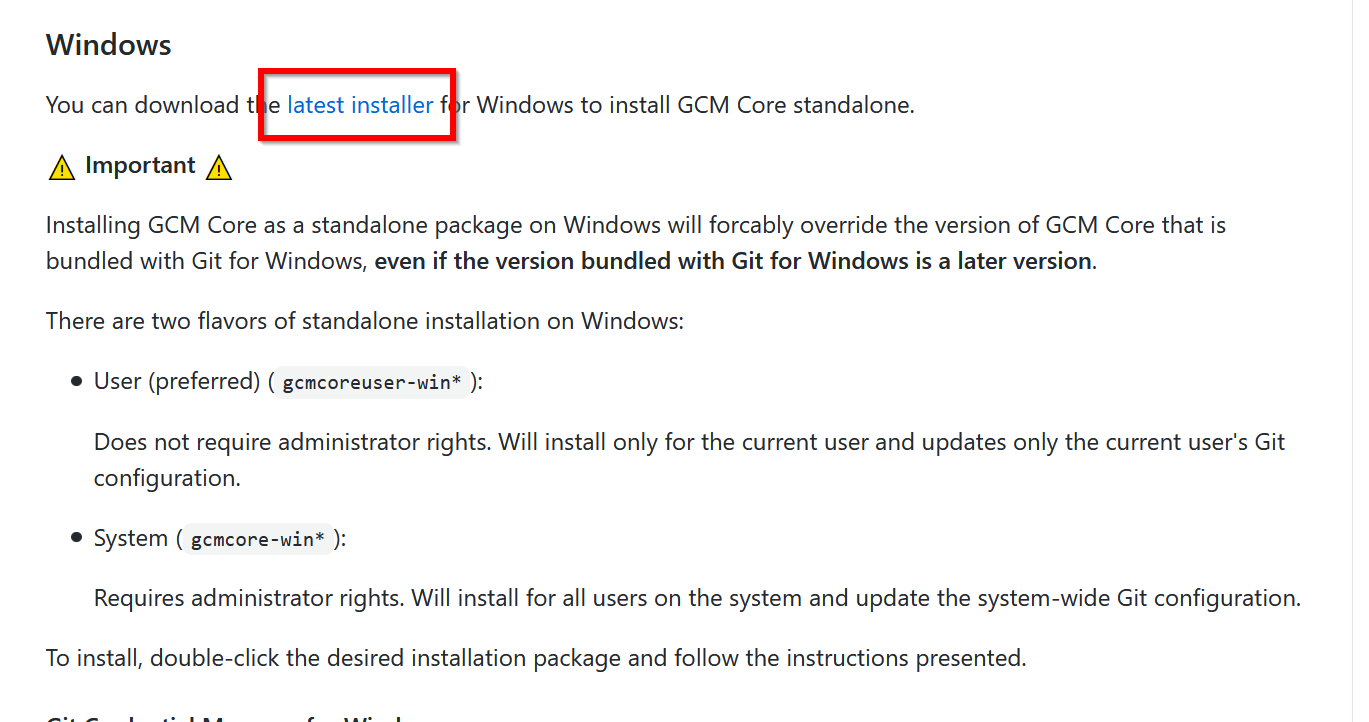
- Windows 版を選ぶ
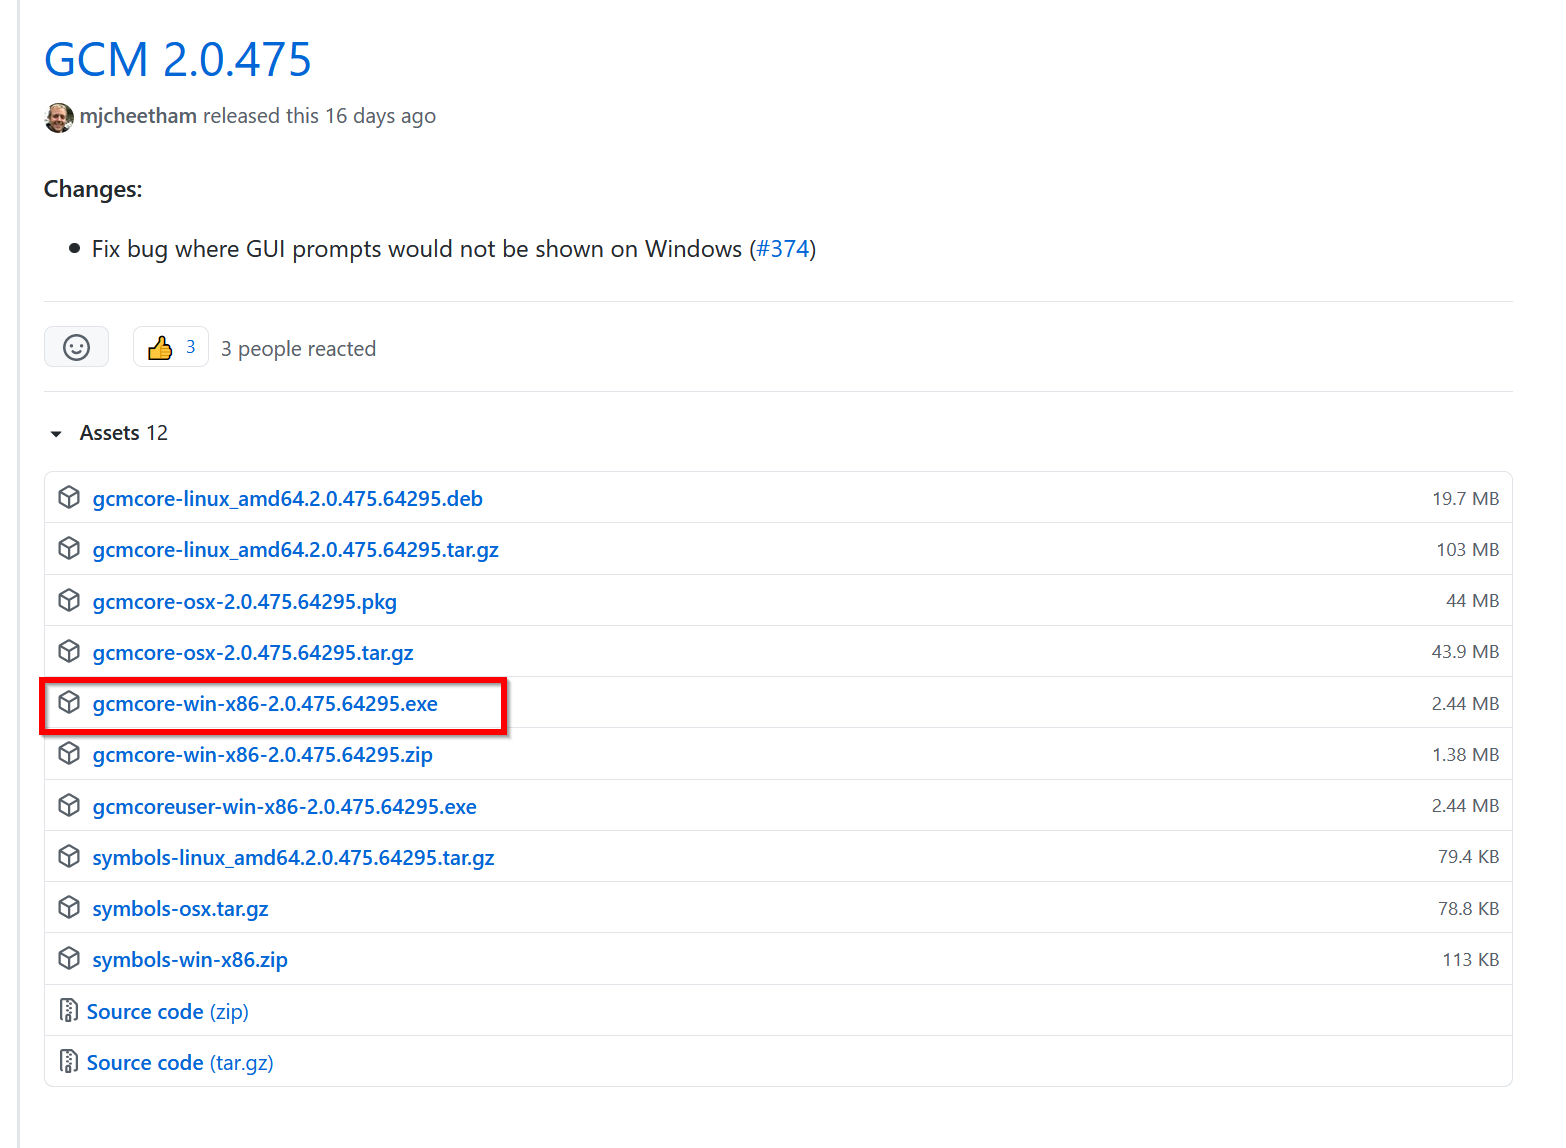
- ダウンロードしたファイルを用いて,インストールを行う。
Open 3D Engine のビルド
- 管理者権限でコマンドプロンプトを起動する
(手順:Windowsキーまたはスタートメニュー →
cmdと入力 → 右クリック → 「管理者として実行」)。 - リポジトリのクローン
mkdir c:\tools
cd c:\tools
git clone https://github.com/o3de/o3de.git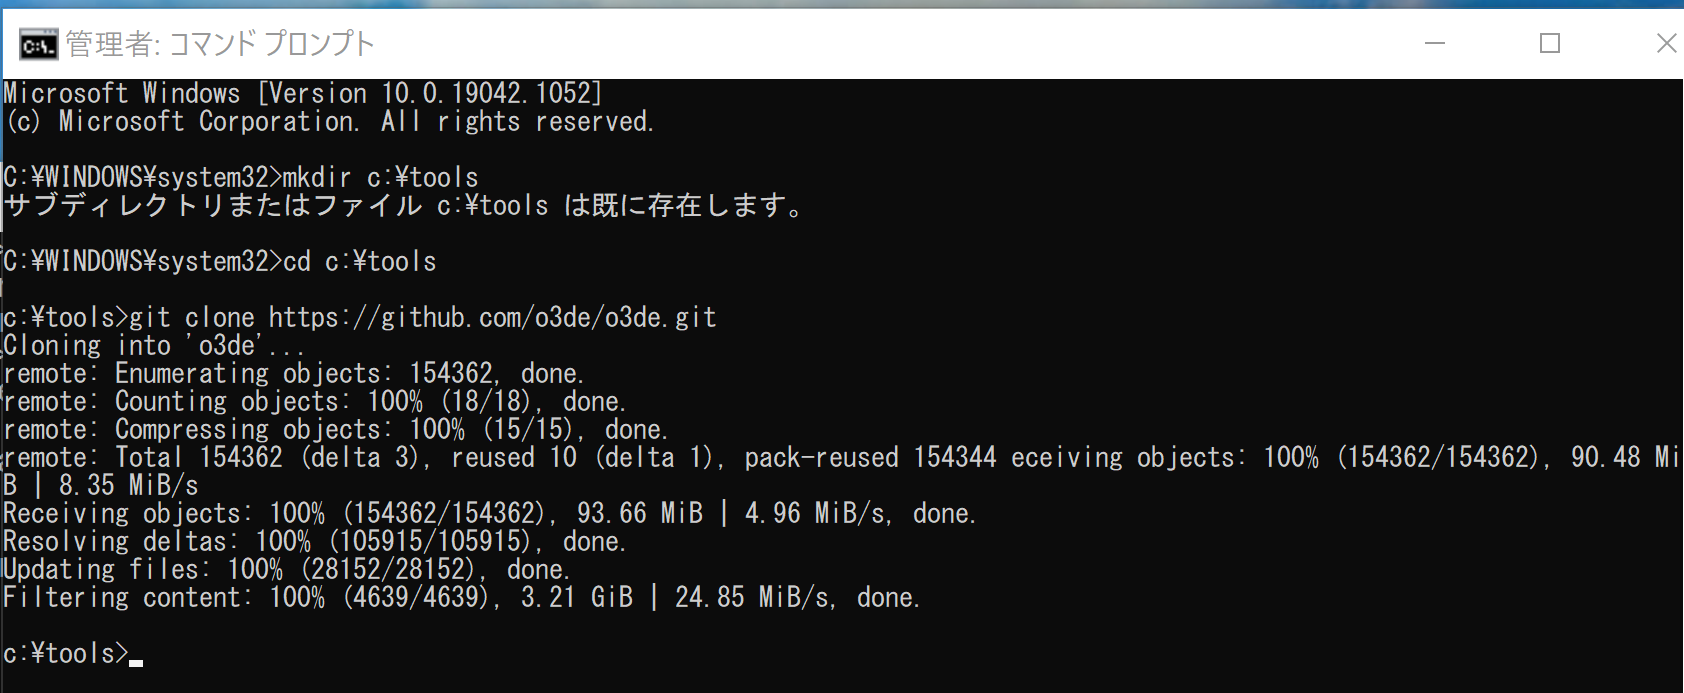
- Python ランタイムのインストール
get_python.batは,O3DE のスクリプトが使う Python ランタイムを取得する。このランタイムは O3DE 専用であり,システムに Python を別途インストールする必要はない。cd c:\tools\o3de python\get_python.bat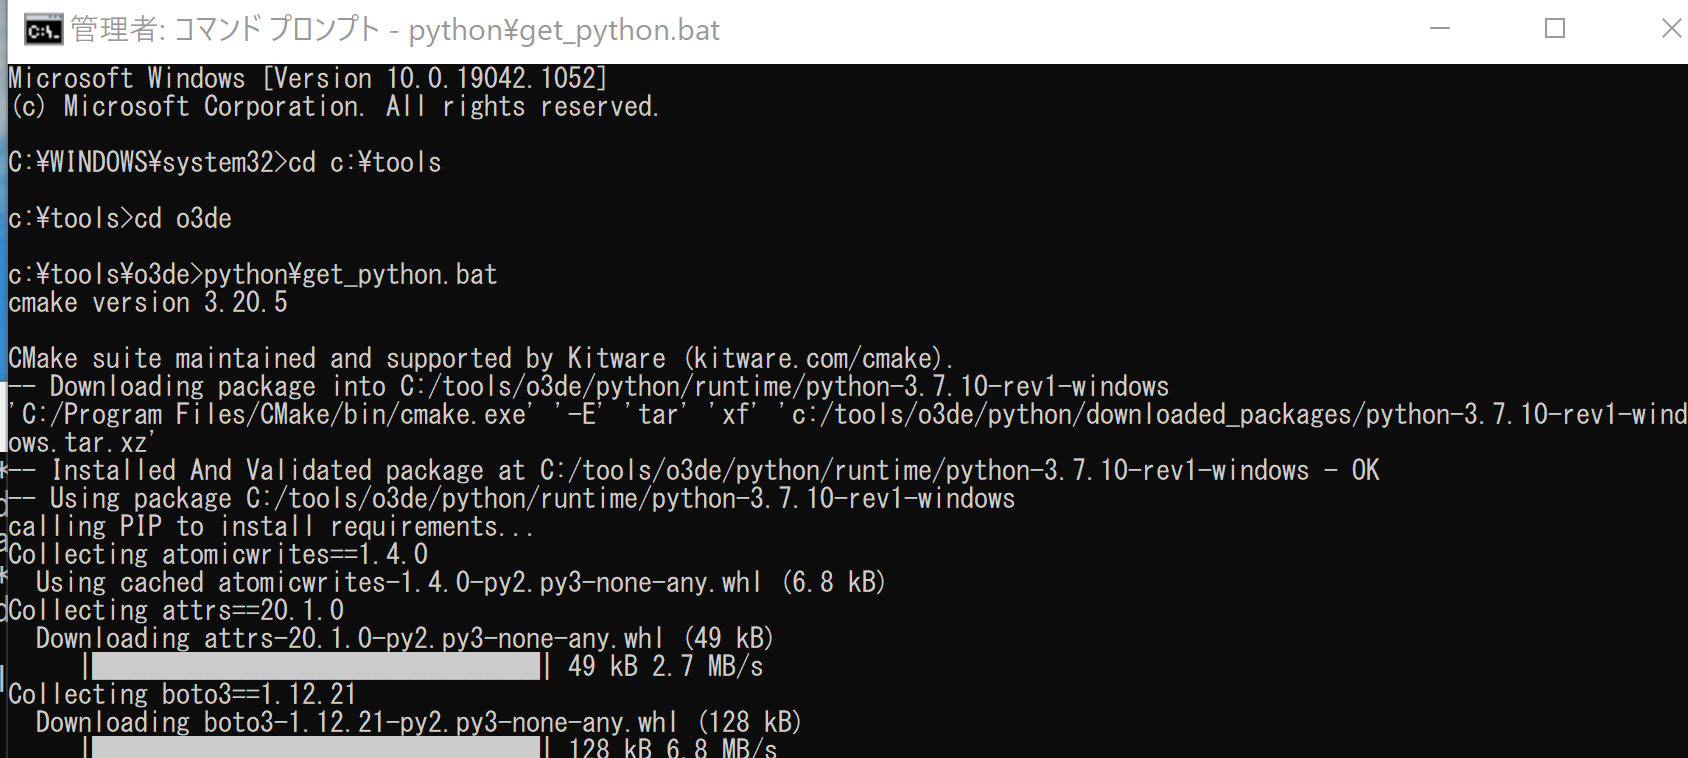
- CMake の実行(プロジェクトの構成)
外部ライブラリ(3rdParty)がダウンロードされる。
-DLY_3RDPARTY_PATHでその保存先を指定する。-Gで使用する Visual Studio のバージョンに応じたジェネレータを指定する。mkdir c:\o3de-packages cd c:\tools\o3de cmake -B build/windows -S . -G "Visual Studio 18 2026" -A x64 -DLY_3RDPARTY_PATH=c:/o3de-packages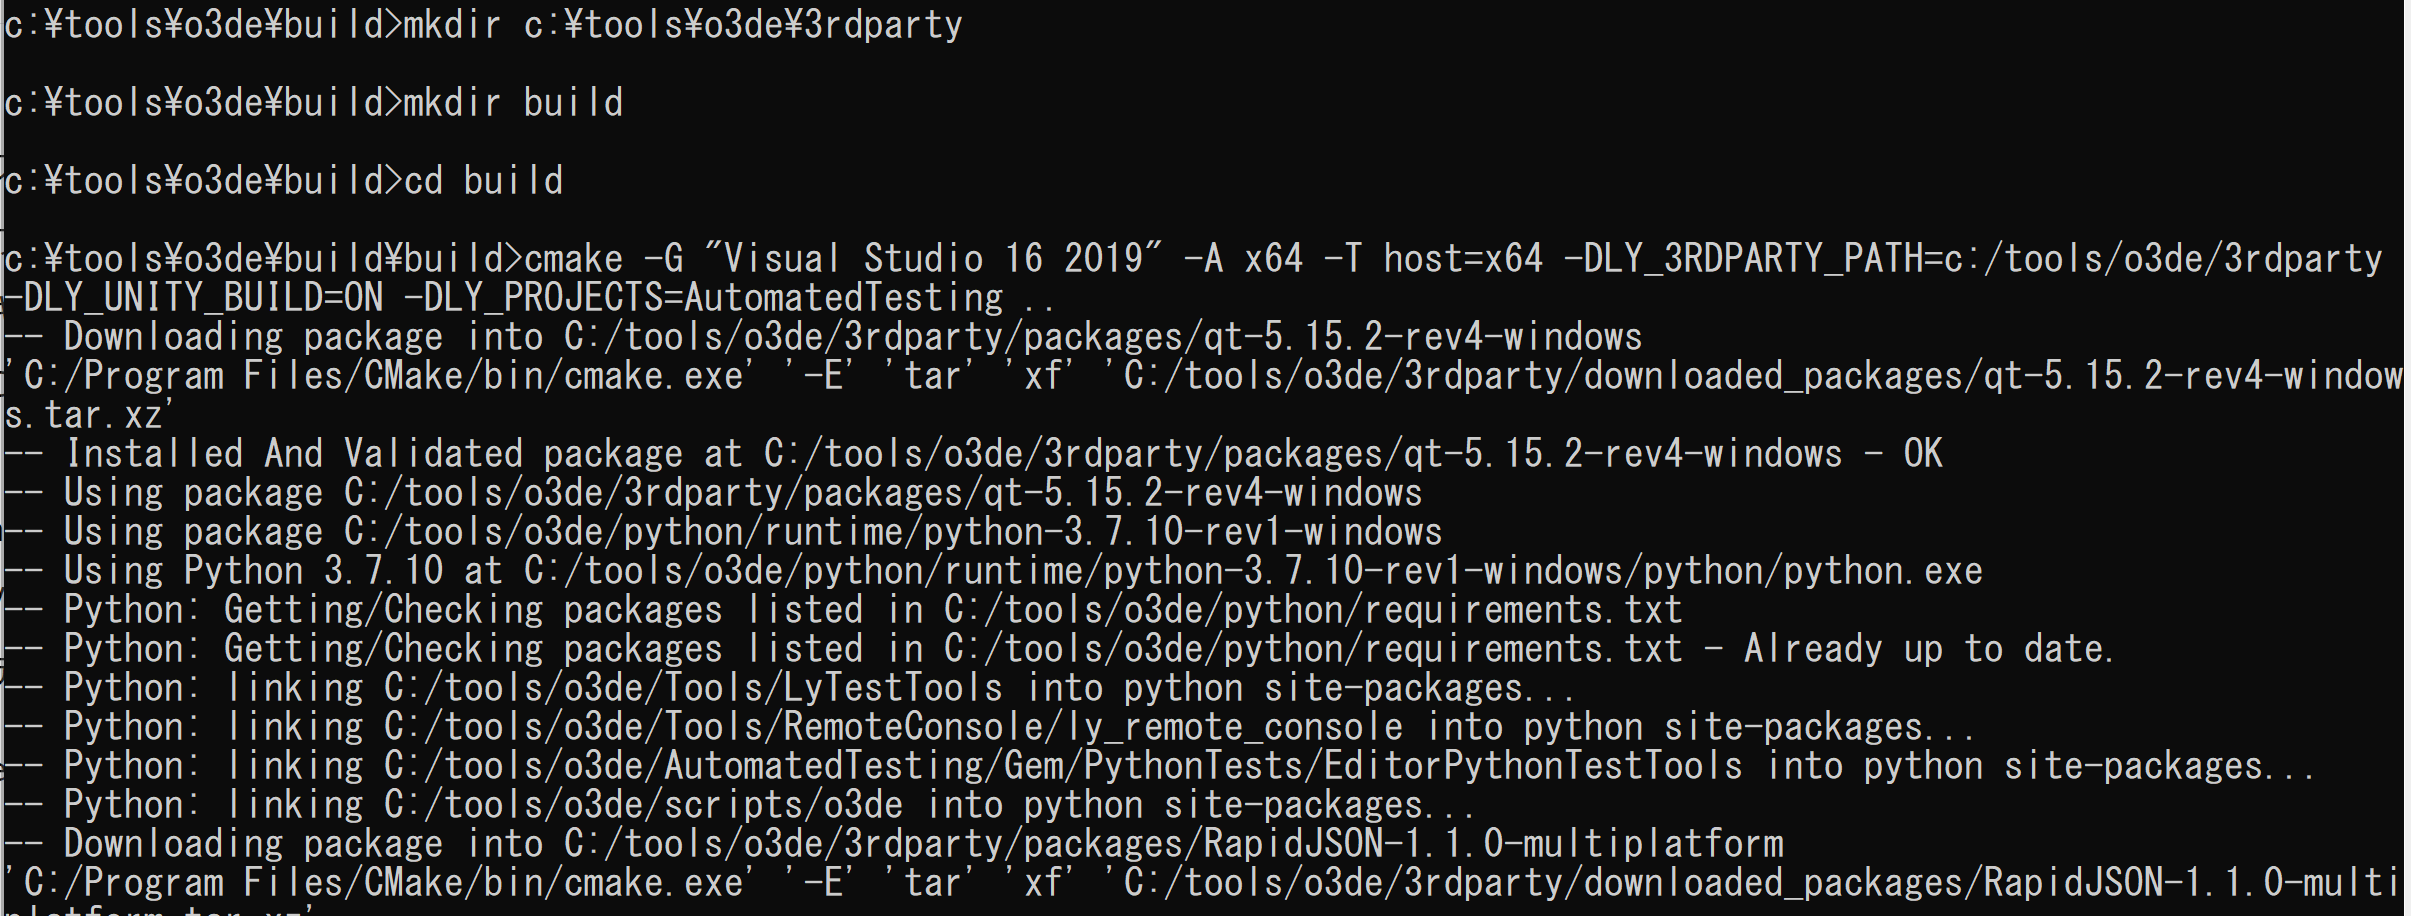
- エンジンのビルド
--config profileは,日常の開発に推奨されるビルド構成である。-- -mは MSVC に複数スレッドでのコンパイルを指示し,ビルド時間を短縮する。cmake --build build/windows --target Editor --config profile -- -m
- 終了の確認
エラーメッセージが出ていないことを確認する。ビルドされたツールやバイナリは
c:\tools\o3de\build\windows\bin\profileに生成される。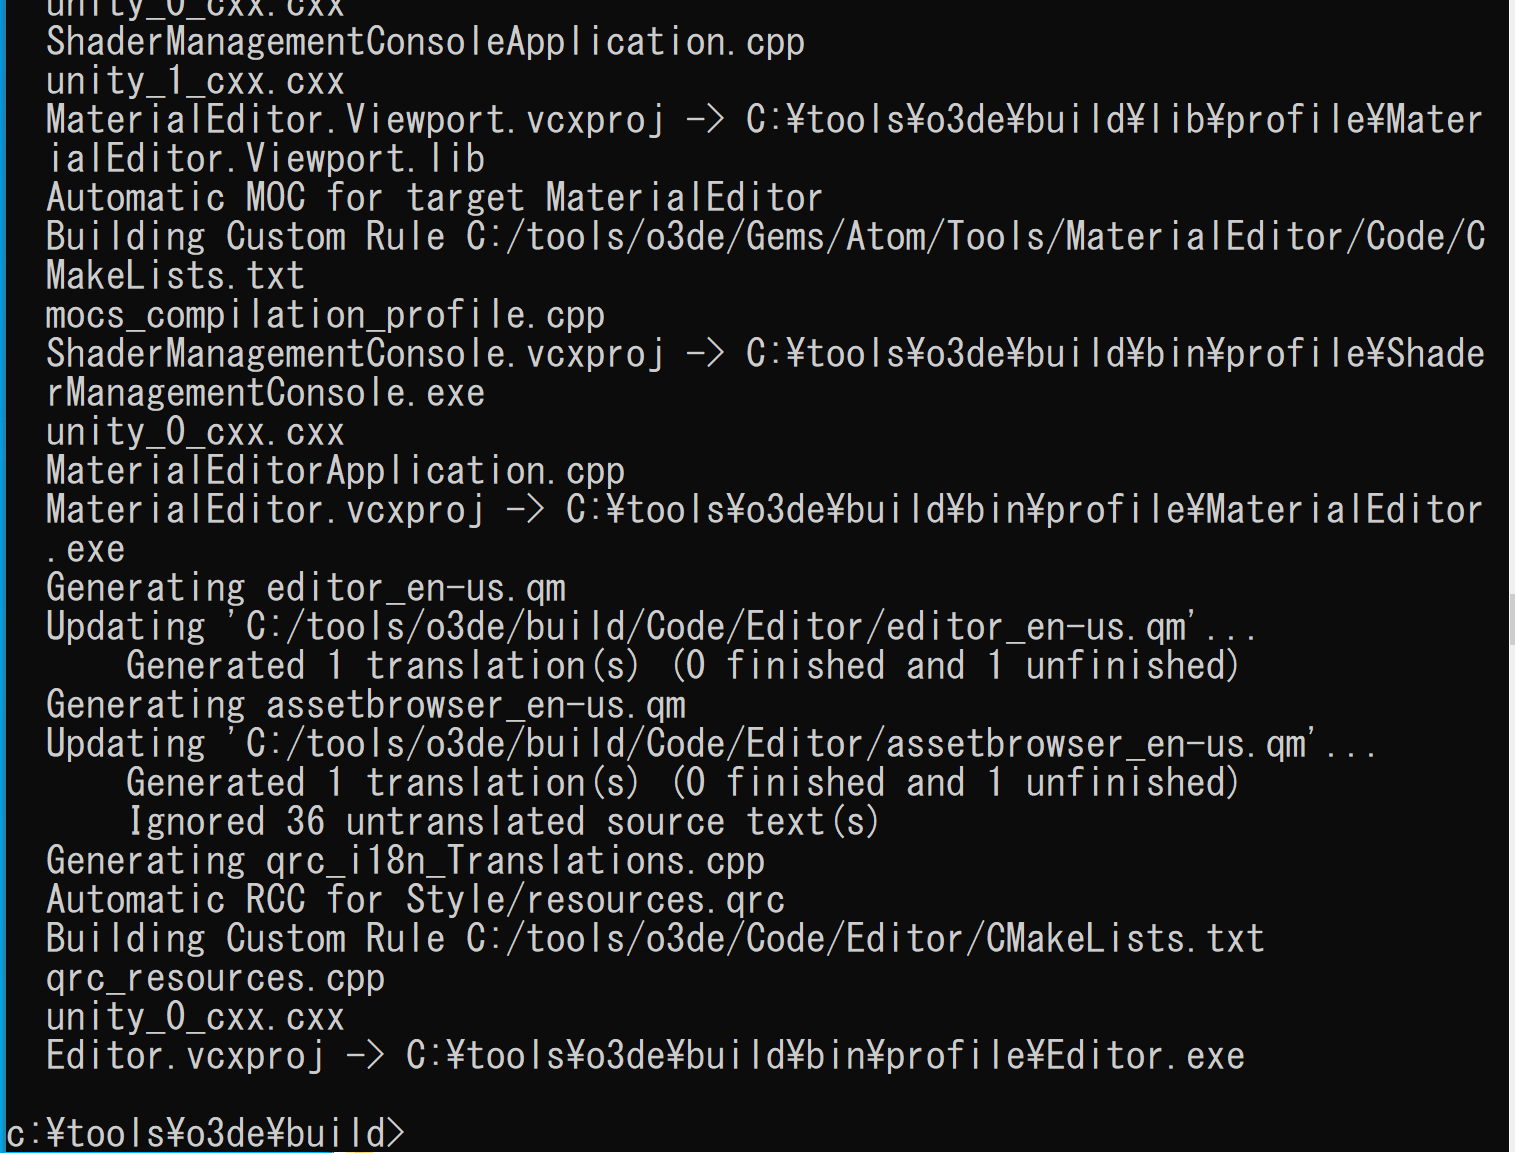
- エンジンの登録
ビルドしたエンジンを O3DE のマニフェストに登録する。これにより,別の場所にあるプロジェクトからもエンジンを見つけられるようになる。
cd c:\tools\o3de
scripts\o3de.bat register --this-engine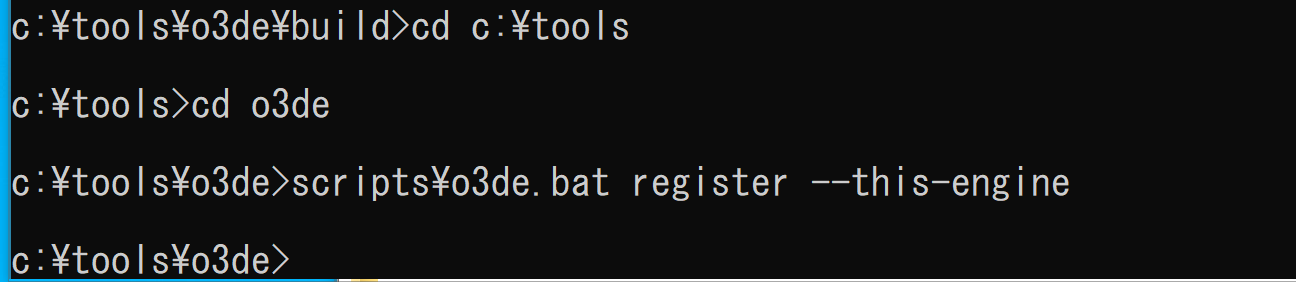
新しいプロジェクトの作成
- 新しいプロジェクトの作成と登録
「
c:\tools\o3de-project」のところには,プロジェクトのパスを指定する。cd c:\tools\o3de scripts\o3de.bat create-project --project-path c:\tools\o3de-project scripts\o3de.bat register --project-path c:\tools\o3de-project
- プロジェクトのビルド
エンジンのビルドと同じく,CMake でプロジェクトを構成してからビルドする。
cd c:\tools\o3de-project
cmake -B build/windows -S . -G "Visual Studio 18 2026" -A x64 -DLY_3RDPARTY_PATH=c:/o3de-packages
cmake --build build/windows --target Editor --config profile -- -m