PyTorch Mask R-CNN(ResNet50-FPN)による物体検出・インスタンスセグメンテーション
【概要】
本資料では、PyTorch の画像系ライブラリ torchvision に含まれる学習済み Mask R-CNN(ResNet50-FPN バックボーン、COCO データセットで学習済み)を用いて、画像中の物体ごとに矩形・クラス名・信頼度・マスクを求める物体検出とインスタンスセグメンテーションを行う。前準備、インストール、動作確認、二つの演習を通して、CPU のみでも動作する手順を示す。
【目次】
- 1. 前準備
- 2. PyTorch Mask R-CNN(torchvision)の実行
- 3. 演習1:学習済み Mask R-CNN による画像のインスタンスセグメンテーション
- 4. 演習2:検出結果の信頼度しきい値による絞り込み
【関連する外部ページ】
torchvision の物体検出モデルの公式ドキュメント: https://docs.pytorch.org/vision/stable/models/generated/torchvision.models.detection.maskrcnn_resnet50_fpn.html
【サイト内の関連情報】
GPU 利用のための環境構築(NVIDIA CUDA、Visual Studio、Cursor など): https://www.kkaneko.jp/cc/dev/aiassist.html
1. 前準備
ここでは、最低限の事前準備について説明する。GPU を用いて高速に実行したい場合は、NVIDIA CUDA、Visual Studio、Cursor などを追加で導入する。これらについては別ページ https://www.kkaneko.jp/cc/dev/aiassist.html で解説しているので、必要に応じて参照してほしい。なお、本資料の演習は CPU のみでも動作する。
Python 3.12 のインストール
Pythonのインストールを行い、Pythonのプログラムを実行する環境を整える。扱う環境は、Windows搭載パソコンである。金子研究室では、Python 3.12.10を推奨する。
[Windows での Python 3.12 のインストール手順を見るには、ここをクリック]
Windows での Python 3.12 のインストール
以下のいずれかの方法でPython 3.12をインストールする。Pythonがインストール済みの場合、この手順は不要である。
方法 1:winget によるインストール
【インストールコマンドの実行方法】
管理者権限でコマンドプロンプトを起動する(手順:Windowsキーまたはスタートメニュー → cmd と入力 → 右クリック → 「管理者として実行」)。そして、コマンド全体をコマンドプロンプトにコピー&ペーストする。
--scope machine を指定することで、システム全体(全ユーザー向け)にインストールされる。このオプションの実行には管理者権限が必要である。インストール完了後、コマンドプロンプトを再起動するとPATHが反映される。
REM Python 3.12 をシステム領域にインストール
winget install --id Python.Python.3.12 -e --scope machine --silent --accept-source-agreements --accept-package-agreements --override "/quiet InstallAllUsers=1 PrependPath=1 Include_test=0 Include_pip=1 Include_launcher=1 InstallLauncherAllUsers=1 TargetDir=\"C:\Program Files\Python312\""

REM Python と Scripts を PATH 先頭に追加
powershell -NoProfile -Command "$p='C:\Program Files\Python312'; $s=\"$p\Scripts\"; $c=[Environment]::GetEnvironmentVariable('Path','Machine'); if((Test-Path $p) -and (';'+$c+';' -notlike \"*;$p;*\") -and (';'+$c+';' -notlike \"*;$s;*\")){[Environment]::SetEnvironmentVariable('Path',\"$p;$s;$c\",'Machine')}"
方法 2:インストーラーによるインストール
- Python公式サイト(https://www.python.org/downloads/)にアクセスし、「Download Python 3.x.x」ボタンからWindows用インストーラーをダウンロードする。
- ダウンロードしたインストーラーを実行する。
- 初期画面の下部に表示される「Add python.exe to PATH」にチェックを入れてから「Customize installation」を選択する。このチェックを入れ忘れると、コマンドプロンプトから
pythonコマンドを実行できない。 - 「Install Python 3.xx for all users」にチェックを入れ、「Install」をクリックする。
インストールの確認
コマンドプロンプトで以下を実行する。
python --versionバージョン番号(例:Python 3.12.x)が表示されればインストール成功である。「'python' は、内部コマンドまたは外部コマンドとして認識されていません。」と表示される場合は、インストールが正常に完了していない。
Build Tools・CUDA Toolkit・PyTorch のインストール
本章では、C++ ビルドツール、NVIDIA CUDA Toolkit、PyTorch のインストールを行い、GPU を活用した機械学習プログラムを実行する環境を整える。扱う環境は、Windows 搭載パソコンである。
[Build Tools・CUDA Toolkit・PyTorch のインストール手順を見るには、ここをクリック]
Windows での Build Tools for Visual Studio 2026 のインストール
Build Tools for Visual Studio 2026 は、C++ ソースコードを Windows 用バイナリにコンパイルするための開発ツール群である。unsloth 等の一部 Python パッケージは、インストール時に C++ コードのビルドを必要とするため、これらのツールが必須となる。
以下のコマンドは、Build Tools が未インストールの場合は winget で新規インストールし、インストール済みの場合は setup.exe modify でコンポーネントを追加する(バージョンは変更しない)。
【インストールコマンドの実行方法】
管理者権限でコマンドプロンプトを起動する(手順:Windows キーまたはスタートメニュー → cmd と入力 → 右クリック → 「管理者として実行」)。そして、コマンド全体をコマンドプロンプトにコピー&ペーストする。
REM VC++ ランタイム
winget install --scope machine --id Microsoft.VCRedist.2015+.x64 -e --silent --disable-interactivity --force --accept-source-agreements --accept-package-agreements --override "/quiet /norestart"

REM ============================================================
REM Visual Studio Build Tools + Desktop development with C++
REM (VCTools、MSBuildTools、CMake連携、Clang、Windows 11 SDK)
REM ============================================================
REM 進行中のインストーラーを停止(ロック競合回避)
taskkill /F /IM vs_setup.exe /T >nul 2>&1
taskkill /F /IM vs_installer.exe /T >nul 2>&1
taskkill /F /IM vs_installerservice.exe /T >nul 2>&1

REM 未インストール時: winget で新規インストール
REM インストール済み時: setup.exe modify でコンポーネント追加(バージョンは変更しない)
winget list --id Microsoft.VisualStudio.BuildTools 2>nul | findstr /i "BuildTools" >nul 2>&1
if %ERRORLEVEL% EQU 0 (
    for /f "usebackq delims=" %P in (`"C:\Program Files (x86)\Microsoft Visual Studio\Installer\vswhere.exe" -products Microsoft.VisualStudio.Product.BuildTools -property installationPath`) do start /wait "" "C:\Program Files (x86)\Microsoft Visual Studio\Installer\setup.exe" modify --installPath "%P" --add Microsoft.VisualStudio.Workload.VCTools --add Microsoft.VisualStudio.Workload.MSBuildTools --add Microsoft.VisualStudio.Component.VC.CMake.Project --add Microsoft.VisualStudio.Component.VC.Llvm.Clang --add Microsoft.VisualStudio.Component.VC.Llvm.ClangToolset --add Microsoft.VisualStudio.Component.Windows11SDK.26100 --includeRecommended --quiet --norestart --nocache
) else (
    winget install --scope machine --id Microsoft.VisualStudio.BuildTools -e --silent --disable-interactivity --force --accept-source-agreements --accept-package-agreements --override "--quiet --wait --norestart --nocache --add Microsoft.VisualStudio.Workload.VCTools --includeRecommended --add Microsoft.VisualStudio.Workload.MSBuildTools --add Microsoft.VisualStudio.Component.VC.CMake.Project --add Microsoft.VisualStudio.Component.VC.Llvm.Clang --add Microsoft.VisualStudio.Component.VC.Llvm.ClangToolset --add Microsoft.VisualStudio.Component.Windows11SDK.26100"
)

REM 破損時の修復(任意、動作がおかしくなった場合)
REM "C:\Program Files (x86)\Microsoft Visual Studio\Installer\setup.exe" repair --installPath "C:\Program Files (x86)\Microsoft Visual Studio\18\BuildTools" --quiet --norestart

REM 導入確認(インストールパスが表示されれば正常)
"C:\Program Files (x86)\Microsoft Visual Studio\Installer\vswhere.exe" -products * -requires Microsoft.VisualStudio.Workload.VCTools -property installationPath
上記のコマンドでは、Build Tools 本体と Visual C++ 再頒布可能パッケージをインストールし、続いて以下のコンポーネントを追加している。
- VCTools:C++ デスクトップ開発ワークロード(
--includeRecommendedにより、MSVC コンパイラ、C++ AddressSanitizer、vcpkg、CMake ツール、Windows 11 SDK 等の推奨コンポーネントが含まれる) - MSBuildTools:MSBuild によるビルドツールのワークロード
- VC.CMake.Project:Windows 向け C++ CMake ツール
- VC.Llvm.Clang:Windows 向け C++ Clang コンパイラ
- VC.Llvm.ClangToolset:MSBuild から Clang を使用するための clang-cl ツールセット
- Windows11SDK.26100:Windows 11 SDK(ビルド 10.0.26100)
追加のコンポーネントが必要になった場合は Visual Studio Installer で個別にインストールできる。
Windows での NVIDIA CUDA Toolkit のインストール
NVIDIA CUDA Toolkit は、NVIDIA GPU 上で計算を行うためのコンパイラ・ライブラリ群である。PyTorch や vLLM 等が GPU を利用するために必要となる。GPU を使用しない場合、この手順は不要である。
前提条件:NVIDIA GPU、NVIDIA ドライバ、Build Tools for Visual Studio もしくは Visual Studio が必要である。
インストール中の注意:他のウインドウは閉じておくこと。
【インストールコマンドの実行方法】
管理者権限でコマンドプロンプトを起動する(手順:Windows キーまたはスタートメニュー → cmd と入力 → 右クリック → 「管理者として実行」)。そして、コマンド全体をコマンドプロンプトにコピー&ペーストする。
REM NVIDIA CUDA Toolkit 12.8 をシステム領域にインストール
winget install --scope machine --id Nvidia.CUDA --version 12.8 -e --silent --disable-interactivity --force --uninstall-previous --accept-source-agreements --accept-package-agreements --override "-s -n"

REM 環境変数TEMP, TMPの設定(一時ファイルの保存先を短いパスに変更)
mkdir C:\TEMP
setx TEMP "C:\TEMP" /M
setx TMP "C:\TEMP" /M
環境変数 TEMP および TMP を C:\TEMP に変更しているのは、後続のインストール処理で長いパス名や空白を含むパス名がエラーの原因となる場合があるためである。
Windows での PyTorch のインストール
https://pytorch.org のインストールガイドに従い、自環境の CUDA バージョンに対応したコマンドを取得して実行する。CUDA バージョンは以下で確認できる。
nvcc --versionPython 3.12、CUDA 12.6 以上の場合は、管理者権限でコマンドプロンプトを起動し、以下を実行する。cu128 は CUDA 12.8 用のタグである。CUDA バージョンが異なる場合は、上記公式サイトで該当するタグを確認し、URL 末尾の cu128 を置き換えること。
pip install --no-user -U numpy torch torchvision torchaudio --index-url https://download.pytorch.org/whl/cu128以降の章では、必要に応じて題材に応じた必要なソフトウェアを追加する。
Python の開発環境 Visual Studio Code のインストールと Python 用の設定
Python の開発環境Visual Studio Code(プログラムを編集するソフトウェア。以下、VS Code)を整える。
[Windows での Visual Studio Code のインストールと Python 用の設定手順を見るには、ここをクリック]
Windows での Visual Studio Code のインストールと Python 用の設定手順
1. VS Code と拡張機能のインストール
以下のコマンドにより,既存の VS Code を削除し,全ユーザー共有の設定で再インストールしたうえで,拡張機能(VS Code に機能を追加するソフトウェア)をまとめて導入する.
【インストールコマンドの実行方法】
管理者権限でコマンドプロンプトを起動する(手順:Windows キーまたはスタートメニュー → cmd と入力 → 右クリック → 「管理者として実行」)。そして,コマンド全体をコマンドプロンプトにコピー&ペーストする。
インストールコマンド
REM ============================================================
REM Microsoft Visual Studio Code
REM ============================================================
winget uninstall -e --id Microsoft.VisualStudioCode --silent --disable-interactivity --accept-source-agreements
rmdir /s /q C:\ProgramData\vscode-extensions 2>nul
rmdir /s /q "%APPDATA%\Code" 2>nul
rmdir /s /q "%USERPROFILE%\.vscode" 2>nul
rmdir /s /q "%LOCALAPPDATA%\Microsoft\vscode-update" 2>nul

REM VS Code をシステム領域に新規インストール
winget install --scope machine --id Microsoft.VisualStudioCode -e --silent --accept-source-agreements --accept-package-agreements

REM 全ユーザー共有の拡張機能フォルダ
mkdir C:\ProgramData\vscode-extensions 2>nul
icacls "C:\ProgramData\vscode-extensions" /grant "Everyone:(OI)(CI)M" /T

REM スタートメニューのショートカットを --extensions-dir 付きで再作成
rmdir /s /q "C:\ProgramData\Microsoft\Windows\Start Menu\Programs\Visual Studio Code" 2>nul
del "C:\ProgramData\Microsoft\Windows\Start Menu\Programs\Visual Studio Code.lnk" 2>nul
powershell -NoProfile -Command "$s=New-Object -ComObject WScript.Shell; $lnk=$s.CreateShortcut('C:\ProgramData\Microsoft\Windows\Start Menu\Programs\Visual Studio Code.lnk'); $lnk.TargetPath='C:\Program Files\Microsoft VS Code\Code.exe'; $lnk.Arguments='--extensions-dir \"C:\ProgramData\vscode-extensions\"'; $lnk.Save()"
REM ショートカットの検証
powershell -NoProfile -Command "$s=New-Object -ComObject WScript.Shell; $lnk=$s.CreateShortcut('C:\ProgramData\Microsoft\Windows\Start Menu\Programs\Visual Studio Code.lnk'); Write-Host 'TargetPath:' $lnk.TargetPath; Write-Host 'Arguments:' $lnk.Arguments"

REM ファイル / フォルダ右クリックの「Code で開く」を登録
reg add "HKLM\SOFTWARE\Classes\*\shell\VSCode\command" /ve /d "\"C:\Program Files\Microsoft VS Code\Code.exe\" --extensions-dir \"C:\ProgramData\vscode-extensions\" \"%1\"" /f
reg add "HKLM\SOFTWARE\Classes\Directory\shell\VSCode\command" /ve /d "\"C:\Program Files\Microsoft VS Code\Code.exe\" --extensions-dir \"C:\ProgramData\vscode-extensions\" \"%1\"" /f
reg add "HKLM\SOFTWARE\Classes\Directory\Background\shell\VSCode\command" /ve /d "\"C:\Program Files\Microsoft VS Code\Code.exe\" --extensions-dir \"C:\ProgramData\vscode-extensions\" \"%V\"" /f

REM --extensions-dir 付きで起動する code.cmd ラッパを作成
REM (%* を echo で書くと対話的 cmd で失われるため、PowerShell で [char]37+'*' を書き出す)
powershell -NoProfile -Command "$pct=[char]37; $q=[char]34; $c='@echo off'+[char]13+[char]10+$q+'C:\Program Files\Microsoft VS Code\bin\code.cmd'+$q+' --extensions-dir '+$q+'C:\ProgramData\vscode-extensions'+$q+' '+$pct+'*'+[char]13+[char]10; [IO.File]::WriteAllText('C:\ProgramData\vscode-extensions\vscode.cmd',$c,[Text.Encoding]::ASCII)"

REM 拡張機能のインストール
set "CODE=C:\Program Files\Microsoft VS Code\bin\code.cmd"
"%CODE%" --extensions-dir "C:\ProgramData\vscode-extensions" --uninstall-extension GitHub.copilot
"%CODE%" --extensions-dir "C:\ProgramData\vscode-extensions" --uninstall-extension GitHub.copilot-chat
"%CODE%" --extensions-dir "C:\ProgramData\vscode-extensions" --install-extension ms-python.python
"%CODE%" --extensions-dir "C:\ProgramData\vscode-extensions" --install-extension ms-python.vscode-pylance
"%CODE%" --extensions-dir "C:\ProgramData\vscode-extensions" --install-extension ms-python.debugpy
"%CODE%" --extensions-dir "C:\ProgramData\vscode-extensions" --install-extension MS-CEINTL.vscode-language-pack-ja
"%CODE%" --extensions-dir "C:\ProgramData\vscode-extensions" --install-extension saoudrizwan.claude-dev
"%CODE%" --extensions-dir "C:\ProgramData\vscode-extensions" --install-extension rust-lang.rust-analyzer
"%CODE%" --extensions-dir "C:\ProgramData\vscode-extensions" --install-extension tamasfe.even-better-toml
"%CODE%" --extensions-dir "C:\ProgramData\vscode-extensions" --install-extension anthropic.claude-code
"%CODE%" --extensions-dir "C:\ProgramData\vscode-extensions" --install-extension almenon.arepl
"%CODE%" --extensions-dir "C:\ProgramData\vscode-extensions" --list-extensions --show-versions
echo === セットアップ完了 ===
2. Python インタプリタの選択
同一マシンに複数の Python がインストールされている場合,VS Code で使用する Python 本体(インタプリタ:Python プログラムを解釈・実行するソフトウェア)を選択する必要がある.
- コマンドパレット(コマンド名で機能を呼び出す VS Code の入力欄)を開く(
Ctrl+Shift+P) Python: Select Interpreterと入力する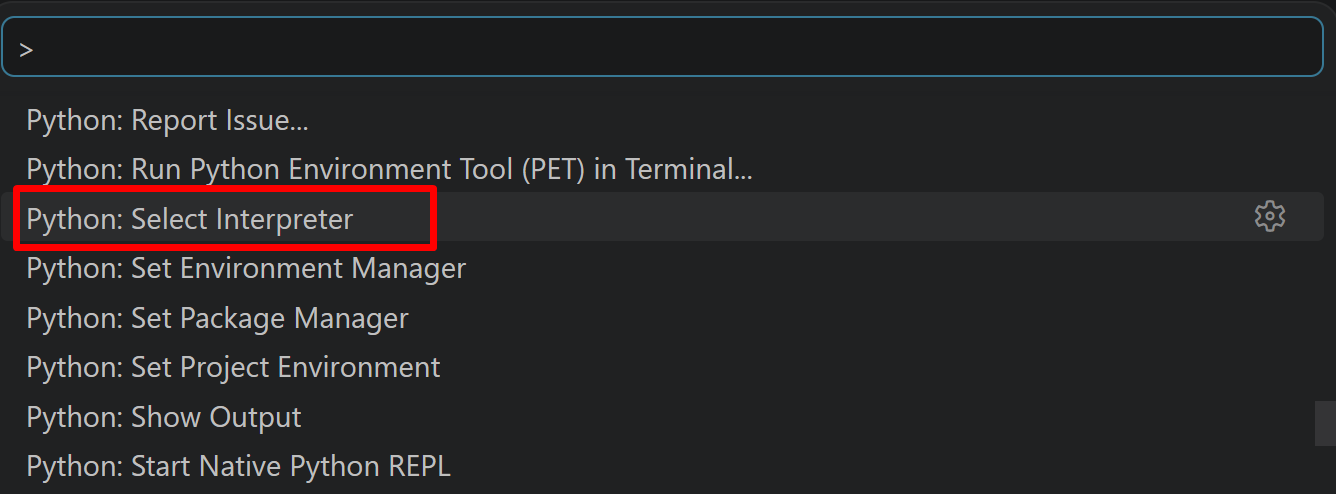
- 表示される一覧から,使用する Python(例:
C:\Program Files\Python312\python.exe)を選択する.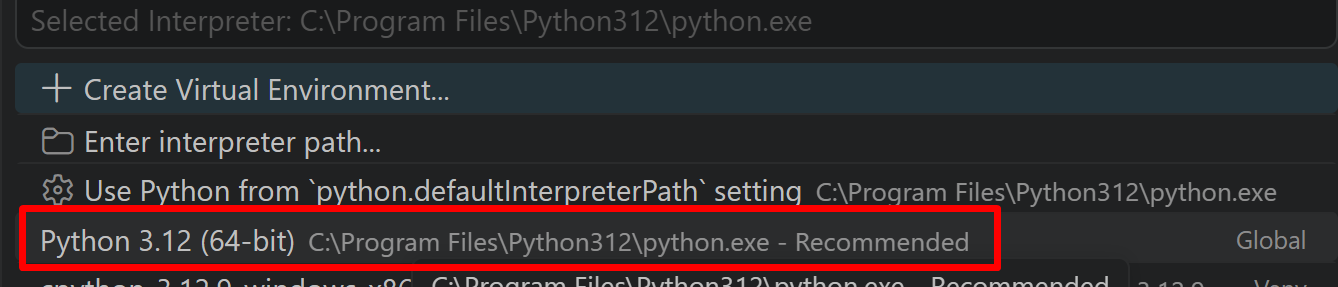
必要なライブラリのインストール
- 以下の手順を管理者権限でコマンドプロンプトを起動する
(手順:Windowsキーまたはスタートメニュー →
cmdと入力 → 右クリック → 「管理者として実行」)。 - 必要なパッケージのインストール
torch、torchvision、および画像の読み込み・表示に用いる numpy、matplotlib、Pillow をインストールする。
python -m pip install -U --no-user pip
python -m pip install -U --no-user numpy matplotlib pillow
学習済みモデルの重み(約170MB)は、後述のコードを初めて実行したときに自動でダウンロードされ、ユーザーのキャッシュフォルダに保存される。次回以降はダウンロードされたファイルが再利用される。
Python プログラム実行手順
[Windows での Python プログラム実行手順を見るには、ここをクリック]
Windows での Python 実行手順(Visual Studio Codeを使用)
プログラムファイルの作成と保存
- 左サイドバーの「エクスプローラー」アイコン(
Ctrl+Shift+E)をクリックする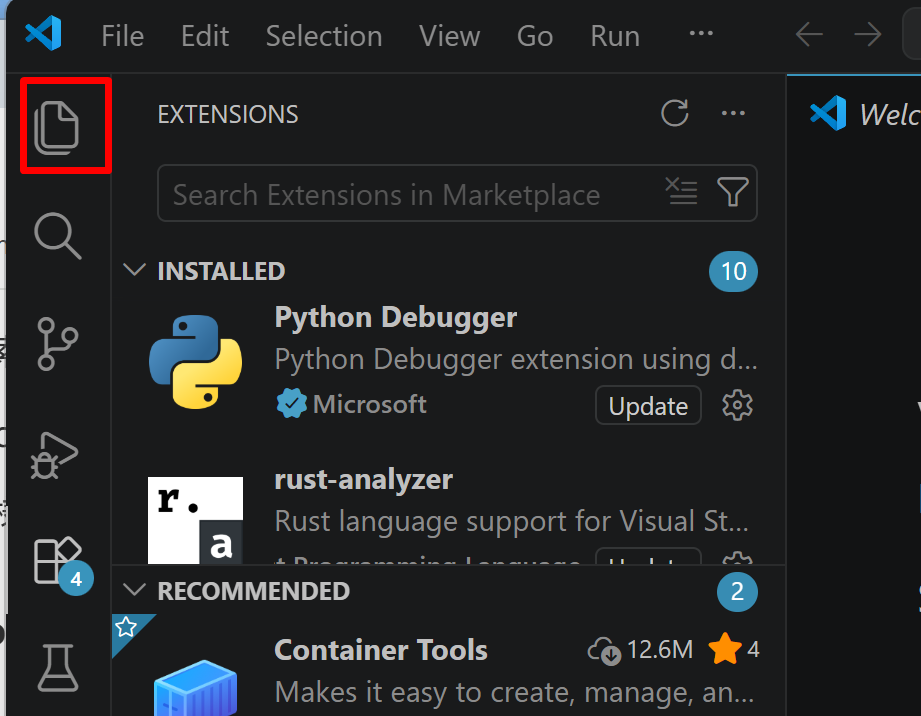
- 「NO FOLDER OPENED」(作業対象フォルダが未選択の状態)と表示される場合は,「Open Folder」をクリックし,プログラムを保存するフォルダを選択する
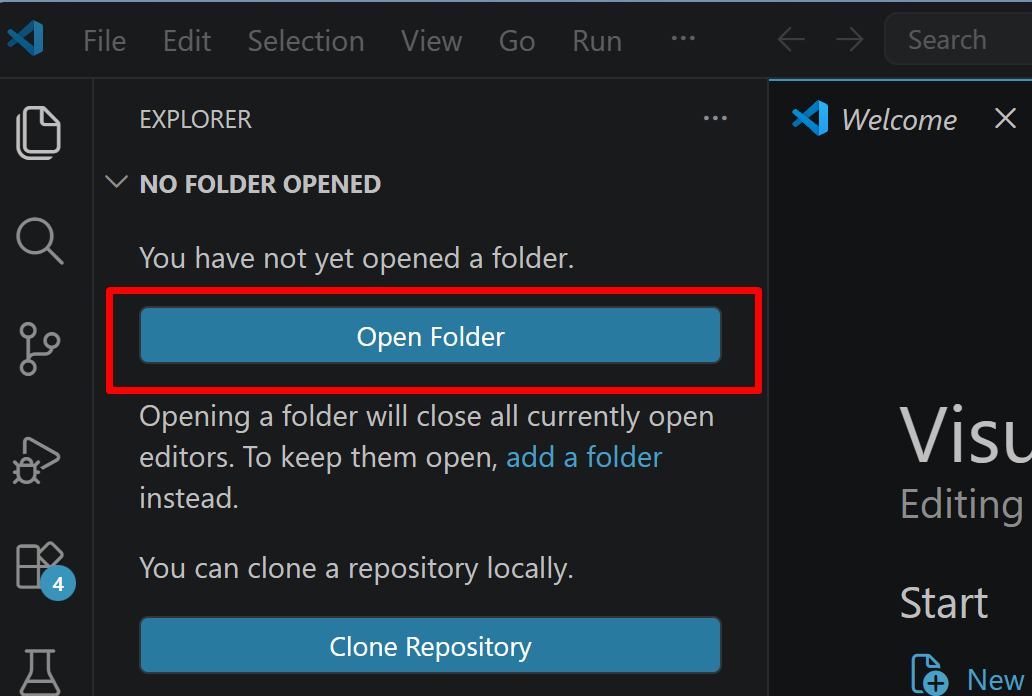
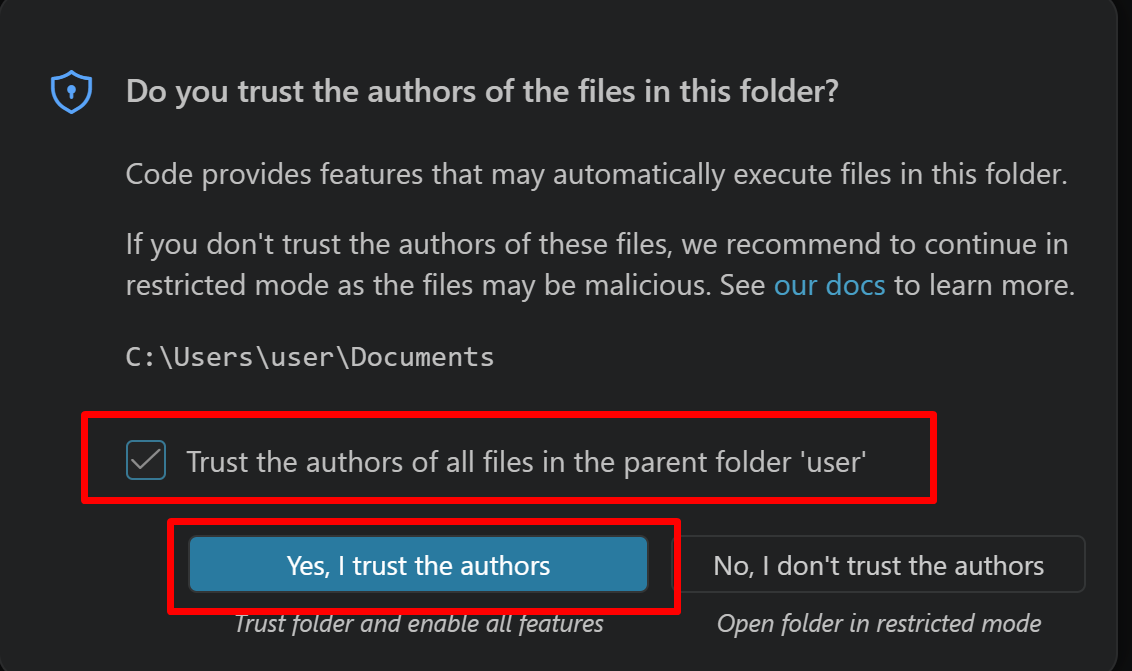
続いて「フォルダを信用するか」を確認する画面(フォルダ内のコードを実行してよいか確認する VS Code の仕組み)が表示されるので,チェックして Yes を選択する
- フォルダ名の右側に表示される「新しいファイル」アイコンをクリックする
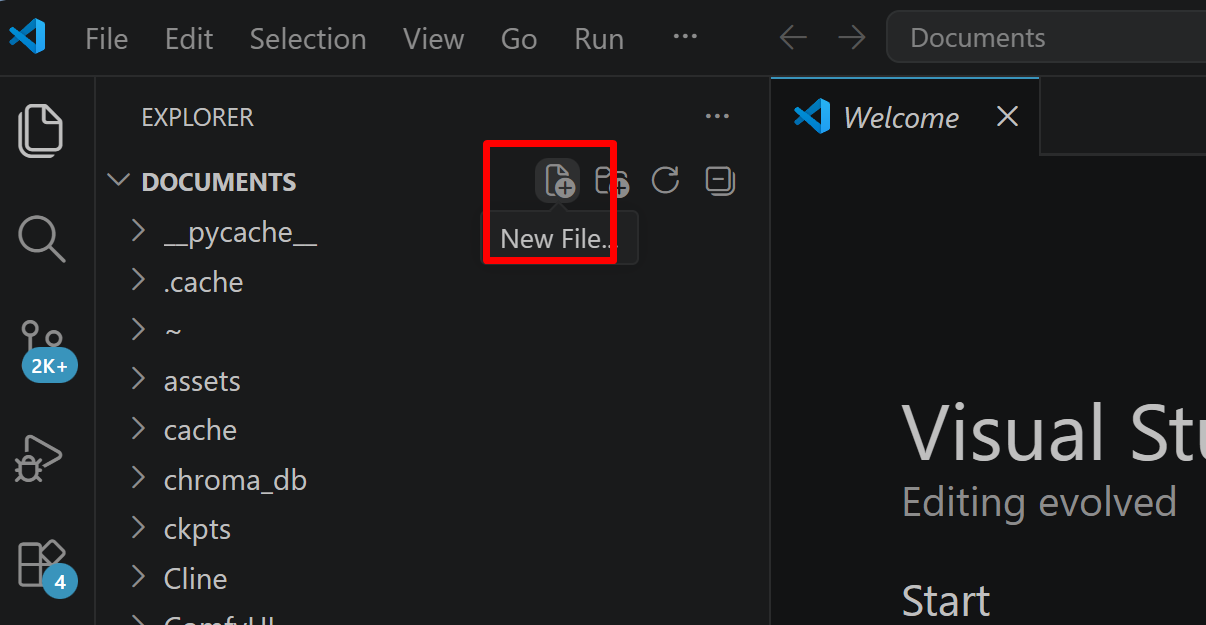
- ファイル名(例:
aitask.py.ファイル名は何でも良い)を入力しEnterを押す.拡張子は.py(Python ファイルを示す拡張子)とする
- 実行したいコードを選択し,
Ctrl+Cでコピーする.VS Code のエディタ領域にCtrl+Vで貼り付ける Ctrl+Sで保存する
プログラムの実行
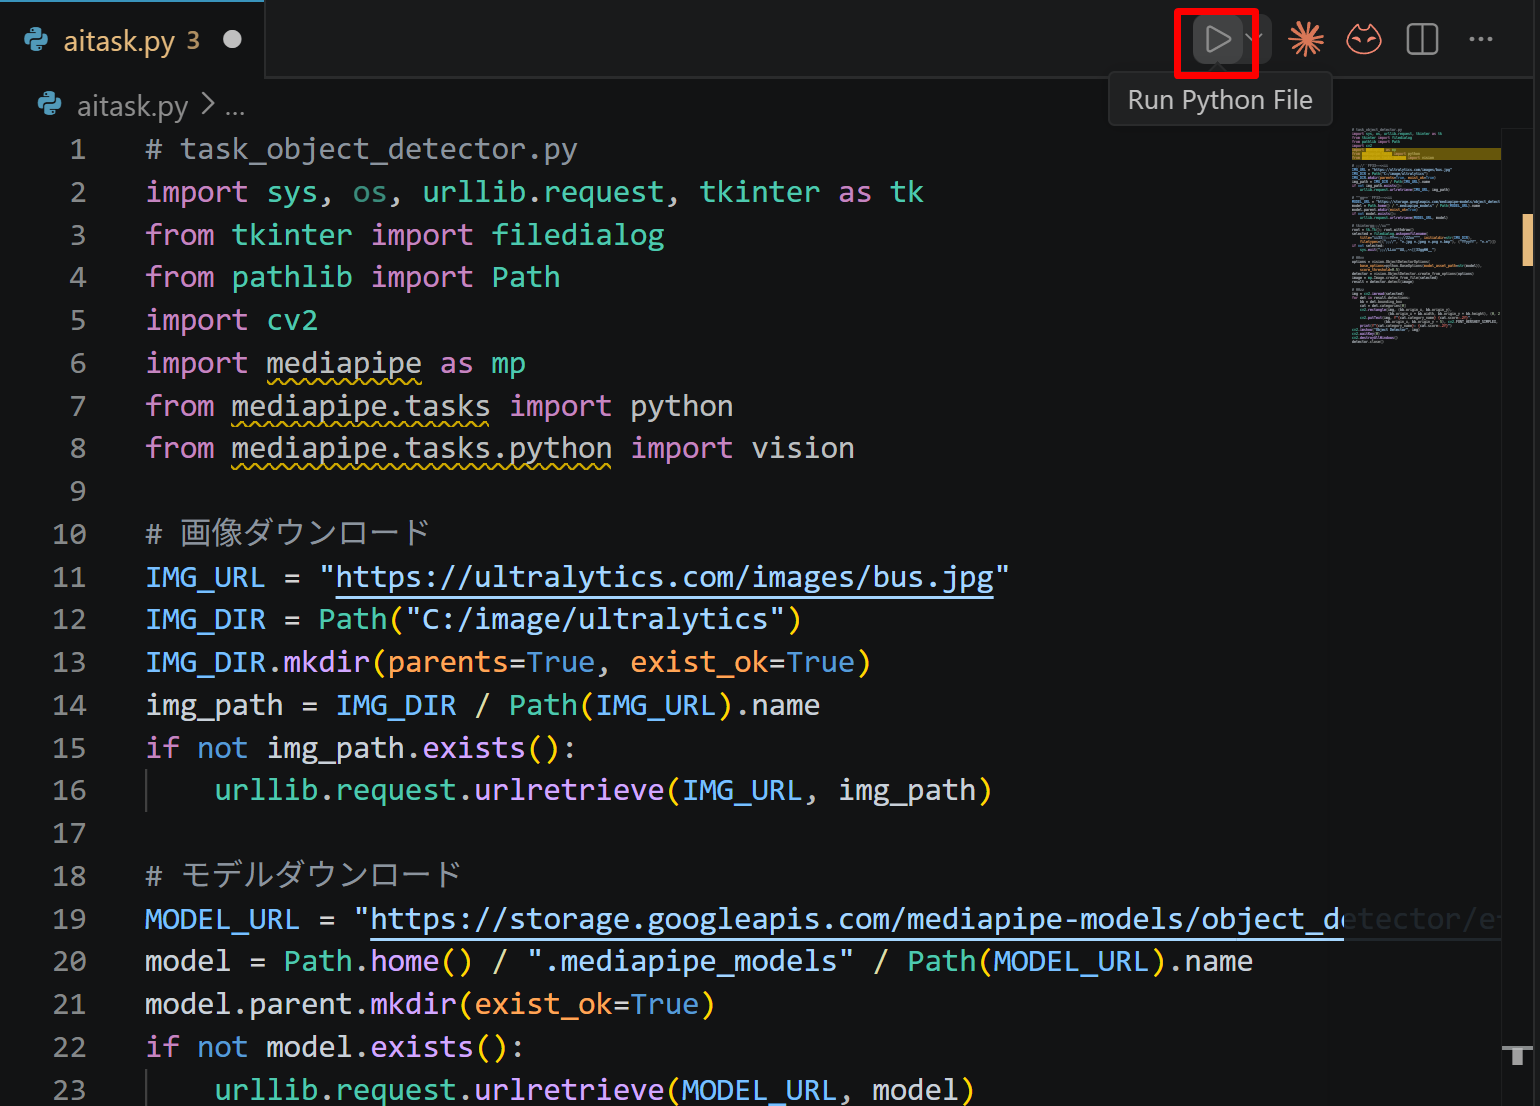
- エディタ右上の三角形「▷」アイコン(Run Python File:現在開いている Python ファイルを実行するボタン)をクリックする.または,エディタ上で右クリックし「ターミナルで Python ファイルを実行」を選択する
- VS Code 下部のターミナル(コマンドの入出力を表示する画面)に,実行結果(
print関数の出力等)が表示される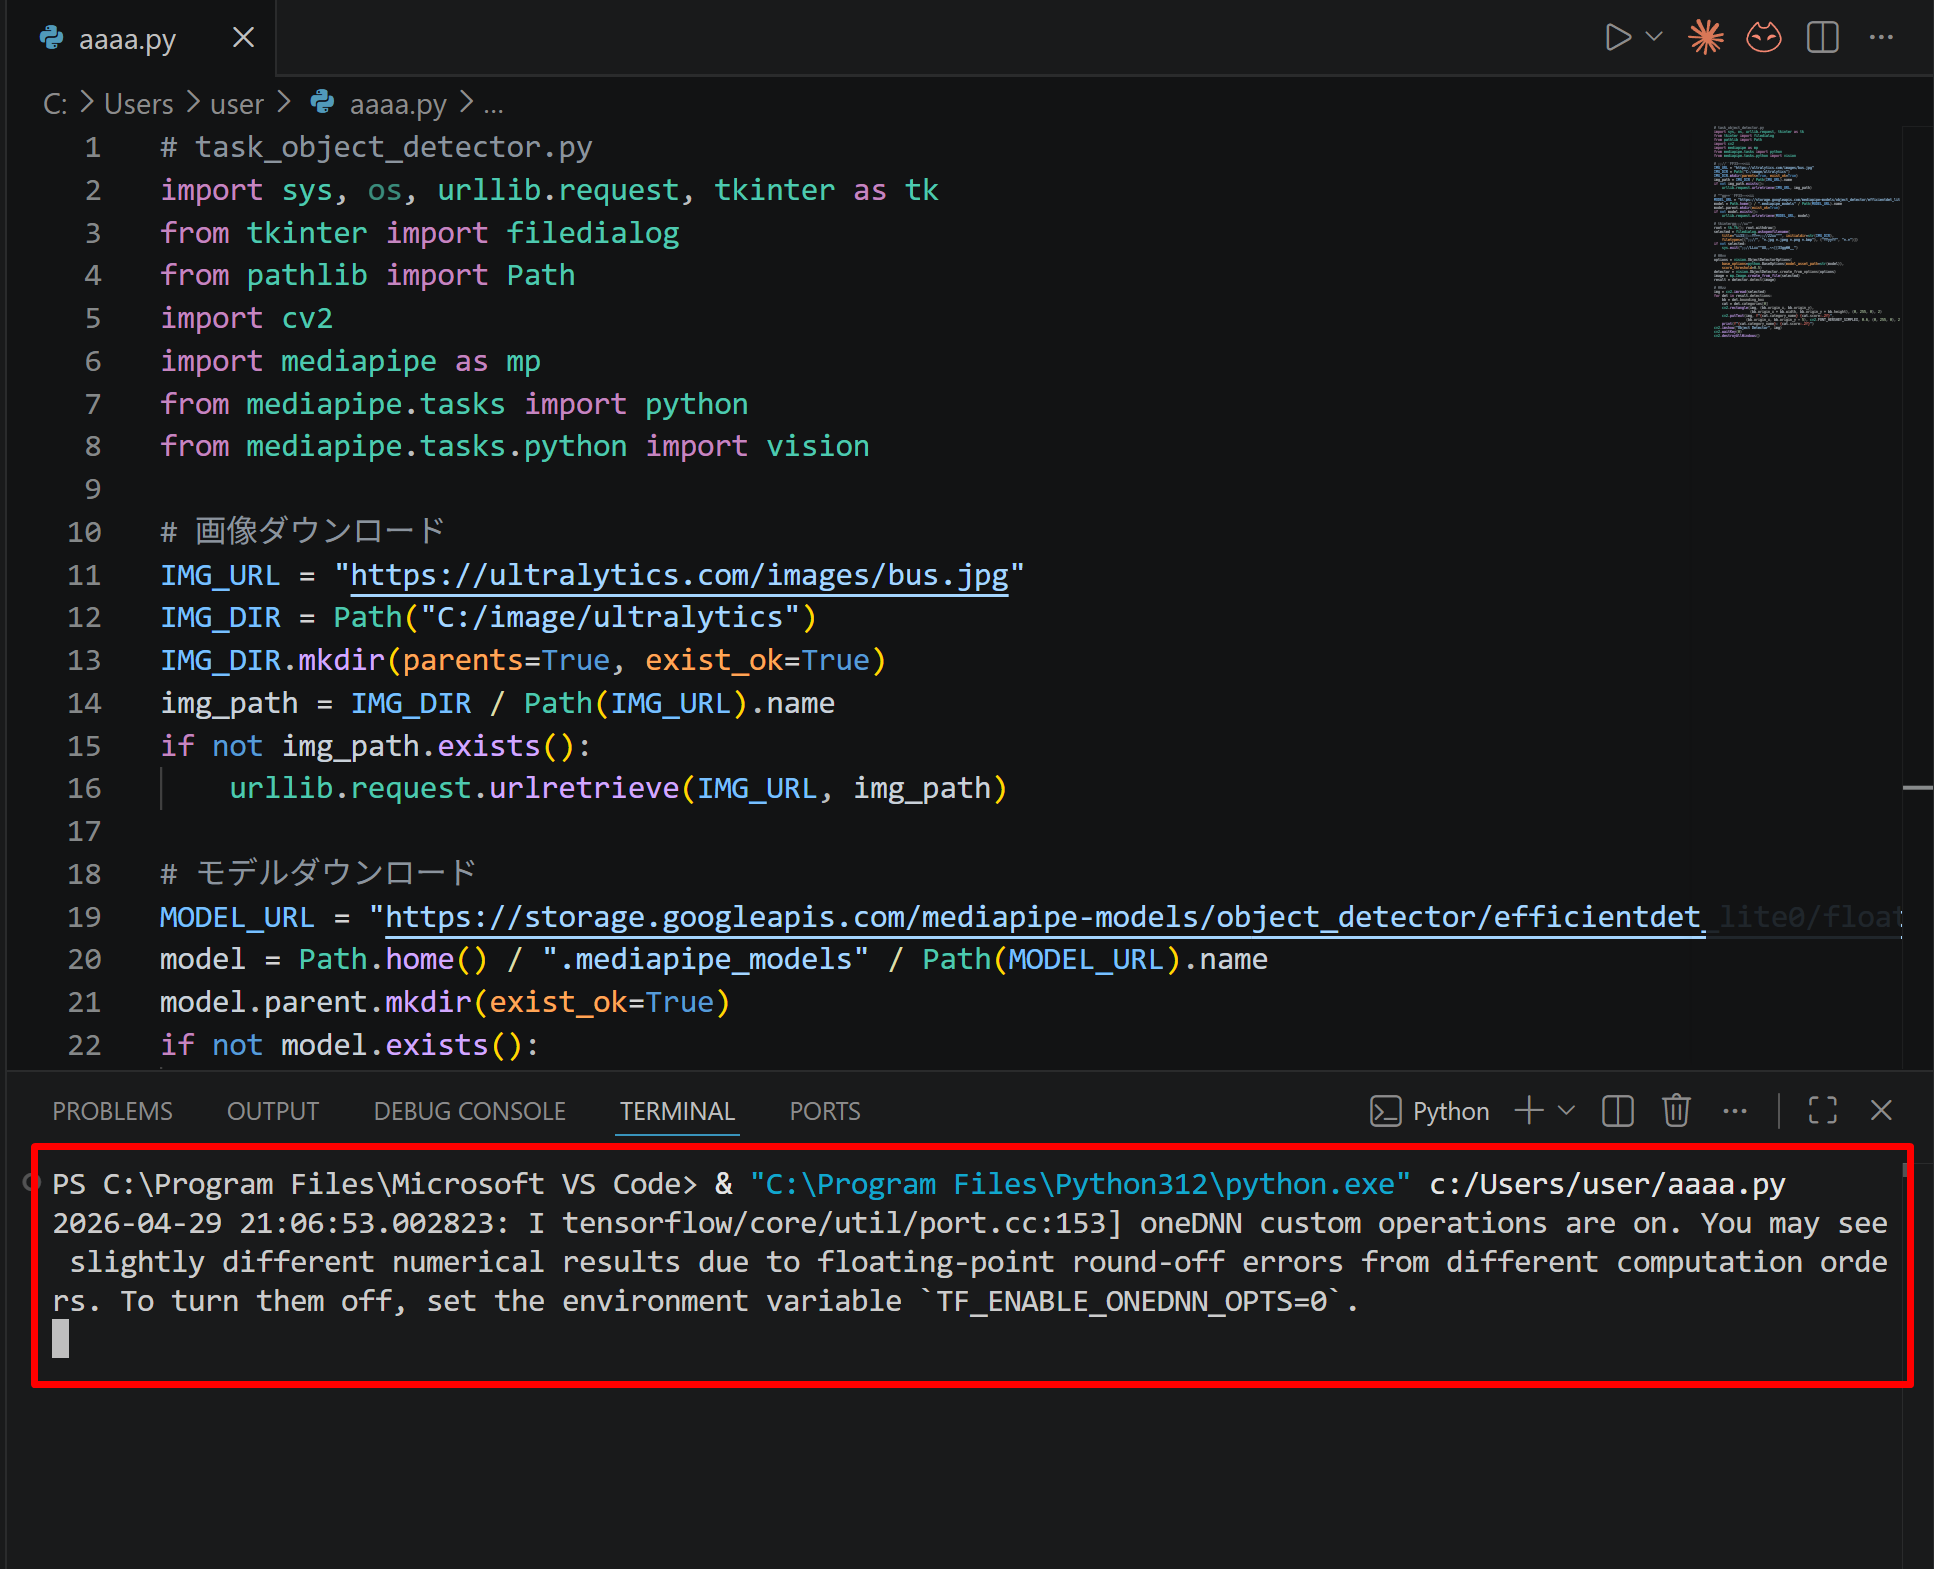
- tkinter(Python 標準の GUI ライブラリ)のファイル選択ダイアログを使うプログラムを実行した場合は,ダイアログが開くので対象画像を選択する
- VS Code 下部のターミナルで実行結果を確認する.OpenCV ウィンドウ(OpenCV が画像を表示するために開く専用ウィンドウ)が開いた場合はそちらも確認する.OpenCV ウィンドウは,マウスクリックでウィンドウをアクティブ(操作対象の状態)にしてからキーを押すと終了する

2. PyTorch Mask R-CNN(torchvision)の実行
PyTorch の画像系ライブラリである torchvision に含まれる学習済み Mask R-CNN(ResNet50-FPN バックボーン、COCO データセットで学習済み)を用いる。このモデルは、画像中の各物体について、矩形(バウンディングボックス)、クラス名、信頼度(スコア)に加えて、物体の形状を表すマスクを出力する(このように物体ごとに領域を塗り分ける処理をインスタンスセグメンテーションという)。
- 学習済みモデルのロード
学習済み Mask R-CNN を読み込み、推論モード(評価モード)に設定する。初回はモデルの重みが自動でダウンロードされる。
import torch
import torchvision
from torchvision.models.detection import maskrcnn_resnet50_fpn, MaskRCNN_ResNet50_FPN_Weights

weights = MaskRCNN_ResNet50_FPN_Weights.DEFAULT
model = maskrcnn_resnet50_fpn(weights=weights)
model.eval()
- クラス名の確認
このモデルは COCO データセットの物体を検出する。COCO で実際に定義されている物体クラスは 80 種類である。ただし、各クラスに割り当てられたクラス番号(ラベル ID)は 1〜90 の範囲に欠番を含んで分布する。
weights.meta["categories"]で得られるクラス名のリストは、検出結果のlabels(クラス番号)を添字としてそのまま名前に変換できるよう、インデックス 0 に背景、インデックス 1〜90 に各クラス番号を対応させた構成になっており、欠番には"N/A"が置かれる。そのためリストの長さは 91 になるが、これはクラス番号の総数(背景+番号 1〜90)であって、物体クラスの種類数(80 種類)とは異なる。class_names = weights.meta["categories"] print(class_names)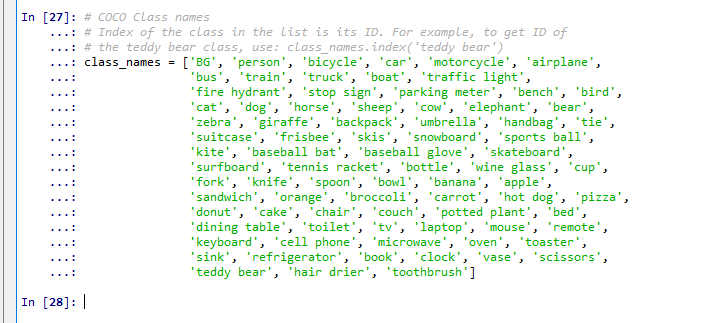
- 画像からのオブジェクト検出
画像を読み込み、モデルが要求する形式(0〜1 に正規化したテンソルのリスト)に変換して推論する。出力は、矩形(
boxes)、クラス番号(labels)、信頼度(scores)、マスク(masks)を持つ辞書である。from PIL import Image preprocess = weights.transforms() image = Image.open("test.jpg").convert("RGB") x = preprocess(image) predictions = model([x]) r = predictions[0] print(r["boxes"].shape, r["labels"].shape, r["scores"].shape, r["masks"].shape)「
test.jpg」のところは、検出したい画像ファイルにする。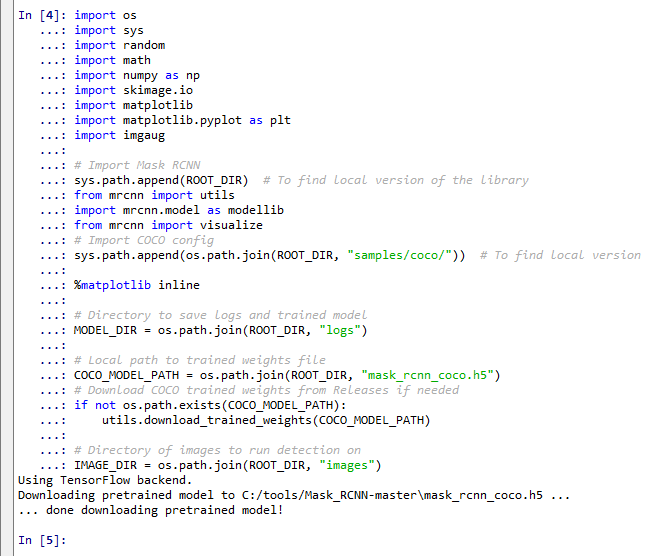
- 検出結果の可視化
検出されたマスクと矩形を元の画像に重ねて表示する。マスクは 0.5 を境に二値化する(torchvision の出力するマスクは 0〜1 の値を持ち、0.5 以上の画素をその物体の領域とみなす)。
import numpy as np
import matplotlib.pyplot as plt
import matplotlib.patches as patches

img = np.array(image)
fig, ax = plt.subplots(figsize=(8, 8))
ax.imshow(img)
for box, label, score, mask in zip(r["boxes"], r["labels"], r["scores"], r["masks"]):
    m = mask[0].detach().numpy() >= 0.5
    overlay = np.zeros((*m.shape, 4))
    overlay[m] = [1, 0, 0, 0.4]
    ax.imshow(overlay)
    x1, y1, x2, y2 = box.detach().numpy()
    ax.add_patch(patches.Rectangle((x1, y1), x2 - x1, y2 - y1, fill=False, edgecolor="lime", linewidth=2))
    ax.text(x1, y1, f"{class_names[label]} {score:.2f}", color="white", backgroundcolor="black")
ax.axis("off")
plt.show()
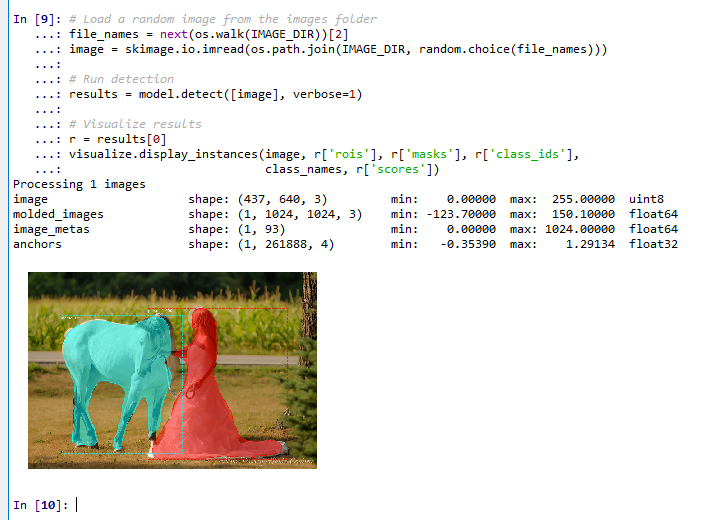
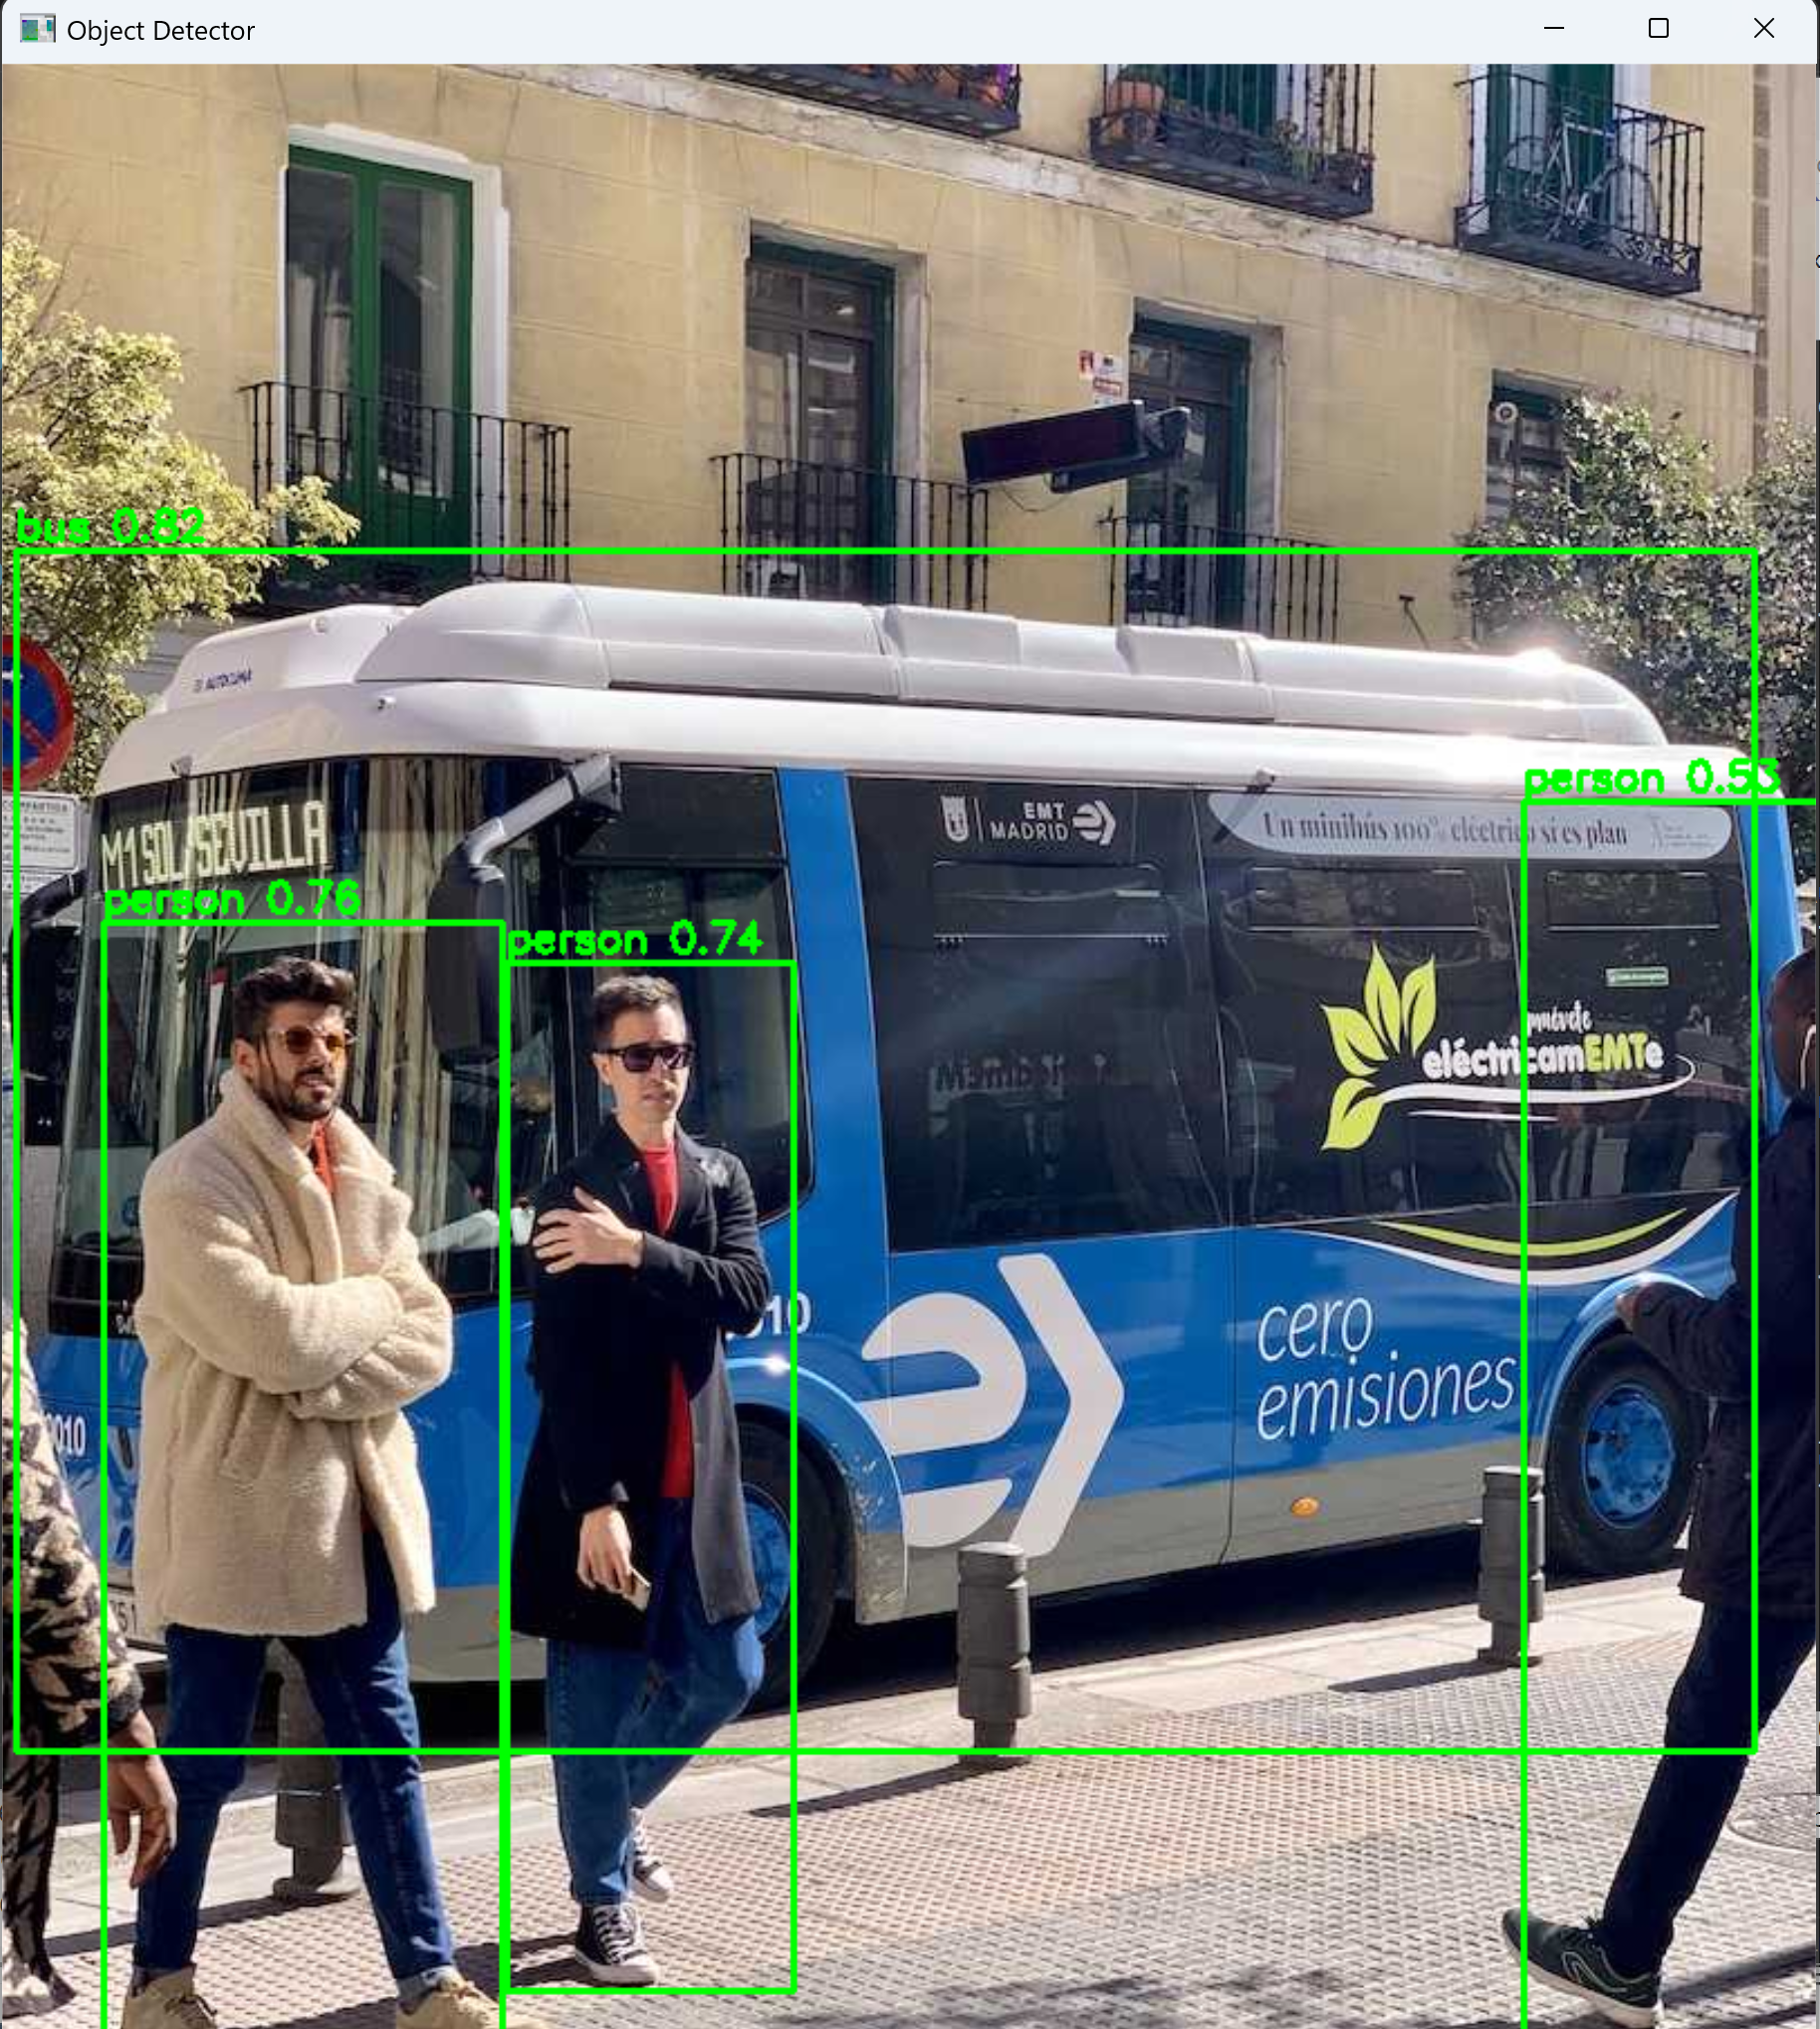
3. 演習1:学習済み Mask R-CNN による画像のインスタンスセグメンテーション
テーマ名:学習済み Mask R-CNN を用いて、任意の画像から物体ごとのマスクを検出する。
手順
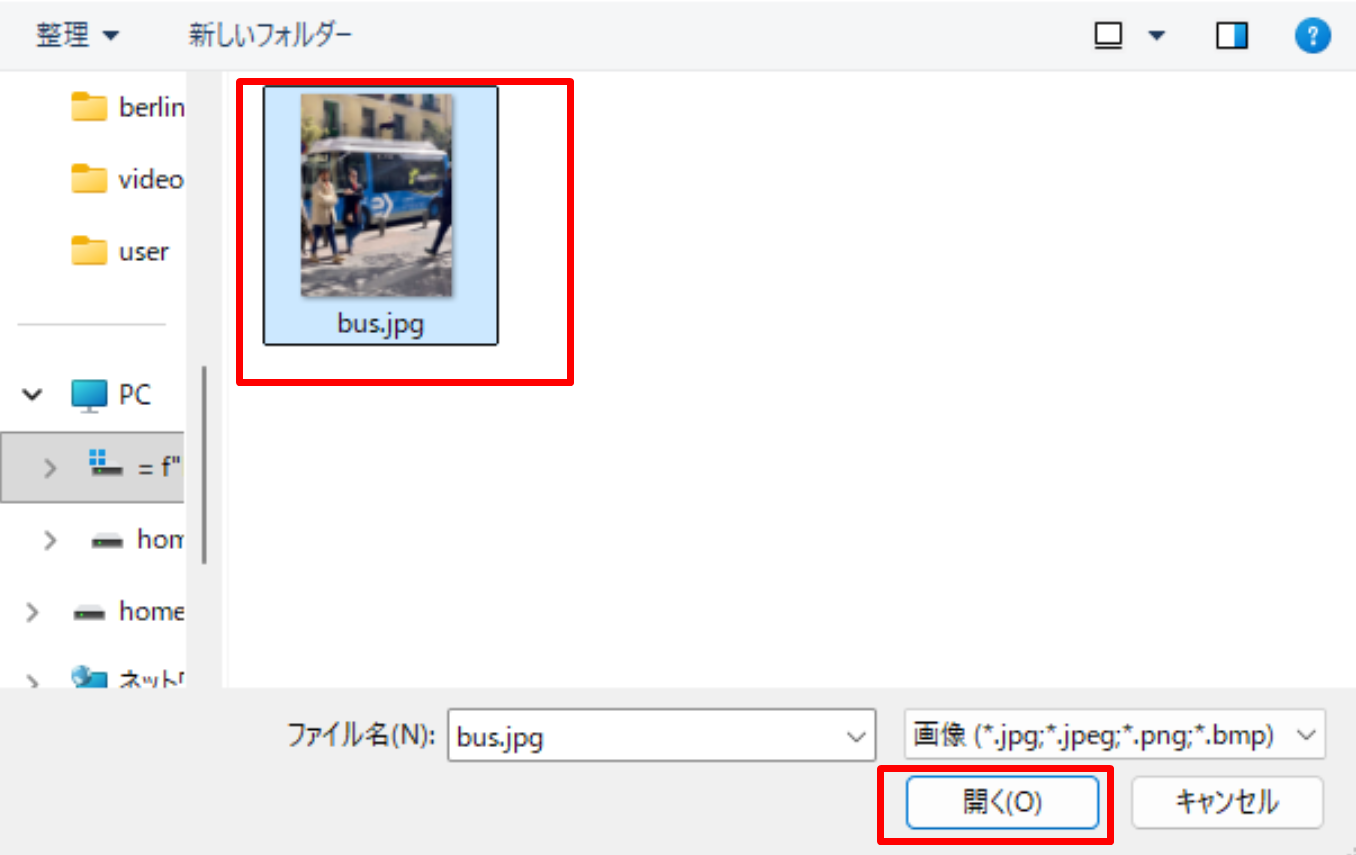
- 人や物が複数写った画像ファイルを 1 枚用意する。
- 次のコードを実行する(メモ帳を用いる場合は a.py のようなファイル名で保存して実行)。コード中の画像ファイル名は、用意した画像に合わせて変更する。
- 検出された各物体に、マスク(半透明の塗り)、矩形、クラス名、信頼度が重ねて表示されることを確認する。
import torch
import torchvision
from torchvision.models.detection import maskrcnn_resnet50_fpn, MaskRCNN_ResNet50_FPN_Weights
from PIL import Image
import numpy as np
import matplotlib.pyplot as plt
import matplotlib.patches as patches

weights = MaskRCNN_ResNet50_FPN_Weights.DEFAULT
model = maskrcnn_resnet50_fpn(weights=weights)
model.eval()
class_names = weights.meta["categories"]

preprocess = weights.transforms()
image = Image.open("test.jpg").convert("RGB")
x = preprocess(image)
predictions = model([x])
r = predictions[0]

img = np.array(image)
fig, ax = plt.subplots(figsize=(8, 8))
ax.imshow(img)
for box, label, score, mask in zip(r["boxes"], r["labels"], r["scores"], r["masks"]):
    m = mask[0].detach().numpy() >= 0.5
    overlay = np.zeros((*m.shape, 4))
    overlay[m] = [1, 0, 0, 0.4]
    ax.imshow(overlay)
    x1, y1, x2, y2 = box.detach().numpy()
    ax.add_patch(patches.Rectangle((x1, y1), x2 - x1, y2 - y1, fill=False, edgecolor="lime", linewidth=2))
    ax.text(x1, y1, f"{class_names[label]} {score:.2f}", color="white", backgroundcolor="black")
ax.axis("off")
plt.show()
ヒント
predictions[0]のboxes、labels、scores、masksは、検出された物体の個数だけ要素を持つ。class_names[label]でクラス番号からクラス名に変換できる。
考察ポイント
- 信頼度(スコア)の高い検出と低い検出で、マスクや矩形の正確さにどのような違いがあるかを読み取る。
- 重なり合った物体が、それぞれ別のマスクとして分離されているかどうかを確認する。
4. 演習2:検出結果の信頼度しきい値による絞り込み
テーマ名:信頼度の低い検出を取り除き、確からしい検出だけを表示する。
手順
- 演習1と同じ画像を用いる。
- 次のコードを実行する(メモ帳を用いる場合は a.py のようなファイル名で保存して実行)。
score_thresholdの値を 0.5 から 0.9 などに変えて、表示される物体の数の変化を確認する。
import torch
import torchvision
from torchvision.models.detection import maskrcnn_resnet50_fpn, MaskRCNN_ResNet50_FPN_Weights
from PIL import Image
import numpy as np
import matplotlib.pyplot as plt
import matplotlib.patches as patches

weights = MaskRCNN_ResNet50_FPN_Weights.DEFAULT
model = maskrcnn_resnet50_fpn(weights=weights)
model.eval()
class_names = weights.meta["categories"]

preprocess = weights.transforms()
image = Image.open("test.jpg").convert("RGB")
x = preprocess(image)
predictions = model([x])
r = predictions[0]

score_threshold = 0.5
img = np.array(image)
fig, ax = plt.subplots(figsize=(8, 8))
ax.imshow(img)
for box, label, score, mask in zip(r["boxes"], r["labels"], r["scores"], r["masks"]):
    if score < score_threshold:
        continue
    m = mask[0].detach().numpy() >= 0.5
    overlay = np.zeros((*m.shape, 4))
    overlay[m] = [1, 0, 0, 0.4]
    ax.imshow(overlay)
    x1, y1, x2, y2 = box.detach().numpy()
    ax.add_patch(patches.Rectangle((x1, y1), x2 - x1, y2 - y1, fill=False, edgecolor="lime", linewidth=2))
    ax.text(x1, y1, f"{class_names[label]} {score:.2f}", color="white", backgroundcolor="black")
ax.axis("off")
plt.show()
ヒント
scoresは降順に並んでいるため、しきい値を上げるほど表示される物体は少なくなる。continueは、しきい値未満の物体の描画を飛ばすために用いている。
考察ポイント
- しきい値を上げると見逃し(本来検出すべき物体が消える)が増え、下げると誤検出が増える。この兼ね合いをしきい値の値ごとに読み取る。
- 同じ画像でも、しきい値の設定次第で「正しく検出できた」という評価が変わることを確認する。