MKLML, MKL-DNN 0.14 のインストール(Windows 上)
前準備
Build Tools for Visual Studio 2026 のインストール(Windows 上) [クリックして展開]
Build Tools for Visual Studio は,Visual Studio の IDE を含まない C/C++ コンパイラ,ライブラリ,ビルドツール等のコマンドライン向け開発ツールセットである。インストール済みの場合、この手順は不要である。
管理者権限のコマンドプロンプトで以下を実行する。管理者権限のコマンドプロンプトを起動するには、Windows キーまたはスタートメニューから「cmd」と入力し、表示された「コマンドプロンプト」を右クリックして「管理者として実行」を選択する。
REM VC++ ランタイム
winget install --scope machine --id Microsoft.VCRedist.2015+.x64 -e --silent --disable-interactivity --force --accept-source-agreements --accept-package-agreements --override "/quiet /norestart"

REM Build Tools + Desktop development with C++(VCTools)+ 追加コンポーネント(一括)
winget list --id Microsoft.VisualStudio.BuildTools 2>nul | findstr /i "BuildTools" >nul 2>&1
if %ERRORLEVEL% EQU 0 (
    for /f "delims=" %P in ('"C:\Program Files (x86)\Microsoft Visual Studio\Installer\vswhere.exe" -products * -property installationPath') do start /wait "" "C:\Program Files (x86)\Microsoft Visual Studio\Installer\setup.exe" modify --installPath "%P" --add Microsoft.VisualStudio.Workload.VCTools --add Microsoft.VisualStudio.Workload.MSBuildTools --add Microsoft.VisualStudio.Component.VC.CMake.Project --add Microsoft.VisualStudio.Component.VC.Llvm.Clang --add Microsoft.VisualStudio.Component.VC.Llvm.ClangToolset --add Microsoft.VisualStudio.Component.Windows11SDK.26100 --includeRecommended --quiet --norestart
) else (
    winget install --scope machine --id Microsoft.VisualStudio.BuildTools -e --silent --disable-interactivity --force --accept-source-agreements --accept-package-agreements --override "--quiet --wait --norestart --nocache --add Microsoft.VisualStudio.Workload.VCTools --includeRecommended --add Microsoft.VisualStudio.Workload.MSBuildTools --add Microsoft.VisualStudio.Component.VC.CMake.Project --add Microsoft.VisualStudio.Component.VC.Llvm.Clang --add Microsoft.VisualStudio.Component.VC.Llvm.ClangToolset --add Microsoft.VisualStudio.Component.Windows11SDK.26100"
)
REM  何らかの理由で BuildTools の動作がおかしくなった場合は,以下を実行すると,既存のインストールのファイル破損・欠損を修復し正常な状態に復元する効果がある.
REM "C:\Program Files (x86)\Microsoft Visual Studio\Installer\setup.exe" repair --installPath "C:\Program Files (x86)\Microsoft Visual Studio\18\BuildTools" --quiet --norestart
REM 以下で正常であることを確認する.パスが表示されれば正常である.
REM "C:\Program Files (x86)\Microsoft Visual Studio\Installer\vswhere.exe" -products * -requires Microsoft.VisualStudio.Workload.VCTools -property installationPath
--add で追加されるコンポーネント
上記のコマンドでは,まず Build Tools 本体と Visual C++ 再頒布可能パッケージをインストールし,次に setup.exe を用いて以下のコンポーネントを追加している。
VCTools:C++ デスクトップ開発ワークロード(--includeRecommendedにより、MSVC コンパイラ、C++ AddressSanitizer、vcpkg、CMake ツール、Windows 11 SDK 等の推奨コンポーネントが含まれる)VC.Llvm.Clang:Windows 向け C++ Clang コンパイラClangCL:clang-cl ツールセットを含むコンポーネントグループ(MSBuild から Clang を使用するために必要)VC.CMake.Project:Windows 向け C++ CMake ツールWindows11SDK.26100:Windows 11 SDK(ビルド 10.0.26100)
インストール完了の確認
winget list Microsoft.VisualStudio.BuildTools上記以外の追加のコンポーネントが必要になった場合は Visual Studio Installer で個別にインストールできる。
Visual Studio の機能を必要とする場合は、追加インストールできる。
Git のインストール(Windows 上) [クリックして展開]
管理者権限のコマンドプロンプトで以下を実行する.管理者権限は,winget の --scope machine オプションでシステム全体にインストールするために必要となる.
REM Git をシステム領域にインストール
winget install --scope machine --id Git.Git -e --silent --disable-interactivity --force --accept-source-agreements --accept-package-agreements --override "/VERYSILENT /NORESTART /NOCANCEL /SP- /CLOSEAPPLICATIONS /RESTARTAPPLICATIONS /COMPONENTS=""icons,ext\reg\shellhere,assoc,assoc_sh"" /o:PathOption=Cmd /o:CRLFOption=CRLFCommitAsIs /o:BashTerminalOption=MinTTY /o:DefaultBranchOption=main /o:EditorOption=VIM /o:SSHOption=OpenSSH /o:UseCredentialManager=Enabled /o:PerformanceTweaksFSCache=Enabled /o:EnableSymlinks=Disabled /o:EnableFSMonitor=Disabled"
CMakeのインストール(Windows 上) [クリックして展開]
管理者権限のコマンドプロンプトで以下を実行する。管理者権限のコマンドプロンプトを起動するには、Windows キーまたはスタートメニューから「cmd」と入力し、表示された「コマンドプロンプト」を右クリックして「管理者として実行」を選択する。
REM CMake をシステム領域にインストール
winget install --scope machine --id Kitware.CMake -e --silent --disable-interactivity --force --accept-source-agreements --accept-package-agreements --override "/qn /norestart ADD_CMAKE_TO_PATH=System"
7-Zip のインストール(Windows 上) [クリックして展開]
管理者権限のコマンドプロンプトで以下を実行する。管理者権限のコマンドプロンプトを起動するには、Windows キーまたはスタートメニューから「cmd」と入力し、表示された「コマンドプロンプト」を右クリックして「管理者として実行」を選択する。
REM 7-Zip をシステム領域にインストール
winget install --scope machine --id 7zip.7zip -e --silent --disable-interactivity --force --accept-source-agreements --accept-package-agreements
REM 7-Zip のパス設定
powershell -NoProfile -Command "$p='C:\Program Files\7-Zip'; $c=[Environment]::GetEnvironmentVariable('Path','Machine'); if((Test-Path $p) -and $c -notlike \"*$p*\"){[Environment]::SetEnvironmentVariable('Path',\"$p;$c\",'Machine')}"
MKLML, MKL-DNN 0.14 のインストール(Windows 上)
次のウェブページの記載に基づきインストールする.
https://learn.microsoft.com/en-us/previous-versions/cognitive-toolkit/setup-buildmkldnn-vs17
ダウンロードとインストールの手順
- 以下の手順を管理者権限のコマンドプロンプトで実行する
(手順:Windowsキーまたはスタートメニュー →
cmdと入力 → 右クリック → 「管理者として実行」)。管理者権限は、wingetの--scope machineオプションでシステム全体にソフトウェアをインストールするために必要となる。 - MKLML バイナリのダウンロードと展開
次のコマンドで MKLML バイナリの .zip ファイルをダウンロードし,c:\local\mklml-mkldnn-0.14 に展開する.
mkdir c:\local\mklml-mkldnn-0.14 curl -L -o %TEMP%\mklml_win_2018.0.3.20180406.zip https://github.com/intel/mkl-dnn/releases/download/v0.14/mklml_win_2018.0.3.20180406.zip powershell -Command "Expand-Archive -Path \"$env:TEMP\mklml_win_2018.0.3.20180406.zip\" -DestinationPath \"$env:TEMP\mklml_temp\" -Force; Copy-Item \"$env:TEMP\mklml_temp\mklml_win_2018.0.3.20180406\*\" \"c:\local\mklml-mkldnn-0.14\" -Recurse -Force; Remove-Item \"$env:TEMP\mklml_temp\" -Recurse -Force; Remove-Item \"$env:TEMP\mklml_win_2018.0.3.20180406.zip\"" - Windows のシステム環境変数 Path に c:\local\mklml-mkldnn-0.14\lib を追加することにより,パスを通す.
powershell -command "$oldpath = [System.Environment]::GetEnvironmentVariable(\"Path\", \"Machine\"); $oldpath += \";c:\local\mklml-mkldnn-0.14\lib\"; [System.Environment]::SetEnvironmentVariable(\"Path\", $oldpath, \"Machine\")" - Windows の システム環境変数 MKL_PATH に,c:\local\mklml-mkldnn-0.14 を設定
powershell -command "[System.Environment]::SetEnvironmentVariable(\"MKL_PATH\", \"c:\local\mklml-mkldnn-0.14\", \"Machine\")"
MKL-DNN のソースコードのビルドの方法
ビルドの必要がある場合には,次の手順でビルドを行うこと.ビルドされた MKL-DNN は c:\local\mklml-mkldnn-0.14 に配置される.
- 以下の手順を管理者権限のコマンドプロンプトで実行する
(手順:Windowsキーまたはスタートメニュー →
cmdと入力 → 右クリック → 「管理者として実行」)。管理者権限は、wingetの--scope machineオプションでシステム全体にソフトウェアをインストールするために必要となる。 - MKLML バイナリのダウンロードと展開
次のコマンドで MKLML バイナリの .zip ファイルをダウンロードし,c:\local\mklml-mkldnn-0.14 に展開する.
mkdir c:\local\mklml-mkldnn-0.14 curl -L -o %TEMP%\mklml_win_2018.0.3.20180406.zip https://github.com/intel/mkl-dnn/releases/download/v0.14/mklml_win_2018.0.3.20180406.zip powershell -Command "Expand-Archive -Path \"$env:TEMP\mklml_win_2018.0.3.20180406.zip\" -DestinationPath \"$env:TEMP\mklml_temp\" -Force; Copy-Item \"$env:TEMP\mklml_temp\mklml_win_2018.0.3.20180406\*\" \"c:\local\mklml-mkldnn-0.14\" -Recurse -Force; Remove-Item \"$env:TEMP\mklml_temp\" -Recurse -Force; Remove-Item \"$env:TEMP\mklml_win_2018.0.3.20180406.zip\"" - MKL-DNN ソースコードのダウンロードと展開
次のコマンドで MKL-DNN ソースコードの .zip ファイルをダウンロードし,c:\local\src\mkl-dnn-0.14 に展開する.
mkdir c:\local\src\mkl-dnn-0.14
curl -L -o %TEMP%\mkl-dnn-0.14.zip https://github.com/01org/mkl-dnn/archive/v0.14.zip
powershell -Command "Expand-Archive -Path \"$env:TEMP\mkl-dnn-0.14.zip\" -DestinationPath \"$env:TEMP\mkldnn_temp\" -Force; Copy-Item \"$env:TEMP\mkldnn_temp\mkl-dnn-0.14\*\" \"c:\local\src\mkl-dnn-0.14\" -Recurse -Force; Remove-Item \"$env:TEMP\mkldnn_temp\" -Recurse -Force; Remove-Item \"$env:TEMP\mkl-dnn-0.14.zip\""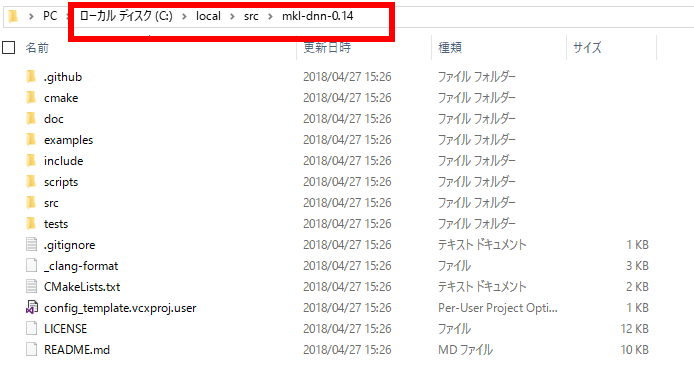
- システム環境変数の設定
Windows のシステム環境変数 Path に c:\local\mklml-mkldnn-0.14\lib を追加し,MKL_PATH を設定する.
powershell -command "$oldpath = [System.Environment]::GetEnvironmentVariable(\"Path\", \"Machine\"); $oldpath += \";c:\local\mklml-mkldnn-0.14\lib\"; [System.Environment]::SetEnvironmentVariable(\"Path\", $oldpath, \"Machine\")" powershell -command "[System.Environment]::SetEnvironmentVariable(\"MKL_PATH\", \"c:\local\mklml-mkldnn-0.14\", \"Machine\")" - ビルドディレクトリの作成と MKLROOT の設定
cd c:\local\src\mkl-dnn-0.14 powershell -Command "(Get-Content CMakeLists.txt -Raw) -replace 'cmake_minimum_required\(VERSION 2\.8\)', 'cmake_minimum_required(VERSION 3.10)' -replace '# Use old-style version handling\r?\nif\(POLICY CMP0048\)\r?\n\s+cmake_policy\(SET CMP0048 OLD\)\r?\n\s+cmake_policy\(SET CMP0054 OLD\)\r?\nendif\(\)\r?\n', '' | Set-Content CMakeLists.txt -NoNewline" set MKLROOT=c:\local\mklml-mkldnn-0.14 - CMake によるリリースビルドの作成と,ビルド結果の MKL_PATH へのコピー
cd cmake
cmake .. -DCMAKE_BUILD_TYPE=Release -DCMAKE_POLICY_VERSION_MINIMUM=3.5
cmake --build . --config Release --target INSTALL -- /m:4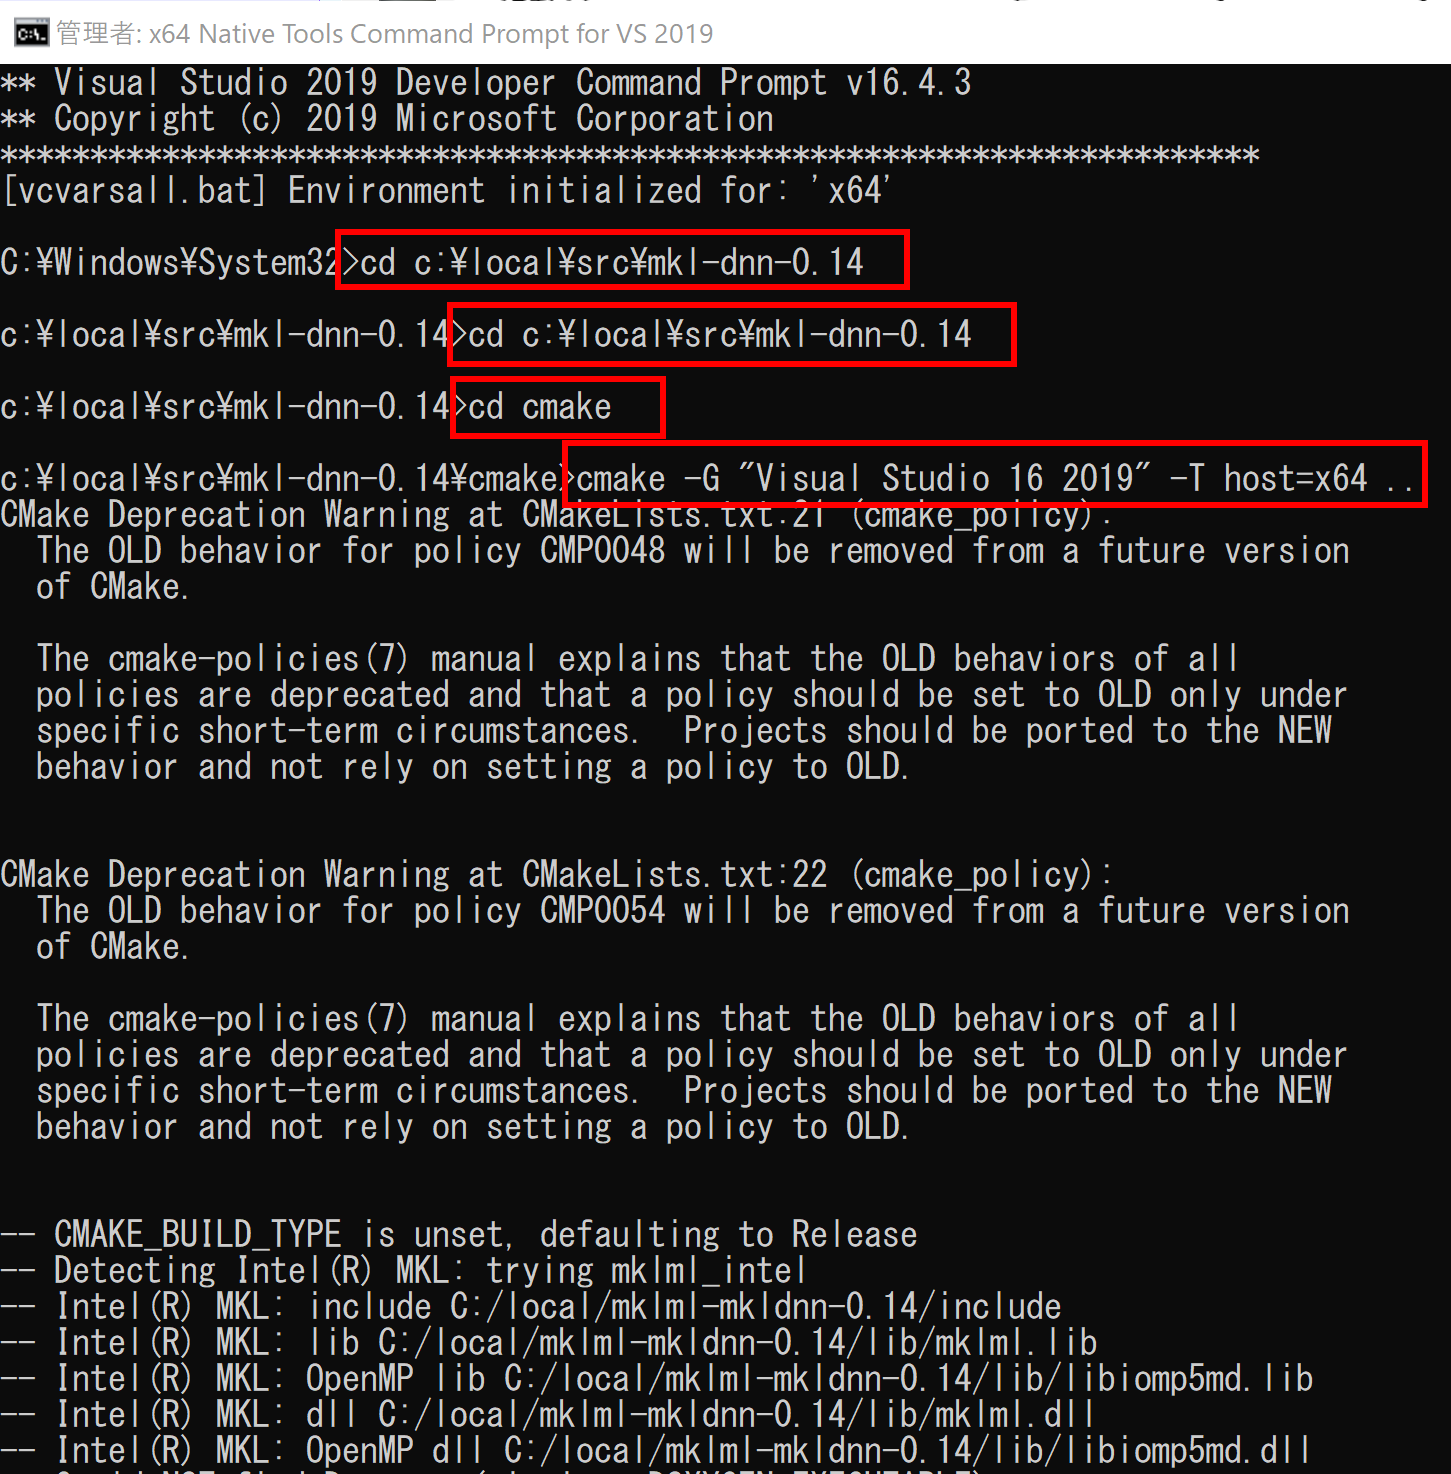
- ファイルのコピー
copy ..\include\* c:\local\mklml-mkldnn-0.14\include
copy src\Release\*.lib c:\local\mklml-mkldnn-0.14\lib
copy src\Release\*.dll c:\local\mklml-mkldnn-0.14\lib