Python 3.8,関連パッケージ,Python 開発環境のインストール(Windows 上)
【目次】
- Python 3.8 のインストール(Windows 上)
- Python に関しての情報取得
- pip と setuptools の更新,Python パッケージ(numpy, pandas, matplotlib, seaborn, scikit-learn)のインストール,Python 開発環境,Python コンソール(Jupyter Qt Console, Jupyter ノートブック (Jupyter Notebook), Jupyter Lab, Nteract, spyder)のインスト
- 性能の確認
【関連する外部ページ】 https://docs.python.org/ja/3/using/windows.html
動画「Python 3.8 のインストール(Windows 上)」の URL: https://www.youtube.com/watch?v=tUItIi5pZ08
Python 3.8 のインストール(Windows 上)
古いバージョンの Python のアンインストール
ここで示すインストール手順とは異なる設定ですでに Python をインストールしていた場合は,それをそのまま使うよりも, アンインストールしておいたほうがトラブルが少ない可能性がある.
- Python をインストール済みであるかを確認.
- インストール済みのときは,Pythonをすべてアンインストールしてから,ここから先の操作を開始した方がトラブルが少ない.
- Python 関係のファイルの削除
Windows では,コマンドプロンプトを管理者として実行し, 次のコマンドを実行する.
コマンドプロンプトを管理者として実行: 別ページ »で説明この操作は,必ずPython をすべてアンインストールした後に行うこと.
次のコマンドは,rmdir を使用して,%APPDATA%\Python ディレクトリを再帰的に削除する.次に,"C:\Program Files" ディレクトリに移動し,Python3 で始まるディレクトリを検索し,見つかったディレクトリを再帰的に削除する.rmdir /s /q %APPDATA%\Python cd "C:\Program Files" for /F %i in ('dir /ad /b /w Python3*') do rmdir /s /q %i
Python 3.8 のインストール
- Python 64-bit 版を使用してください.
- Python をシステム領域にインストールすることを推奨する.
Windowsでは,Python をユーザ領域(既定の設定)またはシステム領域にインストールできる. しかし,ユーザー名に日本語が含まれている場合,Python をユーザ領域にインストールすると問題が発生する可能性がある.システム領域にインストールすることで,ファイルパスに日本語が含まれることを避けることができ,問題を防ぐことができる.
- TensorFlow 2.10.1 の利用
TensorFlow 2.10.1 は次のPythonのバージョンと互換性がある: Python 3.10, Python 3.9, Python 3.8, Python 3.7
この互換性情報は,https://pypi.org/project/tensorflow/2.10/#files で確認できる. 注意点として, TensorFlow 2.10.1 は, Python 3.6以前のバージョン,Python 3.11以降のバージョンではサポートされていない(2024/7時点). 最新の互換性情報は変更される可能性があるため,https://pypi.org/project/tensorflow/2.10/#files などの公式ドキュメントで再確認すること.
インストール手順
Windows での Python 3.8 のインストール(あとのトラブルが起きにくいような手順を定めている)
- TensorFlow のインストール予定がある場合には, 次のページで,必要な Python のバージョンを確認
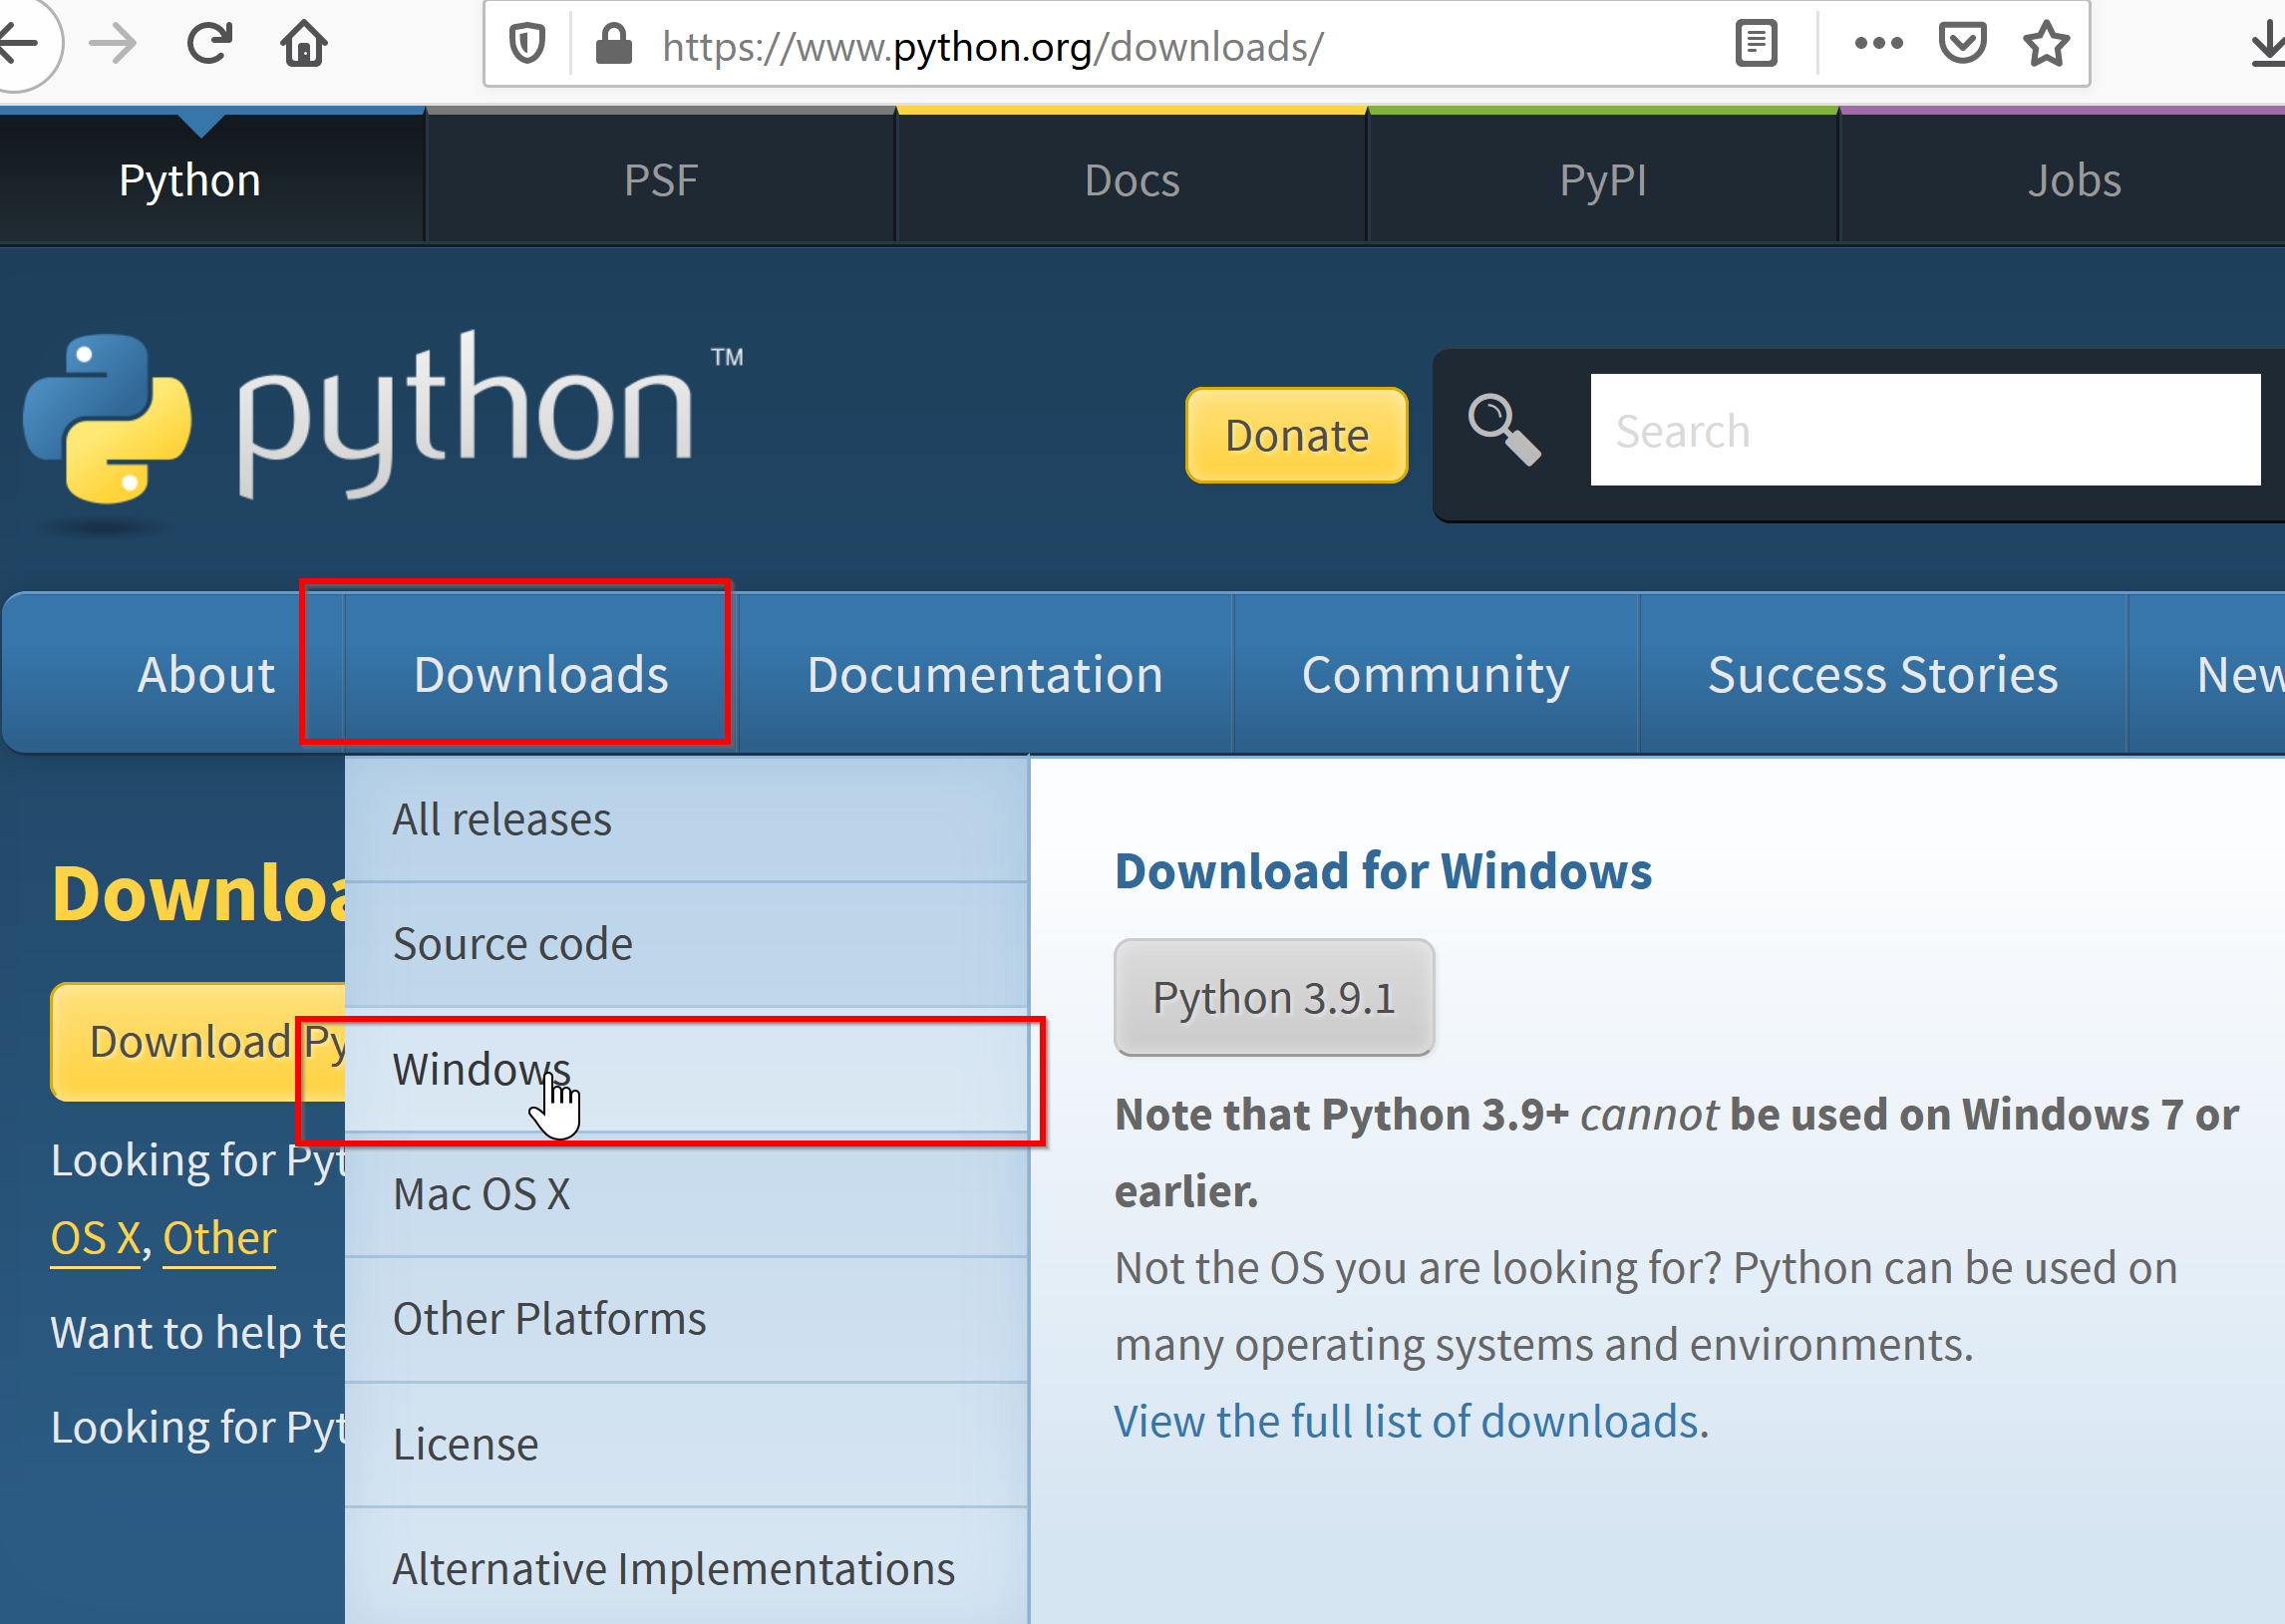
- Python の URL を開く
- Windows 版の Python 3.8 をダウンロード
ページの上の方にある「Downloads」をクリック. 「Downloads」の下にメニューが出るので,その中の「Windows」をクリック
- Python のバージョンを選ぶ
ここでは,Python 3.8.x (x は数字)を探して,選ぶ.
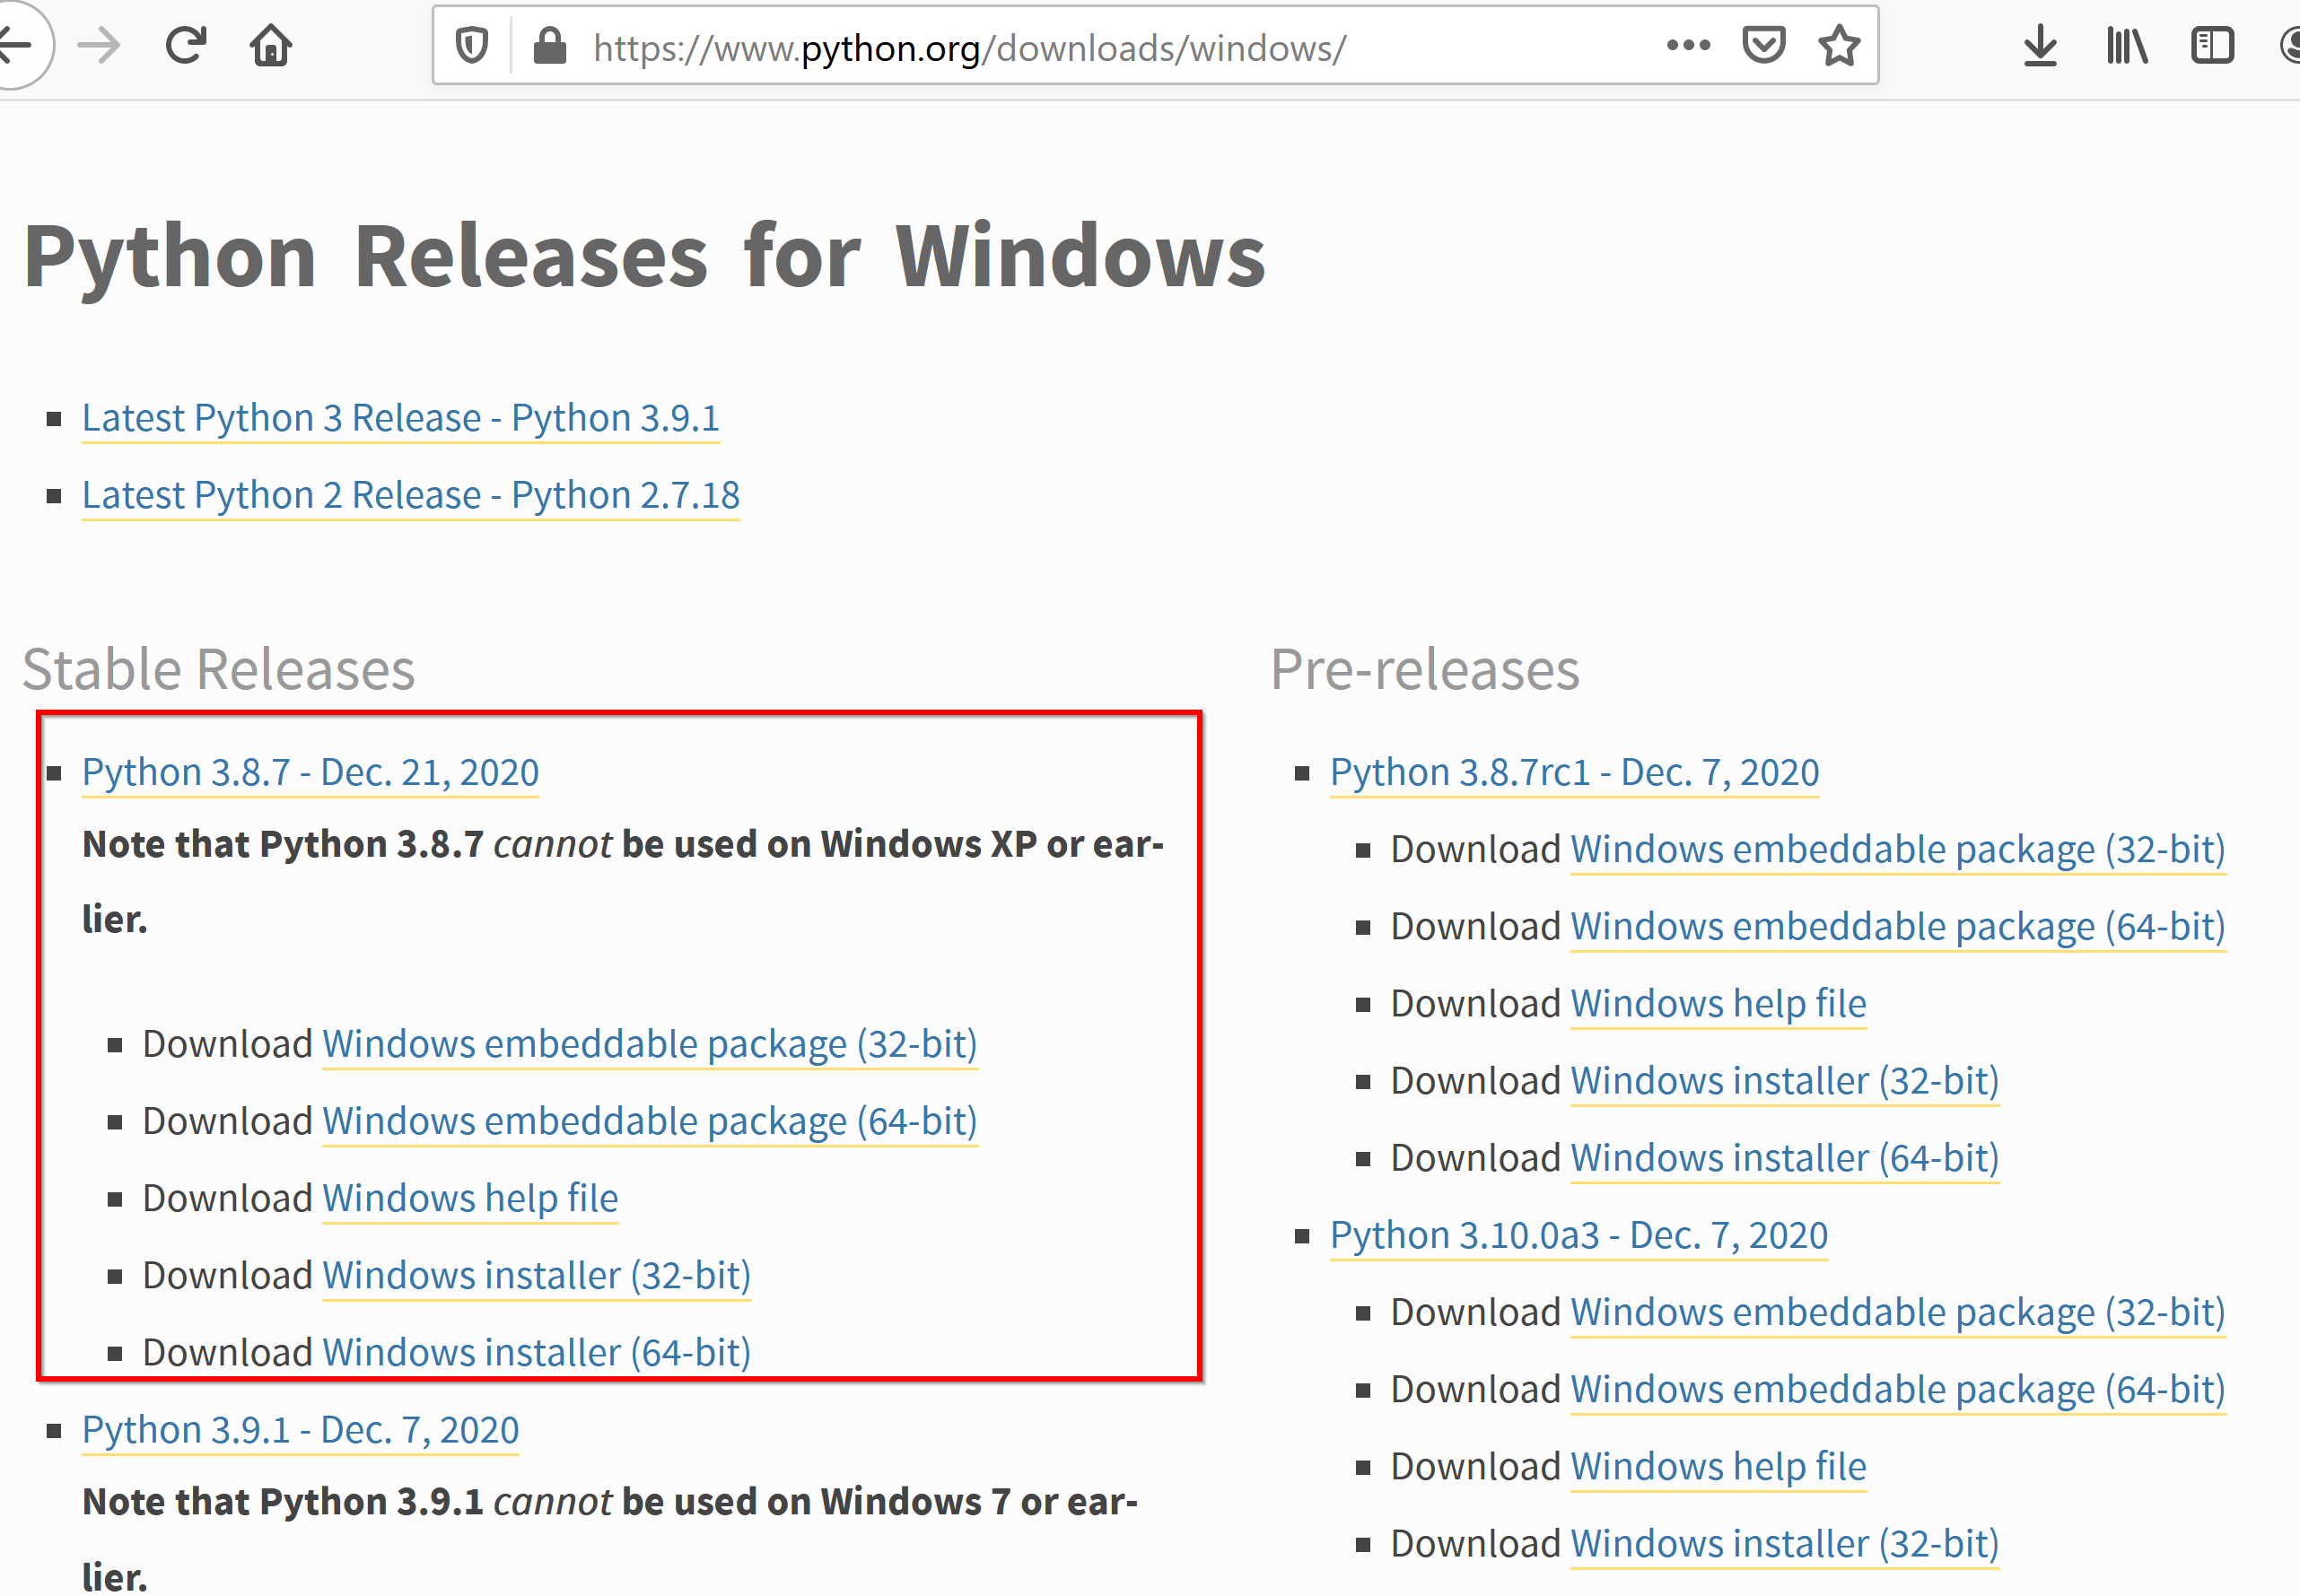
以下,Python 3.8.7 を選んだとして説明を続ける.他のバージョンでも以下の手順はだいたい同じである.
TensorFlow を使う予定がある場合は,https://pypi.org/project/tensorflow-gpu/#filesで,必要な Python のバージョンを確認しておく. 2024/5 時点では,TensorFlow バージョン 2.10 が動くのは,Python 3.10 または Python 3.9 または Python 3.8 または Python 3.7 (https://pypi.org/project/tensorflow/2.10/#files) - ファイルの種類を選ぶ.
Windows の 64ビット版のインストーラをダウンロードしたいので、「Windows Installer (64-bit)」を選ぶ
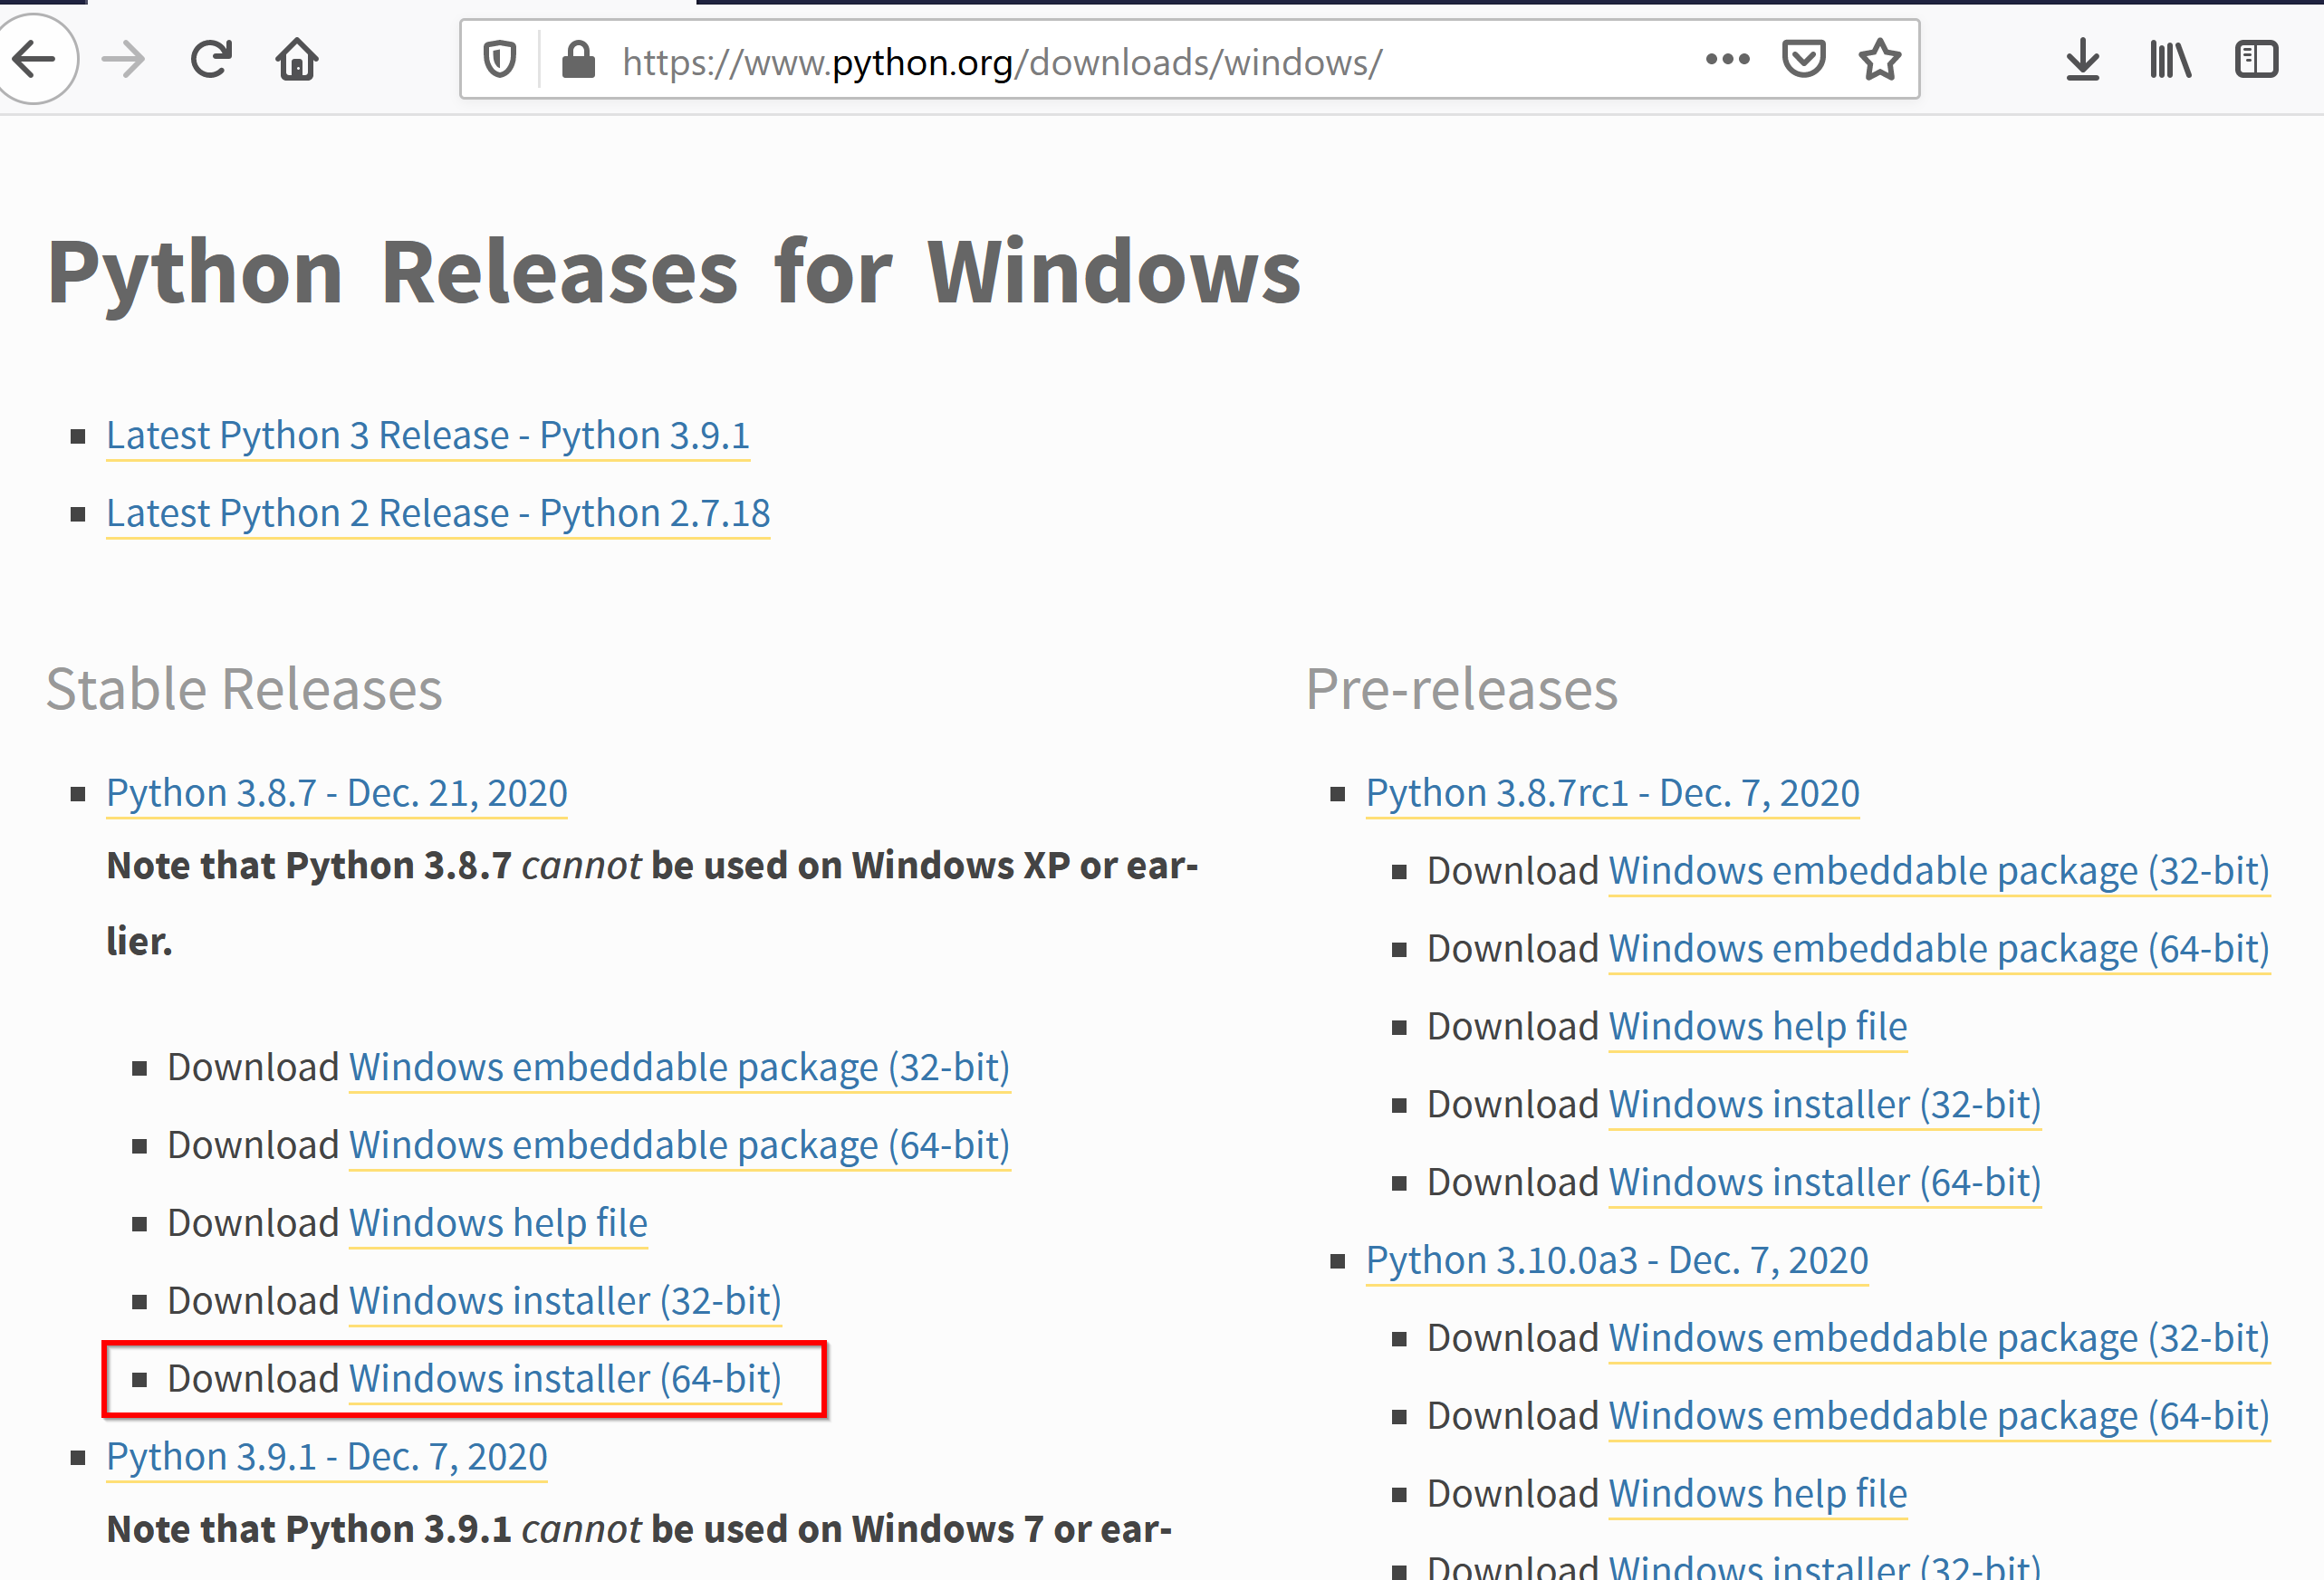
- ダウンロードが始まる
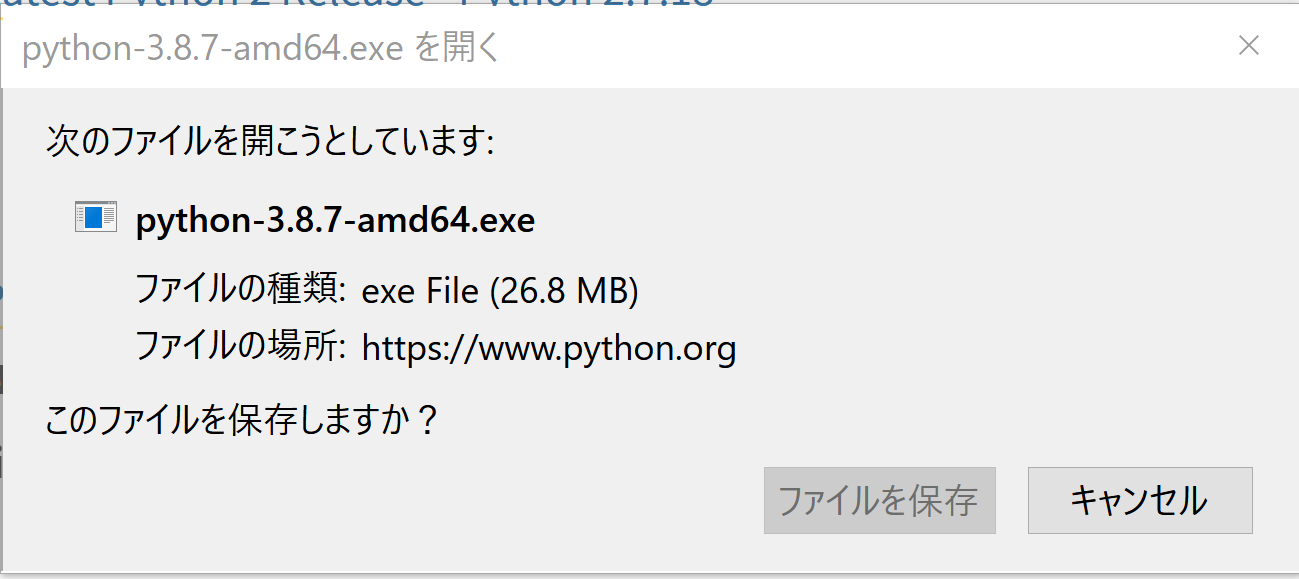
- インストール時の設定
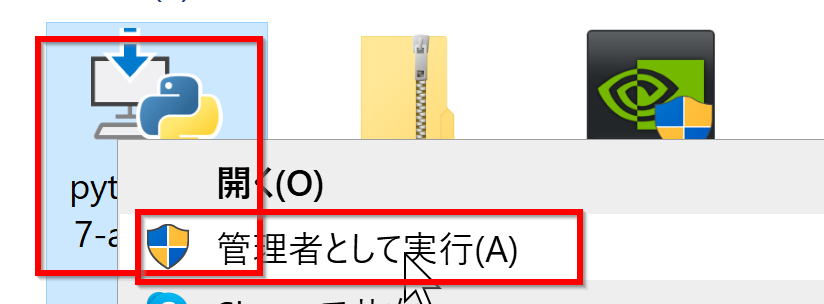
- いまダウンロードした .exe ファイルを右クリック,
右クリックメニューで「管理者として実行」を選ぶ.
-
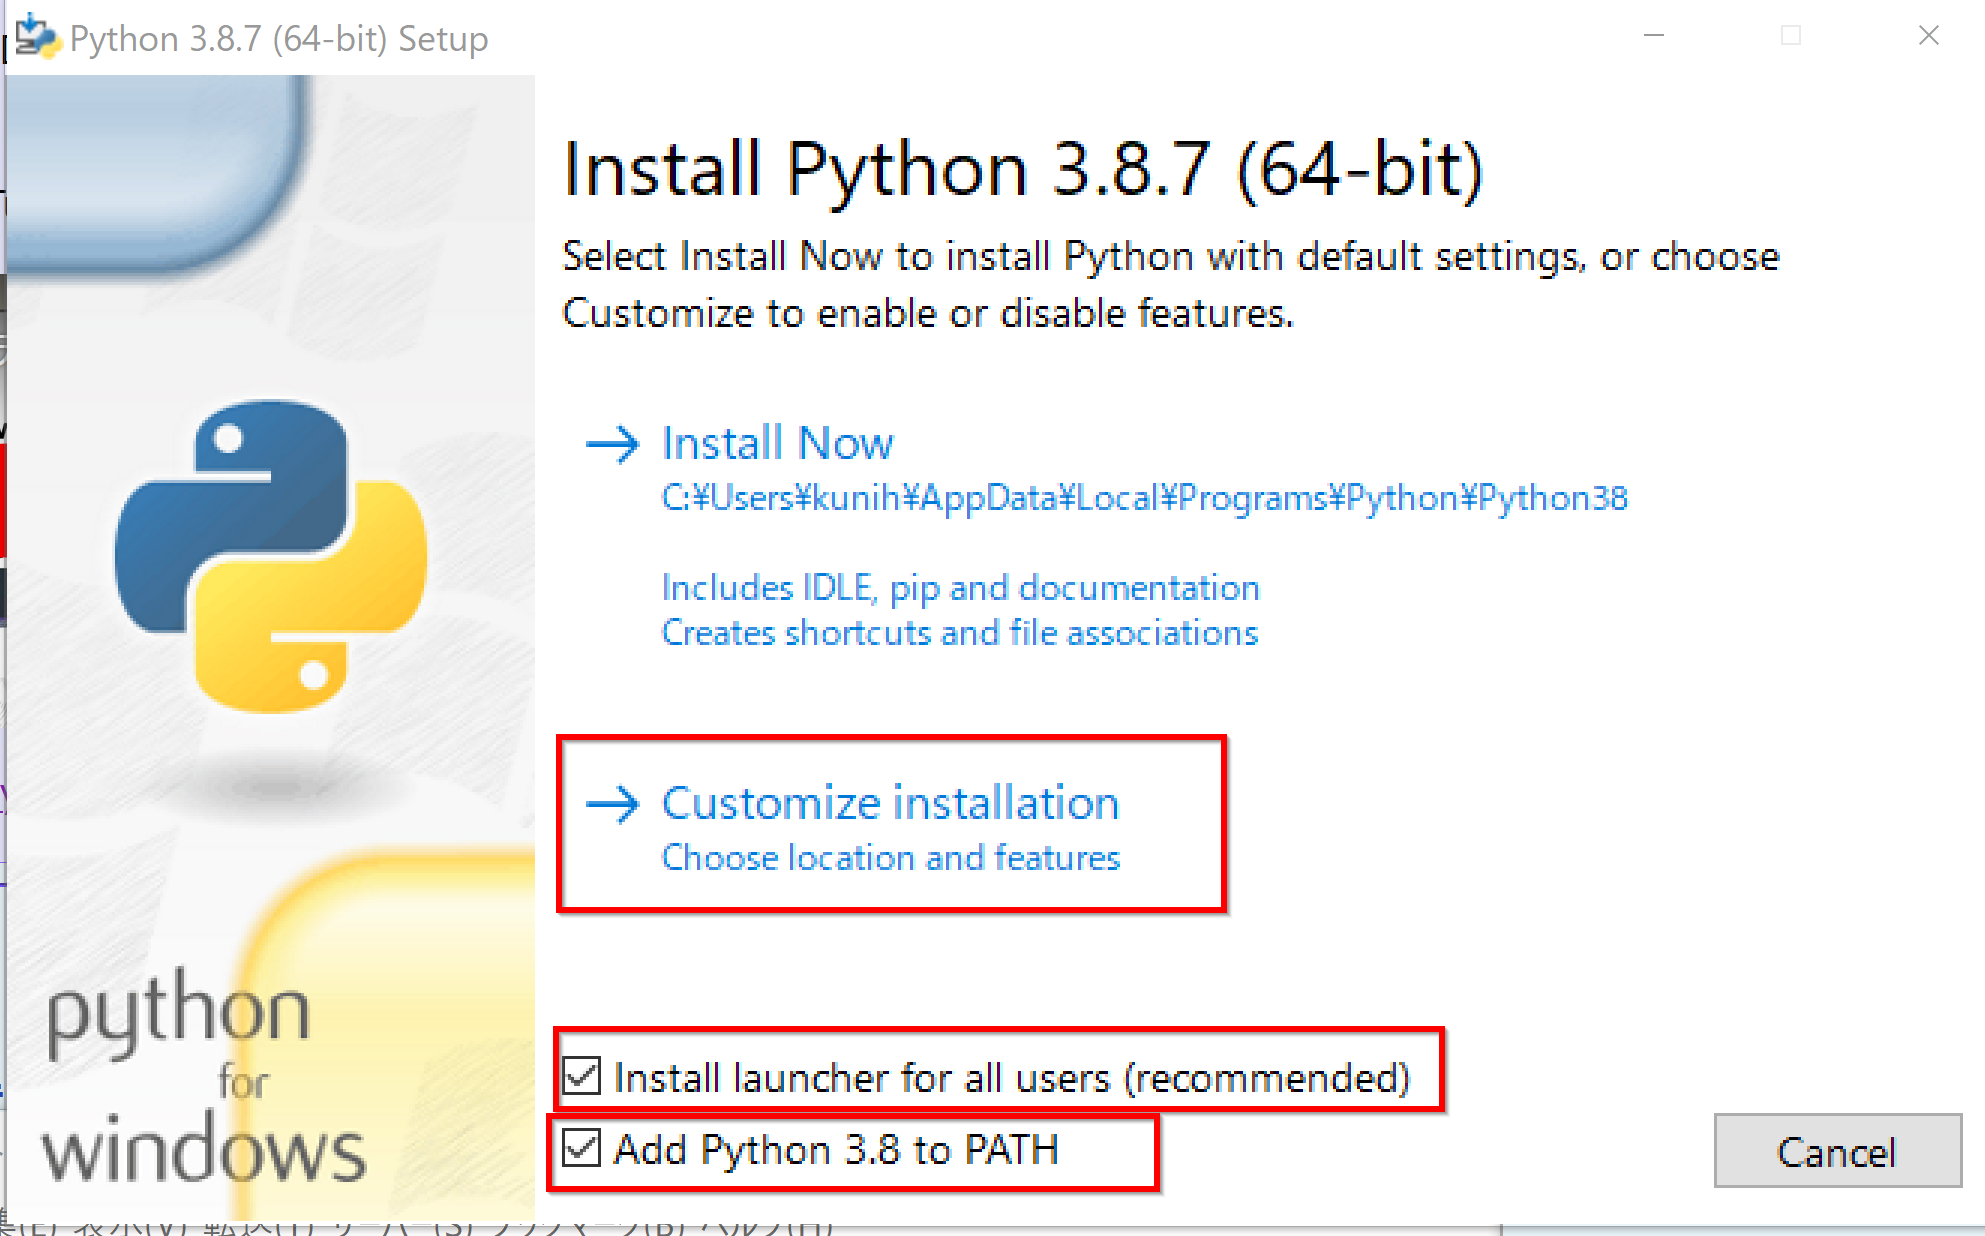
Python ランチャーをインストールするために,「Install launcher for all users (recommended)」をチェック.
* すでに Python ランチャーをインストール済みのときは, 「Install launcher for all users (recommended)」がチェックできないようになっている場合がある.そのときは,チェックせずに進む.

- 「Add Python 3.8 to PATH」をチェック.
- 「Customize Installation」をクリック.
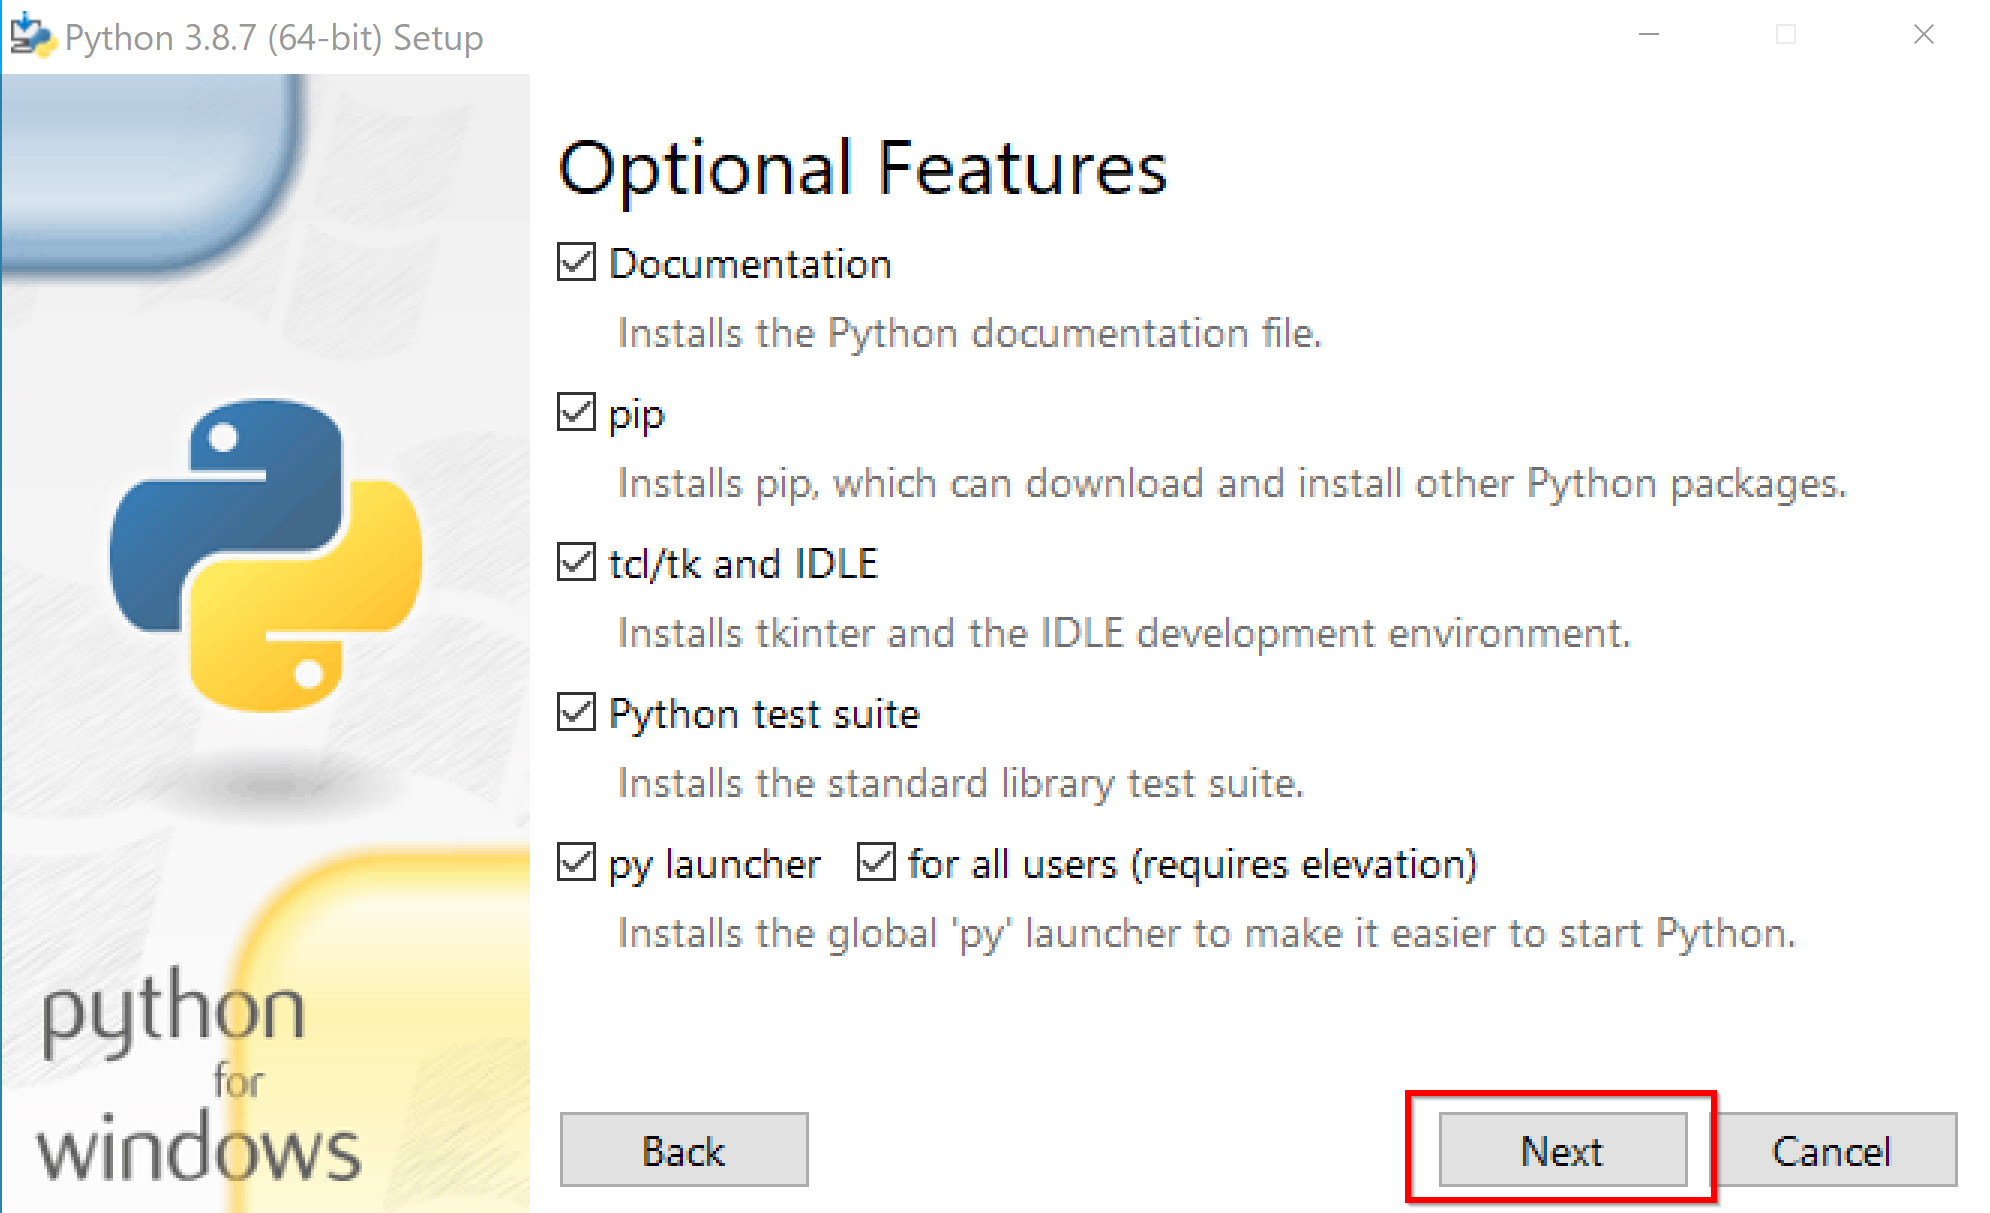
- オプションの機能 (Optional Features)は,既定(デフォルト)のままでよい.
「Next」をクリック
- 「Install for all users」を選ぶ.
「Install for all users」を選ぶ理由.
ユーザ名が日本語のときのトラブルを防ぐため.
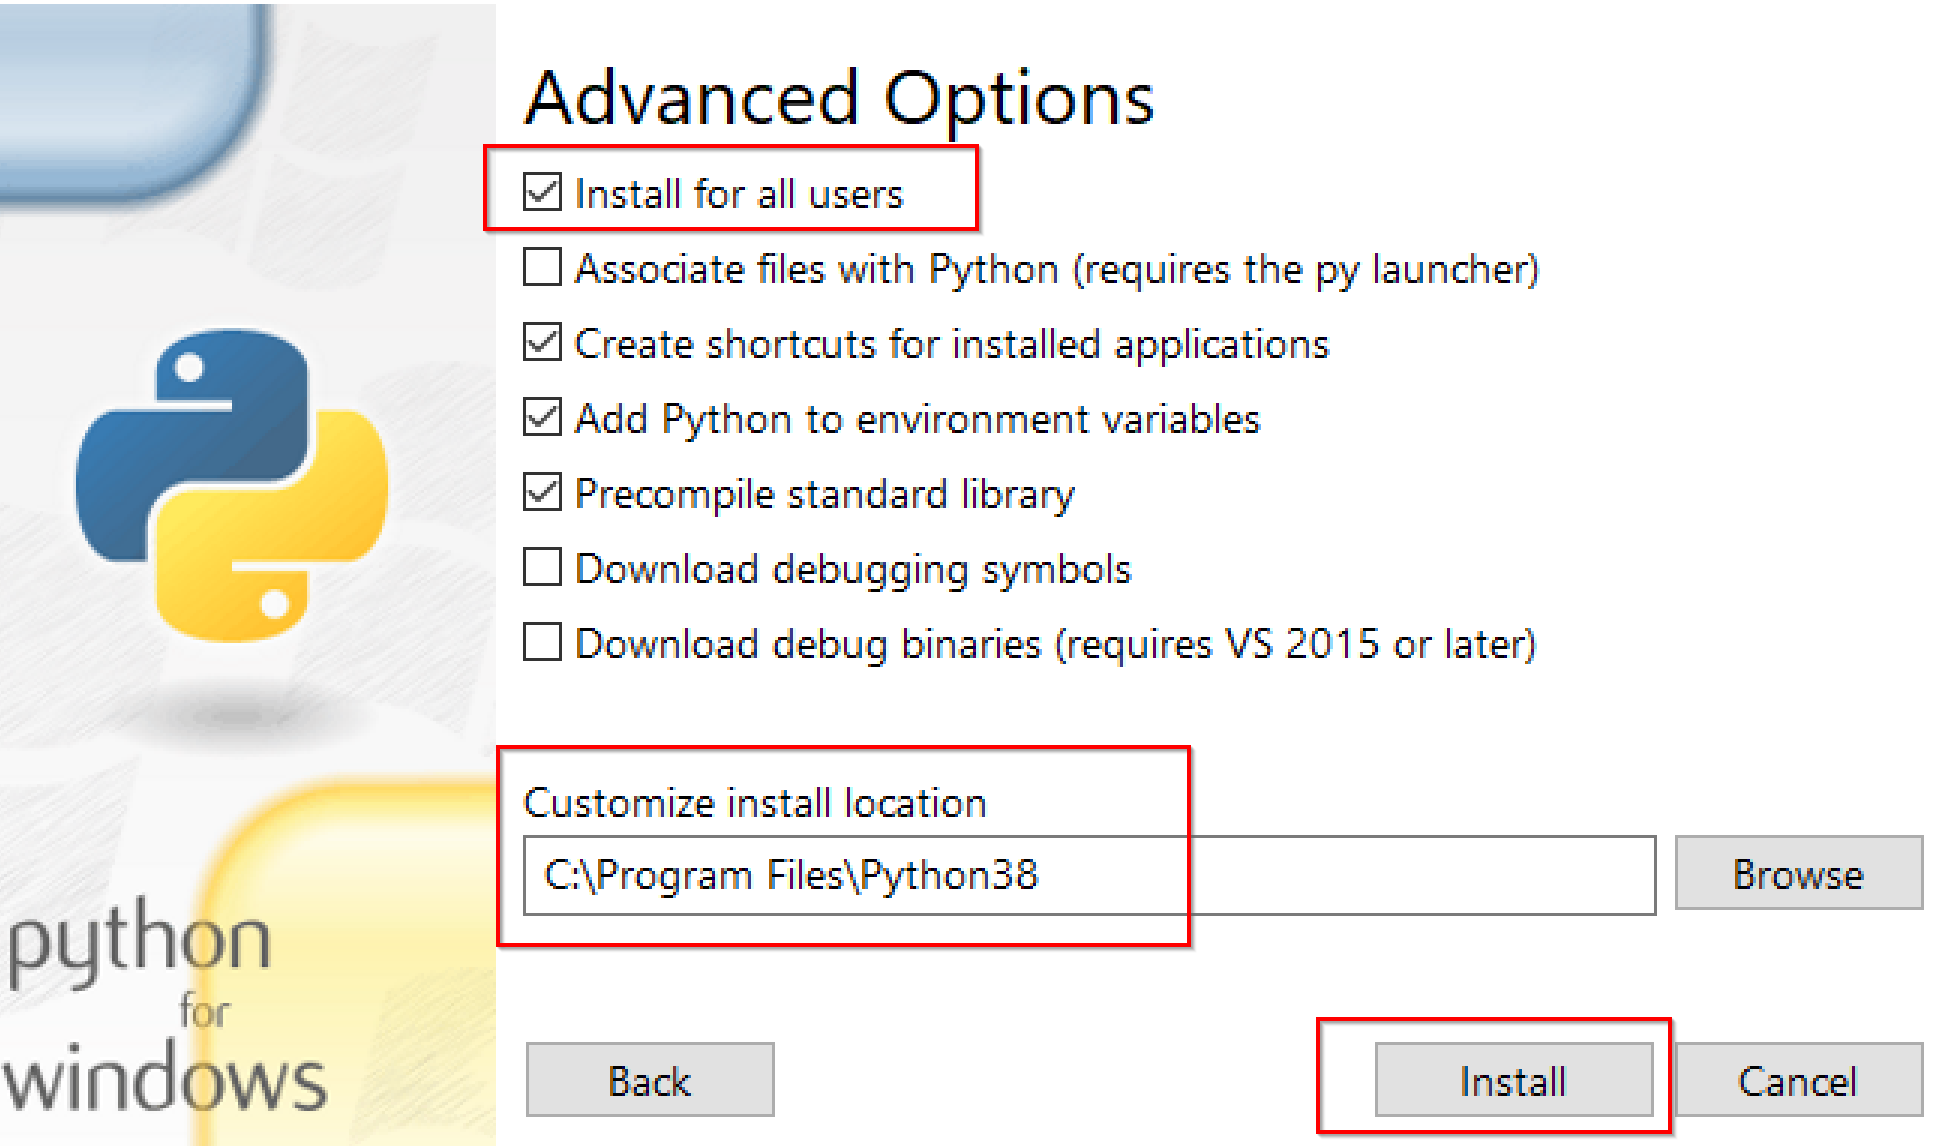
そして,Python のインストールディレクトリは,「C:\Program Files\Python38」のように自動設定されることを確認.
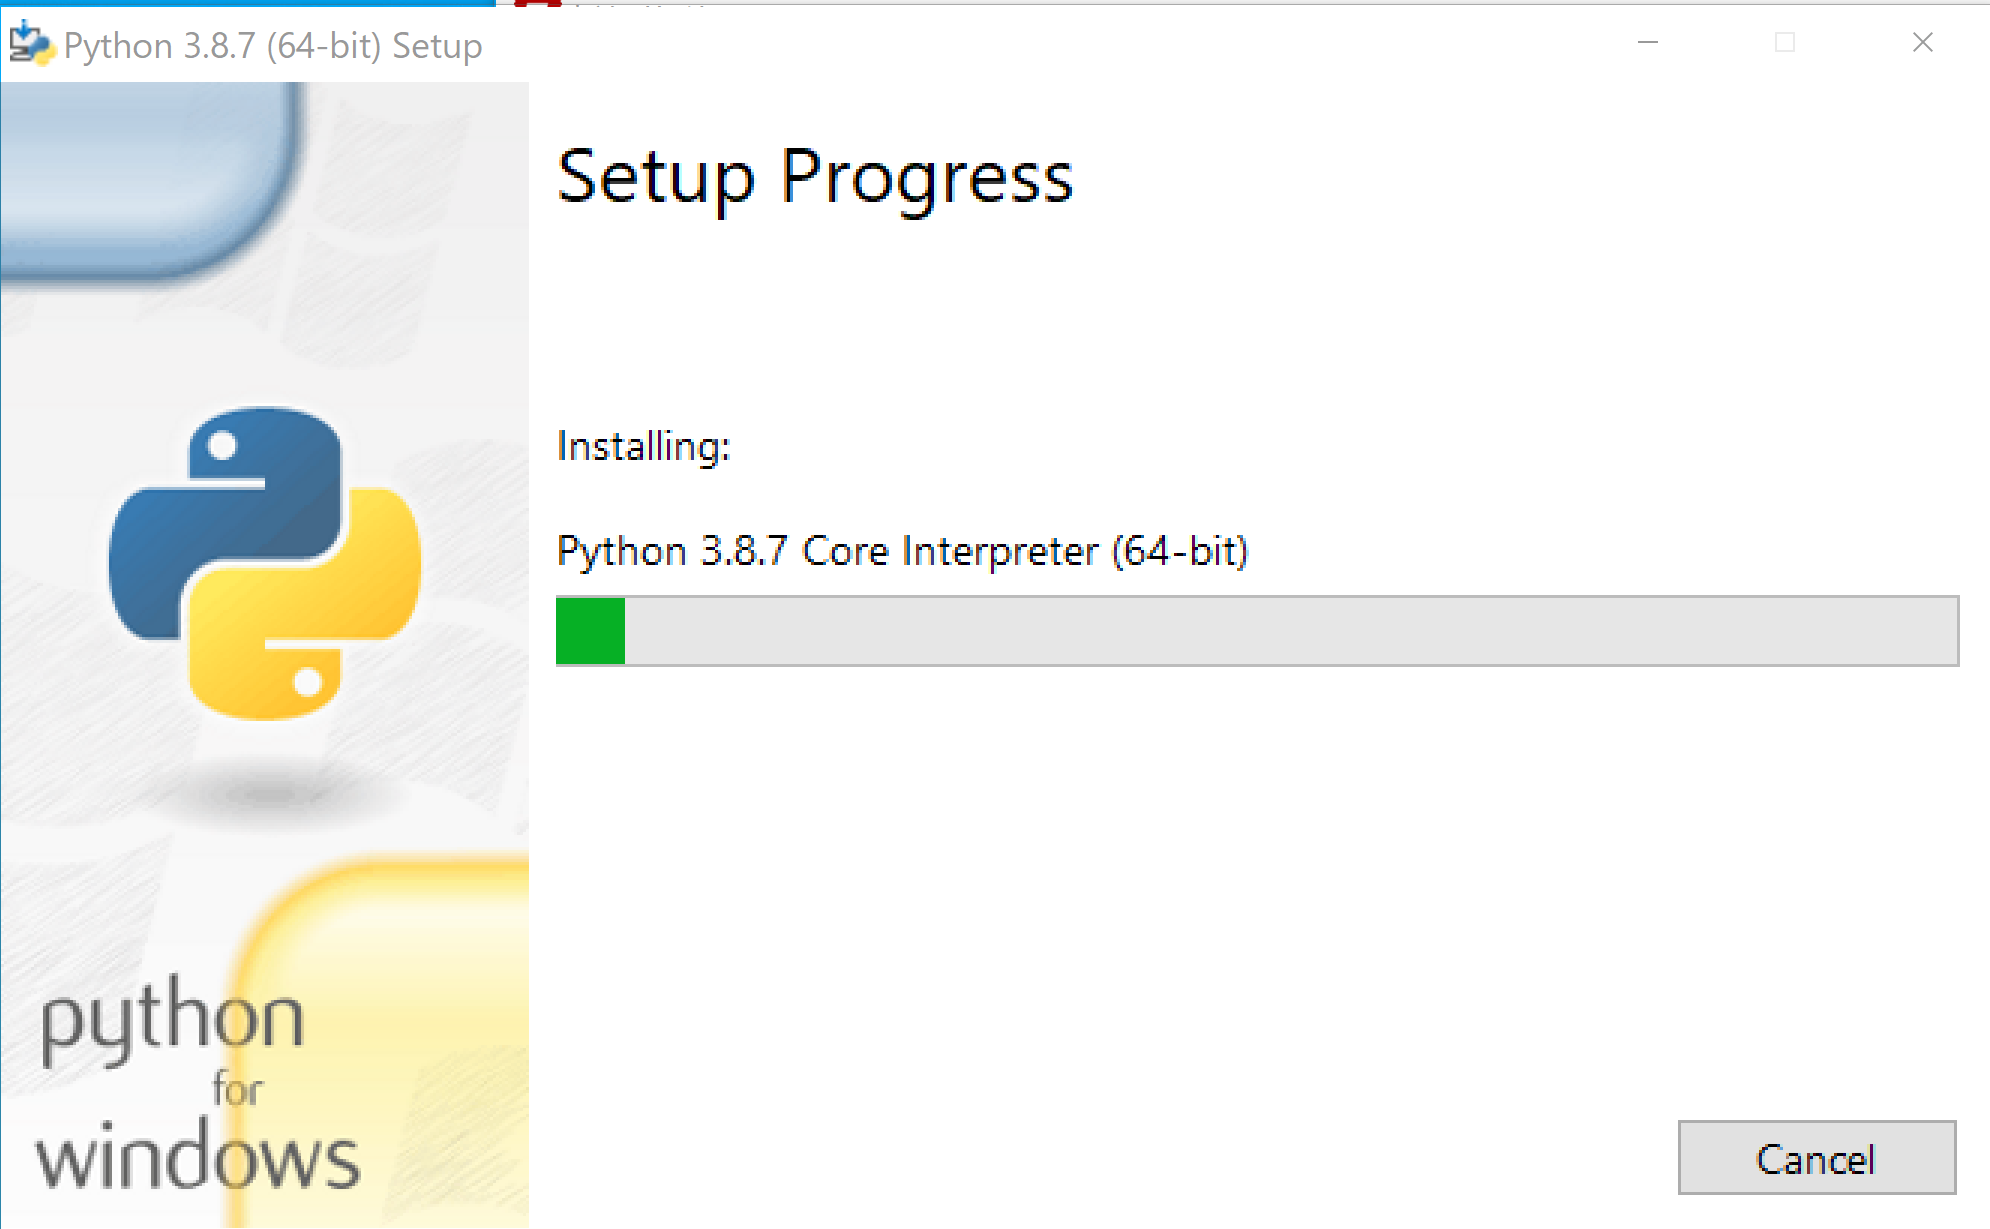
- インストールが始まる
- 「Disable path length limit」が表示される場合がある.クリックして、パス長の制限を解除する
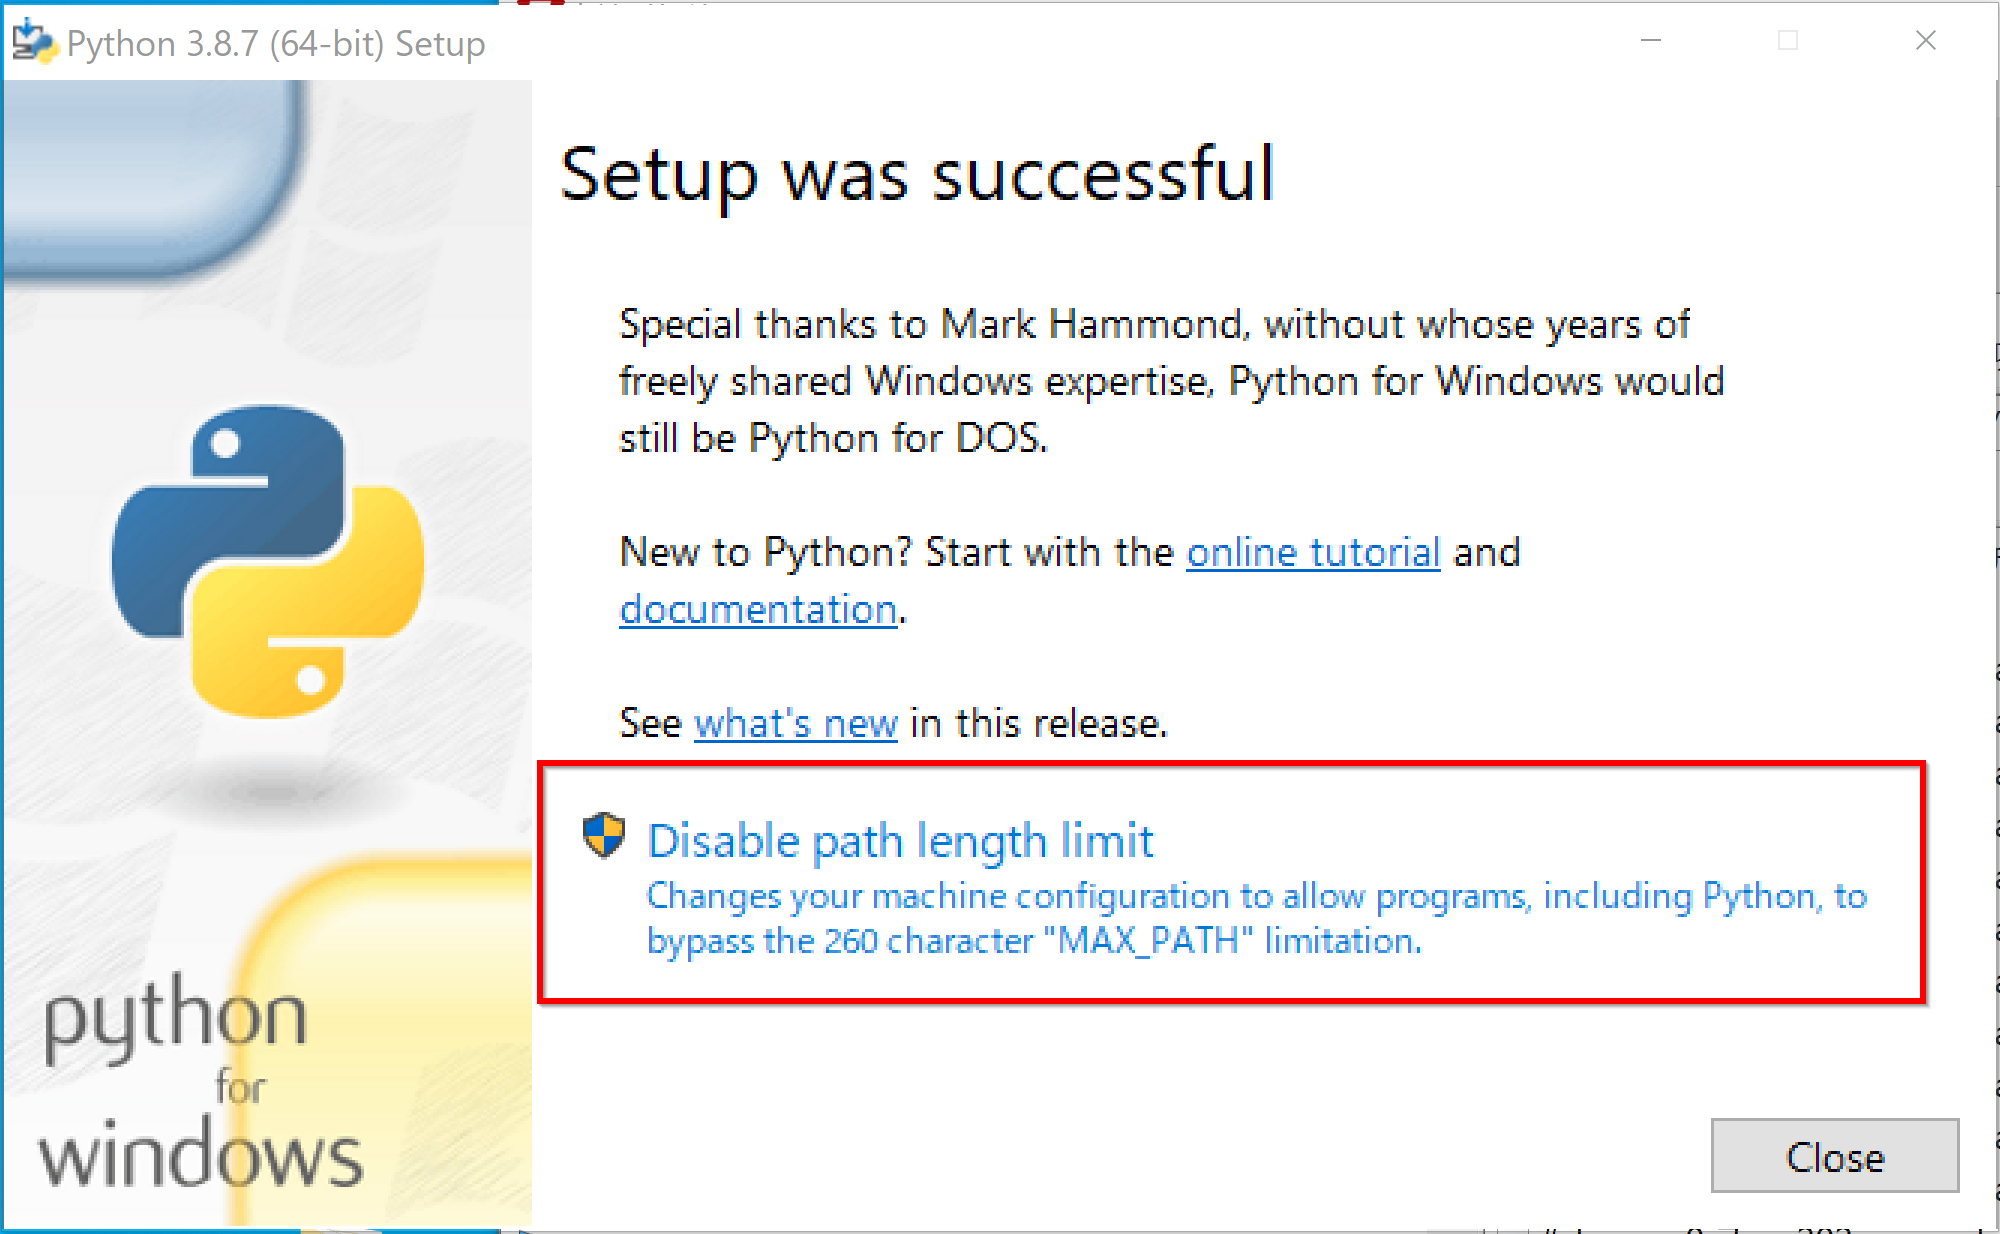
- インストールが終了したら,「Close」をクリック
- いまダウンロードした .exe ファイルを右クリック,
右クリックメニューで「管理者として実行」を選ぶ.
Python に関しての情報取得
- インストールのあと,Windows のスタートメニューに「Python 3.8」が増えていることを確認.
- Windows のシステム環境変数PATHの
先頭部分を確認
さきほど、「Add Python ... to PATH」をチェックしたので、 Python についての設定が自動で行われたことを確認する
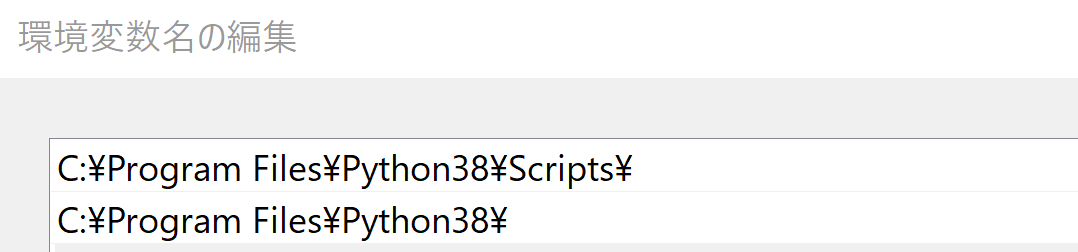
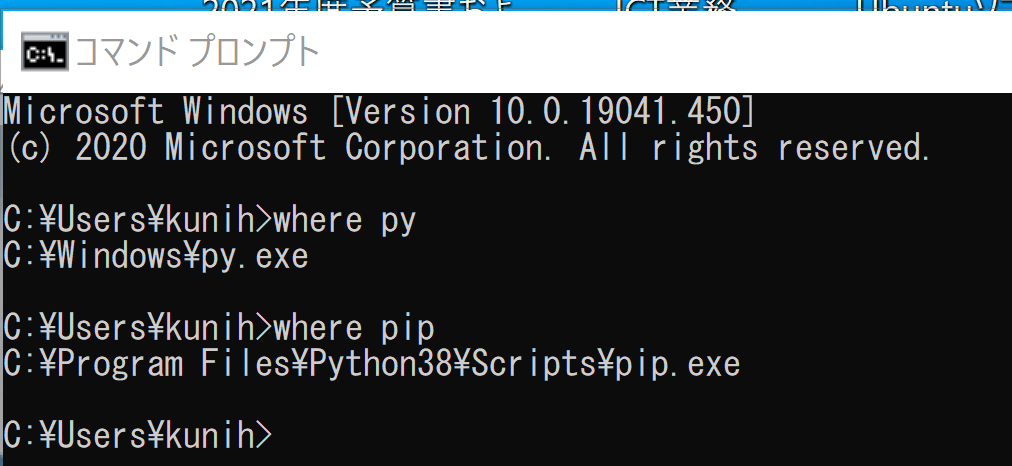
- システムの環境変数 Path の確認のため,新しくコマンドプロンプトを開き,次のコマンドを実行する.
py とpip にパスが通っていることの確認である.
where py
where pip
where py では「C:\Windows\py.exe」 が表示され, where pip では「C:\Program Files\Python38\Scripts\pip.exe」 が表示されることを確認. (「38」のところは使用する Python のバージョンに読み替えること).
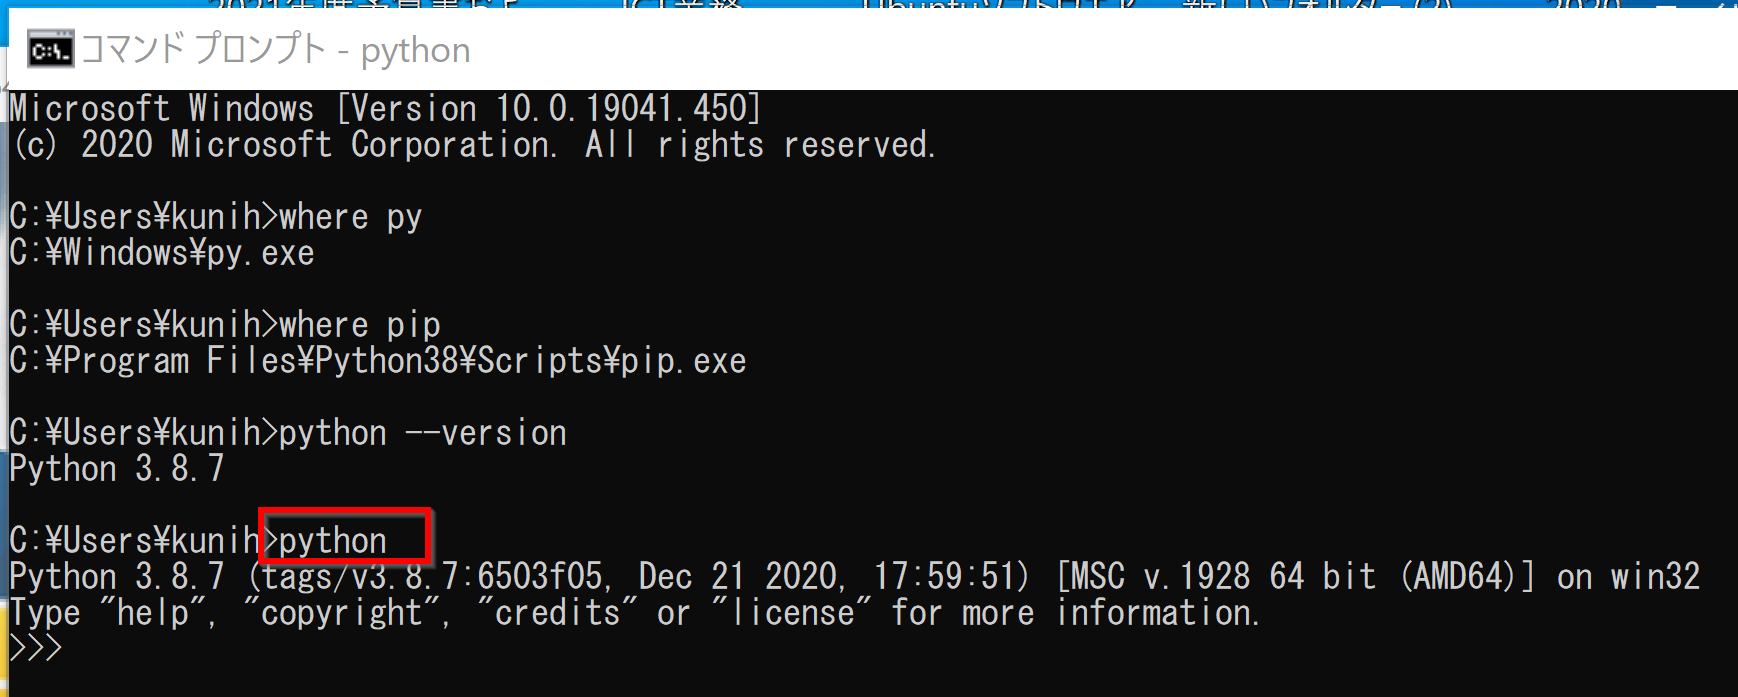
- python のバージョンの確認
* エラーメッセージが出ないことを確認.
python --version
-
Python のビルドに用いられたコンパイラのバージョン番号の確認
python import sys print(sys.version)下の実行例では、バージョン番号として「1928」が表示されている
- 引き続き,次のPythonプログラムを実行し,バージョン番号を確認する
下の実行例では、バージョン番号として「14.2」が表示されている
from distutils.msvc9compiler import *
get_build_version()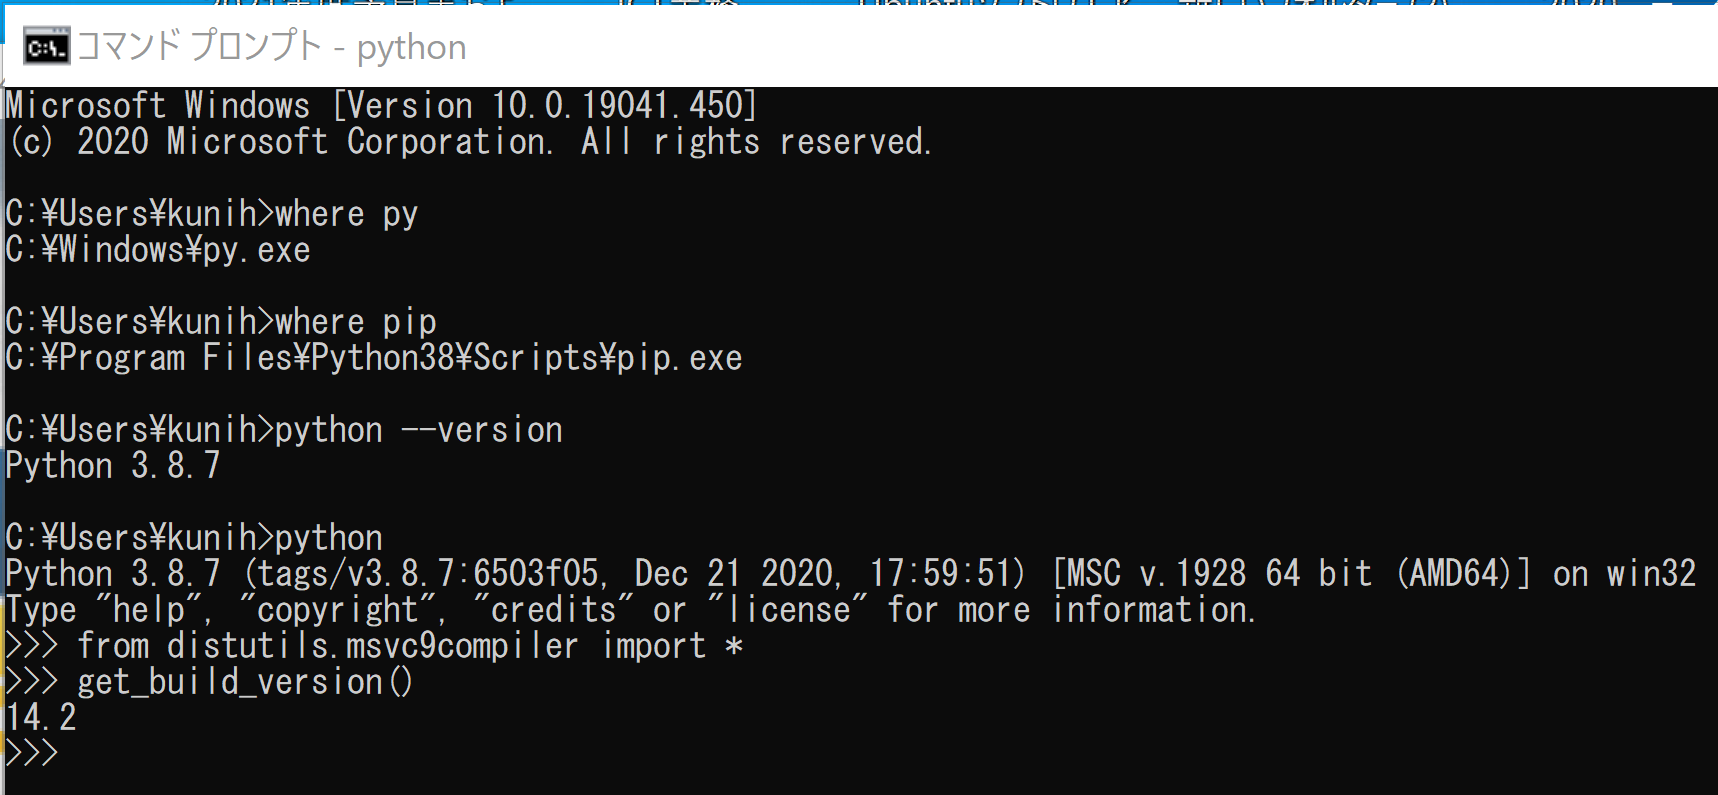
- exit() で終了

- pip の動作確認
Python のパッケージも同時にインストールされることが分かる.
* エラーメッセージが出ないことを確認.
pip list
Windows での Python 開発環境として,Jupyter Qt Console, Jupyter ノートブック (Jupyter Notebook), Jupyter Lab, Nteract, spyder のインストール
pip と setuptools の更新
- pip と setuptools の更新
Windows では,コマンドプロンプトを管理者として実行し, 次のコマンドを実行する.
python -m pip install -U pip setuptools - 再度、pip の動作確認
* エラーメッセージが出ないことを確認.
pip list
Python パッケージ(numpy, pandas, matplotlib, seaborn, scikit-learn)のインストール(Windows 上)
- コマンドプロンプトを管理者として開き次のコマンドを実行する.
python -m pip install -U pip setuptools numpy pandas matplotlib seaborn scikit-learn scikit-learn-intelex
- numpy の動作確認
python
import numpy as np
print(np.sin(0))
exit()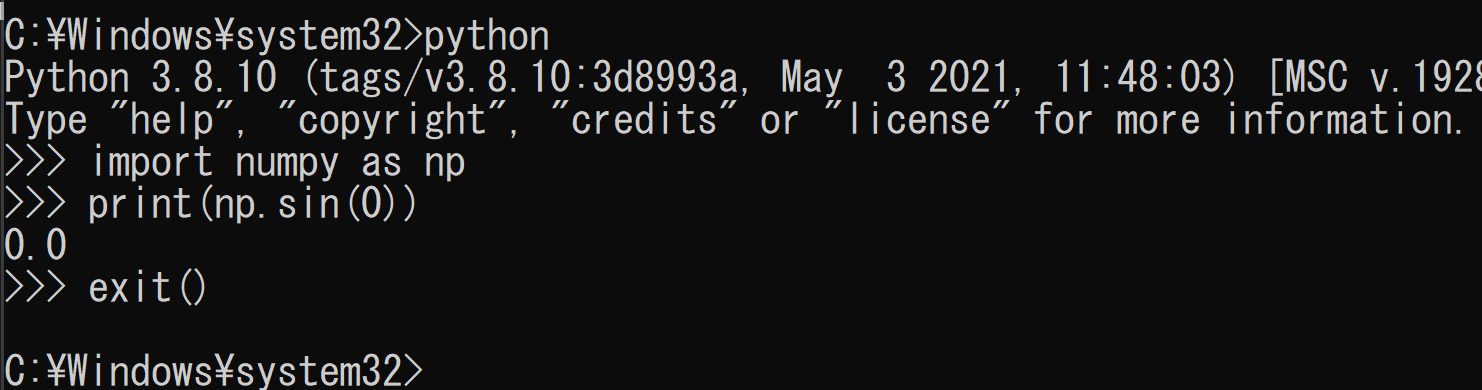
Python 開発環境,Python コンソール(Jupyter Qt Console, Jupyter ノートブック (Jupyter Notebook), Jupyter Lab, Nteract, spyder)のインストール
Python 開発環境,Python コンソール(Jupyter Qt Console, Jupyter ノートブック (Jupyter Notebook), Jupyter Lab, Nteract, spyder)のインストールを行う.
コマンドプロンプトで次のコマンドで起動、多くはスタートメニューでも起動できる
- python または py -3.8 (Python 3.8)
- python -m pip または py -3.8 -m pip (Python 3.8 の pip)
- jupyter qtconsole (Jupyter Qt Console)
- jupyter notebook (Jupyter ノートブック (Jupyter Notebook))
- jupyter lab (Jupyter Lab)
- jupyter nteract (Nteract)
- spyder (spyder)
- pip と setuptools の更新,Python 開発環境,Python コンソール(Jupyter Qt Console, Jupyter ノートブック (Jupyter Notebook), Jupyter Lab, Nteract, spyder)のインストール(Windows 上)
Windows では,コマンドプロンプトを管理者として実行し, 次のコマンドを実行する.
次のコマンドを実行することにより,pipとsetuptoolsを更新する,Jupyter Notebook,PyQt5、Spyderなどの主要なPython環境がインストールされる.
python -m pip install -U pip setuptools requests notebook==6.5.7 jupyterlab jupyter jupyter-console jupytext PyQt5 nteract_on_jupyter spyder Python の仮想環境を使用したいときは,次のような手順で, venv を用いて,Python の仮想環境を作る.
【Python 3.8 の仮想環境の作成(venv を使用)】
- Python の仮想環境の名前: py38
- 使用するPython のバージョン: 3.8
- Python の隔離された環境を置くディレクトリ: C:\venv\py38
Windows では,コマンドプロンプトを管理者として実行し, 次のコマンドを実行する.
コマンドプロンプトを管理者として実行: 別ページ »で説明py -3.8 -m pip install -U pip setuptools py -3.8 -m venv --system-site-packages C:\venv\py38 C:\venv\py38\Scripts\activate.bat python -m pip install -U pip setuptools requests notebook==6.5.7 jupyterlab jupyter jupyter-console jupytext PyQt5 nteract_on_jupyter spyderPython の使用は「C:\venv\py38\Scripts\activate.bat」の後,「python」で行う.
- numpy のインストール(今度の動作確認で使用)
Windows では,コマンドプロンプトを管理者として実行し, 次のコマンドを実行する.
pip install -U numpy matplotlib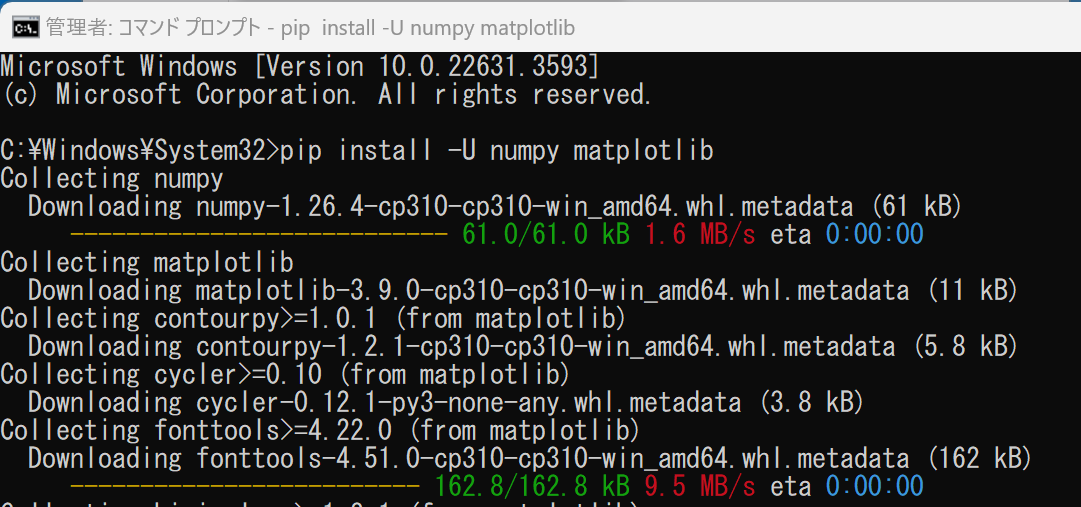
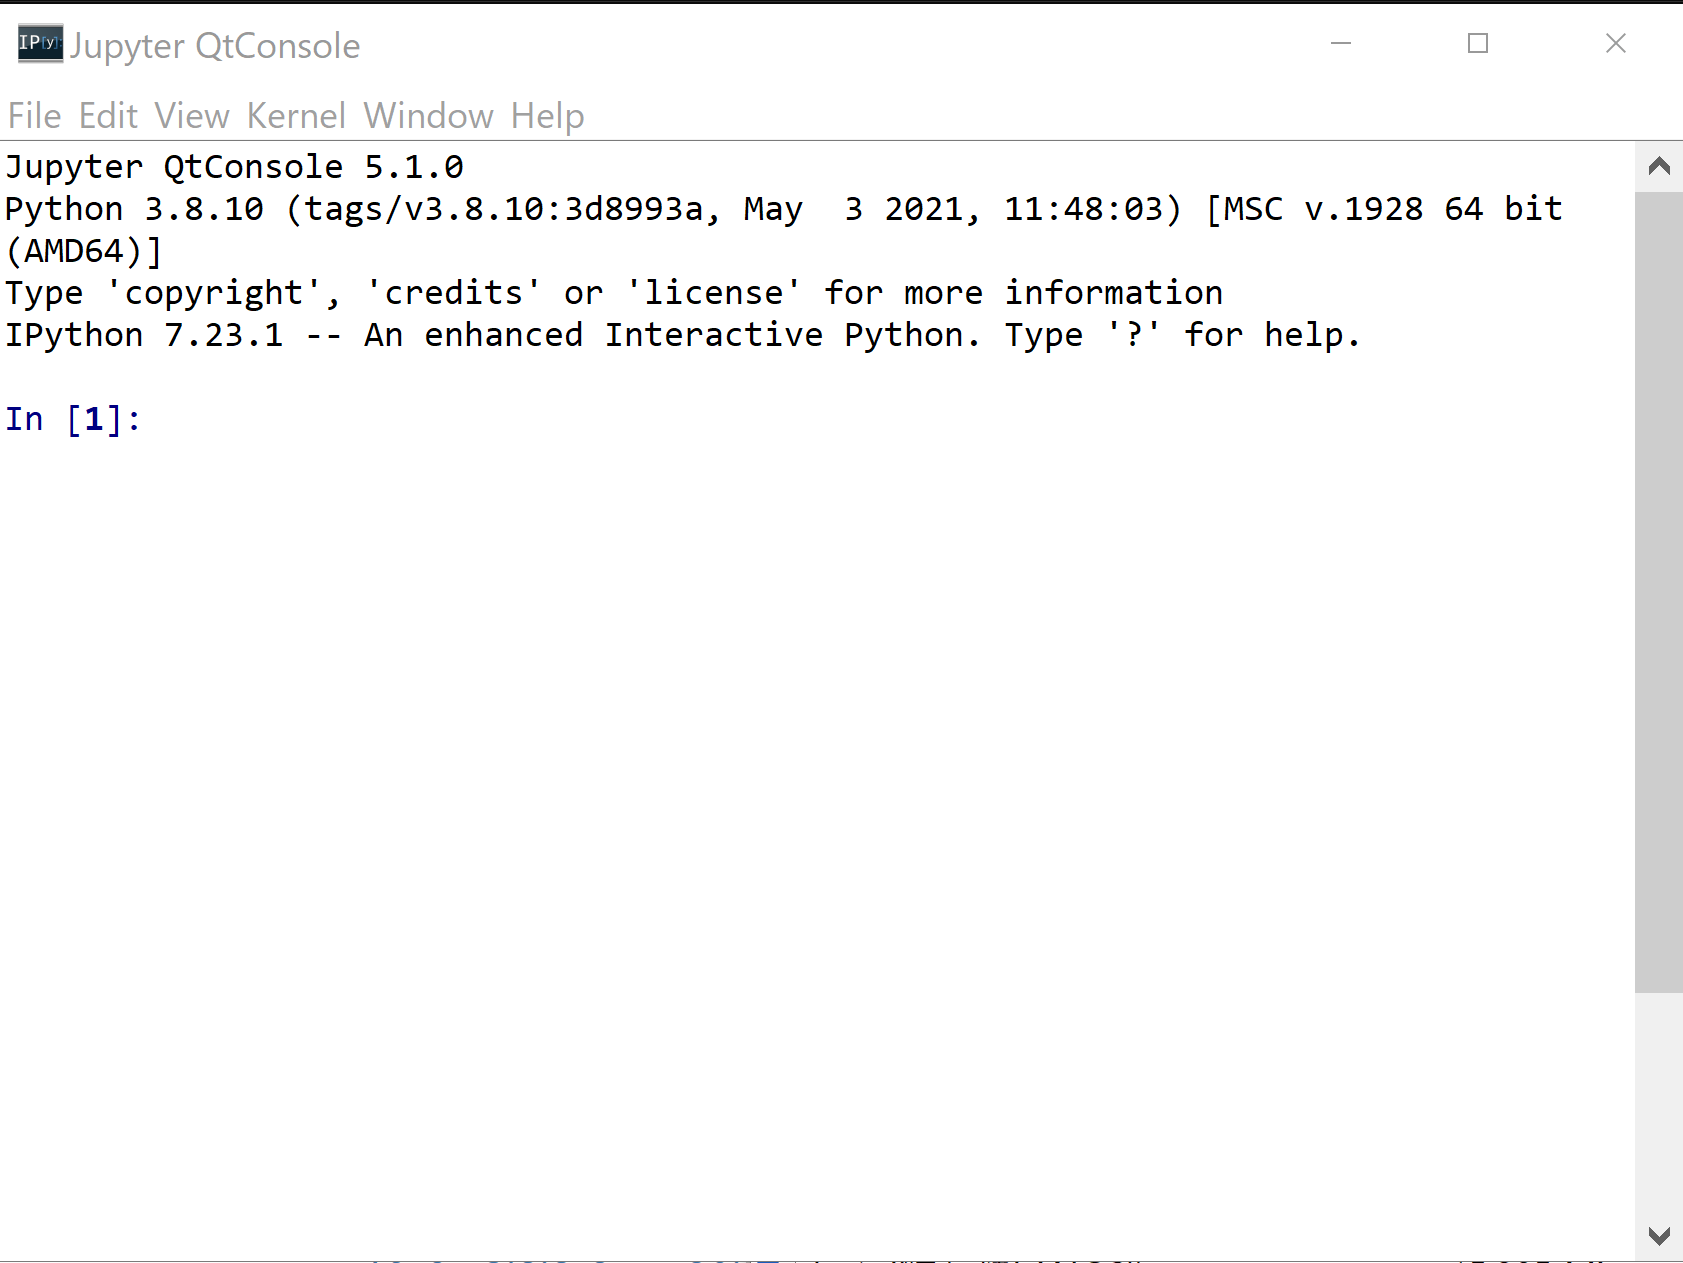
- Jupyter Qt Console の起動チェック
新しくコマンドプロンプトを開き,次のコマンドを実行する. Jupyter Qt Console が開けば OK.
jupyter qtconsole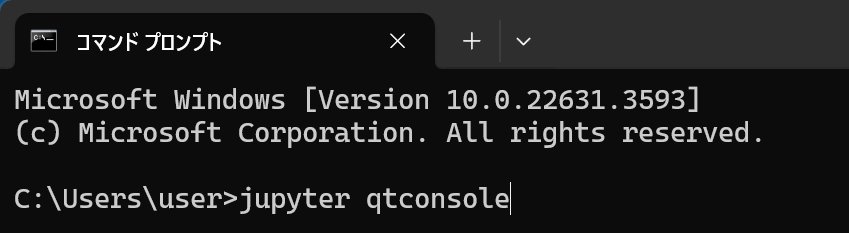
- 確認のため,Jupyter Qt Console で,次の Python プログラムを実行してみる.
次のプログラムは,NumPy と Matplotlib を使用して,0から6までの範囲のsin関数のグラフを描画する.warnings モジュールを使用して Matplotlib の警告表示を抑制し,Matplotlib では,デフォルトのスタイルを使用する.
import numpy as np
%matplotlib inline
import matplotlib.pyplot as plt
import warnings
warnings.filterwarnings('ignore')   # Suppress Matplotlib warnings

x = np.linspace(0, 6, 100)
plt.style.use('default')
plt.plot(x, np.sin(x))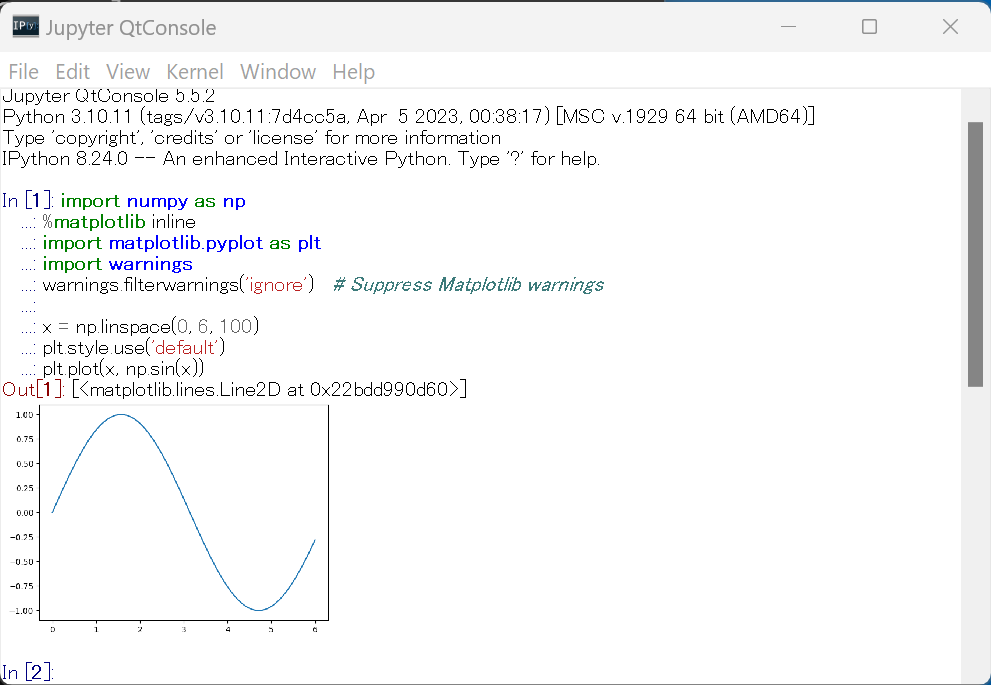
- nteract の起動チェック
新しくコマンドプロンプトを開き,次のコマンドを実行する. ntetact が開けば OK.
jupyter nteract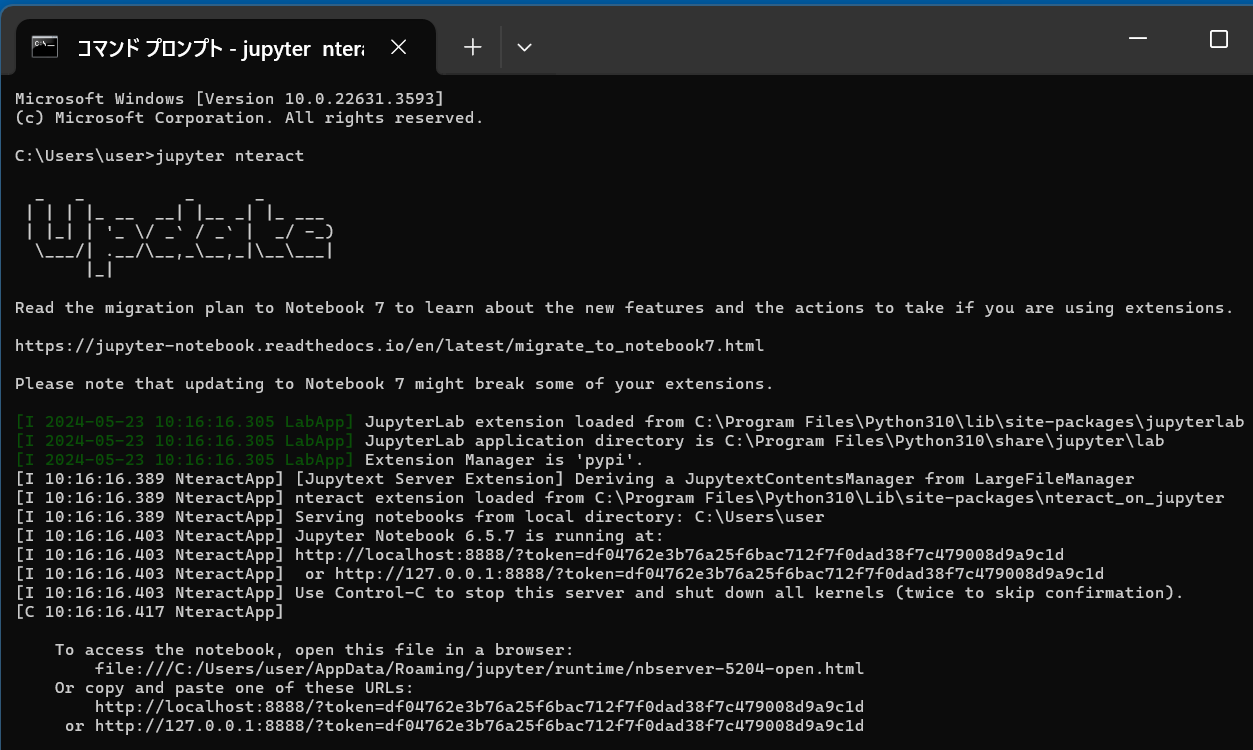
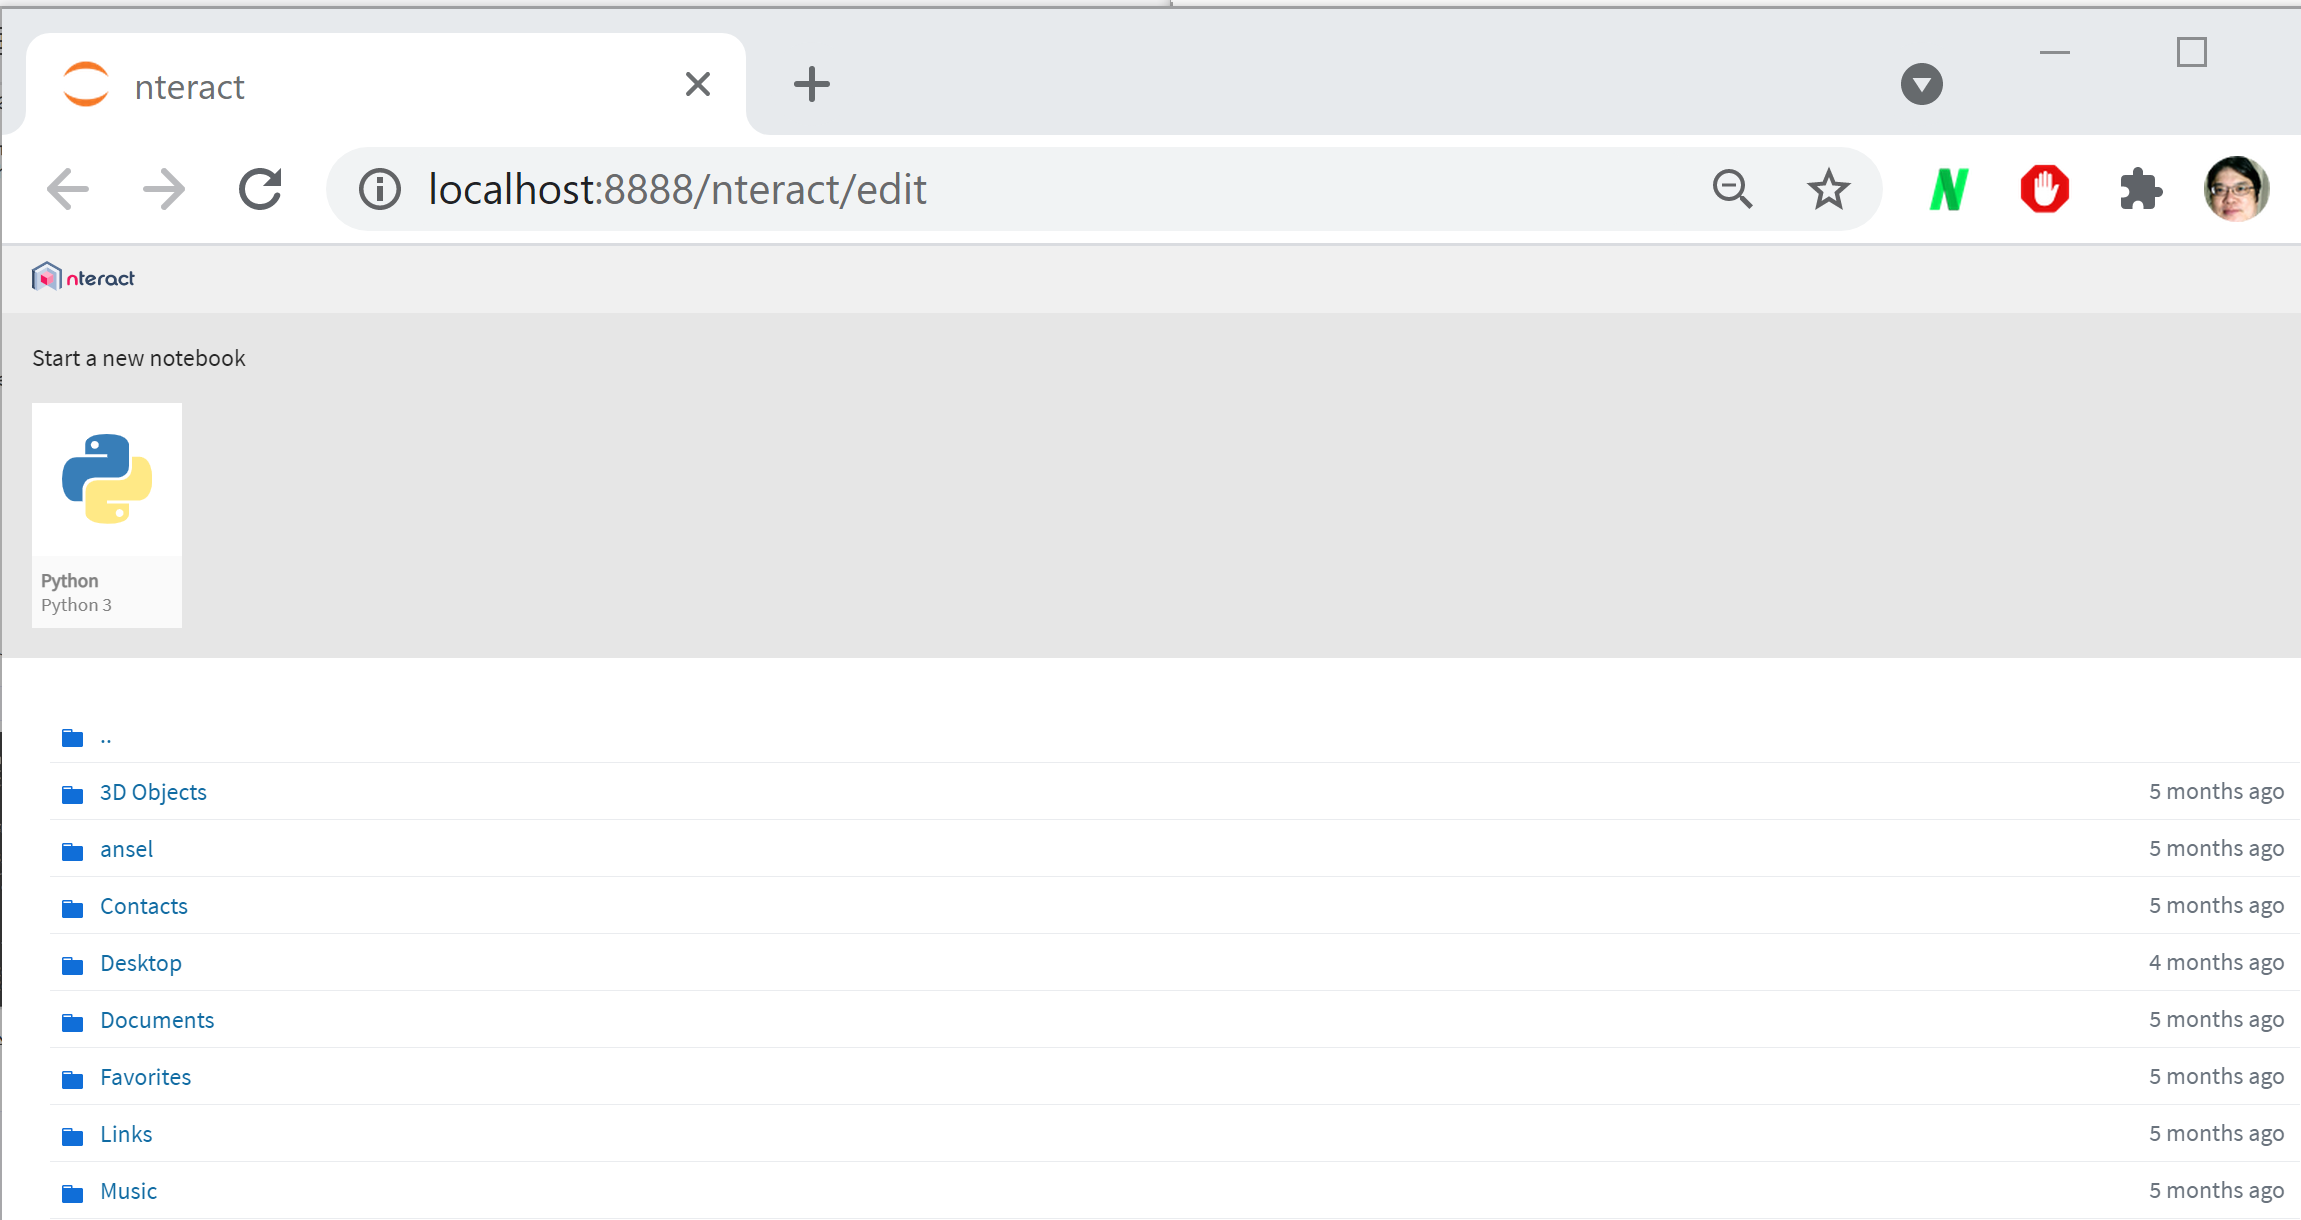
- 確認のため,nteract で,次の Python プログラムを実行してみる.
そのために「Start a new notebook」の下の「Python」をクリック,次のプログラムを入れ実行.
次のプログラムは,NumPy と Matplotlib を使用して,0から6までの範囲のsin関数のグラフを描画する.warnings モジュールを使用して Matplotlib の警告表示を抑制し,Matplotlib では,デフォルトのスタイルを使用する.
import numpy as np
%matplotlib inline
import matplotlib.pyplot as plt
import warnings
warnings.filterwarnings('ignore')   # Suppress Matplotlib warnings

x = np.linspace(0, 6, 100)
plt.style.use('default')
plt.plot(x, np.sin(x))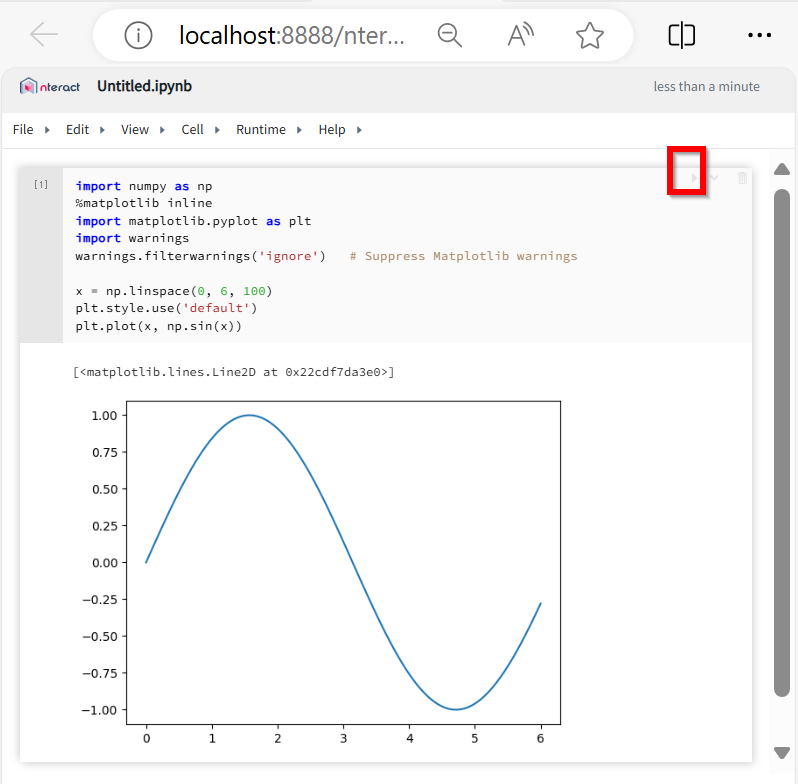
- Juypter Noteboo
- 次のコマンドで,設定ファイルを生成
jupyter notebook --generate-config - jupyter/jupyter_notebook_config.py を編集し,末尾に,次を追加
c.NotebookApp.contents_manager_class = "jupytext.TextFileContentsManager"
- jupyter notebook を起動し,Edit, Edit Notbook Manager を選ぶ.次のように設定する.
"jupytext": {"formats": "ipynb,py"}
- 次のコマンドで,設定ファイルを生成
性能の確認
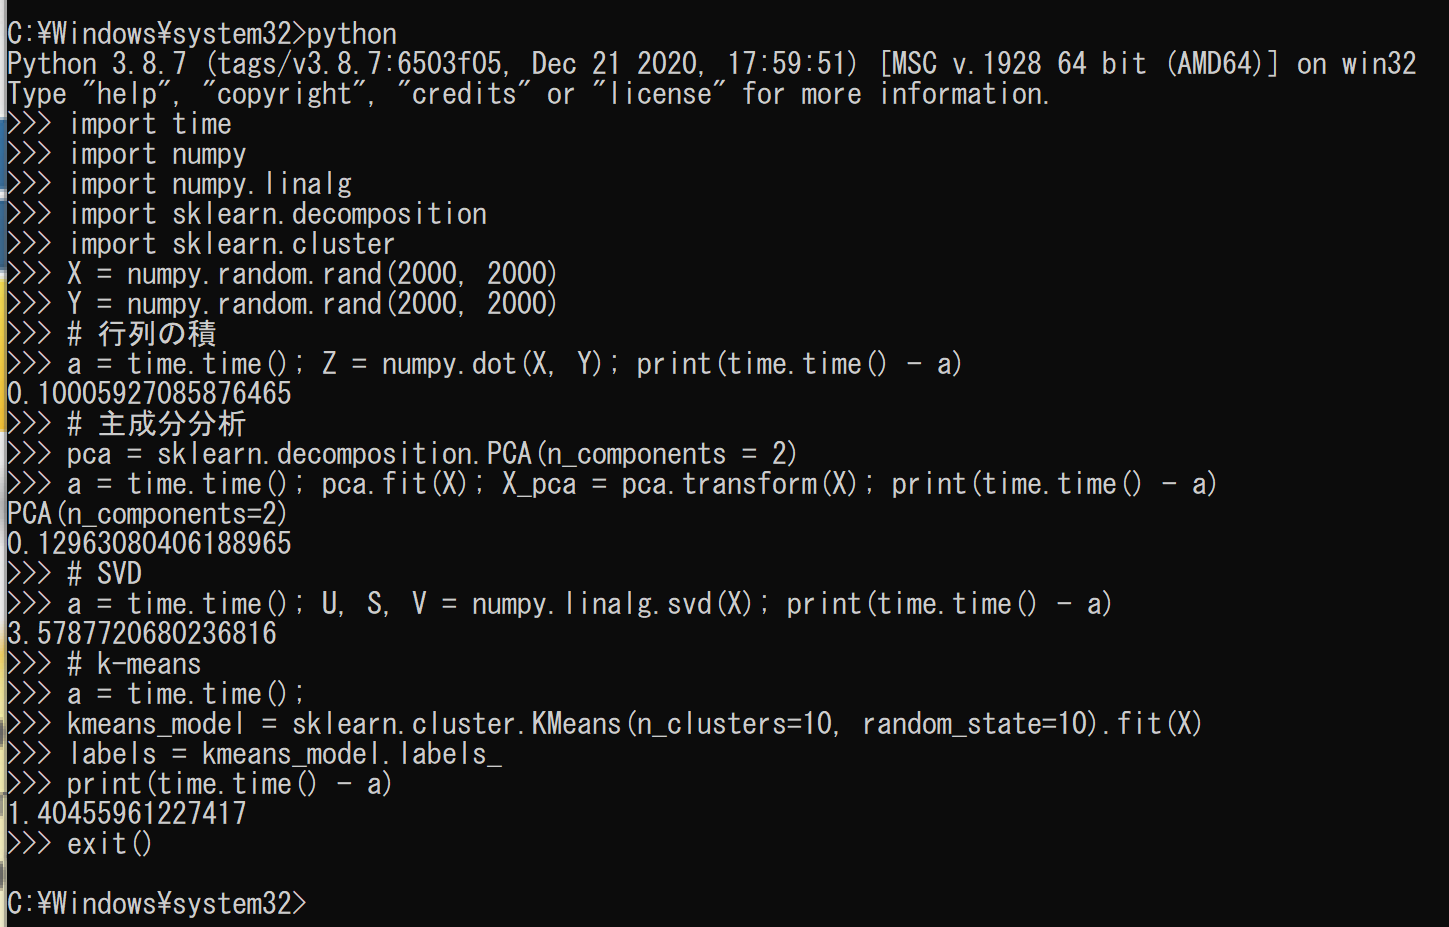
行列の積, 主成分分析, SVD, k-Means クラスタリングを実行し,性能を確認する.
- 以下の手順を管理者権限のコマンドプロンプトで実行する
(手順:Windowsキーまたはスタートメニュー →
cmdと入力 → 右クリック → 「管理者として実行」)。 - まず,前準備として,次のコマンドを実行
python -m pip install -U numpy scikit-learn scikit-learn-intelex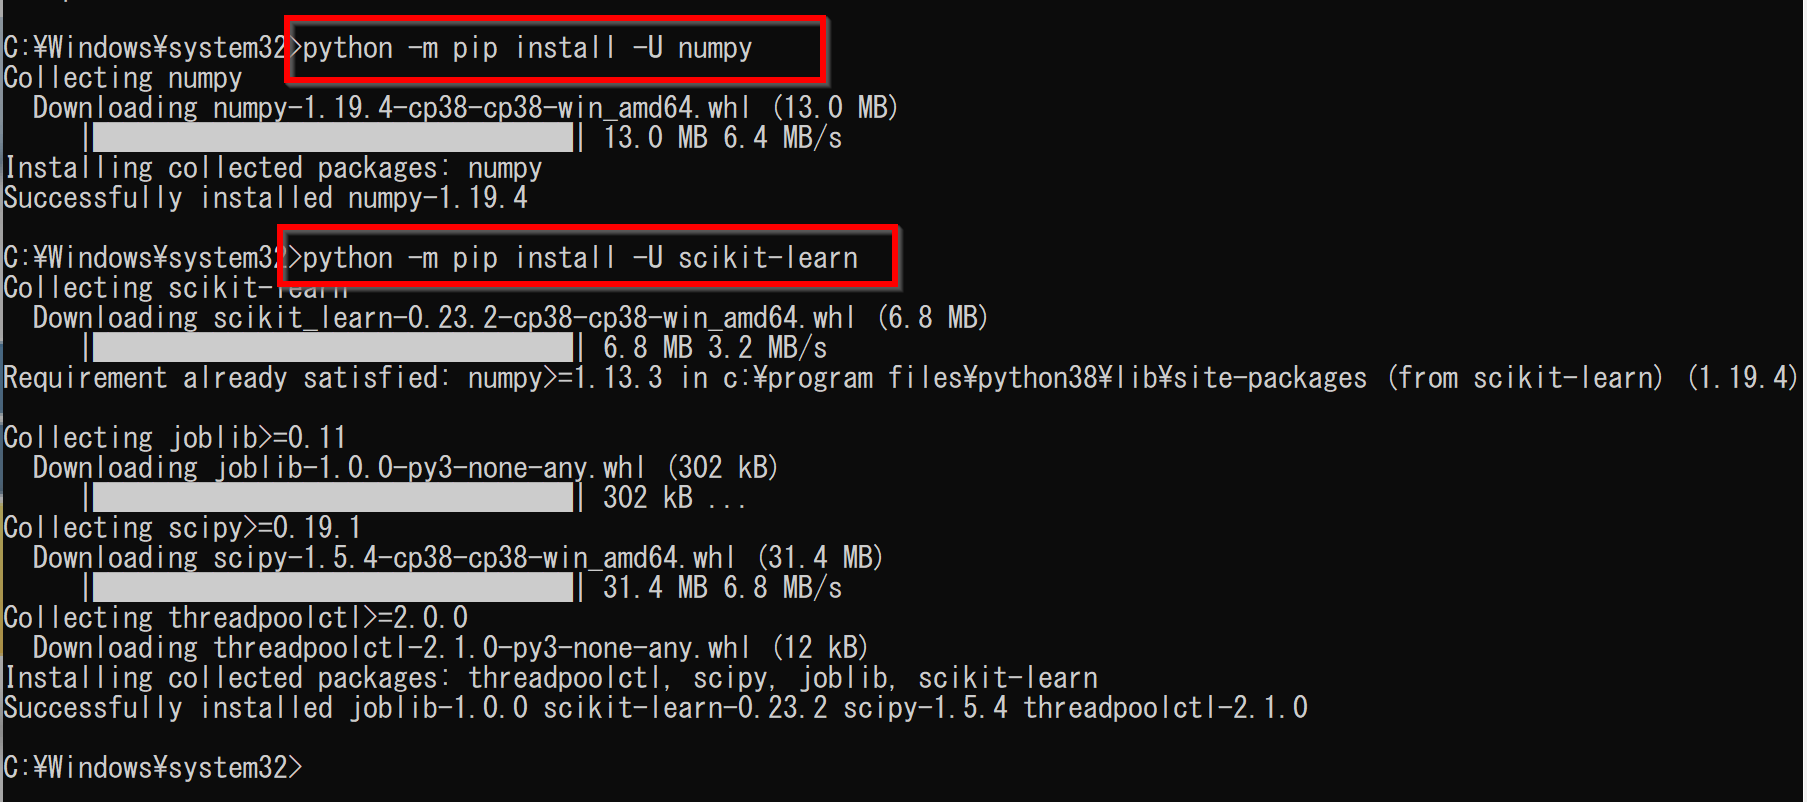
- 性能の確認のため,次の Python プログラムを実行
import time
import numpy
import numpy.linalg
import sklearn.decomposition
import sklearn.cluster
X = numpy.random.rand(2000, 2000)
Y = numpy.random.rand(2000, 2000)
# 行列の積
a = time.time(); Z = numpy.dot(X, Y); print(time.time() - a)
# 主成分分析
pca = sklearn.decomposition.PCA(n_components = 2)
a = time.time(); pca.fit(X); X_pca = pca.transform(X); print(time.time() - a)
# SVD
a = time.time(); U, S, V = numpy.linalg.svd(X); print(time.time() - a)
# k-means
a = time.time();
kmeans_model = sklearn.cluster.KMeans(n_clusters=10, random_state=10).fit(X)
labels = kmeans_model.labels_
print(time.time() - a)
実行結果の例
- 行列の積: 0.10 秒
- 主成分分析: 0.13 秒
- SVD: 3.58 秒
- k-Means クラスタリング: 1.40 秒
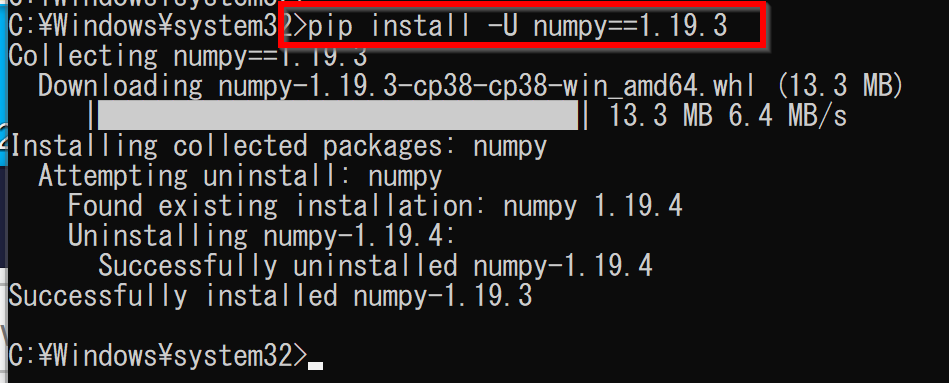
 エラーとして,「RuntimeError: The current Numpy installation ('C:\\Program Files\\Python38\\lib\\site-packages\\numpy\\__init__.py') fails to pass a sanity check due to a bug in the windows runtime. See this issue for more information: https://tinyurl.com/y3dm3h86」のようなメッセージが出た場合.
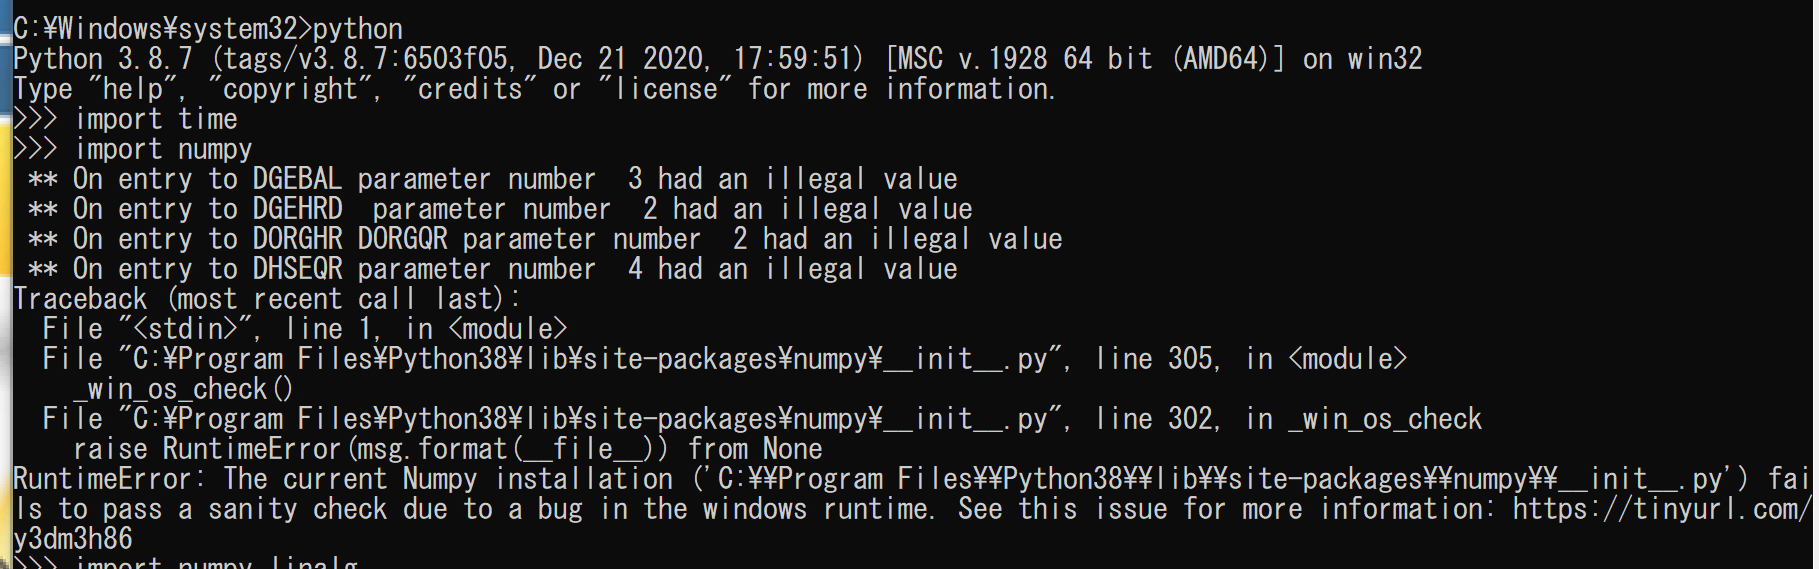
次のように操作して,エラーを回避.