WinPython のインストール(Windows 上)
- MinGW の gcc
- qtconsole: コンソール.図などにも対応.
- spyder: Python 開発環境
- Anaconda Navigator: アプリケーションの起動や管理などができるアプリケーション
本記事では,WinPythonのインストール,初期設定,主要なPythonパッケージのインストール,簡単な性能確認の手順をスクリーンショット等を用いて説明します.
【目次】
- WinPython のダウンロードとインストール
- 環境変数 Path の設定
- WinPython のインストール後の確認
- パッケージ管理ツールの更新
- 性能の確認
- TensorFlow のインストール
- Pythonのライブラリのインストール
- 試しに Python で OpenCV を使ってみる
WinPython のダウンロードとインストール
(注意) 本記事では Python 3.11 ベースのWinPythonを例に説明します.WinPythonのバージョンによって、含まれるPythonのバージョンや手順が若干異なる場合があります.
- ウェブページを開く
- 「Files」をクリック
- バージョンを選ぶ
利用したい Python のバージョン(ここでは例として Python 3.11 系)に対応するWinPythonの最新安定版を選びます.
- 最新の安定版をダウンロード.
「Download Latest Version」をクリックします.(ファイル名を確認し,意図したバージョンのものをダウンロードしてください)
- ファイルのダウンロードが始まる.
- ダウンロードした .exe ファイルを実行
- 展開するディレクトリの設定.
展開(解凍)するディレクトリを設定します.システムドライブ直下(`C:\` など)は避け、ユーザーフォルダ配下(例: `C:\Users\YourUsername\WinPython`)や、専用のフォルダ(例: `C:\Tools\WinPython`)を指定することを推奨します.ここでは例として `C:\Tools\WPy64-311xx` (xxはバージョン番号)に展開するものとします.
- ディレクトリを指定したら,「Extract」をクリック.
- 終了するまでしばらく待つ.
環境変数 Path の設定
コマンドプロンプトなどから WinPython の Python や関連ツール (`pip`など) を簡単に呼び出せるように、Windows のシステム環境変数 `Path` に以下のディレクトリを追加します.
以下のパスは,ご自身がWinPythonを展開したディレクトリに合わせて修正してください.(例: `C:\Tools\WPy64-311xx` に展開した場合)
C:\Tools\WPy64-311xx\python-3.11.x.amd64
C:\Tools\WPy64-311xx\python-3.11.x.amd64\Scripts
C:\Tools\WPy64-311xx\Scripts
C:\Tools\WPy64-311xx
(環境変数 Path の設定方法が分からない場合は,別途「Windows 環境変数 設定」などで検索してください.設定後はPCの再起動や再サインインが必要な場合があります.)
WinPython のインストール後の確認
- Windows で,コマンドプロンプトを起動します.(この確認作業では、通常、管理者権限は不要です)
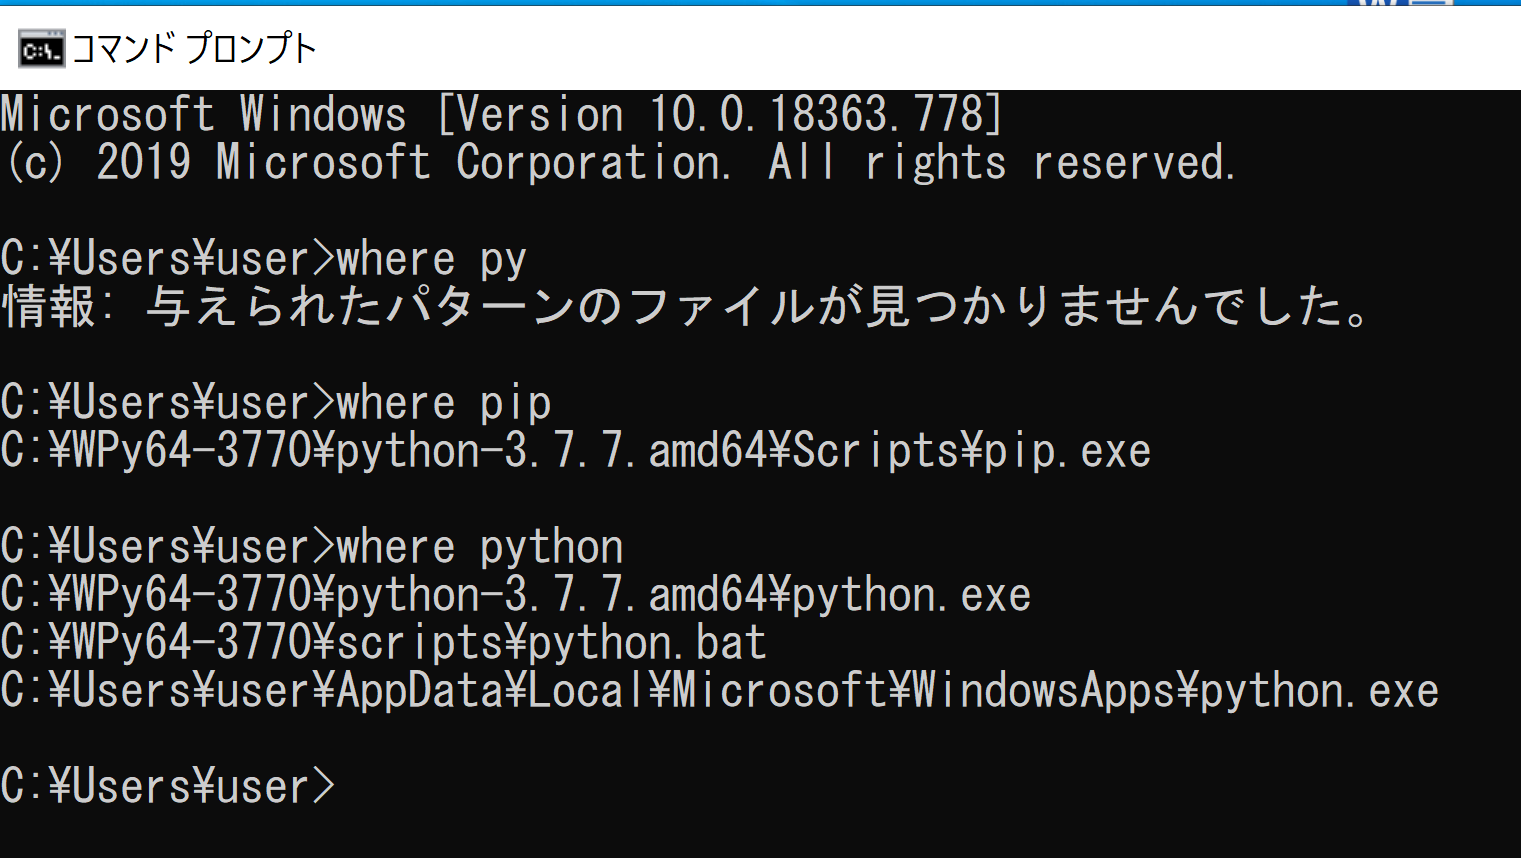
- `pip` と `python` にパスが通っていることの確認
次のコマンドを実行し,設定したPathにある実行ファイルの場所が表示されるか確認します.これは,コマンドプロンプトが `pip` や `python` というコマンドを認識できる状態か(環境変数Pathが正しく設定されているか)を確認するためです.
where pip
where python
* 表示されるパスは,WinPythonの展開先やバージョンによって異なります.エラーメッセージが出ないことを確認してください.
- python のバージョンの確認
使用するPythonのバージョンが表示されることを確認します.
* エラーメッセージが出ないことを確認.
python --version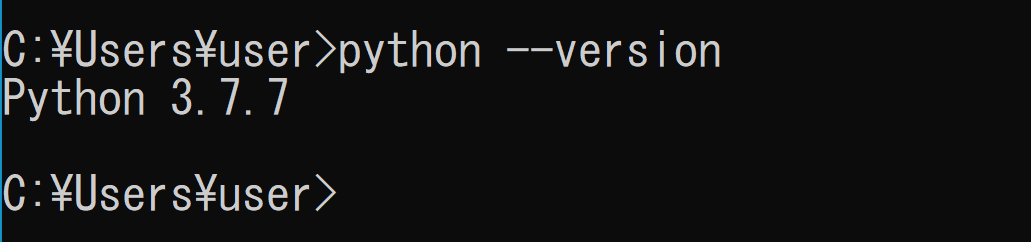
- pip の動作確認(インストール済みパッケージ一覧表示)
WinPythonに最初から含まれているPythonパッケージの一覧が表示されます.
* エラーメッセージが出ないことを確認.
pip list
パッケージ管理ツールの更新
WinPython環境を最新の状態に保つため,パッケージ管理ツールである `pip` と `setuptools` を更新します.
- Windows で,コマンドプロンプトを管理者権限で起動します(例:Windowsキーを押し,「cmd」と入力し,「管理者として実行」を選択).
(`pip` でパッケージをインストール・更新する際は、システム全体に関連する可能性のある操作のため、管理者権限で実行することが推奨される場合があります.)
- pip と `setuptools` の更新
次のコマンドを実行して,`pip` と `setuptools` を最新版に更新します.
python -m pip install -U pip setuptools - 更新後のバージョン確認
再度 `pip list` を実行し,`pip` と `setuptools` のバージョンが更新されているか確認します(任意).
pip list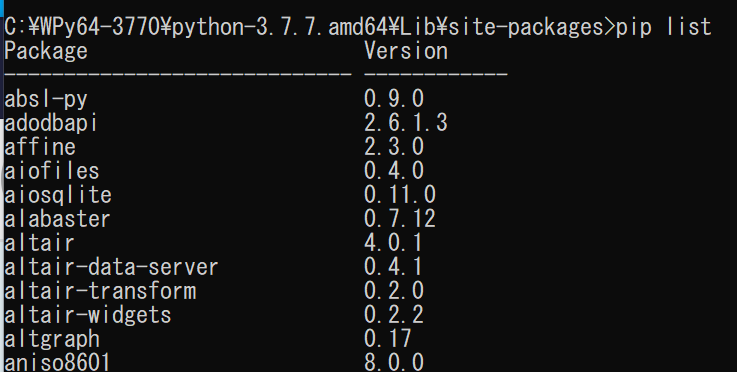
性能の確認
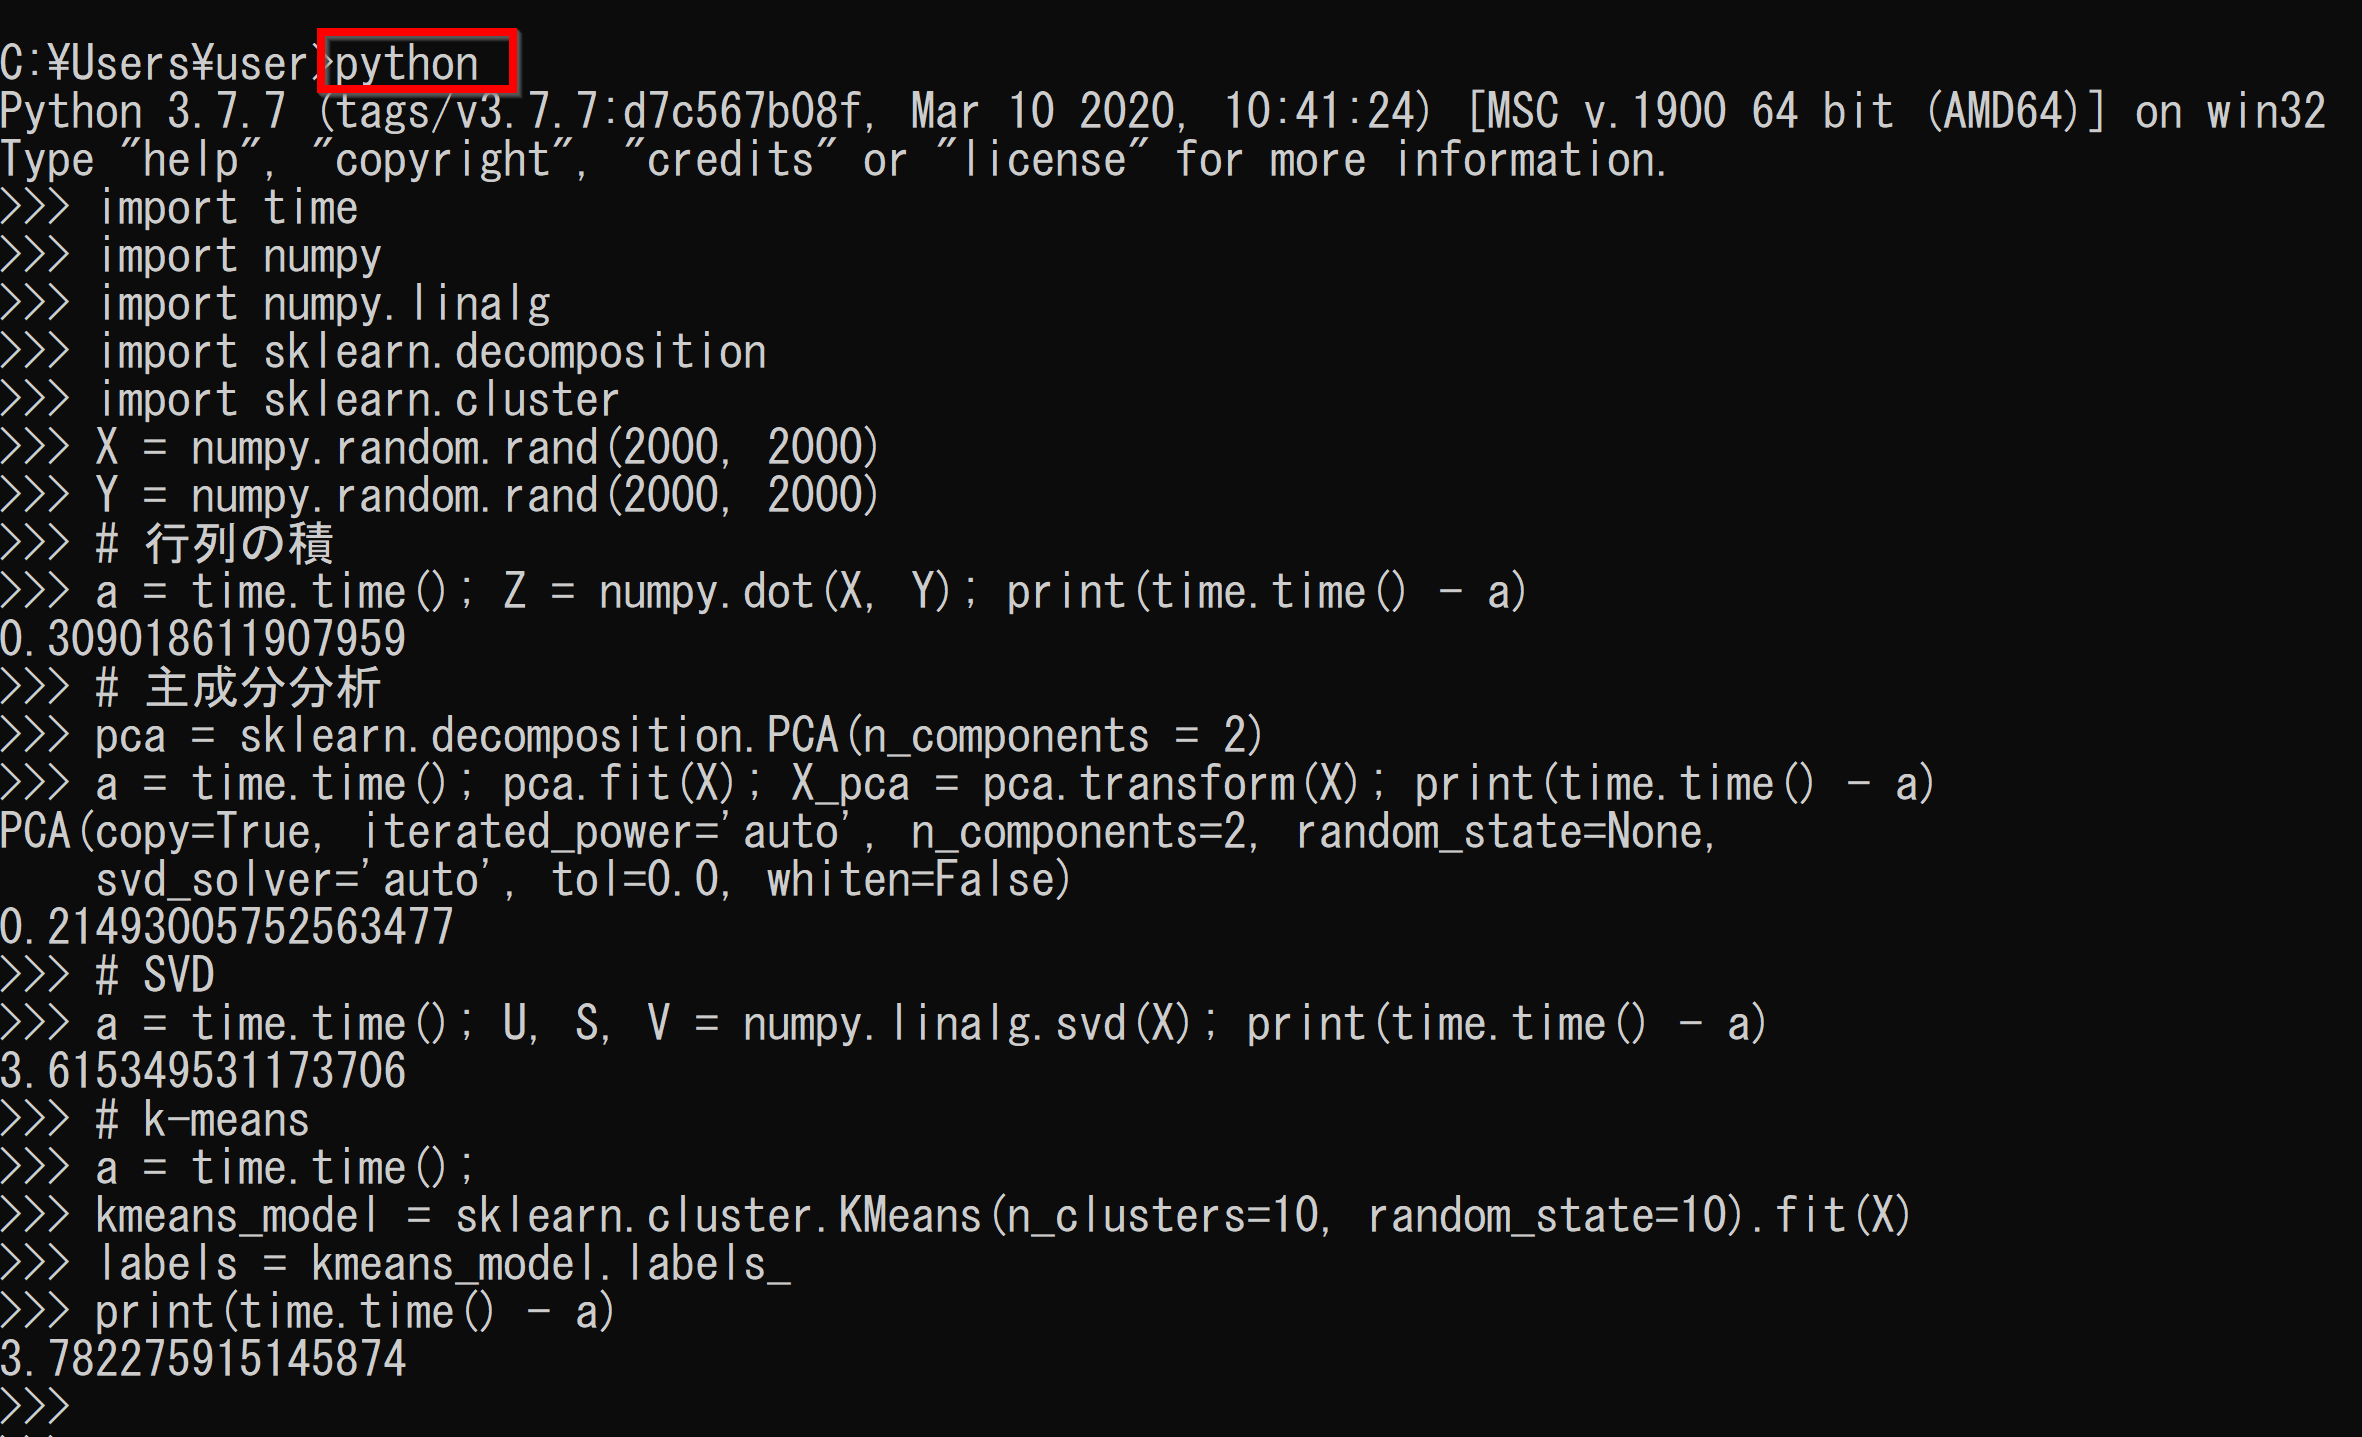
WinPythonに含まれる `numpy` や `scikit-learn` を用いて,簡単な数値計算(行列の積, 主成分分析, SVD, k-Means クラスタリング)を実行し,その処理時間を確認します.
(注意) これらの実行時間は,お使いのPCのCPU性能,メモリ量などの実行環境によって大きく変動します.あくまで目安としてください.
- Windows で,コマンドプロンプトを実行します.
- Python プログラムの実行
以下のPythonコードをファイル(例: `performance_test.py`)に保存し、コマンドプロンプトから `python performance_test.py` のように実行します.事前に `numpy` と `scikit-learn` がインストールされている必要があります(WinPythonには通常含まれています).
import time
import numpy
import numpy.linalg
import sklearn.decomposition
import sklearn.cluster

# データ生成 (2000x2000の乱数行列)
print("Generating random data (2000x2000)...")
X = numpy.random.rand(2000, 2000)
Y = numpy.random.rand(2000, 2000)
print("Data generated.")

print("Calculating matrix product...")
a = time.time(); Z = numpy.dot(X, Y); print(f"Matrix product: {time.time() - a:.2f} sec")

print("Calculating PCA...")
pca = sklearn.decomposition.PCA(n_components = 2)
a = time.time(); pca.fit(X); X_pca = pca.transform(X); print(f"PCA: {time.time() - a:.2f} sec")

print("Calculating SVD...")
a = time.time(); U, S, V = numpy.linalg.svd(X); print(f"SVD: {time.time() - a:.2f} sec")

print("Calculating k-Means...")
# n_init='auto' は scikit-learn 1.2 以降でデフォルト、1.4 以降で明示的指定推奨
kmeans_model = sklearn.cluster.KMeans(n_clusters=10, random_state=10, n_init='auto').fit(X)
labels = kmeans_model.labels_
a = time.time(); kmeans_model.fit(X); print(f"k-Means clustering: {time.time() - a:.2f} sec")
実行結果の例(時間は環境により異なります):
- 行列の積: 0.31 秒
- 主成分分析: 0.21 秒
- SVD: 3.62 秒
- k-Means クラスタリング: 3.78 秒
TensorFlow のインストール
TensorFlow を利用する場合のインストール手順です.
重要: TensorFlow と Python のバージョン互換性
TensorFlowをインストールする前に,利用したいTensorFlowのバージョンが,現在使用しているPythonのバージョン(ここでは Python 3.11 と仮定)に対応しているかを確認してください.公式ドキュメントやPyPI (https://pypi.org/project/tensorflow/) で確認できます.例えば、TensorFlow 2.13 は Python 3.11 に対応しています.
- Windows で,コマンドプロンプトを管理者権限で起動します.
- 既存パッケージのアンインストール(推奨)
* 既存のTensorFlow関連パッケージがインストールされている場合,バージョンの競合などのトラブルを避けるために,一度アンインストールしておくことを推奨します.
python -m pip uninstall -y protobuf tensorflow tensorflow-cpu tensorflow-gpu tensorflow-intel tensorflow-text tensorflow-estimator tf-models-official tf_slim tensorflow_datasets tensorflow-hub keras keras-tuner keras-visualizer tf-keras tensorboard - TensorFlow および関連パッケージのインストール
ここでは例として TensorFlow 2.13 をインストールします.必要に応じて `tensorflow-datasets`, `tensorflow-hub`, `keras-tuner` なども同時にインストールできます.(`keras-visualizer` は更新が停止している可能性あり.`keras-contrib` はアーカイブ済み.`tf-keras` は不要.)
pip を用いてインストールします.
python -m pip install -U tensorflow==2.13.* tensorflow-datasets tensorflow-hub keras-tuner tensorboard(GPU版を利用する場合は、別途CUDA ToolkitやcuDNNのインストールが必要です.TensorFlow GPU サポートを参照してください.)
(TensorFlowの公式ドキュメントやサンプルコードは,公式サイトやGitHubリポジトリを参照してください.)
- Python の numpy がインストールされていることの確認
TensorFlowは `numpy` に依存しています.バージョン番号が表示されればOKです.
バージョン番号は環境によって異なる場合があります.python -c "import numpy; print(numpy.__version__)"
- TensorFlow のバージョン確認
インストールしたTensorFlowのバージョンが表示されればOKです.
バージョン番号は環境によって異なる場合があります.python -c "import tensorflow as tf; print(tf.__version__)"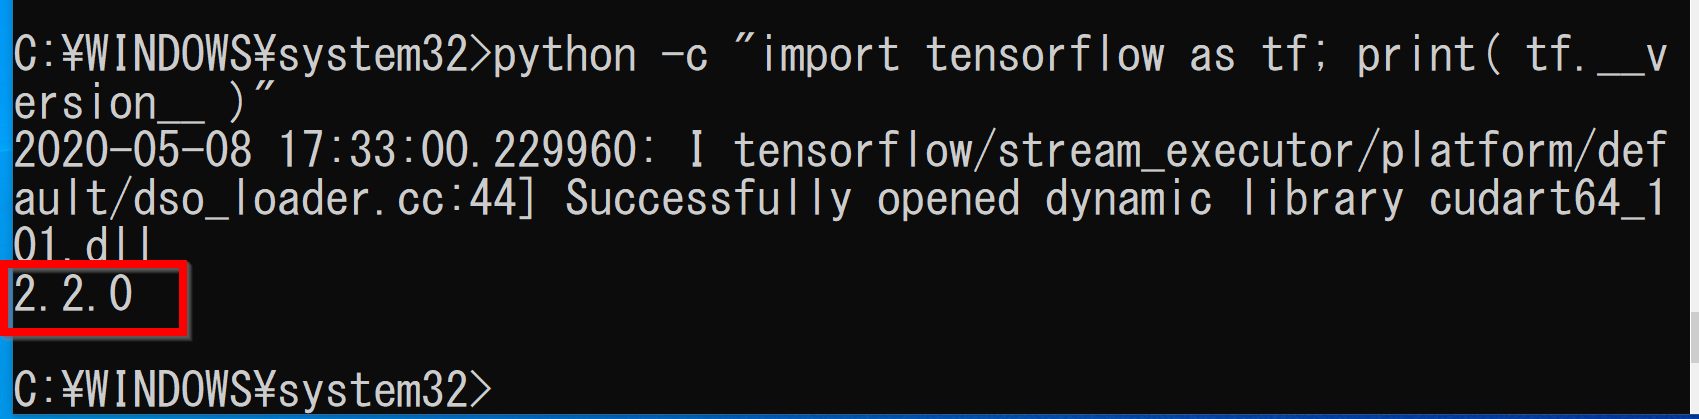
Pythonのライブラリのインストール
WinPython には多くの科学技術計算パッケージが同封されていますが,それ以外のパッケージや,特定のバージョンが必要な場合は,`pip` を使ってインストールします.
- Windows で,コマンドプロンプトを管理者権限で起動します.
- パッケージのインストール
例として,データサイエンスでよく使われるパッケージや,Webフレームワークなどをインストールするコマンドを示します.必要なものを選んでインストールしてください.
データサイエンス・機械学習関連:
python -m pip install -U numpy scipy pandas scikit-learn scikit-image matplotlib seaborn plotly statsmodels h5py pillow cythonWeb開発・その他:
python -m pip install -U flask django requests beautifulsoup4 html5lib lxml openpyxl xlrd xlsxwriter pylint flake8 pytest特定のライブラリ (例: GIS関連):
python -m pip install -U shapely fiona geopandas geopy geographiclib pyproj rtree gdal注意:
- 上記はあくまで例です.必要なパッケージを個別に `python -m pip install パッケージ名` でインストールしてください.
- パッケージによっては,別途システムライブラリのインストールが必要な場合があります(例: `gdal`, `mecab` など).その場合は各パッケージのドキュメントに従ってください.
- 古いパッケージや依存関係が複雑なものは、仮想環境(例:`venv`)の使用を検討してください.
(パッケージのインストールが成功した例を示すスクリーンショット)
試しに Python で OpenCV を使ってみる
OpenCV は有名なコンピュータビジョンのライブラリです.OpenCV を使って画像や動画を表示してみます.
OpenCV の機能とプログラム例: 別ページ »にまとめ
OpenCV のインストール:
まだインストールしていない場合は,コマンドプロンプト(管理者権限推奨)で以下のコマンドを実行します.
python -m pip install opencv-python
画像ファイルの表示
- 画像ファイルを準備する.
表示したい画像ファイル(例: `fruits.jpg`)を,これから実行するPythonスクリプトと同じフォルダに置くか,アクセス可能な場所に配置します.
謝辞:https://github.com/opencv/opencv/tree/master/samples/data で公開されている fruits.jpg を使用しています.感謝します. - Python プログラムの作成と実行
以下のPythonプログラムを `show_image.py` のような名前で保存し,画像ファイルと同じディレクトリから実行します.
import cv2
import os

# 画像ファイル名 (スクリプトと同じディレクトリにあると仮定)
image_filename = "fruits.jpg"

# 画像ファイルが存在するか確認
if not os.path.exists(image_filename):
    print(f"Error: Image file not found: {image_filename}")
    print(f"Please make sure '{image_filename}' is in the same directory as the script.")
else:
    # 画像を読み込む
    img = cv2.imread(image_filename)

    if img is None:
        print(f"Error: Could not read image file: {image_filename}")
    else:
        # 画像を表示する
        window_title = "Fruit Image"
        cv2.imshow(window_title, img)
        print(f"Displaying '{image_filename}'. Press any key on the '{window_title}' window to close.")
        cv2.waitKey(0) # キー入力待ち
        cv2.destroyAllWindows() # ウィンドウを閉じる
        print("Window closed.")
Windows で,コマンドプロンプトを開き,スクリプトのあるディレクトリに移動してから「`python show_image.py`」のように実行します.
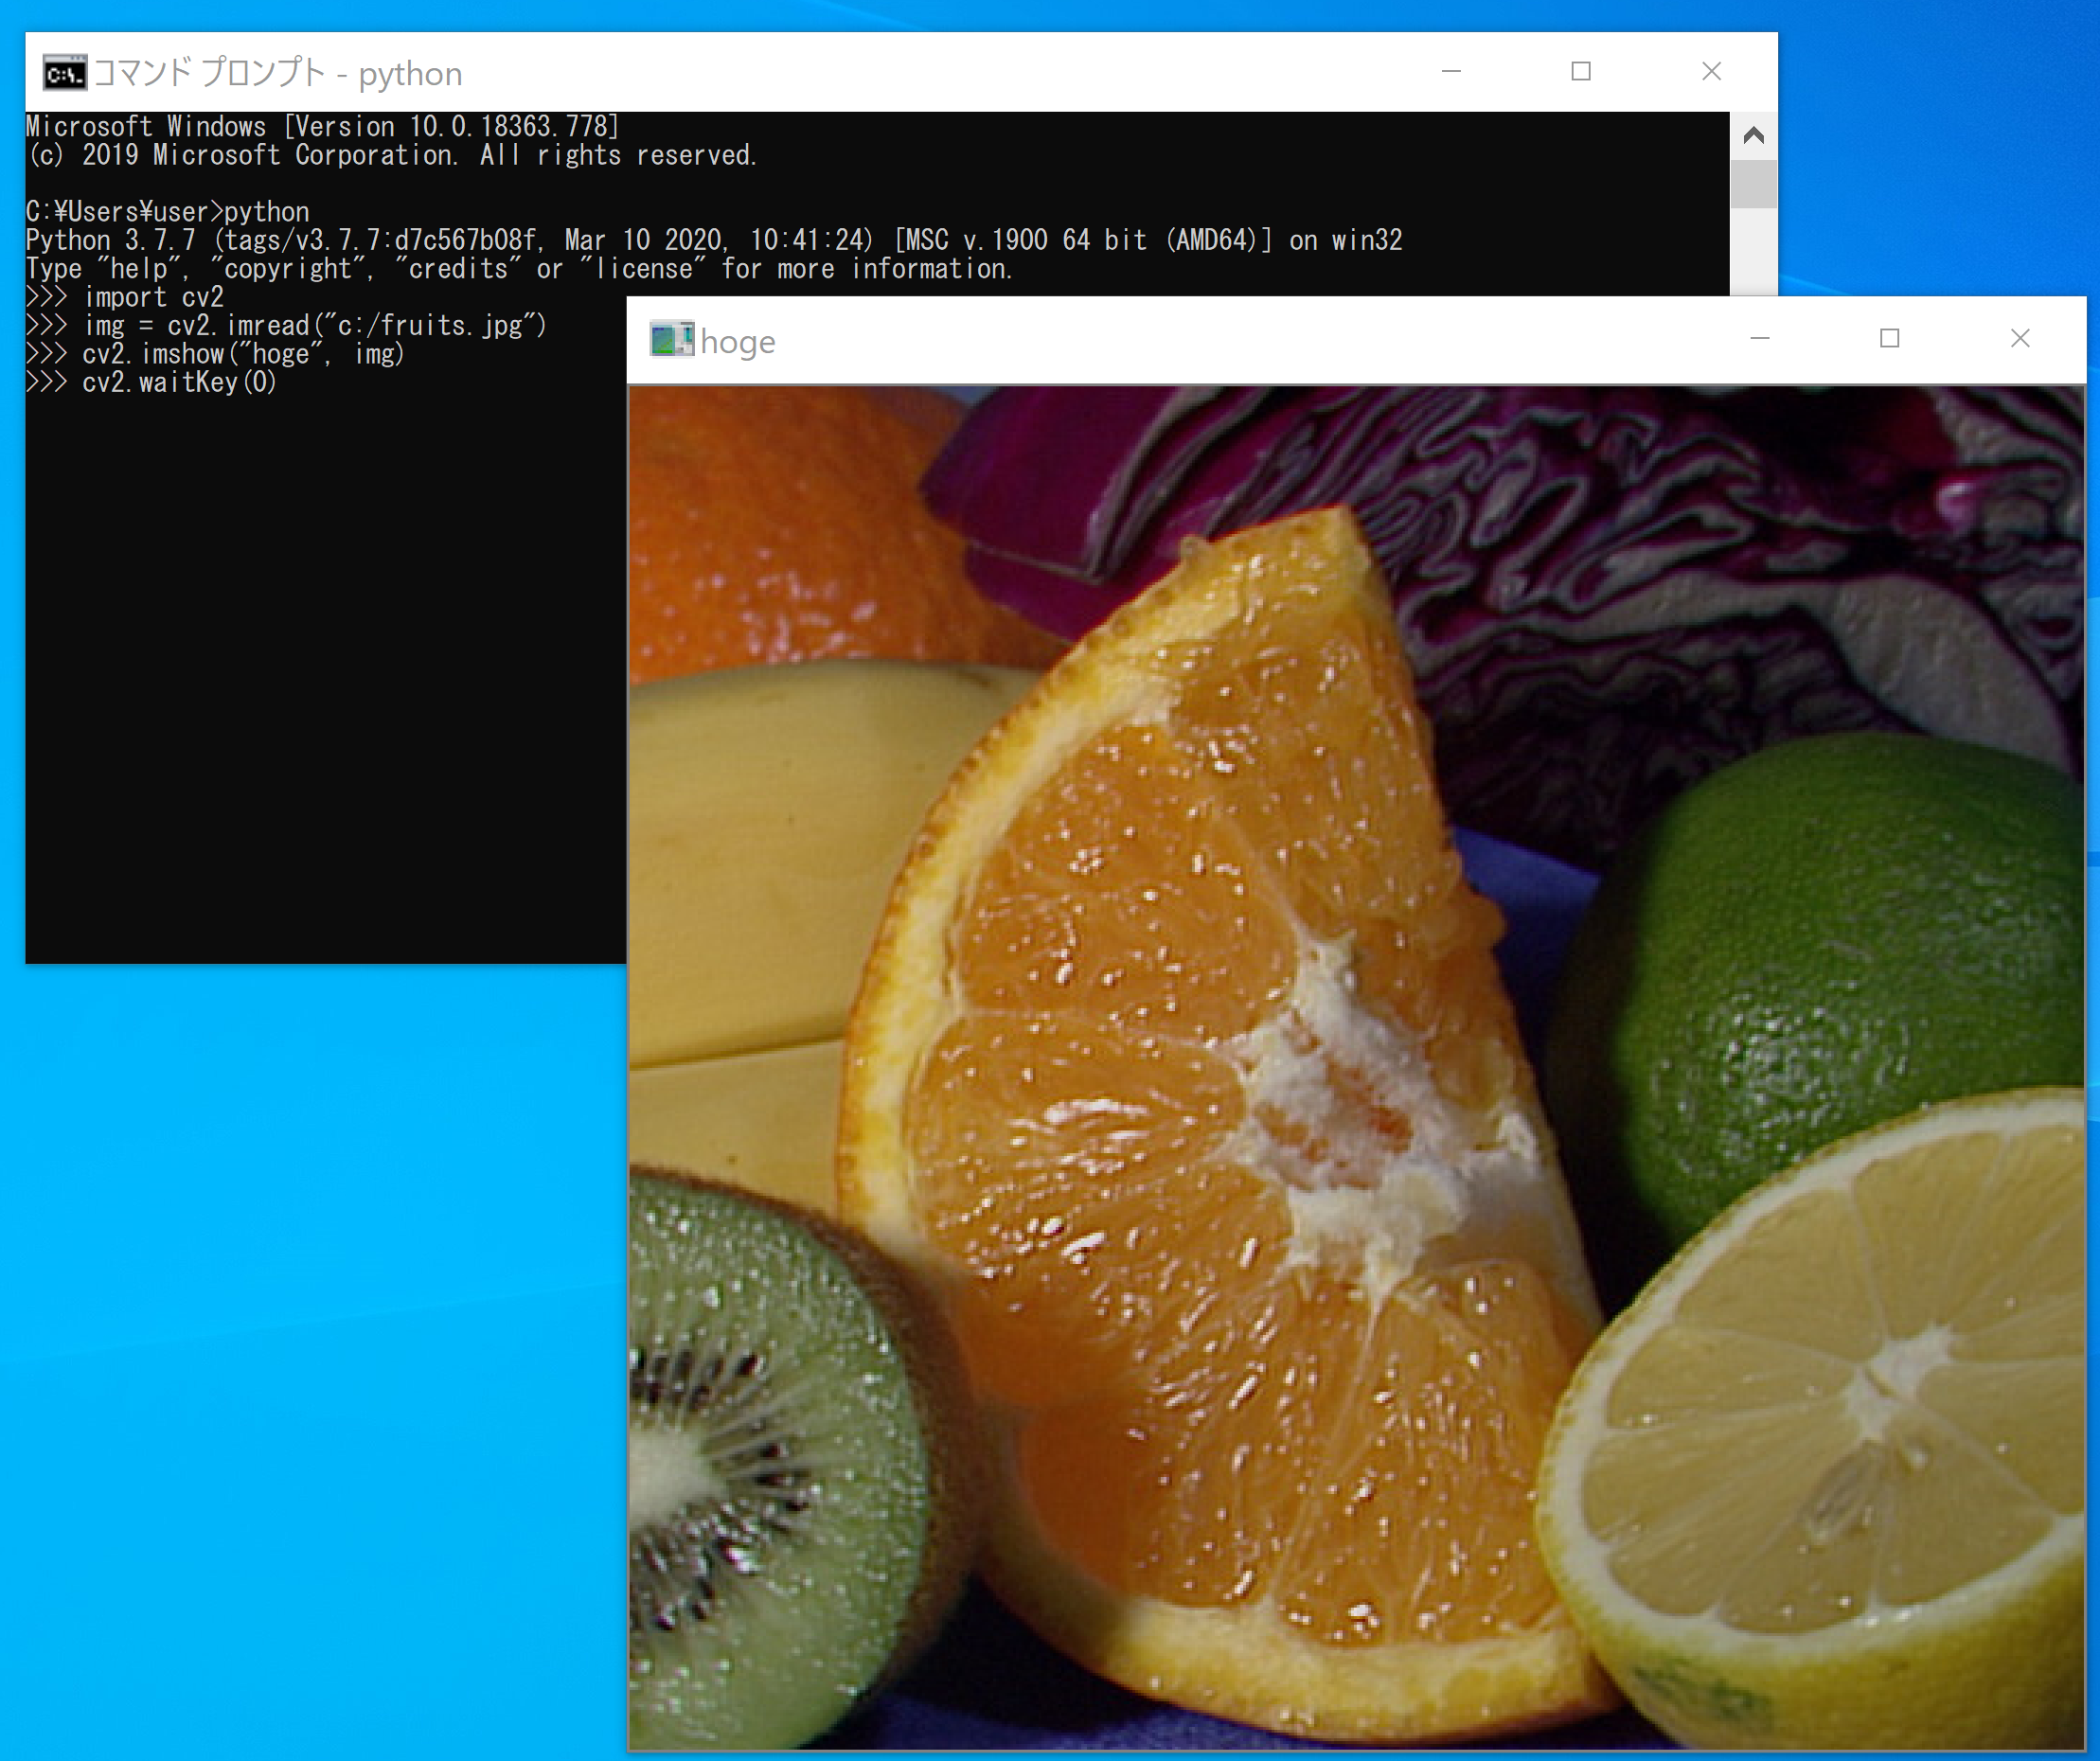
WinPython に付属の「spyder」などで実行することも可能です(その場合,Spyderのワーキングディレクトリに画像ファイルを置いてください).
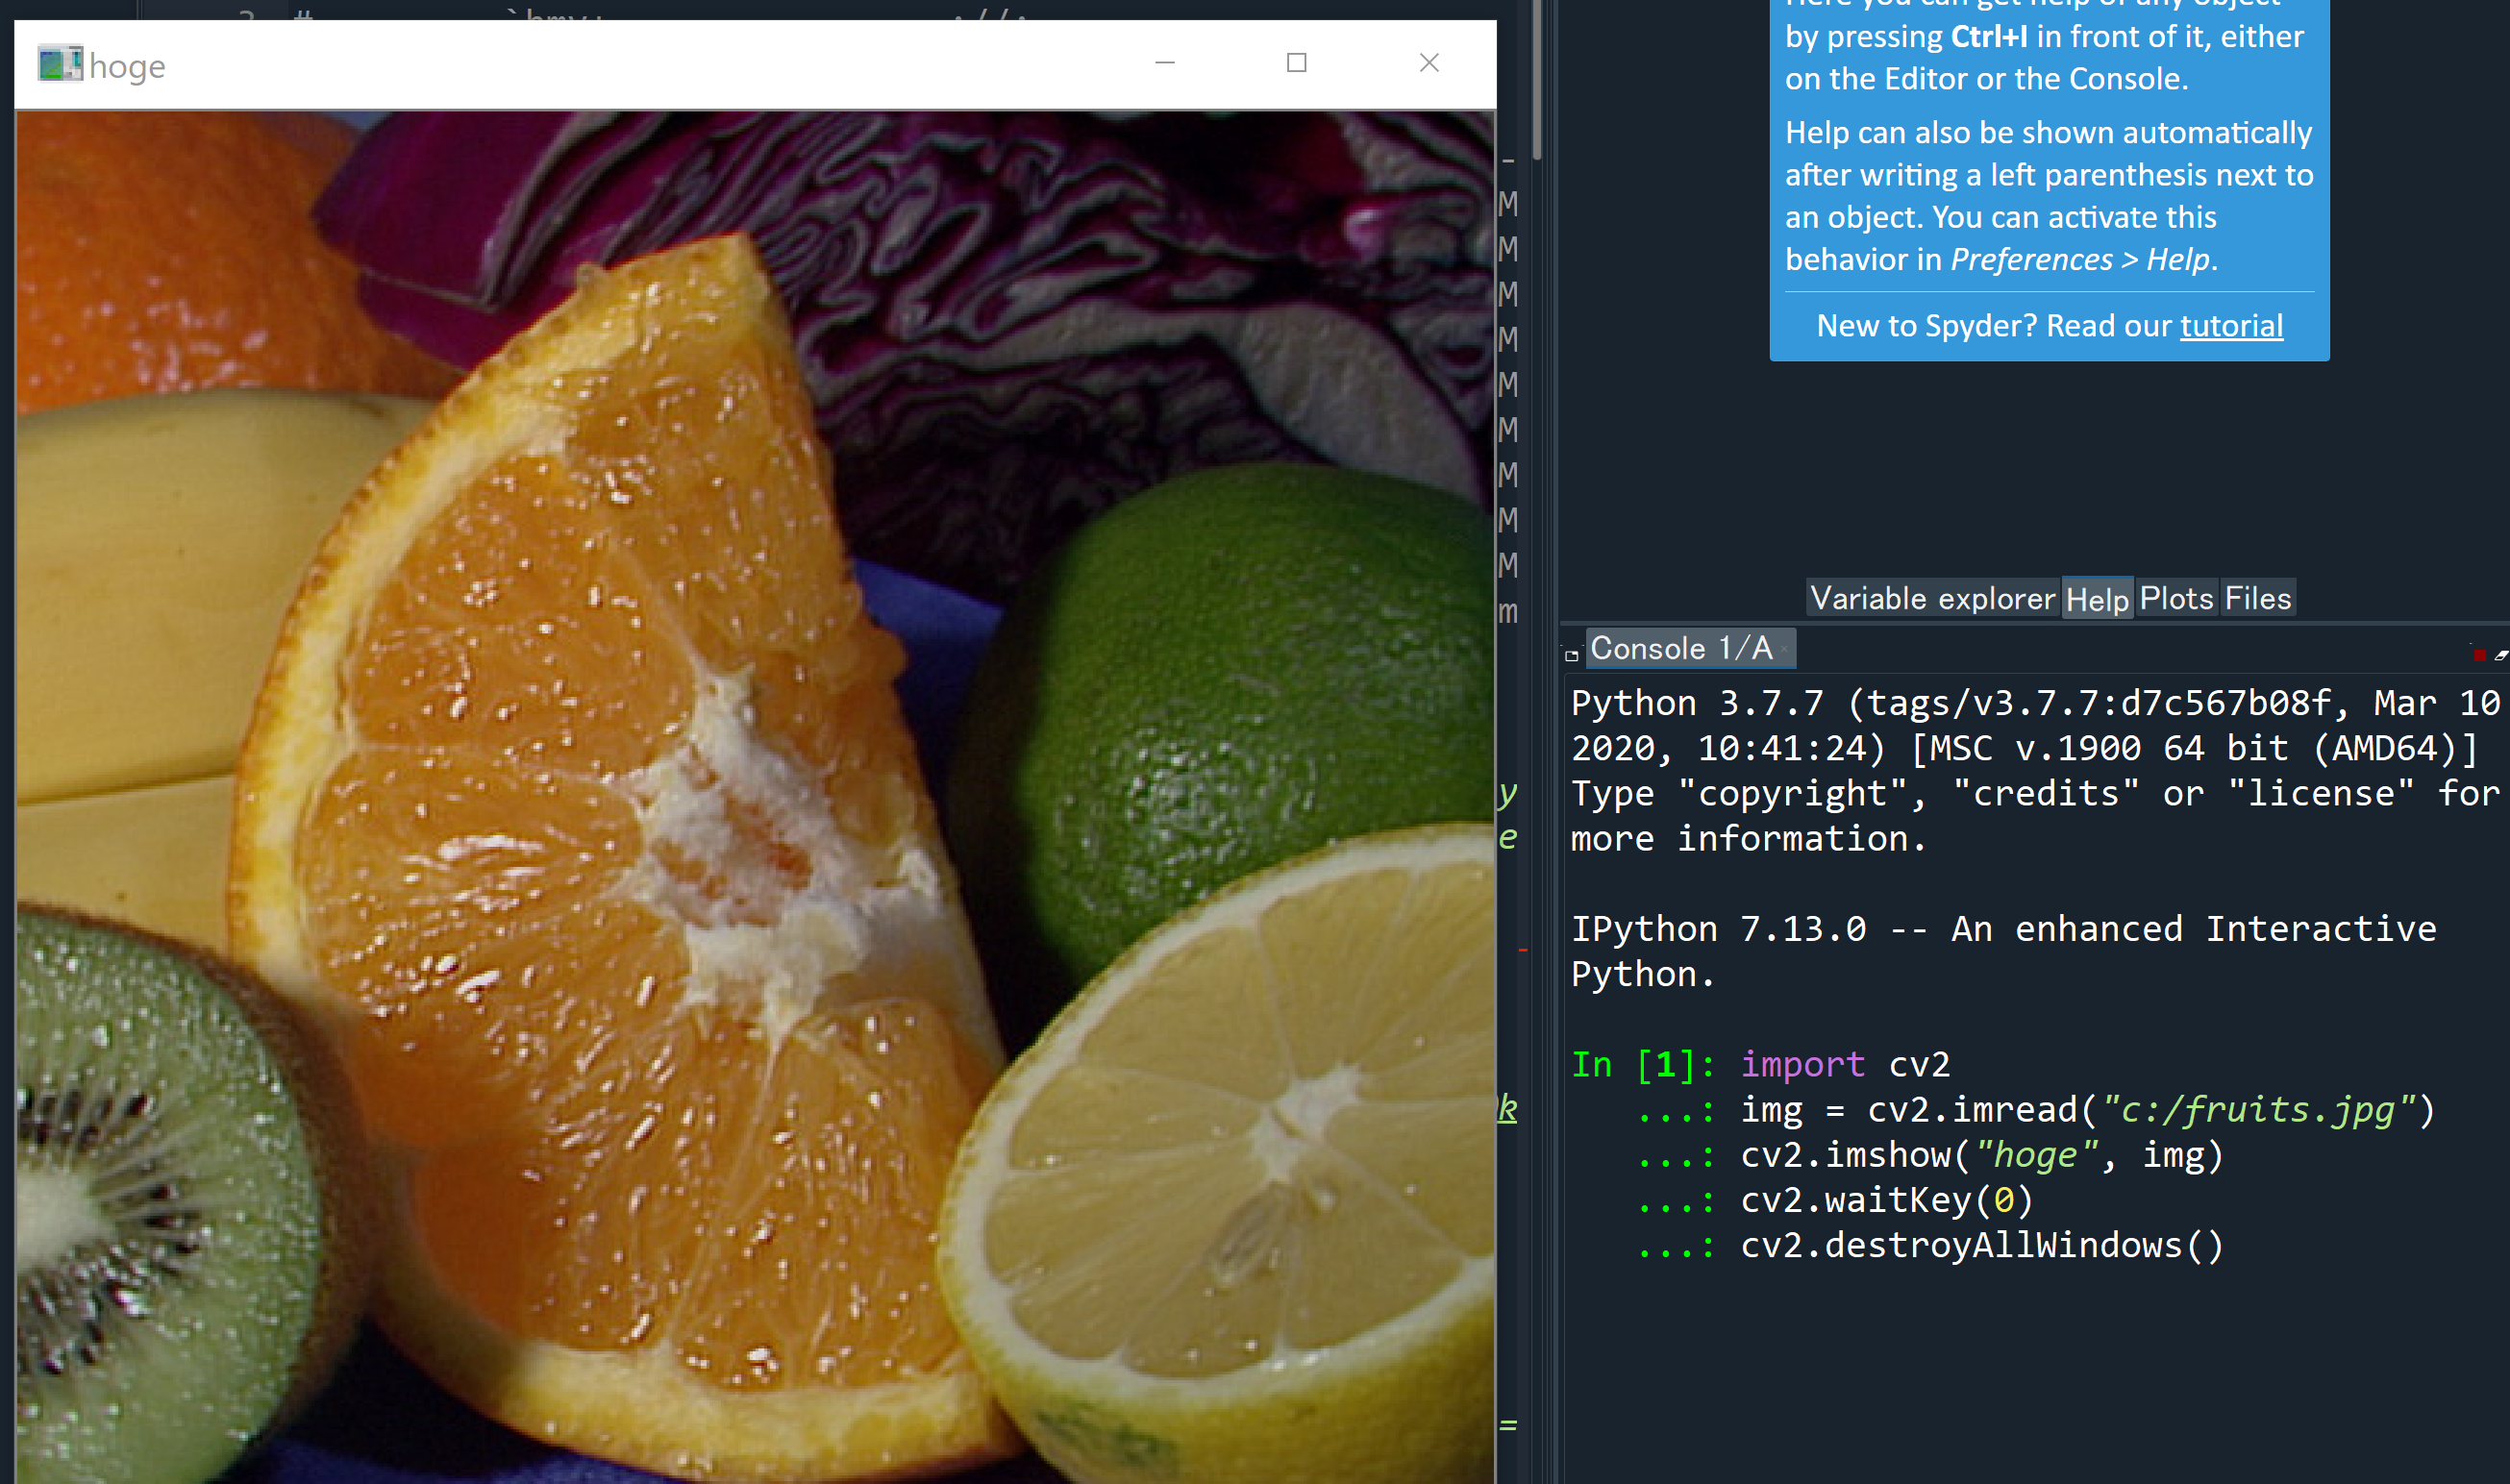
画像が表示されます.画像のウィンドウを選択した状態で何かキーを押すと,ウィンドウが閉じます.
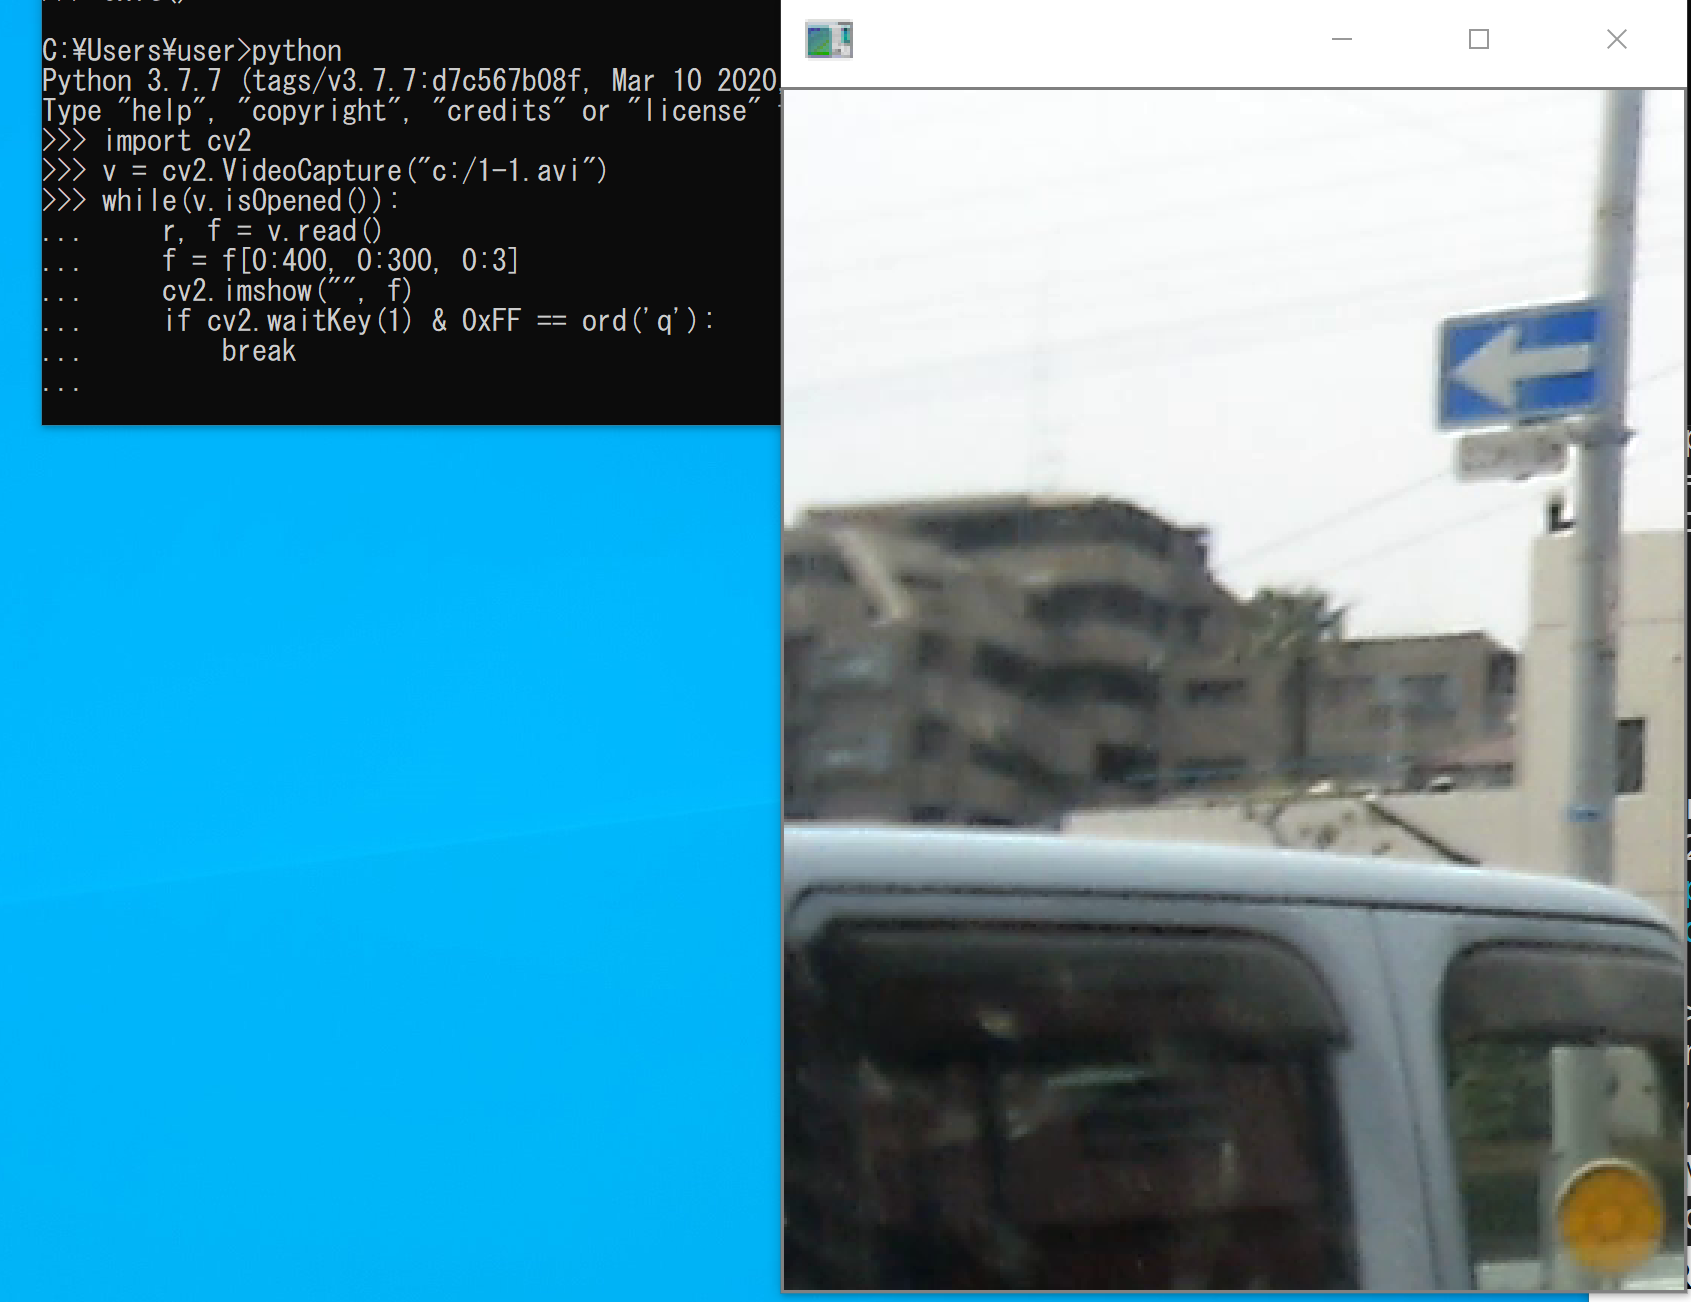
動画ファイルの表示
- 動画ファイルを準備する.
表示したい動画ファイル(例: `1-1.avi`)を,これから実行するPythonスクリプトと同じフォルダに置くか,アクセス可能な場所に配置します.
ここで使用するビデオの例: 1-1.avi (3分1秒)
- Python プログラムの作成と実行
以下のPythonプログラムを `show_video.py` のような名前で保存し,動画ファイルと同じディレクトリから実行します.
import cv2
import os

# 動画ファイル名 (スクリプトと同じディレクトリにあると仮定)
video_filename = "1-1.avi"

# 動画ファイルが存在するか確認
if not os.path.exists(video_filename):
    print(f"Error: Video file not found: {video_filename}")
    print(f"Please make sure '{video_filename}' is in the same directory as the script.")
else:
    # 動画ファイルをキャプチャ
    v = cv2.VideoCapture(video_filename)

    if not v.isOpened():
        print(f"Error: Could not open video file: {video_filename}")
    else:
        window_title = "Video Player"
        print(f"Displaying video '{video_filename}'. Press 'q' to exit.")
        while(v.isOpened()):
            # 1フレーム読み込む
            r, f = v.read()

            # 読み込み失敗か動画終了ならループを抜ける
            if not r:
                break

            # フレームを表示 (元のコードに合わせて一部を表示)
            # フレーム全体を表示する場合は `f_display = f` とする
            try:
                f_display = f[0:400, 0:300, 0:3]
            except IndexError: # フレームサイズが小さい場合の対策
                f_display = f

            cv2.imshow(window_title, f_display)

            # 'q'キーが押されたら終了 (待ち時間 1ms)
            # waitKeyの戻り値は環境依存の場合があるため、複数チェック
            key = cv2.waitKey(1) & 0xFF
            if key == ord('q') or key == 27: # q または Esc キー
                break

        # リソース解放
        v.release()
        cv2.destroyAllWindows()
        print("Video playback finished or stopped.")
Windows で,コマンドプロンプトを開き,スクリプトのあるディレクトリに移動してから「`python show_video.py`」のように実行します.
WinPython に付属の「spyder」などで実行することも可能です(その場合,Spyderのワーキングディレクトリに動画ファイルを置いてください).
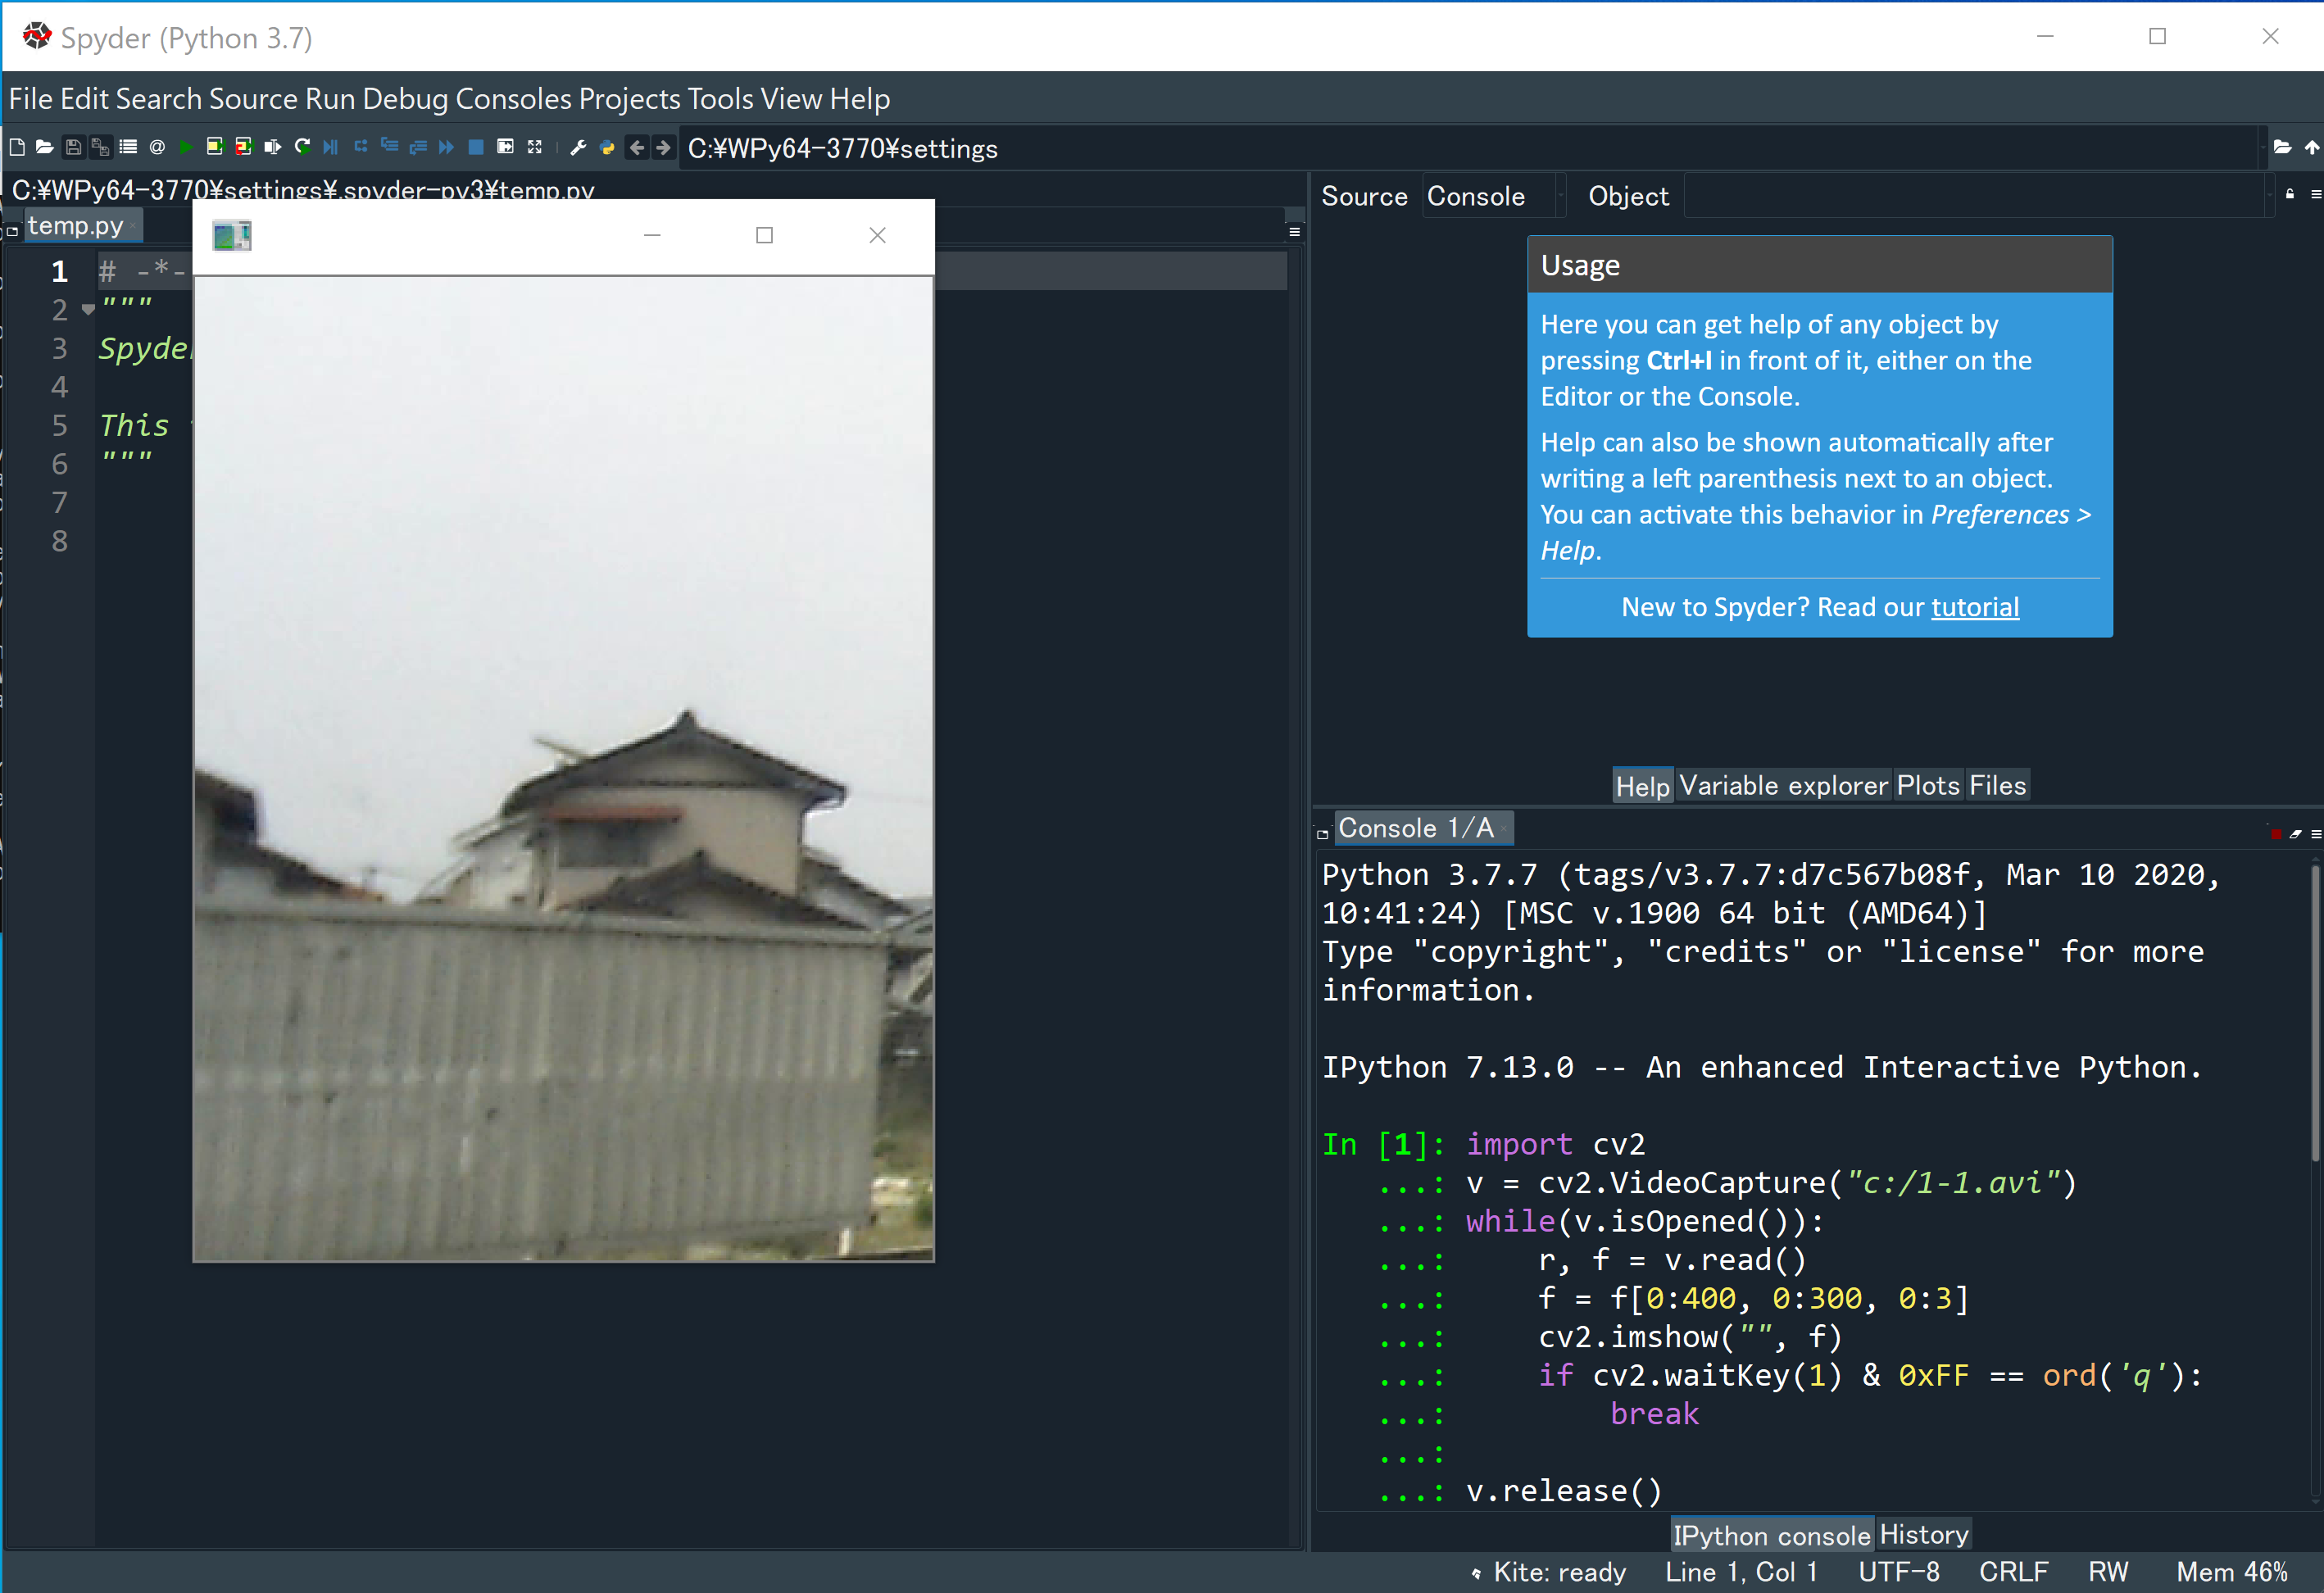
ビデオが表示されます.再生が終了するか,'q'キーまたはEscキーを押すとウィンドウが閉じます.