![[kaneko lab.]](https://www.kkaneko.jp/info/logo_png.png)
PostgreSQL 18, pgAdmin 4, PostGIS 3 のインストール(Ubuntu 24.04 上)
PostgreSQL のインストールは,https://wiki.postgresql.org/wiki/Apt に記載の手順に従う.pgAdmin 4 のインストールは,https://www.pgadmin.org/download/pgadmin-4-apt/ に記載の手順に従う.
【目次】
- 前準備
- PostgreSQL 18, PostGIS 3 のインストール(Ubuntu 24.04 上)
- pgAdmin 4 のインストール(Ubuntu 24.04 上)
- peer 認証の確認と scram-sha-256 認証の設定
- PostgreSQL データベースサーバの起動と終了
- psql の基本操作
- テーブル定義とレコード挿入
【関連する外部ページ】
- PostgreSQL Web ページ: https://www.postgresql.org/
- カーネルリソースの管理: https://www.postgresql.jp/document/18/html/kernel-resources.html
- インストール: https://www.postgresql.jp/document/18/html/installation.html
- PostGIS のインストール(Ubuntu/Debian): https://postgis.net/documentation/getting_started/install_ubuntu/
前準備
Ubuntu のシステム更新
Ubuntu で OS のシステム更新を行うときは, 端末で,次のコマンドを実行する。これは、パッケージ情報を最新の状態に保ち、インストール済みのパッケージをセキュリティアップデートやバグ修正を含めて更新するためである。
# パッケージリストの情報を更新
sudo apt update
# インストール済みのパッケージを包括的に更新 (依存関係も考慮)
sudo apt full-upgrade
# カーネル更新等で実際に再起動が必要な場合のみ実行を推奨
# sudo shutdown -r now
PostgreSQL 18, PostGIS 3 のインストール(Ubuntu 24.04 上)
- レポジトリキーのインストール
署名キーを /usr/share/postgresql-common/pgdg に配置する.
# パッケージリストの情報を更新 sudo apt update sudo apt -y install curl ca-certificates sudo install -d /usr/share/postgresql-common/pgdg sudo curl -o /usr/share/postgresql-common/pgdg/apt.postgresql.org.asc --fail https://www.postgresql.org/media/keys/ACCC4CF8.asc - パッケージリストの取得
レポジトリ定義ファイル /etc/apt/sources.list.d/pgdg.sources を作成する.Suites には「<Ubuntu のコード名>-pgdg」を指定する(Ubuntu 24.04 では noble-pgdg).
. /etc/os-release
sudo tee /etc/apt/sources.list.d/pgdg.sources <<EOF
Types: deb
URIs: https://apt.postgresql.org/pub/repos/apt
Suites: ${VERSION_CODENAME}-pgdg
Architectures: $(dpkg --print-architecture)
Components: main
Signed-By: /usr/share/postgresql-common/pgdg/apt.postgresql.org.asc
EOF
- パッケージ情報の更新
# パッケージリストの情報を更新 sudo apt update - インストール
PostgreSQL 18 本体と,PostGIS 3 をインストールする.
sudo apt -y install postgresql-18 postgresql-18-postgis-3 - インストール直後なので,確認のため,サーバを手動で起動して停止してみて,エラーメッセージが出ないことを確認する
sudo pg_ctlcluster 18 main restart
sudo pg_ctlcluster 18 main status
- PostgreSQL の動作確認
Ubuntu のサービスアカウント postgres と peer 認証により,PostgreSQL の psql を使ってみる.
「\c」により,使用されている PostgreSQL のロール名と,オープンされているデータベース名を確認.
確認したら,「\q」により終了.
sudo -u postgres psql
\c
\q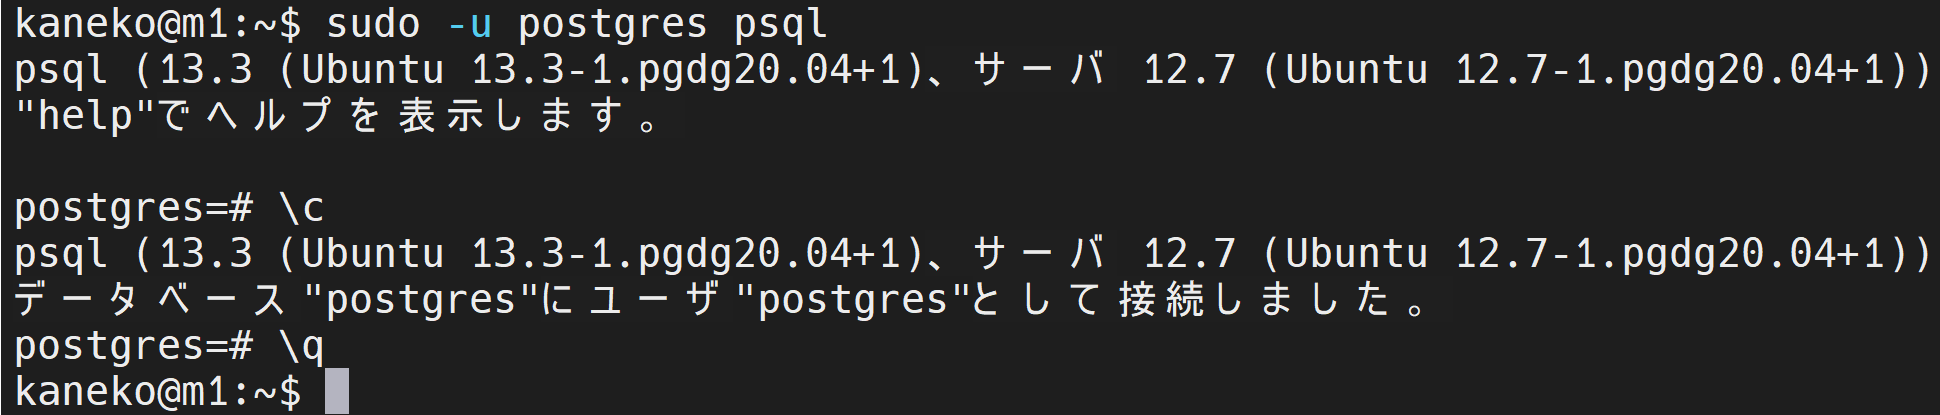
- データベースの確認
postgres, template0, template1 の 3 つのデータベースが表示されることを確認.
sudo -u postgres psql
\l
\q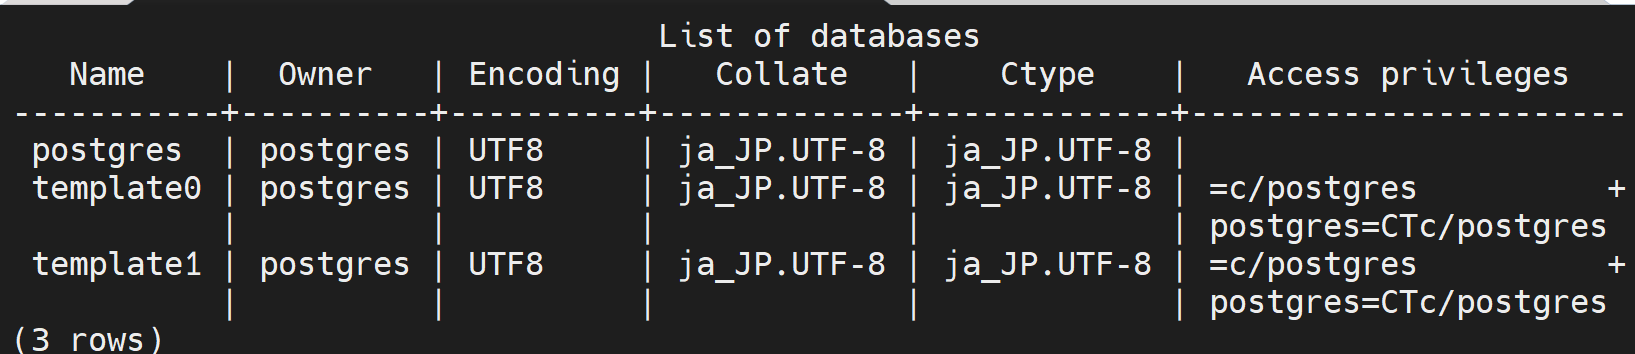
- psql のバージョン確認
psql --version - PostGIS の動作確認
PostGIS はパッケージをインストールしただけでは使用できない.データベースごとに CREATE EXTENSION により拡張を有効化する必要がある.ここでは postgres データベースで有効化し,バージョンを表示する.
sudo -u postgres psql
create extension postgis;
select postgis_version();
\q
pgAdmin 4 のインストール(Ubuntu 24.04 上)
- レポジトリキーのインストール
sudo apt -y install curl ca-certificates gnupg sudo install -d /etc/apt/keyrings curl -fsS https://www.pgadmin.org/static/packages_pgadmin_org.pub | sudo gpg --dearmor -o /etc/apt/keyrings/packages-pgadmin-org.gpg - レポジトリ定義ファイルの作成とパッケージ情報の更新
sudo sh -c 'echo "deb [signed-by=/etc/apt/keyrings/packages-pgadmin-org.gpg] https://ftp.postgresql.org/pub/pgadmin/pgadmin4/apt/$(lsb_release -cs) pgadmin4 main" > /etc/apt/sources.list.d/pgadmin4.list' # パッケージリストの情報を更新 sudo apt update - インストール
デスクトップアプリケーションとして使用する場合は pgadmin4-desktop,Web アプリケーションとして使用する場合は pgadmin4-web をインストールする.ここではデスクトップモードでインストールする.
sudo apt -y install pgadmin4-desktop - 起動
アプリケーション一覧から pgAdmin 4 を起動する.端末から起動するときは,次のコマンドを実行する.
/usr/pgadmin4/bin/pgadmin4
peer 認証の確認と scram-sha-256 認証の設定
peer 認証の確認
- PostgreSQL サービスアカウント (service account)の確認
PostgreSQL サービスアカウントは,Postgres サーバの起動等に使うもの.Ubuntu では,既定(デフォルト)で,peer 認証が行えるようにも設定されている.
Ubuntu でパッケージを使って PostgreSQL をインストールすると,PostgreSQL サービスアカウント(ユーザ名は「postgres」)が自動的に作成される.
次のコマンドで確認できる.
sudo cat /etc/passwd | grep postgres* パスワード欄の「x」は,パスワードのハッシュが /etc/shadow に格納されていることを示す
PostgreSQL サービスアカウントは Linux が管理するアカウントのこと.PostgreSQL が管理するロールとは別のものである.
- PostgreSQL の認証設定を確認する.Unix ドメインソケット経由の接続 (local) には peer 認証が設定されている.
sudo cat /etc/postgresql/18/main/pg_hba.conf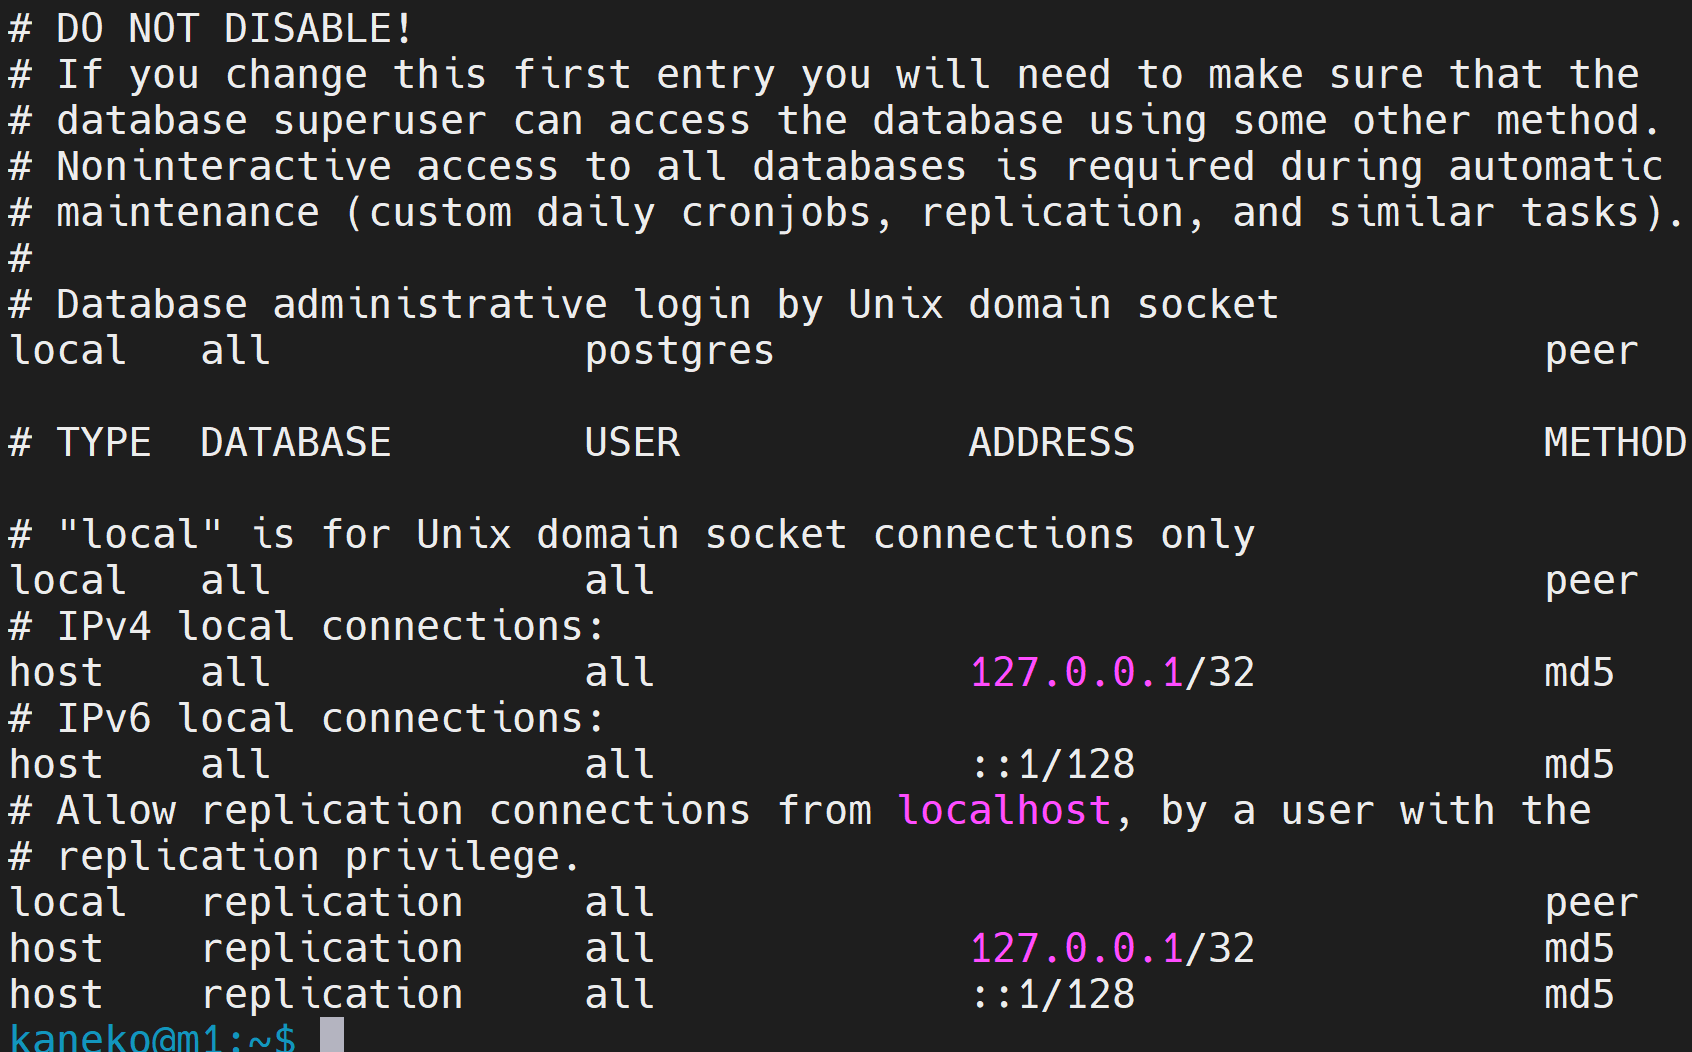
- Ubuntu のサービスアカウント postgres と peer 認証により,PostgreSQL の psql を使ってみる.
「\c」により,使用されている PostgreSQL のロール名と,オープンされているデータベース名を確認.
確認したら,「\q」により終了.
sudo -u postgres psql
\c
\q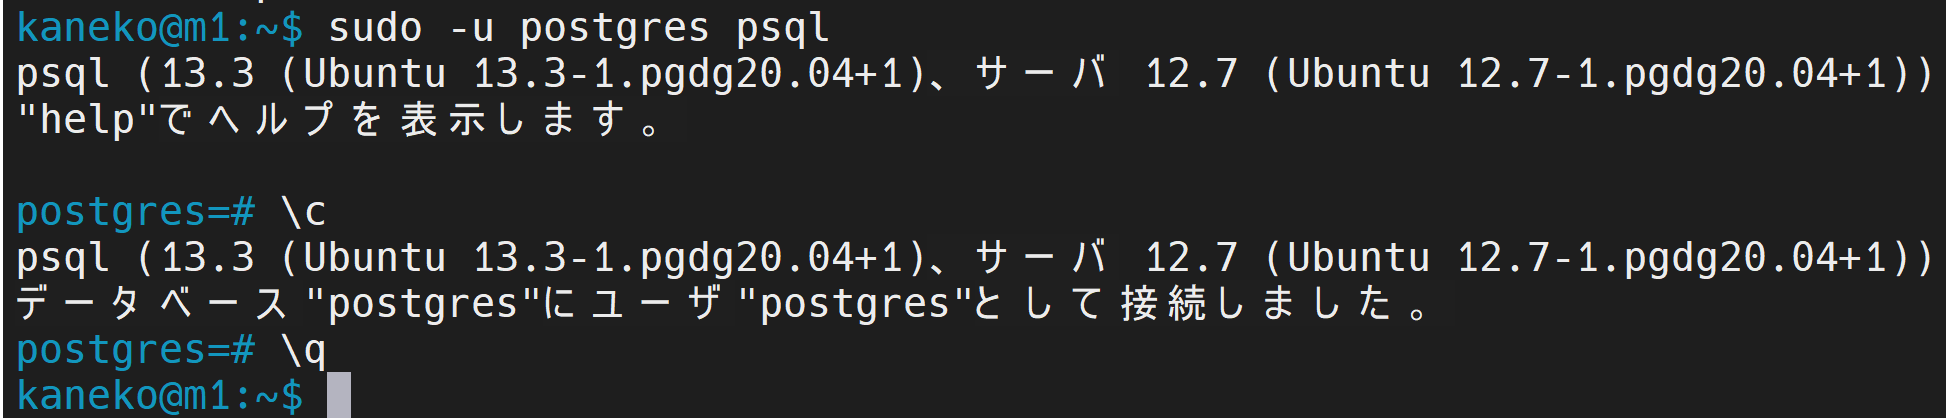
scram-sha-256 認証の設定
PostgreSQL での新しいロールの追加とパスワード認証の設定を行ってみる.
PostgreSQL 14 以降では,パスワードの格納方式の既定値が scram-sha-256 である.md5 は脆弱であり,PostgreSQL 18 では非推奨とされているため,ここでは scram-sha-256 認証を設定する.
下の手順で,PostgreSQL で,新しいロール testuser を作成し scram-sha-256 認証できるように設定してみる
- PostgreSQL で,新しいロール testuser を作成
パスワードは,下のものをそのまま使うのでなく,必ず独自に設定してください.
sudo -u postgres psql
create role "testuser" with login encrypted password 'hoge7618mhty';
\du
\q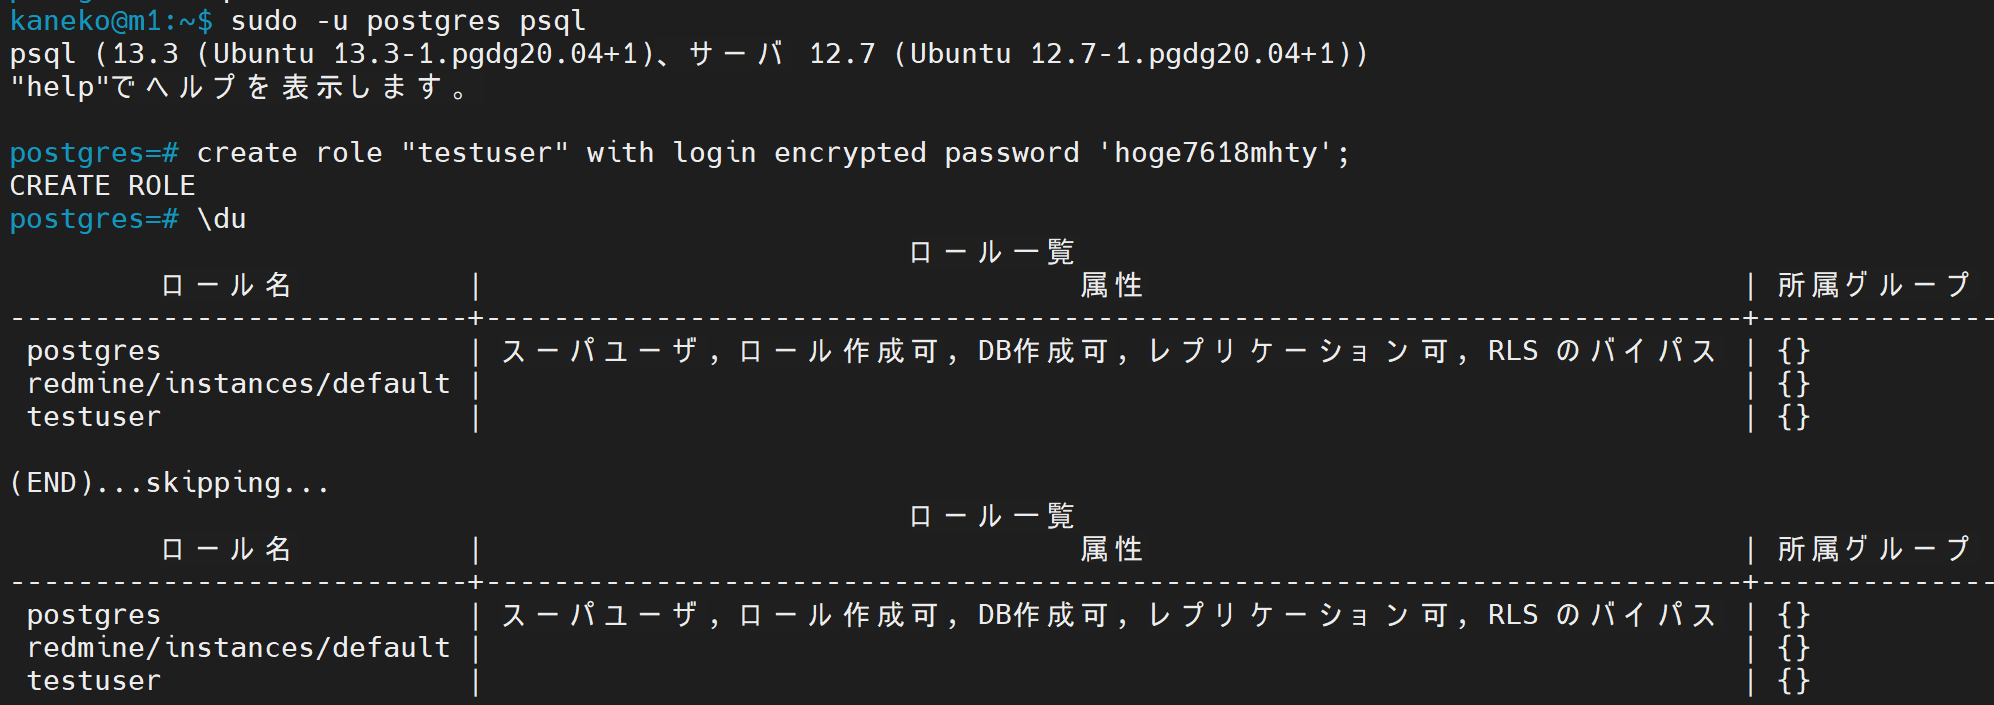
- /etc/postgresql/18/main/pg_hba.conf を書き換えて,全ユーザである all の scram-sha-256 認証を有効にする.
pg_hba.conf は上の行から順に照合され,最初に一致した行だけが使われる.そのため,既定の「local all all peer」の行より前に,次の 2 行を追加する.1 行目により postgres ロールでの peer 認証(sudo -u postgres psql)は従来どおり使用できる.
local   all             postgres                           peer
local   all             all                                scram-sha-256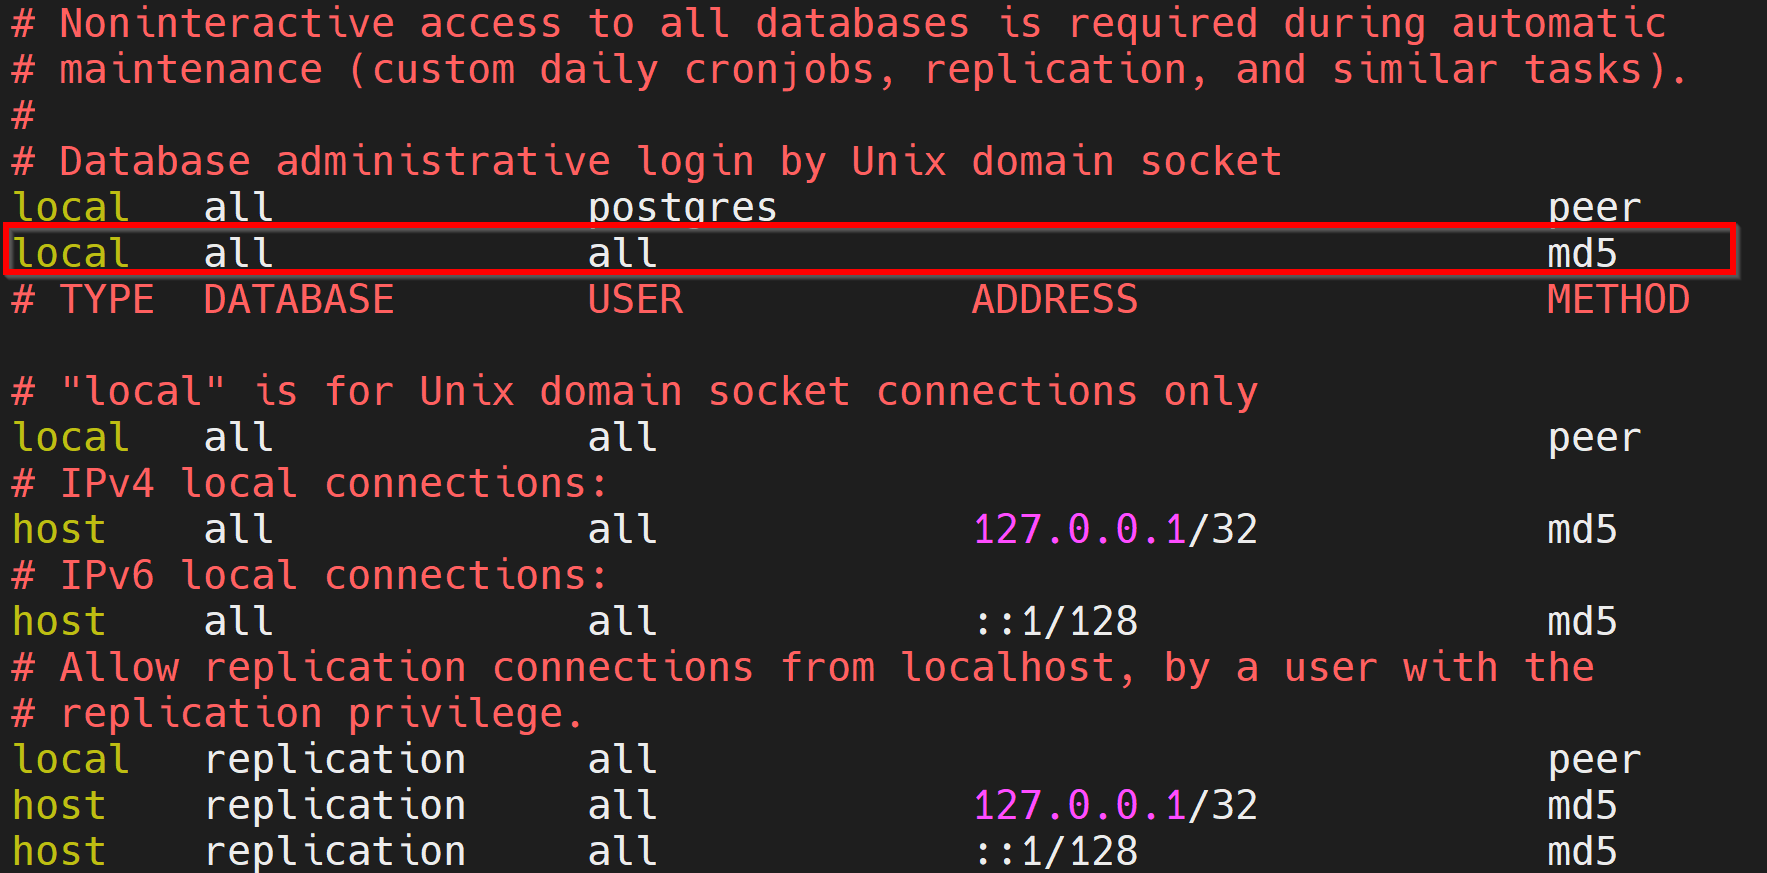
- PostgreSQL サーバの再起動
エラーメッセージが出ていなければ OK.
sudo pg_ctlcluster 18 main restart
sudo pg_ctlcluster 18 main status
- 新しいロール testuser で,scram-sha-256 認証により psql を使用できるか確認する.
パスワード認証のときは psql -U <ロール名> -d <データベース名>
psql -U testuser -d postgres
\c
\q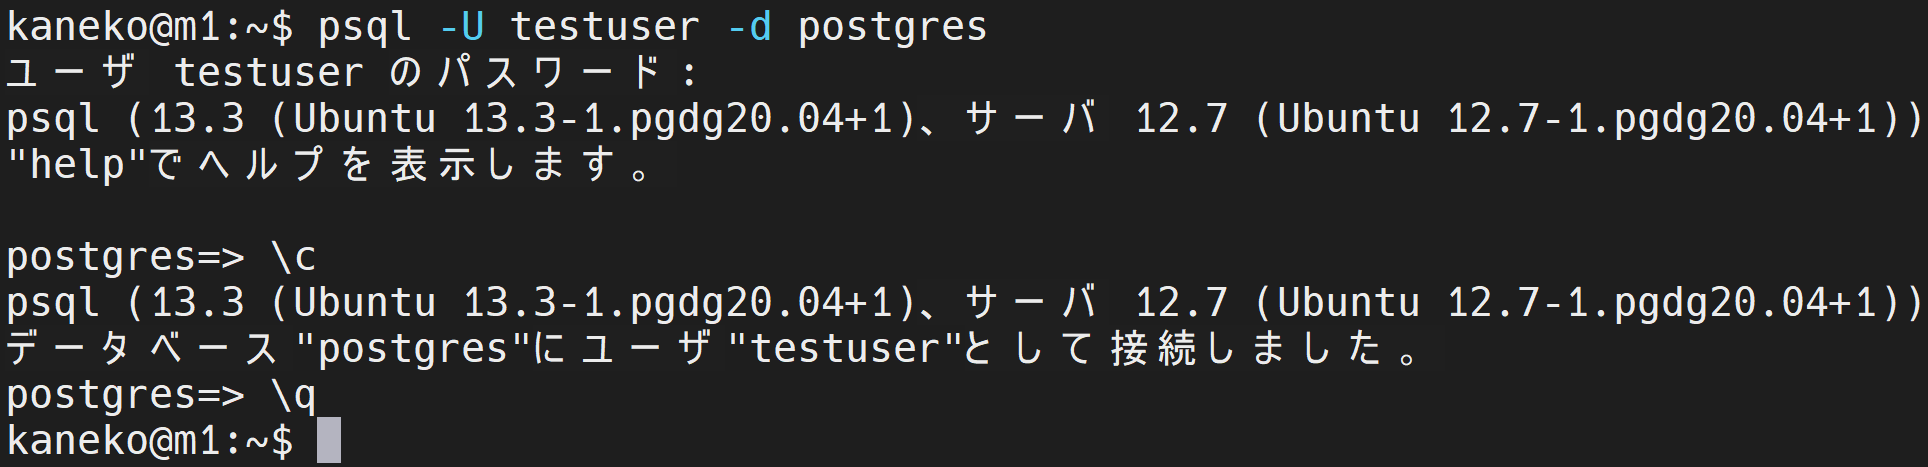
PostgreSQL データベースサーバの起動と終了
PostgreSQL データベースサーバの再起動
sudo pg_ctlcluster 18 main restart
sudo pg_ctlcluster 18 main status

PostgreSQL データベースサーバの終了
sudo pg_ctlcluster 18 main stop
sudo pg_ctlcluster 18 main status

psql の基本操作
- psql --version: psql バージョン確認:
- psql: psql 起動
- \copy: テーブルのコピー
- \d, \d+: テーブル等の情報の表示
- \db, \db+: テーブル空間の表示
- \c: データベースへの接続、現在接続しているデータベースとユーザの確認
- \l: データベースの情報の表示
- \q: 終了
テーブル定義とレコード挿入
- 「PostgreSQL データベース管理者のユーザ名」で,psql を用いて接続.
sudo -u postgres psql
- SQL を用いたテーブル定義
create table order_records (
    id            integer primary key not null,
    year          integer not null CHECK ( year > 2008 ),
    month         integer not null CHECK ( month >= 1 AND month <= 12 ),
    day           integer not null CHECK ( day >= 1 AND day <= 31 ),
    customer_name text not null,
    product_name  text not null,
    unit_price    real not null check ( unit_price > 0 ),
    qty           integer not null default 1 check ( qty > 0 ),
    created_at    timestamp with time zone not null default current_timestamp,
    updated_at    timestamp with time zone not null default current_timestamp,
    check ( ( unit_price * qty ) < 200000 ) );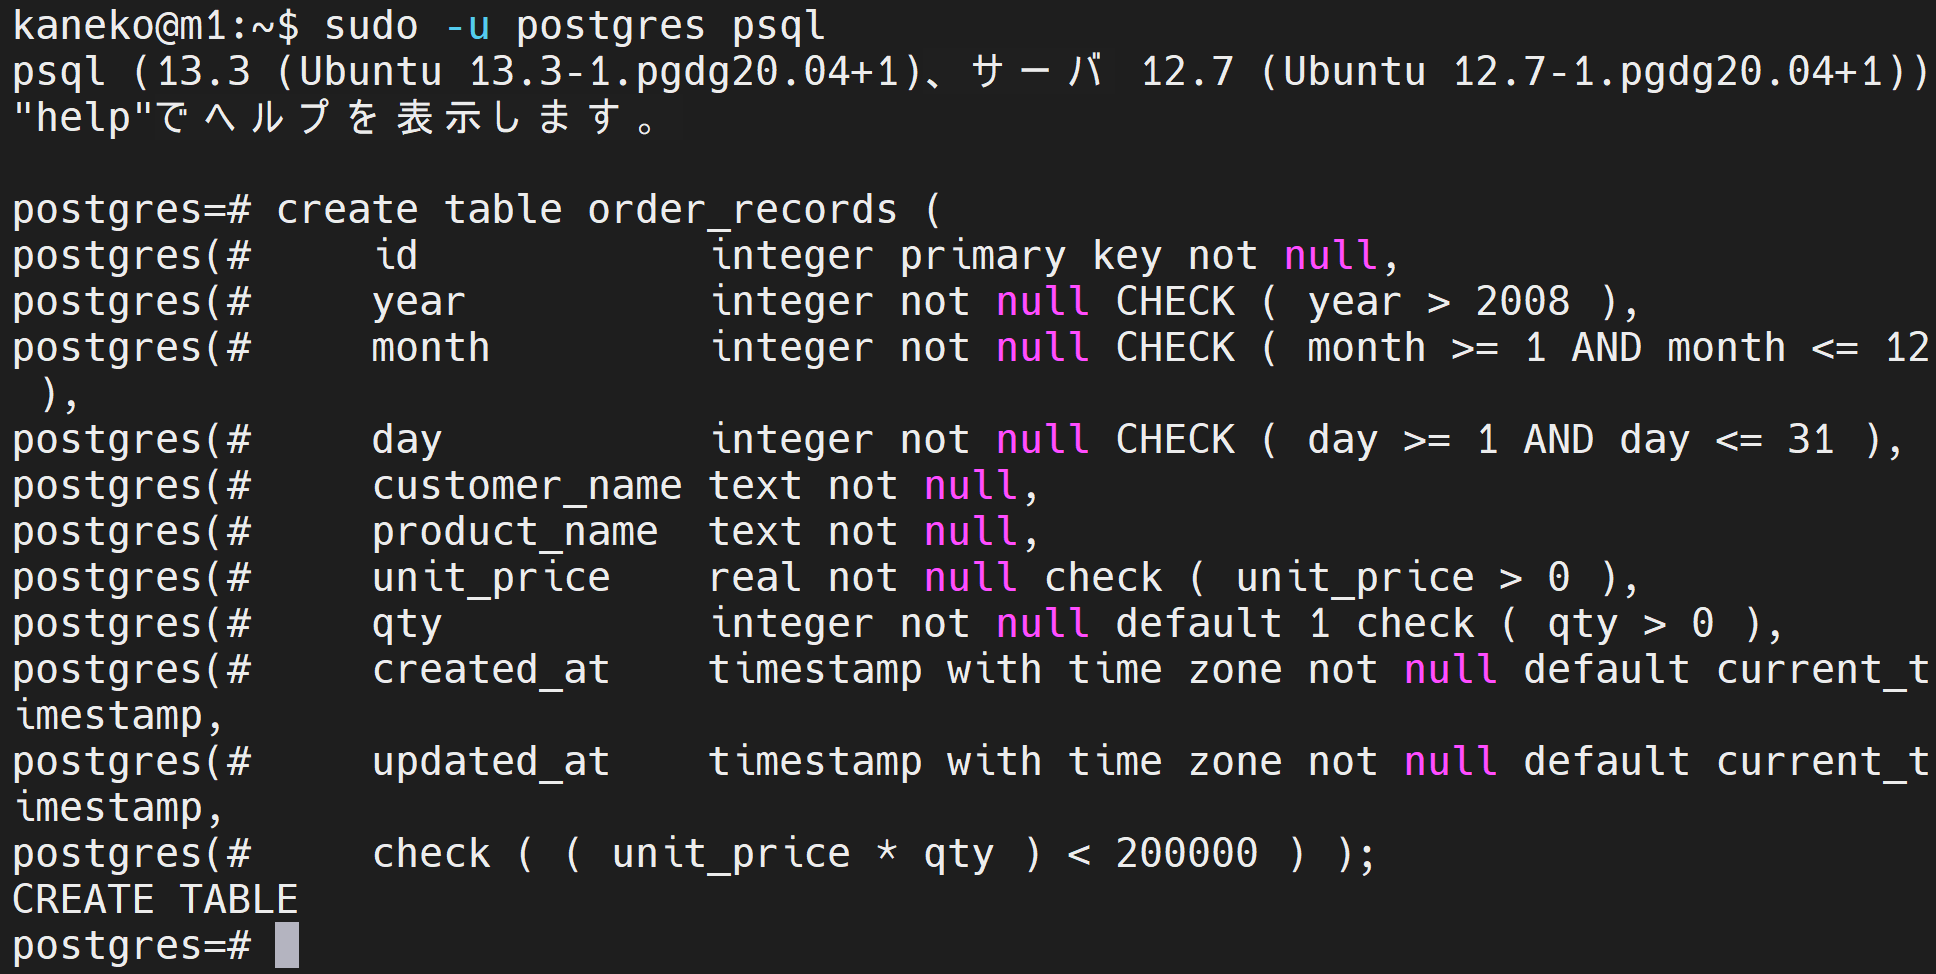
- SQL を用いたレコード挿入
begin transaction;
insert into order_records (id, year, month, day, customer_name, product_name, unit_price, qty) values( 1, 2026, 7, 26,  'kaneko', 'orange A', 1.2, 10 );
insert into order_records (id, year, month, day, customer_name, product_name, unit_price, qty) values( 2, 2026, 7, 26,  'miyamoto', 'Apple M',  2.5, 2 );
insert into order_records (id, year, month, day, customer_name, product_name, unit_price, qty) values( 3, 2026, 7, 27,  'kaneko',   'orange B', 1.2, 8 );
insert into order_records (id, year, month, day, customer_name, product_name, unit_price) values( 4, 2026, 7, 28,  'miyamoto',   'Apple L', 3 );
commit;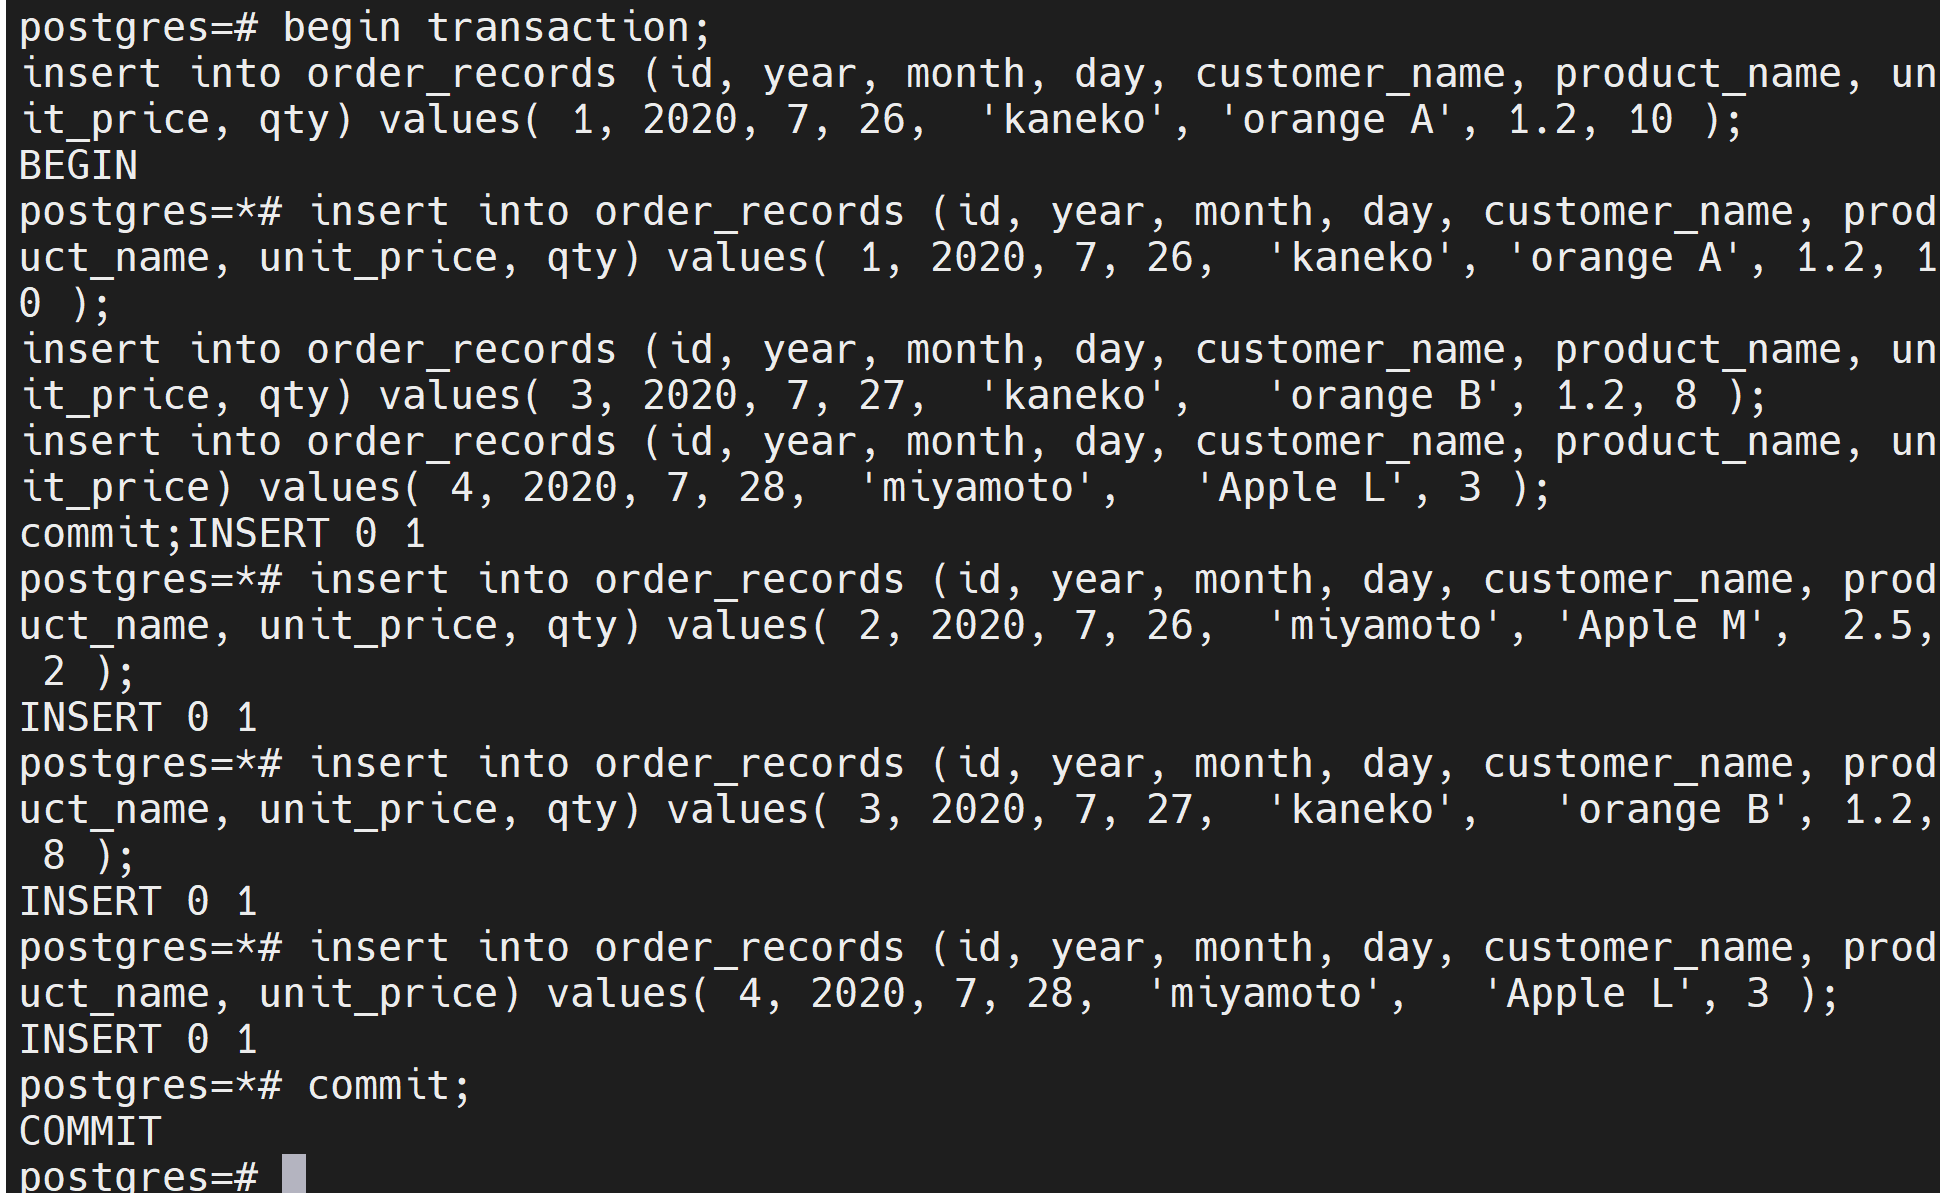
- 確認表示
select * from order_records;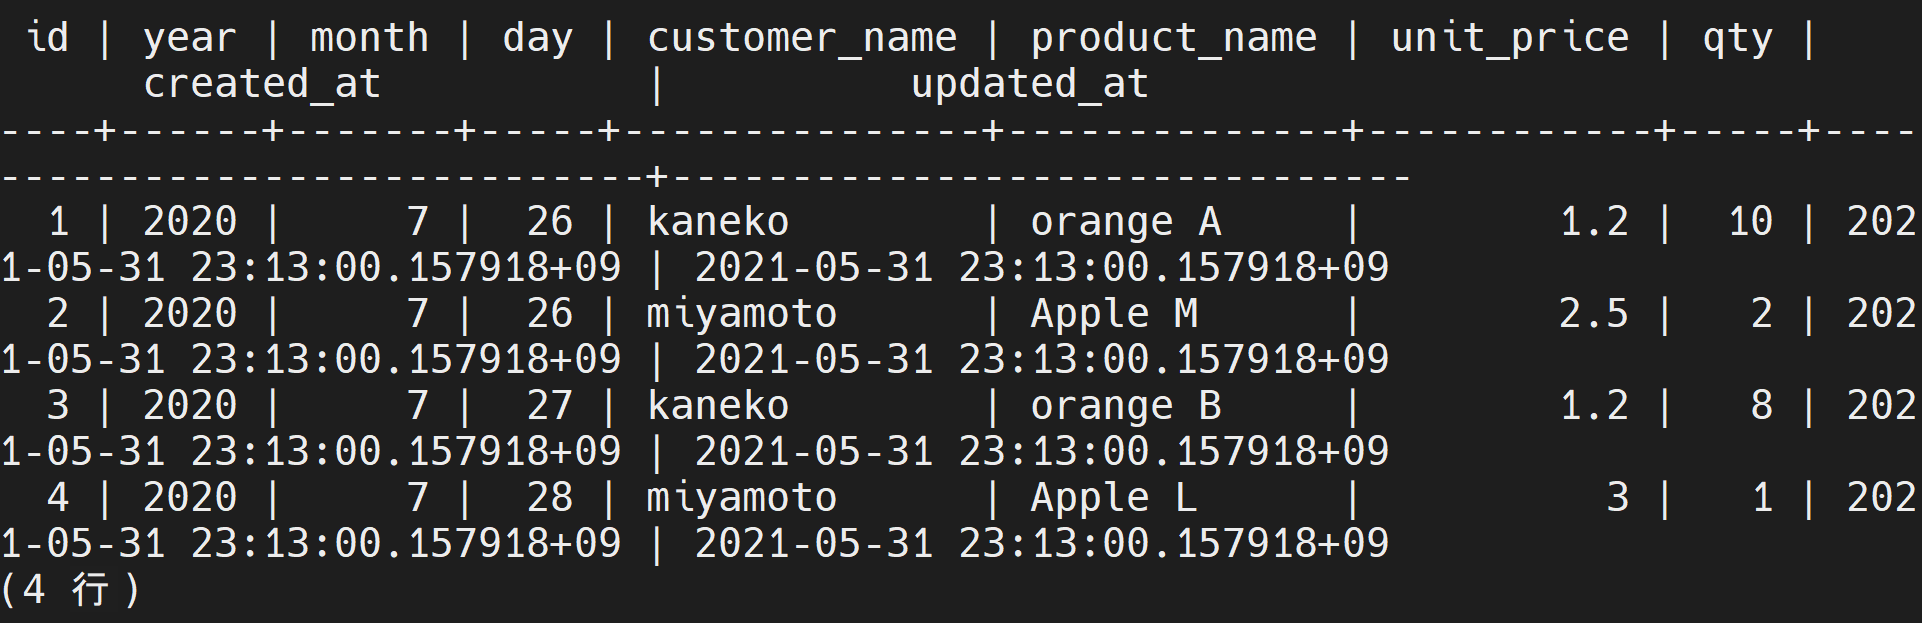
- 更新し確認表示
begin transaction;
update order_records set unit_price = 11.2 where id = 1;
commit;
select * from order_records;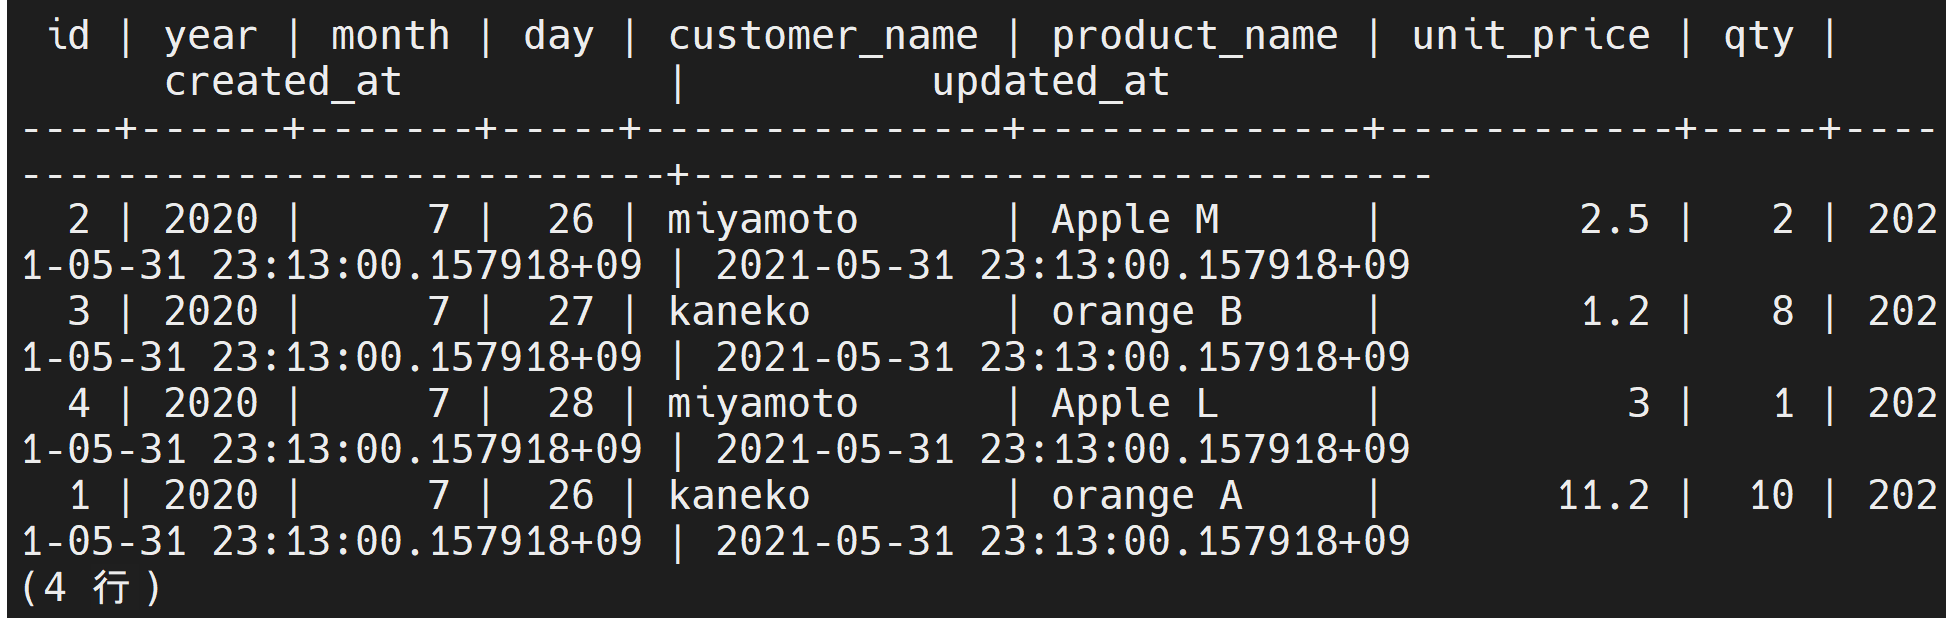
- テーブル一覧の表示
\d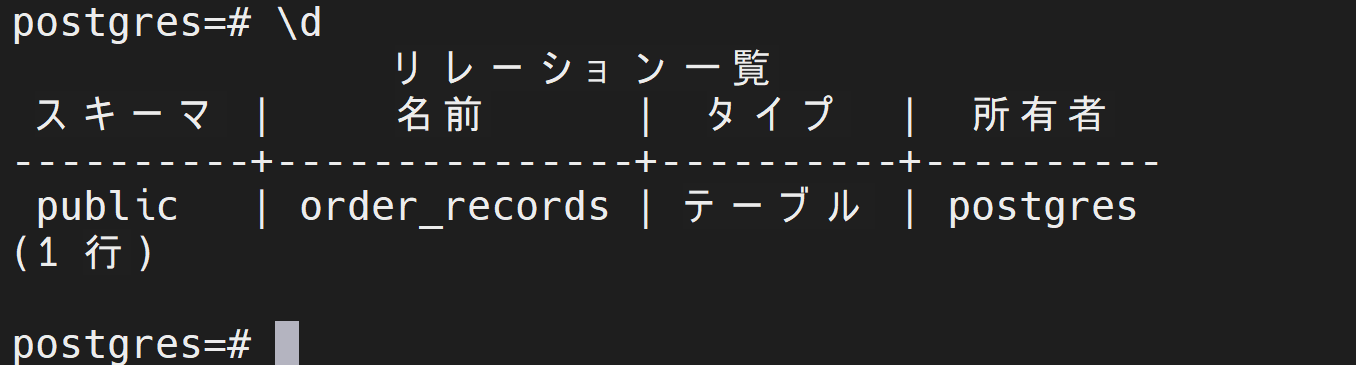
- psql の終了
\q