1adrianb/face-alignment のインストールと動作確認(顔の2次元,3次元のランドマーク)(PyTorch,Python 3.7 を使用)(Windows 上)
前準備
Python 3.7 のインストール(Windows 上) [クリックして展開]
以下のいずれかの方法で Python 3.7 をインストールする。Python がインストール済みの場合、この手順は不要である。
方法1:winget によるインストール
管理者権限のコマンドプロンプトで以下を実行する。管理者権限のコマンドプロンプトを起動するには、Windows キーまたはスタートメニューから「cmd」と入力し、表示された「コマンドプロンプト」を右クリックして「管理者として実行」を選択する。
winget install -e --id Python.Python.3.7 --scope machine --silent --accept-source-agreements --accept-package-agreements --override "/quiet InstallAllUsers=1 PrependPath=1 AssociateFiles=1 InstallLauncherAllUsers=1"--scope machine を指定することで、システム全体(全ユーザー向け)にインストールされる。このオプションの実行には管理者権限が必要である。インストール完了後、コマンドプロンプトを再起動すると PATH が自動的に設定される。
方法2:インストーラーによるインストール
- Python 公式サイト(https://www.python.org/downloads/)にアクセスし、「Download Python 3.x.x」ボタンから Windows 用インストーラーをダウンロードする。
- ダウンロードしたインストーラーを実行する。
- 初期画面の下部に表示される「Add python.exe to PATH」に必ずチェックを入れてから「Customize installation」を選択する。このチェックを入れ忘れると、コマンドプロンプトから
pythonコマンドを実行できない。 - 「Install Python 3.xx for all users」にチェックを入れ、「Install」をクリックする。
インストールの確認
コマンドプロンプトで以下を実行する。
python --versionバージョン番号(例:Python 3.7.x)が表示されればインストール成功である。「'python' は、内部コマンドまたは外部コマンドとして認識されていません。」と表示される場合は、インストールが正常に完了していない。
Git のインストール(Windows 上) [クリックして展開]
管理者権限のコマンドプロンプトで以下を実行する.管理者権限は,winget の --scope machine オプションでシステム全体にインストールするために必要となる.
REM Git をシステム領域にインストール
winget install --scope machine --id Git.Git -e --silent --disable-interactivity --force --accept-source-agreements --accept-package-agreements --override "/VERYSILENT /NORESTART /NOCANCEL /SP- /CLOSEAPPLICATIONS /RESTARTAPPLICATIONS /COMPONENTS=""icons,ext\reg\shellhere,assoc,assoc_sh"" /o:PathOption=Cmd /o:CRLFOption=CRLFCommitAsIs /o:BashTerminalOption=MinTTY /o:DefaultBranchOption=main /o:EditorOption=VIM /o:SSHOption=OpenSSH /o:UseCredentialManager=Enabled /o:PerformanceTweaksFSCache=Enabled /o:EnableSymlinks=Disabled /o:EnableFSMonitor=Disabled"
Visual Studio Community 2017 のインストール
NVIDIA CUDA 10.0 は Visual Studio Commnity 2017, 2015, 2013, 2012 と連携して動く機能がある.
NVIDIA CUDA 10.0 のインストールの前に, Visual Studio Commnity 2017 のインストールを行う.
Visual Studio Commnity 2017 のインストールは, https://visualstudio.microsoft.com/ja/vs/older-downloads/ で「2017」を選び,「ダウンロード」をクリック. その後表示されるダウンロードの画面で, 「Visual Studio Commnity 2017」を選ぶ. インストール時には「C++ によるデスクトップ開発」をチェックしてインストールする.
NVIDIA ドライバのインストール(Windows 上)
NVIDIA ドライバとは
NVIDIA ドライバは,NVIDIA製GPUをWindowsシステム上で適切に動作させるための基盤となるソフトウェアです.このドライバをインストールすることにより,GPUの性能を最大限に引き出し,グラフィックス処理はもちろん,CUDAを利用したAI関連アプリケーションなどの計算速度を向上させることが期待できます.
ドライバは通常、NVIDIA公式サイトからダウンロードするか、NVIDIA GeForce Experienceソフトウェアを通じてインストール・更新します。
公式サイト: https://www.nvidia.co.jp/Download/index.aspx?lang=jp
【サイト内の関連ページ】
- (再掲) NVIDIA グラフィックス・ボードの確認
インストールするドライバを選択するために、まずご使用のPCに搭載されているNVIDIAグラフィックス・ボードの種類を確認します。(確認済みであれば、この手順は不要です。) Windows のコマンドプロンプトで次のコマンドを実行します。
wmic path win32_VideoController get name - NVIDIA ドライバのダウンロード
確認したグラフィックス・ボードのモデル名と、お使いのWindowsのバージョン(例: Windows 11, Windows 10 64-bit)に対応するドライバを、以下のNVIDIA公式サイトからダウンロードします.
https://www.nvidia.co.jp/Download/index.aspx?lang=jp
サイトの指示に従い、製品タイプ、製品シリーズ、製品ファミリー、OS、言語などを選択して検索し、適切なドライバ(通常は最新のGame Ready ドライバまたはStudio ドライバ)をダウンロードします。
- ドライバのインストール
ダウンロードしたインストーラー(.exeファイル)を実行し、画面の指示に従ってインストールを進めます。「カスタムインストール」を選択すると、インストールするコンポーネント(ドライバ本体、GeForce Experience、PhysXなど)を選ぶことができます。通常は「高速(推奨)」で問題ありません。
インストール完了後、システムの再起動を求められる場合があります。
- CUDA対応のNVIDIA GPUが必要.
そのために,NVIDIA グラフィックス・ボードを確認する. Windows で,NVIDIA グラフィックス・ボードの種類を調べたいときは, 次のコマンドを実行することにより調べることができる.
wmic path win32_VideoController get name - NVIDIA ドライバのダウンロードとインストール
NVIDIA ドライバは,以下の NVIDIA 公式サイトからダウンロードできる. ダウンロードの際には,使用しているグラフィックス・ボードの型番とオペレーティングシステムを選択する.
- Windows では,インストール前に,Build Tools for Visual Studio もしくは Visual Studio をインストールしておくことが必要である.
- Windows では, NVIDIA CUDA ツールキットのインストール中は,なるべく他のウインドウはすべて閉じておくこと.
- NVIDIA CUDA ツールキットのインストールが終わったら,ユーザ環境変数 TEMP の設定を行う.
Windows のユーザ名が日本語のとき,nvcc がうまく動作しないエラーを回避するためである.
ユーザ環境変数 TEMP に「C:\TEMP」を設定するために, コマンドプロンプトで,次のコマンドを実行する.
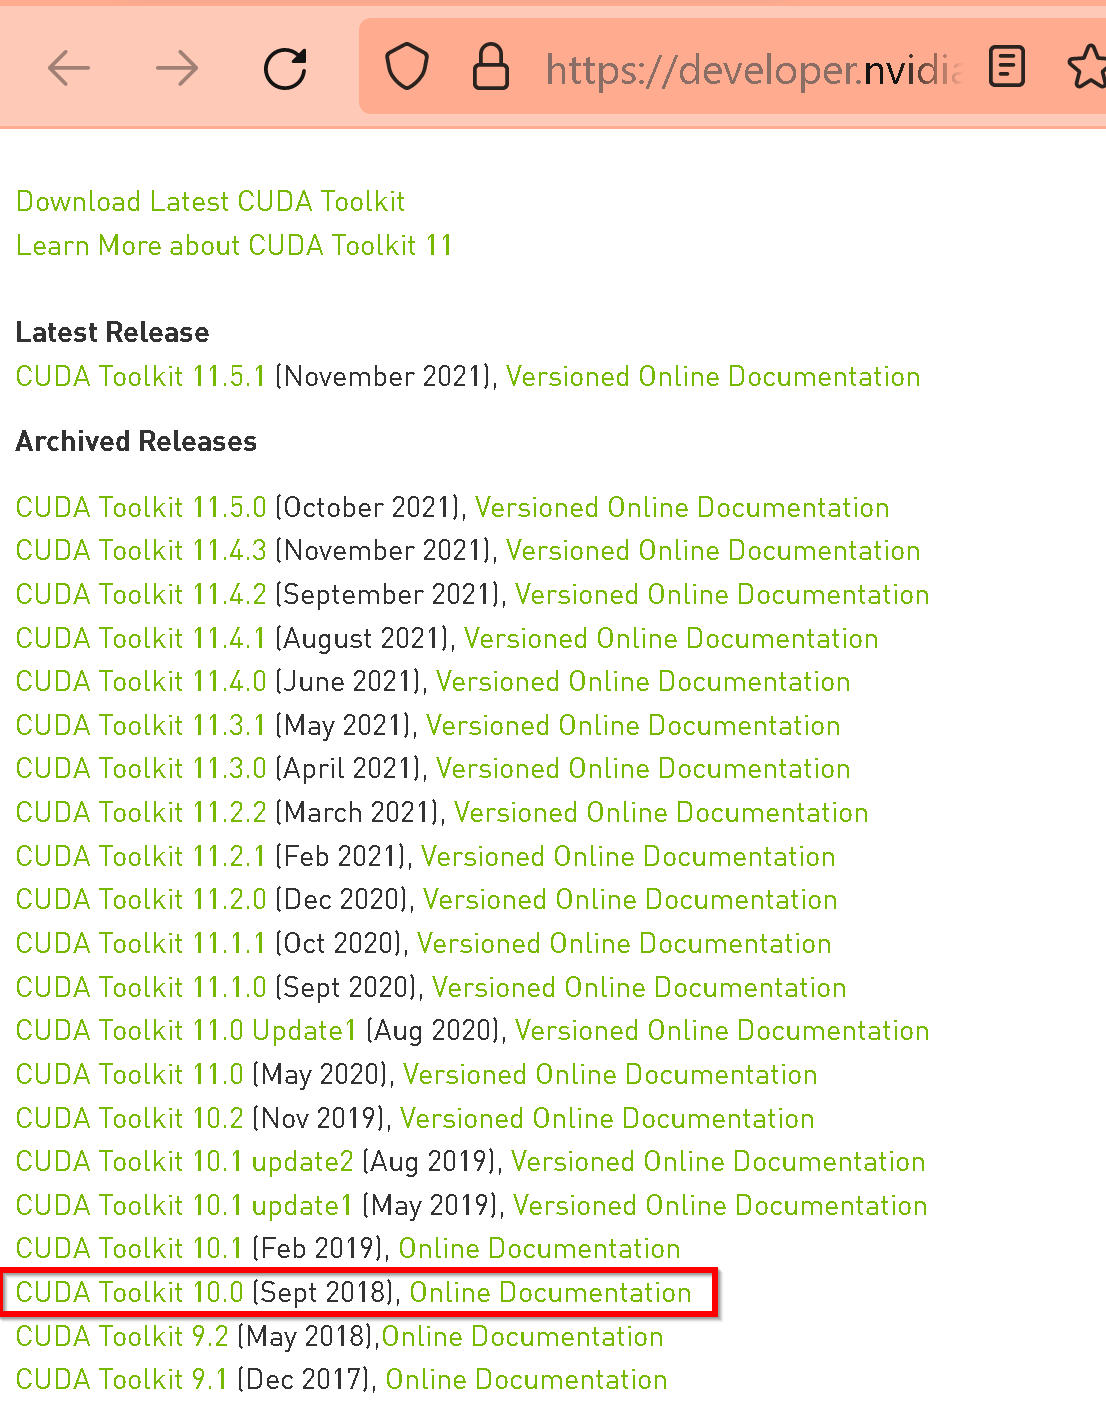
mkdir C:\TEMP powershell -command "[System.Environment]::SetEnvironmentVariable(\"TEMP\", \"C:\TEMP\", \"User\")" - NVIDIA CUDA ツールキットのアーカイブの公式ページ: https://developer.nvidia.com/cuda-toolkit-archive
- NVIDIA CUDA ツールキット の公式のドキュメント: https://docs.nvidia.com/cuda/cuda-installation-guide-linux/index.html
- NVIDIA CUDA ツールキットのインストールに関する,NVIDIA CUDA クイックスタートガイドの公式ページ: https://docs.nvidia.com/cuda/cuda-quick-start-guide/index.html
- NVIDIA CUDA ツールキットのアーカイブのページを開く
- NVIDIA CUDA ツールキットのバージョンを選ぶ
ここでは,NVIDIA CUDA ツールキットの10.0を選んでいる
- 「Windows」,「10」,「exe [local]」を選ぶ.
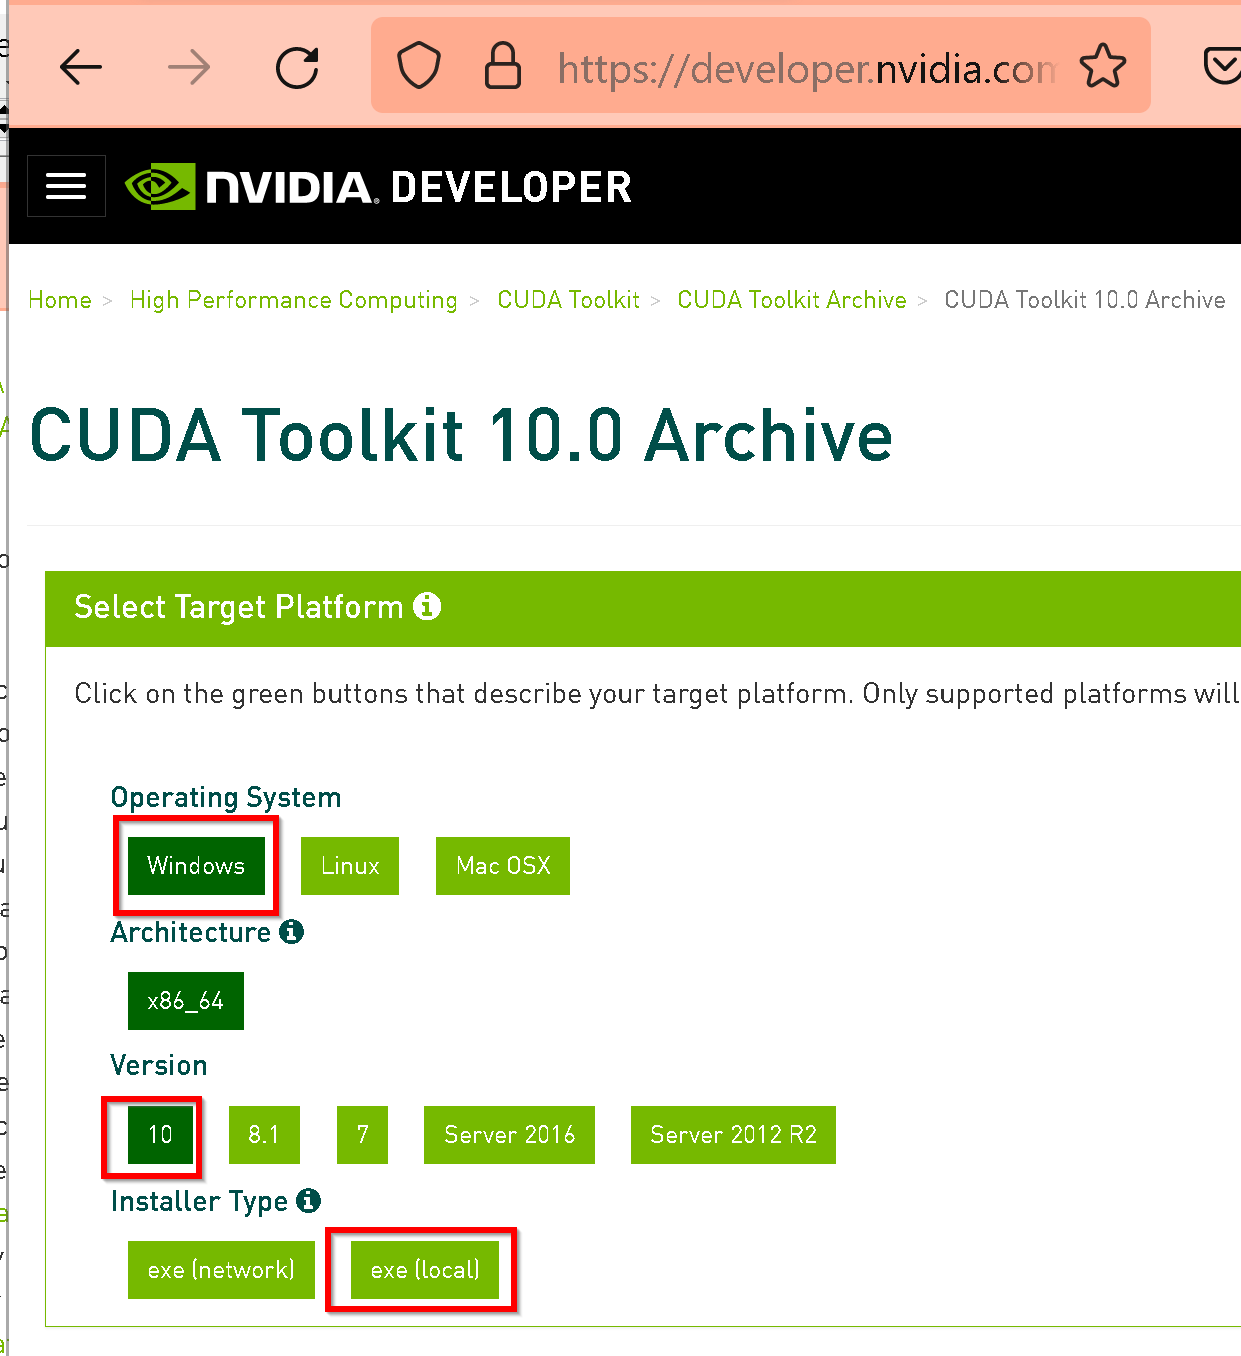
- 「Base Installer」の右横の「Download」をクリックして,.exe ファイルをダウンロード
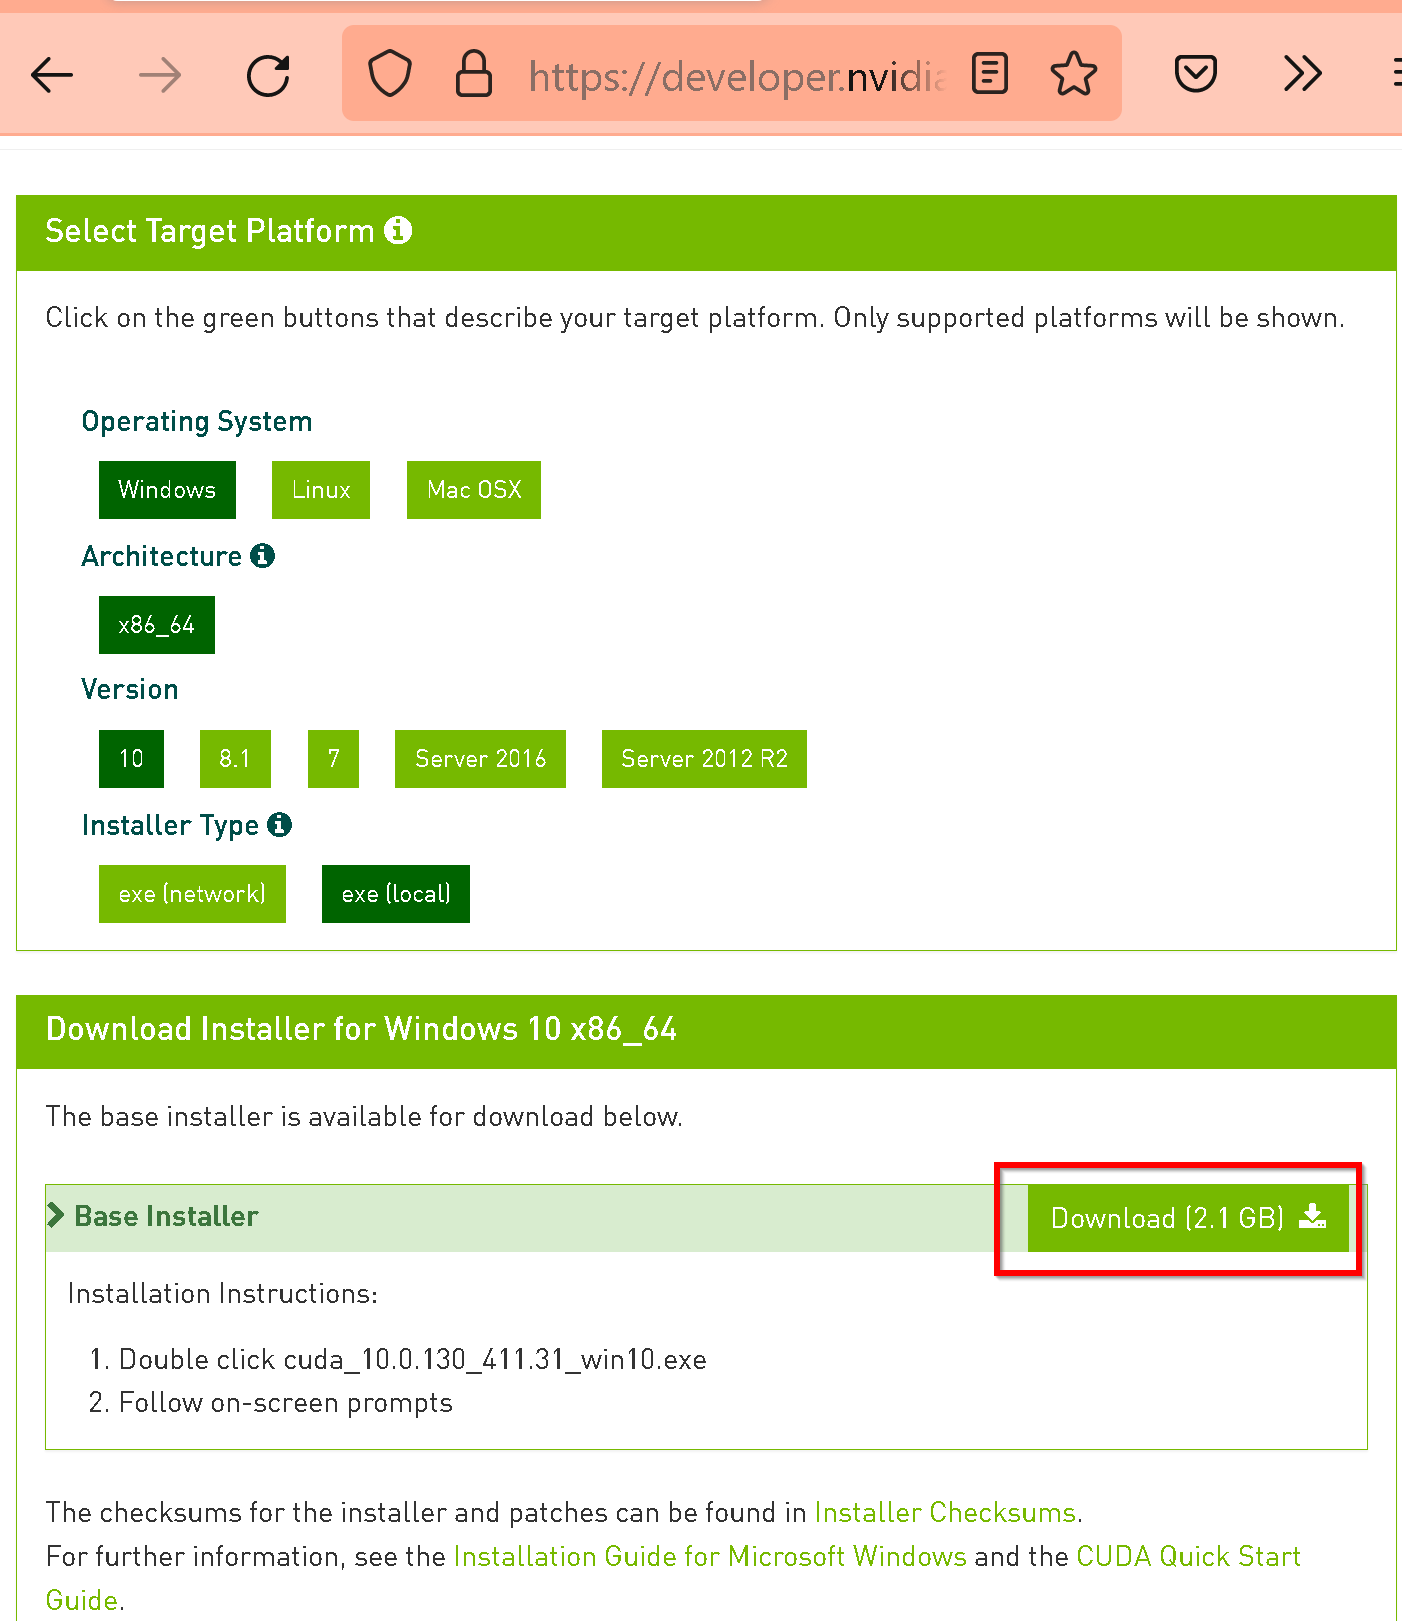
- exe ファイルのダウンロードが始まる

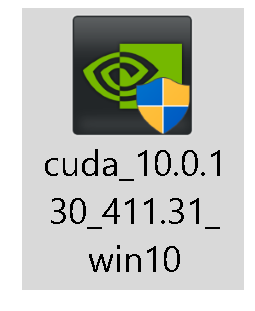
- ダウンロードした .exe ファイルを実行する.
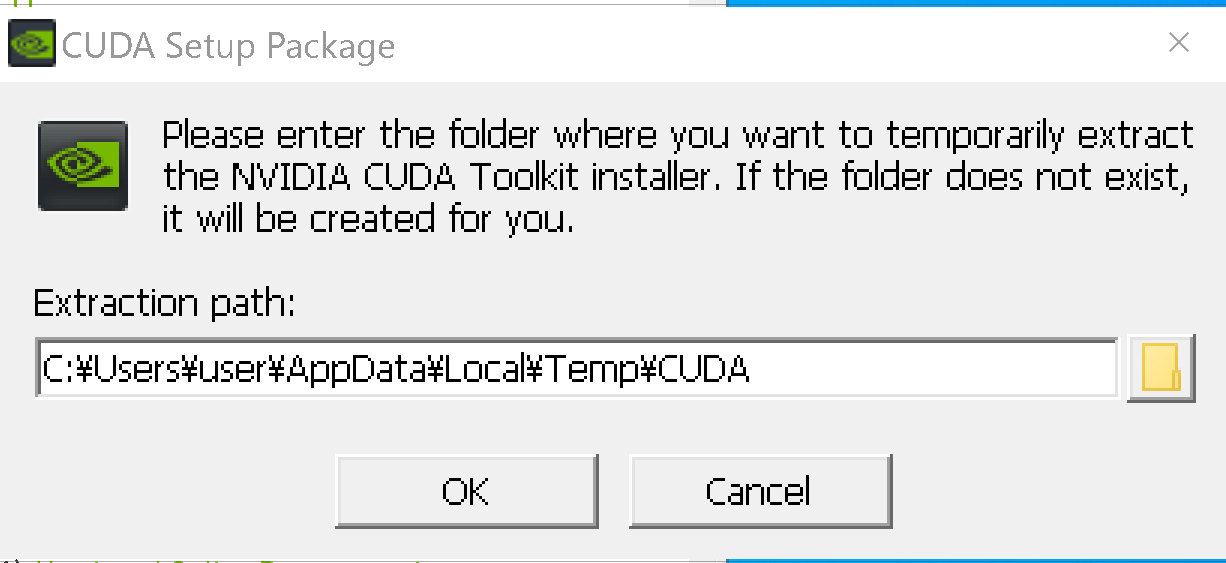
- 展開(解凍)先ディレクトリ(フォルダ)の指定.
既定(デフォルト)のままでよい.「OK」をクリック.
- 展開(解凍)が自動で行われるので,しばらく待つ.

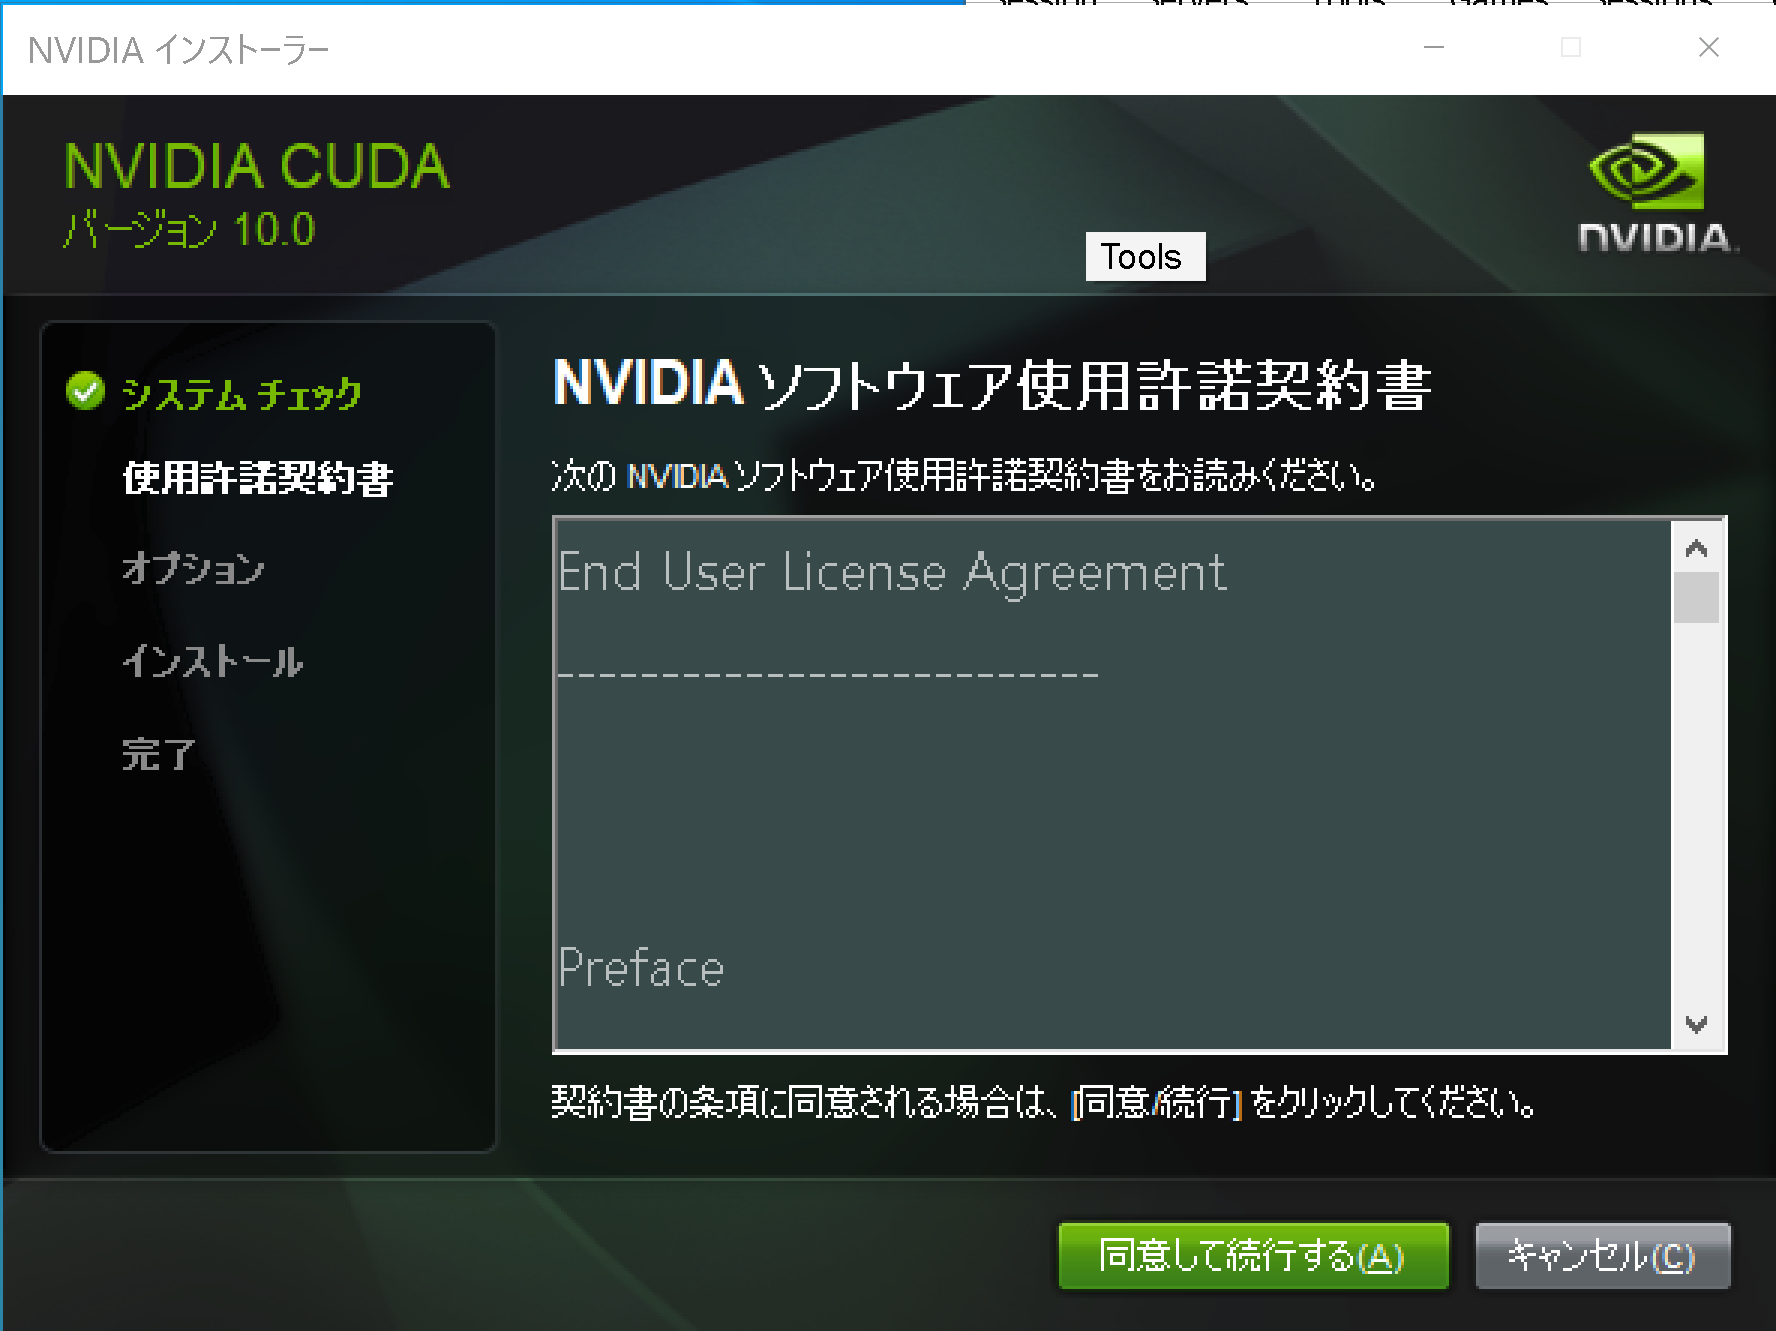
- ライセンス条項の確認.
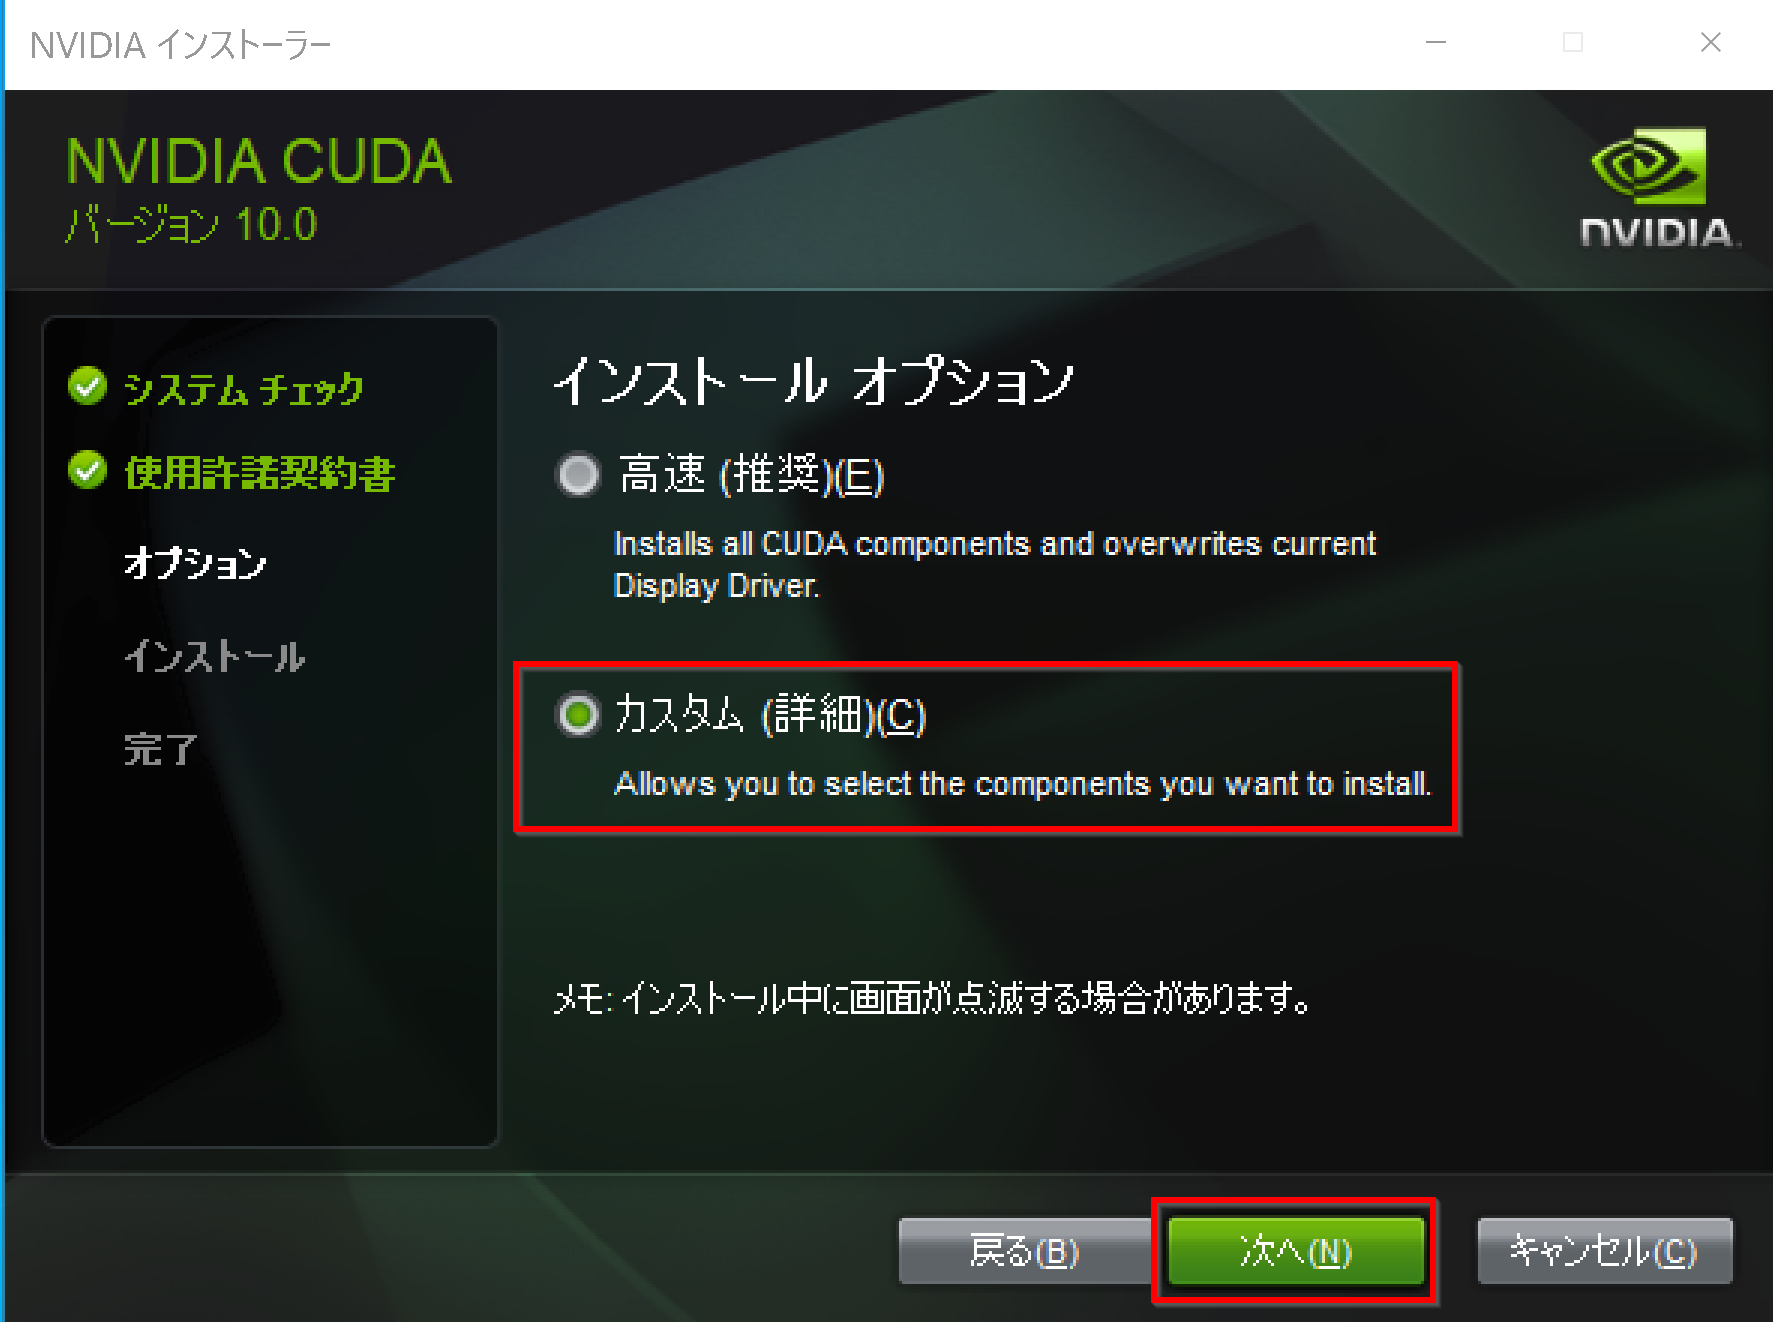
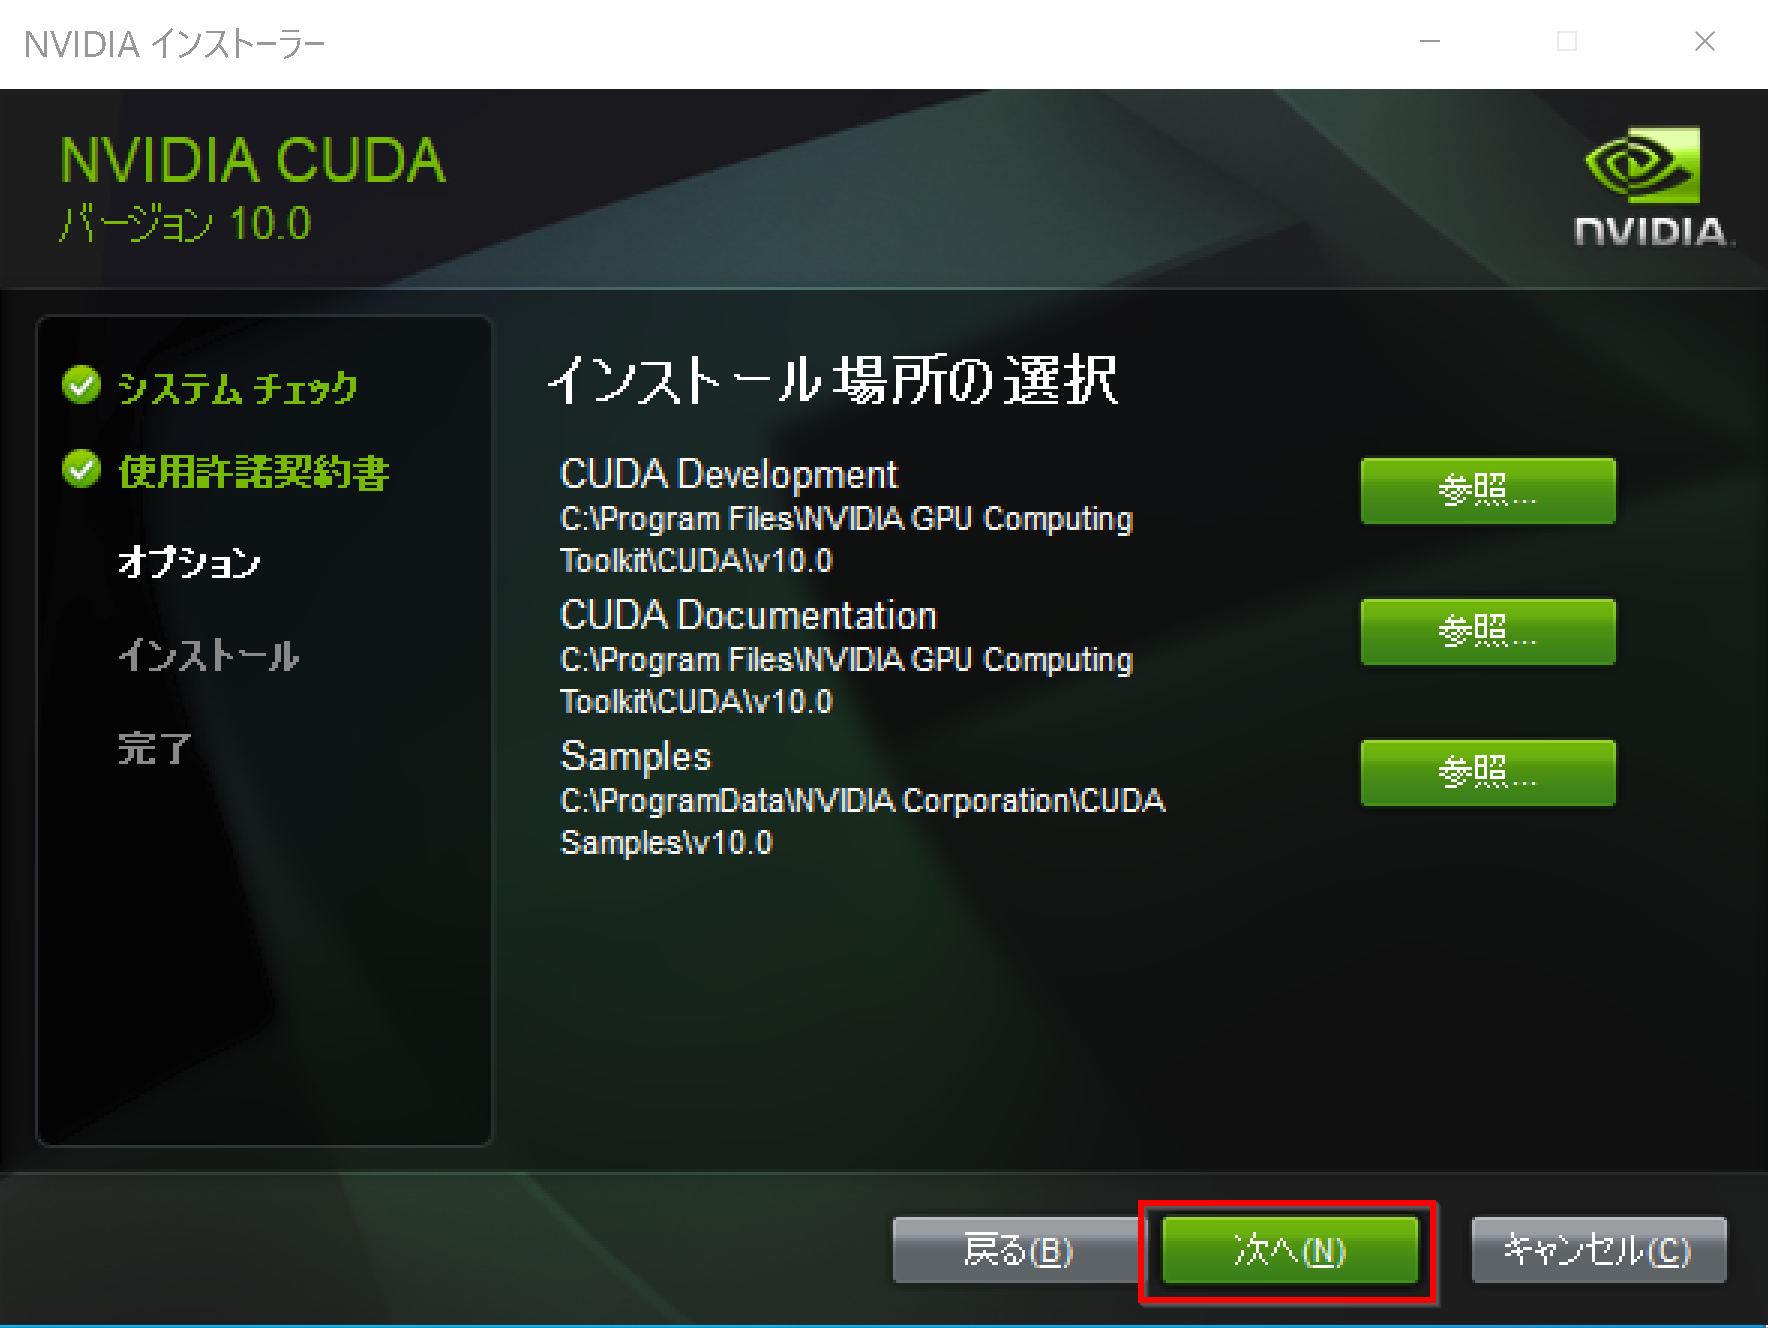
- インストールオプションは,「カスタム(詳細)」を選び,「次へ」をクリック.
- コンポーネントを確認する.
「CUDA」にチェックする.その他は,必要なものがあればチェックする.「次へ」をクリック.
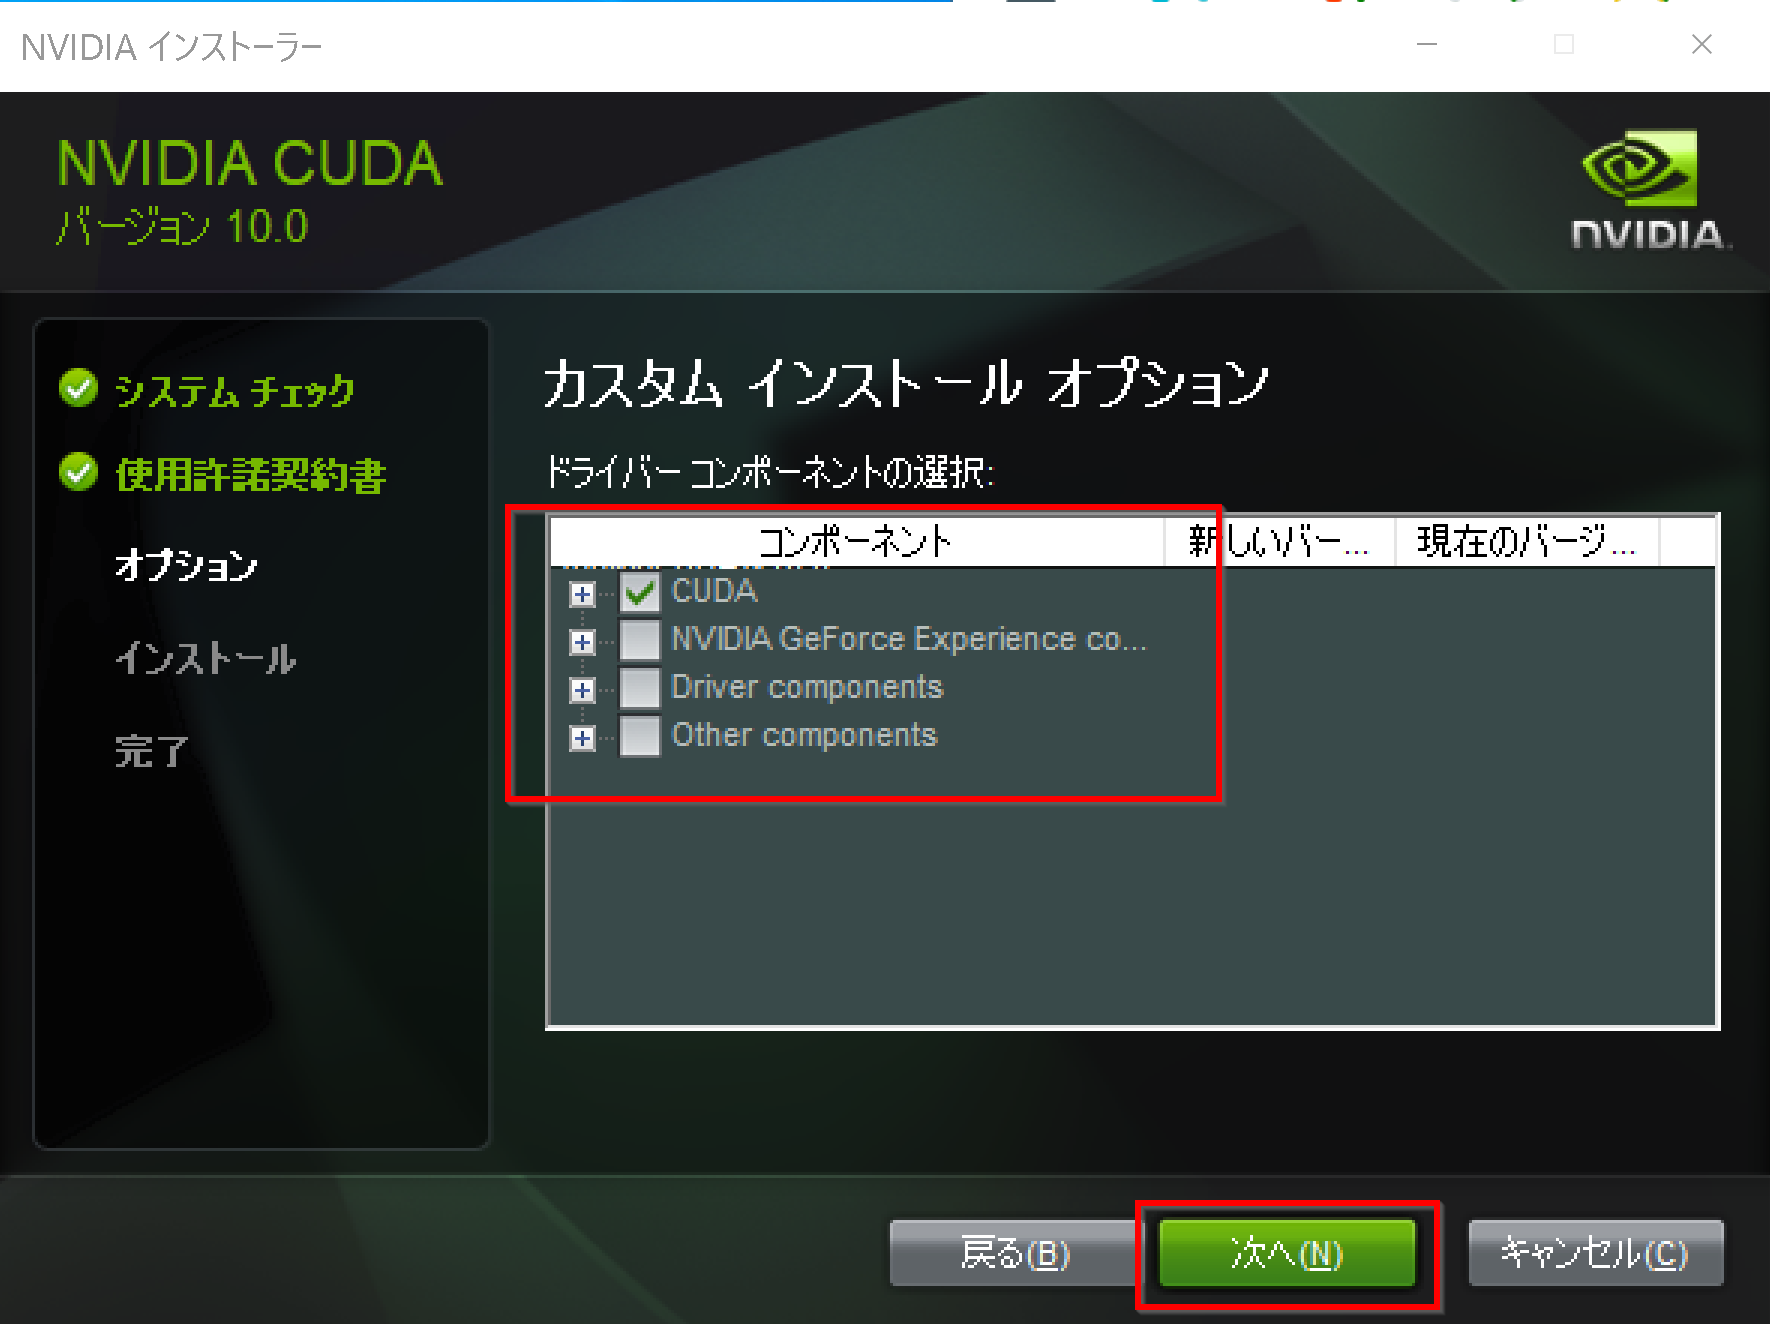 複数の版の NVIDIA CUDA ツールキットをインストールする場合には,古い版のNVIDIA CUDA ツールキットをインストールするときに「CUDA」だけを選ぶようにする.
 - インストール場所の選択は,既定(デフォルト)のままでよい.「次へ」をクリック.
- Visual Studio Integration について表示された場合
表示されなくても問題はない.
表示された場合には,NVIDIA CUDA のインストールを中止して, Visual Studio Commnity 2017 のインストールを行う.Visual Studio Commnity 2017 のインストールは, https://visualstudio.microsoft.com/ja/vs/older-downloads/ で「2017」を選び,「ダウンロード」をクリック. その後表示されるダウンロードの画面で, 「Visual Studio Commnity 2017」を選ぶ. インストール時には「C++ によるデスクトップ開発」をチェックしてインストールする.
- このとき,Windows セキュリティの画面が開くことがある.開いた場合には,「インストール」をクリック.
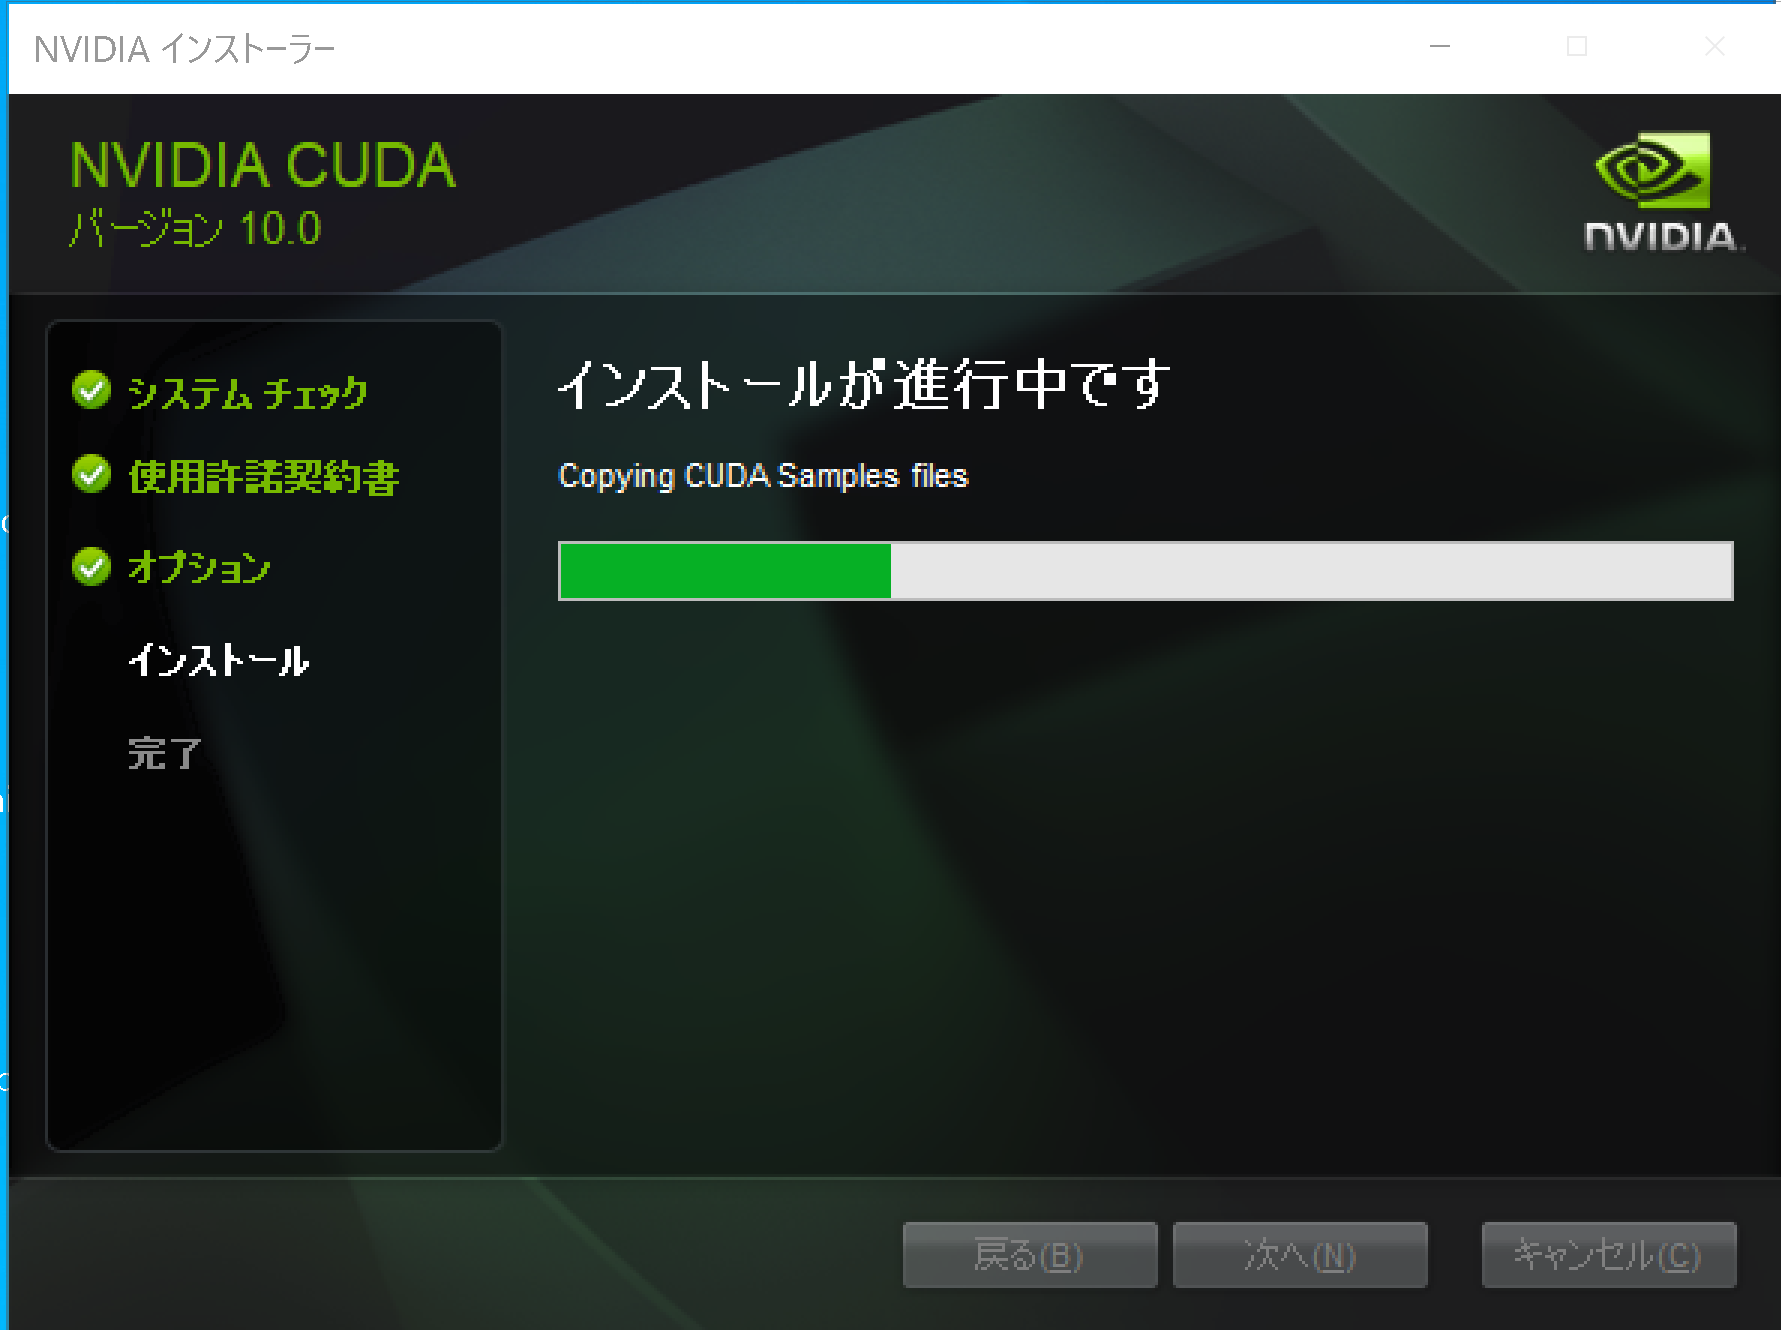
- インストールが始まるので,確認する.
- このとき,グラフィックス・カードのドライバのインストールについての画面が表示される場合がある.「インストール」をクリックして,インストールを続行する.
- Visual Studio がインストール済みのときは,Nsight Visual Studio がインストールされたことが確認できる.確認したら「次へ」をクリック.
Visual Studio をインストールしていないときは,Nsight for Visual Studio はインストールされない.
- インストール終了の確認.「閉じる」をクリック.
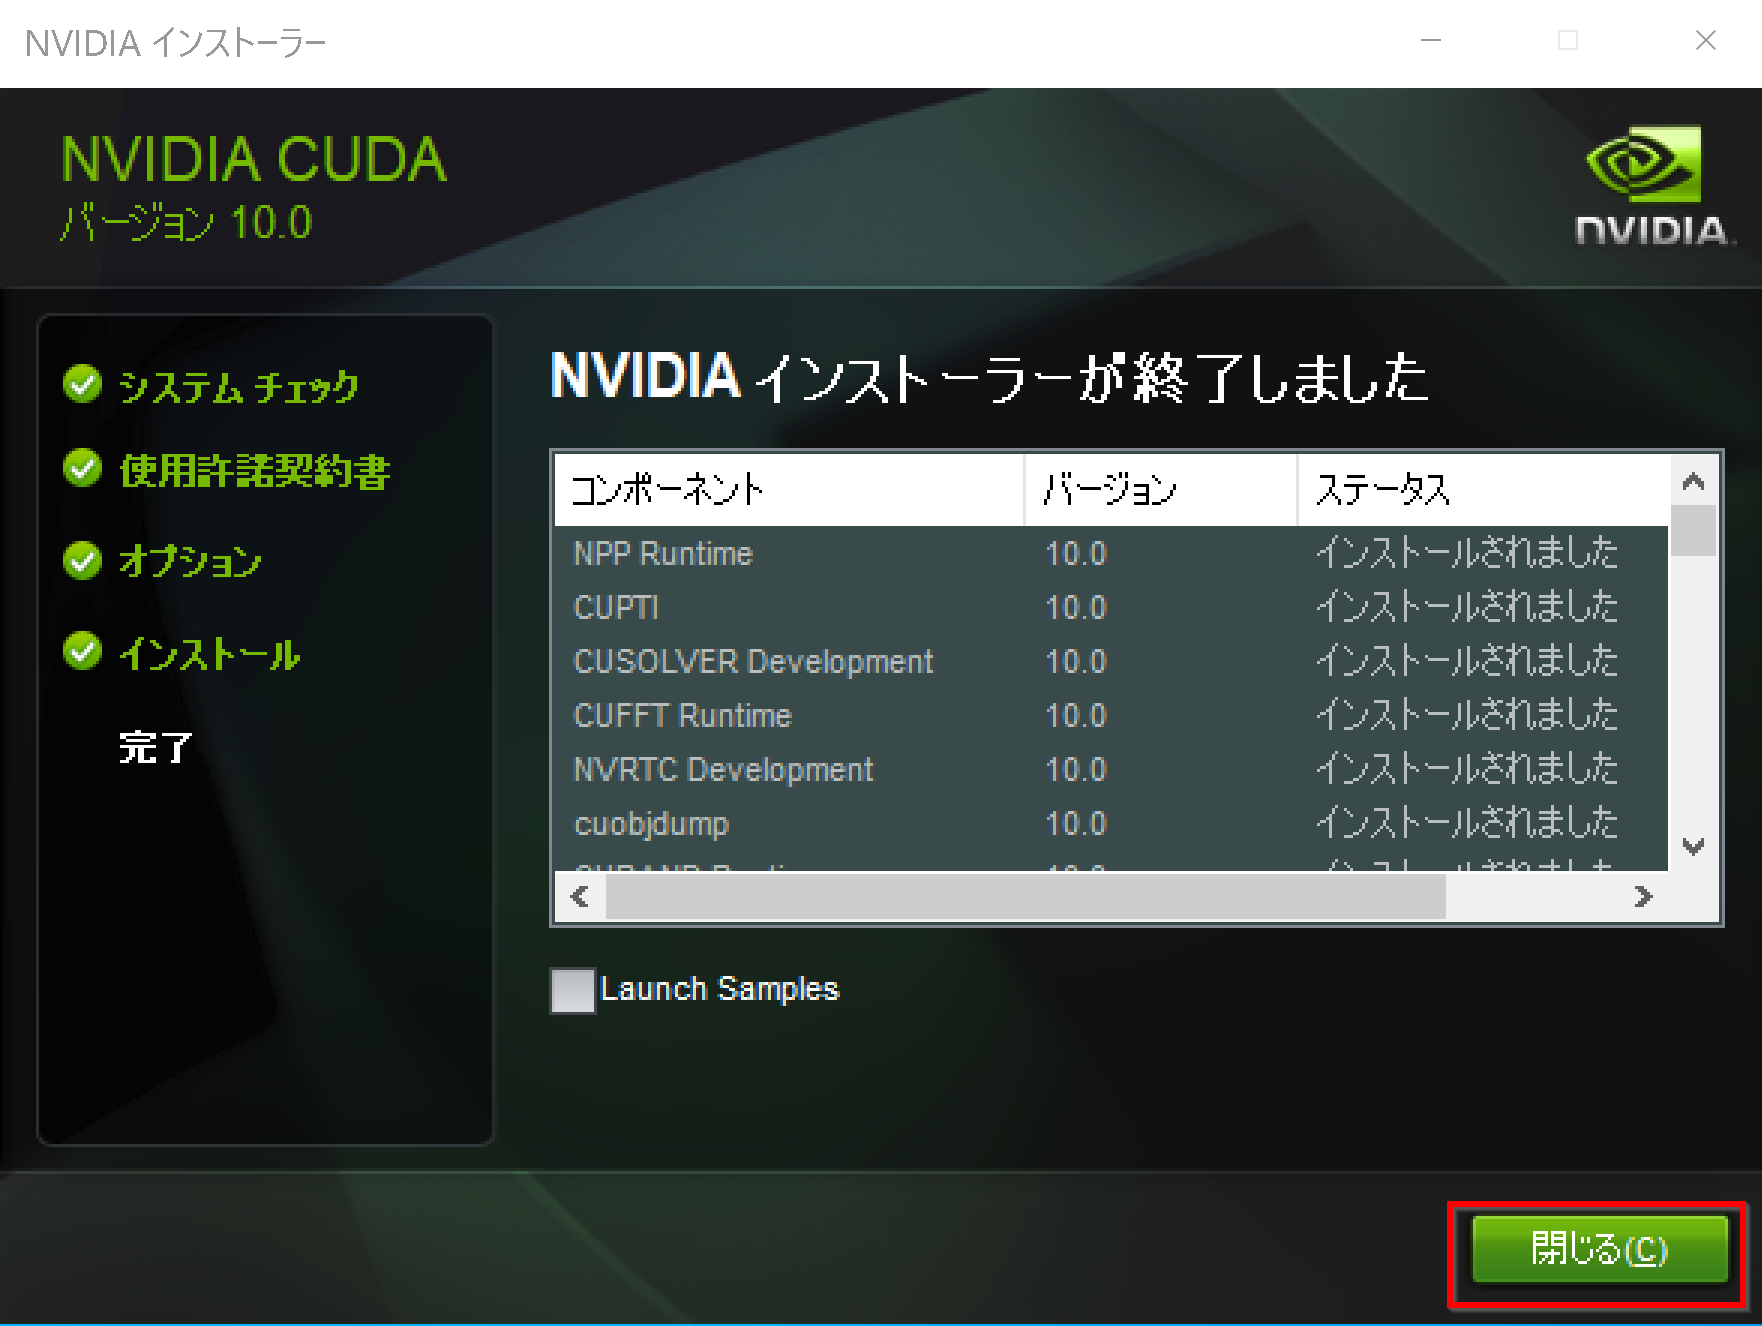 * 「コンピュータを再起動してください」と表示される場合がある.そのときは,再起動する.
 - GeForce Experience が自動で開く場合がある
- 利用条件について表示されたときは、よく確認し、納得できる場合のみ同意・続行する
- リリースハイライトが表示される場合がある.
リリースハイライトを確認したら,「x」をクリックして閉じる.
- このとき,最新版への更新が始まり,起動に時間がかかることがある.
そして「お使いのGPU向けの新しいドライバーが入手可能です」と表示されることがある.そのときは,新しいドライバをインストールする.
- NVIDIA cuDNN の公式ページ(ダウンロードにはDeveloper Programへの登録が必要): https://developer.nvidia.com/cudnn
- NVIDIA Developer Program メンバーシップへの加入: cuDNNのダウンロードには無料のメンバーシップ登録が必要です。
NVIDIA Developer Program の公式ページ: https://developer.nvidia.com/developer-program
- 互換バージョンの選択とダウンロード: インストール済みのCUDAツールキットのバージョン (今回は11.x) に適合するcuDNNのバージョン (今回はv8.9.7) を選択し、Windows用のzipファイルをダウンロードします。
- ファイルの展開と配置: ダウンロードしたzipファイルを展開(解凍)し、中のファイル(
bin,include,libフォルダ内)を、CUDAツールキットのインストールディレクトリにコピーします。 - (オプション) 環境変数の設定: 必要に応じてシステム環境変数
CUDNN_PATHを設定します。 - (必要に応じて) ZLIB DLL のインストール:
zlibwapi.dllが見つからないエラーが発生する場合にインストールします。 - 動作確認: cuDNNライブラリ (
cudnn64_*.dll) にパスが通っているか確認します。 - NVIDIA cuDNN のウェブページを開く
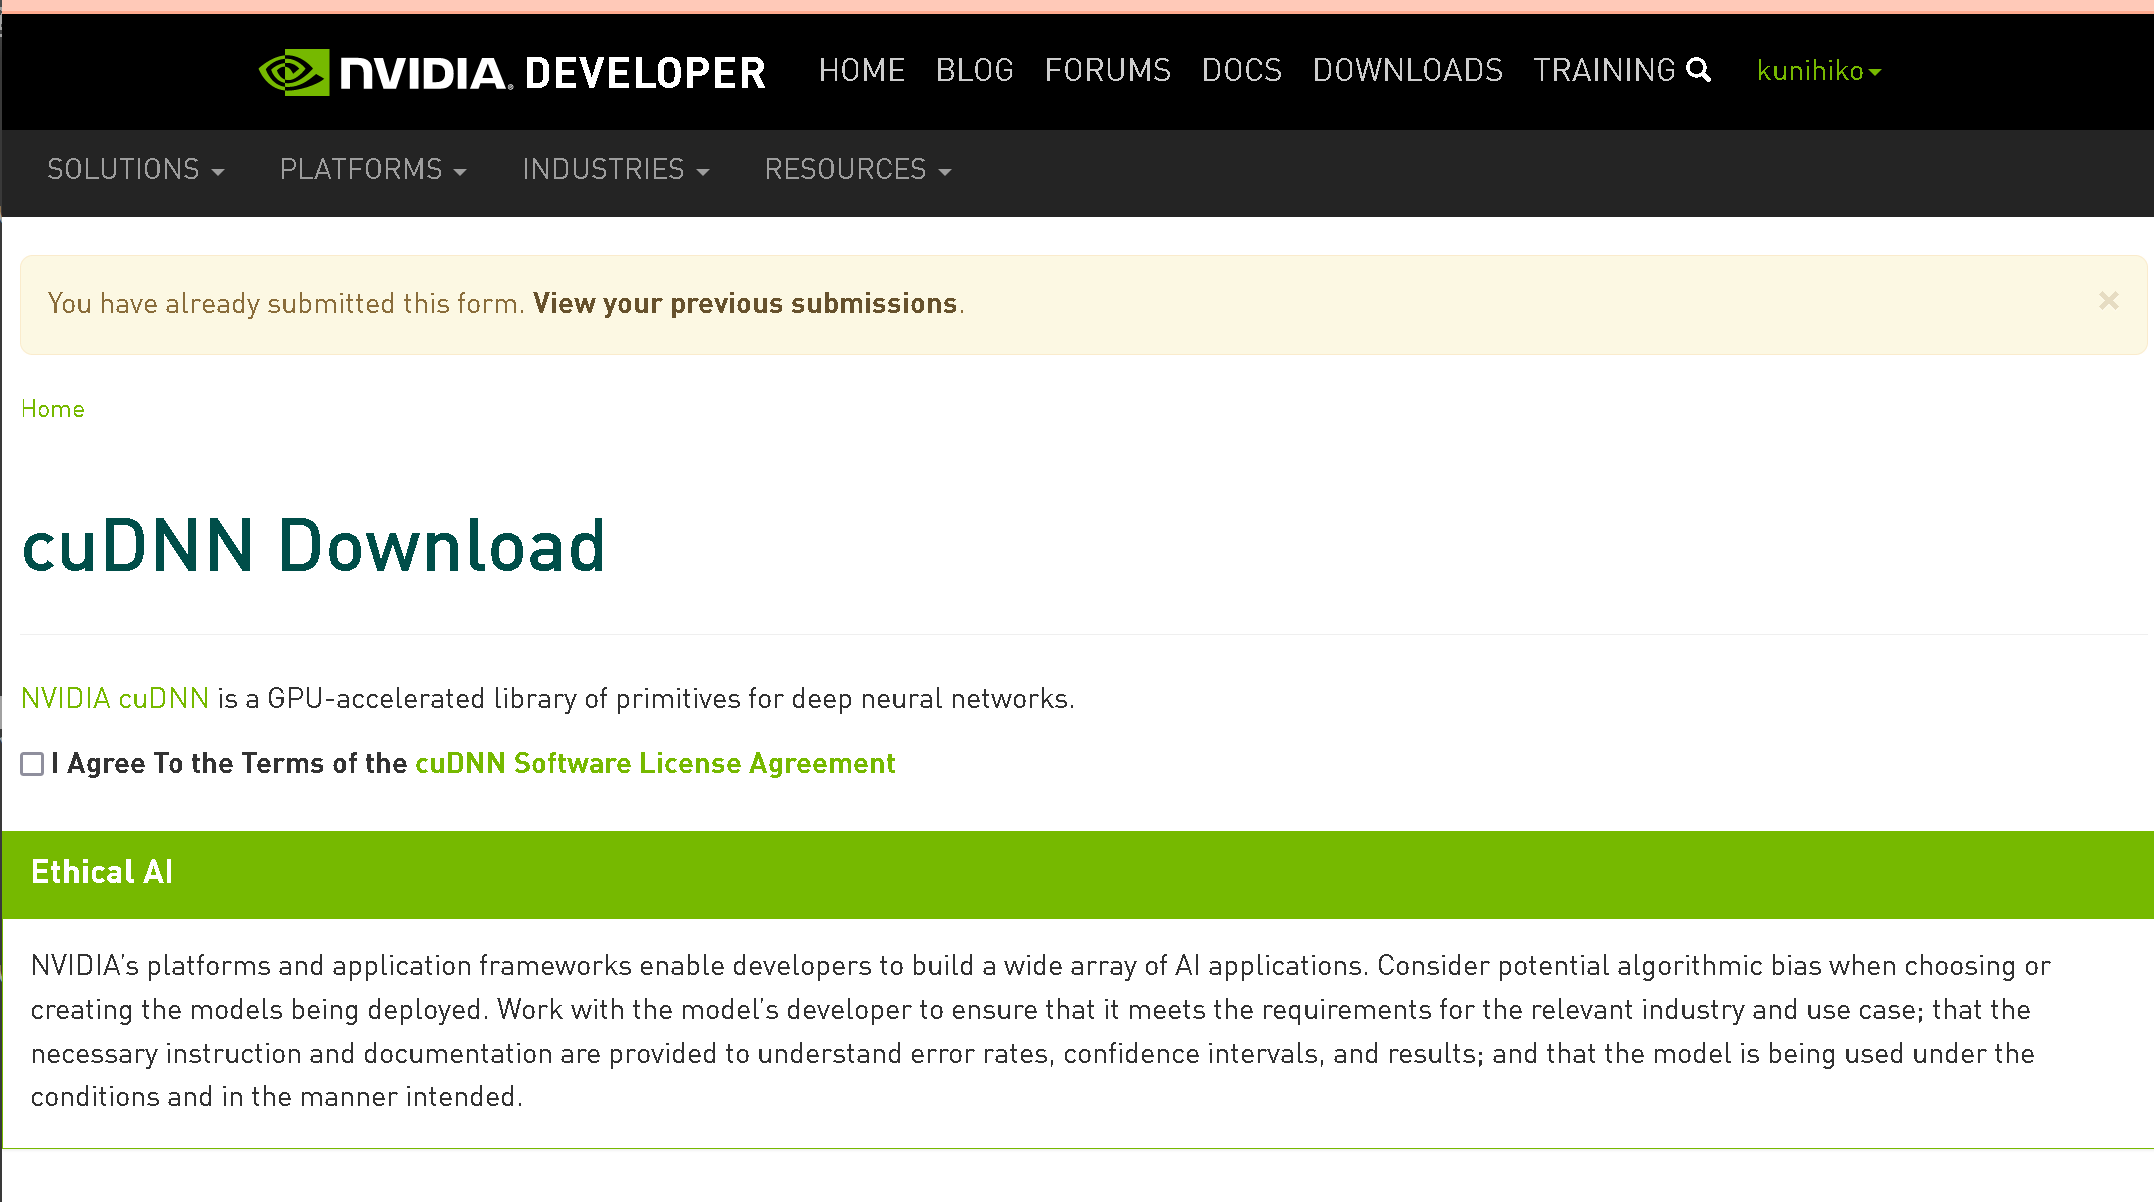
- ダウンロードしたいので,cuDNNのところにある「Download cuDNN」をクリック.

- NVIDIA Developer Program メンバーシップに入る
NVIDIA cuDNN のダウンロードのため.
「Join now」をクリック.その後,画面の指示に従う. 利用者本人が,電子メールアドレス,表示名,パスワード,生年月日を登録.利用条件等に合意.
- ログインする

- 調査の画面が出たときは,調査に応じる
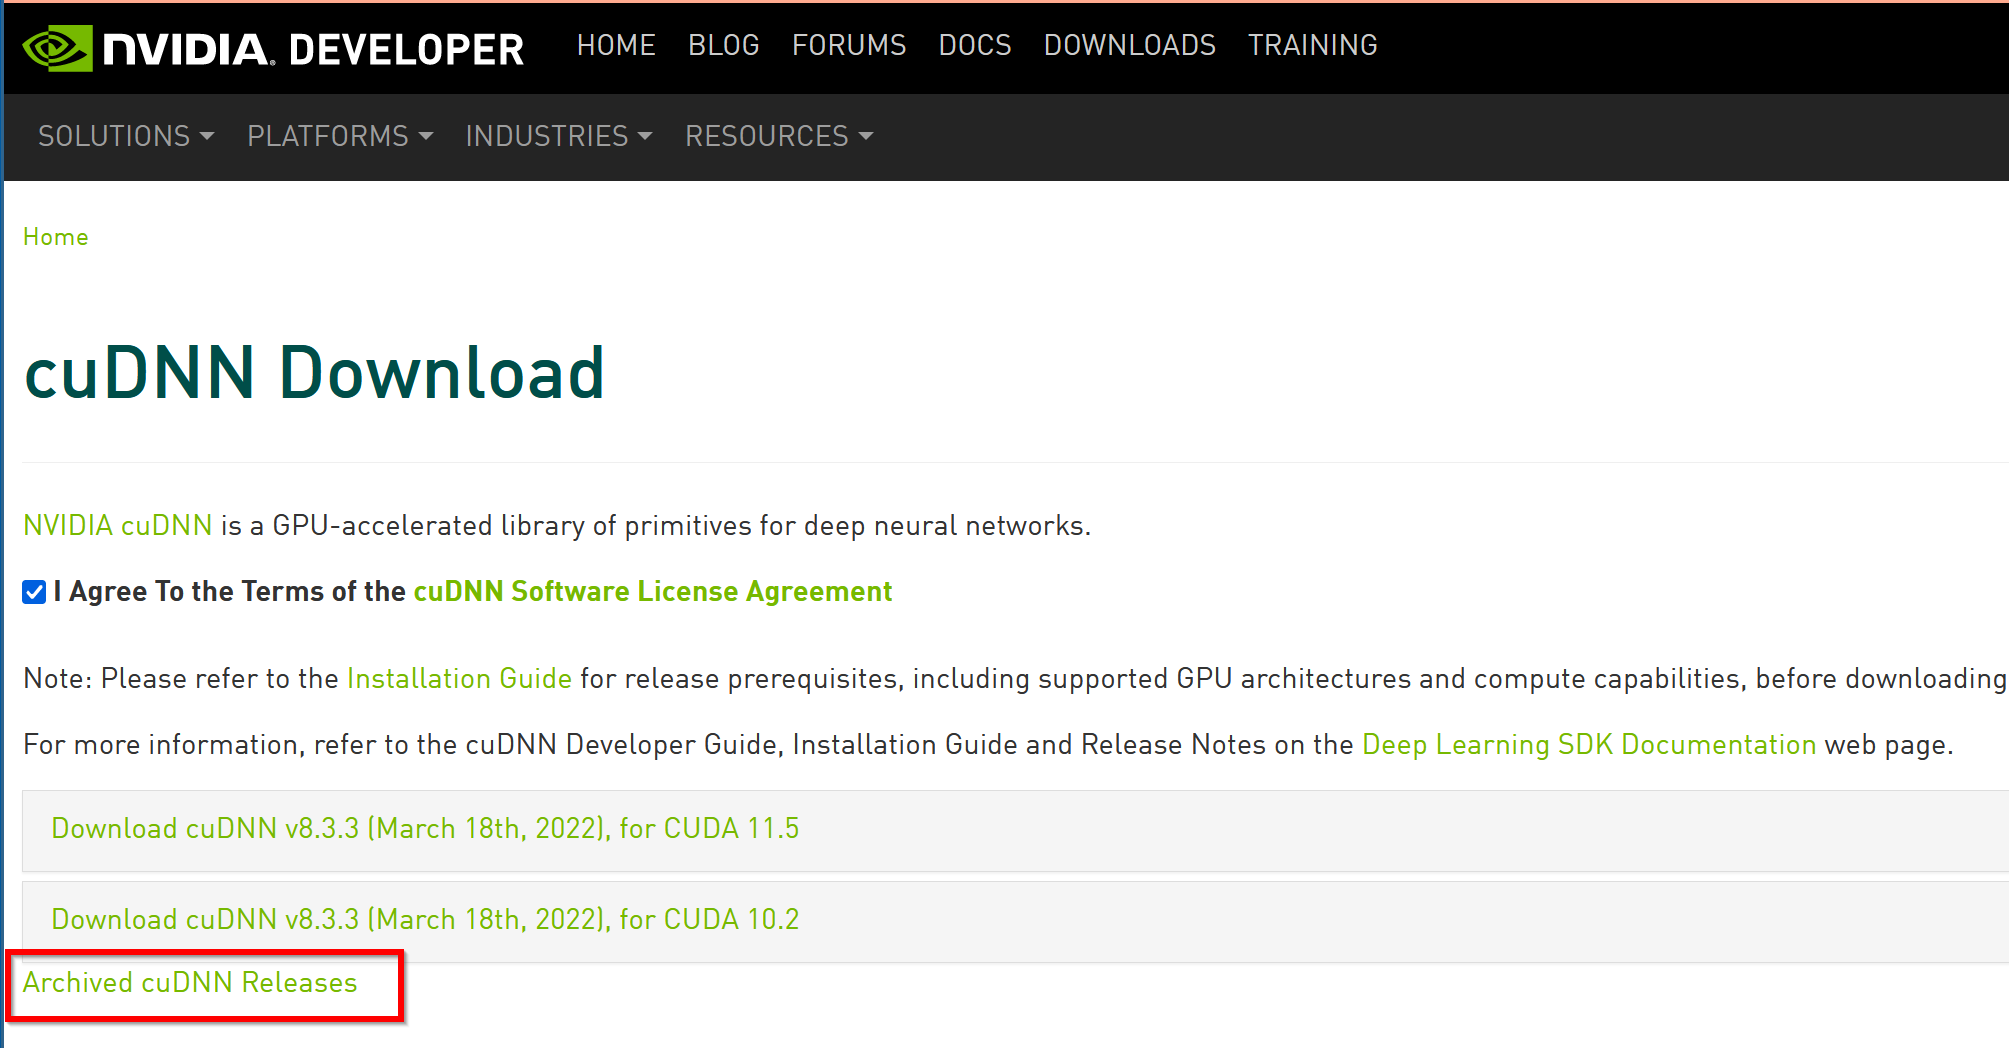
- ライセンス条項の確認
- 「Archived cuDNN Releases」をクリック
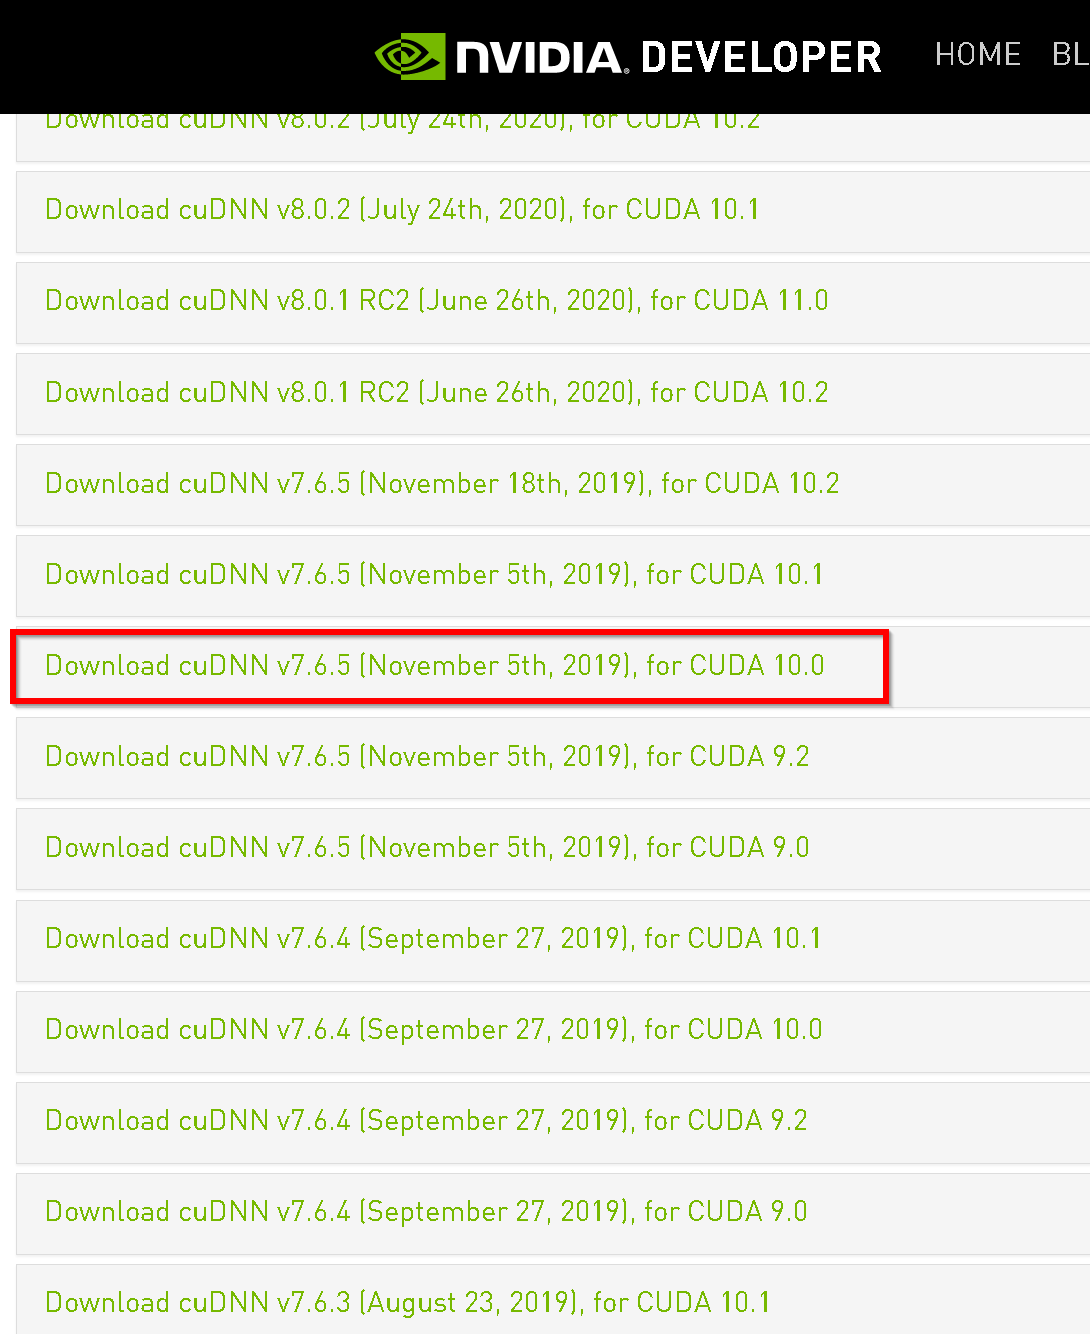
- ダウンロードしたいバージョンを選ぶ
ここでは「cuDNN v 7.6.5, for CUDA 10.0」を選んでいる.
このとき,画面の「for CUDA ...」のところを確認し,使用するNVIDIA CUDA のバージョンに合うものを選ぶこと.
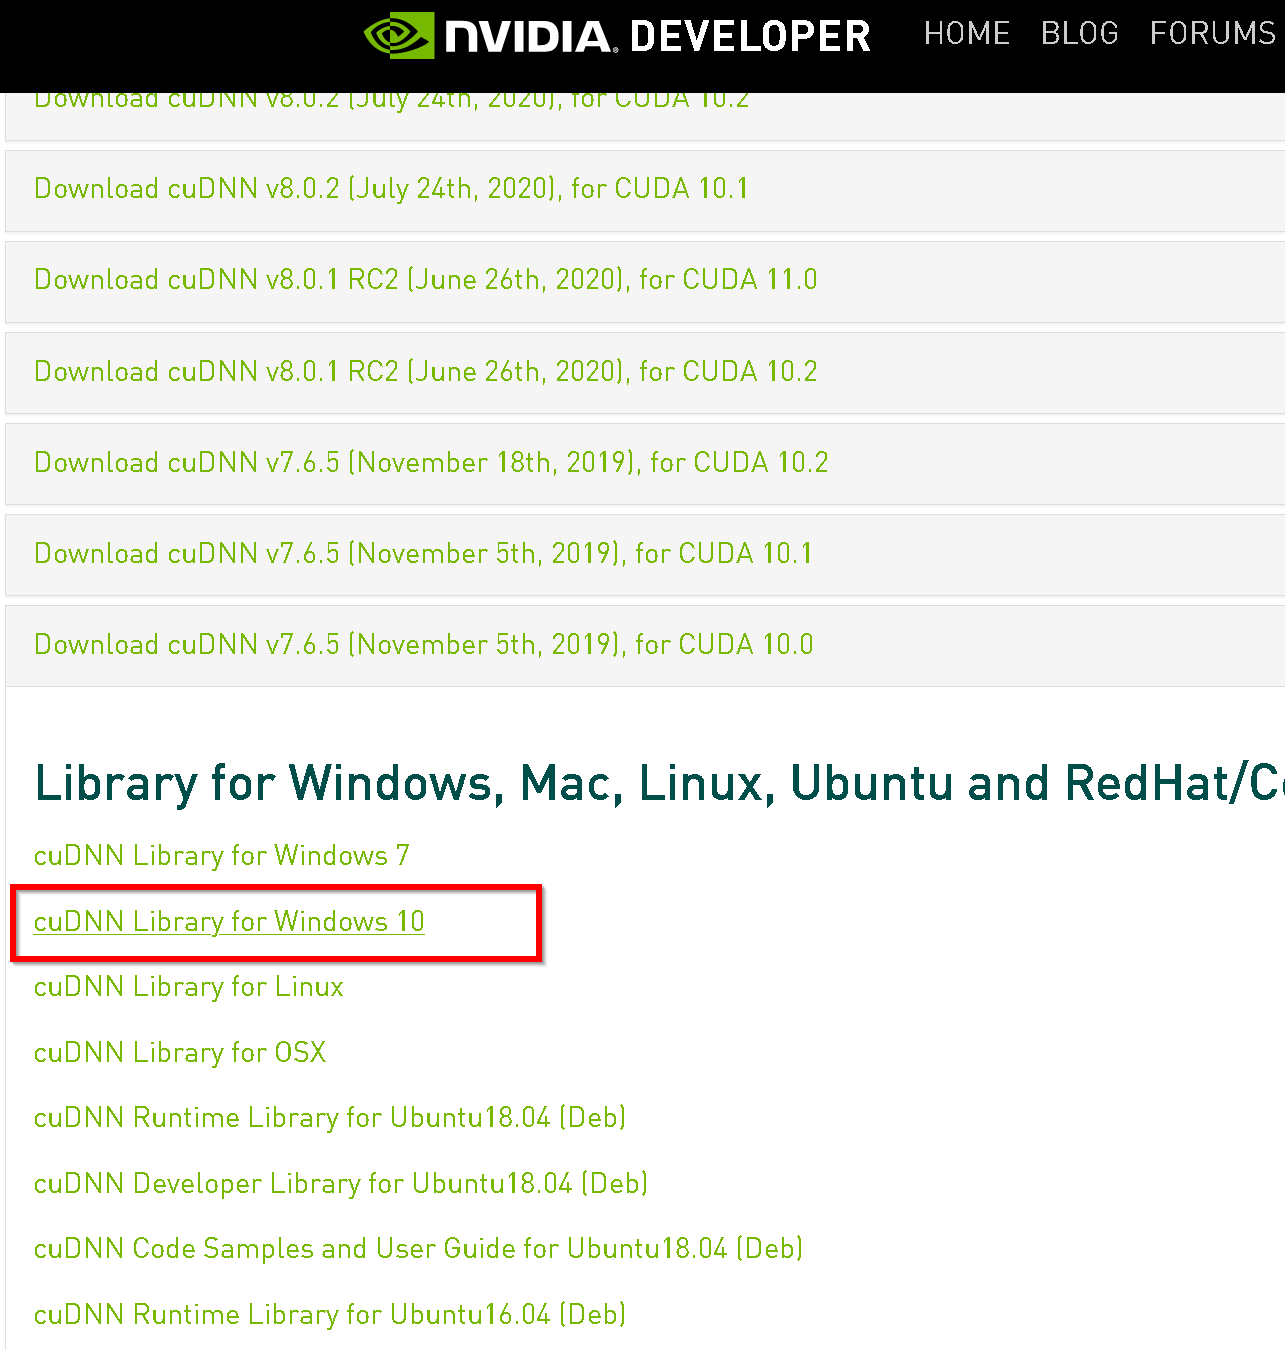
- Windows にインストールするので Windows 版を選ぶ
- ダウンロードが始まる.
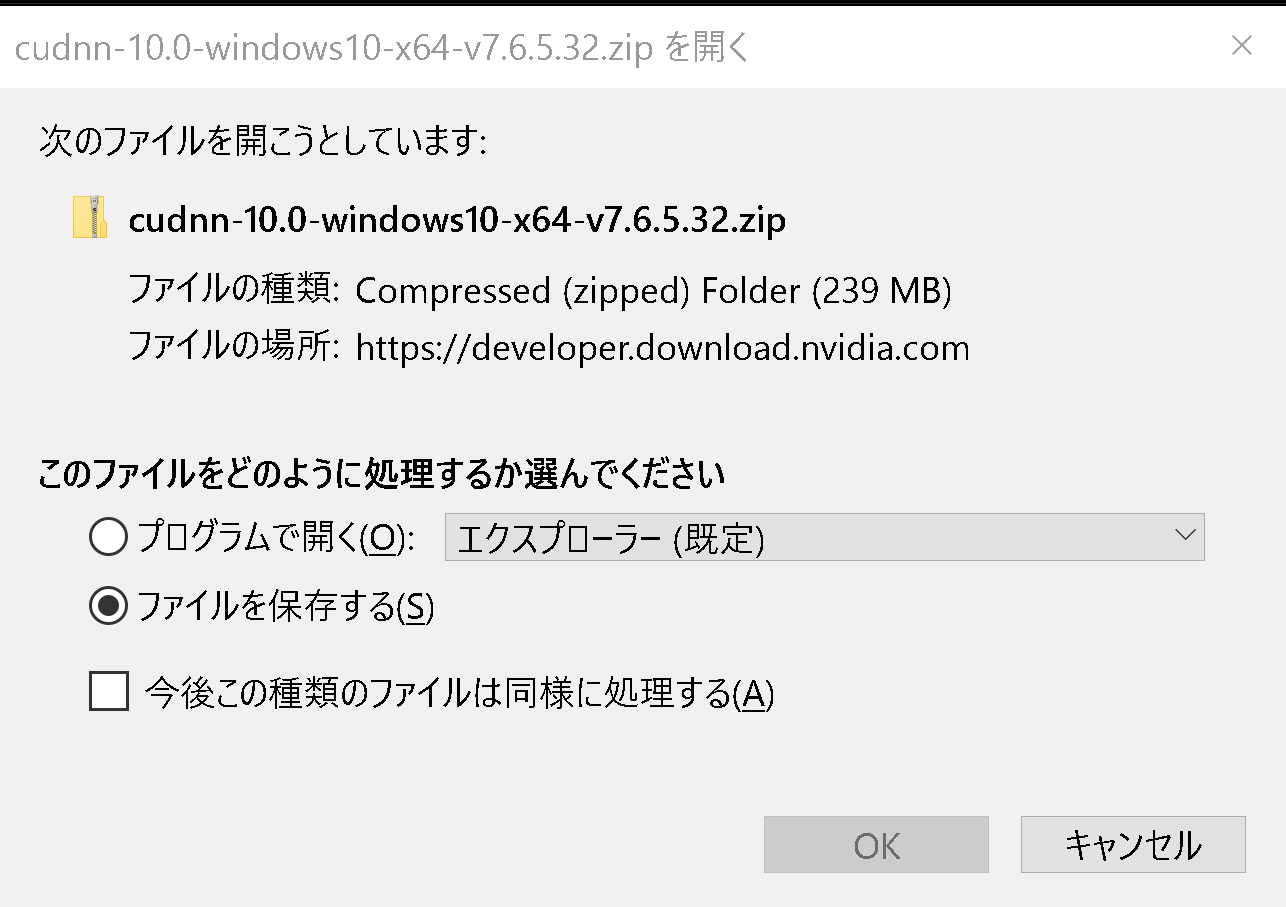
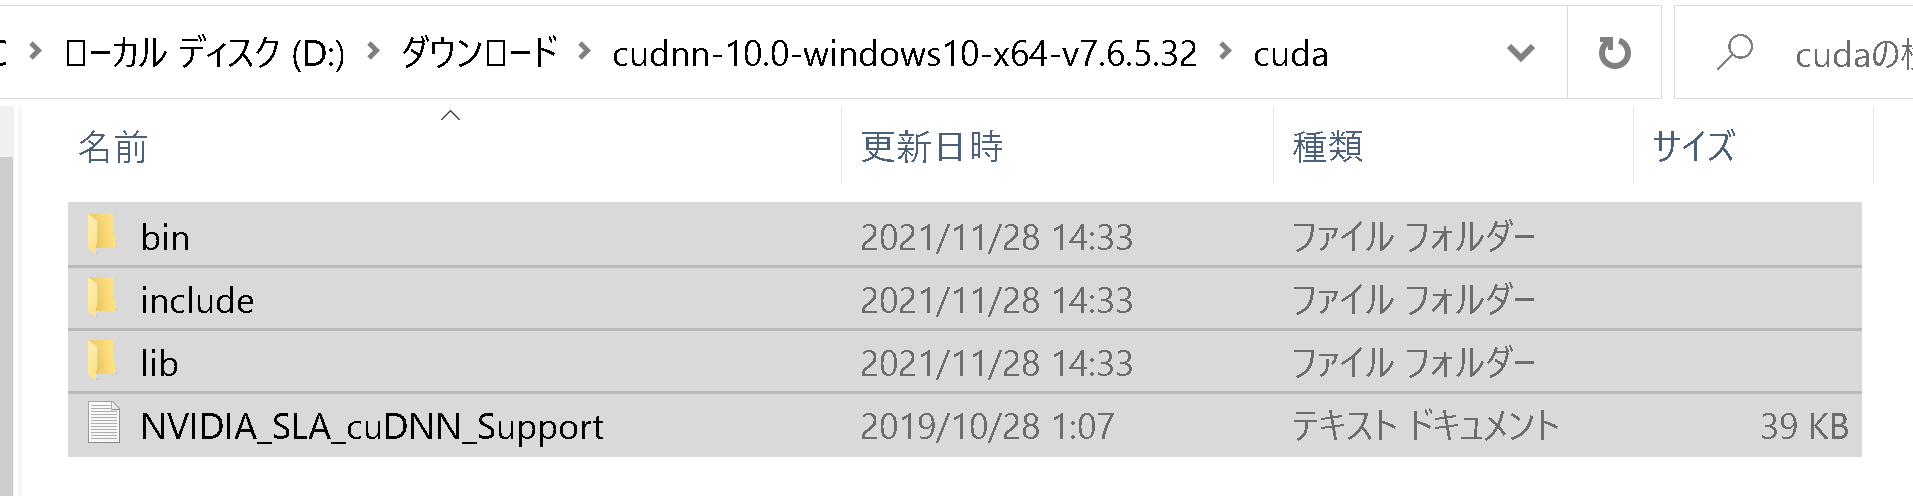
- ダウンロードした .zip ファイルを展開(解凍)する.展開の結果 cuda という名前のディレクトリができる.その中のサブディレクトリを確認しておく.
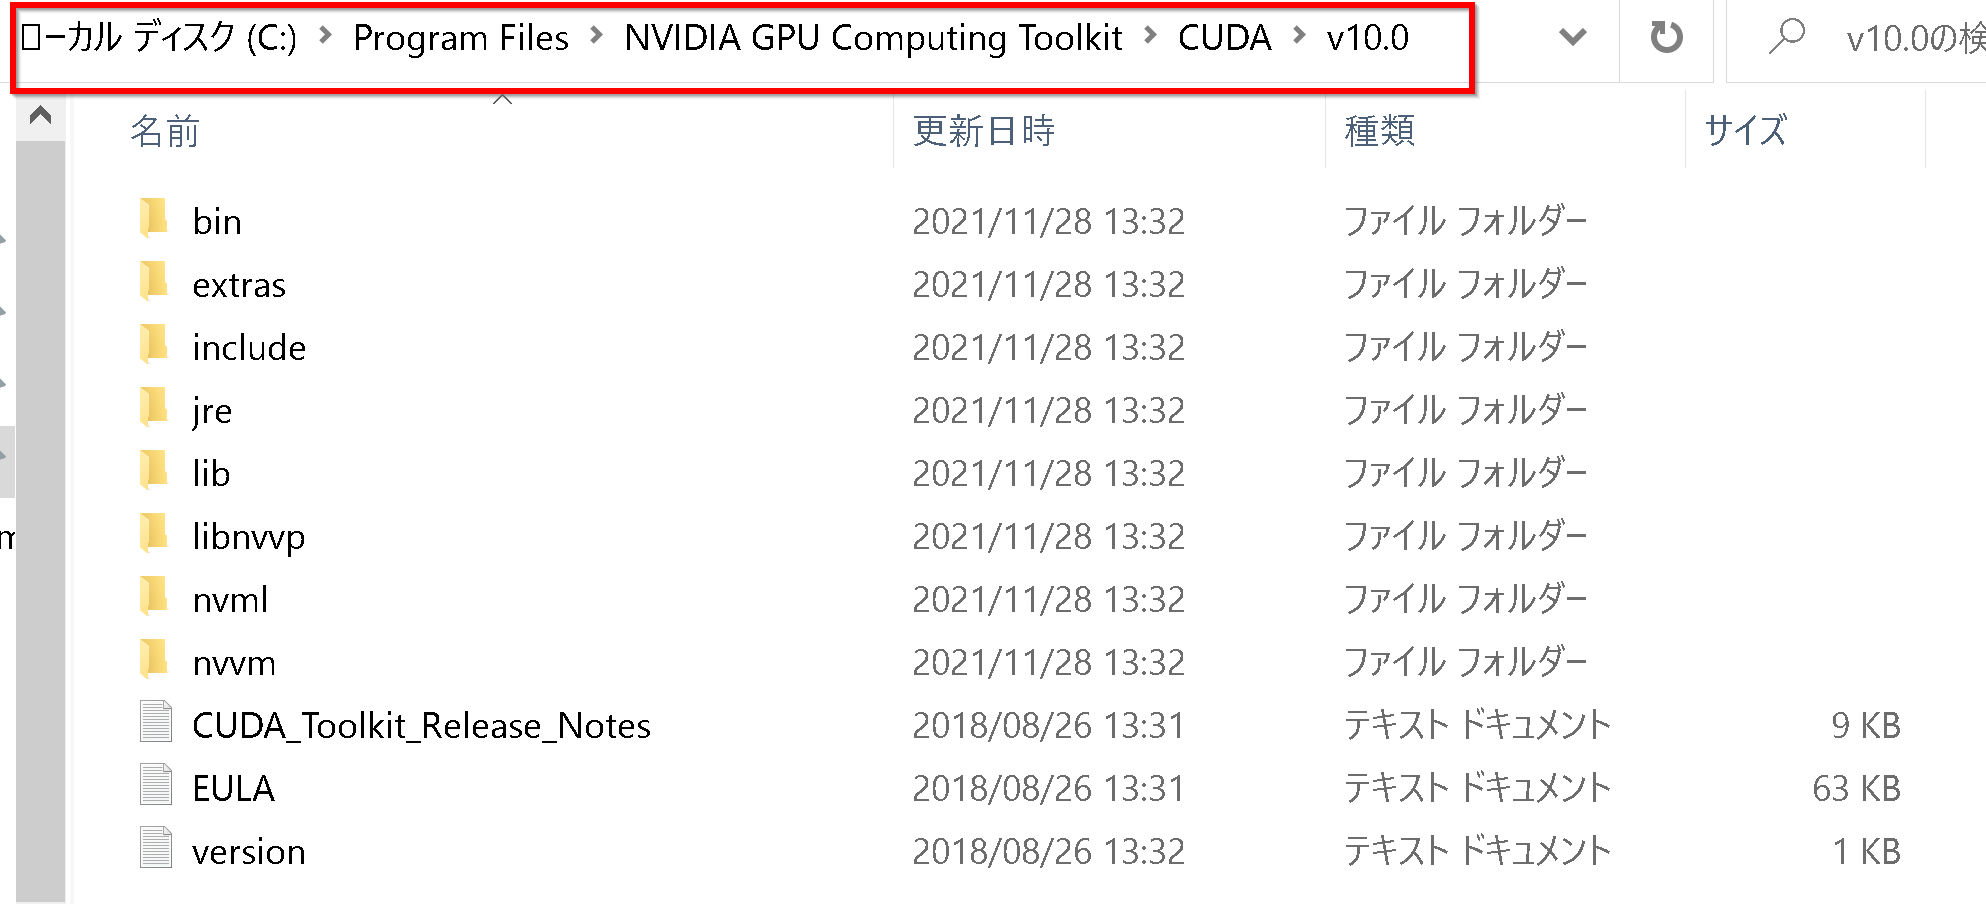
- NVIDIA CUDA ツールキットをインストールしたディレクトリは,「C:\Program Files\NVIDIA GPU Computing Toolkit\CUDA\v10.0」
のようになっている.確認する.
- 確認したら,
さきほど展開してできたディレクトリcuda の下にあるすべてのファイルとディレクトリを,NVIDIA CUDA ツールキットをインストールしたディレクトリにコピーする
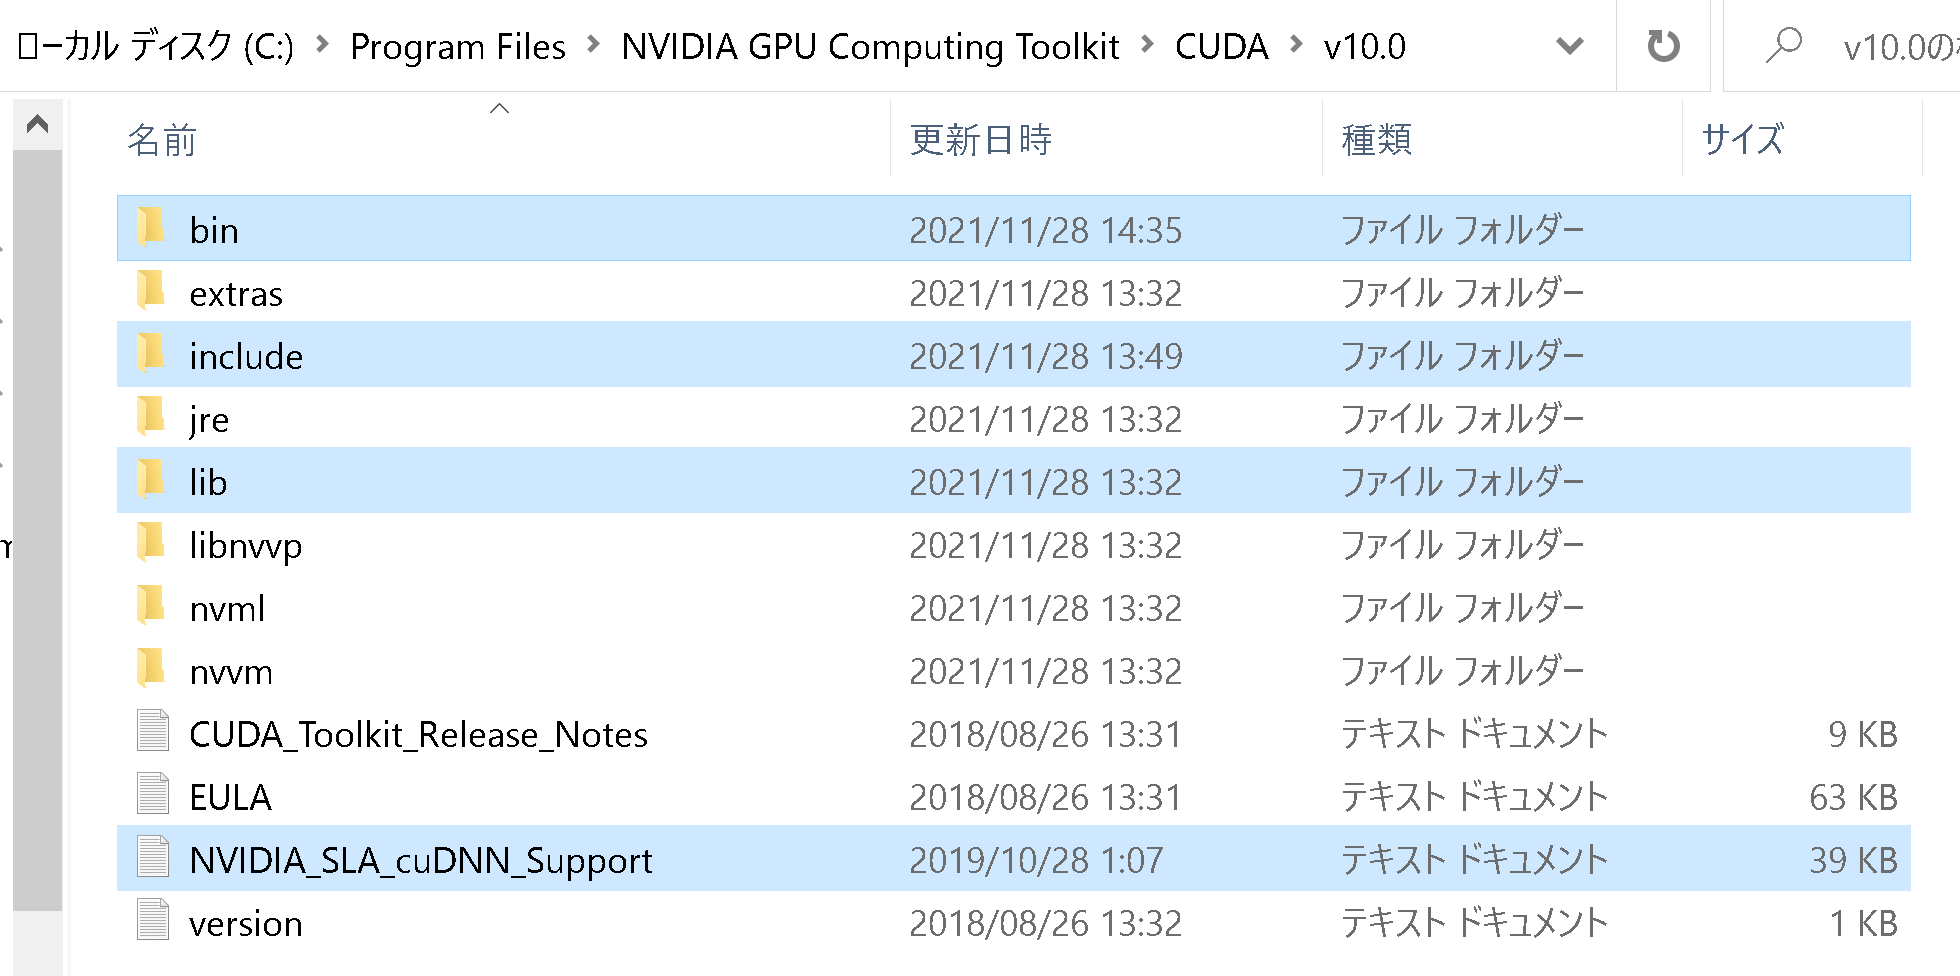
- すでに,c:\Program Files\NVIDIA GPU Computing Toolkit\CUDA\v10.0\bin には,パスが通っている.
- Windows の システム環境変数 CUDNN_PATH に,c:\Program Files\NVIDIA GPU Computing Toolkit\CUDA\v10.0 を設定
Windows で,管理者権限でコマンドプロンプトを起動(手順:Windowsキーまたはスタートメニュー >
cmdと入力 > 右クリック > 「管理者として実行」)。次のコマンドを実行
powershell -command "[System.Environment]::SetEnvironmentVariable(\"CUDNN_PATH\", \"c:\Program Files\NVIDIA GPU Computing Toolkit\CUDA\v10.0\", \"Machine\")" - Windows の システム環境変数 Pathに,次が含まれていることを確認
C:\Program Files\NVIDIA GPU Computing Toolkit\CUDA\v10.0\bin
- 以下のコマンドを管理者権限のコマンドプロンプトで実行する
(手順:Windowsキーまたはスタートメニュー →
cmdと入力 → 右クリック → 「管理者として実行」)。 - github の 1adrianb/face-alignment のダウンロード
cd /d c:%HOMEPATH%
rmdir /s /q face-alignment
cd /d c:%HOMEPATH%
git clone https://github.com/1adrianb/face-alignment
cd face-alignment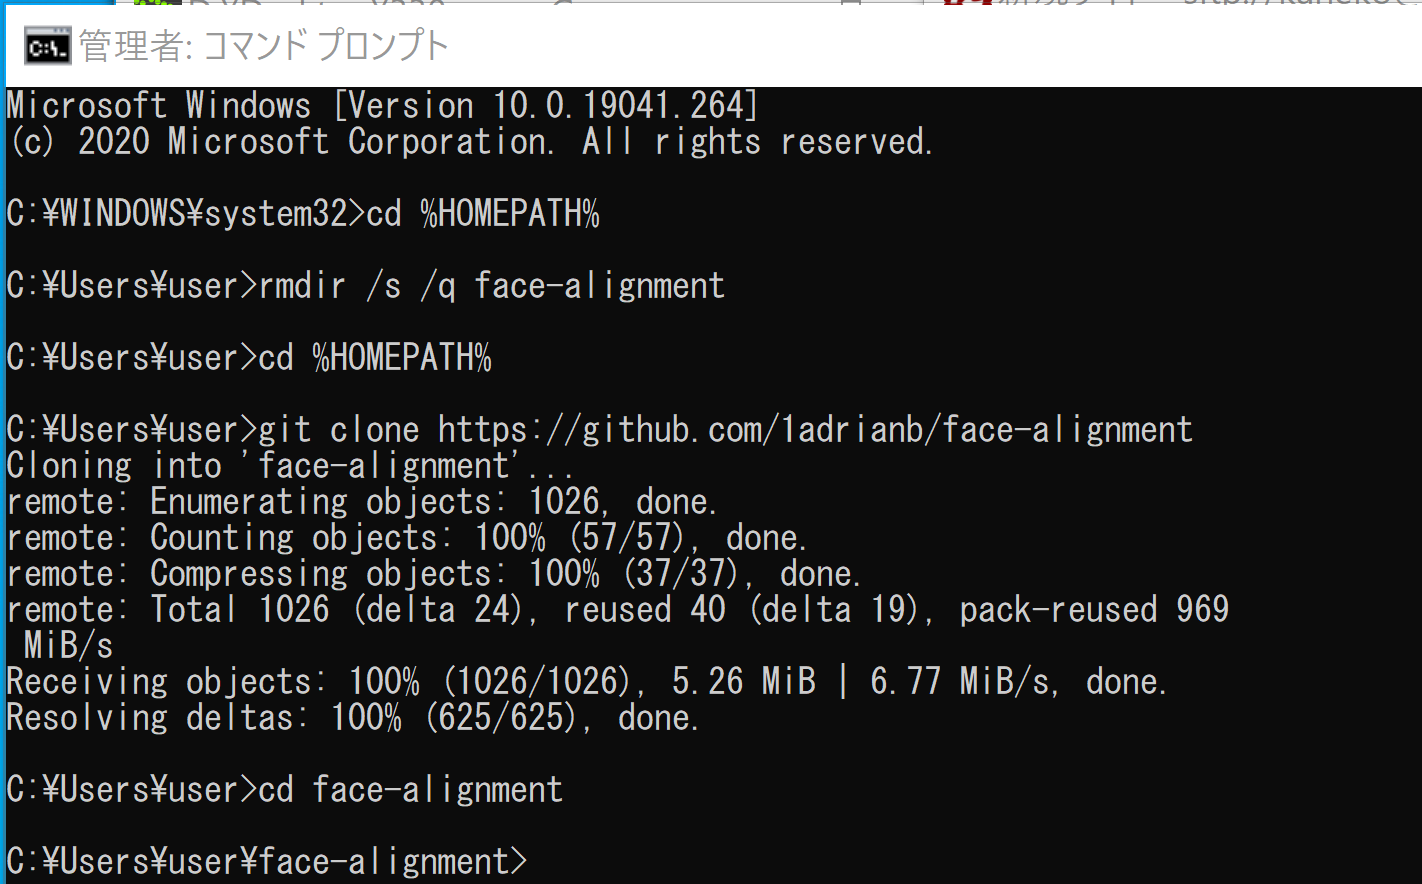
- 前提パッケージのインストール
scipy 1.4 か,それ以下が必要.
C:\venv\py37\Scripts\activate.bat pip install scipy==1.4.1 pip install -r requirements.txt pip install -U torch torchvision torchaudio --extra-index-url https://download.pytorch.org/whl/cu117 - ビルド
python setup.py build
python setup.py install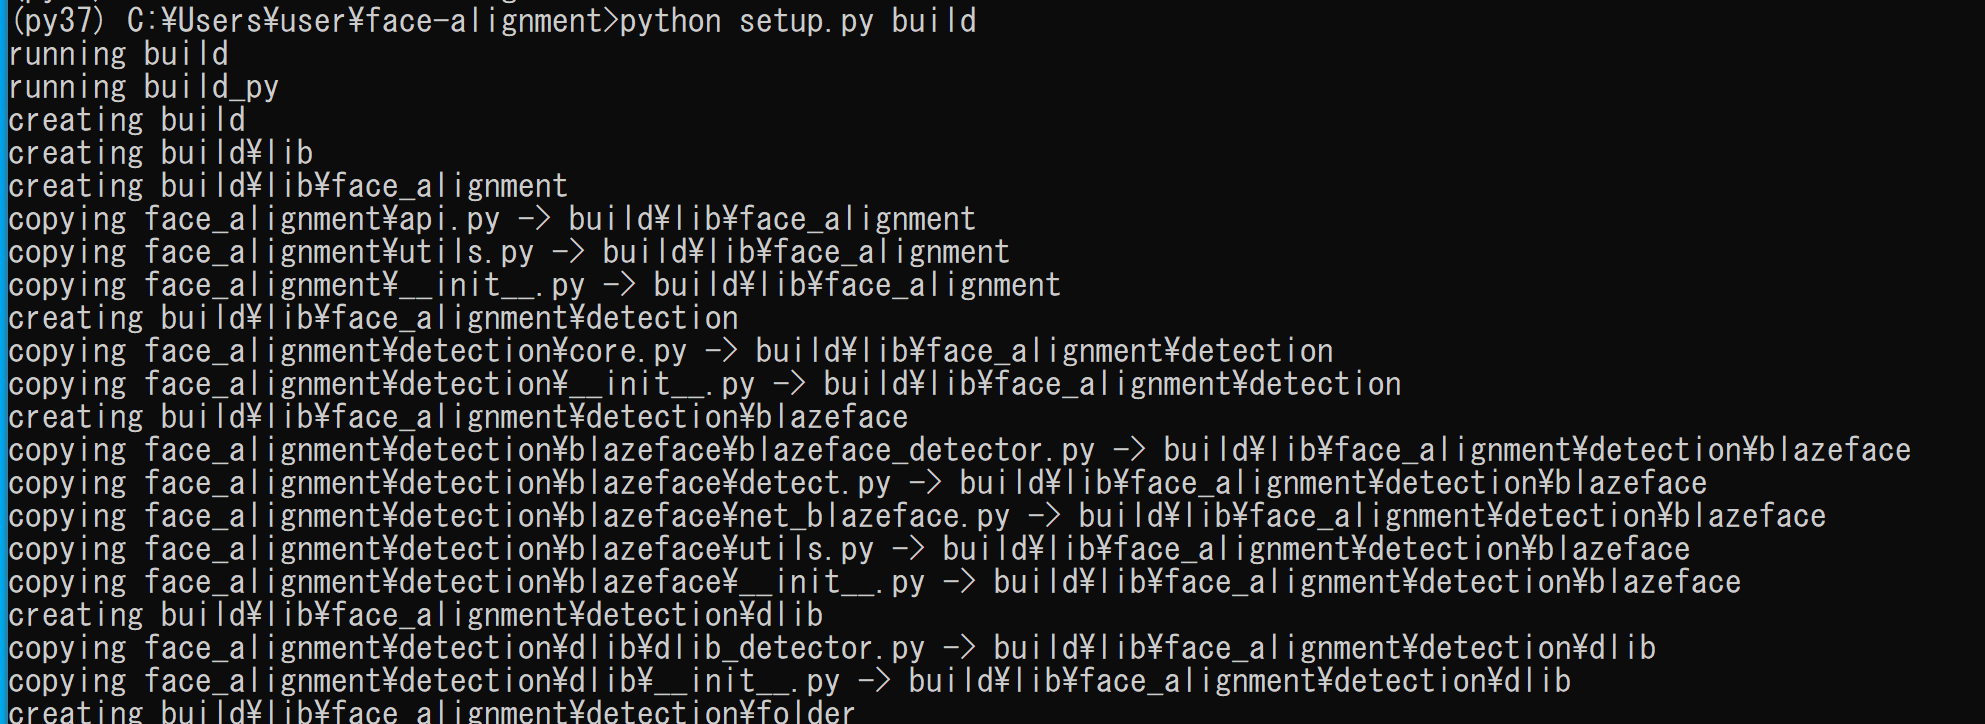
(以下省略) - 終了の確認
エラーメッセージが出ていないこと
- 2次元の顔特徴抽出
https://github.com/1adrianb/face-alignmentに記載のプログラムを実行
まず,次のコマンドを実行
C:\venv\py37\Scripts\activate.bat jupyter qtconsole - Python プログラムの実行
pythonimport face_alignment from skimage import io fa = face_alignment.FaceAlignment(face_alignment.LandmarksType._2D, flip_input=False) input = io.imread('./test/assets/aflw-test.jpg') preds = fa.get_landmarks(input) print(preds) %matplotlib inline import matplotlib.pyplot as plt import warnings warnings.filterwarnings('ignore') # Suppress Matplotlib warnings plt.imshow(input) plt.scatter(preds[0][:,0], preds[0][:,1])
- 3次元の顔特徴抽出
https://github.com/1adrianb/face-alignmentに記載のプログラムを使用
次の Python プログラムを実行する
import face_alignment
from skimage import io

fa = face_alignment.FaceAlignment(face_alignment.LandmarksType._3D, flip_input=False)

input = io.imread('./test/assets/aflw-test.jpg')
preds = fa.get_landmarks(input)
print(preds)
plt.imshow(input)

from mpl_toolkits import mplot3d
%matplotlib inline
import matplotlib.pyplot as plt
import warnings
warnings.filterwarnings('ignore')   # Suppress Matplotlib warnings
ax = plt.axes(projection="3d")
ax.scatter3D(preds[0][:,0], preds[0][:,1], preds[0][:,2])
plt.show()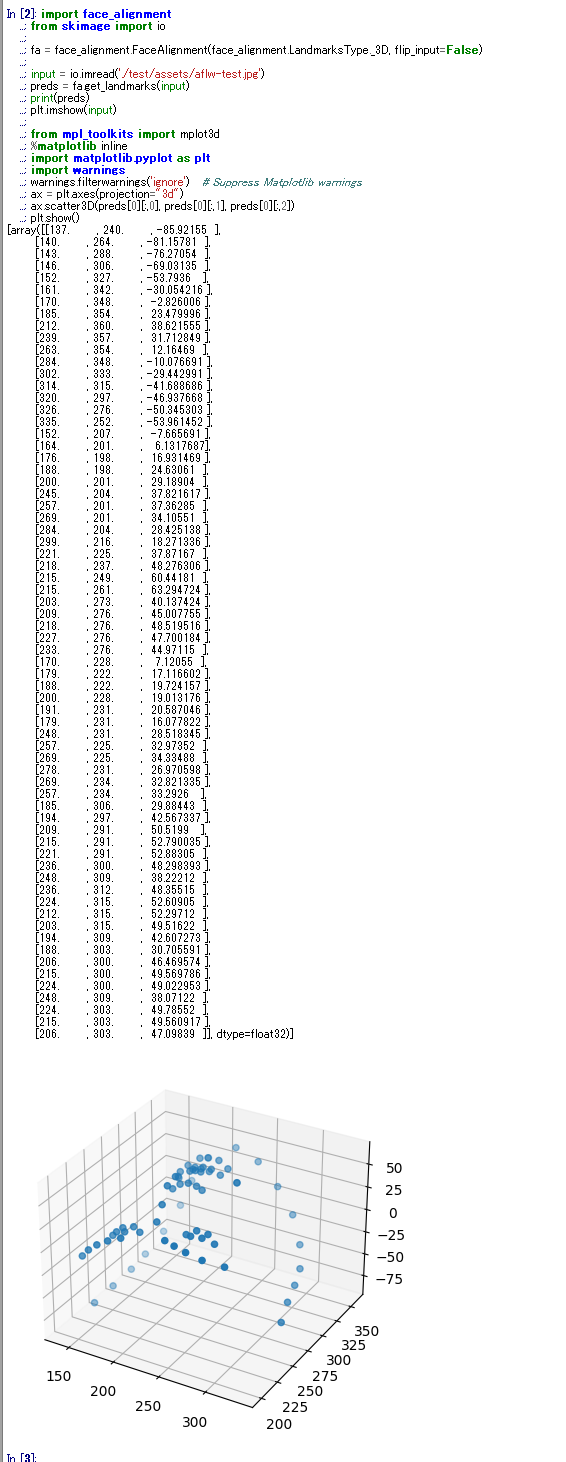
NVIDIA CUDA ツールキット 10.0 のインストール(Windows 上)
NVIDIA CUDA ツールキットのインストール時の注意点
NVIDIAのGPUを使用して並列計算を行うためのツールセット
主な機能: GPU を利用した並列処理,GPU のメモリ管理,C++をベースとした拡張言語とAPIとライブラリ
【NVIDIA CUDA ツールキットの動作に必要なもの】
【Windows でインストールするときの注意点】
【関連する外部ページ】
【関連項目】 NVIDIA CUDA ツールキット, NVIDIA CUDA ツールキット 12.6 のインストール(Windows 上), NVIDIA CUDA ツールキット 11.8 のインストール(Windows 上)
TensorFlow 1.15.5 が必要とする NVIDIA CUDA ツールキットと NVIDIA cuDNN のバージョンの確認
TensorFlow 1.15.5 を動かすために,NVIDIA CUDA ツールキット 10.0,NVIDIA cuDNN 7.6.5 を使う.
(10.2, 10.1 は不可.実際に試みて検証済み).
インストール手順
NVIDIA cuDNN 7.6.5 のインストール
インストールするNVIDIA cuDNN のバージョンは 7.6.5 for CUDA 10.0
NVIDIA cuDNN
NVIDIA cuDNN は,NVIDIA CUDA ツールキット上で動作する、高性能なディープラーニング用ライブラリです.畳み込みニューラルネットワーク (CNN) やリカレントニューラルネットワーク (RNN) など,さまざまなディープラーニングモデルのトレーニングと推論を高速化します.
【cuDNN利用時の注意点: zlibwapi.dll エラー】
Windows環境でcuDNNを利用するアプリケーションを実行した際に、「Could not locate zlibwapi.dll. Please make sure it is in your library path!」というエラーが表示されることがあります。これは、cuDNNの一部の機能が圧縮ライブラリである zlib に依存しているためです。このエラーが発生した場合は、後述する手順で ZLIB DLL をインストールする必要があります。
【関連する外部ページ】
NVIDIA cuDNN のインストール(Windows 上)の概要
NVIDIA cuDNN のダウンロードとインストールの手順
インストール後に行う環境変数の設定
「NVIDIA cuDNN をインストールしたディレクトリ」をもとに環境変数を設定する.
「NVIDIA cuDNN をインストールしたディレクトリ」が C:\Program Files\NVIDIA GPU Computing Toolkit\CUDA\v10.0 の場合には,次のように設定する.
パスの確認
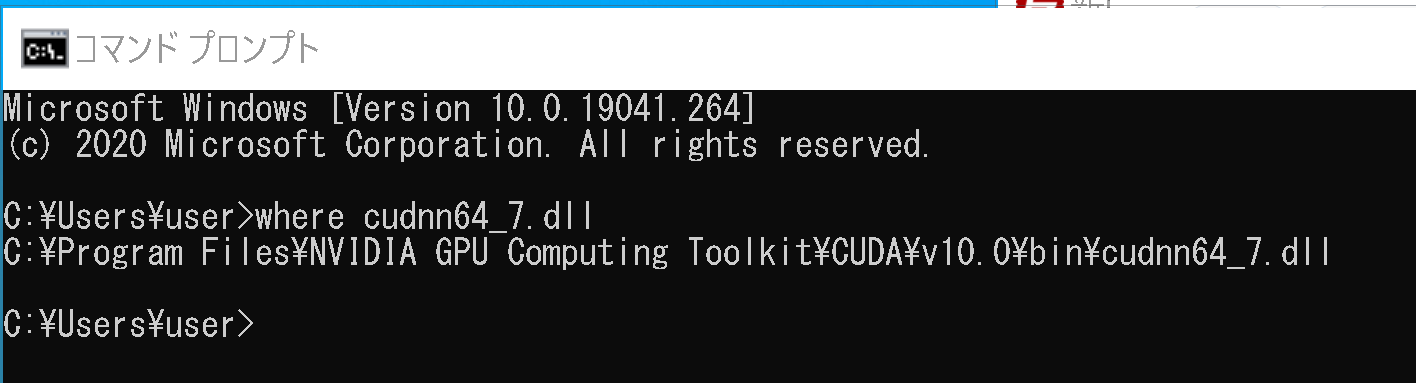
次の操作により,cudnn64_7.dll にパスが通っていることを確認する
Windows のコマンドプロンプトを開き,次のコマンドを実行する.エラーメッセージが出ないことを確認.
where cudnn64_7.dll
github の 1adrianb/face-alignment のインストール
URL: https://github.com/1adrianb/face-alignment