MMTracking のインストールと動作確認(トラッキングビジョン)(PyTorch,Python,MMCV,MMDetection を使用)(Windows 上)
前準備
Build Tools for Visual Studio 2026(ビルドツール)のインストール
Build Tools for Visual Studio 2026(ビルドツール)のインストールを行い、C/C++ コードの微づろ環境を整える。
Build Tools for Visual Studio は,Visual Studio の IDE を含まない C/C++ コンパイラ,ライブラリ,ビルドツール等のコマンドライン向け開発ツールセットである。インストール済みの場合,この手順は不要である。 以下のコマンドは、Build Tools が未インストールの場合は winget で新規インストールし、インストール済みの場合は 【インストールコマンドの実行方法】 管理者権限でコマンドプロンプトを起動する(手順:Windows キーまたはスタートメニュー → 上記のコマンドでは、Build Tools 本体と Visual C++ 再頒布可能パッケージをインストールし、続いて以下のコンポーネントを追加している。 上記以外の追加のコンポーネントが必要になった場合は Visual Studio Installer で個別にインストールできる。 インストール完了の確認 Visual Studio を必要とするとき Visual Studio の機能を必要とする場合は,追加インストールできる。[Build Tools for Visual Studio 2026(ビルドツール)のインストール手順を見るには、ここをクリック]
Windows での Build Tools for Visual Studio 2026 のインストール
setup.exe modify でコンポーネントを追加する(バージョンは変更しない)。cmd と入力 → 右クリック → 「管理者として実行」)。そして、コマンド全体をコマンドプロンプトにコピー&ペーストする。REM VC++ ランタイム
winget install --scope machine --id Microsoft.VCRedist.2015+.x64 -e --silent --disable-interactivity --force --accept-source-agreements --accept-package-agreements --override "/quiet /norestart"
REM ============================================================
REM Visual Studio Build Tools + Desktop development with C++
REM (VCTools、MSBuildTools、CMake連携、Clang、Windows 11 SDK)
REM ============================================================
REM 進行中のインストーラーを停止(ロック競合回避)
taskkill /F /IM vs_setup.exe /T >nul 2>&1
taskkill /F /IM vs_installer.exe /T >nul 2>&1
taskkill /F /IM vs_installerservice.exe /T >nul 2>&1
REM 未インストール時: winget で新規インストール
REM インストール済み時: setup.exe modify でコンポーネント追加(バージョンは変更しない)
winget list --id Microsoft.VisualStudio.BuildTools 2>nul | findstr /i "BuildTools" >nul 2>&1
if %ERRORLEVEL% EQU 0 (
for /f "usebackq delims=" %P in (`"C:\Program Files (x86)\Microsoft Visual Studio\Installer\vswhere.exe" -products Microsoft.VisualStudio.Product.BuildTools -property installationPath`) do start /wait "" "C:\Program Files (x86)\Microsoft Visual Studio\Installer\setup.exe" modify --installPath "%P" --add Microsoft.VisualStudio.Workload.VCTools --add Microsoft.VisualStudio.Workload.MSBuildTools --add Microsoft.VisualStudio.Component.VC.CMake.Project --add Microsoft.VisualStudio.Component.VC.Llvm.Clang --add Microsoft.VisualStudio.Component.VC.Llvm.ClangToolset --add Microsoft.VisualStudio.Component.Windows11SDK.26100 --includeRecommended --quiet --norestart --nocache
) else (
winget install --scope machine --id Microsoft.VisualStudio.BuildTools -e --silent --disable-interactivity --force --accept-source-agreements --accept-package-agreements --override "--quiet --wait --norestart --nocache --add Microsoft.VisualStudio.Workload.VCTools --includeRecommended --add Microsoft.VisualStudio.Workload.MSBuildTools --add Microsoft.VisualStudio.Component.VC.CMake.Project --add Microsoft.VisualStudio.Component.VC.Llvm.Clang --add Microsoft.VisualStudio.Component.VC.Llvm.ClangToolset --add Microsoft.VisualStudio.Component.Windows11SDK.26100"
)
REM 破損時の修復(任意、動作がおかしくなった場合)
REM "C:\Program Files (x86)\Microsoft Visual Studio\Installer\setup.exe" repair --installPath "C:\Program Files (x86)\Microsoft Visual Studio\18\BuildTools" --quiet --norestart
REM 導入確認(インストールパスが表示されれば正常)
"C:\Program Files (x86)\Microsoft Visual Studio\Installer\vswhere.exe" -products * -requires Microsoft.VisualStudio.Workload.VCTools -property installationPath
--includeRecommended により、MSVC コンパイラ、C++ AddressSanitizer、vcpkg、CMake ツール、Windows 11 SDK 等の推奨コンポーネントが含まれる)winget list Microsoft.VisualStudio.BuildTools
Python 3.12 のインストール
Pythonのインストールを行い、Pythonのプログラムを実行する環境を整える。扱う環境は、Windows搭載パソコンである。金子研究室では、Python 3.12.10を推奨する。
[Windows での Python 3.12 のインストール手順を見るには、ここをクリック]
Windows での Python 3.12 のインストール
以下のいずれかの方法でPython 3.12をインストールする。Pythonがインストール済みの場合、この手順は不要である。
方法 1:winget によるインストール
【インストールコマンドの実行方法】
管理者権限でコマンドプロンプトを起動する(手順:Windowsキーまたはスタートメニュー → cmd と入力 → 右クリック → 「管理者として実行」)。そして、コマンド全体をコマンドプロンプトにコピー&ペーストする。
--scope machine を指定することで、システム全体(全ユーザー向け)にインストールされる。このオプションの実行には管理者権限が必要である。インストール完了後、コマンドプロンプトを再起動するとPATHが反映される。
REM Python 3.12 をシステム領域にインストール
winget install --id Python.Python.3.12 -e --scope machine --silent --accept-source-agreements --accept-package-agreements --override "/quiet InstallAllUsers=1 PrependPath=1 Include_test=0 Include_pip=1 Include_launcher=1 InstallLauncherAllUsers=1 TargetDir=\"C:\Program Files\Python312\""

REM Python と Scripts を PATH 先頭に追加
powershell -NoProfile -Command "$p='C:\Program Files\Python312'; $s=\"$p\Scripts\"; $c=[Environment]::GetEnvironmentVariable('Path','Machine'); if((Test-Path $p) -and (';'+$c+';' -notlike \"*;$p;*\") -and (';'+$c+';' -notlike \"*;$s;*\")){[Environment]::SetEnvironmentVariable('Path',\"$p;$s;$c\",'Machine')}"
方法 2:インストーラーによるインストール
- Python公式サイト(https://www.python.org/downloads/)にアクセスし、「Download Python 3.x.x」ボタンからWindows用インストーラーをダウンロードする。
- ダウンロードしたインストーラーを実行する。
- 初期画面の下部に表示される「Add python.exe to PATH」にチェックを入れてから「Customize installation」を選択する。このチェックを入れ忘れると、コマンドプロンプトから
pythonコマンドを実行できない。 - 「Install Python 3.xx for all users」にチェックを入れ、「Install」をクリックする。
インストールの確認
コマンドプロンプトで以下を実行する。
python --versionバージョン番号(例:Python 3.12.x)が表示されればインストール成功である。「'python' は、内部コマンドまたは外部コマンドとして認識されていません。」と表示される場合は、インストールが正常に完了していない。
Git のインストール
管理者権限のコマンドプロンプトで以下を実行する。管理者権限のコマンドプロンプトを起動するには、Windows キーまたはスタートメニューから「cmd」と入力し、表示された「コマンドプロンプト」を右クリックして「管理者として実行」を選択する。
REM Git をシステム領域にインストール
winget install --scope machine --id Git.Git -e --silent --disable-interactivity --force --accept-source-agreements --accept-package-agreements --override "/VERYSILENT /NORESTART /NOCANCEL /SP- /CLOSEAPPLICATIONS /RESTARTAPPLICATIONS /COMPONENTS=""icons,ext\reg\shellhere,assoc,assoc_sh"" /o:PathOption=Cmd /o:CRLFOption=CRLFCommitAsIs /o:BashTerminalOption=MinTTY /o:DefaultBranchOption=main /o:EditorOption=VIM /o:SSHOption=OpenSSH /o:UseCredentialManager=Enabled /o:PerformanceTweaksFSCache=Enabled /o:EnableSymlinks=Disabled /o:EnableFSMonitor=Disabled"
【関連する外部ページ】
- Git の公式ページ: https://git-scm.com/
Build Tools for Visual Studio 2022,NVIDIA ドライバ,NVIDIA CUDA ツールキット 11.8,NVIDIA cuDNN 8.9.7 のインストール(Windows 上)
【サイト内の関連ページ】 NVIDIA グラフィックスボードを搭載しているパソコンの場合には, NVIDIA ドライバ, NVIDIA CUDA ツールキット, NVIDIA cuDNN のインストールを行う.
- Windows での Build Tools for Visual Studio 2022 のインストール: 別ページ »で説明
- Windows での NVIDIA ドライバ,NVIDIA CUDA ツールキット 11.8,NVIDIA cuDNN v8.9.7 のインストール手順: 別ページ »で説明
【関連する外部ページ】
- Build Tools for Visual Studio 2022 (ビルドツール for Visual Studio 2022)の公式ダウンロードページ: https://visualstudio.microsoft.com/ja/visual-cpp-build-tools/
- NVIDIA ドライバのダウンロードの公式ページ: https://www.nvidia.co.jp/Download/index.aspx?lang=jp
- NVIDIA CUDA ツールキットのアーカイブの公式ページ: https://developer.nvidia.com/cuda-toolkit-archive
- NVIDIA cuDNN のダウンロードの公式ページ: https://developer.nvidia.com/cudnn
PyTorch のインストール(Windows 上)
- 以下の手順を管理者権限のコマンドプロンプトで実行する
(手順:Windowsキーまたはスタートメニュー →
cmdと入力 → 右クリック → 「管理者として実行」)。 - PyTorch のページを確認
- 次のようなコマンドを実行(実行するコマンドは,PyTorch のページの表示されるコマンドを使う).
次のコマンドを実行することにより, PyTorch 2.3 (NVIDIA CUDA 11.8 用)がインストールされる. 但し,Anaconda3を使いたい場合には別手順になる.
事前に NVIDIA CUDA のバージョンを確認しておくこと(ここでは,NVIDIA CUDA ツールキット 11.8 が前もってインストール済みであるとする).
PyTorch で,GPU が動作している場合には,「torch.cuda.is_available()」により,True が表示される.
python -m pip install -U --ignore-installed pip python -m pip uninstall -y torch torchvision torchaudio torchtext xformers python -m pip install -U torch torchvision torchaudio numpy --index-url https://download.pytorch.org/whl/cu118 python -c "import torch; print(torch.__version__, torch.cuda.is_available())"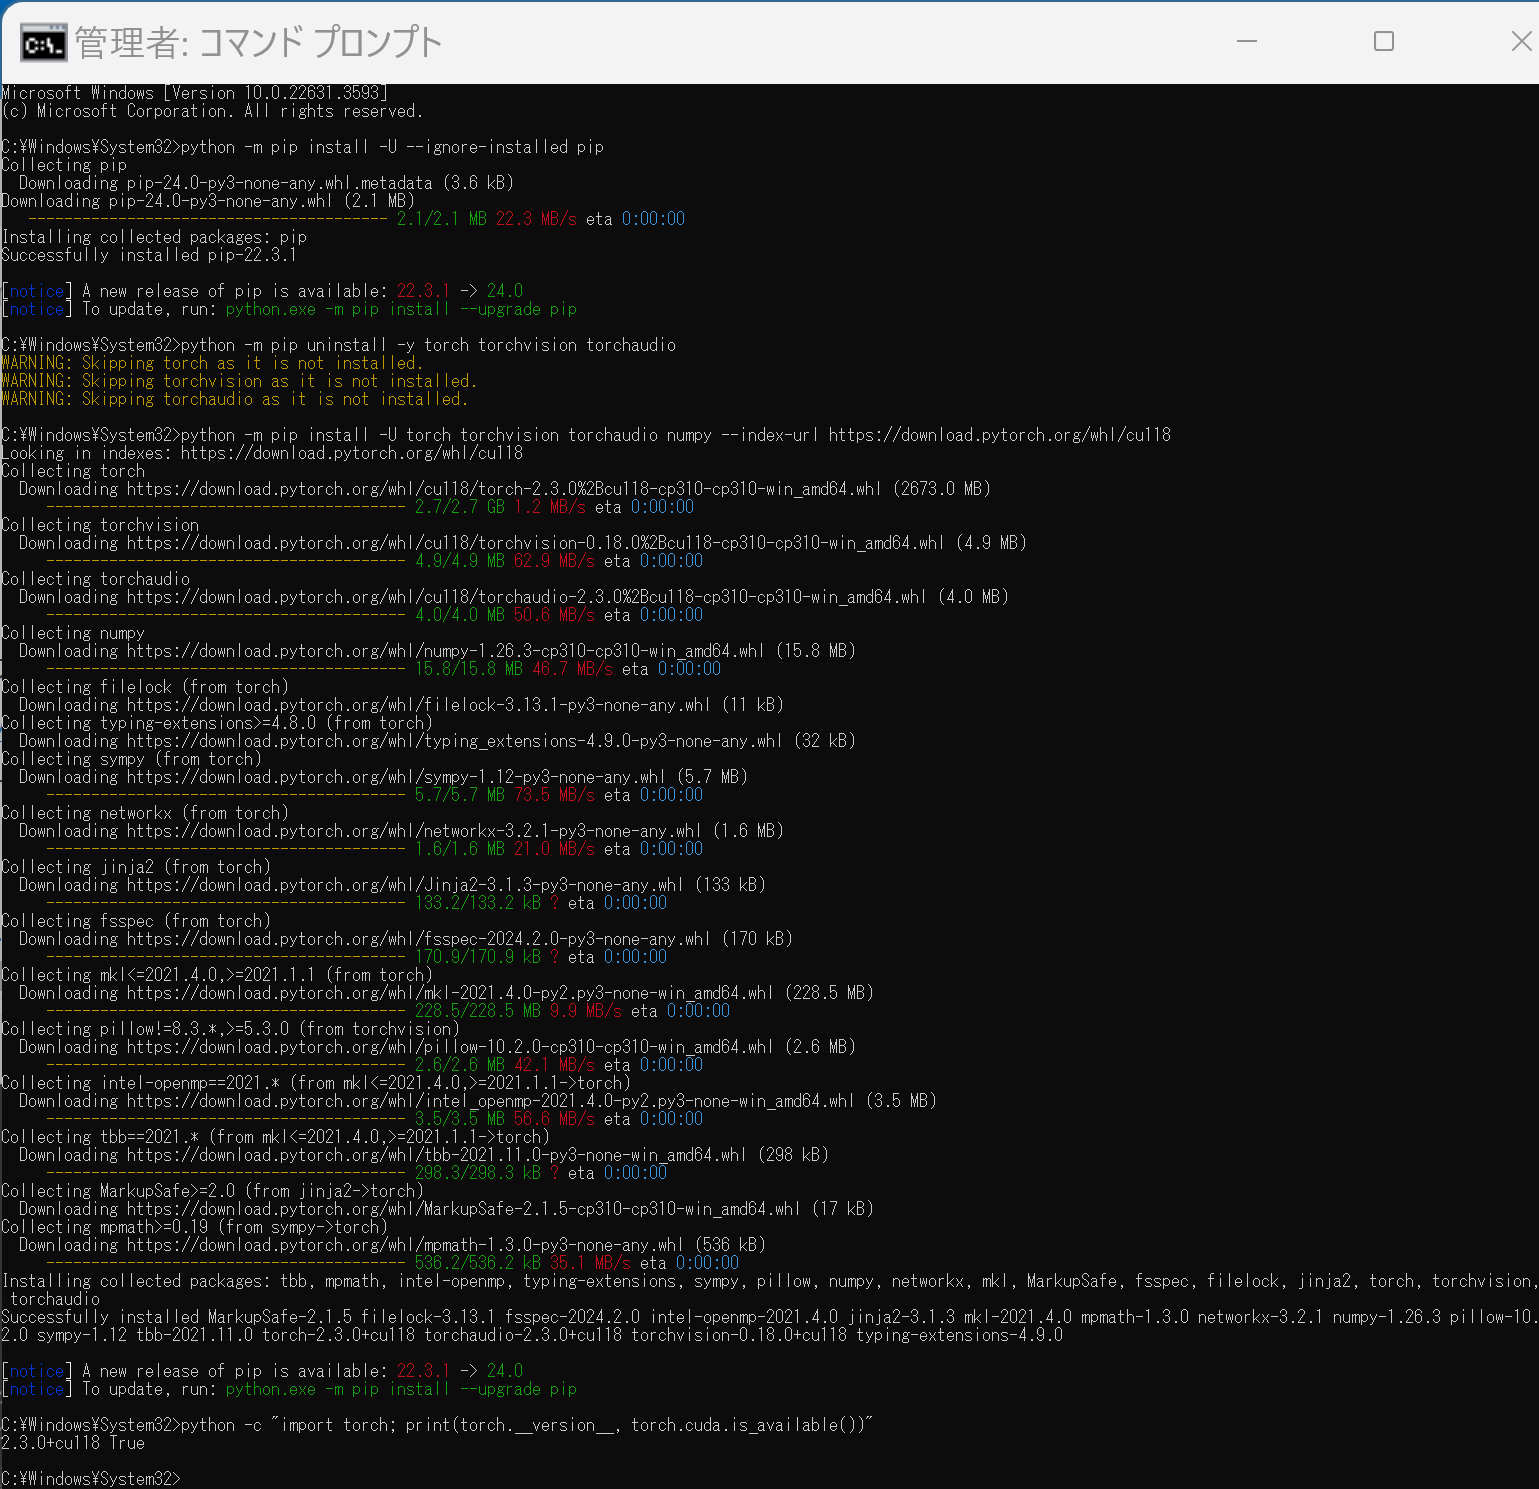 Anaconda3を使いたい場合には, Anaconda プロンプト (Anaconda Prompt) を管理者として実行し, 次のコマンドを実行する. (PyTorch と NVIDIA CUDA との連携がうまくいかない可能性があるため,Anaconda3を使わないことも検討して欲しい).
conda install -y pytorch torchvision torchaudio pytorch-cuda=11.8 cudnn -c pytorch -c nvidia py -c "import torch; print(torch.__version__, torch.cuda.is_available())"【サイト内の関連ページ】
【関連する外部ページ】
MMTracking のインストール(Windows 上)
- 以下の手順を管理者権限のコマンドプロンプトで実行する
(手順:Windowsキーまたはスタートメニュー →
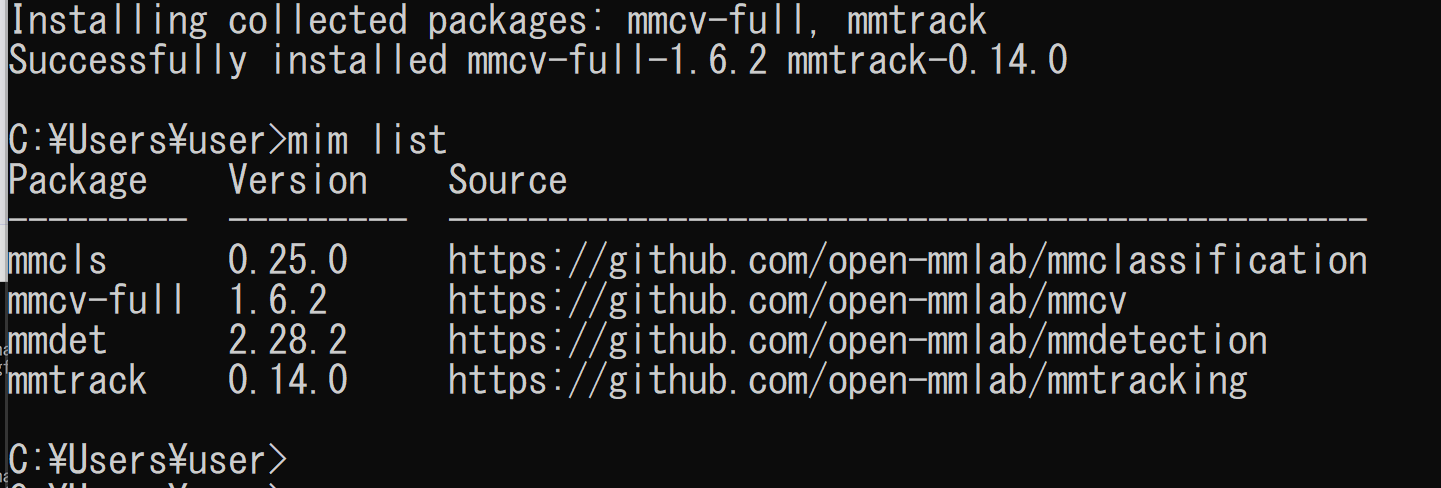
cmdと入力 → 右クリック → 「管理者として実行」)。 - MIM,MMTracking のインストール
インストール手順は, https://mmcv.readthedocs.io/en/latest/get_started/installation.html に記載の手順による
python -m pip install -U --ignore-installed pip
python -m pip uninstall -y openmim mmcv mmcv-full opencv-python opencv-python-headless
python -m pip install -U openmim opencv-python
python -m pip install -U --ignore-installed --no-cache-dir numpy
cd /d c:%HOMEPATH%
rmdir /s /q mmtracking
git clone https://github.com/open-mmlab/mmtracking.git
cd mmtracking
mim uninstall -y mmtrack
pip install -r requirements.txt
mim install -e .
mim list
(途中省略)
- MOT evaluation のインストール
python -m pip install git+https://github.com/JonathonLuiten/TrackEval.git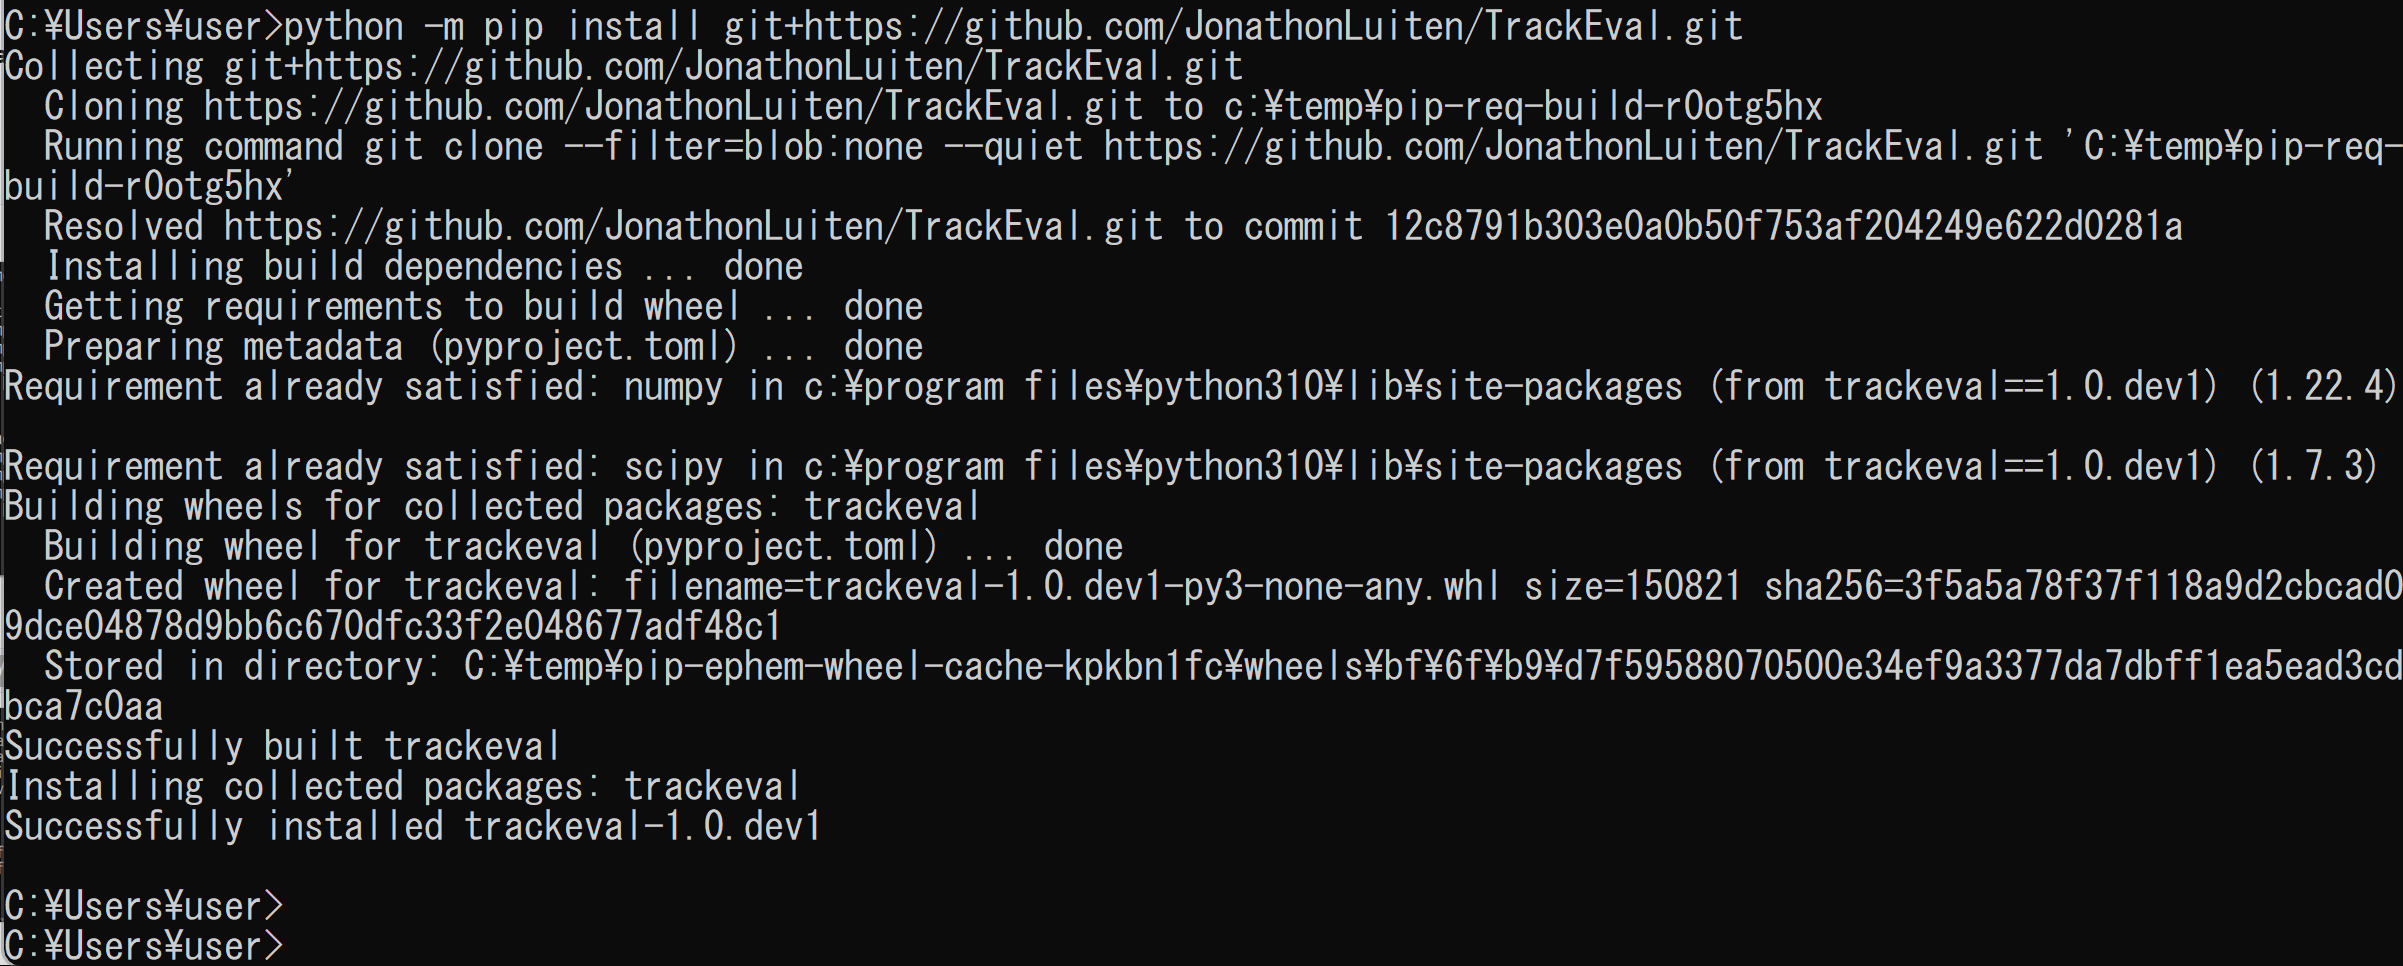
MMTracking の動作確認(Windows 上)
- 以下の手順を管理者権限のコマンドプロンプトで実行する
(手順:Windowsキーまたはスタートメニュー →
cmdと入力 → 右クリック → 「管理者として実行」)。 - 事前学習済みモデルのダウンロード
次のコマンドを実行する.
cd /d c:%HOMEPATH%\mmtracking
mkdir checkpoints
cd checkpoints
curl -O https://download.openmmlab.com/mmtracking/vid/selsa/selsa_faster_rcnn_r50_dc5_1x_imagenetvid/selsa_faster_rcnn_r50_dc5_1x_imagenetvid_20201227_204835-2f5a4952.pth
curl -O https://download.openmmlab.com/mmtracking/sot/siamese_rpn/siamese_rpn_r50_1x_lasot/siamese_rpn_r50_1x_lasot_20211203_151612-da4b3c66.pth
curl -O https://download.openmmlab.com/mmtracking/vis/masktrack_rcnn/masktrack_rcnn_r50_fpn_12e_youtubevis2019/masktrack_rcnn_r50_fpn_12e_youtubevis2019_20211022_194830-6ca6b91e.pth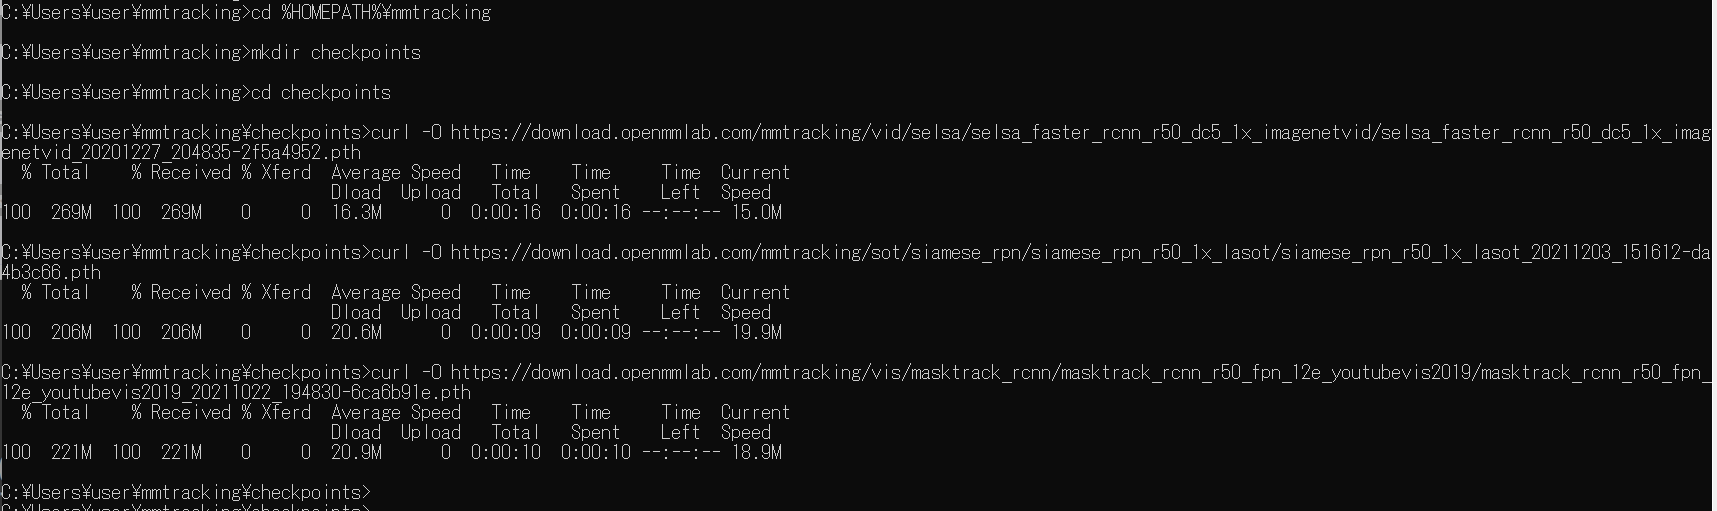
- MOT (Multiple Object Tracling) を行う Python プログラム
次の Python プログラムを実行する.mmcv を用いた表示を行うので,Jupyter QtConsole や Jupyter ノートブック (Jupyter Notebook) の利用が便利である.
Python プログラムは,公式ページhttps://github.com/open-mmlab/mmtracking/blob/master/demo/MMTracking_Tutorial.ipynb のものを書き換えて使用.
下図では,Python プログラムの実行のため,jupyter qtconsole を使用している.
import os
import mmcv
import tempfile
from mmtrack.apis import inference_mot, init_model

os.chdir((os.getenv('HOMEPATH') + '\\' + 'mmtracking'))
mot_config = './configs/mot/deepsort/deepsort_faster-rcnn_fpn_4e_mot17-private-half.py'
input_video = './demo/demo.mp4'
imgs = mmcv.VideoReader(input_video)
# build the model from a config file
mot_model = init_model(mot_config, device='cuda:0')
prog_bar = mmcv.ProgressBar(len(imgs))
out_dir = tempfile.TemporaryDirectory()
out_path = out_dir.name
# test and show/save the images
for i, img in enumerate(imgs):
    result = inference_mot(mot_model, img, frame_id=i)
    mot_model.show_result(
            img,
            result,
            show=False,
            wait_time=int(1000. / imgs.fps),
            out_file=f'{out_path}/{i:06d}.jpg')
    prog_bar.update()

output = './demo/mot.mp4'
print(f'\n making the output video at {output} with a FPS of {imgs.fps}')
mmcv.frames2video(out_path, output, fps=imgs.fps, fourcc='mp4v')
out_dir.cleanup()
./demo/mot.mp4 を表示.
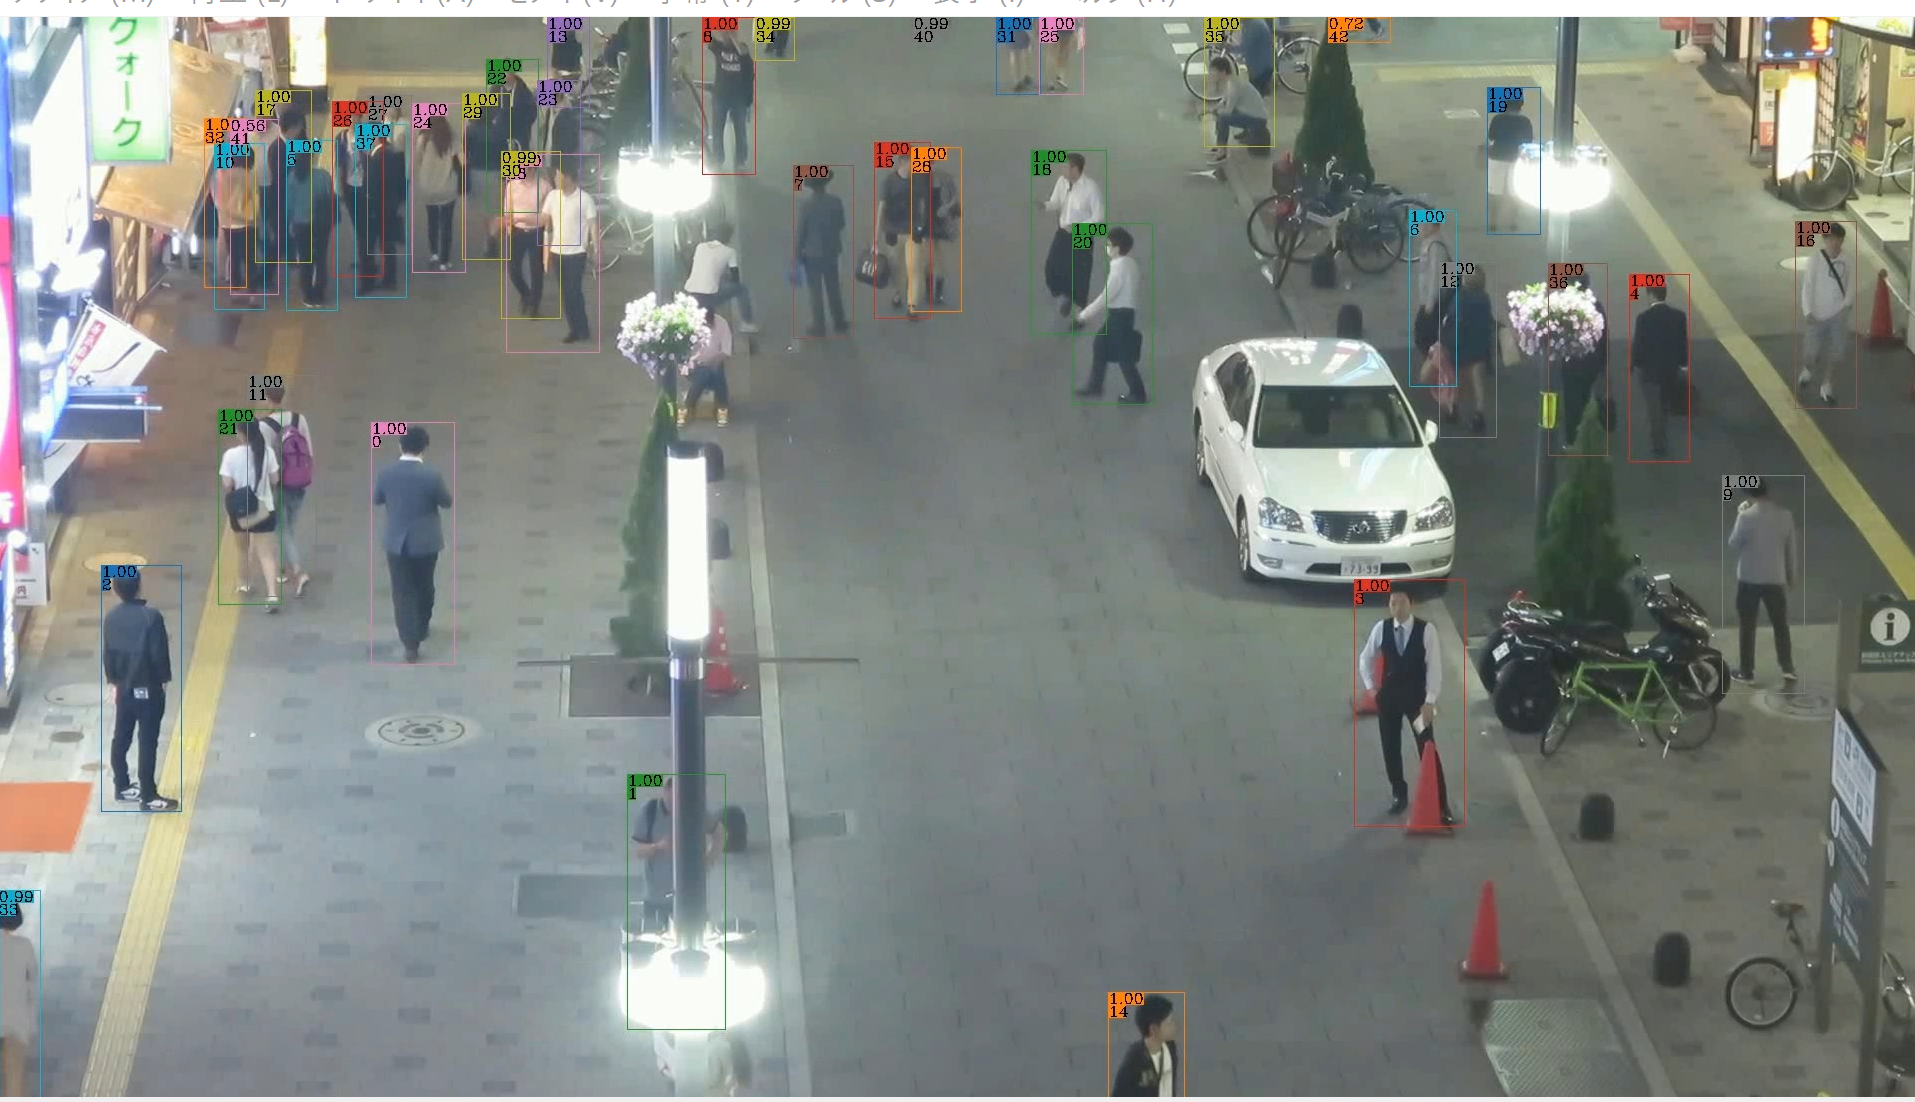
- VIS (Video Instance Segmentation) を行う Python プログラム
次の Python プログラムを実行する.mmcv を用いた表示を行うので,Jupyter QtConsole や Jupyter ノートブック (Jupyter Notebook) の利用が便利である.
Python プログラムは,公式ページhttps://github.com/open-mmlab/mmtracking/blob/master/demo/MMTracking_Tutorial.ipynb のものを書き換えて使用.
下図では,Python プログラムの実行のため,jupyter qtconsole を使用している.
import os
import mmcv
import tempfile
from mmtrack.apis import inference_mot, init_model

os.chdir((os.getenv('HOMEPATH') + '\\' + 'mmtracking'))
vis_config = './configs/vis/masktrack_rcnn/masktrack_rcnn_r50_fpn_12e_youtubevis2019.py'
vis_checkpoint = './checkpoints/masktrack_rcnn_r50_fpn_12e_youtubevis2019_20211022_194830-6ca6b91e.pth'
# build the model from a config file and a checkpoint file
vis_model = init_model(vis_config, vis_checkpoint, device='cuda:0')
input_video = './demo/demo.mp4'
imgs = mmcv.VideoReader(input_video)
prog_bar = mmcv.ProgressBar(len(imgs))
out_dir = tempfile.TemporaryDirectory()
out_path = out_dir.name
for i, img in enumerate(imgs):
    result = inference_mot(vis_model, img, frame_id=i)
    vis_model.show_result(
            img,
            result,
            wait_time=int(1000. / imgs.fps),
            out_file=f'{out_path}/{i:06d}.jpg')
    prog_bar.update()
output = './demo/vis.mp4'
print(f'\n making the output video at {output} with a FPS of {imgs.fps}')
mmcv.frames2video(out_path, output, fps=imgs.fps, fourcc='mp4v')
out_dir.cleanup()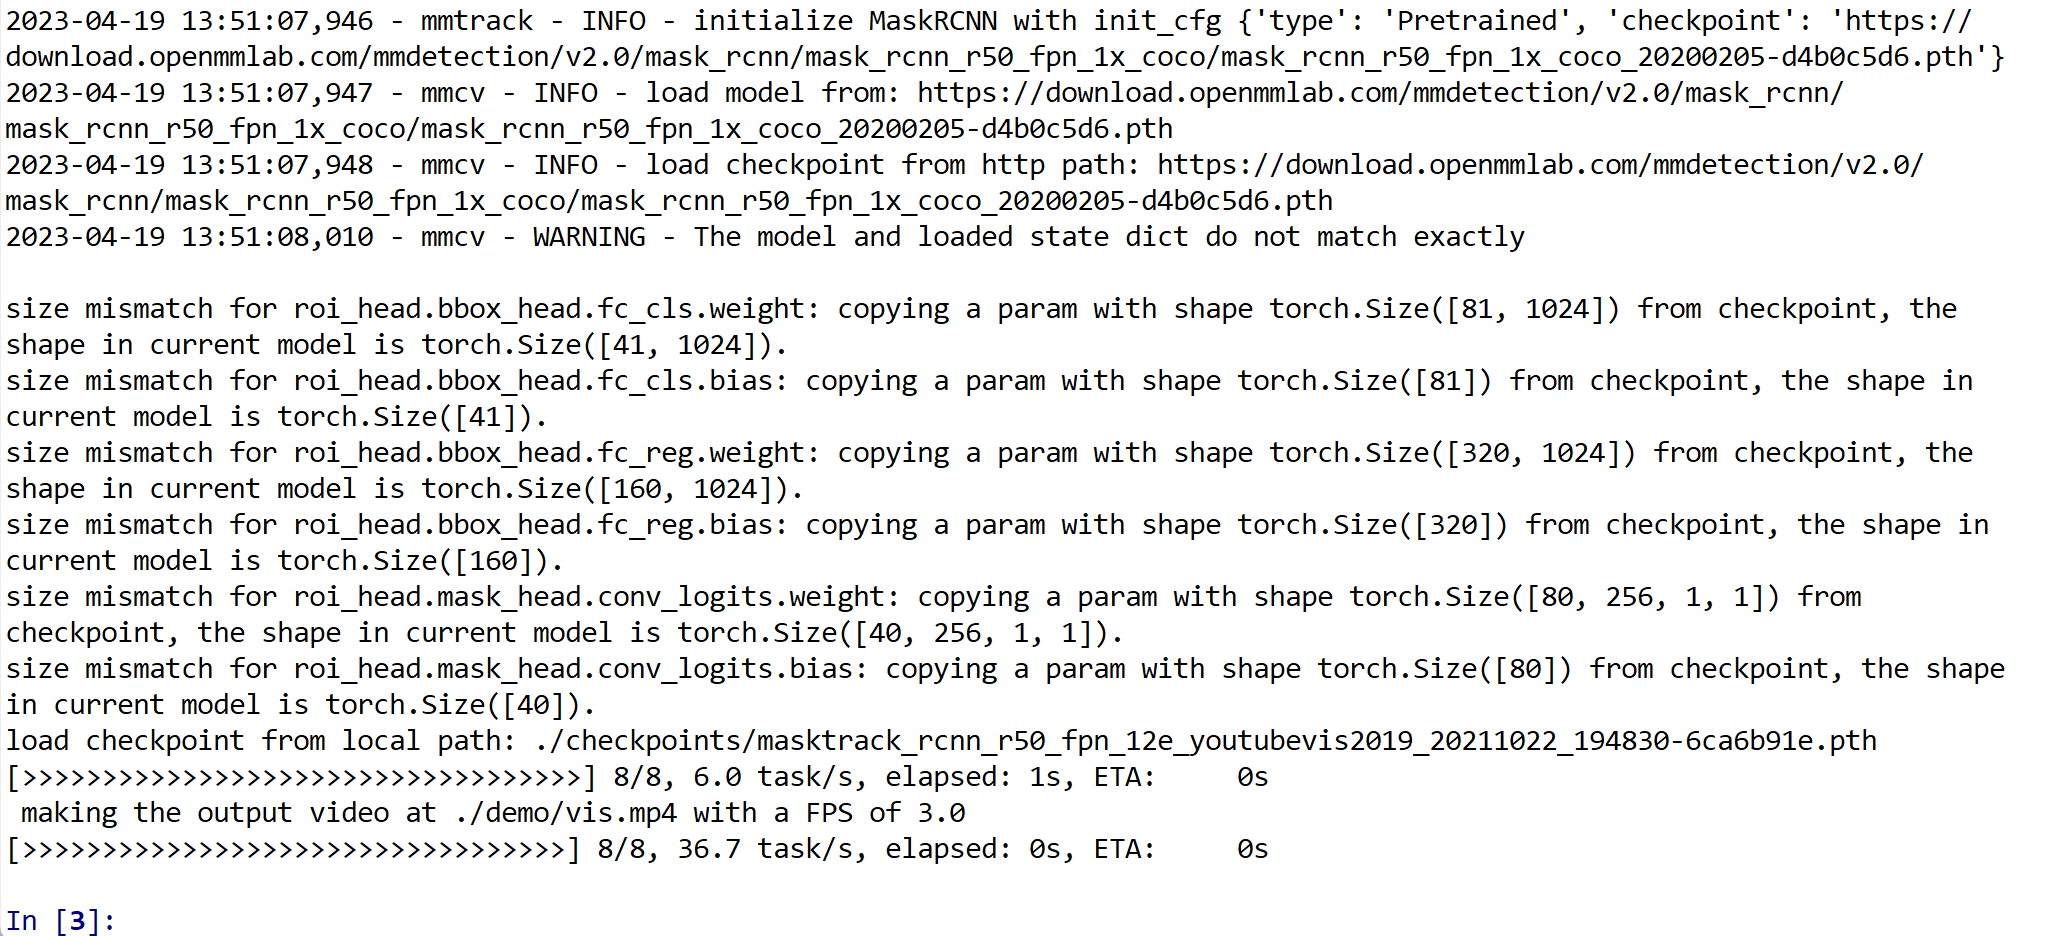
./demo/vis.mp4 を表示.
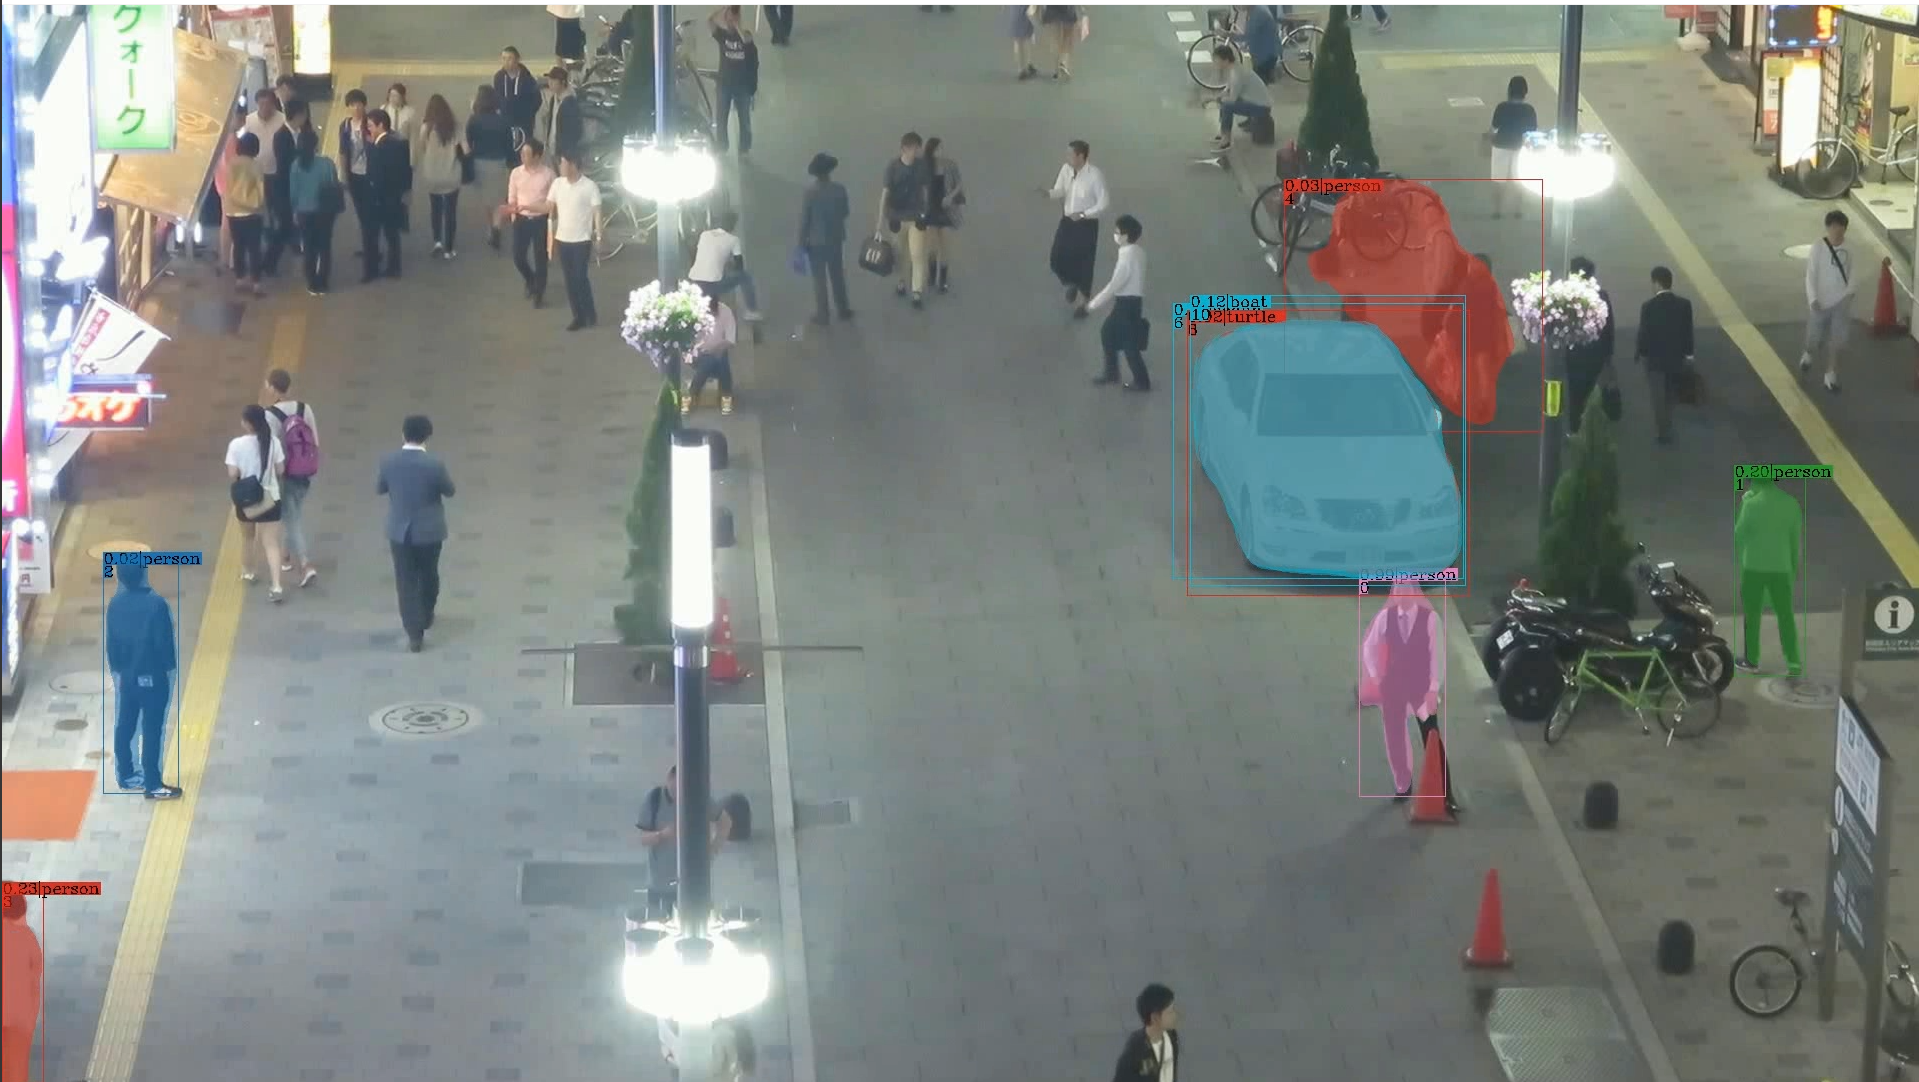
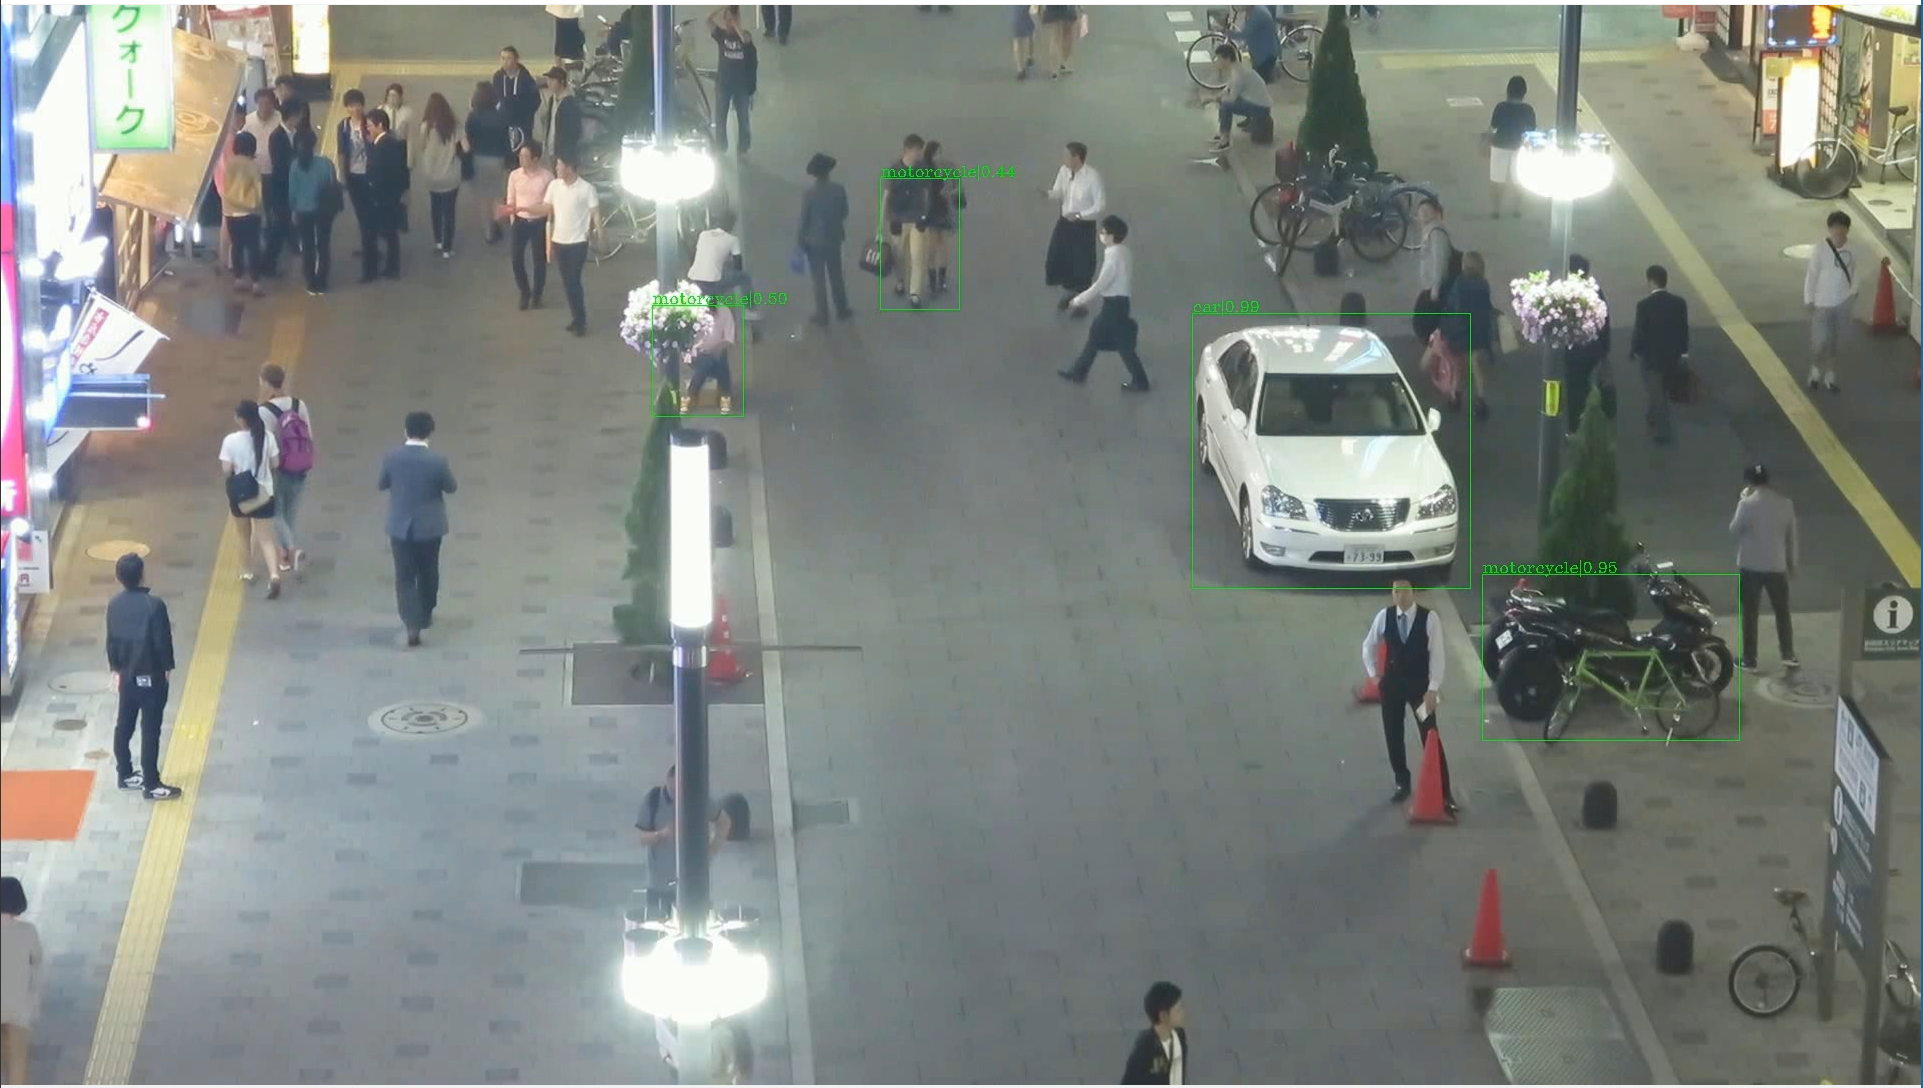
- VID (Video Object Detection) を行う Python プログラム
次の Python プログラムを実行する.mmcv を用いた表示を行うので,Jupyter QtConsole や Jupyter ノートブック (Jupyter Notebook) の利用が便利である.
Python プログラムは,公式ページhttps://github.com/open-mmlab/mmtracking/blob/master/demo/MMTracking_Tutorial.ipynb のものを書き換えて使用.
下図では,Python プログラムの実行のため,jupyter qtconsole を使用している.
import os
import mmcv
import tempfile
from mmtrack.apis import inference_vid, init_model

os.chdir((os.getenv('HOMEPATH') + '\\' + 'mmtracking'))
vid_config = './configs/vid/selsa/selsa_faster_rcnn_r50_dc5_1x_imagenetvid.py'
vid_checkpoint = './checkpoints/selsa_faster_rcnn_r50_dc5_1x_imagenetvid_20201227_204835-2f5a4952.pth'
# build the model from a config file and a checkpoint file
vid_model = init_model(vid_config, vid_checkpoint, device='cuda:0')
input_video = './demo/demo.mp4'
imgs = mmcv.VideoReader(input_video)
prog_bar = mmcv.ProgressBar(len(imgs))
out_dir = tempfile.TemporaryDirectory()
out_path = out_dir.name
for i, img in enumerate(imgs):
    result = inference_vid(vid_model, img, frame_id=i)
    vid_model.show_result(
            img,
            result,
            wait_time=int(1000. / imgs.fps),
            out_file=f'{out_path}/{i:06d}.jpg')
    prog_bar.update()
output = './demo/vid.mp4'
print(f'\n making the output video at {output} with a FPS of {imgs.fps}')
mmcv.frames2video(out_path, output, fps=imgs.fps, fourcc='mp4v')
out_dir.cleanup()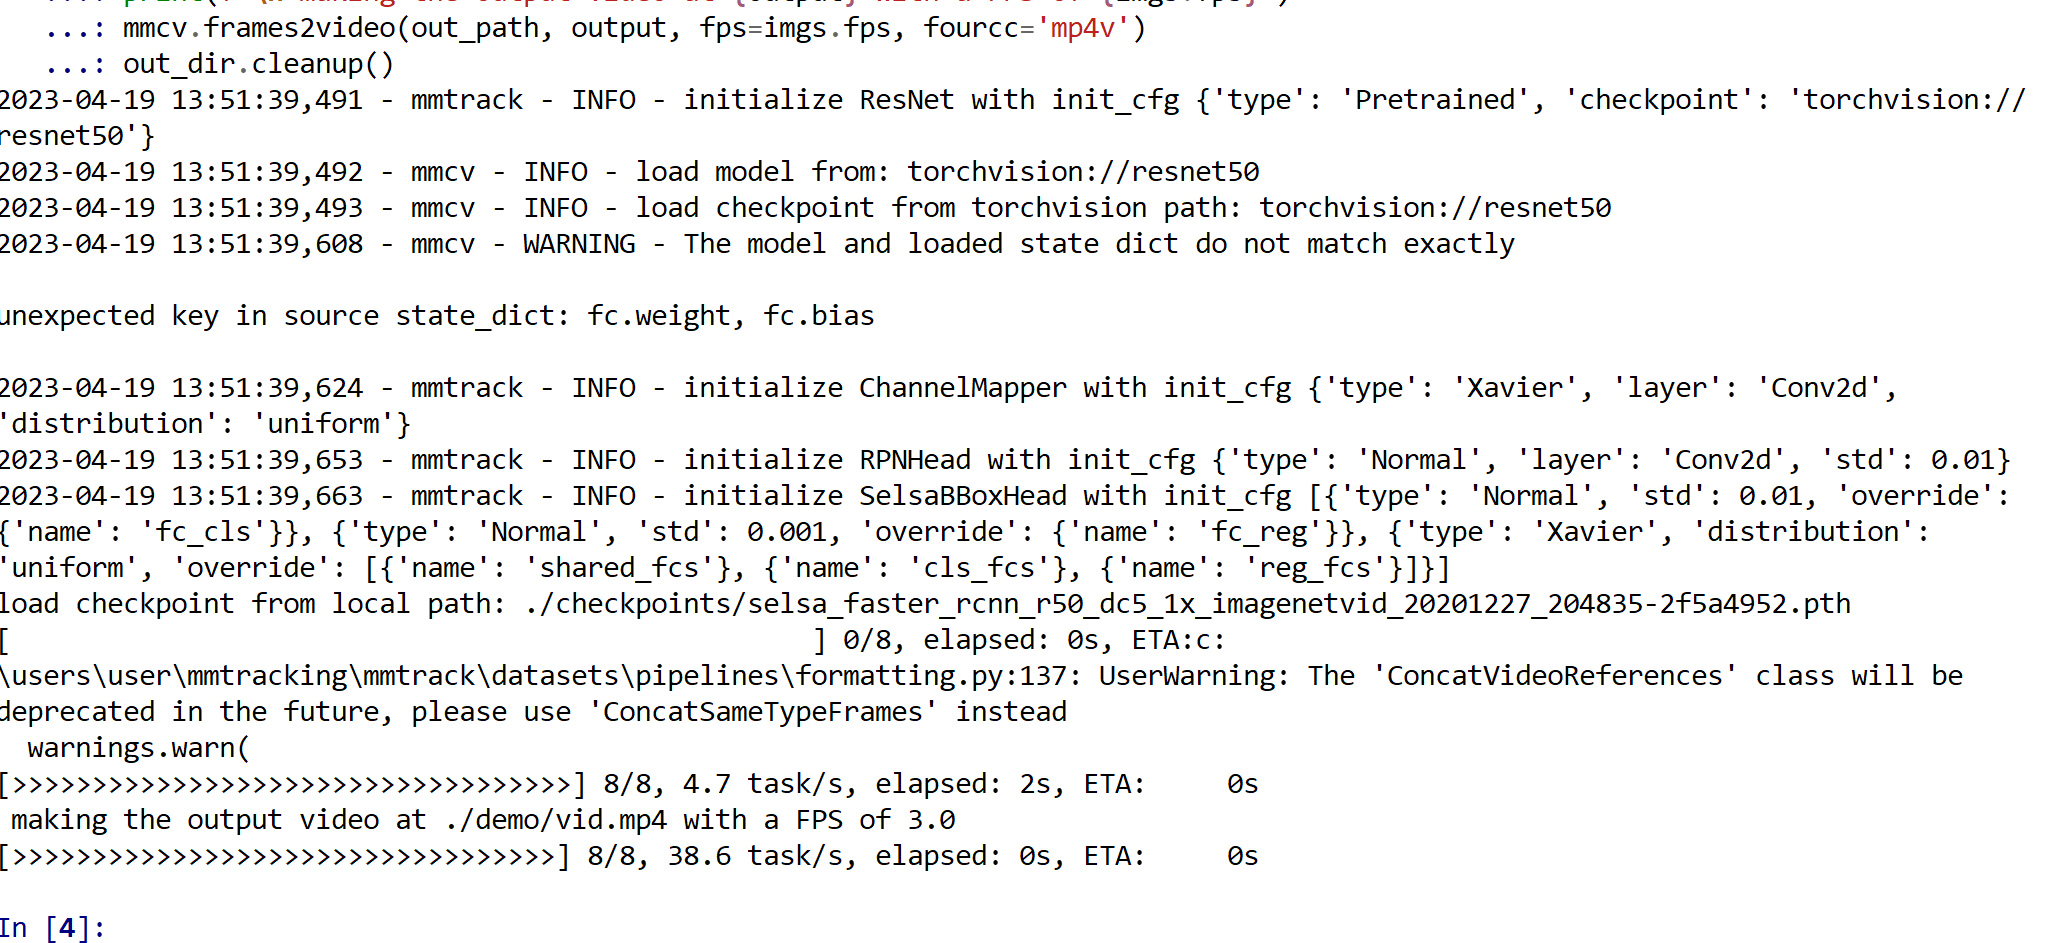
./demo/vid.mp4 を表示.
- SOT (Single Object Tracking) を行う Python プログラム
次の Python プログラムを実行する.mmcv を用いた表示を行うので,Jupyter QtConsole や Jupyter ノートブック (Jupyter Notebook) の利用が便利である.
Python プログラムは,公式ページhttps://github.com/open-mmlab/mmtracking/blob/master/demo/MMTracking_Tutorial.ipynb のものを書き換えて使用.
下図では,Python プログラムの実行のため,jupyter qtconsole を使用している.
import os
import mmcv
import tempfile
from mmtrack.apis import inference_sot, init_model

os.chdir((os.getenv('HOMEPATH') + '\\' + 'mmtracking'))
sot_config = './configs/sot/siamese_rpn/siamese_rpn_r50_20e_lasot.py'
sot_checkpoint = './checkpoints/siamese_rpn_r50_1x_lasot_20211203_151612-da4b3c66.pth'
# build the model from a config file and a checkpoint file
sot_model = init_model(sot_config, sot_checkpoint, device='cuda:0')
init_bbox = [371, 411, 450, 646]
input_video = './demo/demo.mp4'
imgs = mmcv.VideoReader(input_video)
prog_bar = mmcv.ProgressBar(len(imgs))
out_dir = tempfile.TemporaryDirectory()
out_path = out_dir.name
for i, img in enumerate(imgs):
    result = inference_sot(sot_model, img, init_bbox, frame_id=i)
    sot_model.show_result(
            img,
            result,
            wait_time=int(1000. / imgs.fps),
            out_file=f'{out_path}/{i:06d}.jpg')
    prog_bar.update()
output = './demo/sot.mp4'
print(f'\n making the output video at {output} with a FPS of {imgs.fps}')
mmcv.frames2video(out_path, output, fps=imgs.fps, fourcc='mp4v')
out_dir.cleanup()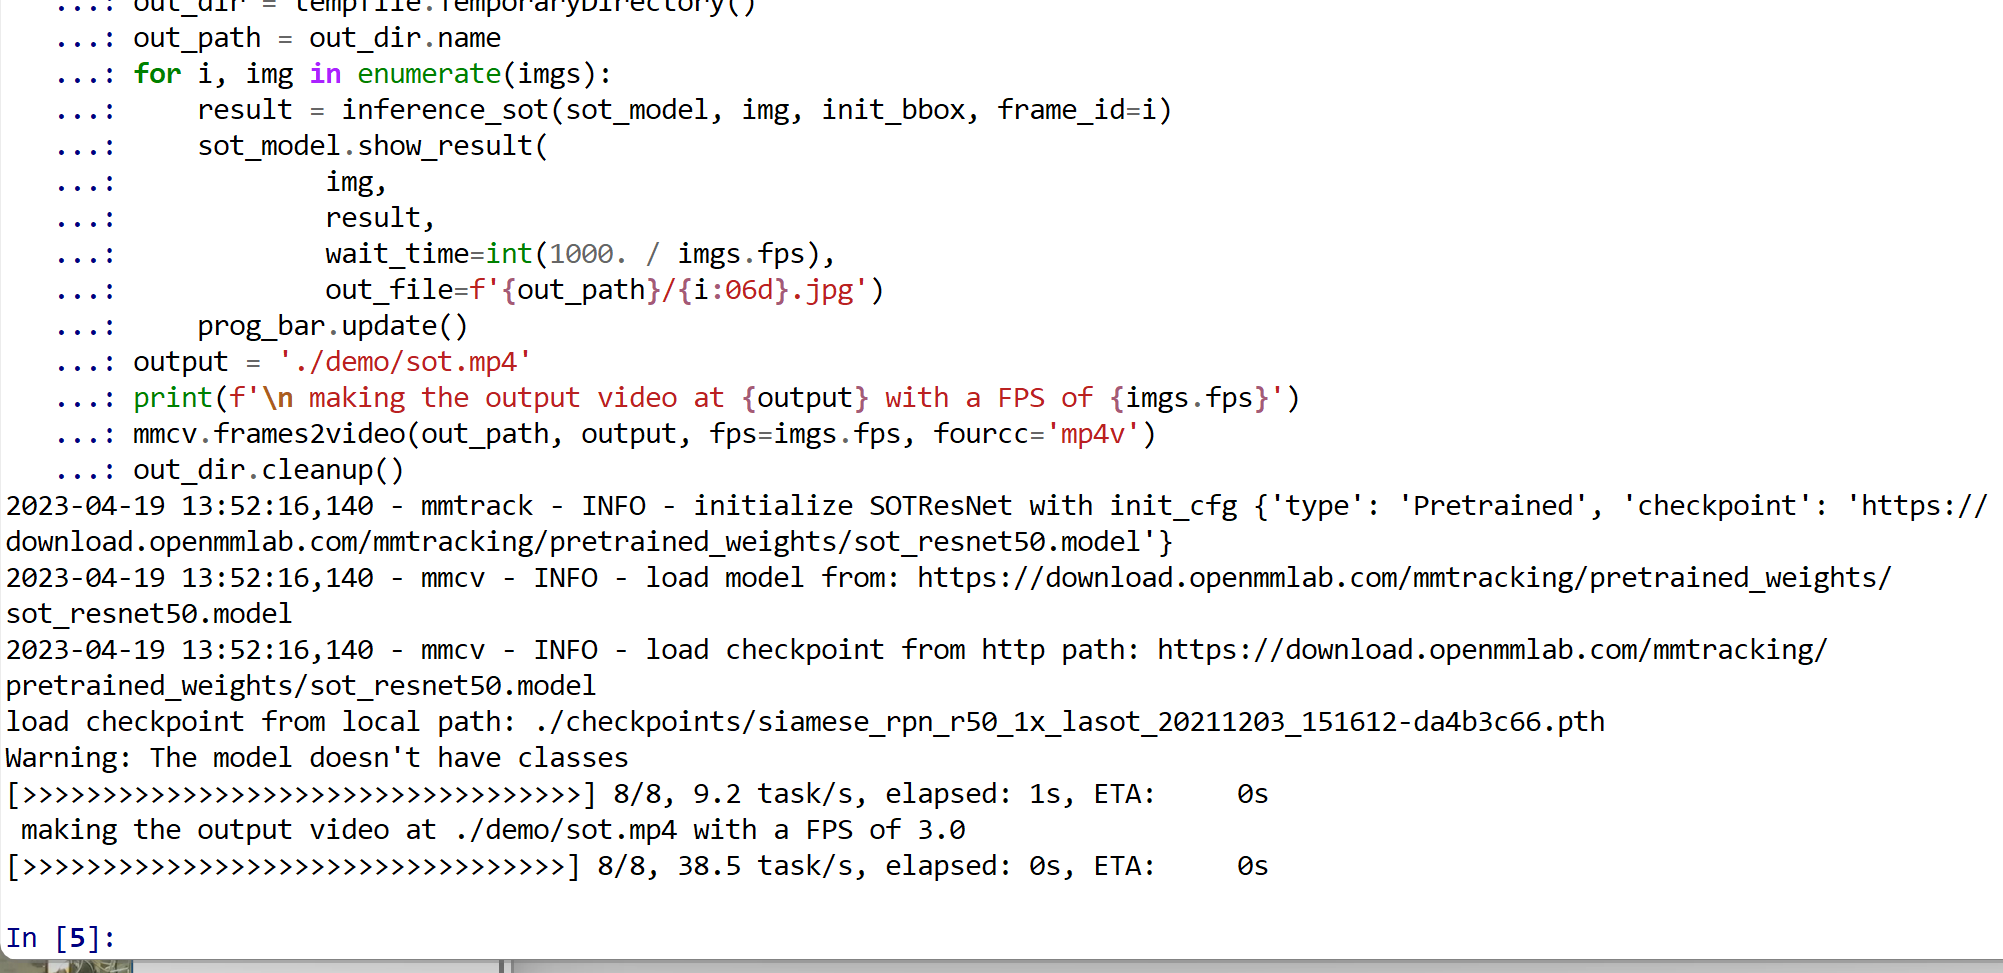
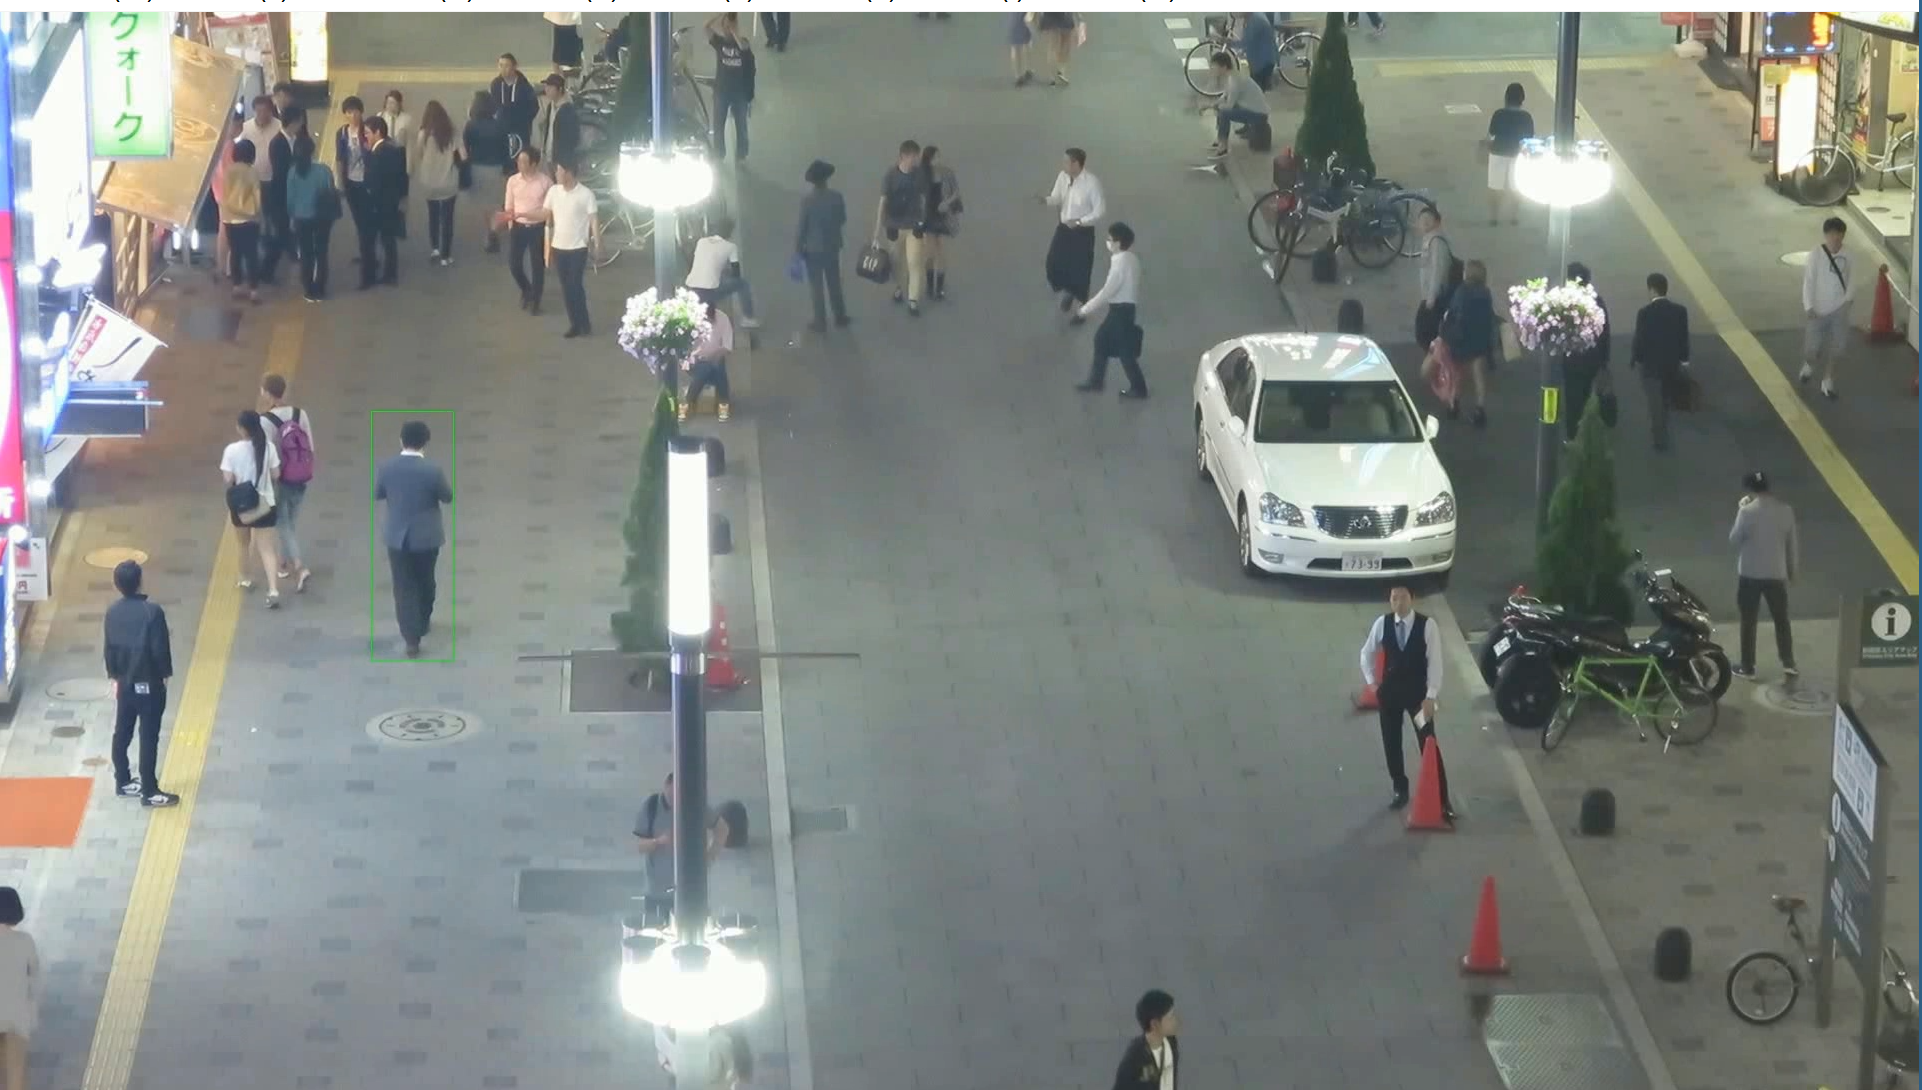
./demo/sot.mp4 を表示.
- 以下の手順を管理者権限のコマンドプロンプトで実行する
(手順:Windowsキーまたはスタートメニュー →