Recognize Anything のインストールと動作確認(ゼロショットの画像タグ付け)(Python,PyTorch を使用)(Windows 上)
【目次】
- 前準備
- RecognizeAnything のインストール(Windows 上)
- RecognizeAnything の動作確認(Windows 上)
- RecognizeAnything を使う Python プログラムの実行(Windows 上)
Recognize Anything Model
画像タグ付けの学習は画像とテキストのペアを訓練データとして使用する。 Recognize Anything Model(RAM)は、画像タグ付けのためのモデルで、手動でのアノテーションではなく、テキストのセマンティック解析を自動化することでラベルを取得することを特徴とする。 Recognize Anything Model(RAM)のラベルシステムは、6,449の一般的なラベルを含んでいる。 また、データエンジンは、欠落しているラベルを追加し、誤ったラベルをクリーニングするために使用される。 データエンジンは既存のモデルを用いて追加のタグを生成し、画像内の特定のカテゴリに対応する領域を特定します。その後、同じカテゴリ内の領域を処理し、異常値を排除します。 さらに、Recognize Anything Model(RAM)は画像タグ付けとキャプションのタスクを統合し、その結果、ゼロショット画像タグ付けを可能にしている。これにより、未見のカテゴリについての処理が可能になる。また、学習のコストを抑制するために、Recognize Anything Model(RAM)はオープンソースでアノテーションフリーのデータセットを使用する。これらの特性により、Recognize Anything Model(RAM)はゼロショットの画像タグ付けだけでなく、学習済みモデルを用いた画像タグ付けでも高い性能を示すとされる。これは、OpenImages V6、COCO、ADE20kなどの一連のベンチマークデータセットでの評価により裏付けられている。
【文献】 Recognize Anything: A Strong Image Tagging Model 6 Jun 2023 · Youcai Zhang, Xinyu Huang, Jinyu Ma, Zhaoyang Li, Zhaochuan Luo, Yanchun Xie, Yuzhuo Qin, Tong Luo, Yaqian Li, Shilong Liu, Yandong Guo, Lei Zhang ·
https://arxiv.org/pdf/2306.03514v3.pdf
【関連する外部ページ】
- Hugging Face の公式デモ: https://huggingface.co/spaces/xinyu1205/recognize-anything
- GitHub の公式ページ: https://github.com/xinyu1205/recognize-anything
- Paper with Code のページ: https://paperswithcode.com/paper/recognize-anything-a-strong-image-tagging
前準備
Build Tools for Visual Studio 2022 のインストール(Windows 上)
Build Tools for Visual Studio は,Visual Studio の IDE を含まない C/C++ コンパイラ,ライブラリ,ビルドツール等のコマンドライン向け開発ツールセットである。
以下のコマンドを管理者権限のコマンドプロンプトで実行する
(手順:Windowsキーまたはスタートメニュー → cmd と入力 → 右クリック → 「管理者として実行」)。
REM VC++ ランタイム
winget install --scope machine --id Microsoft.VCRedist.2015+.x64 -e --silent --disable-interactivity --force --accept-source-agreements --accept-package-agreements --override "/quiet /norestart"

REM Build Tools + Desktop development with C++(VCTools)+ 追加コンポーネント(一括)
winget install --id Microsoft.VisualStudio.2022.BuildTools --accept-source-agreements --accept-package-agreements ^
    --override "--passive --wait --norestart --add Microsoft.VisualStudio.Workload.VCTools --includeRecommended --add Microsoft.VisualStudio.Component.VC.Llvm.Clang --add Microsoft.VisualStudio.ComponentGroup.ClangCL --add Microsoft.VisualStudio.Component.VC.CMake.Project --add Microsoft.VisualStudio.Component.Windows11SDK.26100"
--add で追加されるコンポーネント
上記のコマンドでは,まず Build Tools 本体と Visual C++ 再頒布可能パッケージをインストールし,次に setup.exe を用いて以下のコンポーネントを追加している。
VCTools:C++ デスクトップ開発ワークロード(--includeRecommendedにより、MSVC コンパイラ、C++ AddressSanitizer、vcpkg、CMake ツール、Windows 11 SDK 等の推奨コンポーネントが含まれる)VC.Llvm.Clang:Windows 向け C++ Clang コンパイラClangCL:clang-cl ツールセットを含むコンポーネントグループ(MSBuild から Clang を使用するために必要)VC.CMake.Project:Windows 向け C++ CMake ツールWindows11SDK.26100:Windows 11 SDK(ビルド 10.0.26100)
インストール完了の確認
winget list Microsoft.VisualStudio.2022.BuildTools上記以外の追加のコンポーネントが必要になった場合は Visual Studio Installer で個別にインストールできる。
Visual Studio の機能を必要とする場合は、追加インストールできる。
Python 3.12 のインストール(Windows 上) [クリックして展開]
以下のいずれかの方法で Python 3.12 をインストールする。Python がインストール済みの場合、この手順は不要である。
方法1:winget によるインストール
管理者権限のコマンドプロンプトで以下を実行する。管理者権限のコマンドプロンプトを起動するには、Windows キーまたはスタートメニューから「cmd」と入力し、表示された「コマンドプロンプト」を右クリックして「管理者として実行」を選択する。
winget install --id Python.Python.3.12 -e --scope machine --silent --accept-source-agreements --accept-package-agreements --override "/quiet InstallAllUsers=1 PrependPath=1 Include_test=0 Include_pip=1 Include_launcher=1 InstallLauncherAllUsers=1 TargetDir=\"C:\Program Files\Python312\""
powershell -Command "$p='C:\Program Files\Python312'; $s=\"$p\Scripts\"; $m=[Environment]::GetEnvironmentVariable('Path','Machine'); if($m -notlike \"*$s*\") { [Environment]::SetEnvironmentVariable('Path', \"$p;$s;$m\", 'Machine') }"
--scope machine を指定することで、システム全体(全ユーザー向け)にインストールされる。このオプションの実行には管理者権限が必要である。インストール完了後、コマンドプロンプトを再起動すると PATH が自動的に設定される。
方法2:インストーラーによるインストール
- Python 公式サイト(https://www.python.org/downloads/)にアクセスし、「Download Python 3.x.x」ボタンから Windows 用インストーラーをダウンロードする。
- ダウンロードしたインストーラーを実行する。
- 初期画面の下部に表示される「Add python.exe to PATH」に必ずチェックを入れてから「Customize installation」を選択する。このチェックを入れ忘れると、コマンドプロンプトから
pythonコマンドを実行できない。 - 「Install Python 3.xx for all users」にチェックを入れ、「Install」をクリックする。
インストールの確認
コマンドプロンプトで以下を実行する。
python --versionバージョン番号(例:Python 3.12.x)が表示されればインストール成功である。「'python' は、内部コマンドまたは外部コマンドとして認識されていません。」と表示される場合は、インストールが正常に完了していない。
Git のインストール
管理者権限のコマンドプロンプトで以下を実行する。管理者権限のコマンドプロンプトを起動するには、Windows キーまたはスタートメニューから「cmd」と入力し、表示された「コマンドプロンプト」を右クリックして「管理者として実行」を選択する。
REM Git をシステム領域にインストール
winget install --scope machine --id Git.Git -e --silent --disable-interactivity --force --accept-source-agreements --accept-package-agreements --override "/VERYSILENT /NORESTART /NOCANCEL /SP- /CLOSEAPPLICATIONS /RESTARTAPPLICATIONS /COMPONENTS=""icons,ext\reg\shellhere,assoc,assoc_sh"" /o:PathOption=Cmd /o:CRLFOption=CRLFCommitAsIs /o:BashTerminalOption=MinTTY /o:DefaultBranchOption=main /o:EditorOption=VIM /o:SSHOption=OpenSSH /o:UseCredentialManager=Enabled /o:PerformanceTweaksFSCache=Enabled /o:EnableSymlinks=Disabled /o:EnableFSMonitor=Disabled"
【関連する外部ページ】
- Git の公式ページ: https://git-scm.com/
Build Tools for Visual Studio 2022,NVIDIA ドライバ,NVIDIA CUDA ツールキット 11.8,NVIDIA cuDNN 8.9.7 のインストール(Windows 上)
【サイト内の関連ページ】 NVIDIA グラフィックスボードを搭載しているパソコンの場合には, NVIDIA ドライバ, NVIDIA CUDA ツールキット, NVIDIA cuDNN のインストールを行う.
- Windows での Build Tools for Visual Studio 2022 のインストール: 別ページ »で説明
- Windows での NVIDIA ドライバ,NVIDIA CUDA ツールキット 11.8,NVIDIA cuDNN v8.9.7 のインストール手順: 別ページ »で説明
【関連する外部ページ】
- Build Tools for Visual Studio 2022 (ビルドツール for Visual Studio 2022)の公式ダウンロードページ: https://visualstudio.microsoft.com/ja/visual-cpp-build-tools/
- NVIDIA ドライバのダウンロードの公式ページ: https://www.nvidia.co.jp/Download/index.aspx?lang=jp
- NVIDIA CUDA ツールキットのアーカイブの公式ページ: https://developer.nvidia.com/cuda-toolkit-archive
- NVIDIA cuDNN のダウンロードの公式ページ: https://developer.nvidia.com/cudnn
PyTorch のインストール(Windows 上)
- 以下の手順を管理者権限のコマンドプロンプトで実行する
(手順:Windowsキーまたはスタートメニュー →
cmdと入力 → 右クリック → 「管理者として実行」)。 - PyTorch のページを確認
- 次のようなコマンドを実行(実行するコマンドは,PyTorch のページの表示されるコマンドを使う).
次のコマンドを実行することにより, PyTorch 2.3 (NVIDIA CUDA 11.8 用)がインストールされる. 但し,Anaconda3を使いたい場合には別手順になる.
事前に NVIDIA CUDA のバージョンを確認しておくこと(ここでは,NVIDIA CUDA ツールキット 11.8 が前もってインストール済みであるとする).
PyTorch で,GPU が動作している場合には,「torch.cuda.is_available()」により,True が表示される.
python -m pip install -U --ignore-installed pip python -m pip uninstall -y torch torchvision torchaudio torchtext xformers python -m pip install -U torch torchvision torchaudio numpy --index-url https://download.pytorch.org/whl/cu118 python -c "import torch; print(torch.__version__, torch.cuda.is_available())"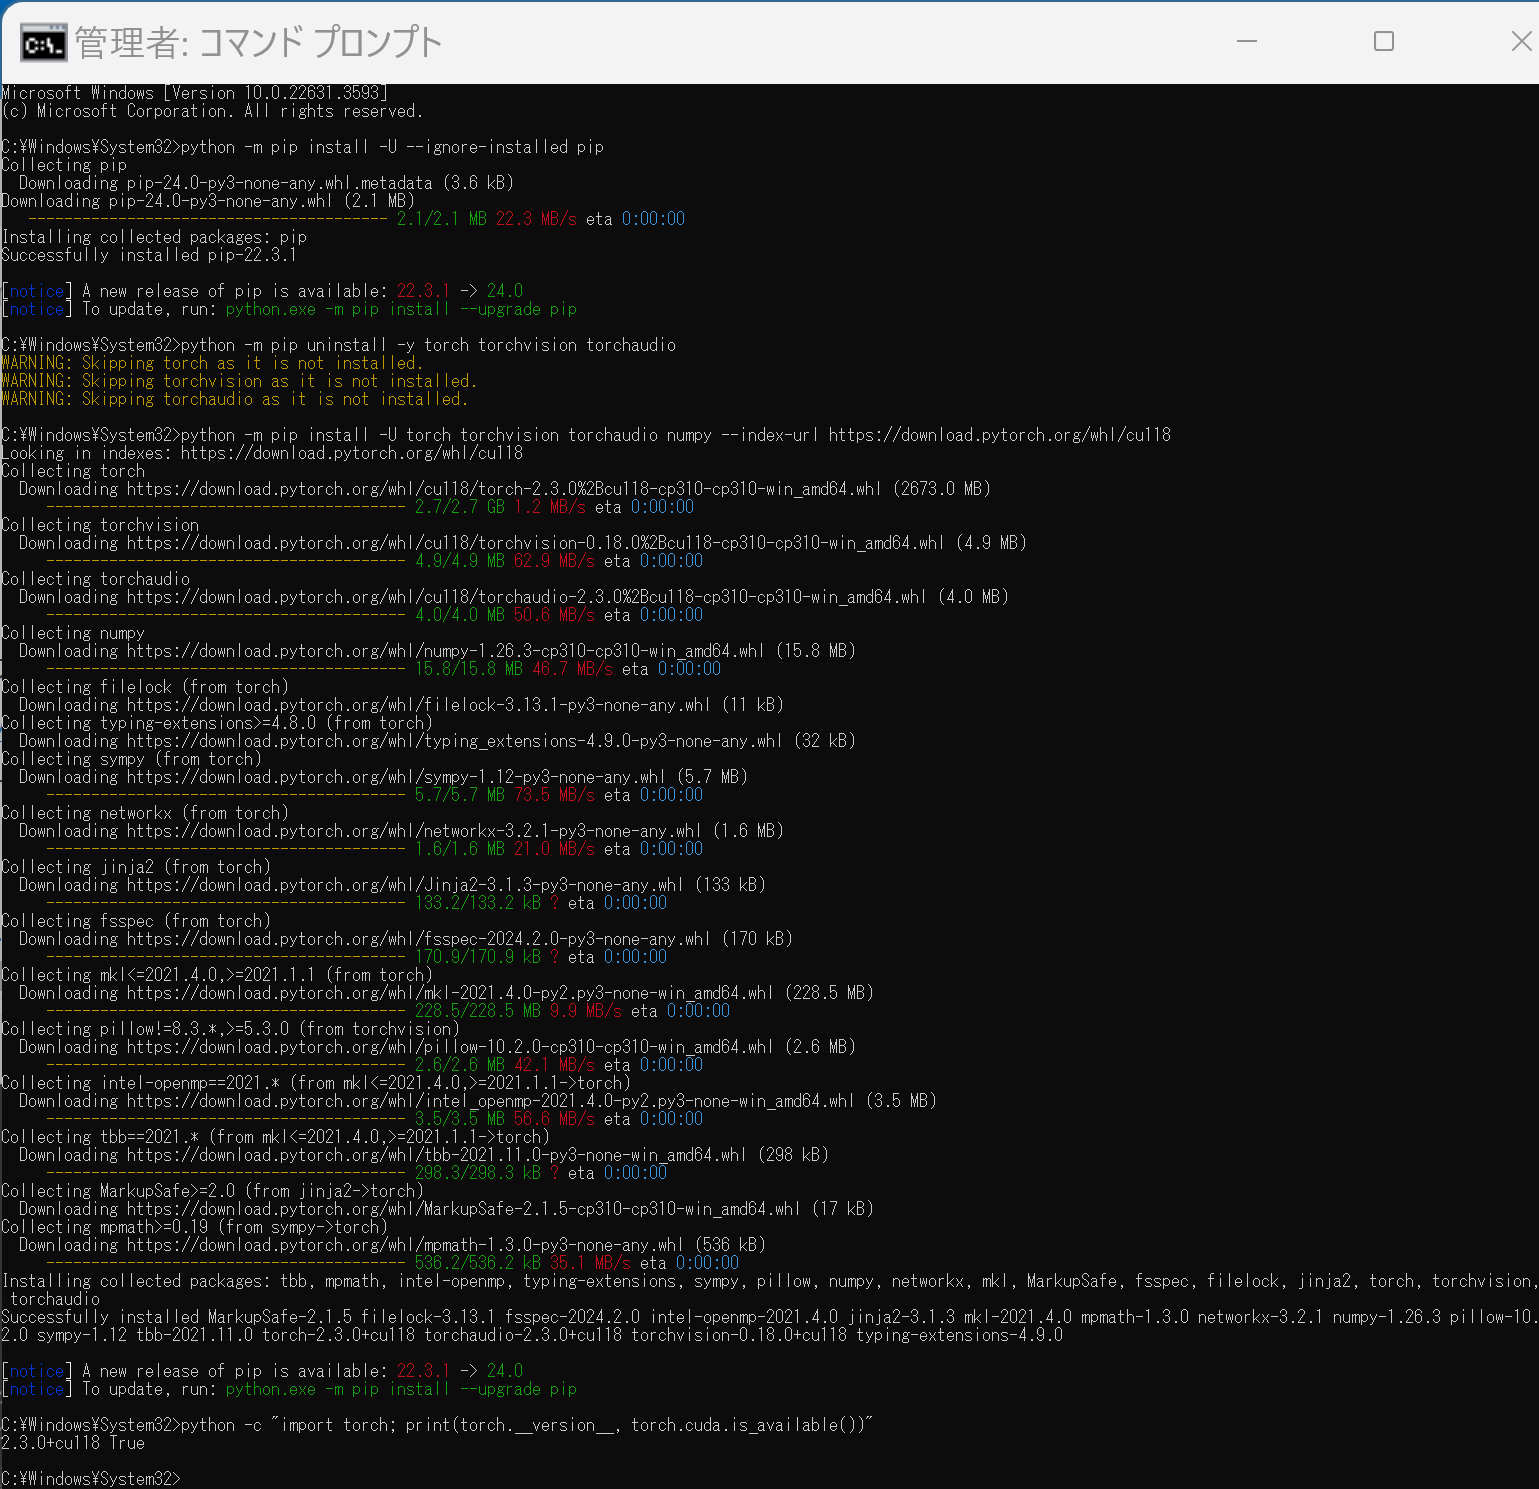 Anaconda3を使いたい場合には, Anaconda プロンプト (Anaconda Prompt) を管理者として実行し, 次のコマンドを実行する. (PyTorch と NVIDIA CUDA との連携がうまくいかない可能性があるため,Anaconda3を使わないことも検討して欲しい).
conda install -y pytorch torchvision torchaudio pytorch-cuda=11.8 cudnn -c pytorch -c nvidia py -c "import torch; print(torch.__version__, torch.cuda.is_available())"【サイト内の関連ページ】
【関連する外部ページ】
RecognizeAnything のインストール(Windows 上)
Rust のインストール(Windows 上)
- 以下の手順を管理者権限のコマンドプロンプトで実行する
(手順:Windowsキーまたはスタートメニュー →
cmdと入力 → 右クリック → 「管理者として実行」)。 - ダウンロードとインストール
cd /d c:%HOMEPATH%
curl -O https://static.rust-lang.org/rustup/dist/x86_64-pc-windows-msvc/rustup-init.exe
.\rustup-init.exe
RecognizeAnything のインストール(Windows 上)
- 以下の手順を管理者権限のコマンドプロンプトで実行する
(手順:Windowsキーまたはスタートメニュー →
cmdと入力 → 右クリック → 「管理者として実行」)。 - ダウンロードとインストール,学習済みモデル ram_swin_large_14m.pth のダウンロード
cd /d c:%HOMEPATH%
rmdir /s /q recognize-anything
git clone --recursive https://github.com/xinyu1205/recognize-anything
cd recognize-anything
python -m pip install -r requirements.txt
mkdir pretrained
cd pretrained
curl -L -O  https://huggingface.co/spaces/xinyu1205/Recognize_Anything-Tag2Text/resolve/main/ram_swin_large_14m.pth
RecognizeAnything の動作確認(Windows 上)
動作確認を行う.公式ページの手順に従う.
Unseen Caterory の推論
- ファイル openset_utils.py を確認し,必要であれば,ファイルの中身を調整する
- 次のコマンドを実行
cd /d c:%HOMEPATH%\recognize-anything
echo RAM Inference on Unseen Categories (Open-Set)
python inference_ram_openset.py  --image images/openset_example.jpg --pretrained pretrained/ram_swin_large_14m.pth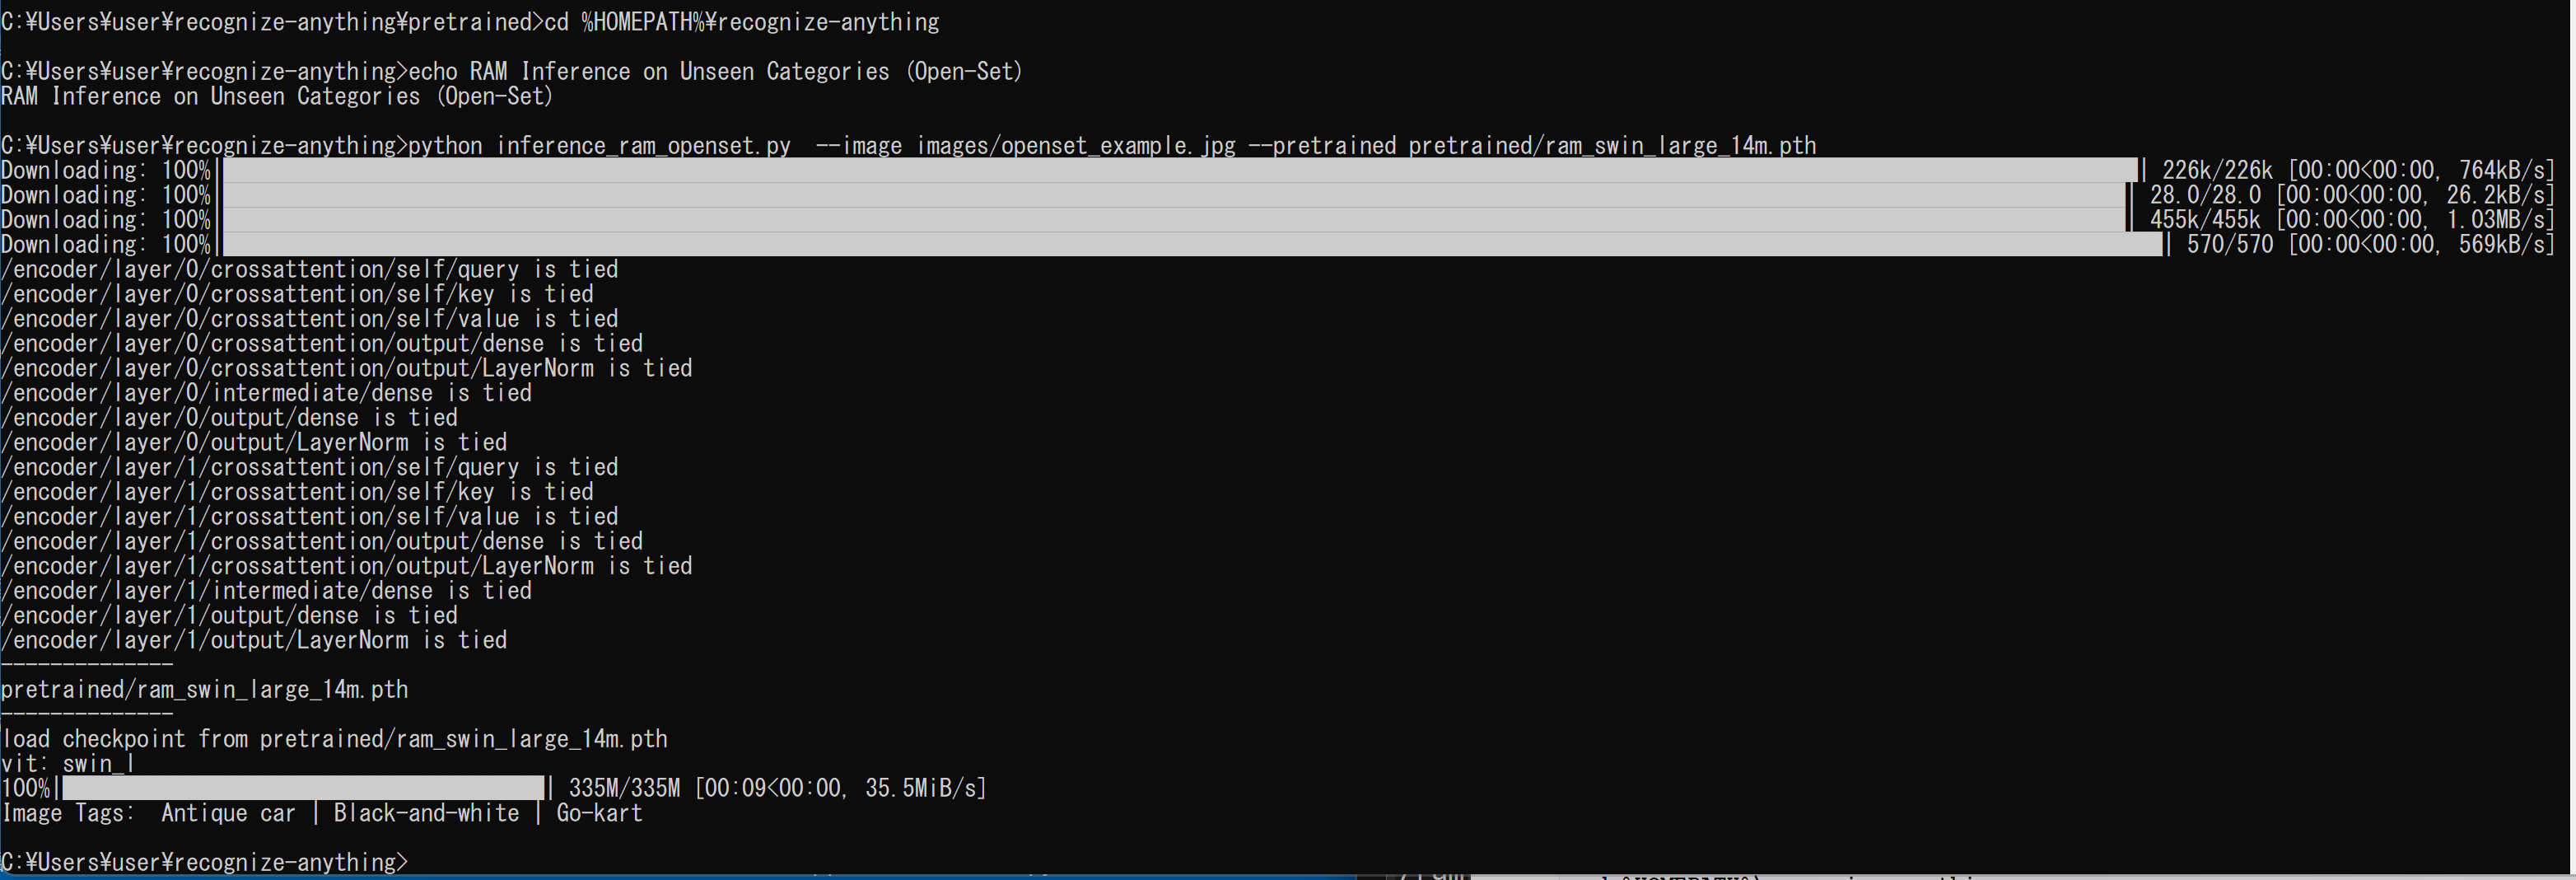
推論
- ファイル openset_utils.py を確認し,調整する
- 次のコマンドを実行
cd /d c:%HOMEPATH%\recognize-anything
echo RAM Inference
python inference_ram.py  --image images/1641173_2291260800.jpg --pretrained pretrained/ram_swin_large_14m.pth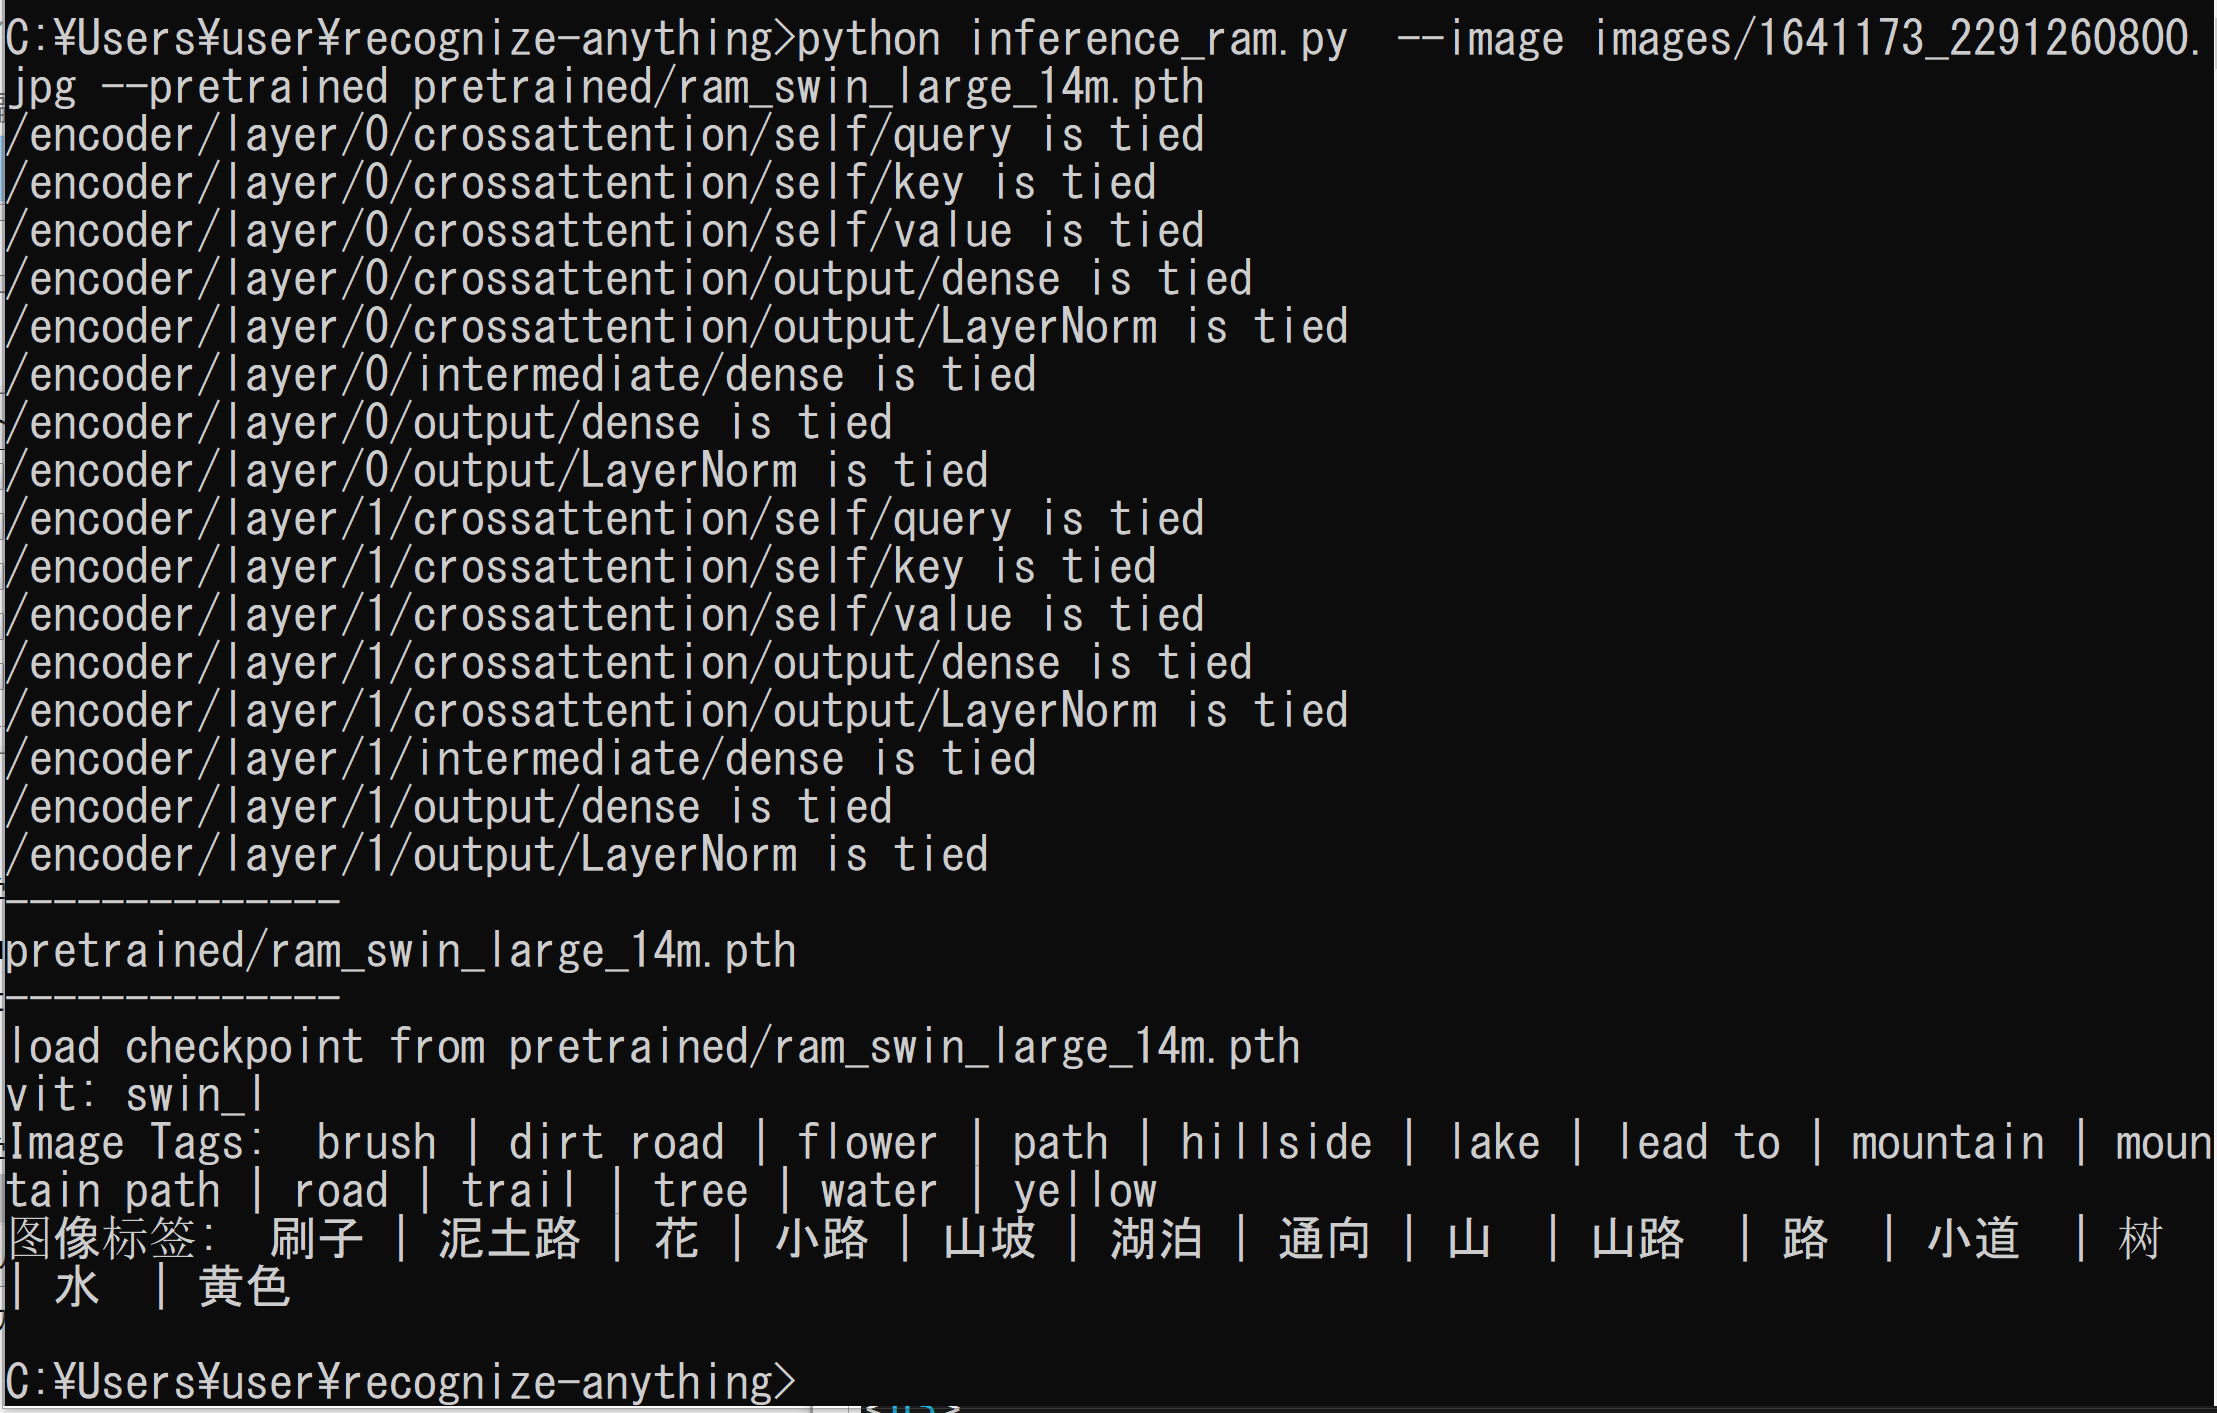
RecognizeAnything を使う Python プログラムの実行(Windows 上)
Unseen Caterory の推論
画像ファイル(複数可)での実行
実行時にファイルを選択する.ファイルは複数選択可能である.
- ファイル openset_utils.py を確認し,調整する
- Windows で,コマンドプロンプトを実行
- エディタを起動
cd /d c:%HOMEPATH%\recognize-anything notepad a.py - エディタで,次のプログラムを保存
このプログラムは, 公式ページの GitHub のページ https://github.com/xinyu1205/recognize-anything/blob/main/inference_ram_openset.pyで公開されていたものを変更して使用している.
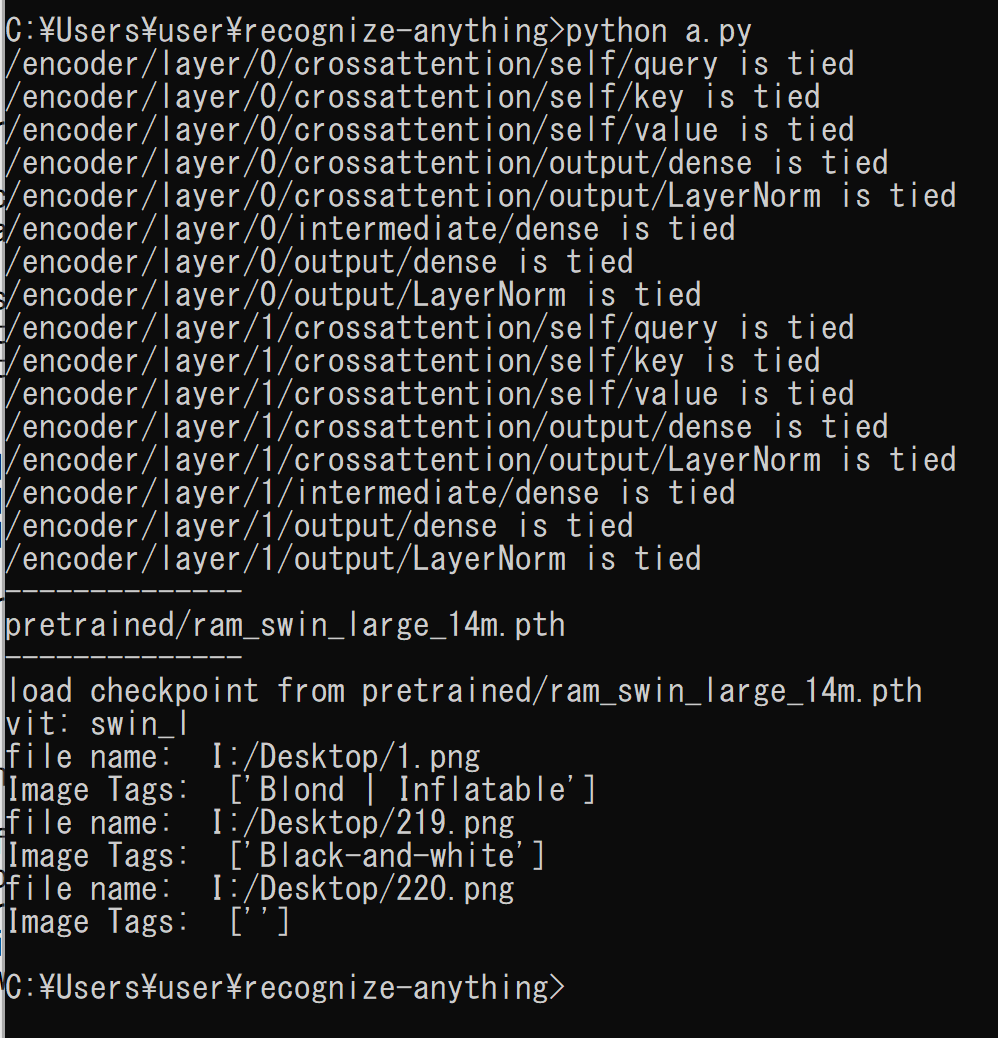
'''
 * The Recognize Anything Model (RAM) inference on unseen classes
 * Written by Xinyu Huang
'''
import numpy as np
import random

import torch
import torchvision.transforms as transforms

from PIL import Image
from ram.models import ram
from ram import inference_ram_openset as inference

from ram.utils import build_openset_label_embedding
from torch import nn

size = 384
pretrained = 'pretrained/ram_swin_large_14m.pth'

device = torch.device('cuda' if torch.cuda.is_available() else 'cpu')
normalize = transforms.Normalize(mean=[0.485, 0.456, 0.406],
                                 std=[0.229, 0.224, 0.225])
transform = transforms.Compose([
    transforms.Resize((size, size)),
    transforms.ToTensor(), normalize
])

model = ram(pretrained=pretrained, image_size=size, vit='swin_l')
openset_label_embedding, openset_categories = build_openset_label_embedding()
model.tag_list = np.array(openset_categories)
model.label_embed = nn.Parameter(openset_label_embedding.float())

model.num_class = len(openset_categories)
# the threshold for unseen categories is often lower
model.class_threshold = torch.ones(model.num_class) * 0.5

model.eval()
model = model.to(device)

import tkinter as tk
from tkinter import filedialog

root = tk.Tk()
root.withdraw()
fpaths = filedialog.askopenfilenames()

for fpath in root.tk.splitlist(fpaths):
    print("file name: ", fpath)
    raw_image = Image.open(fpath).convert("RGB").resize((size, size))
    image = transform(raw_image).unsqueeze(0).to(device)
    with torch.no_grad():
        tags = inference(image, model)
    print("Image Tags: ", tags)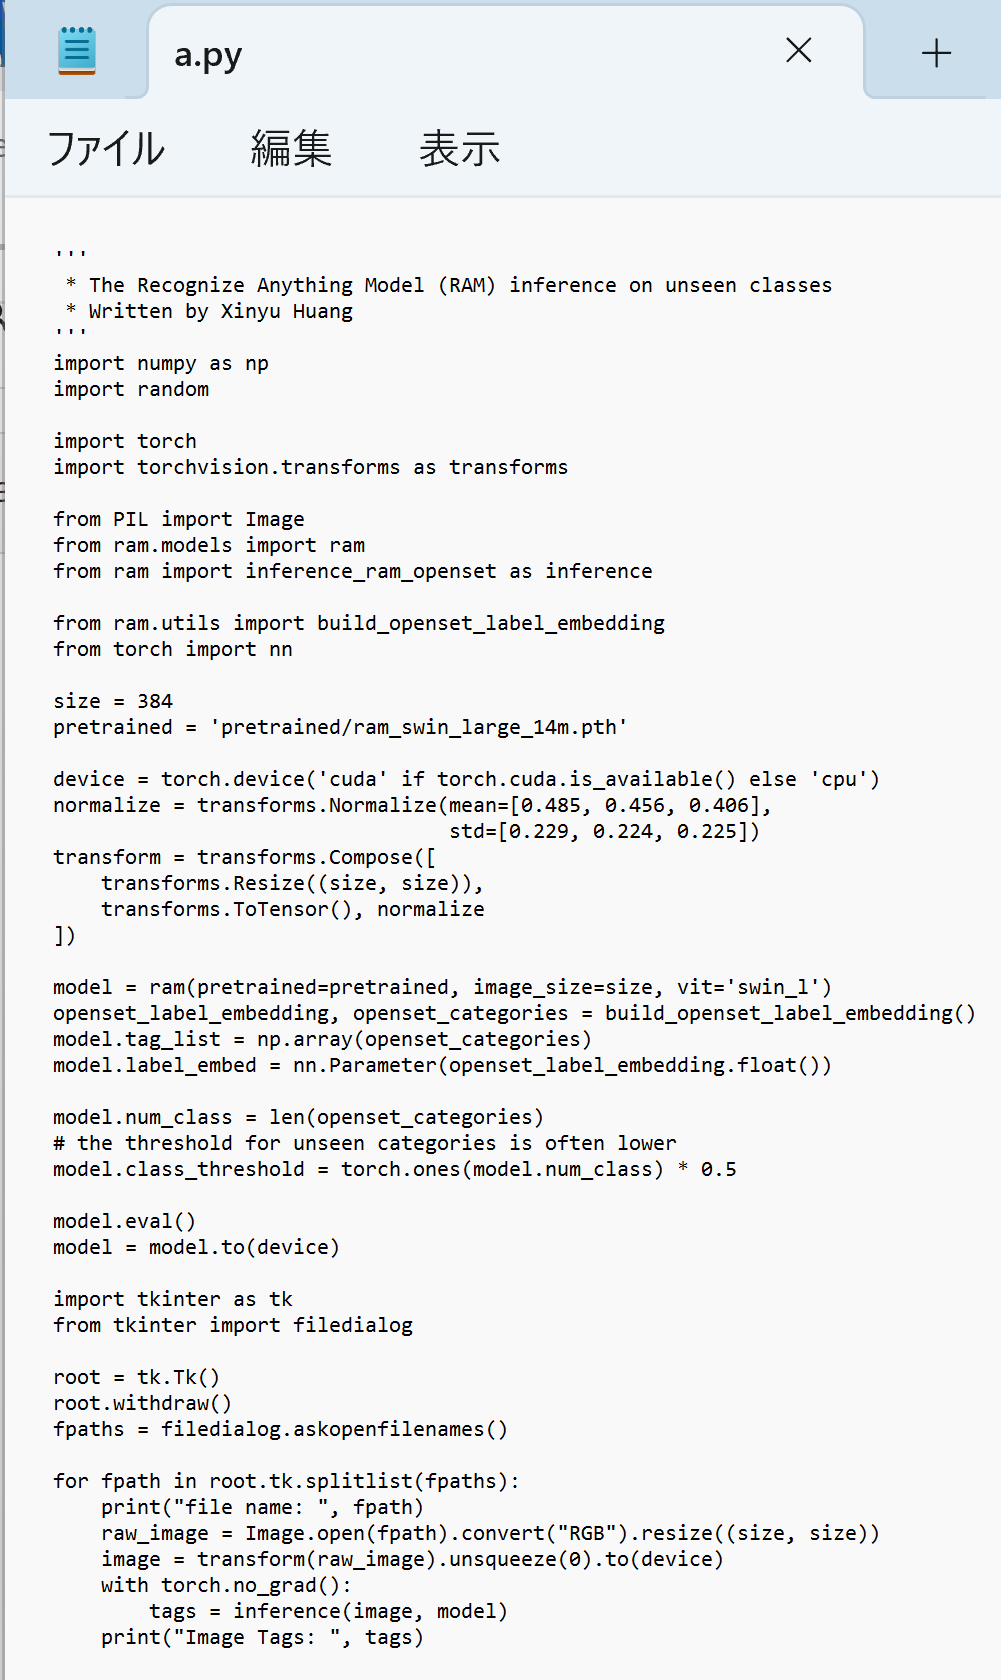
- Python プログラムの実行
プログラムを a.pyのようなファイル名で保存したので, 「python a.py」のようなコマンドで行う.
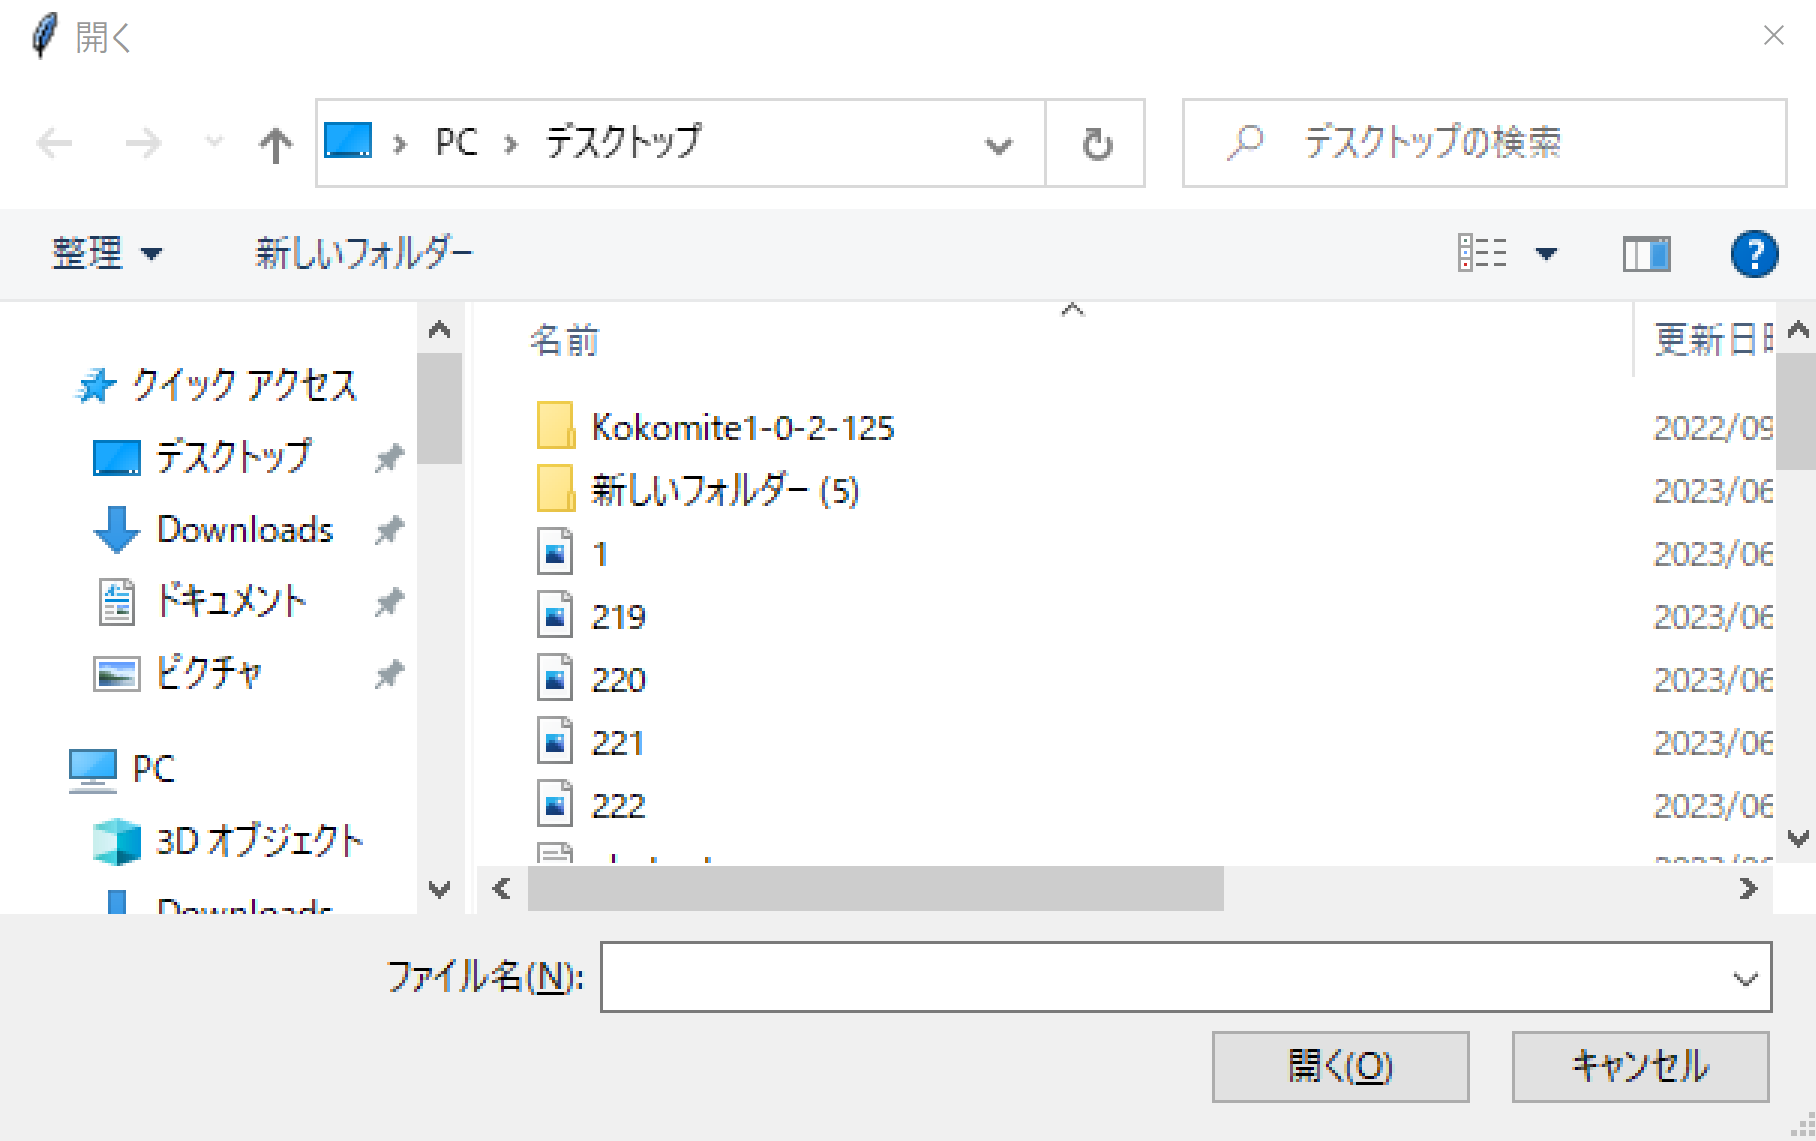
python a.pyファイル選択画面が出るので,画像ファイルを選択する.ファイルは複数選択可能である.
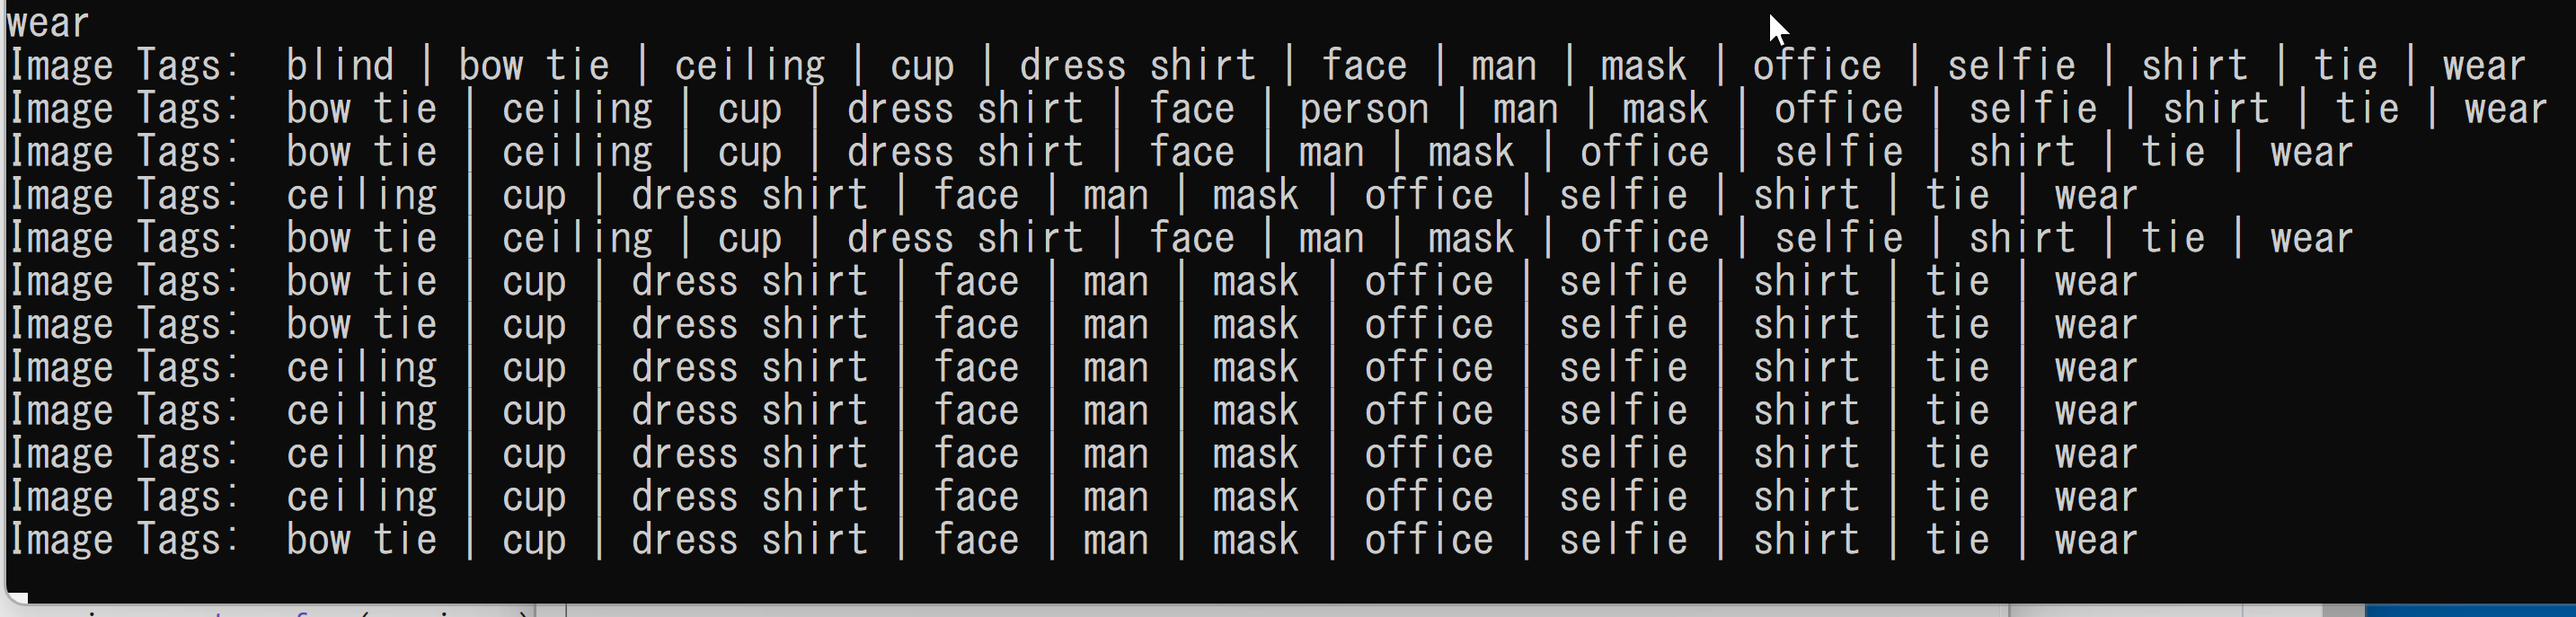
- 結果の確認
パソコンのカメラで使用
- ファイル openset_utils.py を確認し,調整する
- Windows で,コマンドプロンプトを実行
- エディタを起動
cd /d c:%HOMEPATH%\recognize-anything notepad b.py - エディタで,次のプログラムを保存
このプログラムは, 公式ページの GitHub のページ https://github.com/xinyu1205/recognize-anything/blob/main/inference_ram_openset.pyで公開されていたものを変更して使用している.
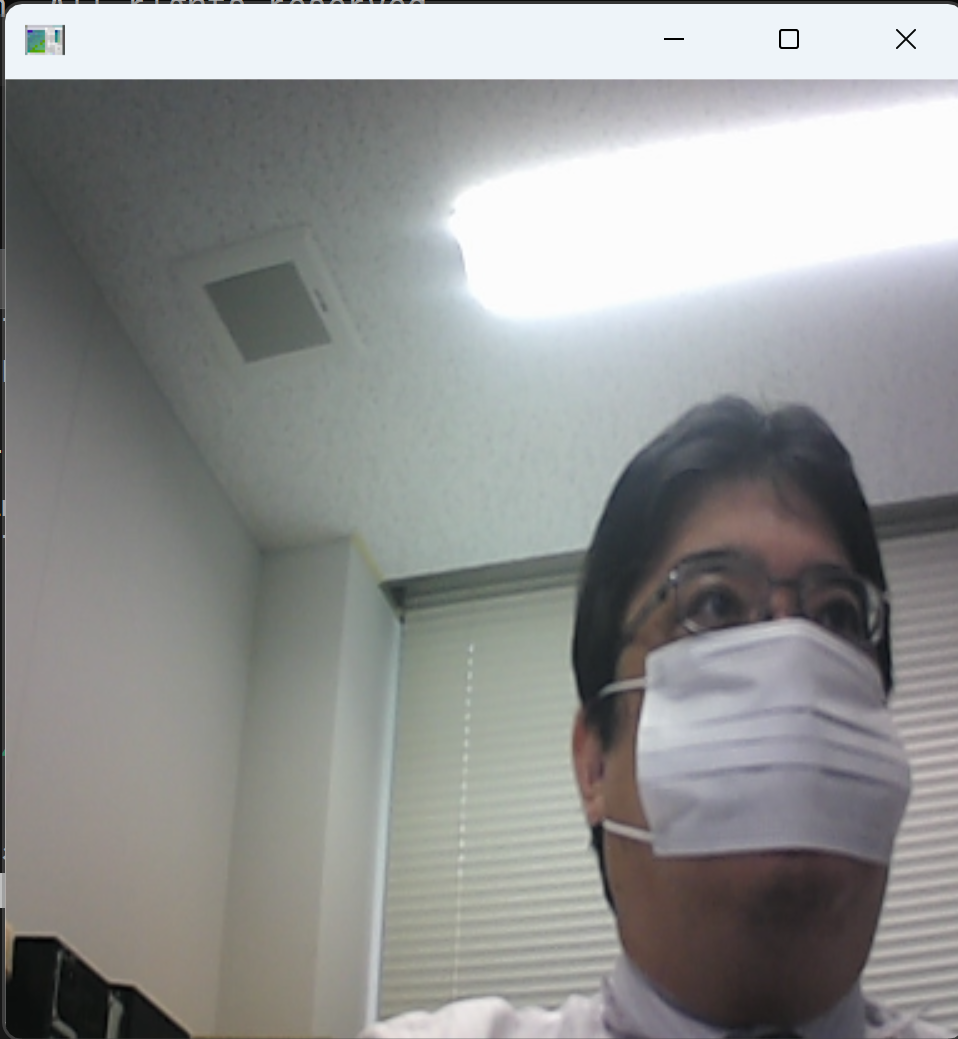
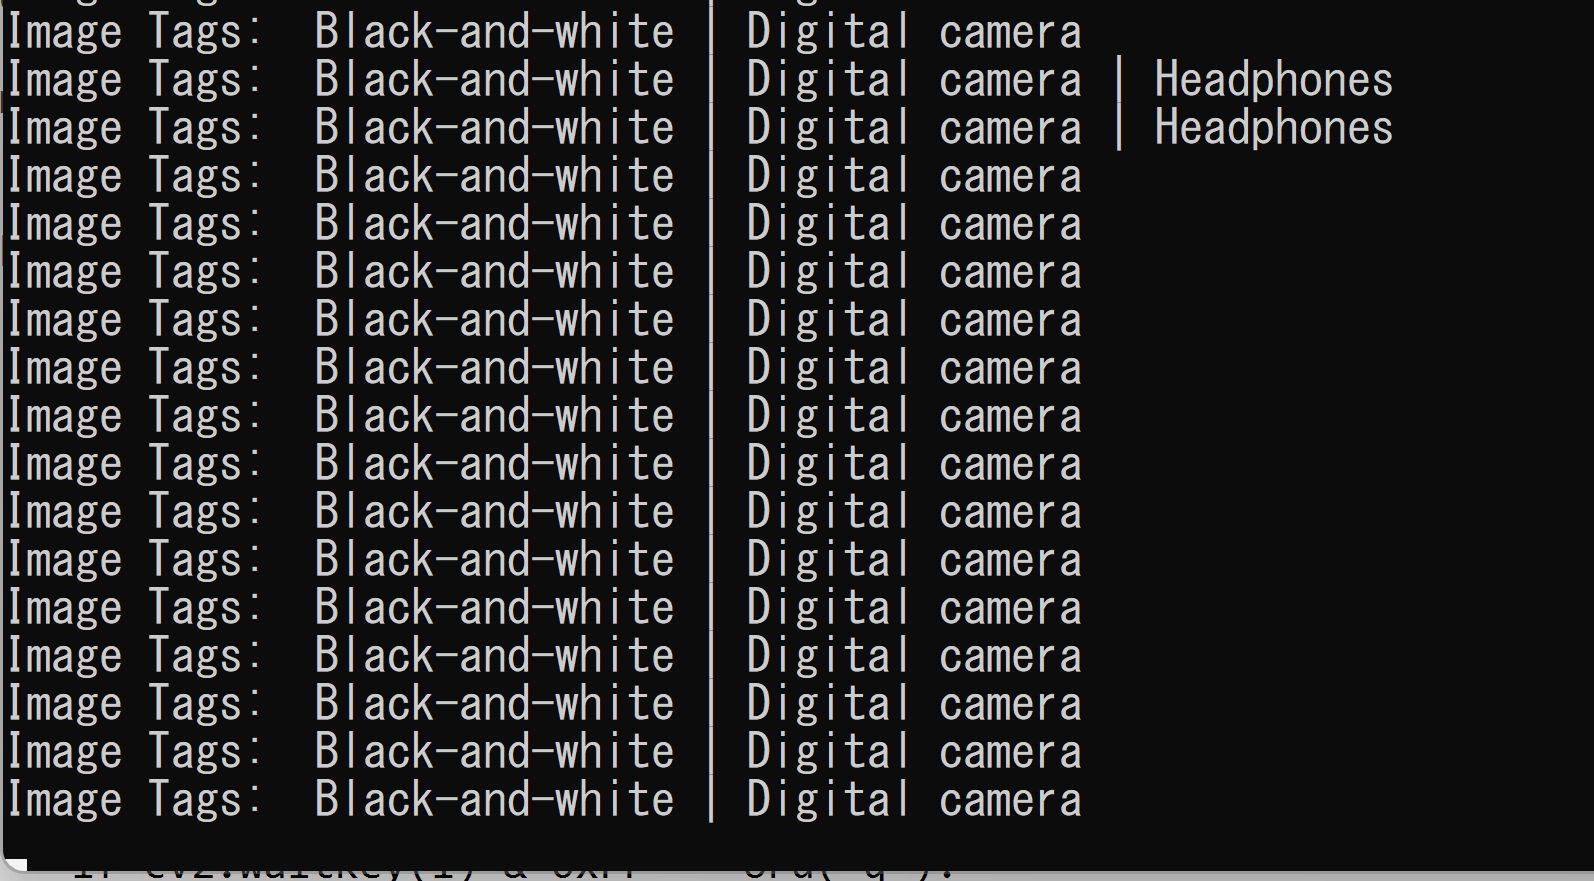
''' * The Recognize Anything Model (RAM) inference on unseen classes * Written by Xinyu Huang ''' import numpy as np import random import torch import torchvision.transforms as transforms from PIL import Image from ram.models import ram from ram import inference_ram_openset as inference from ram.utils import build_openset_label_embedding from torch import nn size = 384 pretrained = 'pretrained/ram_swin_large_14m.pth' device = torch.device('cuda' if torch.cuda.is_available() else 'cpu') normalize = transforms.Normalize(mean=[0.485, 0.456, 0.406], std=[0.229, 0.224, 0.225]) transform = transforms.Compose([ transforms.Resize((size, size)), transforms.ToTensor(), normalize ]) model = ram(pretrained=pretrained, image_size=size, vit='swin_l') openset_label_embedding, openset_categories = build_openset_label_embedding() model.tag_list = np.array(openset_categories) model.label_embed = nn.Parameter(openset_label_embedding.float()) model.num_class = len(openset_categories) # the threshold for unseen categories is often lower model.class_threshold = torch.ones(model.num_class) * 0.5 model.eval() model = model.to(device) import cv2 v = cv2.VideoCapture(0) while(v.isOpened()): r, f = v.read() if ( r == False ): break bgr_image = cv2.resize(f, (size, size)) rgb_image = cv2.cvtColor(bgr_image, cv2.COLOR_BGR2RGB) image = transform(Image.fromarray(rgb_image)).unsqueeze(0).to(device) tags = inference(image, model) cv2.imshow("", bgr_image) print("Image Tags: ", tags) # Press Q to exit if cv2.waitKey(1) & 0xFF == ord('q'): break v.release() cv2.destroyAllWindows() - Python プログラムの実行
python b.py - 結果の確認
推論
画像ファイル(複数可)での実行
実行時にファイルを選択する.ファイルは複数選択可能である.
- Windows で,コマンドプロンプトを実行
- エディタを起動
cd /d c:%HOMEPATH%\recognize-anything notepad c.py - エディタで,次のプログラムを保存
このプログラムは, 公式ページの GitHub のページ https://github.com/xinyu1205/recognize-anything/blob/main/inference_ram.pyで公開されていたものを変更して使用している.
'''
 * The Recognize Anything Model (RAM)
 * Written by Xinyu Huang
'''
import numpy as np
import random

import torch
import torchvision.transforms as transforms

from PIL import Image
from ram.models import ram
from ram import inference_ram as inference

size = 384
pretrained = 'pretrained/ram_swin_large_14m.pth'

device = torch.device('cuda' if torch.cuda.is_available() else 'cpu')
normalize = transforms.Normalize(mean=[0.485, 0.456, 0.406],
                                 std=[0.229, 0.224, 0.225])
transform = transforms.Compose([
    transforms.Resize((size, size)),
    transforms.ToTensor(), normalize
])

model = ram(pretrained=pretrained, image_size=size, vit='swin_l')
model.eval()
model = model.to(device)

import tkinter as tk
from tkinter import filedialog

root = tk.Tk()
root.withdraw()
fpaths = filedialog.askopenfilenames()

for fpath in root.tk.splitlist(fpaths):
    print("file name: ", fpath)
    raw_image = Image.open(fpath).convert("RGB").resize((size, size))
    image = transform(raw_image).unsqueeze(0).to(device)
    with torch.no_grad():
        tags = inference(image, model)
    print("Image Tags: ", tags[0])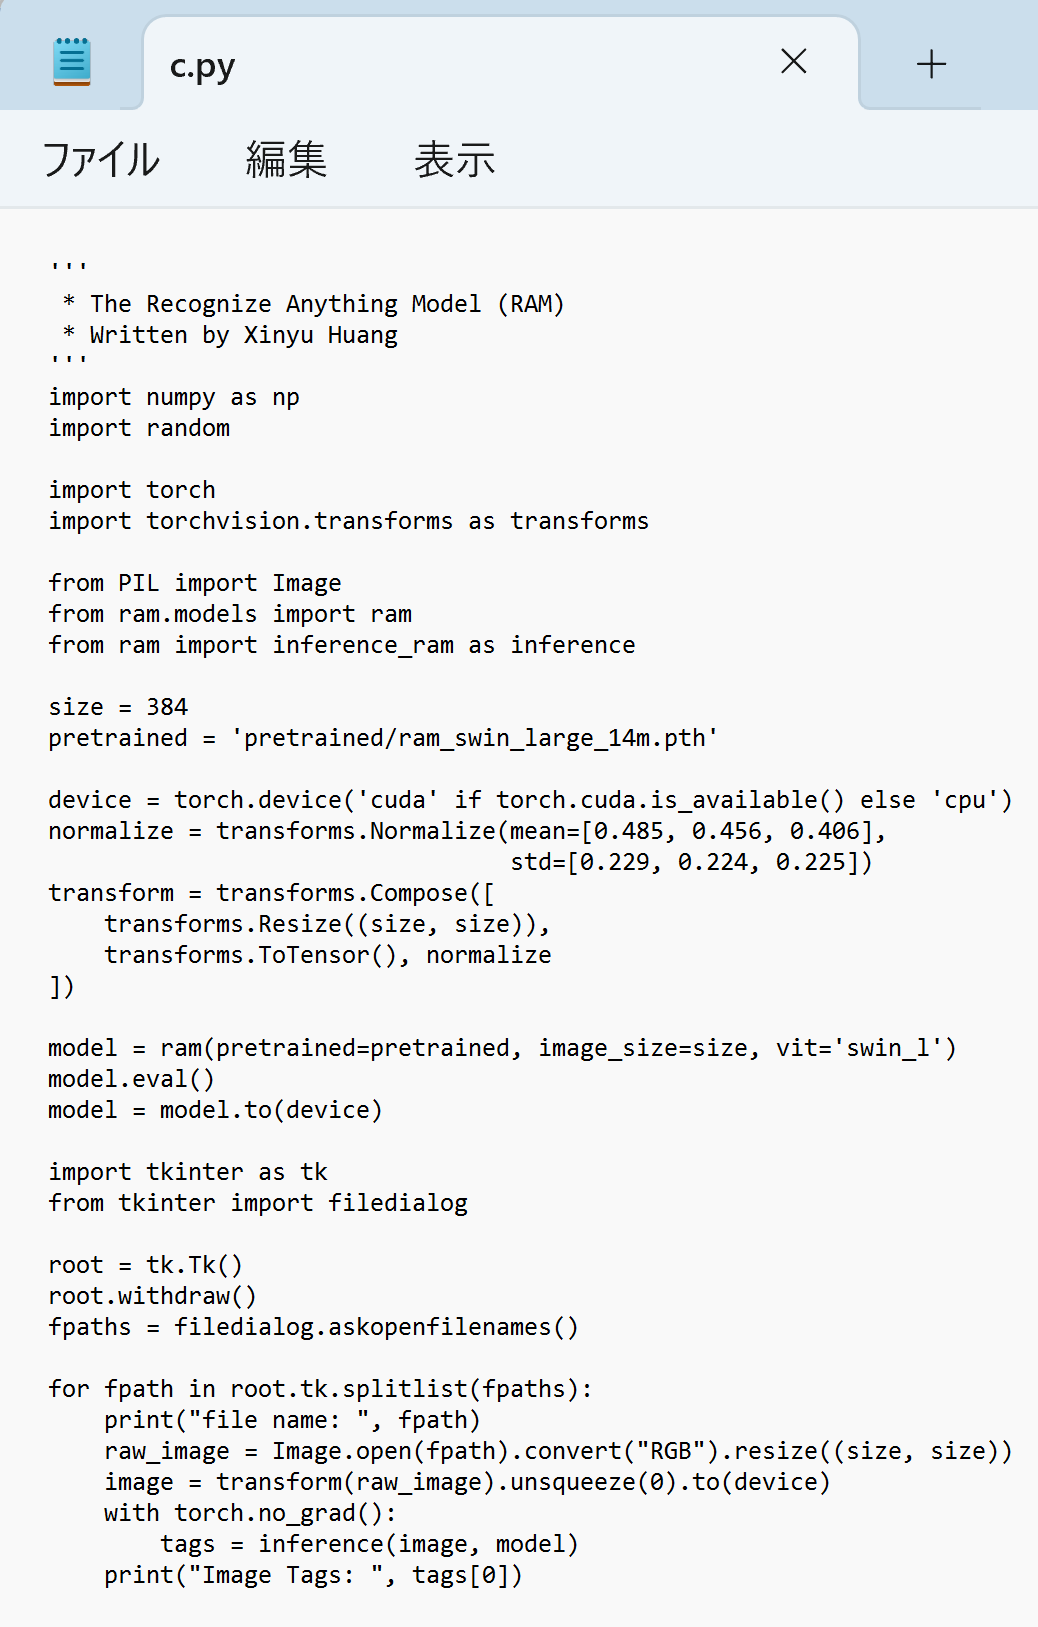
- Python プログラムの実行
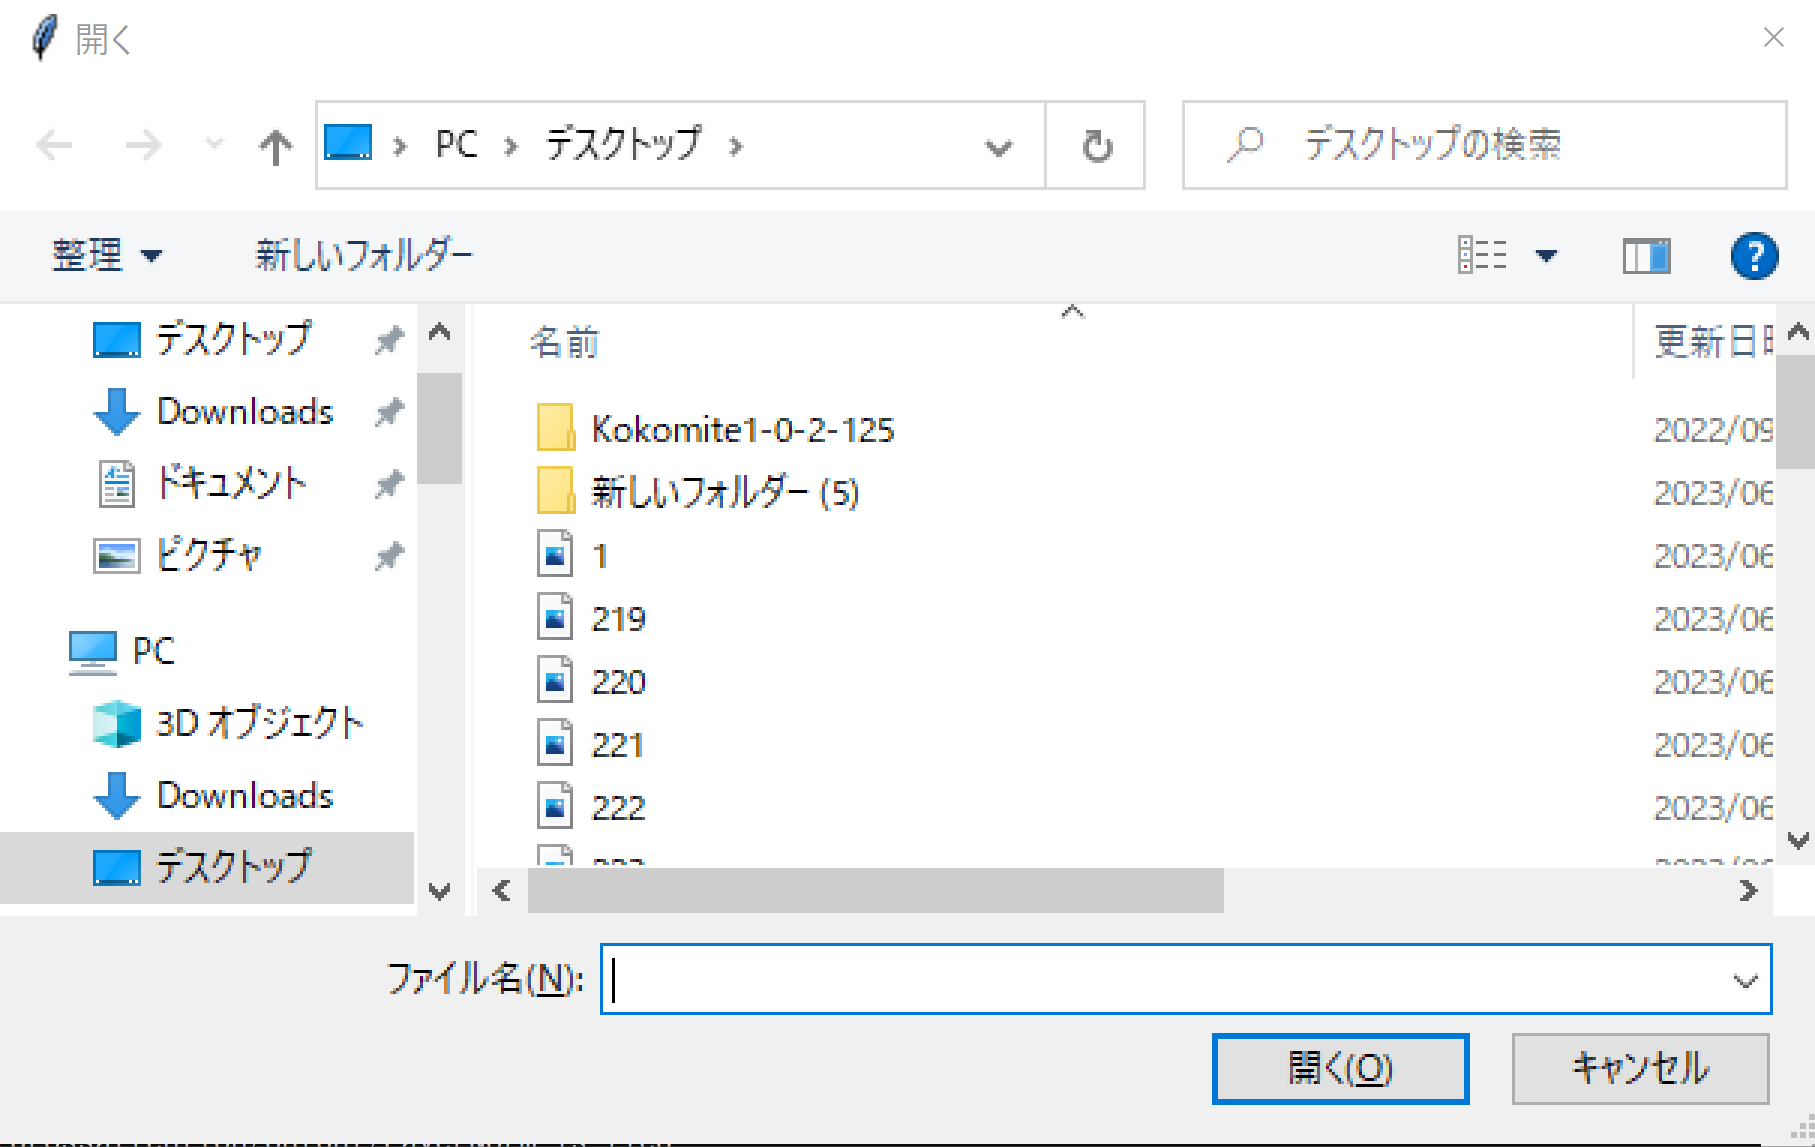
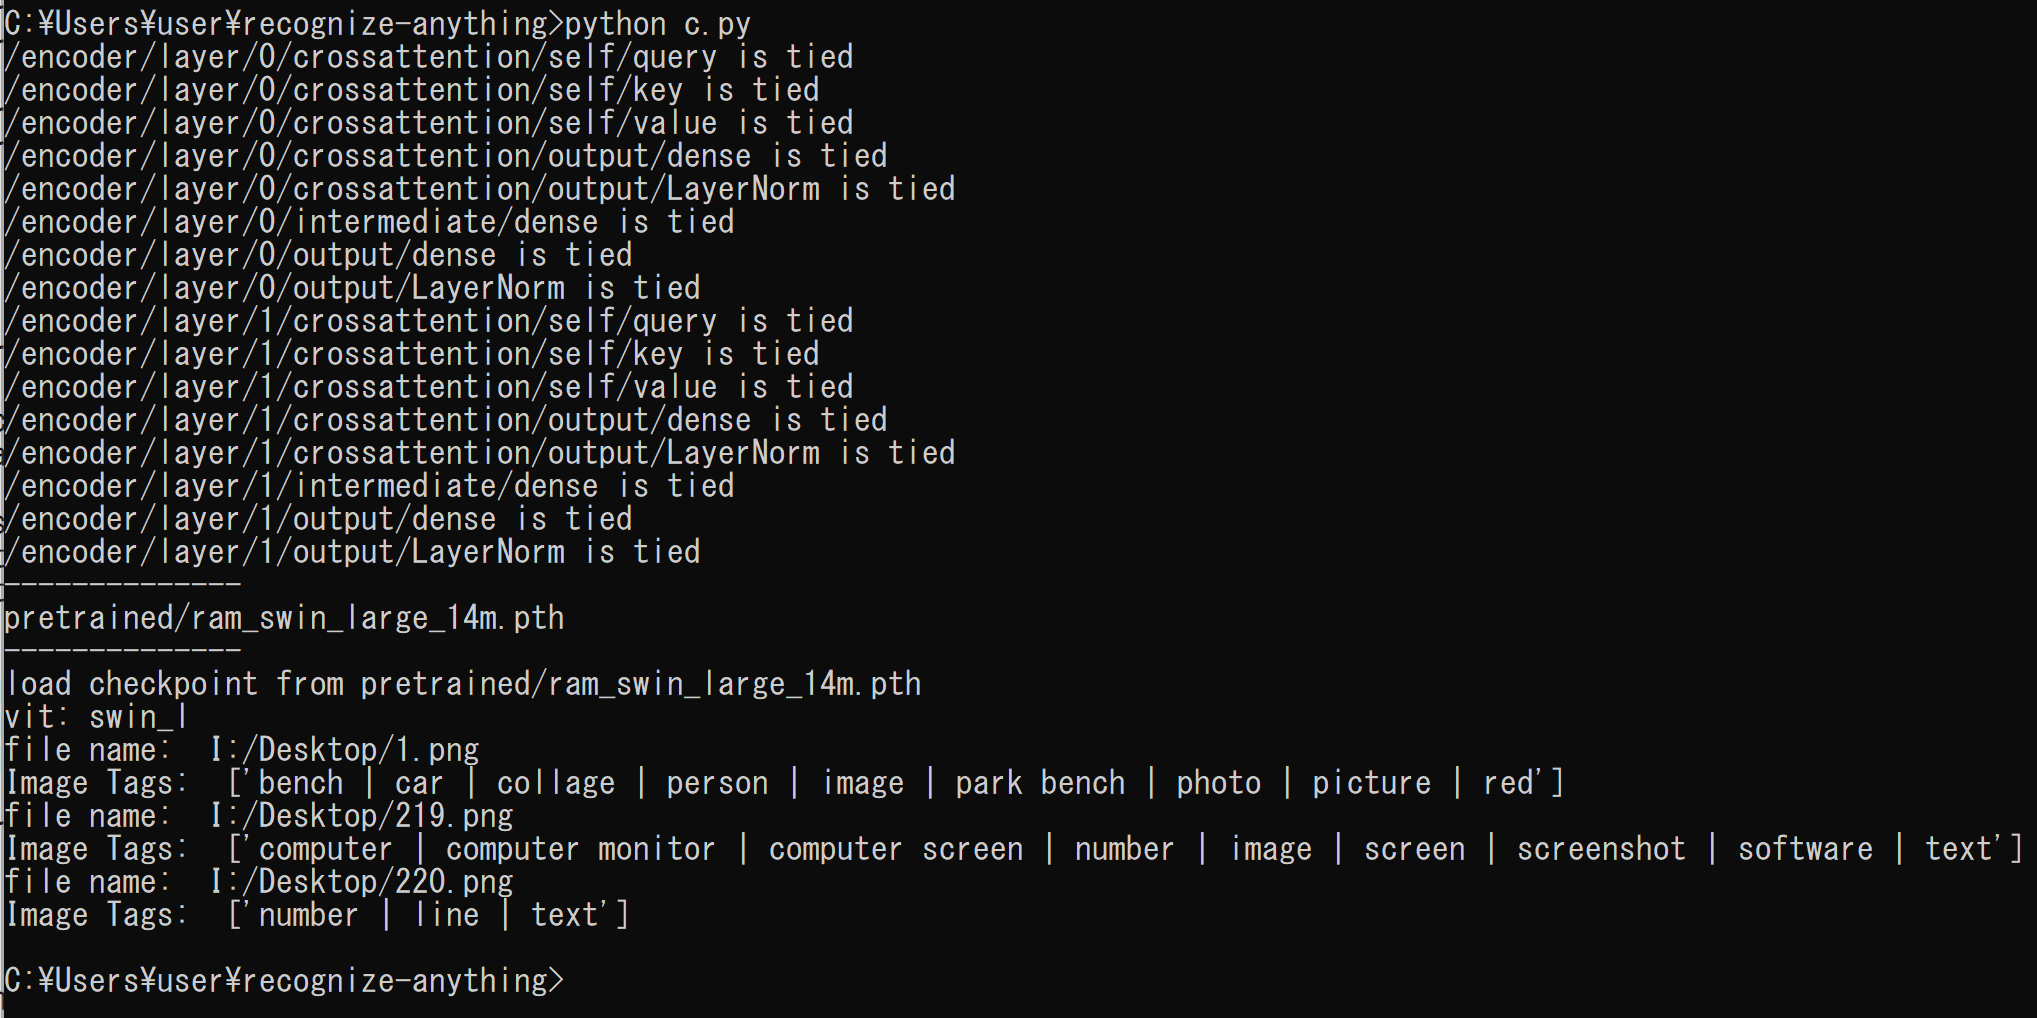
プログラムを c.pyのようなファイル名で保存したので, 「python c.py」のようなコマンドで行う.
python c.pyファイル選択画面が出るので,画像ファイルを選択する.ファイルは複数選択可能である.
- 結果の確認
パソコンのカメラで使用
- ファイル openset_utils.py を確認し,調整する
- Windows で,コマンドプロンプトを実行
- エディタを起動
cd /d c:%HOMEPATH%\recognize-anything notepad d.py - エディタで,次のプログラムを保存
このプログラムは, 公式ページの GitHub のページ https://github.com/xinyu1205/recognize-anything/blob/main/inference_ram_openset.pyで公開されていたものを変更して使用している.
''' * The Recognize Anything Model (RAM) * Written by Xinyu Huang ''' import numpy as np import random import torch import torchvision.transforms as transforms from PIL import Image from ram.models import ram from ram import inference_ram as inference size = 384 pretrained = 'pretrained/ram_swin_large_14m.pth' device = torch.device('cuda' if torch.cuda.is_available() else 'cpu') normalize = transforms.Normalize(mean=[0.485, 0.456, 0.406], std=[0.229, 0.224, 0.225]) transform = transforms.Compose([ transforms.Resize((size, size)), transforms.ToTensor(), normalize ]) model = ram(pretrained=pretrained, image_size=size, vit='swin_l') model.eval() model = model.to(device) import tkinter as tk from tkinter import filedialog import cv2 v = cv2.VideoCapture(0) while(v.isOpened()): r, f = v.read() if ( r == False ): break bgr_image = cv2.resize(f, (size, size)) rgb_image = cv2.cvtColor(bgr_image, cv2.COLOR_BGR2RGB) image = transform(Image.fromarray(rgb_image)).unsqueeze(0).to(device) tags = inference(image, model) cv2.imshow("", bgr_image) print("Image Tags: ", tags[0]) # Press Q to exit if cv2.waitKey(1) & 0xFF == ord('q'): break v.release() cv2.destroyAllWindows() - Python プログラムの実行
python d.py - 結果の確認
- 以下の手順を管理者権限のコマンドプロンプトで実行する
(手順:Windowsキーまたはスタートメニュー →