VidGear のインストールと動作確認(ビデオの安定化,その他ビデオ処理のライブラリ)(Python を使用)(Windows 上)
ビデオの読み込み,書き出し,処理,送受信の機能を持つ.対象は, カメラ,スクリーンからも四方鳥,Webブラウザへの送信,ファイル,その他オンラインのストリーミングである. Python から扱うことができる.
【目次】
【関連する外部ページ】
- GitHub のページ: https://github.com/abhiTronix/vidgear
前準備
Build Tools for Visual Studio 2022 のインストール(Windows 上)
Build Tools for Visual Studio は,Visual Studio の IDE を含まない C/C++ コンパイラ,ライブラリ,ビルドツール等のコマンドライン向け開発ツールセットである。
以下のコマンドを管理者権限のコマンドプロンプトで実行する
(手順:Windowsキーまたはスタートメニュー → cmd と入力 → 右クリック → 「管理者として実行」)。
REM VC++ ランタイム
winget install --scope machine --accept-source-agreements --accept-package-agreements --silent --id Microsoft.VCRedist.2015+.x64

REM Build Tools + Desktop development with C++(VCTools)+ 追加コンポーネント(一括)
winget install --id Microsoft.VisualStudio.2022.BuildTools ^
  --override "--passive --wait --add Microsoft.VisualStudio.Workload.VCTools --includeRecommended --add Microsoft.VisualStudio.Component.VC.Llvm.Clang --add Microsoft.VisualStudio.ComponentGroup.ClangCL --add Microsoft.VisualStudio.Component.VC.CMake.Project --add Microsoft.VisualStudio.Component.Windows11SDK.26100"
--add で追加されるコンポーネント
上記のコマンドでは,まず Build Tools 本体と Visual C++ 再頒布可能パッケージをインストールし,次に setup.exe を用いて以下のコンポーネントを追加している。
VCTools:C++ デスクトップ開発ワークロード(--includeRecommendedにより、MSVC コンパイラ、C++ AddressSanitizer、vcpkg、CMake ツール、Windows 11 SDK 等の推奨コンポーネントが含まれる)VC.Llvm.Clang:Windows 向け C++ Clang コンパイラClangCL:clang-cl ツールセットを含むコンポーネントグループ(MSBuild から Clang を使用するために必要)VC.CMake.Project:Windows 向け C++ CMake ツールWindows11SDK.26100:Windows 11 SDK(ビルド 10.0.26100)
インストール完了の確認
winget list Microsoft.VisualStudio.2022.BuildTools上記以外の追加のコンポーネントが必要になった場合は Visual Studio Installer で個別にインストールできる。
Visual Studio の機能を必要とする場合は、追加インストールできる。
Python 3.12,Git のインストール(Windows 上)
Pythonは,プログラミング言語の1つ. Gitは,分散型のバージョン管理システム.
【手順】
- Windows で,管理者権限でコマンドプロンプトを起動(手順:Windowsキーまたはスタートメニュー >
cmdと入力 > 右クリック > 「管理者として実行」)。次のコマンドを実行
次のコマンドは,Python ランチャーとPython 3.12とGitをインストールし,Gitにパスを通すものである.
次のコマンドでインストールされるGitは 「git for Windows」と呼ばれるものであり, Git,MinGW などから構成されている.
reg add "HKLM\SYSTEM\CurrentControlSet\Control\FileSystem" /v LongPathsEnabled /t REG_DWORD /d 1 /f
REM Python, Git をシステム領域にインストール
winget install --scope machine --id Python.Python.3.12 --id Python.Launcher --id Git.Git -e --silent
REM Python のパス
set "INSTALL_PATH=C:\Program Files\Python312"
echo "%PATH%" | find /i "%INSTALL_PATH%" >nul
if errorlevel 1 setx PATH "%PATH%;%INSTALL_PATH%" /M >nul
echo "%PATH%" | find /i "%INSTALL_PATH%\Scripts" >nul
if errorlevel 1 setx PATH "%PATH%;%INSTALL_PATH%\Scripts" /M >nul
REM Git のパス
set "NEW_PATH=C:\Program Files\Git\cmd"
if exist "%NEW_PATH%" echo "%PATH%" | find /i "%NEW_PATH%" >nul
if exist "%NEW_PATH%" if errorlevel 1 setx PATH "%PATH%;%NEW_PATH%" /M >nul
【関連する外部ページ】
- Python の公式ページ: https://www.python.org/
- Git の公式ページ: https://git-scm.com/
【サイト内の関連ページ】
【関連項目】 Python, Git バージョン管理システム, Git の利用
Build Tools for Visual Studio 2022,NVIDIA ドライバ,NVIDIA CUDA ツールキット 11.8,NVIDIA cuDNN 8.9.7 のインストール(Windows 上)
【サイト内の関連ページ】 NVIDIA グラフィックスボードを搭載しているパソコンの場合には, NVIDIA ドライバ, NVIDIA CUDA ツールキット, NVIDIA cuDNN のインストールを行う.
- Windows での Build Tools for Visual Studio 2022 のインストール: 別ページ »で説明
- Windows での NVIDIA ドライバ,NVIDIA CUDA ツールキット 11.8,NVIDIA cuDNN v8.9.7 のインストール手順: 別ページ »で説明
【関連する外部ページ】
- Build Tools for Visual Studio 2022 (ビルドツール for Visual Studio 2022)の公式ダウンロードページ: https://visualstudio.microsoft.com/ja/visual-cpp-build-tools/
- NVIDIA ドライバのダウンロードの公式ページ: https://www.nvidia.co.jp/Download/index.aspx?lang=jp
- NVIDIA CUDA ツールキットのアーカイブの公式ページ: https://developer.nvidia.com/cuda-toolkit-archive
- NVIDIA cuDNN のダウンロードの公式ページ: https://developer.nvidia.com/cudnn
PyTorch のインストール(Windows 上)
- Windows で,管理者権限でコマンドプロンプトを起動(手順:Windowsキーまたはスタートメニュー >
cmdと入力 > 右クリック > 「管理者として実行」)。 - PyTorch のページを確認
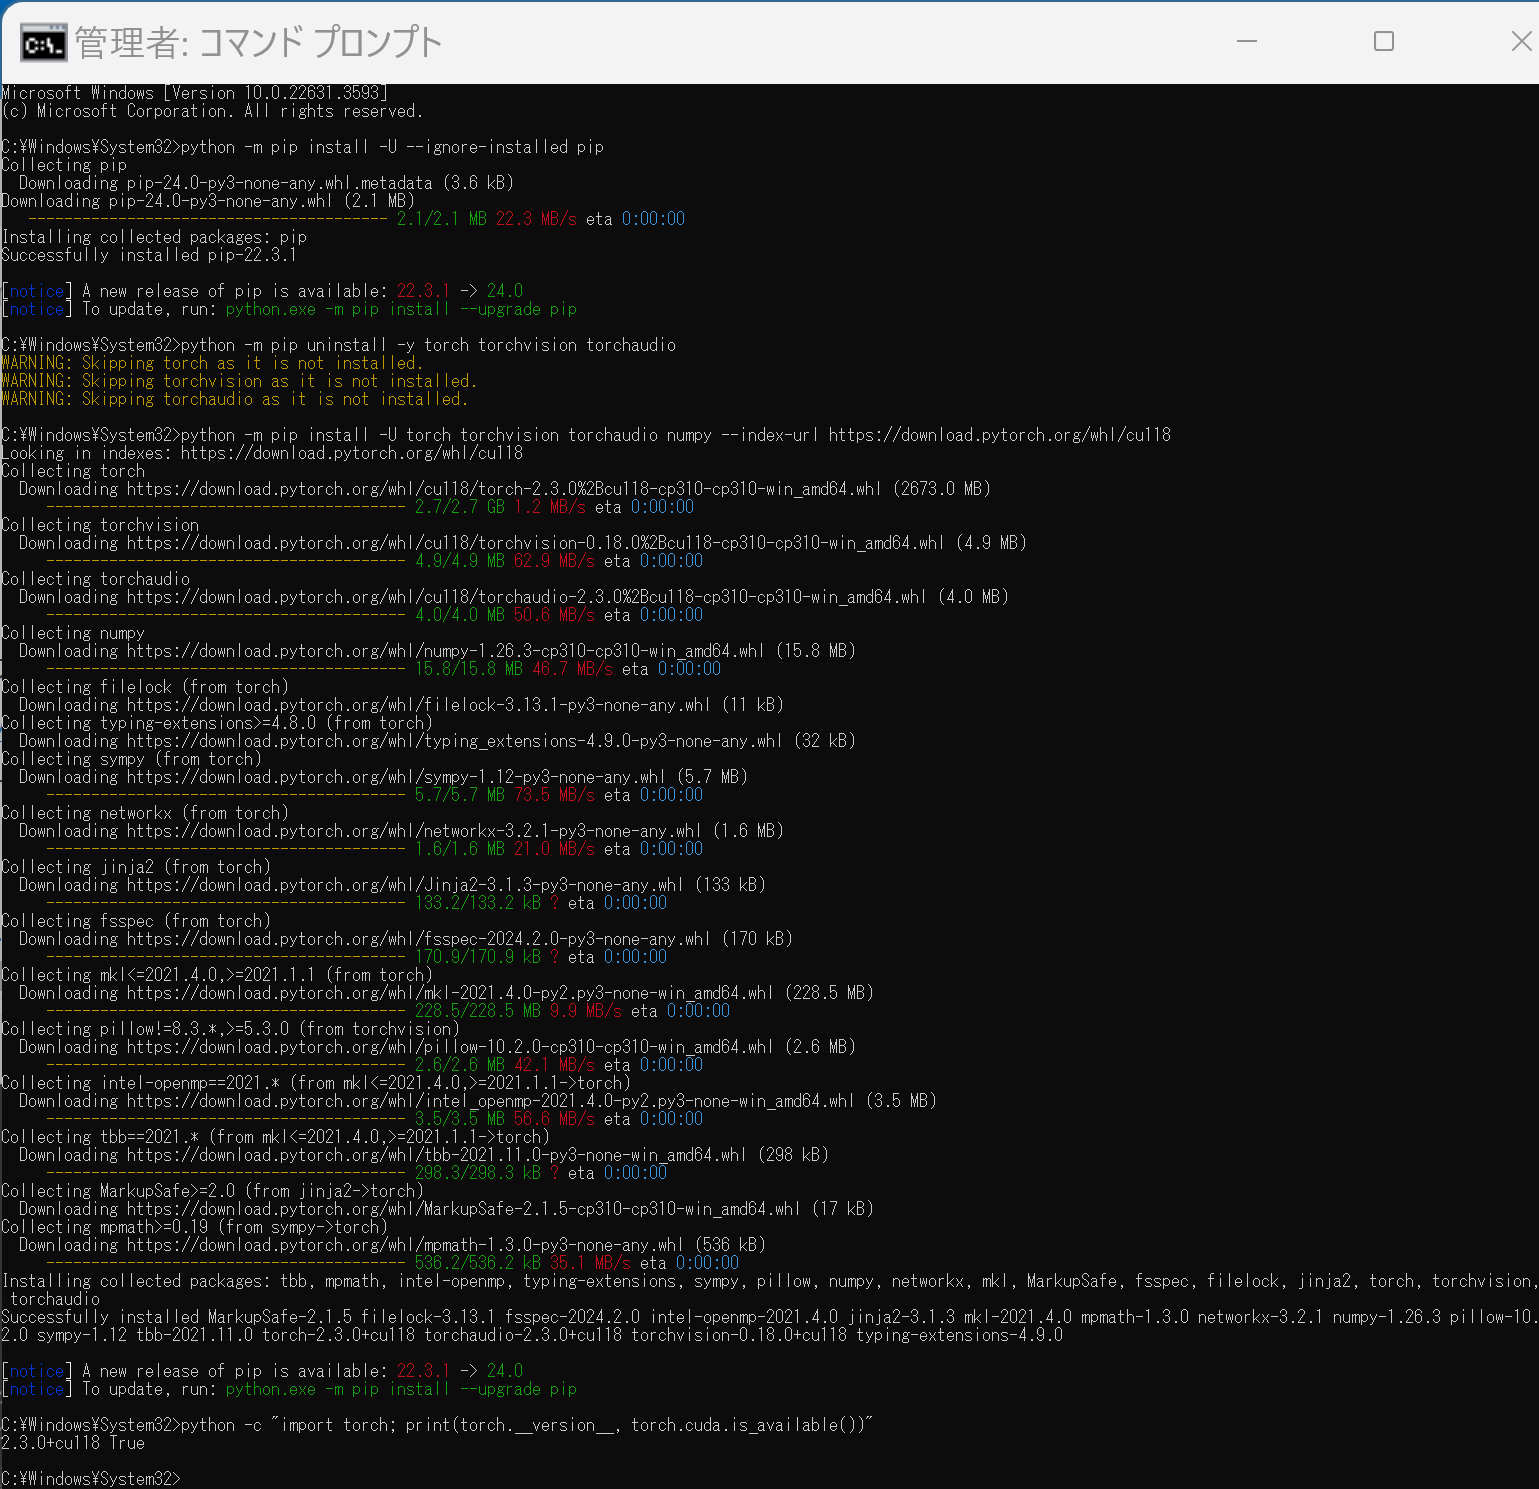
- 次のようなコマンドを実行(実行するコマンドは,PyTorch のページの表示されるコマンドを使う).
次のコマンドを実行することにより, PyTorch 2.3 (NVIDIA CUDA 11.8 用)がインストールされる. 但し,Anaconda3を使いたい場合には別手順になる.
事前に NVIDIA CUDA のバージョンを確認しておくこと(ここでは,NVIDIA CUDA ツールキット 11.8 が前もってインストール済みであるとする).
PyTorch で,GPU が動作している場合には,「torch.cuda.is_available()」により,True が表示される.
python -m pip install -U --ignore-installed pip python -m pip uninstall -y torch torchvision torchaudio torchtext xformers python -m pip install -U torch torchvision torchaudio numpy --index-url https://download.pytorch.org/whl/cu118 python -c "import torch; print(torch.__version__, torch.cuda.is_available())" Anaconda3を使いたい場合には, Anaconda プロンプト (Anaconda Prompt) を管理者として実行し, 次のコマンドを実行する. (PyTorch と NVIDIA CUDA との連携がうまくいかない可能性があるため,Anaconda3を使わないことも検討して欲しい).
conda install -y pytorch torchvision torchaudio pytorch-cuda=11.8 cudnn -c pytorch -c nvidia py -c "import torch; print(torch.__version__, torch.cuda.is_available())"【サイト内の関連ページ】
【関連する外部ページ】
FFmpeg のインストール(Windows 上)
Windows での FFmpeg のインストール(Windows 上): 別ページ »で説明
VidGear のインストール(Windows 上)
公式のページ: https://abhitronix.github.io/vidgear/latest/installation/ によりインストールを行う
- Windows で,管理者権限でコマンドプロンプトを起動(手順:Windowsキーまたはスタートメニュー >
cmdと入力 > 右クリック > 「管理者として実行」)。 - インストール
python -m pip install -U opencv-python
python -m pip pip install -U vidgear[core]
python -m pip pip install -U vidgear[asyncio]
動作確認
公式ページに記載のプログラムのうち1つを実行してみる.
まず,ファイル名 test.mp4 のビデオファイルを準備
- Python プログラムの実行
Python プログラムの実行- Windows では python (Python ランチャーは py)
- Ubuntu では python3
Python 開発環境(Jupyter Qt Console, Jupyter ノートブック (Jupyter Notebook), Jupyter Lab, Nteract, Spyder, PyCharm, PyScripterなど)も便利である.
Python のまとめ: 別ページ »にまとめ
python# import required libraries from vidgear.gears import VideoGear import numpy as np import cv2 # open any valid video stream with stabilization enabled(`stabilize = True`) stream_stab = VideoGear(source="test.mp4", stabilize=True).start() # open same stream without stabilization for comparison stream_org = VideoGear(source="test.mp4").start() # loop over while True: # read stabilized frames frame_stab = stream_stab.read() # check for stabilized frame if Nonetype if frame_stab is None: break # read un-stabilized frame frame_org = stream_org.read() # concatenate both frames output_frame = np.concatenate((frame_org, frame_stab), axis=1) # put text over concatenated frame cv2.putText( output_frame, "Before", (10, output_frame.shape[0] - 10), cv2.FONT_HERSHEY_SIMPLEX, 0.6, (0, 255, 0), 2, ) cv2.putText( output_frame, "After", (output_frame.shape[1] // 2 + 10, output_frame.shape[0] - 10), cv2.FONT_HERSHEY_SIMPLEX, 0.6, (0, 255, 0), 2, ) # Show output window cv2.imshow("Stabilized Frame", output_frame) # check for 'q' key if pressed key = cv2.waitKey(1) & 0xFF if key == ord("q"): break # close output window cv2.destroyAllWindows() # safely close both video streams stream_org.stop() stream_stab.stop() - Windows で,管理者権限でコマンドプロンプトを起動(手順:Windowsキーまたはスタートメニュー >
![[kaneko lab.]](https://www.kkaneko.jp/info/logo_png.png)