Ruby on Rails バージョン 3 を使ってみる
【関係するディレクトリとファイル(主要なもの)】
- config/database.yml: データベース管理システム名,データベース名等の設定
- db: データベースファイルが置かれるディレクトリ
- cc/migrate: マイグレーション・ファイルが置かれるディレクトリ
【この Web ページで行うこと】
- Rails アプリケーションのディレクトリと基本ファイルの生成
データベース管理システムソフトウェアとして SQLite バージョン 3を使うとき
cd <全体のルートディレクトリ> rails new hoge --database sqlite3 - (オプション) Gemfile の調整
gem 'execjs'
gem 'therubyracer'
- コントローラの作成
- rails generate controller の実行
cd hoge rails generate controller welcome index - 上の操作の後,app/views/welcome/index.html.erb を編集
- public/index.html を削除
rm public/index.html - config/routes.rb を次のように編集し、welcome/index.html.erb を使うように設定
元々の config/routes.rb の記述に従って編集する。
* パターン1
root 'welcome#index'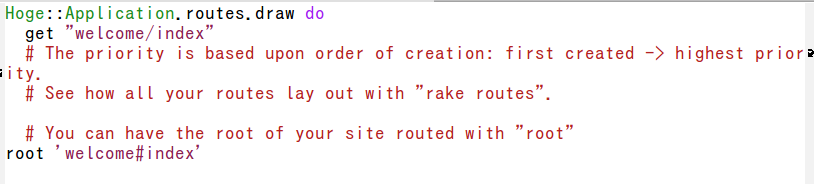
* パターン2
root :to => 'welcome#index'
- rails generate controller の実行
- Rails アプリケーションのひな形 (scaffold アプリケーション) の生成
cd hoge rails generate scaffold order_record year:integer month:integer day:integer customer_name:text product_name:text unit_price:float qty:integer created_at:timestamp updated_at:timestamp - (オプション) マイグレーション・ファイルでのテーブル定義に制約を追加
ファイル cc/migrate/<タイムスタンプ>_create_order_records.rb を編集する
* SQLite 3 でのマイグレーション・ファイルの設定例:
class CreateOrderRecords < ActiveRecord::Migration
  def change
    create_table :order_records do |t|
      t.integer :year,            :null => false
      t.integer :month,            :null => false
      t.integer :day,            :null => false
      t.text :customer_name,    :null => false
      t.text :product_name,    :null => false
      t.float :unit_price,    :null => false
      t.integer :qty,            :null => false, :default => 1
      t.timestamp :created_at,  :null => false
      t.timestamp :updated_at

      t.timestamps
    end
  end
end
* SQLite 3 以外でのマイグレーション・ファイルの設定例:
class CreateOrderRecords < ActiveRecord::Migration def change create_table :order_records do |t| t.integer :year, :null => false t.integer :month, :null => false t.integer :day, :null => false t.text :customer_name, :null => false t.text :product_name, :null => false t.float :unit_price, :null => false t.integer :qty, :null => false, :default => 1 t.timestamp :created_at, :null => false t.timestamp :updated_at t.timestamps end #add constraints execute "ALTER TABLE order_records ADD CONSTRAINT c1_order_records CHECK ( year > 2008 );" execute "ALTER TABLE order_records ADD CONSTRAINT c2_order_records CHECK ( month >= 1 AND month <= 12 );" execute "ALTER TABLE order_records ADD CONSTRAINT c3_order_records CHECK ( day >= 1 AND day <= 31 );" execute "ALTER TABLE order_records ADD CONSTRAINT c4_order_records CHECK ( unit_price > 0 );" execute "ALTER TABLE order_records ADD CONSTRAINT c5_order_records CHECK ( qty > 0 );" execute "ALTER TABLE order_records ADD CONSTRAINT c6_order_records CHECK ( ( unit_price * qty ) < 200000 );" end end - リレーショナルデータベースの作成
rake db:create:all rake db:migrate - Rails サーバの起動
rails server - 動作確認
http://localhost:3000/order_records
[このページで説明している.こと]
- Ruby on Rails バージョン 3 は,バージョン 2 のときと少し使い方が変わっているらしく,このページでは,バージョン 3 の操作手順と動作画面を示します(つまり,バージョン 2 では,この Web ページの記述そのままでは動かない).
- 「バージョン 3 の新機能を使ってみる」ということではない.
前準備
- Ruby 処理系のインストールと, RubyGems のインストールが済んでいること
* この Web ページの手順をなぞる場合は,sqlite3 パッケージのインストールも済んでいること
- JRuby を使う場合に限り,Windows での Java JDK 18 (Java SE Development Kit 18) のインストールが済んでいること.
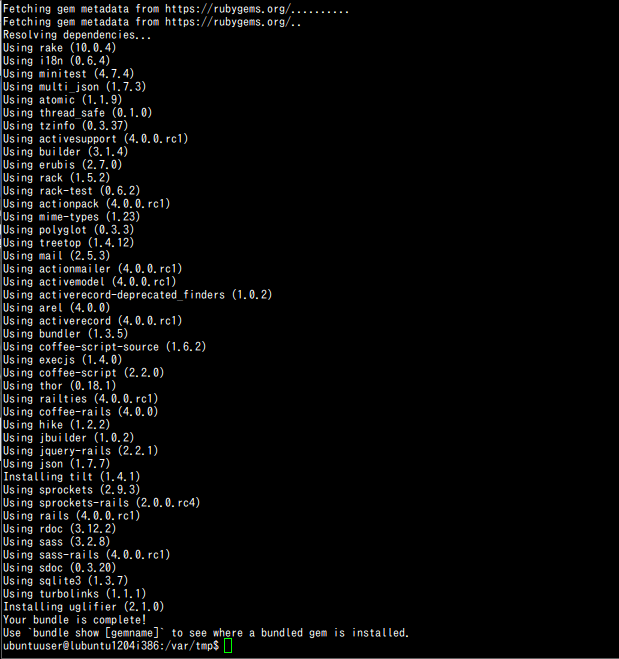
- gem を使って Rails 関連パッケージのインストールが終わっていること
gem install rails
gem install thin
gem install exexjs
gem install therubyracer
gem install sqlite3
前もって決めておく事項
- 全体のルートディレクトリ
- Rails アプリケーション名: このページでは hoge と書く
- Rails アプリケーションのルートディレクトリ: 「全体のルートディレクトリ/hoge」 のようになる.
- データベース管理システム名: このページでは sqlite3 を使う.
mysql, postgresql, sqlite3, oracle などが指定できる.
ここでは Ruby on Rails の学習を行いたいので,SQLite バージョン 3を使うことにする. Ruby から SQLite 3のデータベースを扱うようなプログラムの作成については, 別の Web ページで詳しく説明している.
実際に使うには,データベースの権限の設定,複数のアプリケーションプログラムでのデータベースの共有を行うでしょうから, SQLite ではなく,MySQL の利用 等を使うことを検討してください.
Rails アプリケーションのディレクトリと基本ファイルの生成
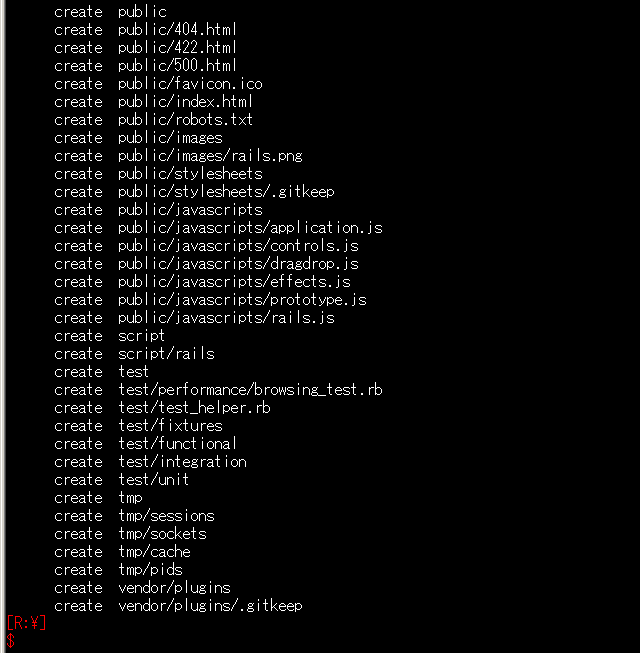
- rails コマンド による Rails アプリケーションのディレクトリと基本ファイルの生成
* rails バージョン 3 の場合の例
cd <全体のルートディレクトリ>
rails new hoge --database sqlite3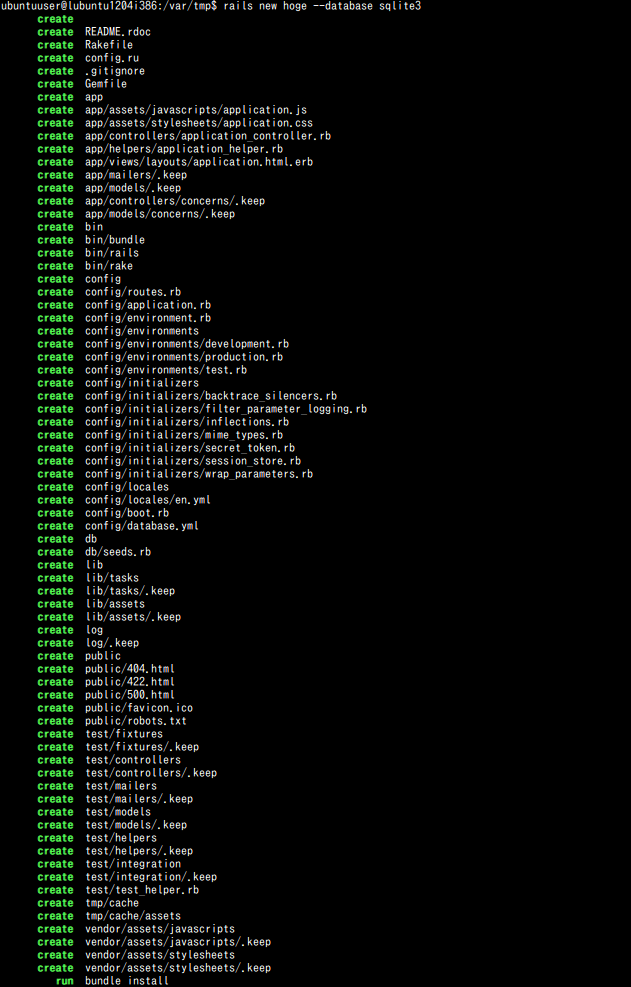
なお、データベース管理システムソフトウェアとして MySQL の利用 を使うときは、次のように操作する
cd <全体のルートディレクトリ>
rails new hoge --database mysql
* rails バージョン 2 系列 の場合の例cd <全体のルートディレクトリ> rails hoge --database sqlite3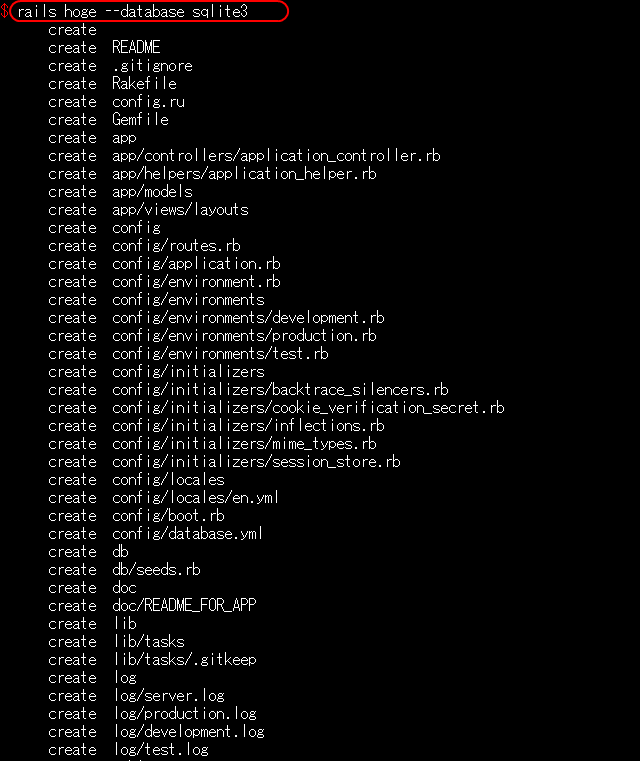
- (オプション)データベース設定ファイル config/database.yml の確認
既定(デフォルト)では,SQLite 3 が使われることが確認できる. この Web ページの目的である Ruby on Rails の入門用)としては全く問題ない.
データベース名も確認できる.
* MySQL などを使うときは,database.yml にパスワードを設定する
* Linux での実行例
cd hoge
more config/database.yml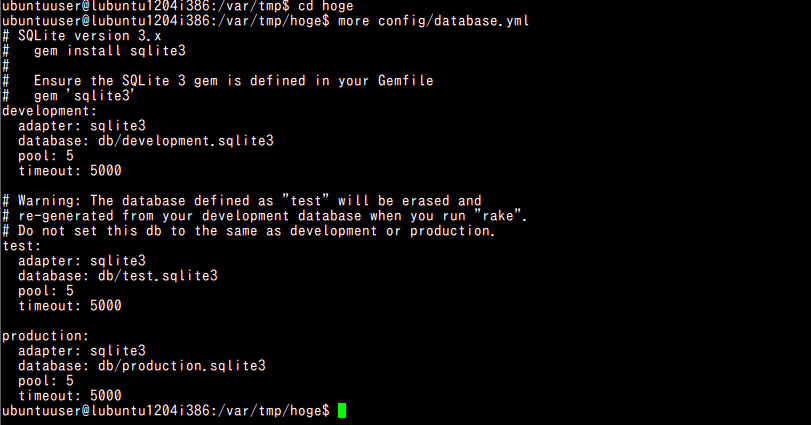
* Windows の場合には「/」を「\」に読み替えて下さい.
cd hoge
more config\database.yml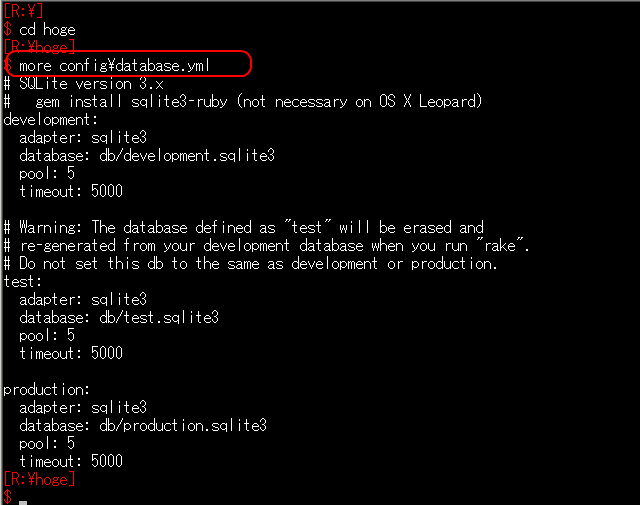
- 確認
Rails サーバを起動し、動作を確認する
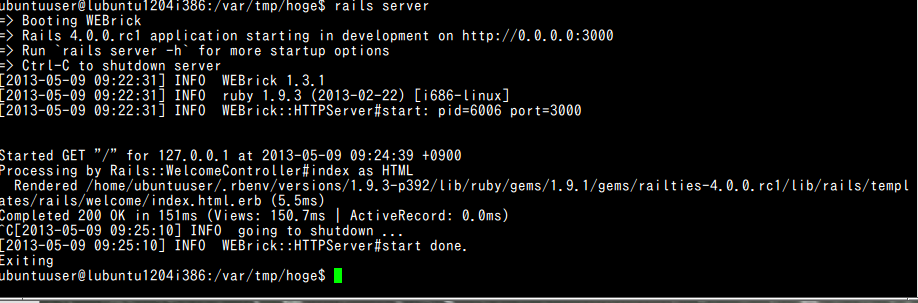
- Rails サーバの起動
cd hoge
rails server
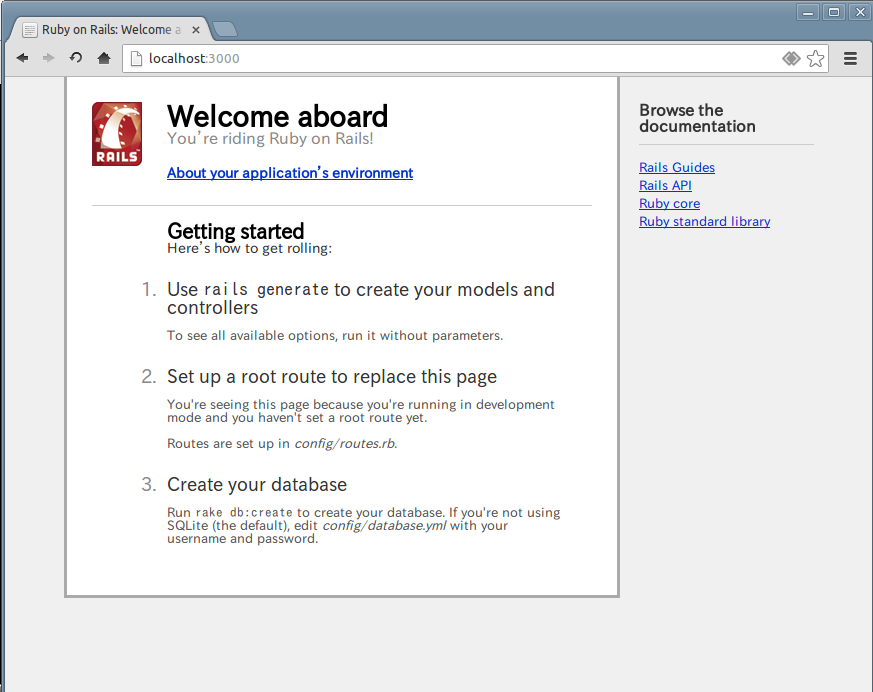
- Web ブラウザから使ってみる
http://localhost:3000
- Rails サーバの停止
Rails サーバを起動した端末で「コントロールキー」と「c」の同時押し
- Rails サーバの起動
コントローラの作成
- rails generate controller の実行
cd hoge
rails generate controller welcome index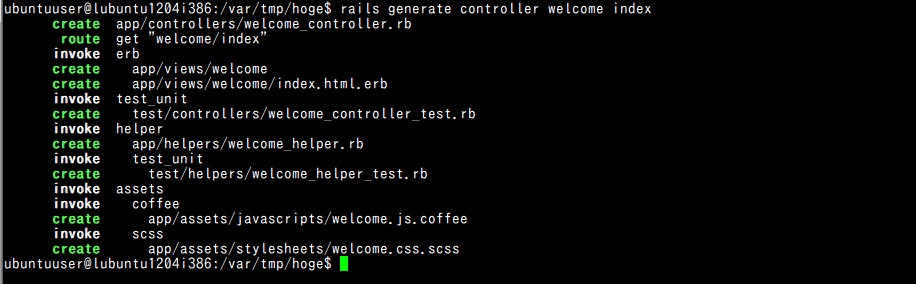
- 上の操作の後,app/views/welcome/index.html.erb を編集

- public/index.html を削除
- config/routes.rb を次のように編集し、welcome/index.html.erb を使うように設定
元々の config/routes.rb の記述に従って編集する。
* パターン1
cd hoge
root 'welcome#index'
* パターン2
cd hoge
root :to=>'welcome#index'
- config/routes.rb の設定確認
「rake routes」で確認する.
rake routes
Rails アプリケーションのひな形 (scaffold アプリケーション) の生成
前もって決めておく事項
- モデル名(単数形): このページでは order_record と書く
- テーブル名(複数形): このページでは order_records と書く
- テーブル定義:
このページでは,次のテーブル定義を使う.
* SQLite 3 の場合:
create table order_records (
    id            INTEGER  PRIMARY KEY autoincrement not null,
    year          INTEGER  not null,
    month         INTEGER  not null,
    day           INTEGER  not null,
    customer_name text  not null,
    product_name  text  not null,
    unit_price    REAL     not null,
    qty           INTEGER  not null DEFAULT 1,
    created_at    DATETIME not null,
    updated_at    DATETIME not null );
* SQLite 3以外 の場合:
create table order_records (
    id            INTEGER  PRIMARY KEY autoincrement not null,
    year          INTEGER  not null CHECK ( year > 2008 ),
    month         INTEGER  not null CHECK ( month >= 1 AND month <= 12 ),
    day           INTEGER  not null CHECK ( day >= 1 AND day <= 31 ),
    customer_name text  not null,
    product_name  text  not null,
    unit_price    REAL     not null CHECK ( unit_price > 0 ),
    qty           INTEGER  not null DEFAULT 1 CHECK ( qty > 0 ),
    created_at    DATETIME not null,
    updated_at    DATETIME not null,
    CHECK ( ( unit_price * qty ) < 200000 ) );
rails generate scaffold の実行
- 先ほど生成した Rails アプリケーションのルートディレクトリに,カレントディレクトリを変更
cd hoge
- (オプション) bundle install の実行
実行例
bundle install - 「rails generate scaffold order_record ...」を実行し、アプリケーションのひな形を生成する
- 「order_record」の部分はモデル名(単数形)です.自由に設定できる.Rails の流儀では,モデル名には単数形の名詞を使う.
- 属性idは自動設定されるので、引数に書きません
rails generate scaffold order_record year:integer month:integer day:integer customer_name:text product_name:text unit_price:float qty:integer created_at:timestamp updated_at:timestamp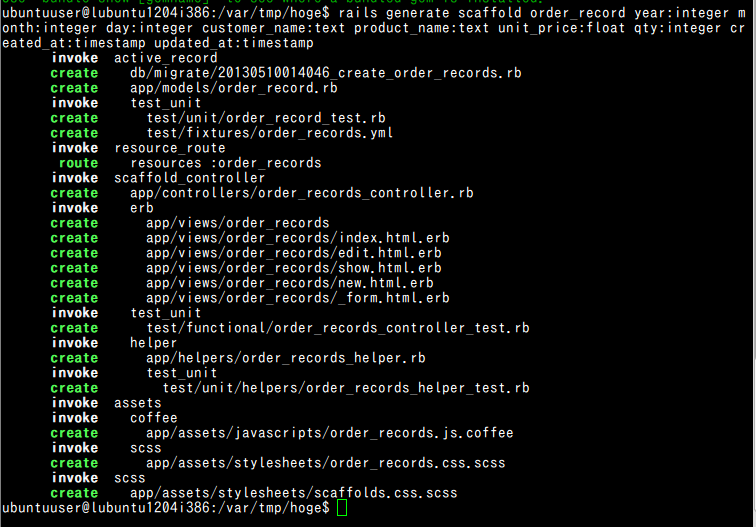
【ここで試している設定の要点】
- year, month, day, customer_name, product_name, unit_price, qty, created_at, updated_at: 属性名(Rails の流儀では,これら属性名はリレーショナルデータベースのテーブルの属性名と一致する)
- :integer, :text, :float, :timestampなど: データ型を表すシンボル
Rails で使えるデータ型は次の通り
- :binary
- :boolean
- :date
- :datetime
- :decimal
- :float
- :integer
- :primary_key
- :string
- :text
- :time
- :timestamp
データ型の詳細については,別の Web ページで説明する.
* execjs を使っている場合,次のようなエラーが出る場合があります.このときは、node.js などをインストールすることで回避できる場合があります. 詳しくは、 https://github.com/sstephenson/execjs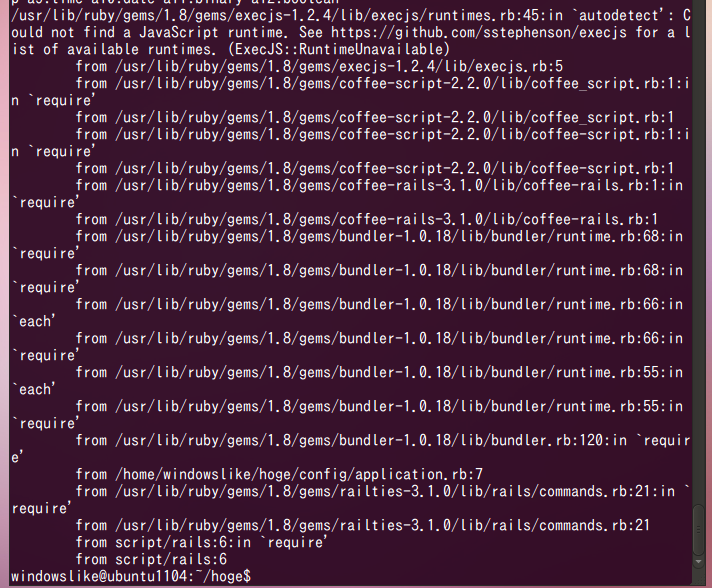
- 「rake routes」で確認
rake routes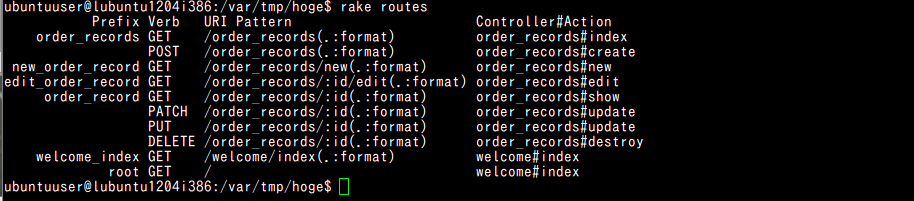
マイグレーション・ファイルでのテーブル定義
マイグレーション定義ファイルには,データベースのテーブル定義と一貫性制約の記述等を行う.
【関連する外部ページ】 https://api.rubyonrails.org/classes/ActiveRecord/ConnectionAdapters/SchemaStatements.html
- Rails アプリケーションのひな形の作成において生成されたマイグレーション・ファイルの確認
マイグレーション・ファイルを表示させる手順の例は次の通り.20110901074423 は実際の日付に読み替えてください.
* Linux での実行例
more cc/migrate/20110901074423_create_order_records.rb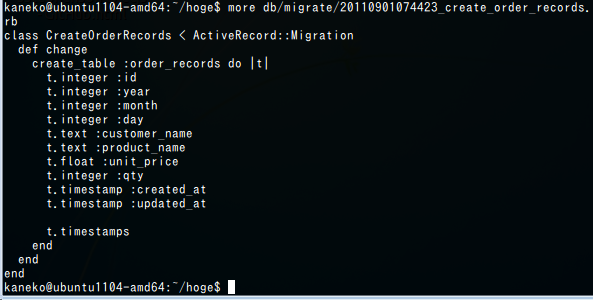 * Windows の場合には「/」を「\」に読み替えて下さい.
 - マイグレーション・ファイルでのテーブル定義と一貫性制約の記述
いま確認したマイグレーション・ファイルを書き換えて,一貫性制約を記述したい.
記述したい一貫性制約は,SQL を使って次のように書くことができるとする.問題は,これを,マイグレーション・ファイルにどう書くか,ということ.
* SQL の文法と意味については,ここでは説明しないので, 別の Web ページを見てください.
◆ 一貫性制約を含むテーブル定義の例 (SQL での記述)
このページでは,次のテーブル定義を使う.
* SQLite 3 の場合:
create table order_records (
    id            INTEGER  PRIMARY KEY autoincrement not null,
    year          INTEGER  not null,
    month         INTEGER  not null,
    day           INTEGER  not null,
    customer_name text  not null,
    product_name  text  not null,
    unit_price    REAL     not null,
    qty           INTEGER  not null DEFAULT 1,
    created_at    DATETIME not null,
    updated_at    DATETIME not null);
* SQLite 3以外 の場合:
create table order_records (
    id            INTEGER  PRIMARY KEY autoincrement not null,
    year          INTEGER  not null CHECK ( year > 2008 ),
    month         INTEGER  not null CHECK ( month >= 1 AND month <= 12 ),
    day           INTEGER  not null CHECK ( day >= 1 AND day <= 31 ),
    customer_name text  not null,
    product_name  text  not null,
    unit_price    REAL     not null CHECK ( unit_price > 0 ),
    qty           INTEGER  not null DEFAULT 1 CHECK ( qty > 0 ),
    created_at    DATETIME not null,
    updated_at    DATETIME not null,
    CHECK ( ( unit_price * qty ) < 200000 ) );
◆ ここで行うこと: 上記のテーブル定義と等価なものをマイグレーション・ファイルに記述したいということ
- SQL での not null と DEFAULT
SQL の not null は非空制約であり, SQL の DEFAULT はデフォルト値 (default value) の指定である.
「ActiveRecord::ConnectionAdapters::TableDefinition#column」の記述によれば,
- SQL の not null ・・・ マイグレーション・ファイルでは「:default => "Untitled"」のように書く
デフォルト値を SQL の「NULL」にしたい場合には,マイグレーション・ファイルでは 「:default => nil」のように書く
- SQL の DEFAULT ・・・ マイグレーション・ファイルでは「:null => false」のように書く
- SQL の not null ・・・ マイグレーション・ファイルでは「:default => "Untitled"」のように書く
- (SQLite 3 以外を使う場合) SQL での UNIQUE と CHECK (...) と REFERENCES
UNIQUE は一意制約であり, CHECK (...) は更新時にチェックされる式 であり, REFERENCES は参照整合性制約である.
◆ SQLite 3 でのマイグレーション・ファイルの設定例:
class CreateOrderRecords < ActiveRecord::Migration
  def change
    create_table :order_records do |t|
      t.integer :year,            :null => false
      t.integer :month,            :null => false
      t.integer :day,            :null => false
      t.text :customer_name,    :null => false
      t.text :product_name,    :null => false
      t.float :unit_price,    :null => false
      t.integer :qty,            :null => false, :default => 1
      t.timestamp :created_at,  :null => false
      t.timestamp :updated_at

      t.timestamps
    end
  end
end
◆ SQLite 3 以外でのマイグレーション・ファイルの設定例:
http://guides.rails.info/migrations.html の記述によれば, マイグレーション・ファイル内に execute ... を含めることになる.実例を下に載せています.
SQLite 3 には ADD CONSTRAINT の機能が実装されていないため、下のプログラムは動かない(2011/09/01 時点).
class CreateOrderRecords < ActiveRecord::Migration def change create_table :order_records do |t| t.integer :year, :null => false t.integer :month, :null => false t.integer :day, :null => false t.text :customer_name, :null => false t.text :product_name, :null => false t.float :unit_price, :null => false t.integer :qty, :null => false, :default => 1 t.timestamp :created_at, :null => false t.timestamp :updated_at t.timestamps end #add constraints execute "ALTER TABLE order_records ADD CONSTRAINT c1_order_records CHECK ( year > 2008 );" execute "ALTER TABLE order_records ADD CONSTRAINT c2_order_records CHECK ( month >= 1 AND month <= 12 );" execute "ALTER TABLE order_records ADD CONSTRAINT c3_order_records CHECK ( day >= 1 AND day <= 31 );" execute "ALTER TABLE order_records ADD CONSTRAINT c4_order_records CHECK ( unit_price > 0 );" execute "ALTER TABLE order_records ADD CONSTRAINT c5_order_records CHECK ( qty > 0 );" execute "ALTER TABLE order_records ADD CONSTRAINT c6_order_records CHECK ( ( unit_price * qty ) < 200000 );" end end - SQL での not null と DEFAULT
リレーショナルデータベースの作成
- 先ほど生成した Rails アプリケーションのルートディレクトリに,カレントディレクトリを変更
cd hoge
- (オプション)rake で実行可能なタスク一覧の表示
rake -T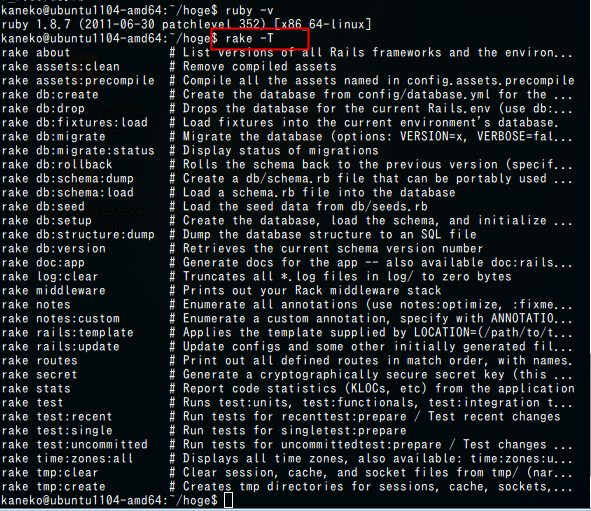
- (オプション)データベース・スキーマの版(バージョン)の確認
rake db:version
- (オプション)データベースのキャラクタ・セットの確認
「UTF-8」のように表示される.
rake db:charset
- (オプション)Ruby が認識するキャラクタコードの設定
Ruby が認識するキャラクタコードの設定は、config/environment.rb で「$KCODE = 'u'」のように行う.
- データベース・マイグレーションの実行によるデータベースの生成
rake db:create:all
- マイグレーション・ファイルと rake コマンドを用いたマイグレーションの実行
メッセージから,新しいテーブルが定義されたことが分かります.
rake db:migrate
- テーブル定義の確認
「"id" integer primary key autoincrement not null」が増えていることなどが確認できる.
echo "select * from sqlite_master;" | sqlite3 db/development.sqlite3
Rails サーバの起動と動作確認
- 先ほど生成した Rails アプリケーションのルートディレクトリに,カレントディレクトリを変更
cd hoge
- Rails サーバの起動
rails server
* Windows の場合には「/」を「\」に読み替えて下さい.
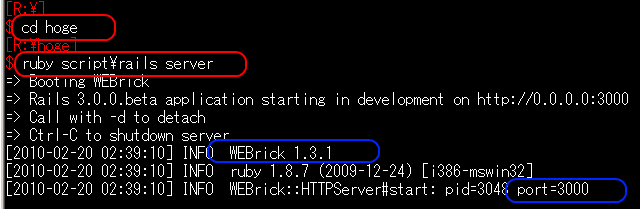
WEBrick が起動していることが確認できる.ポート番号が 3000 であることも確認できる.
- Rails サーバと通信できることのテスト
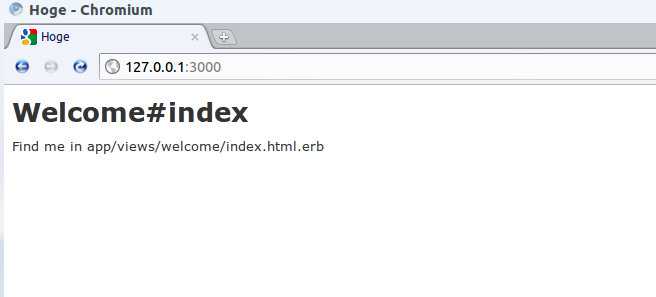
Web ブラウザで http://127.0.0.1:3000 を指定します.
この Web ページの「コントローラの作成」の手順を踏んでいた場合には, Rails サーバと通信して,welcome/index.html.erb が次のように表示される
* Windows のファイヤウオール機能により,ポート番号 3000 との通信が遮断されている場合があるので, ポート番号 3000 の通信については解除しておくこと.
- Ctrl + 「c」 による Rails サーバの終了
Ctrl + 「c」(コントロールキーと「c」キーの同時押し)で,Rails サーバが終了します.
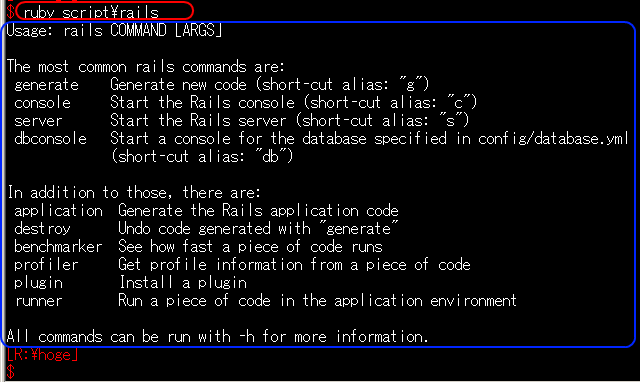
- Rails コマンドの確認
* Windows の場合には「/」を「\」に読み替えて下さい.
scaffold アプリケーションを使ってみる
以下の手順では,いま生成された scaffold アプリケーションを使ってみる.
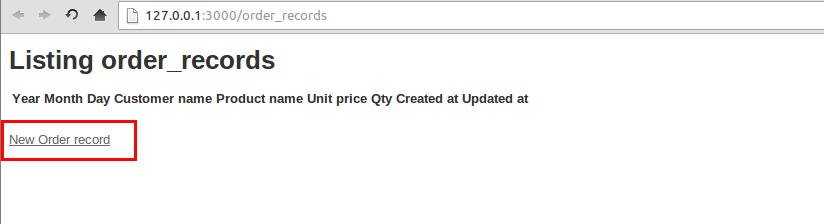
- http://127.0.0.1:3000/order_records を Web ブラウザで開く
- New order_record をクリック
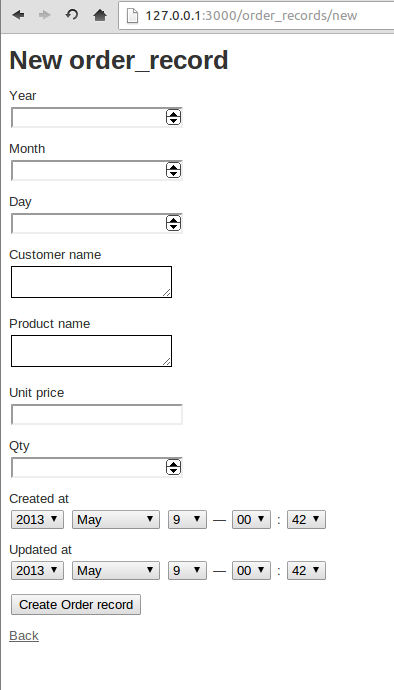
- 新しいウインドウが開く.これは,テーブルに新しい行(レコード)を挿入するための編集画面
- データを設定し,Create order_record をクリック
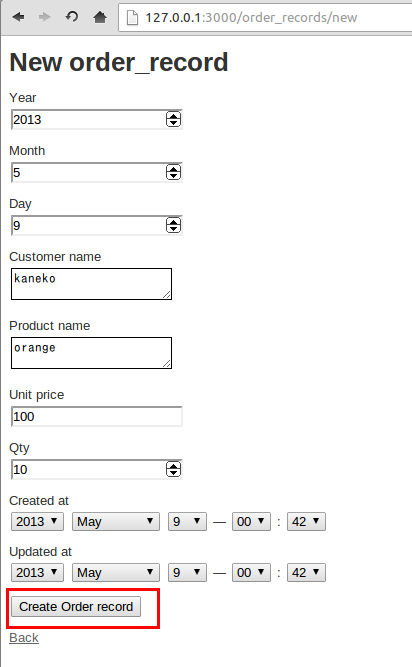 * もし,どれかのフィールドのデータが空 (NULL) のままだと,テーブル定義で指定した not null 制約に違反し,行(レコード)を挿入できない.
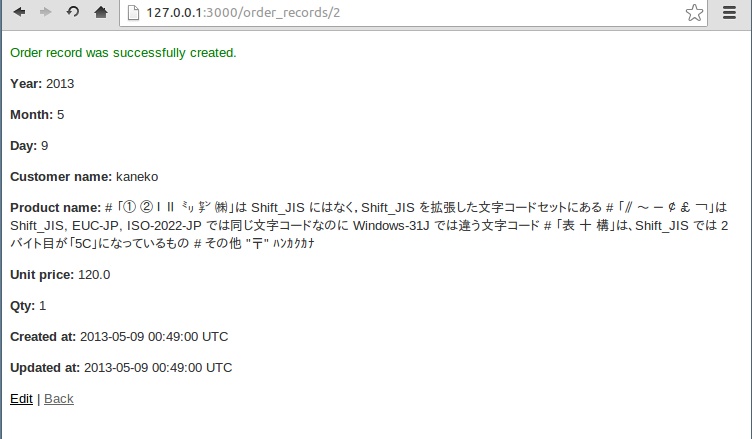
- 行(レコード)挿入の確認
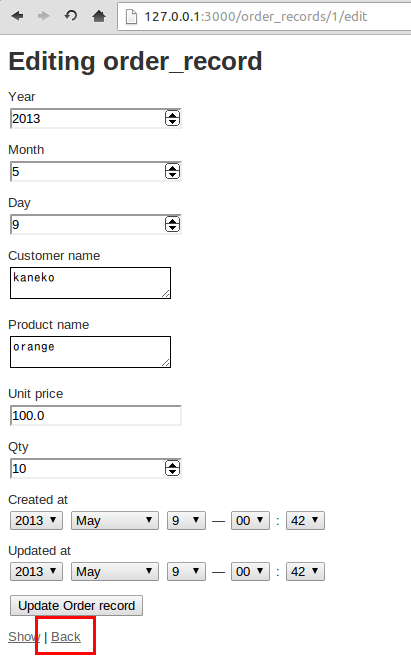
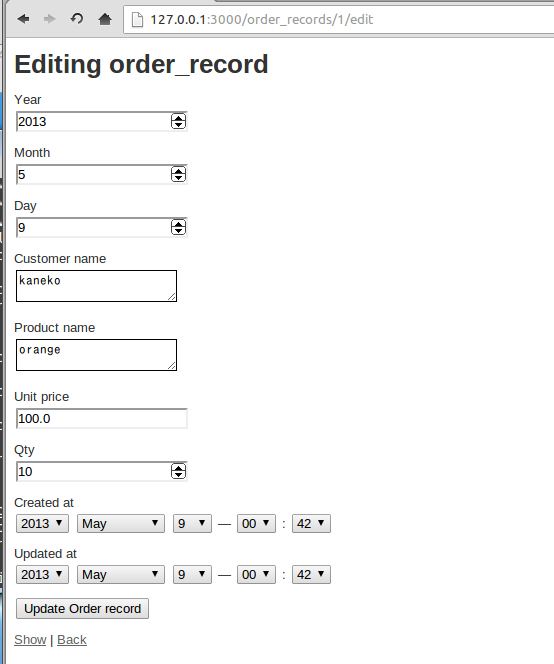
◆ 間違いがあるときは「Edit」で編集画面に戻る.
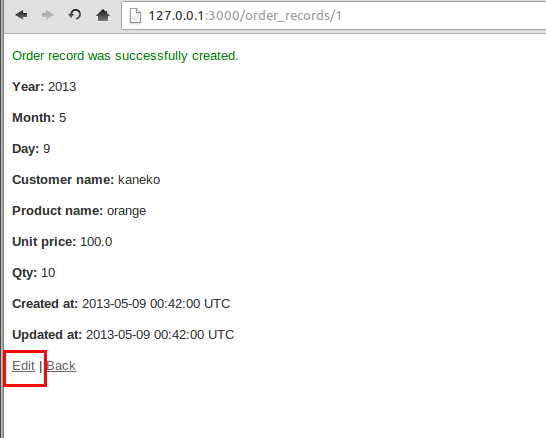
◆ これで正しいときは「Back」で元の画面に戻る.
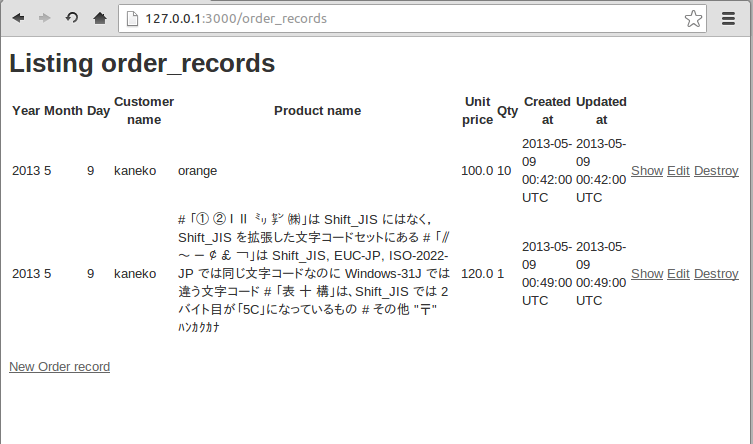
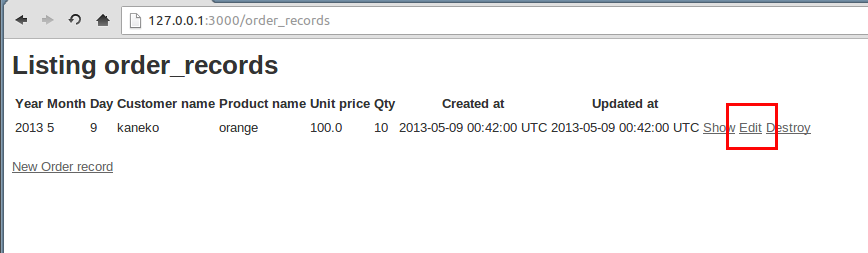
- Back をクリックすると,元の画面に戻る.order_records テーブルに行(レコード)が挿入されたことが確認できる.
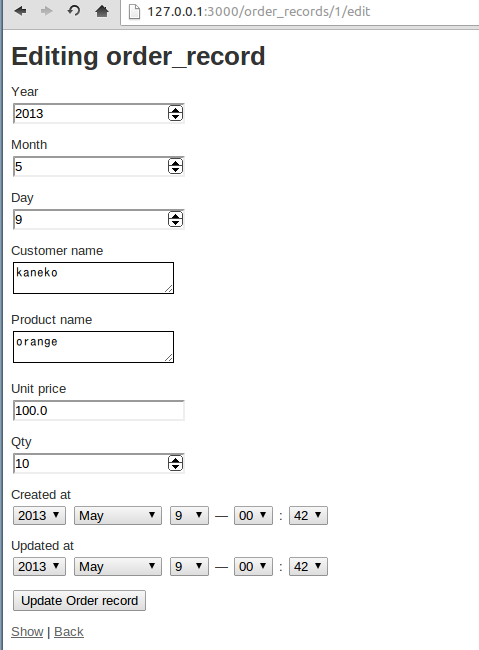
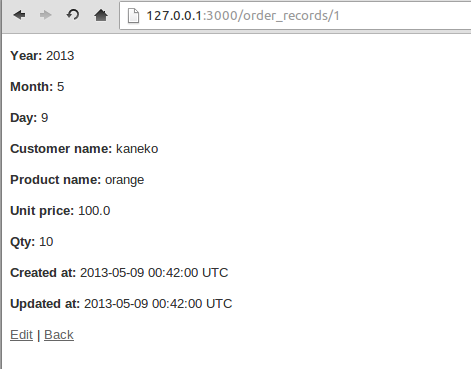
- 「Show」をクリックすると,1ページで1レコード表示される.
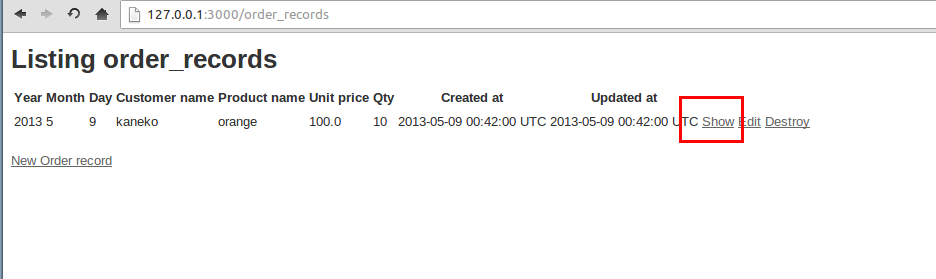
- 「Edit」をクリックすると,編集画面に移る
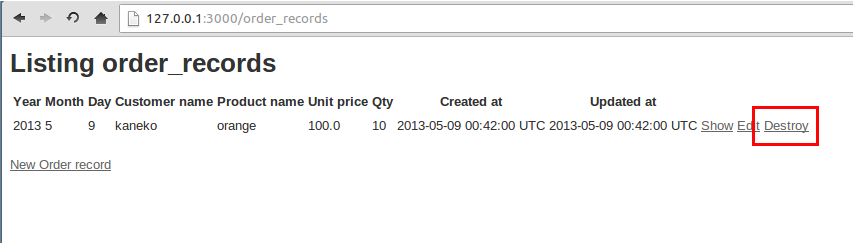
- 「Delete」をクリックすると,削除される
- 今度は日本語を試してみる
# 「① ② I Ⅱ ㍉ ㌢ ㈱」は Shift_JIS にはなく,Shift_JIS を拡張した文字コードセットにある
# 「‖ 〜 − ¢ £ ¬」は Shift_JIS, EUC-JP, ISO-2022-JP では同じ文字コードなのに Windows-31J では違う文字コード
# 「表 十 構」は、Shift_JIS では 2 バイト目が「5C」になっているもの
#  その他 "〒" ハンカクカナ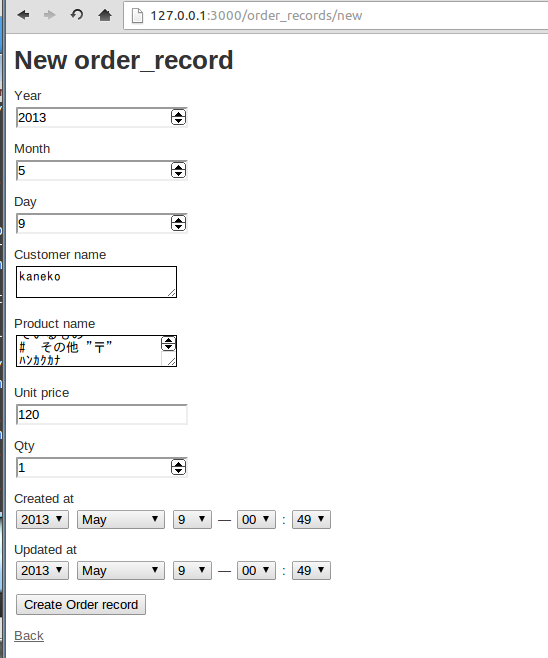
- 確認表示