Python 最新版のインストール(ソースコードを使用)(Windows 上)
Python のインストール: 別ページ »で説明は,複数の方法がある.
- Python の最新版を検証,開発者に貢献したいなどの場合には, ソースコードからビルドして,インストールする.このページで説明する.
- 公式の Python のビルド済みのものをインストールする手順は: 別ページなどで説明している.
【関連する外部ページ】 https://devguide.python.org/setup/#getting-the-source-code
前準備
Python 3.12 のインストール
Pythonのインストールを行い、Pythonのプログラムを実行する環境を整える。扱う環境は、Windows搭載パソコンである。金子研究室では、Python 3.12.10を推奨する。
[Windows での Python 3.12 のインストール手順を見るには、ここをクリック]
Windows での Python 3.12 のインストール
以下のいずれかの方法でPython 3.12をインストールする。Pythonがインストール済みの場合、この手順は不要である。
方法 1:winget によるインストール
【インストールコマンドの実行方法】
管理者権限でコマンドプロンプトを起動する(手順:Windowsキーまたはスタートメニュー → cmd と入力 → 右クリック → 「管理者として実行」)。そして、コマンド全体をコマンドプロンプトにコピー&ペーストする。
--scope machine を指定することで、システム全体(全ユーザー向け)にインストールされる。このオプションの実行には管理者権限が必要である。インストール完了後、コマンドプロンプトを再起動するとPATHが反映される。
REM Python 3.12 をシステム領域にインストール
winget install --id Python.Python.3.12 -e --scope machine --silent --accept-source-agreements --accept-package-agreements --override "/quiet InstallAllUsers=1 PrependPath=1 Include_test=0 Include_pip=1 Include_launcher=1 InstallLauncherAllUsers=1 TargetDir=\"C:\Program Files\Python312\""

REM Python と Scripts を PATH 先頭に追加
powershell -NoProfile -Command "$p='C:\Program Files\Python312'; $s=\"$p\Scripts\"; $c=[Environment]::GetEnvironmentVariable('Path','Machine'); if((Test-Path $p) -and (';'+$c+';' -notlike \"*;$p;*\") -and (';'+$c+';' -notlike \"*;$s;*\")){[Environment]::SetEnvironmentVariable('Path',\"$p;$s;$c\",'Machine')}"
方法 2:インストーラーによるインストール
- Python公式サイト(https://www.python.org/downloads/)にアクセスし、「Download Python 3.x.x」ボタンからWindows用インストーラーをダウンロードする。
- ダウンロードしたインストーラーを実行する。
- 初期画面の下部に表示される「Add python.exe to PATH」にチェックを入れてから「Customize installation」を選択する。このチェックを入れ忘れると、コマンドプロンプトから
pythonコマンドを実行できない。 - 「Install Python 3.xx for all users」にチェックを入れ、「Install」をクリックする。
インストールの確認
コマンドプロンプトで以下を実行する。
python --versionバージョン番号(例:Python 3.12.x)が表示されればインストール成功である。「'python' は、内部コマンドまたは外部コマンドとして認識されていません。」と表示される場合は、インストールが正常に完了していない。
Git のインストール(Windows 上) [クリックして展開]
管理者権限のコマンドプロンプトで以下を実行する.管理者権限は,winget の --scope machine オプションでシステム全体にインストールするために必要となる.
REM Git をシステム領域にインストール
winget install --scope machine --id Git.Git -e --silent --disable-interactivity --force --accept-source-agreements --accept-package-agreements --override "/VERYSILENT /NORESTART /NOCANCEL /SP- /CLOSEAPPLICATIONS /RESTARTAPPLICATIONS /COMPONENTS=""icons,ext\reg\shellhere,assoc,assoc_sh"" /o:PathOption=Cmd /o:CRLFOption=CRLFCommitAsIs /o:BashTerminalOption=MinTTY /o:DefaultBranchOption=main /o:EditorOption=VIM /o:SSHOption=OpenSSH /o:UseCredentialManager=Enabled /o:PerformanceTweaksFSCache=Enabled /o:EnableSymlinks=Disabled /o:EnableFSMonitor=Disabled"
CMakeのインストール(Windows 上) [クリックして展開]
管理者権限のコマンドプロンプトで以下を実行する。管理者権限のコマンドプロンプトを起動するには、Windows キーまたはスタートメニューから「cmd」と入力し、表示された「コマンドプロンプト」を右クリックして「管理者として実行」を選択する。
REM CMake をシステム領域にインストール
winget install --scope machine --id Kitware.CMake -e --silent --disable-interactivity --force --accept-source-agreements --accept-package-agreements --override "/qn /norestart ADD_CMAKE_TO_PATH=System"
Visual Studio のインストール(Windows 上)
以下のコマンドを管理者権限のコマンドプロンプトで実行する
(手順:Windowsキーまたはスタートメニュー → cmd と入力 → 右クリック → 「管理者として実行」)。
winget install --scope machine --accept-source-agreements --accept-package-agreements Microsoft.VisualStudio.2022.Community --override "--add Microsoft.VisualStudio.Workload.NativeDesktop Microsoft.VisualStudio.ComponentGroup.NativeDesktop.Core Microsoft.VisualStudio.Component.VC.CLI.Support Microsoft.VisualStudio.Component.CoreEditor Microsoft.VisualStudio.Component.NuGet Microsoft.VisualStudio.Component.Roslyn.Compiler Microsoft.VisualStudio.Component.TextTemplating Microsoft.VisualStudio.Component.Windows11SDK.26100 Microsoft.VisualStudio.Component.VC.Tools.x86.x64 Microsoft.VisualStudio.Component.VC.ATL Microsoft.VisualStudio.Component.VC.ATLMFC Microsoft.VisualStudio.Component.VC.Llvm.Clang Microsoft.VisualStudio.Component.VC.Llvm.ClangToolset Microsoft.VisualStudio.Component.VC.CMake.Project Microsoft.VisualStudio.Component.VC.ASAN Microsoft.VisualStudio.Component.Vcpkg"
winget install --scope machine --accept-source-agreements --accept-package-agreements --silent Microsoft.VCRedist.2015+.x64
インストールされるコンポーネント:
NativeDesktop:C++ によるデスクトップアプリケーション開発ワークロード(MSVC,Clang,CMake,MSBuild 等を含む)NativeDesktop.Core:C++ デスクトップ開発の基本コンポーネントVC.CLI.Support:C++/CLI サポート(.NET マネージドコードとネイティブコードの相互運用)CoreEditor:Visual Studio のコアエディタ(コード編集,構文ハイライト,検索機能)NuGet:NuGet パッケージマネージャーRoslyn.Compiler:C# および Visual Basic 用の Roslyn コンパイラTextTemplating:T4 テキストテンプレート変換機能Windows11SDK.26100:Windows 11 SDK(ビルド 10.0.26100)VC.Tools.x86.x64:MSVC v143 C++ x64/x86 コンパイラおよびビルドツールVC.ATL:C++ ATL(Active Template Library)(COM コンポーネント開発用ライブラリ)VC.ATLMFC:C++ MFC(Microsoft Foundation Class Library)(デスクトップ GUI アプリケーション開発用ライブラリ)VC.Llvm.Clang:Windows 向け C++ Clang コンパイラVC.Llvm.ClangToolset:LLVM(clang-cl)ツールセットの MSBuild サポートVC.CMake.Project:Windows 向け C++ CMake ツールVC.ASAN:C++ AddressSanitizer(メモリエラー検出ツール)Vcpkg:vcpkg パッケージマネージャー(C/C++ ライブラリ管理)
インストール完了の確認
winget list Microsoft.VisualStudio.2022.CommunityPython のビルドとインストール
- x64 Native Tools コマンドプロンプト (x64 Native Tools Command Prompt)を実行する
(手順:スタートメニュー →Visual Studio 20xx」の下の「x64 Native Tools コマンドプロンプト (x64 Native Tools Command Prompt)」 を選ぶ)。
「x64 Native Tools コマンドプロンプト」がないときは,ビルドツール (Build Tools) をインストールすると,x64 Native Tools コマンドプロンプトもインストールされる.その手順は,別ページ »で説明している.
- 作業ディレクトリとインストールディレクトリを削除する
mkdir c:\tools
rmdir /s /q cpython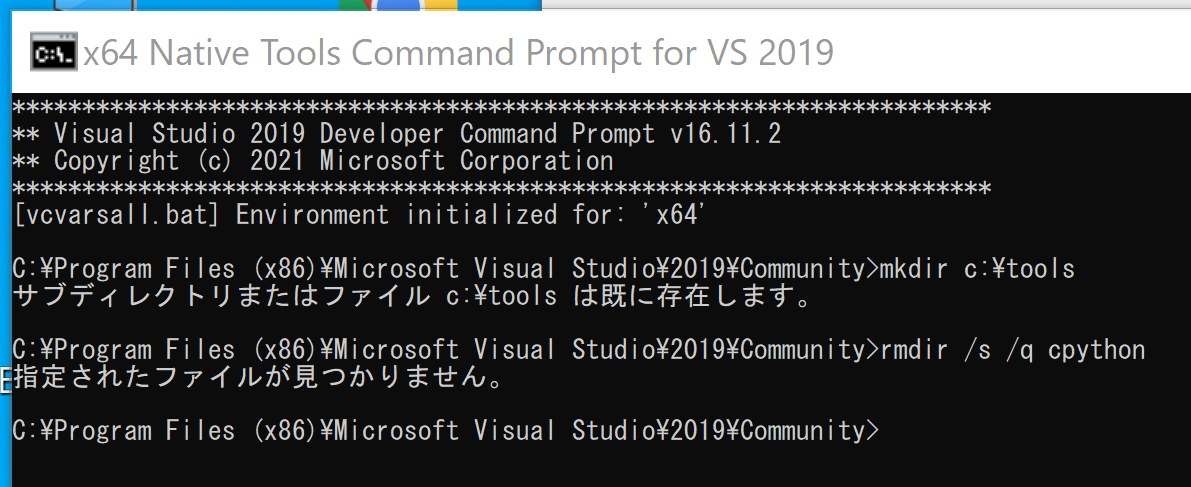
- Python のソースコードをダウンロード
cd c:\
git clone https://github.com/python/cpython.git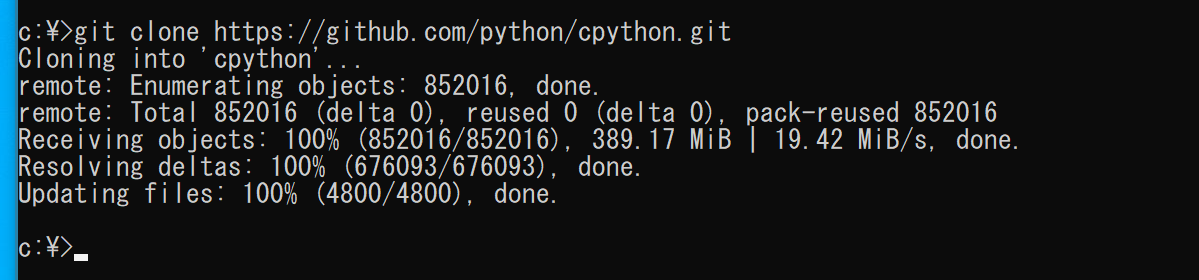
- インストール手順の説明は PCbuild\readme.txt に記載されている.一読しておく
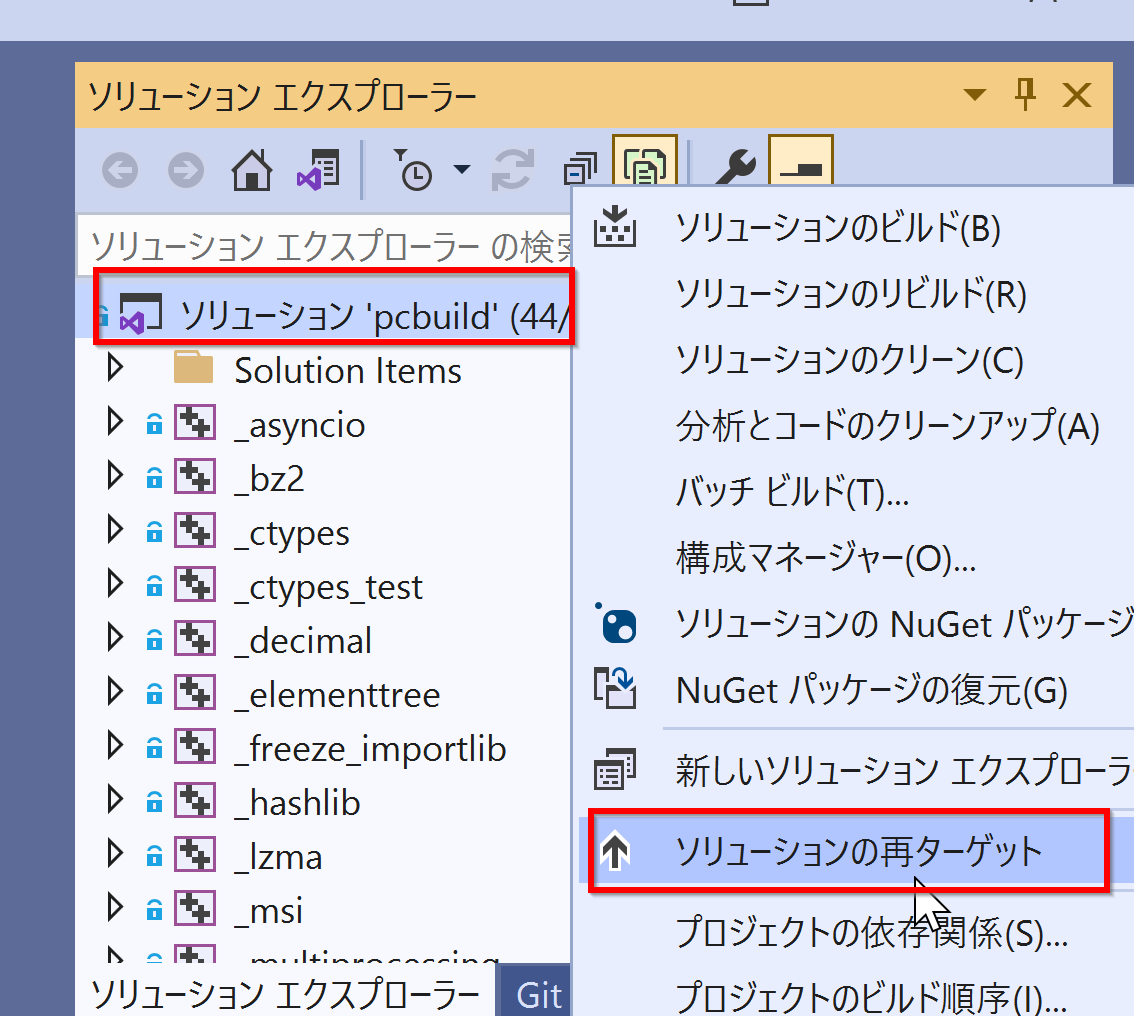
- プロジェクトの再ターゲットの操作
c:\cpython\PCbuild\pythoncore.vcxproj を開く(右クリックメニューが便利).すると Visual Studio が起動する.
ソリューションを右クリック.右クリックメニューで「ソリューションの再ターゲット」を選ぶ.
- PCbuild\build.bat の実行
* このとき作業ディレクトリ内に bzip, sqlite3, xz, zlib, libffi, openssl-bin, tcltk が自動でダウンロードが始まる
cd c:\
cd cpython
.\PCbuild\build.bat
- 終了の確認
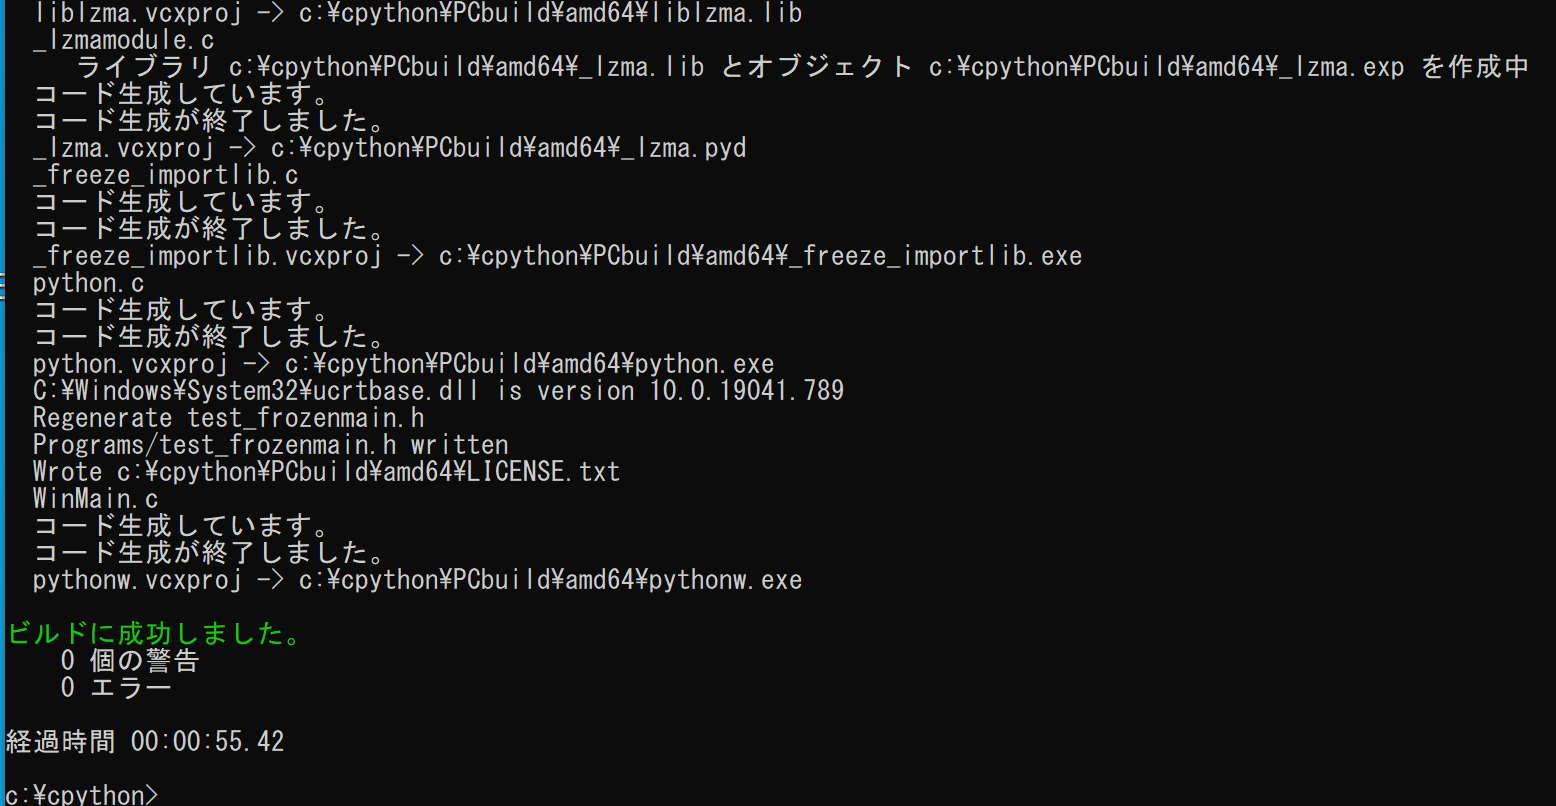
- 試しに起動してみる
c:\cpython\PCbuild\amd64\python.exe
「exit()」で終わる
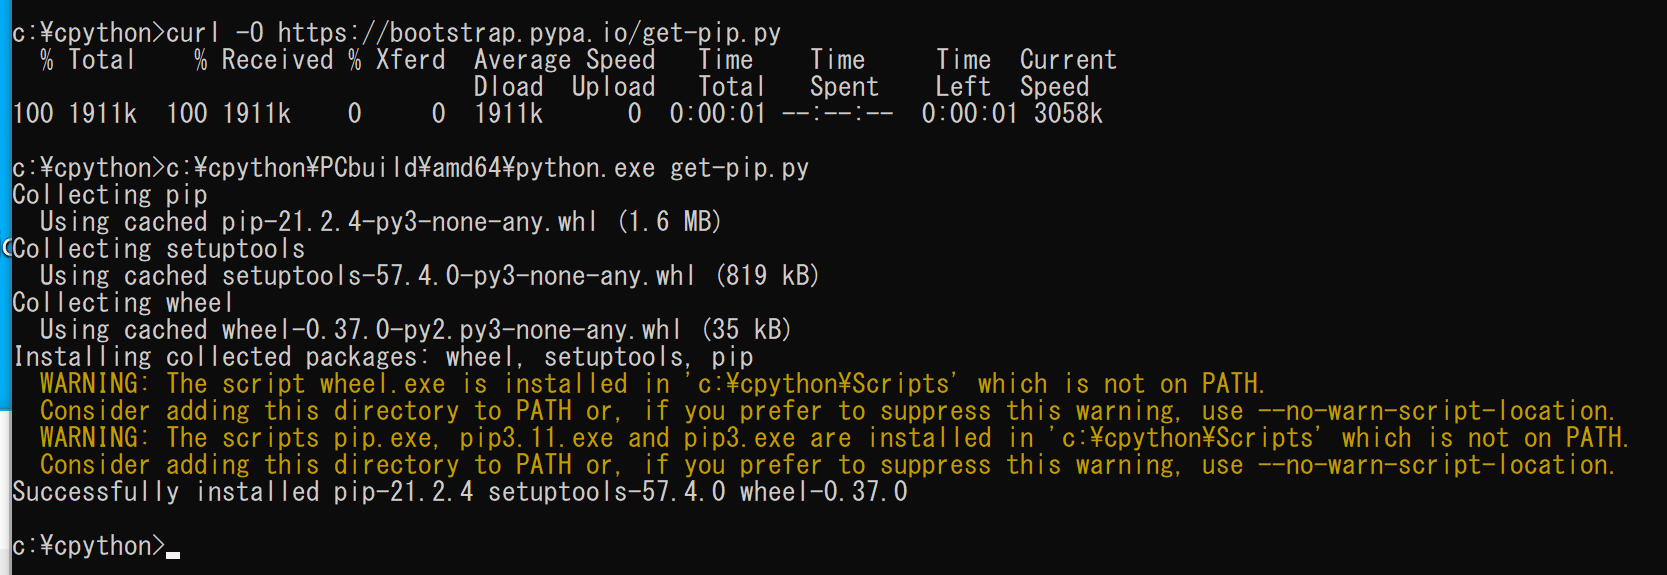
- pip をインストール
pip を使うときは,「c:\cpython\PCbuild\win32\python.exe -m pip」のように使う
curl -O https://bootstrap.pypa.io/get-pip.py
c:\cpython\PCbuild\amd64\python.exe get-pip.py