![[kaneko lab.]](https://www.kkaneko.jp/info/logo_png.png)
JavaServer Faces タグ
- フォーム部品
1行テキスト,テキストエリア,カレンダー,ブーレアン・チェックボックス,チェックボックス, チェックボックス・2段組,セレクトメニュー,ラジオボタン,ラジオボタン・2段組, コマンドボタン
- マネージド・ビーン (Managed Bean) の属性値の表示
- テーブル及びテーブルでのソート
注意事項
- プログラムを動作させるために Java のプログラムが必要になる.この Web ページの下の方に,Java プログラムも付けています.
- faces-config.xml ファイルを適切に設定する必要がある.この Web ページの末尾に付けています.
- https://www.tutorialspoint.com/jsf/index.htm に記載の jsf-blank プログラムを書き換えて使う.
前準備
Java 25(Temurin 25 JDK) のインストール
Eclipse Temurin(Adoptium)のインストールを行い、Javaのプログラムをコンパイル・実行する環境を整える。扱う環境は、Windows搭載パソコンである。現時点(2026年6月)での最新LTS版である Java 25(Temurin 25 JDK)を推奨する。
[Windows での Java 25(Temurin 25 JDK) のインストール手順を見るには、ここをクリック]
Windows での Java 25(Temurin 25 JDK) のインストール
以下のいずれかの方法で Java 25(Temurin 25 JDK)をインストールする。JDKがインストール済みの場合、この手順は不要である。
方法 1:winget によるインストール
【インストールコマンドの実行方法】
管理者権限でコマンドプロンプトを起動する(手順:Windowsキーまたはスタートメニュー → cmd と入力 → 右クリック → 「管理者として実行」)。そして、コマンド全体をコマンドプロンプトにコピー&ペーストする。
Temurin の Windows インストーラー(.msi)は、ユーザー単位ではなくマシン単位でインストールされる(1台に1つのインストール)。そのため、システム全体(全ユーザー向け)にインストールするには管理者権限が必要である。インストール完了後、コマンドプロンプトを再起動するとPATHが反映される。
REM Java 25(Temurin 25 JDK) をインストール(PATH と JAVA_HOME を更新)
winget install --id EclipseAdoptium.Temurin.25.JDK -e --silent --accept-source-agreements --accept-package-agreements --override "ADDLOCAL=FeatureMain,FeatureEnvironment,FeatureJarFileRunWith,FeatureJavaHome INSTALLDIR=\"C:\Program Files\Eclipse Adoptium\jdk-25\" /quiet"
上記の --override 内の指定の意味は次のとおりである。FeatureEnvironment はPATH環境変数の更新、FeatureJavaHome は JAVA_HOME 環境変数の更新、FeatureJarFileRunWith は .jar ファイルとJavaアプリケーションの関連付けである。INSTALLDIR はインストール先フォルダの指定である。
方法 2:インストーラーによるインストール
- Adoptium公式サイト(https://adoptium.net/temurin/releases/)にアクセスし、Version として「25 - LTS」、Operating System として「Windows」を選び、
.msi形式のWindows用インストーラーをダウンロードする。 - ダウンロードした
.msiファイルを実行し、インストールプログラムを起動する。 - ライセンス条項を確認し、同意できる場合はチェックを入れて次へ進む。
- 「Installation Scope」画面では「Install for all users of this machine」を選ぶ
- 「Custom Setup(カスタムセットアップ)」画面で、インストールする機能を選択する。既定では「Add to PATH(PATH環境変数への追加)」と「Associate .jar」(.jarファイルの関連付け)が有効になっている。さらに、ツリー内でバツ印(×)が付いている「Set JAVA_HOME variable(JAVA_HOME環境変数の更新)」をクリックして有効に変更することを推奨する。これらを有効にしないと、コマンドプロンプトから
javaコマンドを実行できなかったり、開発ツールがJDKを見つけられなかったりする。 - 「次へ (Next)」をクリックし、続いて「インストール (Install)」をクリックしてインストールを開始する。完了後「Finish」で閉じる。
インストールの確認
コマンドプロンプトで以下を実行する。
java --versionバージョン番号(例:openjdk 25.x.x)が表示されればインストール成功である。「'java' は、内部コマンドまたは外部コマンドとして認識されていません。」と表示される場合は、インストールが正常に完了していないか、PATHが反映されていない(コマンドプロンプトを再起動して再度確認する)。
あわせて、コンパイラと JAVA_HOME も確認しておくとよい。
javac --version
echo %JAVA_HOME%
Eclipse のインストール
Eclipse をインストールする。扱う環境は、Windows搭載パソコンである。
Windows での Eclipse のインストール 以下のいずれかの方法で Java 25(Temurin 25 JDK)をインストールする。JDKがインストール済みの場合、この手順は不要である。 方法 1:winget によるインストール 【インストールコマンドの実行方法】 管理者権限でコマンドプロンプトを起動する(手順:Windowsキーまたはスタートメニュー → winget が使えない場合や,インストール先・パッケージ種類を画面で選びながら導入したい場合は,次の方法を用いる。 方法 2:インストーラーによるインストール 公式サイトからダウンロードしてインストールできる。詳しくはhttps://www.kkaneko.jp/tools/win/eclipse.htmlで説明している。 Eclipse の初期設定、使用方法の基本 詳しくはhttps://www.kkaneko.jp/tools/win/eclipse.htmlで説明している。[Windows での Eclipse のインストール手順を見るには、ここをクリック]
cmd と入力 → 右クリック → 「管理者として実行」)。そして,コマンド全体をコマンドプロンプトにコピー&ペーストする。REM Temurin 25 JDK をインストール
winget install --id EclipseAdoptium.Temurin.25.JDK -e --accept-source-agreements --accept-package-agreements
その他
- Eclipse の Web, XML, and Java EE Development に関するプラグインのインストールが終わっていること
- 「Tomcat インストール」の Web ページの記述に従って,Tomcat のインストールが終わっていること.
- 「Eclipse 内部の tomcat サーバ」を使えるようにするために, 「Eclipse を使用しての Java サーブレット・プログラムの開発」の Web ページに記載 の「新規サーバの定義」を行っておくこと.
事前の準備
「JavaServer Faces サンプルプログラム」の Web ページの記述に従って,下記の作業を終えていること.
- Eclipse での動的 Web プロジェクトの作成
- Apache MyFaces バージョン 2.0 に関するファイル群 jsf-blank のインポート
JSP プログラム作成の方針
- JSF の f:view タグ, html タグ,body タグ, h:form タグの入れ子(この順で入れ子)を用います.
- フォーム部品には、必ず、id をつける
◆ 記述例
<h:form id="form1"> <h:outputLabel for="text1" value="ユーザ名は?"/> <h:inputText id="text1" value="#{regform.ユーザ名}"/> </h:form> - フォーム部品ごとに、h:outputLabel でラベルを付けるが、
フォーム部品のラベルでは、対象となるフォーム部品の id を for で指定する
これは、ラベルをクリックすると、フォーム部品にフォーカスがあうようにするため。
- panelGrid を使ってラジオボタンやチェックボックスなどの段組みを行うときには、 フォーム部品の id を使う。
- フォーム部品では、value 属性に、Managed Bean 名と属性名を指定する。
フォーム部品への入力内容が、指定された属性に格納される。
◆ 記述例
value="#{regform.ユーザ名}"Managed Bean 名は、必ず、英語でつける。属性名は、日本語または英語
- Managed Bean 名と、Java クラスの対応は、faces-config.xml に書く
◆ 記述例
    <managed-bean>
        <managed-bean-name>regform</managed-bean-name>
        <managed-bean-class>hoge.hoge.com.登録フォーム</managed-bean-class>
        <managed-bean-scope>session</managed-bean-scope>
    </managed-bean>
JSF タグにおけるフォーム部品
1行テキスト
- 表示されるラベル:ユーザ名は?
- id: text1
- Managed Bean 名: regform
- 属性名: ユーザ名
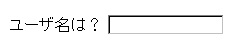 図. 動作画面の例(1行テキスト)
<%@ page contentType="text/html; charset=Shift_JIS" %> <%@ taglib uri="http://java.sun.com/jsf/html" prefix="h" %> <%@ taglib uri="http://java.sun.com/jsf/core" prefix="f" %> <%@ taglib uri="https://myfaces.apache.org/tomahawk" prefix="t" %> <html> <head> <title></title> </head> <body> <f:view> <h:form id="form1"> <h:outputLabel for="text1" value="ユーザ名は?"/> <h:inputText id="text1" value="#{regform.ユーザ名}"/> </h:form> </f:view> </body> </html>図. index.jsp の例(1行テキスト)
テキストエリア
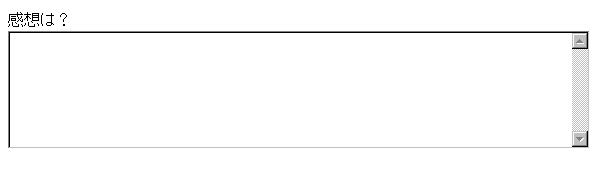
- 表示されるラベル:感想は?
- id: textarea1
- Managed Bean 名: regform
- 属性名: 感想
<%@ page contentType="text/html; charset=Shift_JIS" %>
<%@ taglib uri="http://java.sun.com/jsf/html" prefix="h" %>
<%@ taglib uri="http://java.sun.com/jsf/core" prefix="f" %>
<%@ taglib uri="https://myfaces.apache.org/tomahawk" prefix="t" %>

<html>
<head>
    <title></title>
</head>

<body>
<f:view>
    <h:form id="form1">
        <h:outputLabel for="textarea1" value="感想は?"/>
        <br/>
        <h:inputTextarea id="textarea1" cols="80" rows="8" value="#{regform.感想}"/>
    </h:form>
</f:view>
</body>
</html>

図. index.jsp の例(テキストエリア)
カレンダー
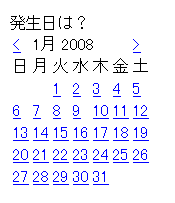
- 表示されるラベル:発生日は?
- id: 無し
- Managed Bean 名: regform
- 属性名: 発生日
<%@ page contentType="text/html; charset=Shift_JIS" %>
<%@ taglib uri="http://java.sun.com/jsf/html" prefix="h" %>
<%@ taglib uri="http://java.sun.com/jsf/core" prefix="f" %>
<%@ taglib uri="https://myfaces.apache.org/tomahawk" prefix="t" %>

<html>
<head>
    <title></title>
</head>

<body>
<f:view>
    <h:form id="form1">
        <h:outputLabel value="発生日は?"/>
        <br/>
        <t:inputCalendar monthYearRowClass="yearMonthHeader"
                    weekRowClass="weekHeader" renderAsPopup="false"
                    popupDateFormat="yyyy/MM/dd" popupTodayString="本日は"
                    popupWeekString="週目"
                    value="#{regform.発生日}" />
    </h:form>
</f:view>
</body>
</html>
ブーレアン・チェックボックス
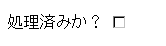
- 表示されるラベル:処理済みか?
- id: checkbox1
- Managed Bean 名: regform
- 属性名: 処理済みか
<%@ page contentType="text/html; charset=Shift_JIS" %>
<%@ taglib uri="http://java.sun.com/jsf/html" prefix="h" %>
<%@ taglib uri="http://java.sun.com/jsf/core" prefix="f" %>
<%@ taglib uri="https://myfaces.apache.org/tomahawk" prefix="t" %>

<html>
<head>
    <title></title>
</head>

<body>
<f:view>
    <h:form id="form1">
        <h:outputLabel for="checkbox1" value="処理済みか?"/>
        <h:selectBooleanCheckbox id="checkbox1" value="#{regform.処理済みか}" />
    </h:form>
</f:view>
</body>
</html>
チェックボックス
- 表示されるラベル:種類は(複数選択可)?
- id: checkbox2
- Managed Bean 名: regform
- 属性名: 種類

<%@ page contentType="text/html; charset=Shift_JIS" %>
<%@ taglib uri="http://java.sun.com/jsf/html" prefix="h" %>
<%@ taglib uri="http://java.sun.com/jsf/core" prefix="f" %>
<%@ taglib uri="https://myfaces.apache.org/tomahawk" prefix="t" %>

<html>
<head>
    <title></title>

</head>

<body>
<f:view>
    <h:form id="form1">
        <h:outputLabel value="種類は(複数選択可)?" />

        <h:selectManyCheckbox id="checkbox2" value="#{regform.種類}" >
        <f:selectItem itemValue="楽しい出来事" itemLabel="楽しい出来事" />
        <f:selectItem itemValue="悲しい出来事" itemLabel="悲しい出来事" />
        <f:selectItem itemValue="重要" itemLabel="重要" />
        <f:selectItem itemValue="影響大" itemLabel="影響大" />
        </h:selectManyCheckbox>
    </h:form>
</f:view>
</body>
</html>
<%@ page contentType="text/html; charset=Shift_JIS" %>
<%@ taglib uri="http://java.sun.com/jsf/html" prefix="h" %>
<%@ taglib uri="http://java.sun.com/jsf/core" prefix="f" %>
<%@ taglib uri="https://myfaces.apache.org/tomahawk" prefix="t" %>

<html>
<head>
    <title></title>

</head>

<body>
<f:view>
    <h:form id="form1">
    <h:panelGrid columns="2">
    <h:outputLabel value="種類は(複数選択可)?" />

        <!-- layout="spread" にしているので,チェックボックスを作るが表示はされない(2カラム表示を可能にするための工夫) -->
        <t:selectManyCheckbox id="checkbox2" value="#{regform.種類}" styleClass="selectManyCheckbox">
        <f:selectItems value="#{items.種類}" />
        </t:selectManyCheckbox>
    </h:panelGrid>
    </h:form>
</f:view>
</body>
</html>
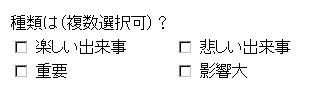
チェックボックス・2段組み
- 表示されるラベル:種類は(複数選択可)?
- id: checkbox2
- Managed Bean 名: regform
- 属性名: 種類
<%@ page contentType="text/html; charset=Shift_JIS" %>
<%@ taglib uri="http://java.sun.com/jsf/html" prefix="h" %>
<%@ taglib uri="http://java.sun.com/jsf/core" prefix="f" %>
<%@ taglib uri="https://myfaces.apache.org/tomahawk" prefix="t" %>

<html>
<head>
    <title></title>
</head>

<body>
<f:view>

    <h:form id="form1">
    <h:panelGrid columns="2">
    <h:outputLabel value="種類は(複数選択可)?" />

        <!-- layout="spread" にしているので,チェックボックスを作るが表示はされない(2カラム表示を可能にするための工夫) -->
        <t:selectManyCheckbox id="checkbox2" value="#{regform.種類}" layout="spread" styleClass="selectManyCheckbox">
        <f:selectItem itemValue="楽しい出来事" itemLabel="楽しい出来事" />
        <f:selectItem itemValue="悲しい出来事" itemLabel="悲しい出来事" />
        <f:selectItem itemValue="重要" itemLabel="重要" />
        <f:selectItem itemValue="影響大" itemLabel="影響大" />
        </t:selectManyCheckbox>

        <!-- 作ったチェックボックスの表示.for="???" 部分は一致させること.index は 0 から始まる -->
        <t:checkbox for="checkbox2" index="0" />
        <t:checkbox for="checkbox2" index="1" />
        <t:checkbox for="checkbox2" index="2" />
        <t:checkbox for="checkbox2" index="3" />
    </h:panelGrid>
    </h:form>

</f:view>
</body>
</html>
<%@ page contentType="text/html; charset=Shift_JIS" %>
<%@ taglib uri="http://java.sun.com/jsf/html" prefix="h" %>
<%@ taglib uri="http://java.sun.com/jsf/core" prefix="f" %>
<%@ taglib uri="https://myfaces.apache.org/tomahawk" prefix="t" %>

<html>
<head>
    <title></title>

</head>

<body>
<f:view>
    <h:form id="form1">
    <h:panelGrid columns="2">
    <h:outputLabel value="種類は(複数選択可)?" />

        <!-- layout="spread" にしているので,チェックボックスを作るが表示はされない(2カラム表示を可能にするための工夫) -->
        <t:selectManyCheckbox id="checkbox2" value="#{regform.種類}" layout="spread" styleClass="selectManyCheckbox">
        <f:selectItems value="#{items.種類}" />
        </t:selectManyCheckbox>

        <!-- 作ったチェックボックスの表示.for="???" 部分は一致させること.index は 0 から始まる -->
        <t:checkbox for="checkbox2" index="0" />
        <t:checkbox for="checkbox2" index="1" />
        <t:checkbox for="checkbox2" index="2" />
        <t:checkbox for="checkbox2" index="3" />
    </h:panelGrid>
    </h:form>
</f:view>
</body>
</html>
セレクトメニュー
- 表示されるラベル:レベルは?
- id: select1
- Managed Bean 名: regform
- 属性名: レベル

<%@ page contentType="text/html; charset=Shift_JIS" %>
<%@ taglib uri="http://java.sun.com/jsf/html" prefix="h" %>
<%@ taglib uri="http://java.sun.com/jsf/core" prefix="f" %>
<%@ taglib uri="https://myfaces.apache.org/tomahawk" prefix="t" %>

<html>
<head>
    <title></title>
</head>

<body>
<f:view>
    <h:form id="form1">
        <h:outputLabel for="select1" value="レベルは?" />
        <h:selectOneMenu id="select1" value="#{regform.レベル}" >
        <f:selectItem itemValue="1" itemLabel="1" />
        <f:selectItem itemValue="2" itemLabel="2" />
        <f:selectItem itemValue="3" itemLabel="3" />
        <f:selectItem itemValue="4" itemLabel="4" />
        </h:selectOneMenu>
    </h:form>
</f:view>
</body>
</html>
ラジオボタン
- 表示されるラベル:場所は?
- id: radio1
- Managed Bean 名: regform
- 属性名: 場所

<%@ page contentType="text/html; charset=Shift_JIS" %>
<%@ taglib uri="http://java.sun.com/jsf/html" prefix="h" %>
<%@ taglib uri="http://java.sun.com/jsf/core" prefix="f" %>
<%@ taglib uri="https://myfaces.apache.org/tomahawk" prefix="t" %>

<html>
<head>
    <title></title>
</head>

<body>
<f:view>
    <h:form id="form1">
        <h:outputLabel value="場所は?" />
        <h:selectOneRadio id="radio1" value="#{regform.場所}" >
        <f:selectItem itemValue="公園" itemLabel="公園" />
        <f:selectItem itemValue="駅" itemLabel="駅" />
        <f:selectItem itemValue="道路" itemLabel="道路" />
        <f:selectItem itemValue="その他" itemLabel="その他" />
        </h:selectOneRadio>
    </h:form>
</f:view>
</body>
</html>
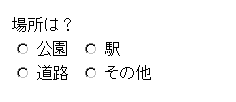
ラジオボタン・2段組み
tomahawk の機能を使い、ラジオボタンの2段組みを簡単に行えます。
- 表示されるラベル:場所は?
- id: radio1
- Managed Bean 名: regform
- 属性名: 場所
<%@ page contentType="text/html; charset=Shift_JIS" %>
<%@ taglib uri="http://java.sun.com/jsf/html" prefix="h" %>
<%@ taglib uri="http://java.sun.com/jsf/core" prefix="f" %>
<%@ taglib uri="https://myfaces.apache.org/tomahawk" prefix="t" %>

<html>
<head>
    <title></title>
</head>

<body>
<f:view>

    <h:form id="form1">
    <h:panelGrid columns="2">
    <h:outputLabel value="場所は?" />

        <!-- layout="spread" にしているので,ラジオボタンを作るが表示はされない(2カラム表示を可能にするための工夫) -->
        <t:selectOneRadio id="radio1" value="#{regform.場所}" layout="spread" styleClass="selectOneRadio">
            <f:selectItem itemValue="公園" itemLabel="公園" />
            <f:selectItem itemValue="駅" itemLabel="駅" />
            <f:selectItem itemValue="道路" itemLabel="道路" />
            <f:selectItem itemValue="その他" itemLabel="その他" />
        </t:selectOneRadio>

        <!-- 作ったラジオボタンの表示.for="???" 部分は一致させること.index は 0 から始まる -->
        <t:radio for="radio1" index="0" />
        <t:radio for="radio1" index="1" />
        <t:radio for="radio1" index="2" />
        <t:radio for="radio1" index="3" />
    </h:panelGrid>
    </h:form>

</f:view>
</body>
</html>
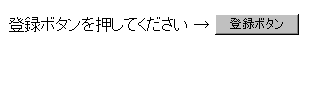
コマンドボタン
コマンドボタンは、HTML の input type="submit" のこと。
- 表示されるラベル:登録ボタンを押してください →
- id: buttion1
- Managed Bean 名: action
- メソッド名: doRegistration
<%@ page contentType="text/html; charset=Shift_JIS" %>
<%@ taglib uri="http://java.sun.com/jsf/html" prefix="h" %>
<%@ taglib uri="http://java.sun.com/jsf/core" prefix="f" %>
<%@ taglib uri="https://myfaces.apache.org/tomahawk" prefix="t" %>

<html>
<head>
    <title></title>
</head>

<body>
<f:view>
    <h:form id="form1">
        <h:outputLabel for="button1" value="登録ボタンを押してください → "/>
        <h:commandButton id="button1" value="登録ボタン" action="#{action.doRegistration}" />
    </h:form>
</f:view>
</body>
</html>
マネージド・ビーン (Managed Bean) の属性値の表示など
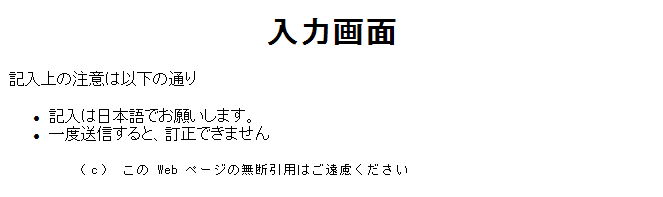
HTML タグ
H1, UL, LI タグなどはそのまま使える。
<%@ page contentType="text/html; charset=Shift_JIS" %>
<%@ taglib uri="http://java.sun.com/jsf/html" prefix="h" %>
<%@ taglib uri="http://java.sun.com/jsf/core" prefix="f" %>
<%@ taglib uri="https://myfaces.apache.org/tomahawk" prefix="t" %>

<html>
<head>
    <title></title>
</head>

<body>
<f:view>
    <h1>
    <center>入力画面</center>
    </h1>

    <p>
    記入上の注意は以下の通り
    <UL>
    <LI> 記入は日本語でお願いします。
    <LI> 一度送信すると、訂正できません
    </UL>

    <pre>
    (c) この Web ページの無断引用はご遠慮ください
    </pre>
</f:view>
</body>
</html>
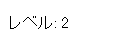
Managed Bean 名の属性値の表示
Managed Bean 名の属性値の表示は簡単です。
<%@ page contentType="text/html; charset=Shift_JIS" %>
<%@ taglib uri="http://java.sun.com/jsf/html" prefix="h" %>
<%@ taglib uri="http://java.sun.com/jsf/core" prefix="f" %>
<%@ taglib uri="https://myfaces.apache.org/tomahawk" prefix="t" %>

<html>
<head>
    <title></title>
</head>

<body>
<f:view>

        レベル:
        <h:outputText value="#{regform.レベル}" />

</f:view>
</body>
</html>
テーブル及びテーブルでのソート
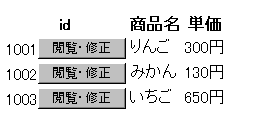
単純なテーブル
- 1行分を保持するオブジェクトの DSO クラスを定義 (商品Dso.java)
- 上記 DSO クラスの ArrayList を保持するのクラスを定義 (テーブル.java)
- JSP では、 tomahawk の t:dataTable タグを使用。 column タグの中に「変数名.属性名」を記述するのが基本
- rowIndexVar を使って、「行番号」を格納する変数名を指定
- マウスオーバ、ダブルクリック
t:dataTable タグの rowOnClick, rowOnDblClick 属性に、JavaScript を記述
記述例
rowOnClick="this.style.backgroundColor='#FFE0E0'"
rowOnDblClick="this.style.backgroundColor='#FFC0C0'"
- コマンドリンク
commandLink タグでは、action 属性で指定したメソッドが呼び出される。
updateActionLister タグでは、value 属性で指定した値を、property 属性で指定した Java Bean の属性に自動的にセットすることができる。
記述例は次の通り
<t:commandLink action="#{action.doCommodityCommandLink}" immediate="true"> <h:outputText value="#{commodity.id}"/> <t:updateActionListener property="#{commodityform.id}" value="#{commodity.id}" /> </t:commandLink> - コマンドボタン
commandButton タグでは、action 属性で指定したメソッドが呼び出される。
updateActionLister タグでは、value 属性で指定した値を、property 属性で指定した Java Bean の属性に自動的にセットすることができる。
記述例は次の通り
<t:commandButton action="#{action.doCommodityCommandButton}" immediate="true" value="選択">
    <h:outputText value="#{commodity.選択済み}"/>
    <t:updateActionListener property="#{commodityform.id}" value="#{commodity.id}" />
</t:commandButton>
<%@ page contentType="text/html; charset=Shift_JIS" %>
<%@ taglib uri="http://java.sun.com/jsf/html" prefix="h" %>
<%@ taglib uri="http://java.sun.com/jsf/core" prefix="f" %>
<%@ taglib uri="https://myfaces.apache.org/tomahawk" prefix="t" %>

<html>
<head>
    <title></title>

</head>

<body>
<f:view>
    <h:form id="table1">
        <t:dataTable styleClass="standardTable"
                var="commodity"
                value="#{datatable.商品テーブル}"
                preserveDataModel="true">

            <h:column>
                <f:facet name="header">
                    <h:outputText value="id"/>
                </f:facet>
                <!-- commandLink タグで、ボタンを付ける。ボタンのクリック時には、action 属性で指定したメソッドが呼び出される -->
                <t:commandLink action="#{action.doCommodityCommandButton}" immediate="true" value="閲覧・修正">
                    <h:outputText value="#{commodity.id}"/>
                    <!--  updateActionLister タグで、value 属性で指定した値を、property 属性で指定した Java Bean の属性に自動的にセットすることができる -->
                    <t:updateActionListener property="#{commodityform.id}" value="#{commodity.id}" />
                </t:commandLink>
            </h:column>

            <h:column>
                <f:facet name="header">
                    <h:outputText value="商品名"/>
                </f:facet>
                <h:outputText value="#{commodity.商品名}"/>
            </h:column>

            <h:column>
                <f:facet name="header">
                    <h:outputText value="単価"/>
                </f:facet>
                <h:outputText value="#{commodity.単価}"/>
            </h:column>

        </t:dataTable>
    </h:form>
</f:view>
</body>
</html>
テーブルでのソート
- テーブル.java(下記) は、SortableList.java(下記)のサブクラスとする。
- SortableList.java は決まり文句
- テーブル.java は下記のように調整
- テーブル.java の テーブル() コンストラクタ: ソートすべきカラムの既定値
- テーブル.java の isDefaultAscending メソッド: true あるいは false
- テーブル.java の sort メソッド: 全属性でソートするように記述
参考
<%@ page contentType="text/html; charset=Shift_JIS" %>
<%@ taglib uri="http://java.sun.com/jsf/html" prefix="h" %>
<%@ taglib uri="http://java.sun.com/jsf/core" prefix="f" %>
<%@ taglib uri="https://myfaces.apache.org/tomahawk" prefix="t" %>

<html>
<head>
    <title></title>

</head>

<body>
<f:view>
    <h:form id="table1">
        <t:dataTable styleClass="standardTable"
                cellpadding="1"
                cellspacing="0"
                width="100%"
                border="1"
                var="commodity"
                value="#{datatable.商品テーブル}"
                rowIndexVar="rowIndex"
                rowOnClick="this.style.backgroundColor='#FFE0E0'"
                rowOnDblClick="this.style.backgroundColor='#FFC0C0'"
                sortColumn="#{datatable.sort}"
                sortAscending="#{datatable.ascending}"
                preserveDataModel="true"
                preserveSort="true">

            <h:column>
                <!-- commandButton タグで、ボタンを付ける。ボタンのクリック時には、action 属性で指定したメソッドが呼び出される -->
                <t:commandButton action="#{action.doCommodityCommandButton}" immediate="true" value="選択">
                    <h:outputText value="#{commodity.選択済み}"/>
                    <!--  updateActionLister タグで、value 属性で指定した値を、property 属性で指定した Java Bean の属性に自動的にセットすることができる -->
                    <t:updateActionListener property="#{commodityform.行番号}" value="#{rowIndex}" />
                </t:commandButton>
            </h:column>

            <h:column>
                <f:facet name="header">
                    <t:commandSortHeader arrow="true" immediate="true" columnName="id" >
                        <h:outputText value="id"/>
                    </t:commandSortHeader>
                </f:facet>

                <!-- commandLink タグで、リンクを付ける。リンクのクリック時には、action 属性で指定したメソッドが呼び出される -->
                <t:commandLink action="#{action.doCommodityCommandLink}" immediate="true">
                    <h:outputText value="#{commodity.id}"/>
                    <!--  updateActionLister タグで、value 属性で指定した値を、property 属性で指定した Java Bean の属性に自動的にセットすることができる -->
                    <t:updateActionListener property="#{commodityform.id}" value="#{commodity.id}" />
                </t:commandLink>
            </h:column>

            <h:column>
                <f:facet name="header">
                    <t:commandSortHeader arrow="true" columnName="商品名">
                        <h:outputText value="商品名"/>
                    </t:commandSortHeader>
                </f:facet>
                <h:outputText value="#{commodity.商品名}"/>
            </h:column>

            <h:column>
                <f:facet name="header">
                    <t:commandSortHeader arrow="true" columnName="単価">
                        <h:outputText value="単価"/>
                    </t:commandSortHeader>
                </f:facet>
                <h:outputText value="#{commodity.単価}"/>
            </h:column>

            <h:column>
                <f:facet name="header">
                    <t:commandSortHeader arrow="true" columnName="野菜か">
                        <h:outputText value="野菜か"/>
                    </t:commandSortHeader>
                </f:facet>
                <h:outputText value="#{commodity.野菜か}"/>
            </h:column>

        </t:dataTable>
    </h:form>
    <p>
  クリック、ダブルクリックによって色が付き、目印になります (ソートしたり、画面を再表示すると、色が消えます)。
    <p>
    例えば、「野菜か」を第一に、「単価」を第二にして、ソートをしたいときには、先に「単価」をクリックし、その後「野菜か」をクリックしてください。
</f:view>
</body>
</html>
上記の index.jsp を動作させるためのファイル
手順は、 JavaServer Faces サンプルプログラムのWebページに記述の手順と同じ。
アクション.java
パッケージ hoge.hoge.com のクラスとして作る コマンドボタン用のアクション・コントーラ・メソッドの見本
package hoge.hoge.com;

import javax.faces.context.ExternalContext;
import javax.faces.context.FacesContext;
import javax.servlet.http.HttpServletRequest;
import javax.servlet.http.HttpSession;

public class アクション {
    private 登録フォーム regform;
    private 商品フォーム commodityform;
    private テーブル datatable;

    // 以下のうち,セッターはJSFが呼び出す.
    public 登録フォーム getRegform() {
        return regform;
    }
    public void setRegform(登録フォーム regform) {
        this.regform = regform;
    }
    public 商品フォーム getCommodityform() {
        return commodityform;
    }
    public void setCommodityform(商品フォーム commodityform) {
        this.commodityform = commodityform;
    }
    public テーブル getDatatable() {
        return datatable;
    }
    public void setDatatable(テーブル datatable) {
        this.datatable = datatable;
    }

    // アクション・コントロール・メソッド
    public String doRegistration() {
        // JFS で HttpServletRequest, HttpSession を取得するときの決まり文句
        ExternalContext context = FacesContext.getCurrentInstance().getExternalContext();
        HttpServletRequest request = (HttpServletRequest)context.getRequest();
        HttpSession session = request.getSession();

        //登録処理
        System.out.println("アクション・コントロール・メソッド doRegistration() が呼び出されました");

        // いつも成功
        return "success";
        // return "failure";
    }

    public String doCommodityCommandButton() {
        // JFS で HttpServletRequest, HttpSession を取得するときの決まり文句
        ExternalContext context = FacesContext.getCurrentInstance().getExternalContext();
        HttpServletRequest request = (HttpServletRequest)context.getRequest();
        HttpSession session = request.getSession();

        //登録処理
        // System.out.println("アクション・コントロール・メソッドdoCommodityButton() が呼び出されました。commodityform.行番号 の値は");
        // System.out.println( getCommodityform().get行番号() );
        this.getDatatable().get商品テーブル().get( getCommodityform().get行番号() ).toggle選択済み();;

        // いつも成功
        return "success";
        // return "failure";
    }

    public String doCommodityCommandLink() {
        // JFS で HttpServletRequest, HttpSession を取得するときの決まり文句
        ExternalContext context = FacesContext.getCurrentInstance().getExternalContext();
        HttpServletRequest request = (HttpServletRequest)context.getRequest();
        HttpSession session = request.getSession();

        //登録処理
        System.out.println("アクション・コントロール・メソッドdoCommodityLink() が呼び出されました。commodityform.id の値は");
        System.out.println( getCommodityform().getId() );

        // いつも成功
        return "success";
        // return "failure";
    }
}
SortableList.java
Apache Software Foundation (ASF) 配布のものを使用
/*
 * Licensed to the Apache Software Foundation (ASF) under one
 * or more contributor license agreements.  See the NOTICE file
 * distributed with this work for additional information
 * regarding copyright ownership.  The ASF licenses this file
 * to you under the Apache License, Version 2.0 (the
 * "License"); you may not use this file except in compliance
 * with the License.  You may obtain a copy of the License at
 *
 *   http://www.apache.org/licenses/LICENSE-2.0
 *
 * Unless required by applicable law or agreed to in writing,
 * software distributed under the License is distributed on an
 * "AS IS" BASIS, WITHOUT WARRANTIES OR CONDITIONS OF ANY
 * KIND, either express or implied.  See the License for the
 * specific language governing permissions and limitations
 * under the License.
 */
// package org.apache.myfaces.examples.listexample;
package hoge.hoge.com;

/**
 * Convenient base class for sortable lists.
 * @author Thomas Spiegl (latest modification by $Author: grantsmith $)
 * @version $Revision: 472610 $ $Date: 2006-11-08 20:46:34 +0100 (Wed, 08 Nov 2006) $
 */
public abstract class SortableList
{
    private String _sort;
    private boolean _ascending;

    protected SortableList(String defaultSortColumn)
    {
        _sort = defaultSortColumn;
        _ascending = isDefaultAscending(defaultSortColumn);
    }

    /**
     * Sort the list.
     */
    protected abstract void sort(String column, boolean ascending);

    /**
     * Is the default sort direction for the given column "ascending" ?
     */
    protected abstract boolean isDefaultAscending(String sortColumn);


    public void sort(String sortColumn)
    {
        if (sortColumn == null)
        {
            throw new IllegalArgumentException("Argument sortColumn must not be null.");
        }

        if (_sort.equals(sortColumn))
        {
            //current sort equals new sortColumn -> reverse sort order
            _ascending = !_ascending;
        }
        else
        {
            //sort new column in default direction
            _sort = sortColumn;
            _ascending = isDefaultAscending(_sort);
        }

        sort(_sort, _ascending);
    }

    public String getSort()
    {
        return _sort;
    }

    public void setSort(String sort)
    {
        _sort = sort;
    }

    public boolean isAscending()
    {
        return _ascending;
    }

    public void setAscending(boolean ascending)
    {
        _ascending = ascending;
    }
}
テーブル.java
パッケージ hoge.hoge.com のクラスとして作る
t:dataTable タグのテスト用
package hoge.hoge.com;

import java.util.ArrayList;
import java.util.Collections;
import java.util.Comparator;

public class テーブル extends SortableList {
    private static ArrayList<商品Dso> 商品テーブル = null;

    public テーブル() {
        // ソートすべきカラムの既定値
        super("id");
    }

    public ArrayList<商品Dso> get商品テーブル() {
        if (商品テーブル == null) {
            商品テーブル = new ArrayList<商品Dso>();
            商品テーブル.add(new 商品Dso("1001","りんご", "300円", "n"));
            商品テーブル.add(new 商品Dso("1002","白菜", "180円", "y"));
            商品テーブル.add(new 商品Dso("1003","にんじん", "100円", "y"));
            商品テーブル.add(new 商品Dso("1004","キャベツ", "450円", "y"));
            商品テーブル.add(new 商品Dso("1005","みかん", "130円", "n"));
            商品テーブル.add(new 商品Dso("1006","いちご", "650円", "n"));
        }
        // ソートの実行
        sort(getSort(), isAscending());
        return 商品テーブル;
    }

    protected boolean isDefaultAscending(String sortColumn)
    {
        return true;
    }

    protected void sort(final String column, final boolean ascending)
    {
        Comparator comparator = new Comparator()
        {
            public int compare(Object o1, Object o2)
            {
                商品Dso c1 = (商品Dso)o1;
                商品Dso c2 = (商品Dso)o2;
                if (column == null)
                {
                    return 0;
                }
                // 各属性での比較 (属性すべてを記述)
                if (column.equals("id"))
                {
                    return ascending ? c1.getId().compareTo(c2.getId()) : c2.getId().compareTo(c1.getId());
                }
                else if (column.equals("商品名"))
                {
                    return ascending ? c1.get商品名().compareTo(c2.get商品名()) : c2.get商品名().compareTo(c1.get商品名());
                }
                else if (column.equals("単価"))
                {
                    return ascending ? c1.get単価().compareTo(c2.get単価()) : c2.get単価().compareTo(c1.get単価());
                }
                else if (column.equals("野菜か"))
                {
                    return ascending ? c1.get野菜か().compareTo(c2.get野菜か()) : c2.get野菜か().compareTo(c1.get野菜か());
                }
                else return 0;
            }
        };
        // 第一引数には属性名を記述
        Collections.sort(商品テーブル, comparator);
    }
}
商品Dso.java
パッケージ hoge.hoge.com のクラスとして作る
t:dataTable タグのテスト用
package hoge.hoge.com;

import java.io.Serializable;

// Dso は 「Serializable」である必要がある(DataTable での表示等のため)
public class 商品Dso implements Serializable {
    private static final long serialVersionUID = 1L;
    private String id = null;
    private String 商品名 = null;
    private String 単価 = null;
    private String 野菜か = null;
    // 「選択済み」は JSF での処理用(チェックボックスでチェックしたかの情報)
    private String 選択済み = "□";
    public 商品Dso(String id, String 商品名, String 単価, String 野菜か) {
        super();
        this.id = id;
        this.商品名 = 商品名;
        this.単価 = 単価;
        this.野菜か = 野菜か;
    }
    public String getId() {
        return id;
    }
    public void setId(String id) {
        this.id = id;
    }
    public String get商品名() {
        return 商品名;
    }
    public void set商品名(String 商品名) {
        this.商品名 = 商品名;
    }
    public String get単価() {
        return 単価;
    }
    public void set単価(String 単価) {
        this.単価 = 単価;
    }
    public String get野菜か() {
        return 野菜か;
    }
    public void set野菜か(String 野菜か) {
        this.野菜か = 野菜か;
    }
    public String get選択済み() {
        return 選択済み;
    }
    public void set選択済み(String 選択済み) {
        this.選択済み = 選択済み;
    }
    public void toggle選択済み() {
        if ( this.選択済み.equals("□") ) {
            this.set選択済み("■");
        }
        else if ( this.選択済み.equals("■") ) {
            this.set選択済み("□");
        }
    }
}
商品フォーム.java
パッケージ hoge.hoge.com のクラスとして作る
フォームデータが入る
package hoge.hoge.com;

public class 商品フォーム {
    private String id = null;
    private int 行番号 = -1;

    public String getId() {
        return id;
    }

    public void setId(String id) {
        this.id = id;
    }

    public int get行番号() {
        return 行番号;
    }

    public void set行番号(int 行番号) {
        this.行番号 = 行番号;
    }
}
登録フォーム.java
パッケージ hoge.hoge.com のクラスとして作る
フォームデータが入る
package hoge.hoge.com;

import java.util.List;

public class 登録フォーム {
    private String ユーザ名 = null;
    private java.util.Date 発生日;
    private String 場所 = null;
    private List<String> 種類 = null;
    private String レベル = null;
    private boolean 処理済みか = false;
    private String 感想 = null;

    public String getユーザ名() {
        return ユーザ名;
    }

    public void setユーザ名(String ユーザ名) {
        this.ユーザ名 = ユーザ名;
    }

    public java.util.Date get発生日() {
        return 発生日;
    }

    public void set発生日(java.util.Date 発生日) {
        this.発生日 = 発生日;
    }

    public String get場所() {
        return 場所;
    }

    public void set場所(String 場所) {
        this.場所 = 場所;
    }

    public List<String> get種類() {
        return 種類;
    }

    public void set種類(List<String> 種類) {
        this.種類 = 種類;
    }

    public String getレベル() {
        return レベル;
    }

    public void setレベル(String レベル) {
        this.レベル = レベル;
    }

    public boolean is処理済みか() {
        return 処理済みか;
    }

    public void set処理済みか(boolean 処理済みか) {
        this.処理済みか = 処理済みか;
    }

    public String get感想() {
        return 感想;
    }

    public void set感想(String 感想) {
        this.感想 = 感想;
    }
}
表示項目マスタ.java
パッケージ hoge.hoge.com のクラスとして作る selectItems で使用
package hoge.hoge.com;

import java.util.ArrayList;
import javax.faces.model.SelectItem;

public class 表示項目マスタ {
    private ArrayList<SelectItem> 種類 = null;

    public ArrayList<SelectItem> get種類() {
        if (種類 == null) {
            種類 = new ArrayList<SelectItem>();
            // "値", "(表示される)ラベル" の順で記述
            種類.add(new SelectItem("楽しい出来事","楽しい出来事"));
            種類.add(new SelectItem("悲しい出来事","悲しい出来事"));
            種類.add(new SelectItem("重要","重要"));
            種類.add(new SelectItem("影響大","影響大"));
        }
        return 種類;
    }

}
faces-config.xml
<?xml version="1.0"?>
<!DOCTYPE faces-config PUBLIC "-//Sun Microsystems, Inc.//DTD JavaServer Faces Config 1.1//EN" "http://java.sun.com/dtd/web-facesconfig_1_1.dtd">
<faces-config>
    <managed-bean>
        <managed-bean-name>regform</managed-bean-name>
        <managed-bean-class>hoge.hoge.com.登録フォーム</managed-bean-class>
        <managed-bean-scope>session</managed-bean-scope>
    </managed-bean>
    <managed-bean>
        <managed-bean-name>commodityform</managed-bean-name>
        <managed-bean-class>hoge.hoge.com.商品フォーム</managed-bean-class>
        <managed-bean-scope>session</managed-bean-scope>
    </managed-bean>
    <managed-bean>
        <managed-bean-name>items</managed-bean-name>
        <managed-bean-class>hoge.hoge.com.表示項目マスタ</managed-bean-class>
        <managed-bean-scope>session</managed-bean-scope>
    </managed-bean>
        <managed-bean>
        <managed-bean-name>datatable</managed-bean-name>
        <managed-bean-class>hoge.hoge.com.テーブル</managed-bean-class>
        <managed-bean-scope>session</managed-bean-scope>
    </managed-bean>

    <managed-bean>
    <managed-bean-name>action</managed-bean-name>
    <managed-bean-class>hoge.hoge.com.アクション</managed-bean-class>
    <managed-bean-scope>session</managed-bean-scope>
       <managed-property>
        <property-name>regform</property-name>
        <property-class>hoge.hoge.com.登録フォーム</property-class>
        <value>#{regform}</value>
       </managed-property>
       <managed-property>
        <property-name>commodityform</property-name>
        <property-class>hoge.hoge.com.商品フォーム</property-class>
        <value>#{commodityform}</value>
       </managed-property>
              <managed-property>
        <property-name>datatable</property-name>
        <property-class>hoge.hoge.com.テーブル</property-class>
        <value>#{datatable}</value>
       </managed-property>
    </managed-bean>
</faces-config>