ポケモンデータセット(CSVファイル)の読み込みと散布図(Python, pandas, matplotlib, seaborn を使用)
【概要】
ポケモンデータセット(CSVファイル)の読み込みと散布図の作成を,Python, pandas, matplotlib, seaborn で行う.具体的には,Pokemon データセット(CSV ファイル)のダウンロードと配置,pandas による CSV ファイルの読み込みとデータフレームの基本操作(head, shape, ndim, columns, info, describe),seaborn による散布図の作成(Attack と Defense の関係を Type 1 で色分け),scikit-learn による主成分分析(PCA)プロットを扱う.
利用条件は,利用者自身で確認すること.
【目次】
【関連する外部ページ】
機械学習や深層学習で用いる NVIDIA CUDA,Visual Studio,Cursor などの解説: https://www.kkaneko.jp/cc/dev/aiassist.html
Windsurf の公式ページ: https://windsurf.com/
【サイト内の関連情報】
Windows の操作,git の解説ページを参照できる.
1. 前準備
Python 3.12 のインストール
Pythonのインストールを行い、Pythonのプログラムを実行する環境を整える。扱う環境は、Windows搭載パソコンである。金子研究室では、Python 3.12.10を推奨する。
[Windows での Python 3.12 のインストール手順を見るには、ここをクリック]
Windows での Python 3.12 のインストール
以下のいずれかの方法でPython 3.12をインストールする。Pythonがインストール済みの場合、この手順は不要である。
方法 1:winget によるインストール
【インストールコマンドの実行方法】
管理者権限でコマンドプロンプトを起動する(手順:Windowsキーまたはスタートメニュー → cmd と入力 → 右クリック → 「管理者として実行」)。そして、コマンド全体をコマンドプロンプトにコピー&ペーストする。
--scope machine を指定することで、システム全体(全ユーザー向け)にインストールされる。このオプションの実行には管理者権限が必要である。インストール完了後、コマンドプロンプトを再起動するとPATHが反映される。
REM Python 3.12 をシステム領域にインストール
winget install --id Python.Python.3.12 -e --scope machine --silent --accept-source-agreements --accept-package-agreements --override "/quiet InstallAllUsers=1 PrependPath=1 Include_test=0 Include_pip=1 Include_launcher=1 InstallLauncherAllUsers=1 TargetDir=\"C:\Program Files\Python312\""

REM Python と Scripts を PATH 先頭に追加
powershell -NoProfile -Command "$p='C:\Program Files\Python312'; $s=\"$p\Scripts\"; $c=[Environment]::GetEnvironmentVariable('Path','Machine'); if((Test-Path $p) -and (';'+$c+';' -notlike \"*;$p;*\") -and (';'+$c+';' -notlike \"*;$s;*\")){[Environment]::SetEnvironmentVariable('Path',\"$p;$s;$c\",'Machine')}"
方法 2:インストーラーによるインストール
- Python公式サイト(https://www.python.org/downloads/)にアクセスし、「Download Python 3.x.x」ボタンからWindows用インストーラーをダウンロードする。
- ダウンロードしたインストーラーを実行する。
- 初期画面の下部に表示される「Add python.exe to PATH」にチェックを入れてから「Customize installation」を選択する。このチェックを入れ忘れると、コマンドプロンプトから
pythonコマンドを実行できない。 - 「Install Python 3.xx for all users」にチェックを入れ、「Install」をクリックする。
インストールの確認
コマンドプロンプトで以下を実行する。
python --versionバージョン番号(例:Python 3.12.x)が表示されればインストール成功である。「'python' は、内部コマンドまたは外部コマンドとして認識されていません。」と表示される場合は、インストールが正常に完了していない。
Python の開発環境 Visual Studio Code のインストールと Python 用の設定
Python の開発環境Visual Studio Code(プログラムを編集するソフトウェア。以下、VS Code)を整える。
[Windows での Visual Studio Code のインストールと Python 用の設定手順を見るには、ここをクリック]
Windows での Visual Studio Code のインストールと Python 用の設定手順
1. VS Code と拡張機能のインストール
以下のコマンドにより,既存の VS Code を削除し,全ユーザー共有の設定で再インストールしたうえで,拡張機能(VS Code に機能を追加するソフトウェア)をまとめて導入する.
【インストールコマンドの実行方法】
管理者権限でコマンドプロンプトを起動する(手順:Windows キーまたはスタートメニュー → cmd と入力 → 右クリック → 「管理者として実行」)。そして,コマンド全体をコマンドプロンプトにコピー&ペーストする。
インストールコマンド
REM ============================================================
REM Microsoft Visual Studio Code
REM ============================================================
winget uninstall -e --id Microsoft.VisualStudioCode --silent --disable-interactivity --accept-source-agreements
rmdir /s /q C:\ProgramData\vscode-extensions 2>nul
rmdir /s /q "%APPDATA%\Code" 2>nul
rmdir /s /q "%USERPROFILE%\.vscode" 2>nul
rmdir /s /q "%LOCALAPPDATA%\Microsoft\vscode-update" 2>nul

REM VS Code をシステム領域に新規インストール
winget install --scope machine --id Microsoft.VisualStudioCode -e --silent --accept-source-agreements --accept-package-agreements

REM 全ユーザー共有の拡張機能フォルダ
mkdir C:\ProgramData\vscode-extensions 2>nul
icacls "C:\ProgramData\vscode-extensions" /grant "Everyone:(OI)(CI)M" /T

REM スタートメニューのショートカットを --extensions-dir 付きで再作成
rmdir /s /q "C:\ProgramData\Microsoft\Windows\Start Menu\Programs\Visual Studio Code" 2>nul
del "C:\ProgramData\Microsoft\Windows\Start Menu\Programs\Visual Studio Code.lnk" 2>nul
powershell -NoProfile -Command "$s=New-Object -ComObject WScript.Shell; $lnk=$s.CreateShortcut('C:\ProgramData\Microsoft\Windows\Start Menu\Programs\Visual Studio Code.lnk'); $lnk.TargetPath='C:\Program Files\Microsoft VS Code\Code.exe'; $lnk.Arguments='--extensions-dir \"C:\ProgramData\vscode-extensions\"'; $lnk.Save()"
REM ショートカットの検証
powershell -NoProfile -Command "$s=New-Object -ComObject WScript.Shell; $lnk=$s.CreateShortcut('C:\ProgramData\Microsoft\Windows\Start Menu\Programs\Visual Studio Code.lnk'); Write-Host 'TargetPath:' $lnk.TargetPath; Write-Host 'Arguments:' $lnk.Arguments"

REM ファイル / フォルダ右クリックの「Code で開く」を登録
reg add "HKLM\SOFTWARE\Classes\*\shell\VSCode\command" /ve /d "\"C:\Program Files\Microsoft VS Code\Code.exe\" --extensions-dir \"C:\ProgramData\vscode-extensions\" \"%1\"" /f
reg add "HKLM\SOFTWARE\Classes\Directory\shell\VSCode\command" /ve /d "\"C:\Program Files\Microsoft VS Code\Code.exe\" --extensions-dir \"C:\ProgramData\vscode-extensions\" \"%1\"" /f
reg add "HKLM\SOFTWARE\Classes\Directory\Background\shell\VSCode\command" /ve /d "\"C:\Program Files\Microsoft VS Code\Code.exe\" --extensions-dir \"C:\ProgramData\vscode-extensions\" \"%V\"" /f

REM --extensions-dir 付きで起動する code.cmd ラッパを作成
REM (%* を echo で書くと対話的 cmd で失われるため、PowerShell で [char]37+'*' を書き出す)
powershell -NoProfile -Command "$pct=[char]37; $q=[char]34; $c='@echo off'+[char]13+[char]10+$q+'C:\Program Files\Microsoft VS Code\bin\code.cmd'+$q+' --extensions-dir '+$q+'C:\ProgramData\vscode-extensions'+$q+' '+$pct+'*'+[char]13+[char]10; [IO.File]::WriteAllText('C:\ProgramData\vscode-extensions\vscode.cmd',$c,[Text.Encoding]::ASCII)"

REM 拡張機能のインストール
set "CODE=C:\Program Files\Microsoft VS Code\bin\code.cmd"
"%CODE%" --extensions-dir "C:\ProgramData\vscode-extensions" --uninstall-extension GitHub.copilot
"%CODE%" --extensions-dir "C:\ProgramData\vscode-extensions" --uninstall-extension GitHub.copilot-chat
"%CODE%" --extensions-dir "C:\ProgramData\vscode-extensions" --install-extension ms-python.python
"%CODE%" --extensions-dir "C:\ProgramData\vscode-extensions" --install-extension ms-python.vscode-pylance
"%CODE%" --extensions-dir "C:\ProgramData\vscode-extensions" --install-extension ms-python.debugpy
"%CODE%" --extensions-dir "C:\ProgramData\vscode-extensions" --install-extension MS-CEINTL.vscode-language-pack-ja
"%CODE%" --extensions-dir "C:\ProgramData\vscode-extensions" --install-extension saoudrizwan.claude-dev
"%CODE%" --extensions-dir "C:\ProgramData\vscode-extensions" --install-extension rust-lang.rust-analyzer
"%CODE%" --extensions-dir "C:\ProgramData\vscode-extensions" --install-extension tamasfe.even-better-toml
"%CODE%" --extensions-dir "C:\ProgramData\vscode-extensions" --install-extension anthropic.claude-code
"%CODE%" --extensions-dir "C:\ProgramData\vscode-extensions" --install-extension almenon.arepl
"%CODE%" --extensions-dir "C:\ProgramData\vscode-extensions" --list-extensions --show-versions
echo === セットアップ完了 ===
2. Python インタプリタの選択
同一マシンに複数の Python がインストールされている場合,VS Code で使用する Python 本体(インタプリタ:Python プログラムを解釈・実行するソフトウェア)を選択する必要がある.
- コマンドパレット(コマンド名で機能を呼び出す VS Code の入力欄)を開く(
Ctrl+Shift+P) Python: Select Interpreterと入力する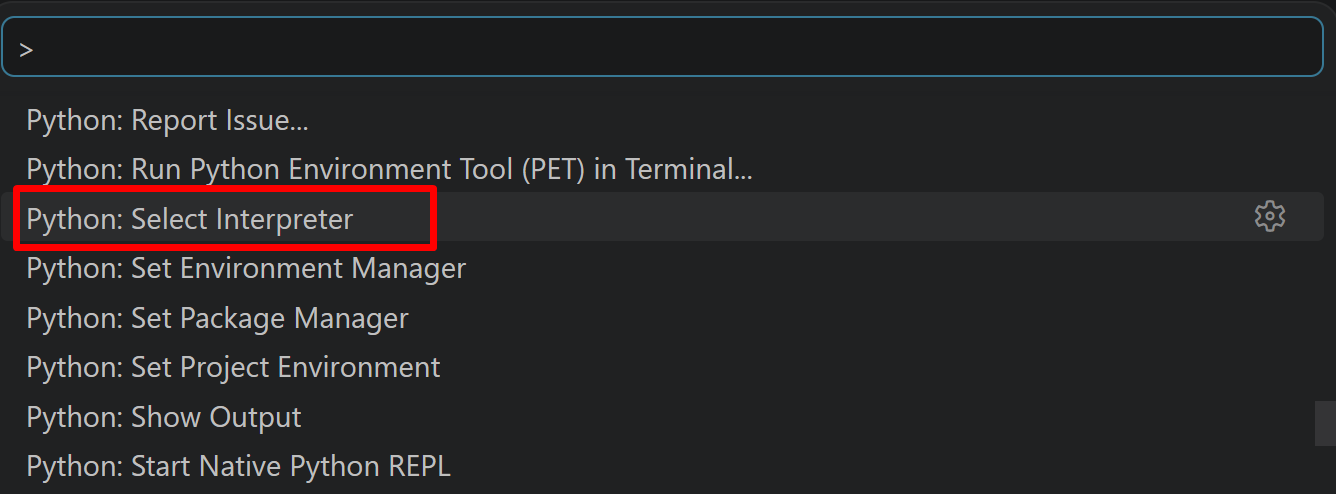
- 表示される一覧から,使用する Python(例:
C:\Program Files\Python312\python.exe)を選択する.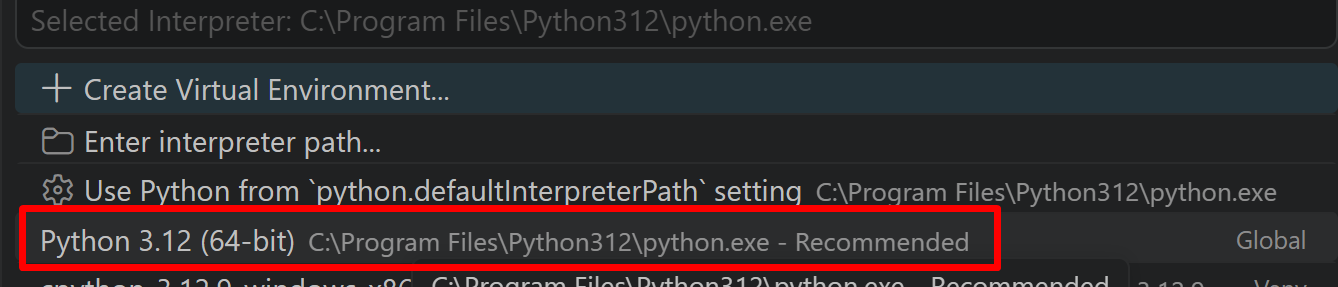
必要なライブラリのインストール
管理者権限でコマンドプロンプトを起動する
(手順:Windowsキーまたはスタートメニュー → cmd と入力 → 右クリック → 「管理者として実行」)。
起動したコマンドプロンプトで以下を実行する.
pip install -U --no-user numpy pandas matplotlib seaborn scikit-learn2. 実行のための準備とその確認手順(Windows 前提)
2.1 プログラムファイルの準備
第4章のソースコードをテキストエディタ(メモ帳,Windsurf 等)で保存する(文字コード:UTF-8).Jupyter Notebook の場合は,各コードブロックを順にセルへ入力して実行する.
2.2 実行コマンド
コマンドプロンプトでファイルの保存先ディレクトリに移動し,保存したファイルを以下のように実行する(ファイル名を a.py とした場合).
python a.pyコード中の %matplotlib inline は Jupyter Notebook 専用のマジックコマンド(IPython のコマンドで,描画結果をノートブック内に表示するための指示)である.スクリプトとして実行する場合はこの行を削除またはコメントアウトする.
2.3 動作確認チェックリスト
| 確認項目 | 期待される結果 |
|---|---|
| CSV ファイルの配置 | C:\data\pokemon.csv が存在する |
| CSV ファイルの読み込み | pd.read_csv がエラーなく完了し,データフレーム pokemon が生成される |
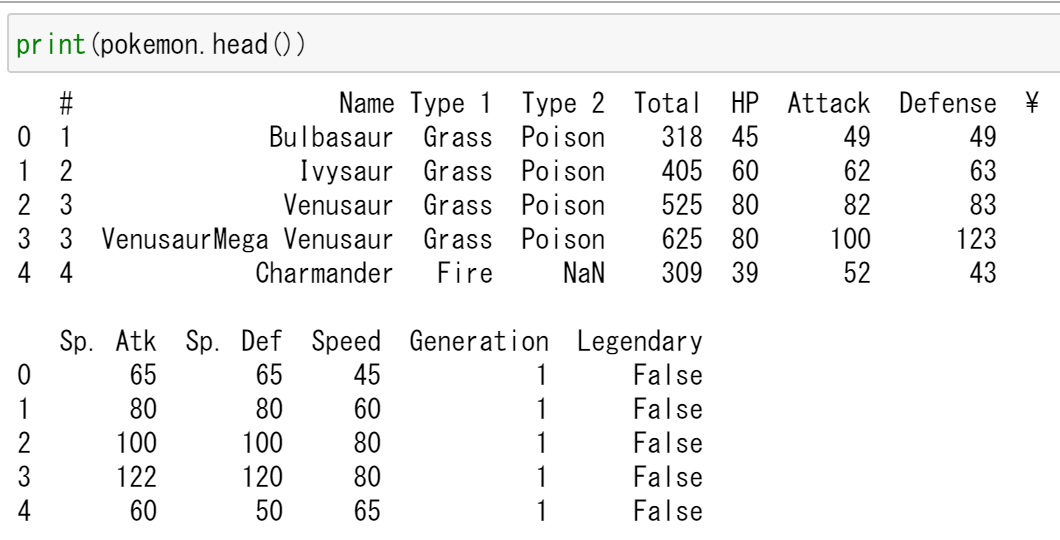
pokemon.head() | 先頭5行のデータが表示される |
pokemon.shape | 行数と列数がタプルで表示される |
pokemon.describe() | 各数値属性の件数,平均,標準偏差,最小値,四分位数,最大値が表示される |
| seaborn 散布図 | Attack と Defense の関係を Type 1 で色分けした散布図が表示される |
| 主成分分析プロット | PCA の結果が Type 1 で色分けされた散布図として表示される |
3. 概要・使い方・実行上の注意
Pokemon データセットの準備
Windows では,次のように操作する.
- データディレクトリの作成
mkdir c:\data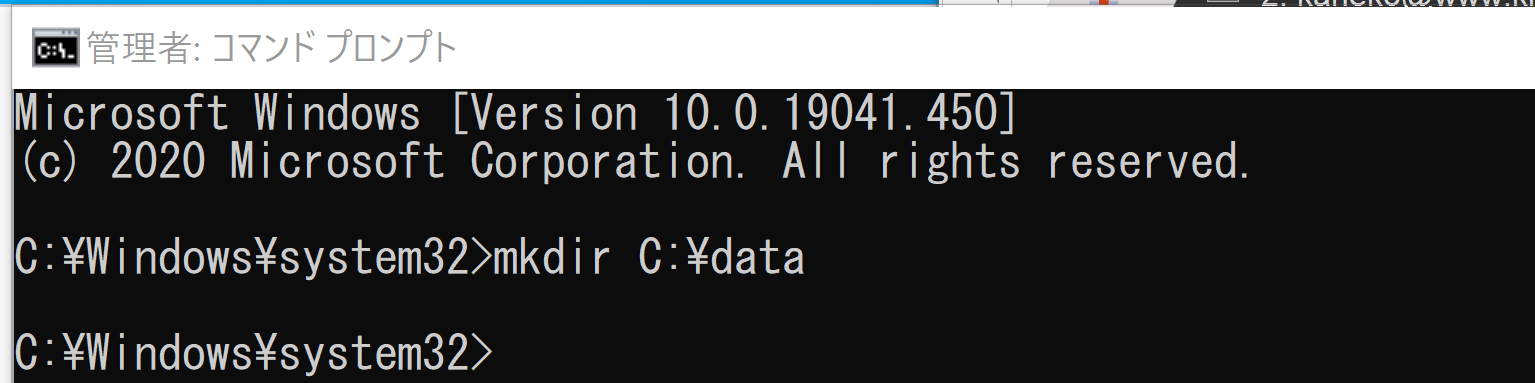
- カレントディレクトリの移動とデータのダウンロード
cd C:\data
git clone https://gist.github.com/armgilles/194bcff35001e7eb53a2a8b441e8b2c6
move 194bcff35001e7eb53a2a8b441e8b2c6\pokemon.csv .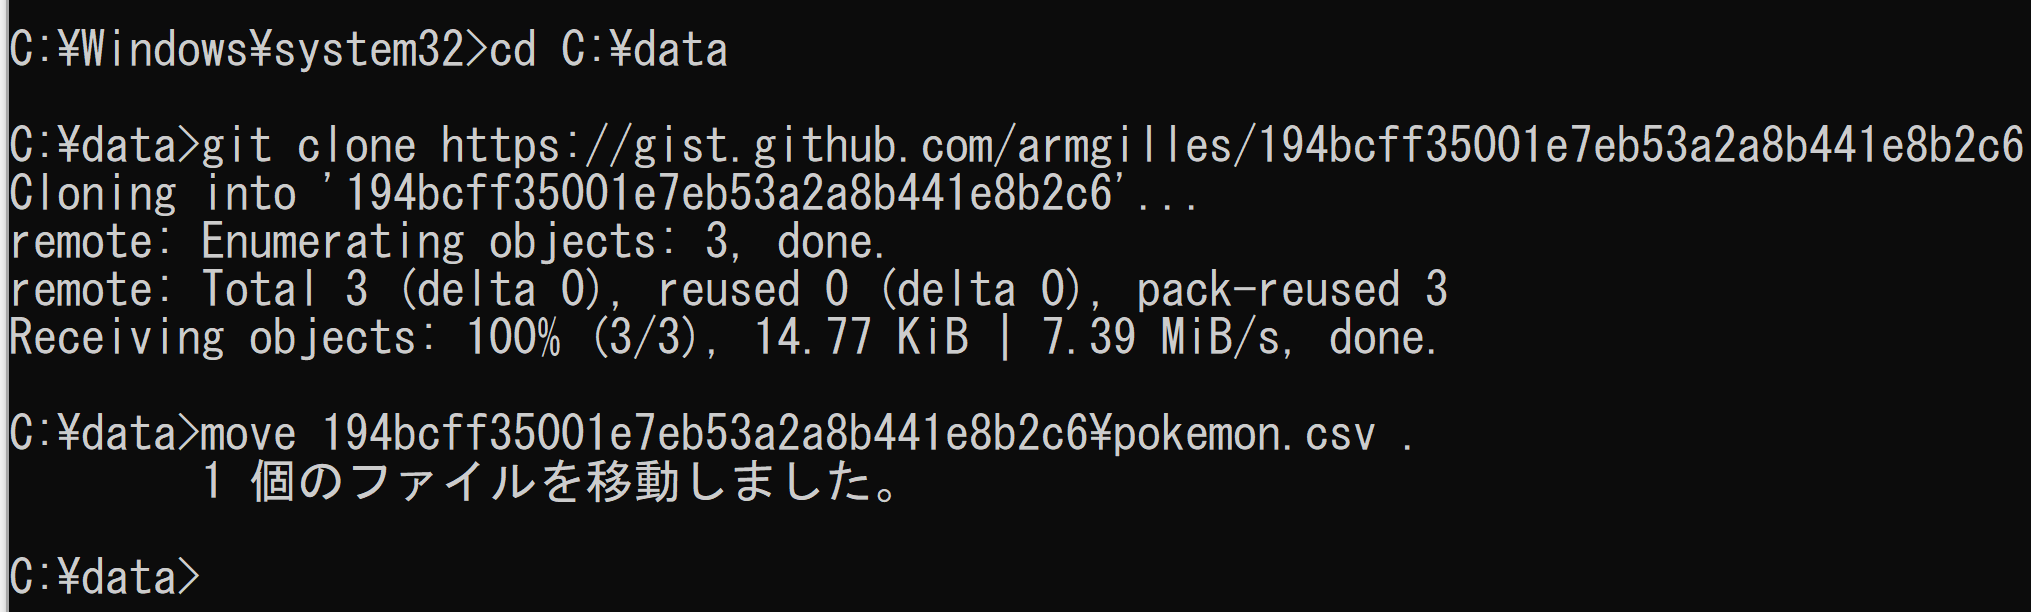
CSV ファイル pokemon.csv がデータディレクトリに作成される.
データフレームの基本操作
pandas で読み込んだデータフレームでは,以下の属性・メソッドが使用できる.
- head: 先頭部分の表示
- shape: サイズ
- ndim: 次元数
- columns: 属性名
- info(): 各属性のデータ型
describe() で各数値属性の件数,平均,標準偏差,最小値,四分位数,最大値を確認できる.
散布図の作成
seaborn の scatterplot で,Attack(攻撃力)と Defense(防御力)の関係を Type 1(タイプ1)で色分けして表示する.
主成分分析プロット
scikit-learn の PCA で数値属性を2つの主成分に次元削減し,Type 1 で色分けした散布図として描画する.
4. ソースコード
CSV ファイルの読み込み
import pandas as pd
pokemon = pd.read_csv("C:/data/pokemon.csv")

データの確認
print(pokemon.head())
基本的な情報の表示
print(pokemon.head())
print(pokemon.info())
print(pokemon.shape)
print(pokemon.ndim)
print(pokemon.columns)

基本統計量の表示
print(pokemon.describe())
seaborn による散布図
import seaborn as sns
import matplotlib.pyplot as plt
sns.scatterplot(x='Attack', y='Defense', hue='Type 1', data=pokemon, alpha=0.6)
plt.title('Attack vs Defense by Type 1')
plt.show()
主成分分析プロットの前準備
import numpy as np
import seaborn as sns
import sklearn.decomposition
%matplotlib inline
import matplotlib.pyplot as plt

def prin(A, n):
    pca = sklearn.decomposition.PCA(n_components=n)
    return pca.fit_transform(A)

def prin2(A):
    return prin(A, 2)

def scatter_label_plot(M, b, alpha):
    a12 = pd.DataFrame(M[:, 0:2], columns=['a1', 'a2'])
    f = pd.factorize(b)
    a12['target'] = f[0]
    g = sns.scatterplot(x='a1', y='a2', hue='target', data=a12, palette=sns.color_palette("hls", np.max(f[0]) + 1), legend="full", alpha=alpha)
    labels = f[1]
    for i, label in enumerate(labels):
        g.legend_.get_texts()[i].set_text(label)
    plt.show()

def pcaplot(A, b, alpha):
    scatter_label_plot(prin2(A), b, alpha)

主成分分析プロット
X = pokemon.iloc[:, 5:11].to_numpy()
y = pokemon.iloc[:, 2]
pcaplot(X, y, 0.4)

5. まとめ
pandas による CSV ファイルの読み込み
pd.read_csv で CSV ファイルを読み込み,データフレームとして扱う.head, shape, ndim, columns, info(), describe() でデータの構造や基本統計量を確認できる.
seaborn による散布図
seaborn の scatterplot で,2つの数値属性の関係をカテゴリ(Type 1)で色分けして可視化する.
scikit-learn による主成分分析(PCA)
sklearn.decomposition.PCA で数値データを2つの主成分に次元削減し,散布図としてプロットする.
Pokemon データセット
Pokemon データセットは CSV 形式で提供され,各ポケモンの名前,タイプ,各種ステータス(HP, Attack, Defense, Sp. Atk, Sp. Def, Speed),世代,伝説かどうかの情報を含む.git clone で取得できる.