![[kaneko lab.]](https://www.kkaneko.jp/info/logo_png.png)
PyTorch, Torchvision, Caffe 2 のインストール(Windows 上)
【目次】
- 前準備
- Build Tools for Visual Studio 2022,NVIDIA ドライバ,NVIDIA CUDA ツールキット,NVIDIA cuDNN のインストール
- Python のインストール,pip と setuptools の更新,Python 開発環境のインストール
- caffe のインストール(Build Tools for Visual Studio を利用)
caffe の利用条件などは、利用者が確認すること。
謝辞:このWebページで紹介する caffe ソフトウェアの作者に感謝します
前準備
Python 3.12 のインストール
Pythonのインストールを行い、Pythonのプログラムを実行する環境を整える。扱う環境は、Windows搭載パソコンである。金子研究室では、Python 3.12.10を推奨する。
[Windows での Python 3.12 のインストール手順を見るには、ここをクリック]
Windows での Python 3.12 のインストール
以下のいずれかの方法でPython 3.12をインストールする。Pythonがインストール済みの場合、この手順は不要である。
方法 1:winget によるインストール
【インストールコマンドの実行方法】
管理者権限でコマンドプロンプトを起動する(手順:Windowsキーまたはスタートメニュー → cmd と入力 → 右クリック → 「管理者として実行」)。そして、コマンド全体をコマンドプロンプトにコピー&ペーストする。
--scope machine を指定することで、システム全体(全ユーザー向け)にインストールされる。このオプションの実行には管理者権限が必要である。インストール完了後、コマンドプロンプトを再起動するとPATHが反映される。
REM Python 3.12 をシステム領域にインストール
winget install --id Python.Python.3.12 -e --scope machine --silent --accept-source-agreements --accept-package-agreements --override "/quiet InstallAllUsers=1 PrependPath=1 Include_test=0 Include_pip=1 Include_launcher=1 InstallLauncherAllUsers=1 TargetDir=\"C:\Program Files\Python312\""
if not "%ERRORLEVEL%"=="0" ( color 0c & echo Python 3.12 のインストールに失敗しました & ping 127.0.0.1 -n 6 >nul & color )

REM Python と Scripts を PATH 先頭に追加
powershell -NoProfile -Command "$p='C:\Program Files\Python312'; $s=\"$p\Scripts\"; if(Test-Path $p){$k=[Microsoft.Win32.Registry]::LocalMachine.OpenSubKey('SYSTEM\CurrentControlSet\Control\Session Manager\Environment',$true); $c=$k.GetValue('Path','',[Microsoft.Win32.RegistryValueOptions]::DoNotExpandEnvironmentNames); $t=$k.GetValueKind('Path'); $new=$c; if((';'+$new+';') -notlike \"*;$p;*\"){$new=$p+';'+$new}; if((';'+$new+';') -notlike \"*;$s;*\"){$new=$s+';'+$new}; if($new -ne $c){$k.SetValue('Path',$new,$t)}; $k.Close()}"

REM 現在のセッションにも反映(システムPATHを再取得して連結)
for /f "usebackq tokens=2,*" %A in (`reg query "HKLM\SYSTEM\CurrentControlSet\Control\Session Manager\Environment" /v Path`) do set "PATH=%B"

REM pip / wheel の更新
python -m pip install --no-user -U pip wheel
if not "%ERRORLEVEL%"=="0" ( color 0c & echo pip / wheel の更新に失敗しました & ping 127.0.0.1 -n 6 >nul & color )
方法 2:インストーラーによるインストール
- Python公式サイト(https://www.python.org/downloads/)にアクセスし、「Download Python 3.x.x」ボタンからWindows用インストーラーをダウンロードする。
- ダウンロードしたインストーラーを実行する。
- 初期画面の下部に表示される「Add python.exe to PATH」にチェックを入れてから「Customize installation」を選択する。このチェックを入れ忘れると、コマンドプロンプトから
pythonコマンドを実行できない。 - 「Install Python 3.xx for all users」にチェックを入れ、「Install」をクリックする。
インストールの確認
コマンドプロンプトで以下を実行する。
python --versionバージョン番号(例:Python 3.12.x)が表示されればインストール成功である。「'python' は、内部コマンドまたは外部コマンドとして認識されていません。」と表示される場合は、インストールが正常に完了していない。
Git のインストール(Windows 上) [クリックして展開]
管理者権限のコマンドプロンプトで以下を実行する.管理者権限は,winget の --scope machine オプションでシステム全体にインストールするために必要となる.
REM Git をシステム領域にインストール
winget install --scope machine --id Git.Git -e --silent --disable-interactivity --force --accept-source-agreements --accept-package-agreements --override "/VERYSILENT /NORESTART /NOCANCEL /SP- /CLOSEAPPLICATIONS /RESTARTAPPLICATIONS /COMPONENTS=""icons,ext\reg\shellhere,assoc,assoc_sh"" /o:PathOption=Cmd /o:CRLFOption=CRLFCommitAsIs /o:BashTerminalOption=MinTTY /o:DefaultBranchOption=main /o:EditorOption=VIM /o:SSHOption=OpenSSH /o:UseCredentialManager=Enabled /o:PerformanceTweaksFSCache=Enabled /o:EnableSymlinks=Disabled /o:EnableFSMonitor=Disabled"
CMakeのインストール(Windows 上) [クリックして展開]
管理者権限のコマンドプロンプトで以下を実行する。管理者権限のコマンドプロンプトを起動するには、Windows キーまたはスタートメニューから「cmd」と入力し、表示された「コマンドプロンプト」を右クリックして「管理者として実行」を選択する。
REM CMake をシステム領域にインストール
winget install --scope machine --id Kitware.CMake -e --silent --disable-interactivity --force --accept-source-agreements --accept-package-agreements --override "/qn /norestart ADD_CMAKE_TO_PATH=System"
7-Zip のインストール(Windows 上) [クリックして展開]
管理者権限のコマンドプロンプトで以下を実行する。管理者権限のコマンドプロンプトを起動するには、Windows キーまたはスタートメニューから「cmd」と入力し、表示された「コマンドプロンプト」を右クリックして「管理者として実行」を選択する。
REM 7-Zip をシステム領域にインストール
winget install --scope machine --id 7zip.7zip -e --silent --disable-interactivity --force --accept-source-agreements --accept-package-agreements
REM 7-Zip のパス設定
powershell -NoProfile -Command "$p='C:\Program Files\7-Zip'; $c=[Environment]::GetEnvironmentVariable('Path','Machine'); if((Test-Path $p) -and $c -notlike \"*$p*\"){[Environment]::SetEnvironmentVariable('Path',\"$p;$c\",'Machine')}"
Build Tools for Visual Studio 2026(ビルドツール)のインストール
Build Tools for Visual Studio 2026(ビルドツール)のインストールを行い、C/C++ コードのビルド環境を整える。
Build Tools for Visual Studio は,Visual Studio の IDE を含まない C/C++ コンパイラ,ライブラリ,ビルドツール等のコマンドライン向け開発ツールセットである。インストール済みの場合,この手順は不要である。 以下のコマンドは、Build Tools が未インストールの場合は winget で新規インストールし、インストール済みの場合は 【インストールコマンドの実行方法】 管理者権限でコマンドプロンプトを起動する(手順:Windows キーまたはスタートメニュー → 上記のコマンドでは、Build Tools 本体と Visual C++ 再頒布可能パッケージをインストールし、続いて以下のコンポーネントを追加している。 追加のコンポーネントが必要になった場合は Visual Studio Installer で個別にインストールできる。 インストール完了の確認 Visual Studio を必要とするとき Visual Studio の機能を必要とする場合は,追加インストールできる。[Build Tools for Visual Studio 2026(ビルドツール)のインストール手順を見るには、ここをクリック]
Windows での Build Tools for Visual Studio 2026 のインストール
setup.exe modify でコンポーネントを追加する(バージョンは変更しない)。cmd と入力 → 右クリック → 「管理者として実行」)。そして、コマンド全体をコマンドプロンプトにコピー&ペーストする。REM ============================================================
REM Visual C++ 再頒布可能パッケージ (VCRedist 2015-)
REM ============================================================
winget install --scope machine --id Microsoft.VCRedist.2015+.x64 -e --silent --disable-interactivity --force --accept-source-agreements --accept-package-agreements --override "/quiet /norestart"
if not "%ERRORLEVEL%"=="0" ( color 0c & echo VCRedist のインストールに失敗しました & ping 127.0.0.1 -n 6 >nul & color )
REM ============================================================
REM Visual Studio Build Tools + Desktop development with C++
REM (VCTools、MSBuildTools、CMake連携、Clang、Windows 11 SDK)
REM ============================================================
REM 進行中のインストーラーを停止(ロック競合回避。対象プロセスが存在しない場合は
REM taskkillがエラーを返すが、これは想定内であるため出力のみ抑制する)
taskkill /F /IM vs_setup.exe /T >nul 2>&1
taskkill /F /IM vs_installer.exe /T >nul 2>&1
taskkill /F /IM vs_installerservice.exe /T >nul 2>&1
taskkill /F /IM msiexec.exe /T >nul 2>&1
REM Build Tools + Desktop development with C++(VCTools)+ 追加コンポーネント(一括)
REM 未インストール時: winget で新規インストール
REM インストール済み時: setup.exe modify でコンポーネント追加(バージョンは変更しない)
winget list --id Microsoft.VisualStudio.BuildTools 2>nul | findstr /i "BuildTools" >nul 2>&1
if %ERRORLEVEL% EQU 0 (
for /f "usebackq delims=" %P in (`"C:\Program Files (x86)\Microsoft Visual Studio\Installer\vswhere.exe" -products Microsoft.VisualStudio.Product.BuildTools -property installationPath`) do start /wait "" "C:\Program Files (x86)\Microsoft Visual Studio\Installer\setup.exe" modify --installPath "%P" --add Microsoft.VisualStudio.Workload.VCTools --add Microsoft.VisualStudio.Workload.MSBuildTools --add Microsoft.VisualStudio.Component.VC.CMake.Project --add Microsoft.VisualStudio.Component.VC.Llvm.Clang --add Microsoft.VisualStudio.Component.VC.Llvm.ClangToolset --add Microsoft.VisualStudio.Component.Windows11SDK.26100 --add Microsoft.VisualStudio.Component.VC.v143.x86.x64 --includeRecommended --quiet --norestart --nocache
if not "%ERRORLEVEL%"=="0" ( color 0c & echo Build Tools のコンポーネント追加に失敗しました & ping 127.0.0.1 -n 6 >nul & color )
) else (
winget install --scope machine --id Microsoft.VisualStudio.BuildTools -e --silent --disable-interactivity --force --accept-source-agreements --accept-package-agreements --override "--quiet --wait --norestart --nocache --add Microsoft.VisualStudio.Workload.VCTools --includeRecommended --add Microsoft.VisualStudio.Workload.MSBuildTools --add Microsoft.VisualStudio.Component.VC.CMake.Project --add Microsoft.VisualStudio.Component.VC.Llvm.Clang --add Microsoft.VisualStudio.Component.VC.Llvm.ClangToolset --add Microsoft.VisualStudio.Component.Windows11SDK.26100 --add Microsoft.VisualStudio.Component.VC.v143.x86.x64"
if not "%ERRORLEVEL%"=="0" ( color 0c & echo Build Tools のインストールに失敗しました & ping 127.0.0.1 -n 6 >nul & color )
)
REM
REM BuildTools のインストールパスを vswhere.exe で取得(メジャーバージョンに依存しない)
set "VSWHERE=C:\Program Files (x86)\Microsoft Visual Studio\Installer\vswhere.exe"
set "BT_PATH="
for /f "usebackq delims=" %P in (`"%VSWHERE%" -products Microsoft.VisualStudio.Product.BuildTools -property installationPath`) do set "BT_PATH=%P"
if not defined BT_PATH ( color 0c & echo Build Tools のインストールパスを取得できませんでした & ping 127.0.0.1 -n 6 >nul & color )
REM 破損時の修復(任意、動作がおかしくなった場合)
REM if defined BT_PATH "C:\Program Files (x86)\Microsoft Visual Studio\Installer\setup.exe" repair --installPath "%BT_PATH%" --quiet --norestart
REM 導入確認(インストールパスが表示されれば正常)
"%VSWHERE%" -products * -requires Microsoft.VisualStudio.Workload.VCTools -property installationPath
--includeRecommended により、MSVC コンパイラ、C++ AddressSanitizer、vcpkg、CMake ツール、Windows 11 SDK 等の推奨コンポーネントが含まれる)winget list Microsoft.VisualStudio.BuildTools
NVIDIA CUDA Toolkit 12.8のインストール
- 前提条件(NVIDIA CUDA Toolkit インストール前): NVIDIA GPU,NVIDIA ドライバ,および Build Tools for Visual Studio もしくは Visual Studio が必要である.
- インストール中の注意: なるべく他のウインドウはすべて閉じておくこと.
以下のコマンドを管理者権限のコマンドプロンプトで実行する
(手順:Windowsキーまたはスタートメニュー → cmd と入力 → 右クリック → 「管理者として実行」)。
REM NVIDIA CUDA Toolkit 12.8 をシステム領域にインストール
winget install --scope machine --id Nvidia.CUDA --version 12.8 -e --silent --disable-interactivity --force --uninstall-previous --accept-source-agreements --accept-package-agreements --override "-s -n"

REM 環境変数TEMP, TMPの設定(一時ファイルの保存先を短いパスに変更)
mkdir C:\TEMP
set "TEMP_PATH=C:\TEMP"
setx TEMP "%TEMP_PATH%" /M >nul
setx TMP "%TEMP_PATH%" /M >nul
PyTorch, Torchvision, Caffe 2 のインストール
PyTorch の URL: https://pytorch.org/
- PyTorch の「はじめよう」の Web ページを開く
- 種類を選ぶ
Windows, pip, Python,NVIDIA CUDA ツールキット 11.0 での実行例
NVIDIA CUDA ツールキットのバージョンは一致するものを選ぶ. 選択肢として出てこないという場合には, 「install previous versions of PyTorch」をクリックし,そのページの記載に従う.- PyTorch Build: 「Stable」
- Your OS: 「Windows」 ・・・ Windows にインストールするので
- Package: 「pip」
- Language: ・・・ Python を選ぶ
- CUDA: 「11.0」 ・・・ CUDA 11.0 をインストールした場合
- 「Run the command」のところに,コマンドが表示されるので確認する
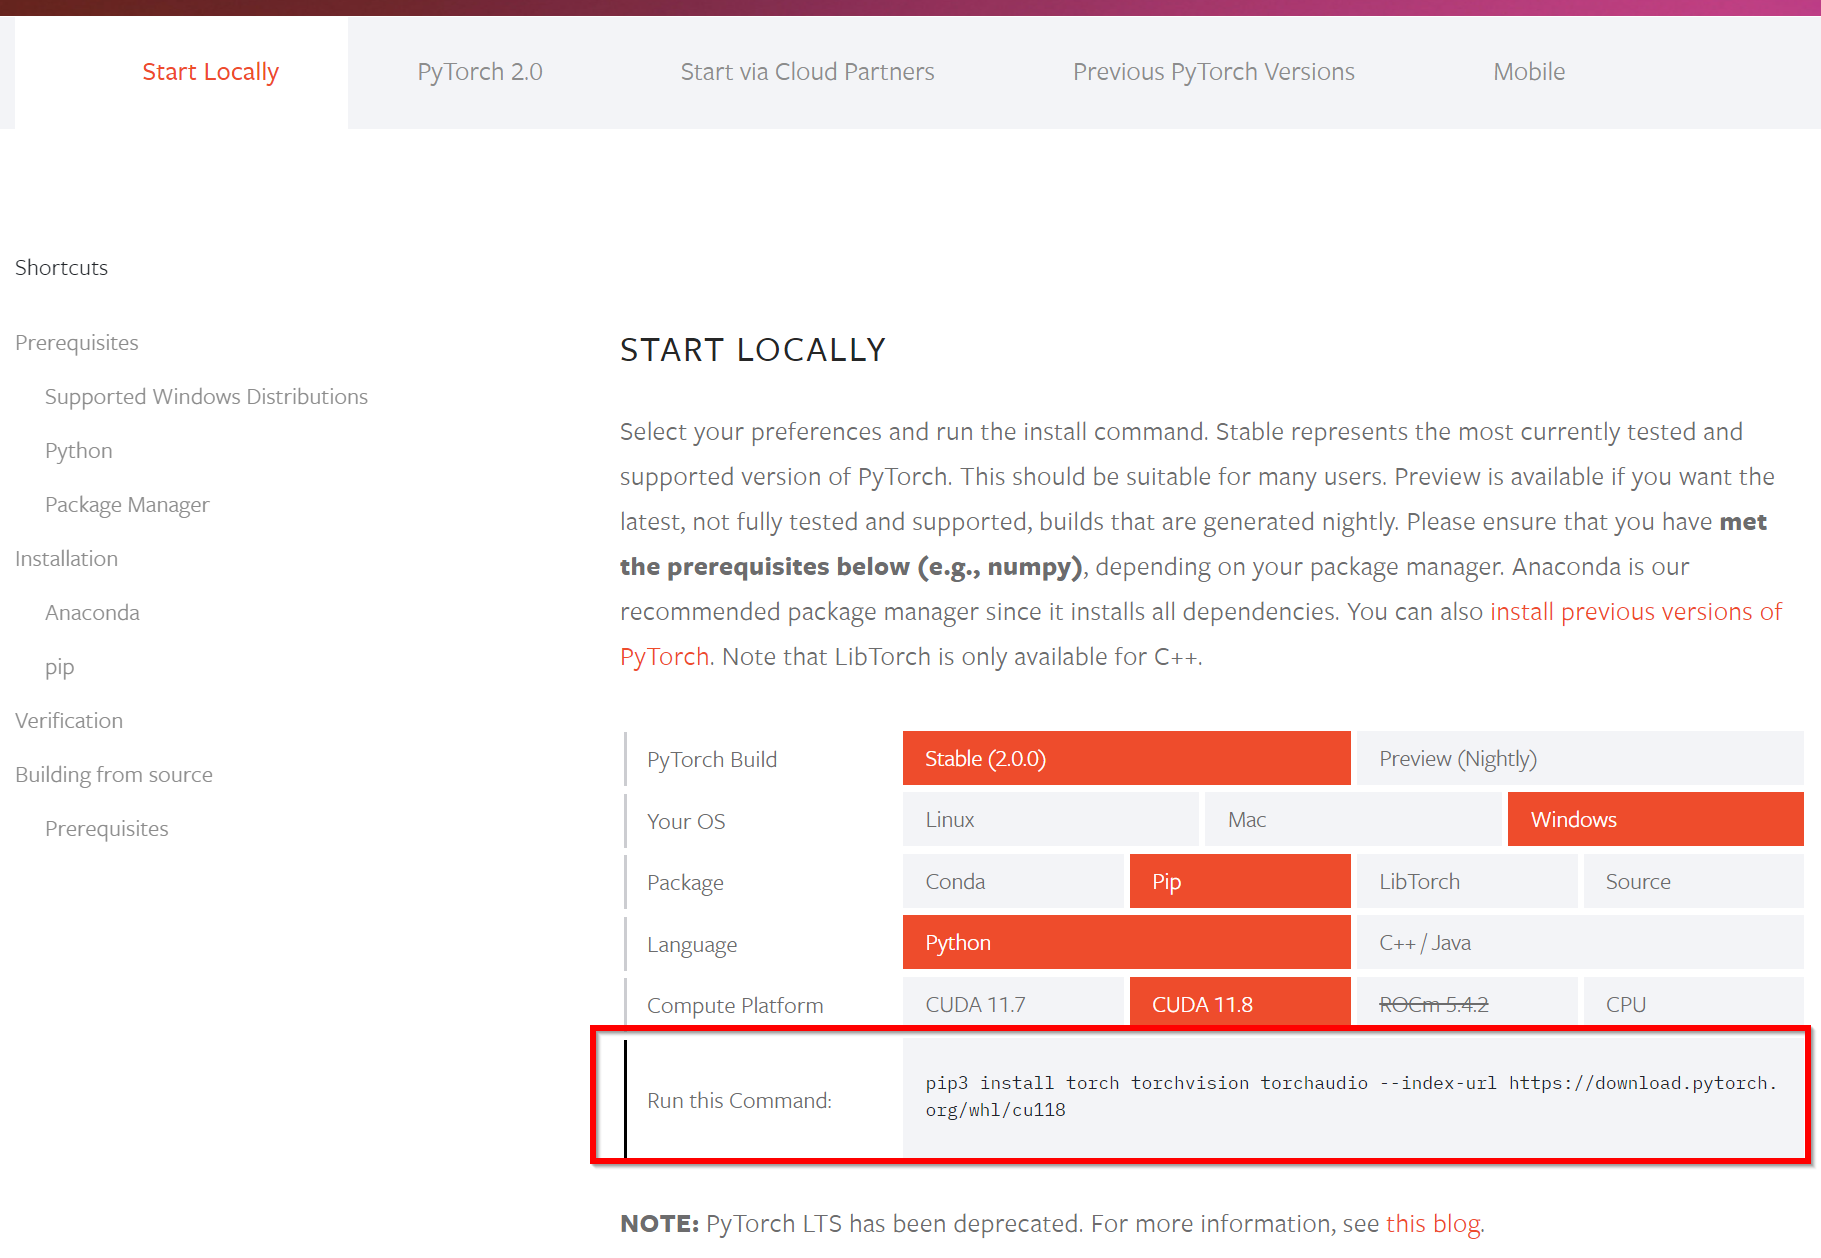
- 表示されたコマンドを実行.「pip3」は「python -m pip」に読み替える.
コマンドプロンプトを管理者として開き,次のように,コマンドを実行
python -m pip install torch===1.7.1+cu110 torchvision===0.8.2+cu110 torchaudio===0.7.2 -f https://download.pytorch.org/whl/torch_stable.html - その結果,エラーメッセージが出ていないことを確認.
- PyTorch のバージョン確認
次のコマンドを実行.
* バージョン番号が表示されれば OK.
python -c "import torch; print( torch.__version__ )"
- PyTorch の動作確認
https://pytorch.org/get-started/locally/ に記載のサンプルプログラムを実行してみる
- Python プログラムの実行
pythonfrom __future__ import print_function import torch x = torch.rand(5, 3) print(x) exit()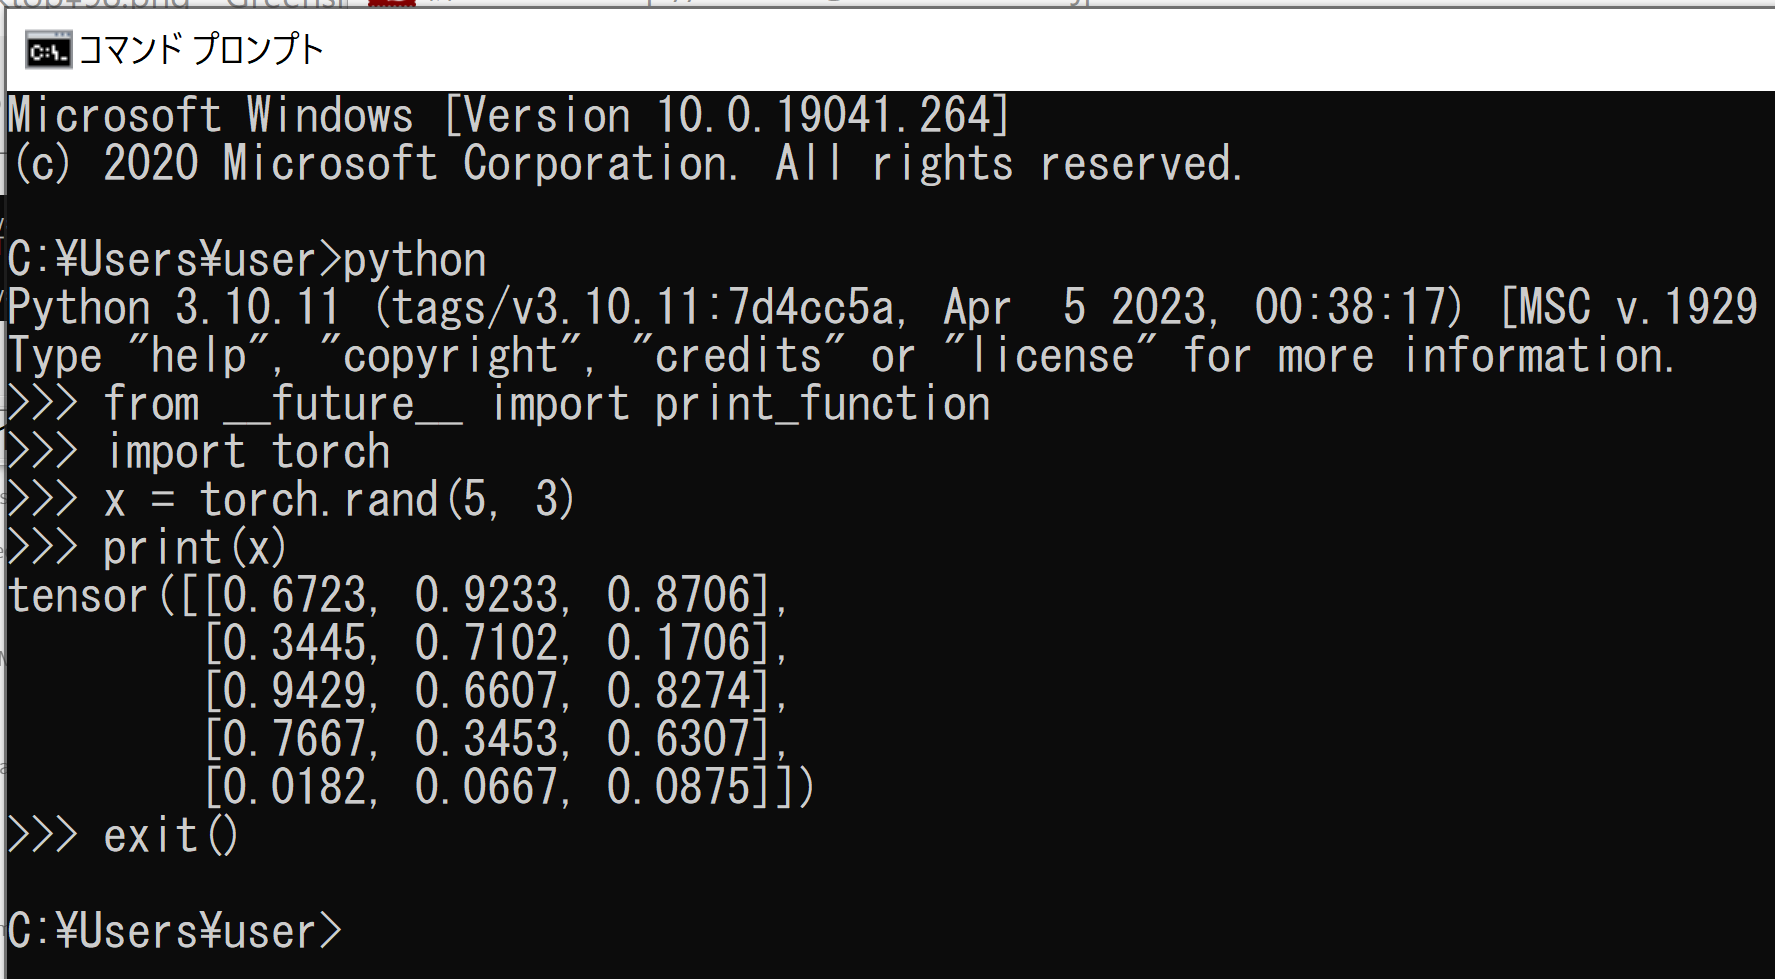
- GPU が動作しているか確認
Python プログラムを実行する
import torch
print(torch.__version__, torch.cuda.is_available())
exit()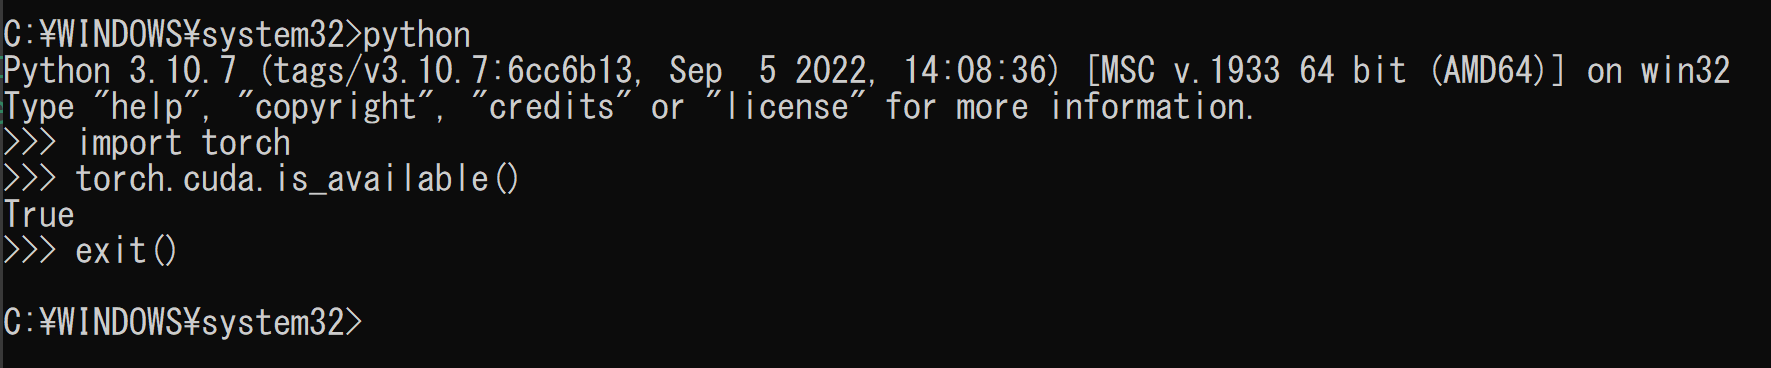
Caffe のインストール
Python のバージョンは 3.5, Visual Studio のバージョンは 2013, 2015, CUDA のバージョンは 7.5 あるいは 8.0 が指定されているので,よく確認すること
- x64 Native Tools コマンドプロンプト (x64 Native Tools Command Prompt)を実行する
(手順:スタートメニュー →Visual Studio 20xx」の下の「x64 Native Tools コマンドプロンプト (x64 Native Tools Command Prompt)」 を選ぶ)。
「x64 Native Tools コマンドプロンプト」がないときは,ビルドツール (Build Tools) をインストールすると,x64 Native Tools コマンドプロンプトもインストールされる.その手順は,別ページ »で説明している.
- caffe-builder のソースコードをダウンロード
次のコマンドをx64 Native Tools コマンドプロンプト (x64 Native Tools Command Prompt)で実行する
(手順:スタートメニュー →
」の下の「x64 Native Tools コマンドプロンプト (x64 Native Tools Command Prompt)」を選ぶ)。 cd /d c:%HOMEPATH% rmdir /s /q caffe-builder git clone https://github.com/willyd/caffe-builder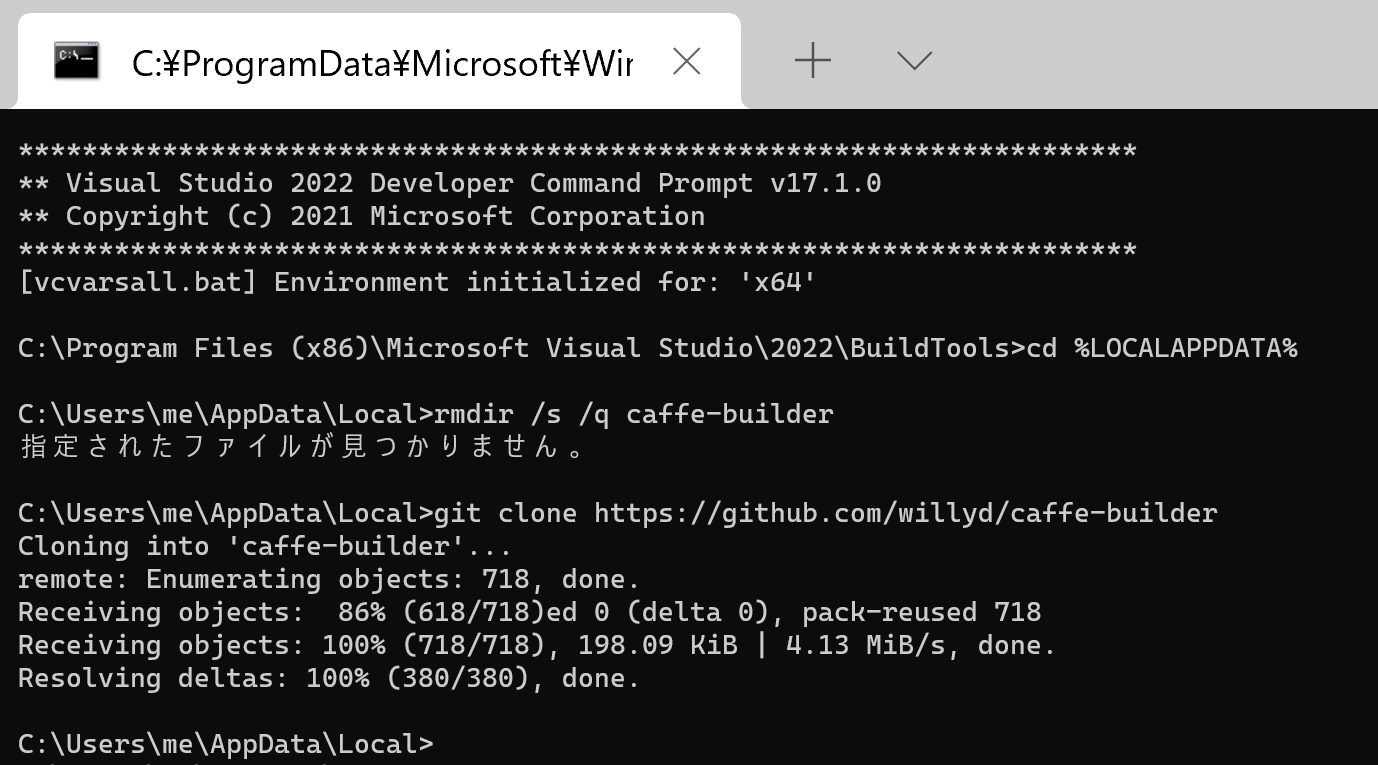
- ビルドする
https://github.com/willyd/caffe-builder の記述に従う- set WITH_NINJA=0 : Ninjaを使わない
- set PYTHON_VERSION=3 : Python のバージョンは 3
cd /d c:%HOMEPATH%
cd caffe-builder
set WITH_NINJA=0
set PYTHON_VERSION=3
build_v140_x64.cmd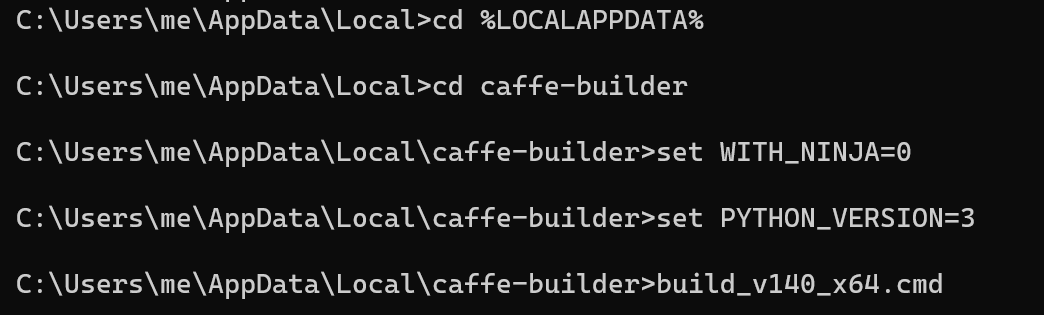
- 結果を確認する
エラーメッセージがでる.断念する.
次のように進める予定
- 確認のため,「Using the built libraries in your project」の手順を実行する
cmake のオプションの 「Visual Studio 16 2019」のところは, 使用する Visual Studio のバージョンにあわせること. Visual Studio 2022 のときは,「Visual Studio 17 2022」. Visual Studio 2019 のときは,「Visual Studio 16 2019」
cd /d c:%HOMEPATH% cd caffe-builder set WITH_NINJA=0 set PYTHON_VERSION=3 rmdir /s /q build mkdir build cd build del CMakeCache.txt rmdir /s /q CMakeFiles cmake -G "Visual Studio 17 2022" -A x64 -T host=x64 ^ -DCMAKE_BUILD_TYPE=RELEASE ^ -C c:\tools\caffe-builder\build\libraries\caffe-builder-config.cmake .. - ビルドする
次のように設定する
%LOCALAPPDATA%\CMake-caffe-1.10.4\caffe-1.10.4
次のように追加する
%LOCALAPPDATA%\CMake-caffe-1.10.4\build\bin\Release
次のように設定する
%LOCALAPPDATA%\CMake-caffe-1.10.4\caffe-1.10.4
次のように追加する
%LOCALAPPDATA%\CMake-caffe-1.10.4\build\bin\Release