GPU環境でのTensorFlow 2.10.1のインストールと活用(Windows 上)
【要約】 Windows環境でのTensorFlow 2.10.1のインストールから応用プログラムの実行まで,手順を説明している.主な内容としては,TensorFlowの前提条件となるソフトウェア(Build Tools for Visual Studio 2022,Git,7-Zip,NVIDIAソフトウェア)のインストール,Python環境の準備,TensorFlow 2.10.1のインストールとGPU認識の確認である.さらに,TensorFlowを活用した応用プログラム例として,行列演算(掛け算,主成分分析,特異値分解)と画像分類(リアルタイムおよび選択画像)のサンプルコードとその実行方法を示している.画像分類は,ImageNetで学習済みのConvNeXtBaseモデルを用いており,GPUとCPUの性能比較もできるようにしている.各ステップでは,具体的なコマンドラインの操作を示している.
【目次】
- 前準備
- TensorFlow 2.10(GPU 対応可能)のインストールと活用(Windows 上)
- 行列の掛け算,主成分分析,特異値分解(TensorFlow 2 のプログラム例)(Windows 上)
- ImageNet で学習済みの ConvNeXtBase モデルを用いた画像分類(TensorFlow, Keras を使用)
【付記】 本ページのプログラムはAIのアシストを受けて作成しています
GPUとは
GPUは,グラフィックス・プロセッシング・ユニット(Graphics Processing Unit)の略です.その高い並列計算能力から,3次元コンピュータグラフィックス,3次元ゲーム,動画編集,科学計算,ディープラーニングなど,並列処理が必要な幅広い分野で活用されています.
TensorFlow GPU 版
TensorFlowは,Googleが開発した機械学習フレームワークである.Python,C/C++言語から利用可能で,CPU,GPU,TPU上で動作する.TensorFlowの特徴として「データフローグラフ」がある.これは,「データの流れ」を表現するもので,グラフの節点は演算(オペレーション)を,エッジはデータ(テンソル)の流れを表す.TensorFlowを使用することで,音声,画像,テキスト,ビデオなど多様なデータを扱う機械学習アプリケーションの開発が容易になる.2015年11月に初版がリリースされて以来,継続的にバージョンアップが続いている.
TensorFlow GPU 版の動作に必要なもの(2023年4月時点)
- NVIDIA ドライバ
Windows で,NVIDIA グラフィックス・ボードの種類を調べたいときは, 次のコマンドを実行することにより調べることができる.
wmic path win32_VideoController get name【関連する外部ページ】
- NVIDIA CUDA ツールキット 11.但し最新のNVIDIA cuDNN に対応するもの.
TensorFlow の動作に,cudart64_110.dll, cusolver64_11.dll, cudnn64_8.dll が必要であるため,NVIDIA CUDA ツールキット 11 をインストールする.
注意点の1:NVIDIA CUDA ツールキット 11は,NVIDIA cuDNN が対応しているものを選ぶこと. 新しいNVIDIA CUDA ツールキット 11では,NVIDIA cuDNN が対応していない場合がある.詳細は,NVIDIA cuDNN のページ https://developer.nvidia.com/cudnn で確認できる.
注意点の2:NVIDIA CUDA ツールキット は,バージョン12 でなくバージョン11 の最新版を使うこと.バージョン 12 は,2023年 4月に TensorFlow 2.10.1 で試したが動作しなかった.
- 最新のNVIDIA cuDNN.但し,NVIDIA CUDA ツールキット 11に対応するもの.
古いバージョンである2.4.4 あるいはそれ以前のバージョン のTensorFlow を使う場合は, 最新の NVIDIA cuDNNを使わないこと. 詳しくは,別ページ »で説明
前準備
Python 3.12 のインストール
インストール済みの場合は実行不要。
管理者権限でコマンドプロンプトを起動(手順:Windowsキーまたはスタートメニュー > cmd と入力 > 右クリック > 「管理者として実行」)し、以下を実行する。管理者権限は、wingetの--scope machineオプションでシステム全体にソフトウェアをインストールするために必要である。
REM Python 3.12 をシステム領域にインストール
winget install --scope machine --id Python.Python.3.12 -e --silent --accept-source-agreements --accept-package-agreements
REM Python のパス設定
set "PYTHON_PATH=C:\Program Files\Python312"
set "PYTHON_SCRIPTS_PATH=C:\Program Files\Python312\Scripts"
if exist "%PYTHON_PATH%" setx PYTHON_PATH "%PYTHON_PATH%" /M >nul
if exist "%PYTHON_SCRIPTS_PATH%" setx PYTHON_SCRIPTS_PATH "%PYTHON_SCRIPTS_PATH%" /M >nul
for /f "skip=2 tokens=2*" %a in ('reg query "HKLM\SYSTEM\CurrentControlSet\Control\Session Manager\Environment" /v Path') do set "SYSTEM_PATH=%b"
echo "%SYSTEM_PATH%" | find /i "%PYTHON_PATH%" >nul
if errorlevel 1 setx PATH "%PYTHON_PATH%;%PYTHON_SCRIPTS_PATH%;%SYSTEM_PATH%" /M >nul【関連する外部ページ】
Python の公式ページ: https://www.python.org/
AI エディタ Windsurf のインストール
Pythonプログラムの編集・実行には、AI エディタの利用を推奨する。ここでは,Windsurfのインストールを説明する。
管理者権限でコマンドプロンプトを起動(手順:Windowsキーまたはスタートメニュー > cmd と入力 > 右クリック > 「管理者として実行」)し、以下を実行して、Windsurfをシステム全体にインストールする。管理者権限は、wingetの--scope machineオプションでシステム全体にソフトウェアをインストールするために必要となる。
winget install --scope machine --id Codeium.Windsurf -e --silent --accept-source-agreements --accept-package-agreements【関連する外部ページ】
Windsurf の公式ページ: https://windsurf.com/
Gitのインストール
管理者権限でコマンドプロンプトを起動(手順:Windowsキーまたはスタートメニュー > cmd と入力 > 右クリック > 「管理者として実行」)し、以下を実行する。管理者権限は、wingetの--scope machineオプションでシステム全体にソフトウェアをインストールするために必要となる。
REM Git をシステム領域にインストール
winget install --scope machine --id Git.Git -e --silent --accept-source-agreements --accept-package-agreements
REM Git のパス設定
set "GIT_PATH=C:\Program Files\Git\cmd"
for /f "skip=2 tokens=2*" %a in ('reg query "HKLM\SYSTEM\CurrentControlSet\Control\Session Manager\Environment" /v Path') do set "SYSTEM_PATH=%b"
if exist "%GIT_PATH%" (
    echo "%SYSTEM_PATH%" | find /i "%GIT_PATH%" >nul
    if errorlevel 1 setx PATH "%GIT_PATH%;%SYSTEM_PATH%" /M >nul
)
7-Zip のインストール
管理者権限でコマンドプロンプトを起動(手順:Windowsキーまたはスタートメニュー > cmd と入力 > 右クリック > 「管理者として実行」)し、以下を実行する。管理者権限は、wingetの--scope machineオプションでシステム全体にソフトウェアをインストールするために必要となる。
REM 7-Zip をシステム領域にインストール
winget install --scope machine --id 7zip.7zip -e --silent
REM 7-Zip のパス設定
set "SEVENZIP_PATH=C:\Program Files\7-Zip"
for /f "skip=2 tokens=2*" %a in ('reg query "HKLM\SYSTEM\CurrentControlSet\Control\Session Manager\Environment" /v Path') do set "SYSTEM_PATH=%b"
if exist "%SEVENZIP_PATH%" (
    echo "%SYSTEM_PATH%" | find /i "%SEVENZIP_PATH%" >nul
    if errorlevel 1 setx PATH "%SEVENZIP_PATH%;%SYSTEM_PATH%" /M >nul
)
Visual Studio 2022 Build Toolsとランタイムのインストール
管理者権限でコマンドプロンプトを起動(手順:Windowsキーまたはスタートメニュー > cmd と入力 > 右クリック > 「管理者として実行」)し、以下を実行する。管理者権限は、wingetの--scope machineオプションでシステム全体にソフトウェアをインストールするために必要である。
REM Visual Studio 2022 Build Toolsとランタイムをシステム領域にインストール
winget install --scope machine --wait --accept-source-agreements --accept-package-agreements Microsoft.VisualStudio.2022.BuildTools Microsoft.VCRedist.2015+.x64

REM インストーラーとインストールパスの設定
set "VS_INSTALLER=C:\Program Files (x86)\Microsoft Visual Studio\Installer\vs_installer.exe"
set VS_PATH="C:\Program Files (x86)\Microsoft Visual Studio\2022\BuildTools"

REM C++開発ワークロードのインストール
"%VS_INSTALLER%" modify --installPath "%VS_PATH%" --add Microsoft.VisualStudio.Workload.VCTools --includeRecommended --quiet --norestart
"%VS_INSTALLER%" modify --installPath "%VS_PATH%" --add Microsoft.VisualStudio.Component.VC.Tools.x86.x64 --includeRecommended --quiet --norestart
"%VS_INSTALLER%" modify --installPath "%VS_PATH%" --add Microsoft.VisualStudio.Component.Windows11SDK.22621 --includeRecommended --quiet --norestart
NVIDIA ドライバのインストール(Windows 上)
NVIDIA ドライバ
NVIDIA ドライバは,NVIDIA製GPUを動作させるための重要なソフトウェアである.このドライバをインストールすることにより,GPUの性能を引き出すことができ,グラフィックス関連のアプリ,AI関連のアプリの高速化が期待できる.
ドライバはNVIDIA公式サイトである https://www.nvidia.co.jp/Download/index.aspx?lang=jp からダウンロードできる.このサイトからダウンロードするときには,グラフィックスカードとオペレーティングシステムを選択する. なお,NVIDIA GeForce Experiance を用いてインストールすることも可能である.
【サイト内の関連ページ】
- NVIDIA グラフィックス・ボードの確認
Windows で,NVIDIA グラフィックス・ボードの種類を調べたいときは, 次のコマンドを実行することにより調べることができる.
wmic path win32_VideoController get name - NVIDIA ドライバのダウンロード
NVIDIA ドライバは,以下の NVIDIA 公式サイトからダウンロードできる.
- ダウンロードの際には,使用しているグラフィックス・ボードの型番とオペレーティングシステムを選択する.
NVIDIA CUDA ツールキット 11.8 のインストール(Windows 上)
NVIDIA CUDA ツールキットのインストール時の注意点
NVIDIAのGPUを使用して並列計算を行うためのツールセット
主な機能: GPU を利用した並列処理,GPU のメモリ管理,C++をベースとした拡張言語とAPIとライブラリ
【NVIDIA CUDA ツールキットの動作に必要なもの】
- CUDA対応のNVIDIA GPUが必要.
そのために,NVIDIA グラフィックス・ボードを確認する. Windows で,NVIDIA グラフィックス・ボードの種類を調べたいときは, 次のコマンドを実行することにより調べることができる.
wmic path win32_VideoController get name - NVIDIA ドライバのダウンロードとインストール
NVIDIA ドライバは,以下の NVIDIA 公式サイトからダウンロードできる. ダウンロードの際には,使用しているグラフィックス・ボードの型番とオペレーティングシステムを選択する.
- Windows では,インストール前に,Build Tools for Visual Studio もしくは Visual Studio をインストールしておくことが必要である.
【Windows でインストールするときの注意点】
- Windows では, NVIDIA CUDA ツールキットのインストール中は,なるべく他のウインドウはすべて閉じておくこと.
- NVIDIA CUDA ツールキットのインストールが終わったら,ユーザ環境変数 TEMP の設定を行う.
Windows のユーザ名が日本語のとき,nvcc がうまく動作しないエラーを回避するためである.
ユーザ環境変数 TEMP に「C:\TEMP」を設定するために, コマンドプロンプトで,次のコマンドを実行する.
mkdir C:\TEMP
powershell -command "[System.Environment]::SetEnvironmentVariable(\"TEMP\", \"C:\TEMP\", \"User\")"
【関連する外部ページ】
- NVIDIA CUDA ツールキットのアーカイブの公式ページ: https://developer.nvidia.com/cuda-toolkit-archive
- NVIDIA CUDA ツールキット の公式のドキュメント: https://docs.nvidia.com/cuda/cuda-installation-guide-linux/index.html
- NVIDIA CUDA ツールキットのインストールに関する,NVIDIA CUDA クイックスタートガイドの公式ページ: https://docs.nvidia.com/cuda/cuda-quick-start-guide/index.html
【関連項目】 NVIDIA CUDA ツールキット, NVIDIA CUDA ツールキット 12.6 のインストール(Windows 上), NVIDIA CUDA ツールキット 11.8 のインストール(Windows 上)
- Windows では,NVIDIA CUDA ツールキットのインストール中は,なるべく他のウインドウはすべて閉じておくこと.
- Windows で,管理者権限でコマンドプロンプトを起動(手順:Windowsキーまたはスタートメニュー >
cmdと入力 > 右クリック > 「管理者として実行」)。 - 次のコマンドを実行
次のコマンドは,NVIDIA GeForce Experience,NVIDIA CUDA ツールキット 11.8 をインストールするものである.
wmic path win32_VideoController get name winget install --scope machine Nvidia.CUDA --version 11.8 powershell -command "[System.Environment]::SetEnvironmentVariable(\"CUDA_HOME\", \"C:\Program Files\NVIDIA GPU Computing Toolkit\CUDA\v11.8\", \"Machine\")" - NVIDIA CUDA ツールキットのインストールが終わったら,ユーザ環境変数 TEMP の設定を行う.
Windows のユーザ名が日本語のとき,nvcc がうまく動作しないエラーを回避するためである.
ユーザ環境変数 TEMP に「C:\TEMP」を設定するために, コマンドプロンプトで,次のコマンドを実行する.
mkdir C:\TEMP
powershell -command "[System.Environment]::SetEnvironmentVariable(\"TEMP\", \"C:\TEMP\", \"User\")"
NVIDIA cuDNN 8.9.7 のインストール(Windows 上)
NVIDIA cuDNN
NVIDIA cuDNN は,NVIDIA CUDA ツールキット上で動作する、高性能なディープラーニング用ライブラリです.畳み込みニューラルネットワーク (CNN) やリカレントニューラルネットワーク (RNN) など,さまざまなディープラーニングモデルのトレーニングと推論を高速化します.
【cuDNN利用時の注意点: zlibwapi.dll エラー】
Windows環境でcuDNNを利用するアプリケーションを実行した際に、「Could not locate zlibwapi.dll. Please make sure it is in your library path!」というエラーが表示されることがあります。これは、cuDNNの一部の機能が圧縮ライブラリである zlib に依存しているためです。このエラーが発生した場合は、後述する手順で ZLIB DLL をインストールする必要があります。
【関連する外部ページ】
- NVIDIA cuDNN の公式ページ(ダウンロードにはDeveloper Programへの登録が必要): https://developer.nvidia.com/cudnn
NVIDIA cuDNN のインストール(Windows 上)の概要
- NVIDIA Developer Program メンバーシップへの加入: cuDNNのダウンロードには無料のメンバーシップ登録が必要です。
NVIDIA Developer Program の公式ページ: https://developer.nvidia.com/developer-program
- 互換バージョンの選択とダウンロード: インストール済みのCUDAツールキットのバージョン (今回は11.x) に適合するcuDNNのバージョン (今回はv8.9.7) を選択し、Windows用のzipファイルをダウンロードします。
- ファイルの展開と配置: ダウンロードしたzipファイルを展開(解凍)し、中のファイル(
bin,include,libフォルダ内)を、CUDAツールキットのインストールディレクトリにコピーします。 - (オプション) 環境変数の設定: 必要に応じてシステム環境変数
CUDNN_PATHを設定します。 - (必要に応じて) ZLIB DLL のインストール:
zlibwapi.dllが見つからないエラーが発生する場合にインストールします。 - 動作確認: cuDNNライブラリ (
cudnn64_*.dll) にパスが通っているか確認します。
zlib のインストール(Windows 上)
- Windows で,管理者権限でコマンドプロンプトを起動(手順:Windowsキーまたはスタートメニュー >
cmdと入力 > 右クリック > 「管理者として実行」)。 - 次のコマンドを実行
次のコマンドは,zlibをインストールし,パスを通すものである.
cd %HOMEPATH%
rmdir /s /q zlib
git clone https://github.com/madler/zlib
cd zlib
del CMakeCache.txt
rmdir /s /q CMakeFiles\
cmake . -G "Visual Studio 17 2022" -A x64 -T host=x64 -DCMAKE_INSTALL_PREFIX=c:/zlib
cmake --build . --config RELEASE --target INSTALL
powershell -command "$oldpath = [System.Environment]::GetEnvironmentVariable(\"Path\", \"Machine\"); $oldpath += \";c:\zlib\bin\"; [System.Environment]::SetEnvironmentVariable(\"Path\", $oldpath, \"Machine\")"
powershell -command "[System.Environment]::SetEnvironmentVariable(\"ZLIB_HOME\", \"C:\zlib\", \"Machine\")"
【関連する外部ページ】
- zlib の公式ページ: https://www.zlib.net/
【関連項目】 zlib
NVIDIA cuDNN 8.9.7 のインストール(Windows 上)
- NVIDIA cuDNN のウェブページを開く
- ダウンロードしたいので,cuDNNのところにある「Download cuDNN」をクリック.

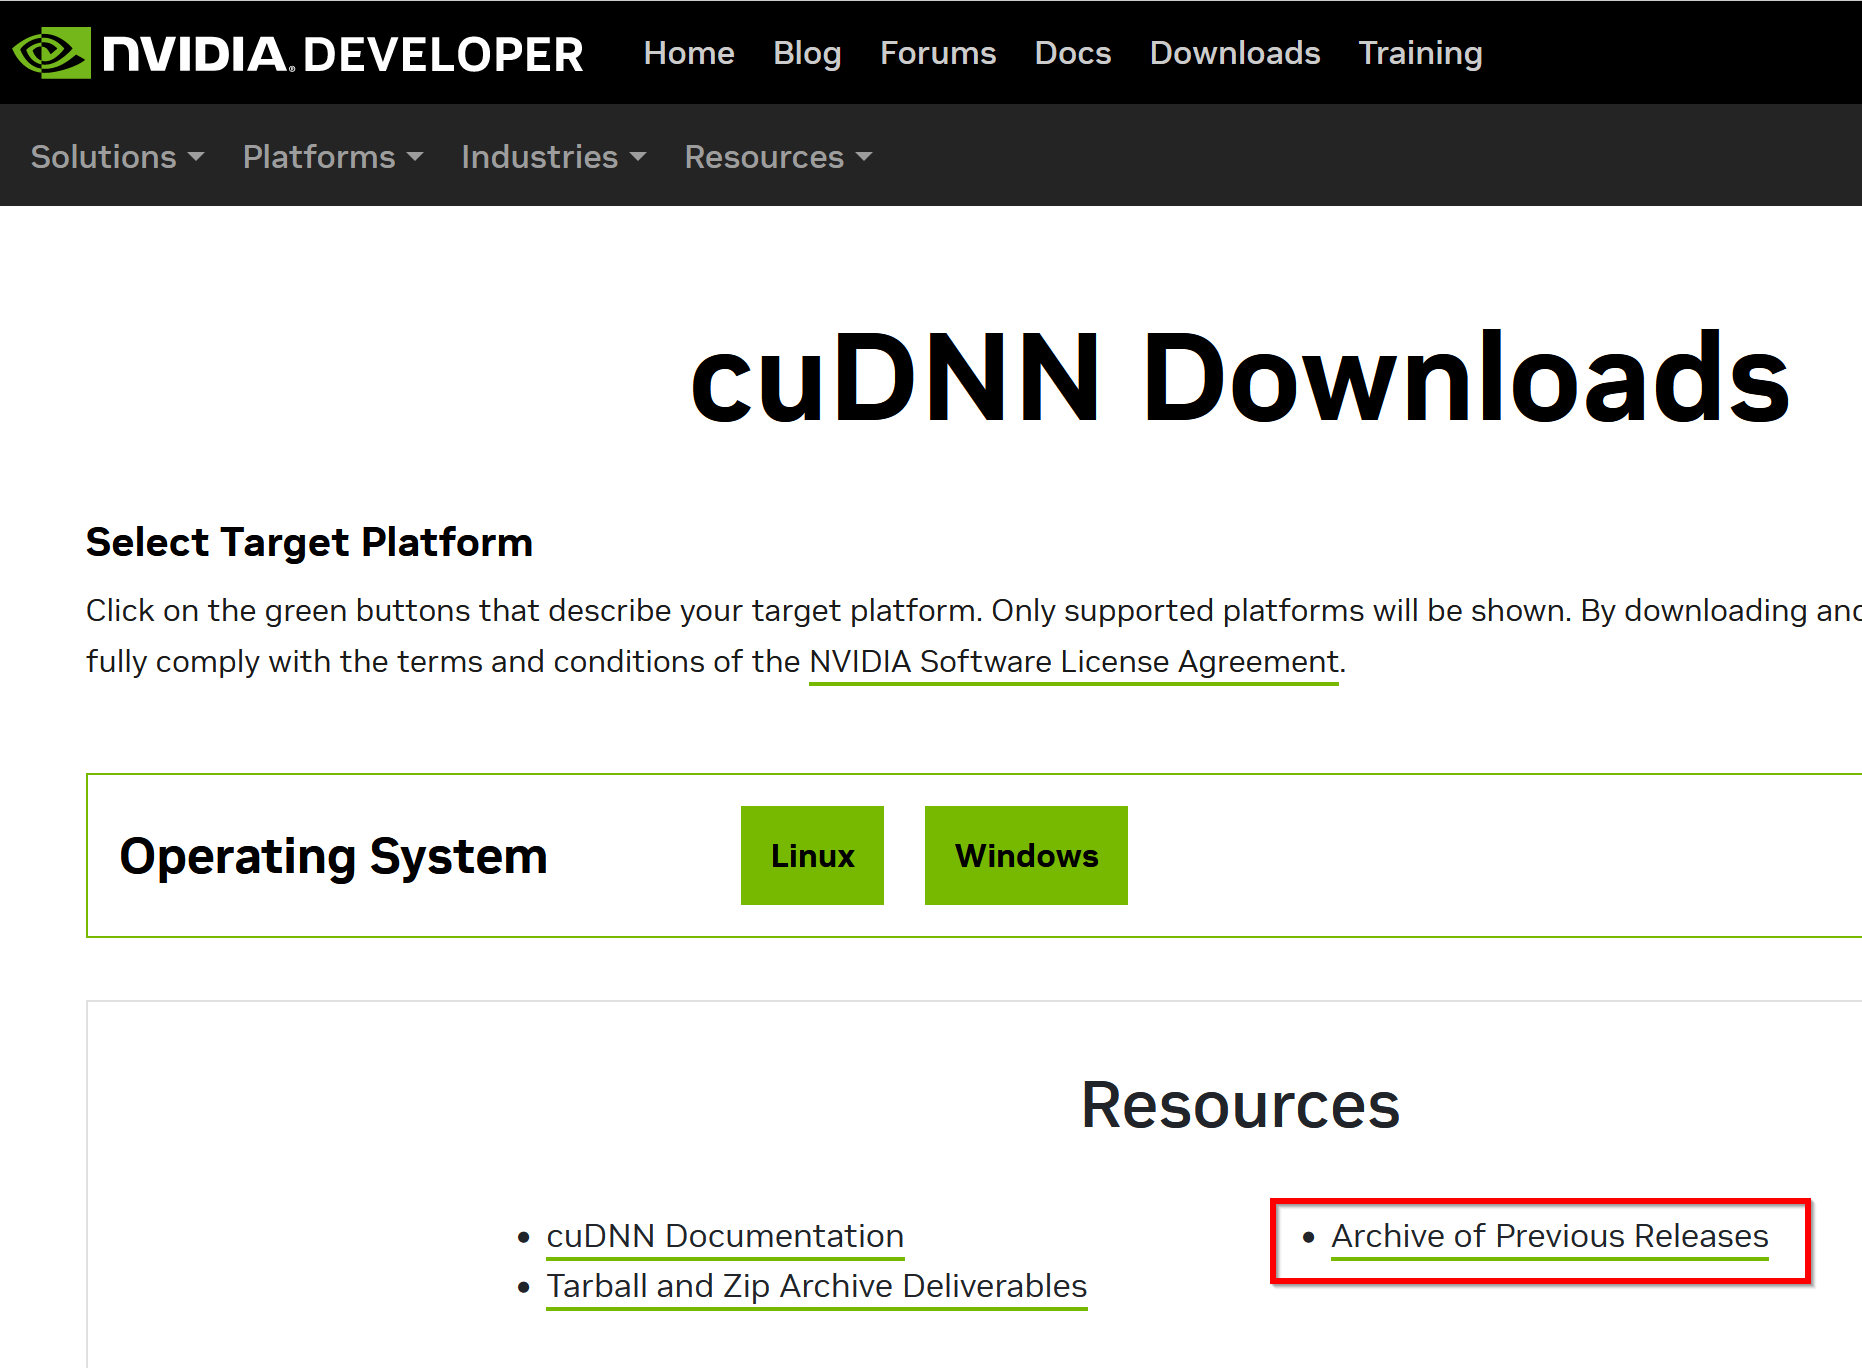
- cuDNN Downloads のページで「Archive of Previous Releases」をクリック
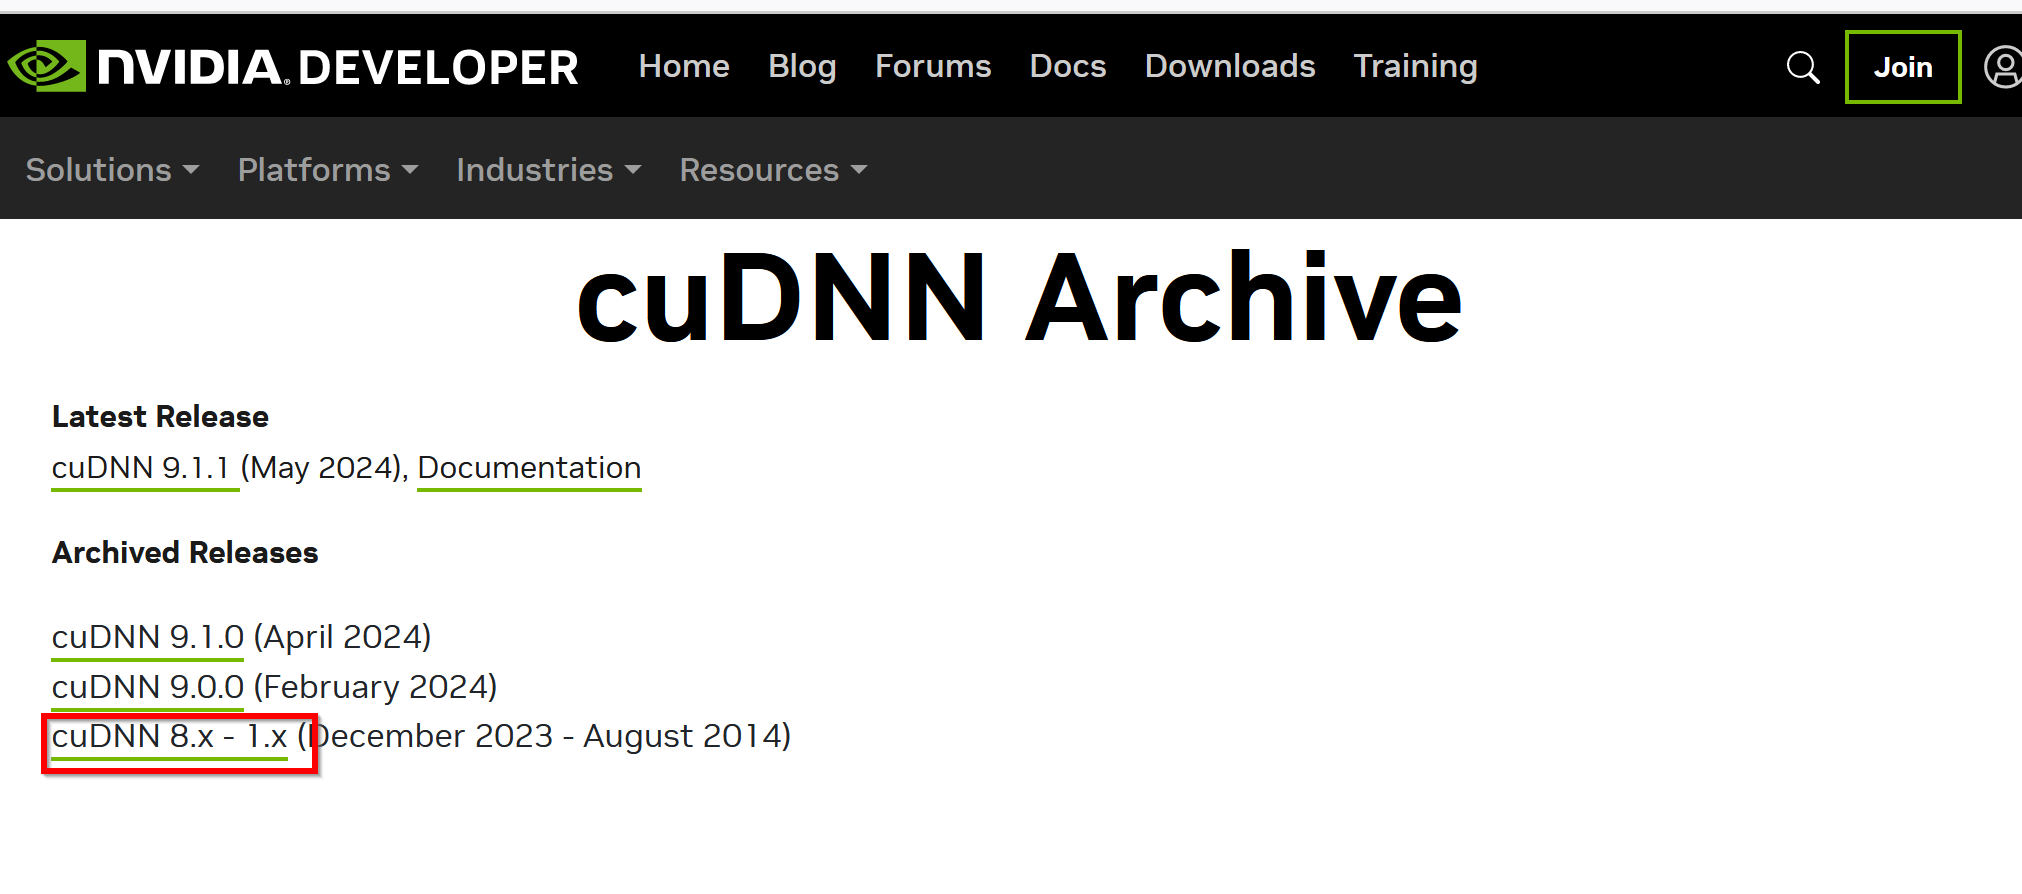
- 「cuDNN 8.x - 1.x」をクリック
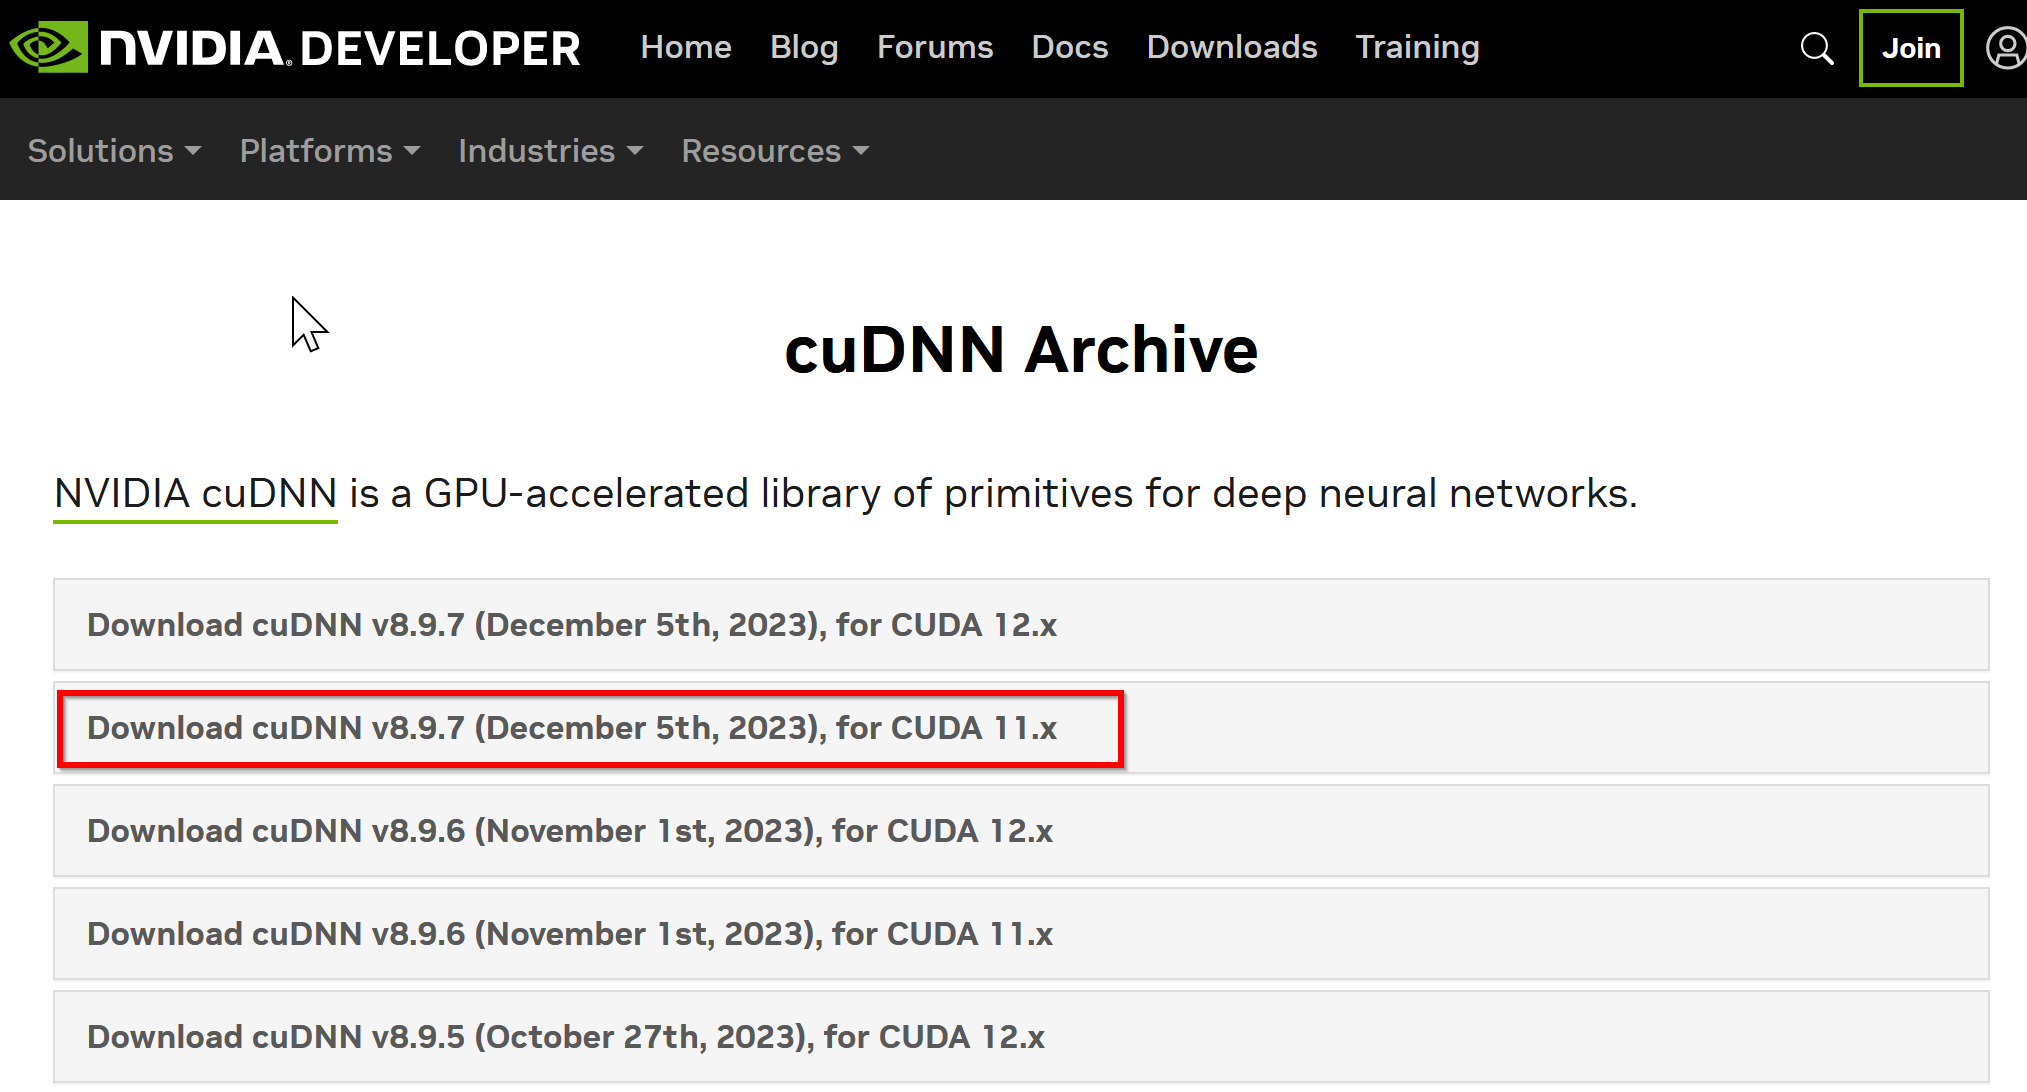
- ダウンロードしたいバージョンを選ぶ
ここでは「NVIDIA cuDNN v8.9.7 for CUDA 11.x」を選んでいる.
このとき,画面の「for CUDA ...」のところを確認し,使用するNVIDIA CUDA のバージョンに合うものを選ぶこと.
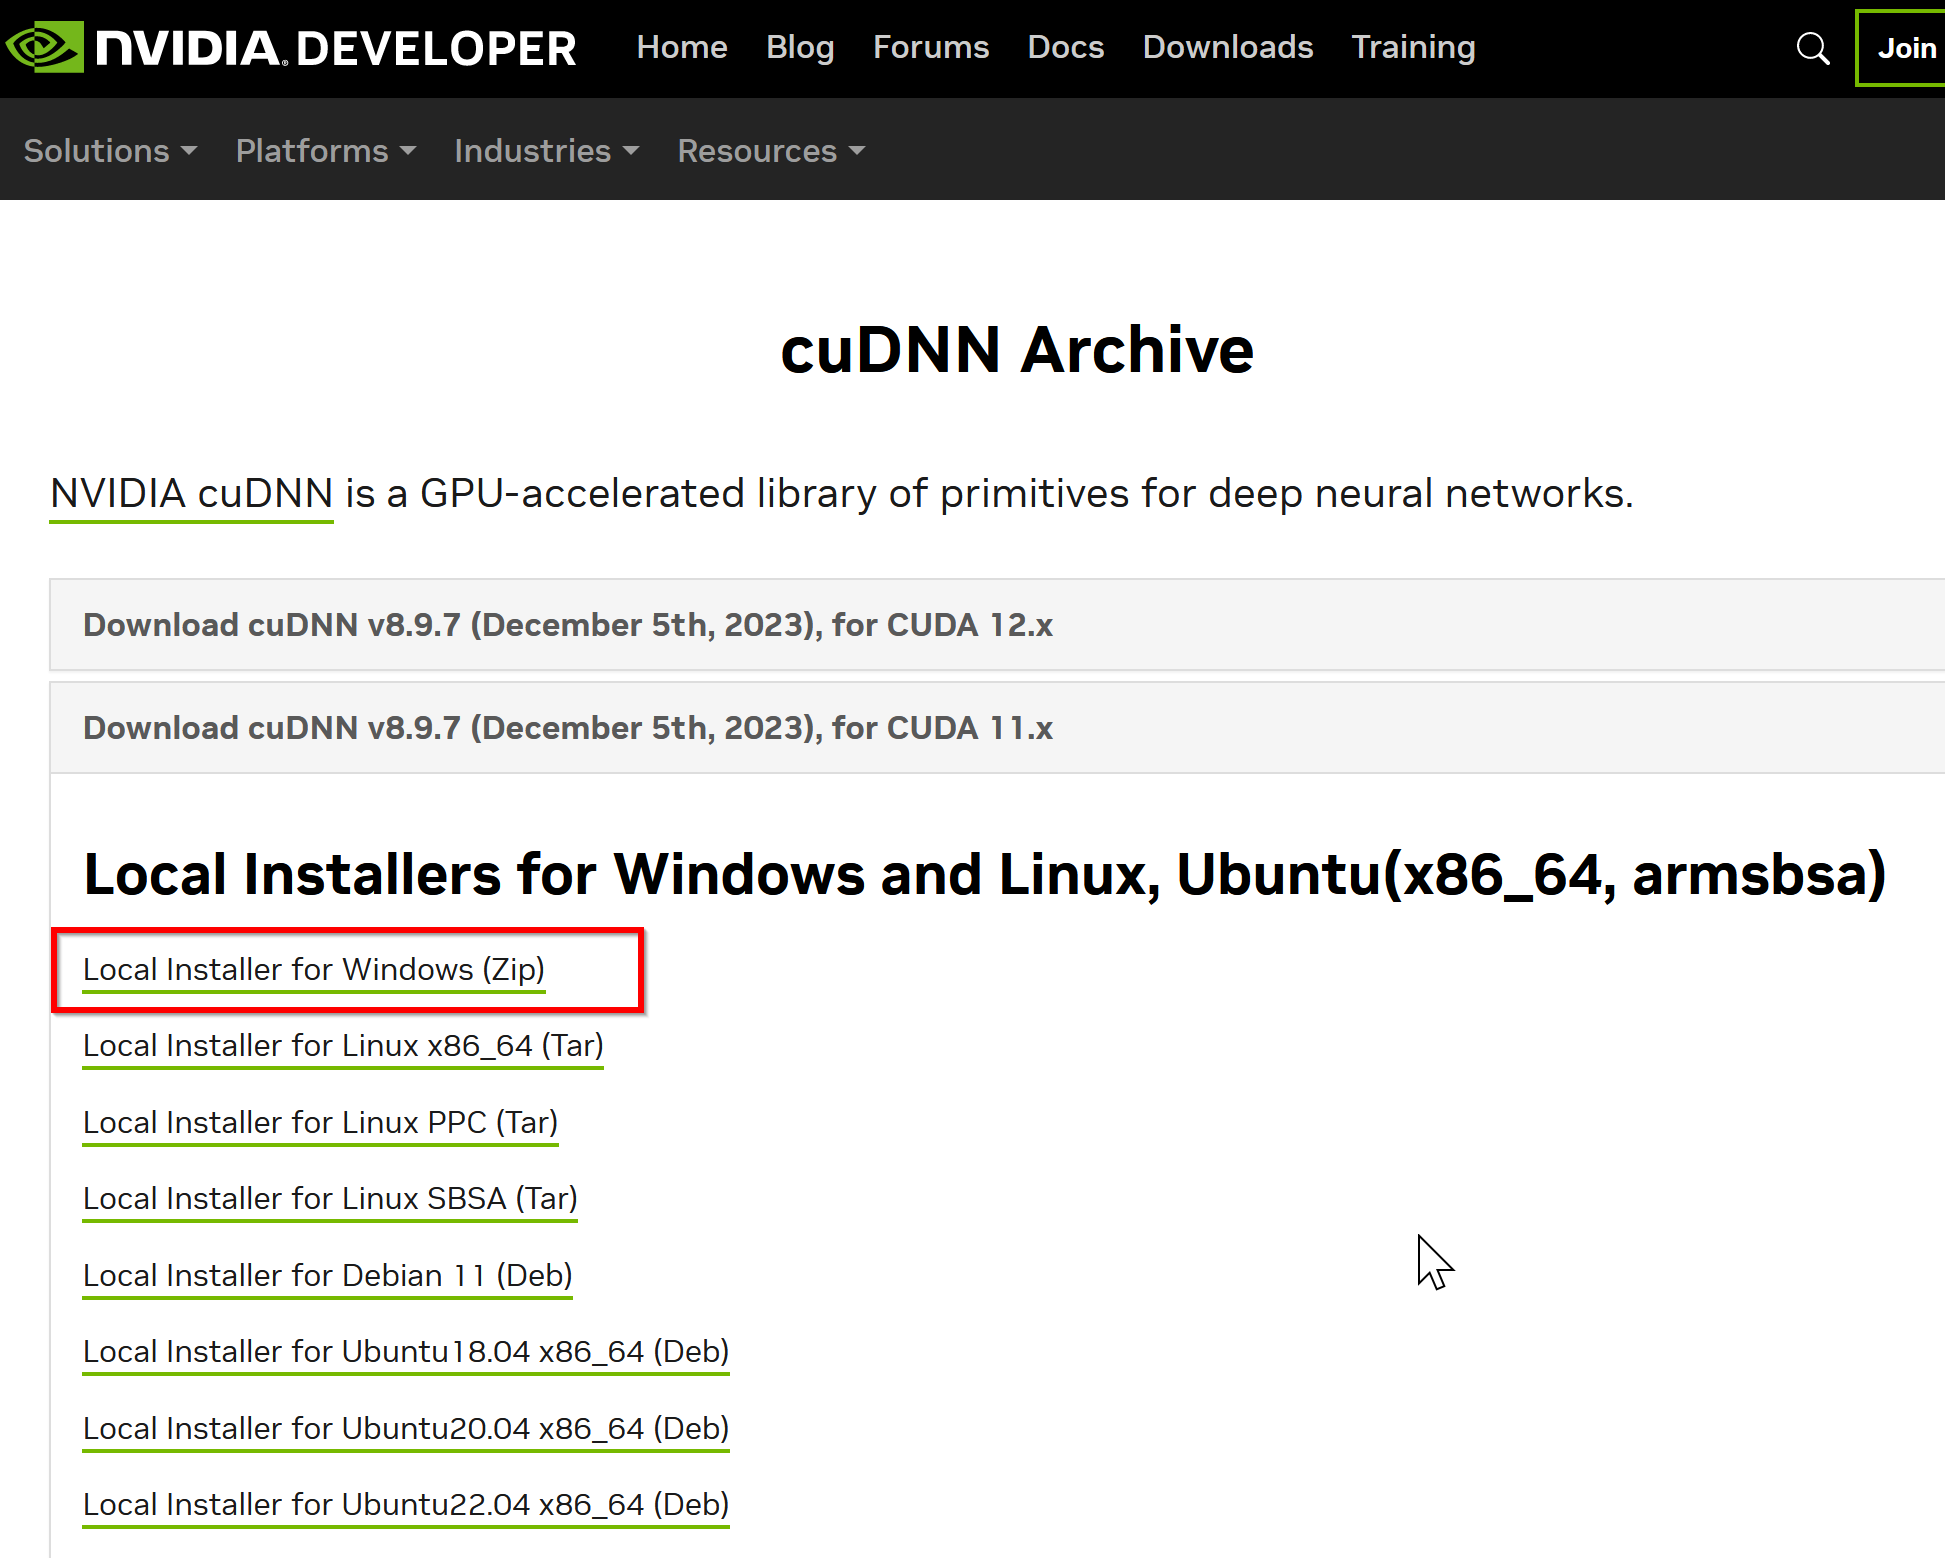
- Windows にインストールするので Windows 版を選ぶ
- NVIDIA Developer Program メンバーシップに入る
NVIDIA cuDNN のダウンロードのため.
「Join now」をクリック.その後,画面の指示に従う. 利用者本人が,電子メールアドレス,表示名,パスワード,生年月日を登録.利用条件等に合意.

- ログインする

- 調査の画面が出たときは,調査に応じる
- ライセンス条項の確認

- ダウンロードが始まる.

- ダウンロードした .zip ファイルを展開(解凍)する.
その中のサブディレクトリを確認しておく.

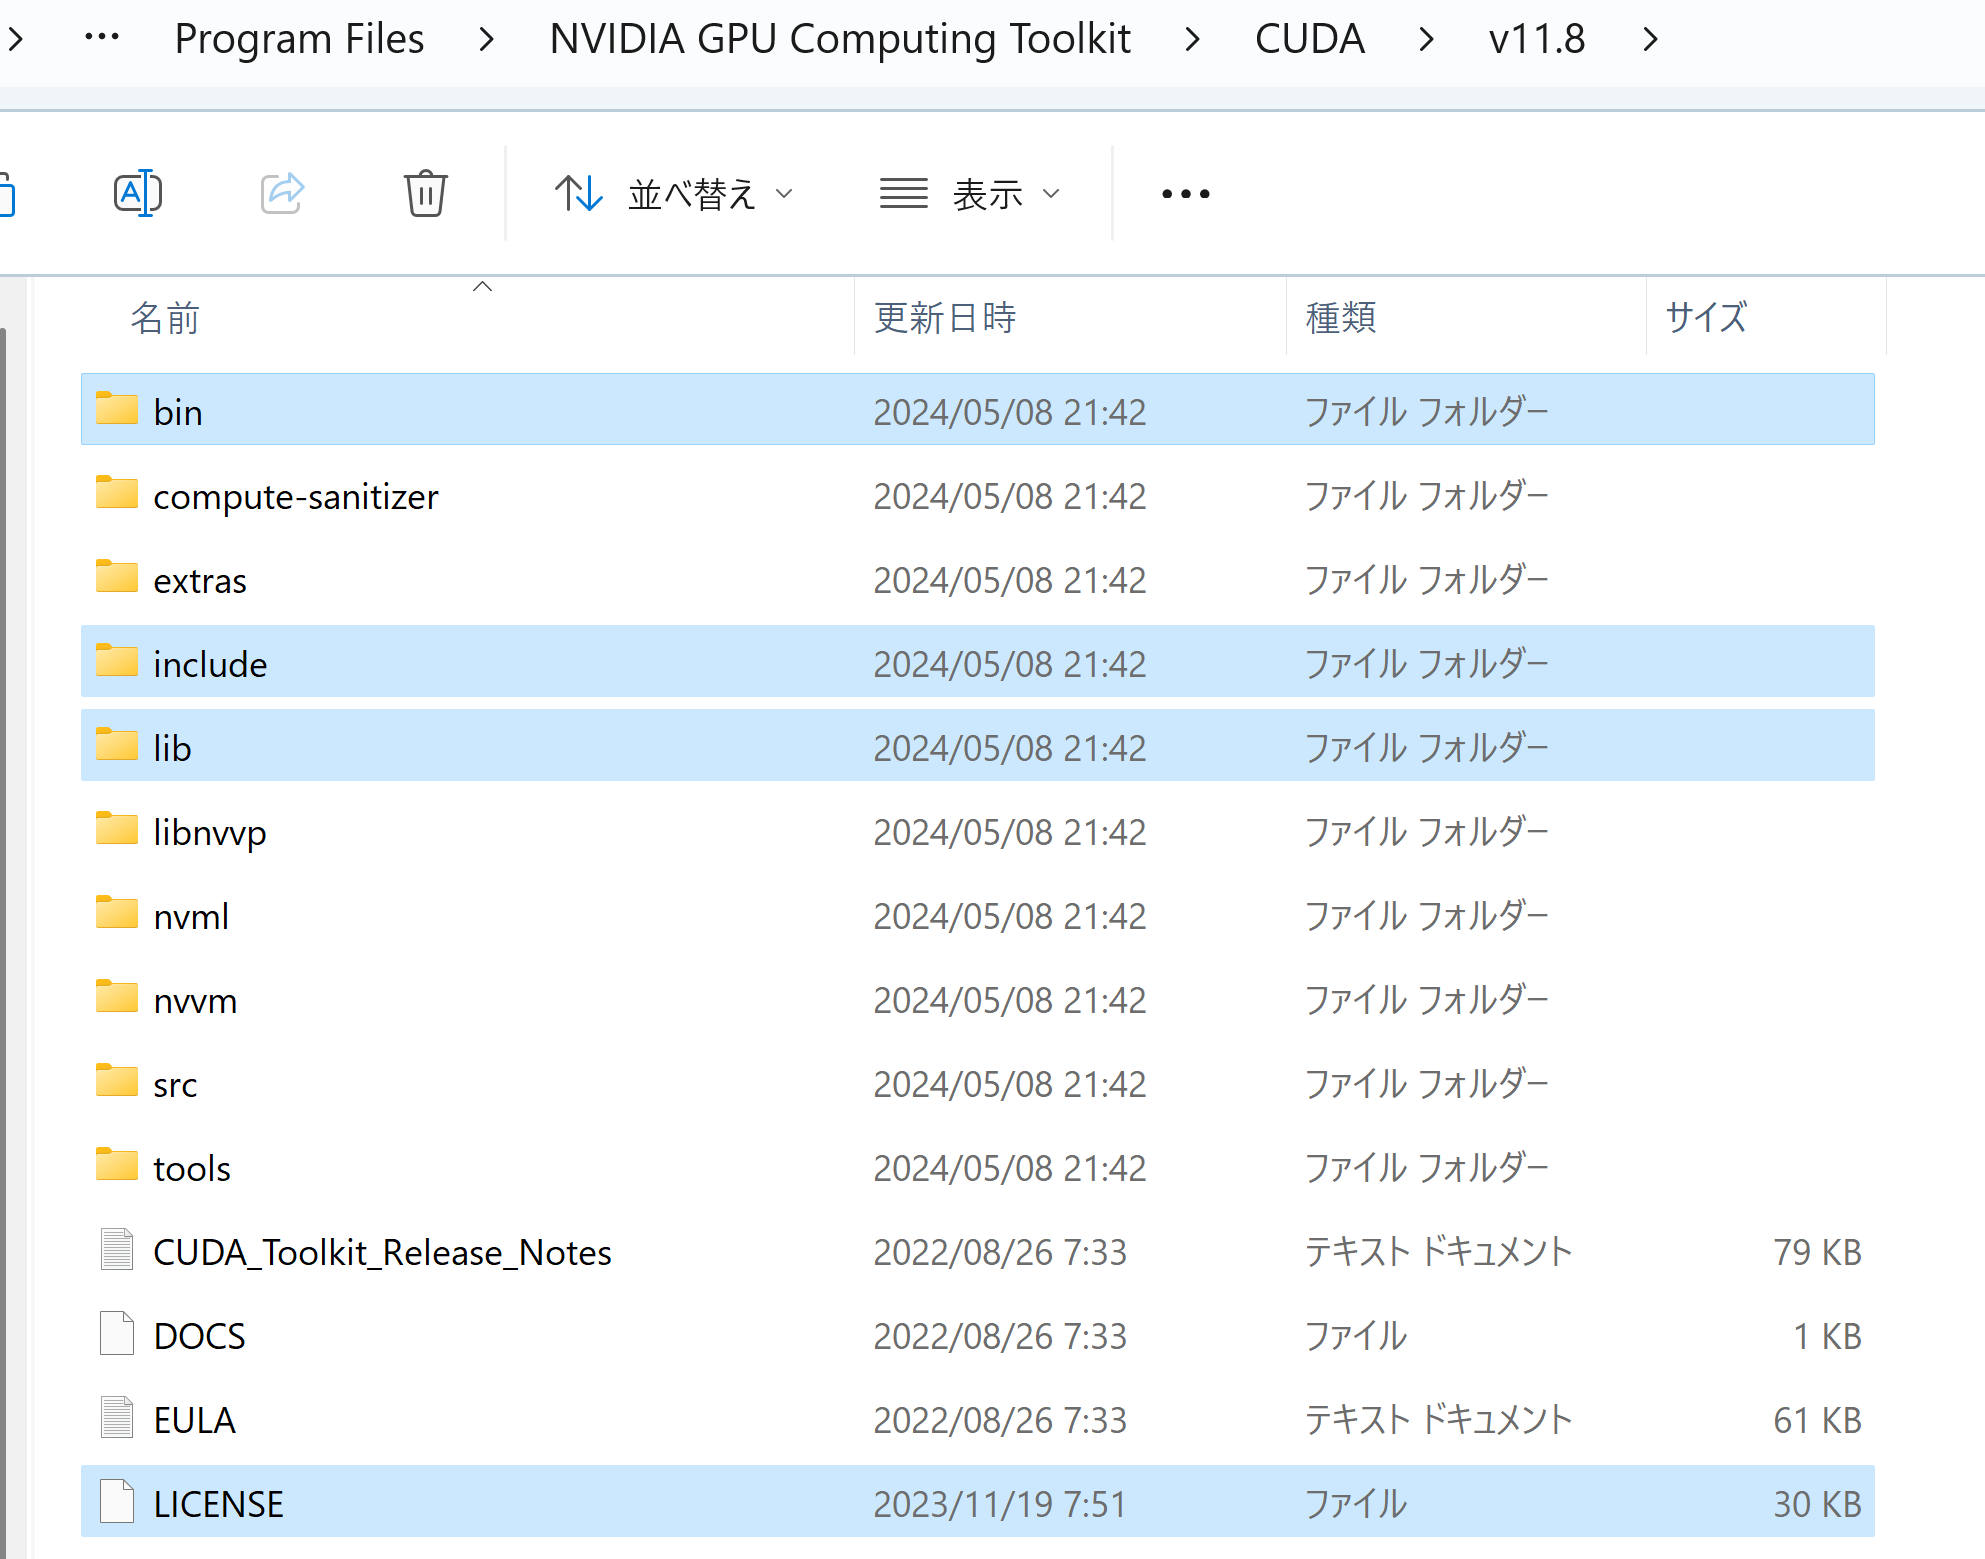
- NVIDIA CUDA ツールキットをインストールしたディレクトリを確認する.「C:\Program Files\NVIDIA GPU Computing Toolkit\CUDA\v11.8」のようになっている.

- 確認したら,
さきほど展開してできたすべてのファイルとディレクトリを,NVIDIA CUDA ツールキットをインストールしたディレクトリにコピーする
- パスが通っていることを確認.
次の操作により,cudnn64_8.dll にパスが通っていることを確認する.
Windows のコマンドプロンプトを開き,次のコマンドを実行する.エラーメッセージが出ないことを確認.
where cudnn64_8.dll
- Windows の システム環境変数 CUDNN_PATH の設定を行う.
Windows では,
コマンドプロンプトを管理者として開き,
次のコマンドを実行することにより,
システム環境変数 CUDNN_PATH の設定を行うことができる.
コマンドプロンプトを管理者として実行: 別ページ »で説明
powershell -command "[System.Environment]::SetEnvironmentVariable(\"CUDNN_PATH\", \"C:\Program Files\NVIDIA GPU Computing Toolkit\CUDA\v11.8\", \"Machine\")"
TensorFlow 2.10(GPU 対応可能)のインストールと活用(Windows 上)
設定の要点
システム環境変数 TF_FORCE_GPU_ALLOW_GROWTH の設定: true
インストール手順
- Windows で,管理者権限でコマンドプロンプトを起動(手順:Windowsキーまたはスタートメニュー >
cmdと入力 > 右クリック > 「管理者として実行」)。 - 使用する Python のバージョンの確認
python --version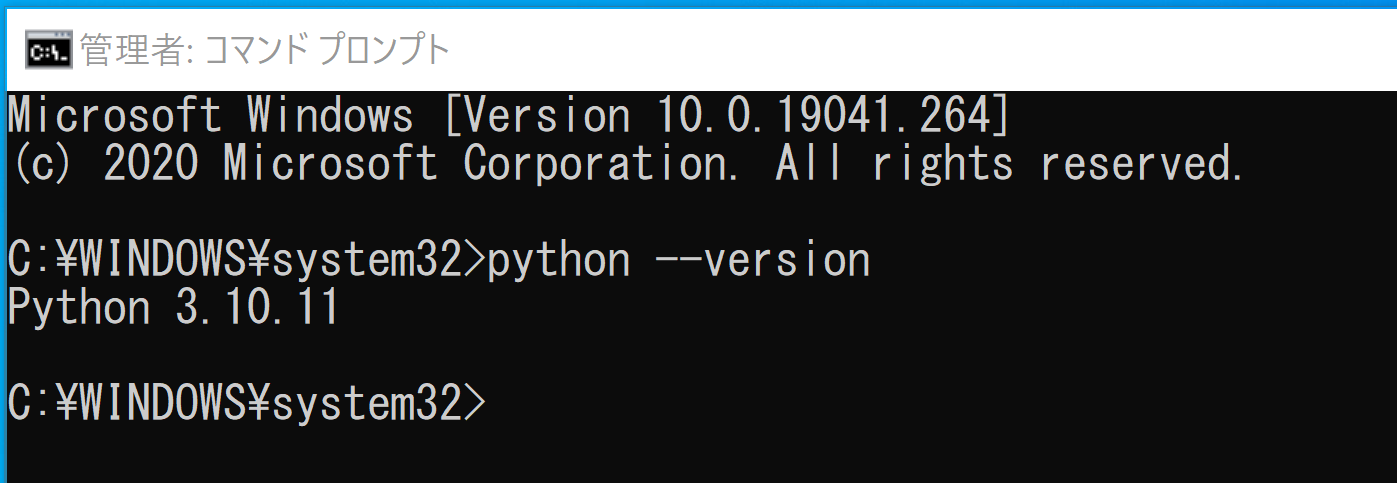
- pip と setuptools の更新
* 「 python -m pip install ...」は,Python パッケージをインストールするためのコマンド.
python -m pip install -U pip setuptools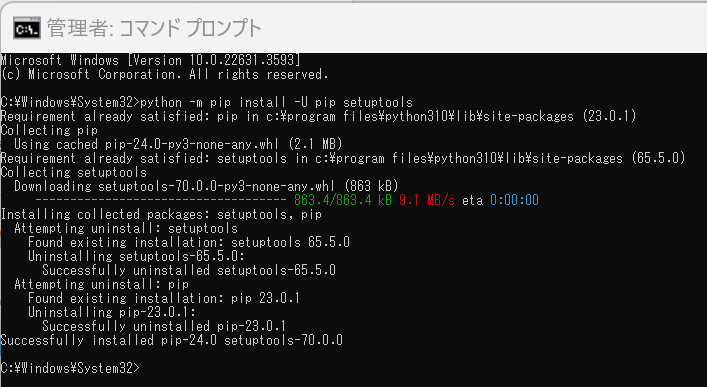
- TensorFlow, Keras 関係のパッケージのアンインストール操作
トラブルの可能性を減らすために,関係のパッケージのアンインストールを行っておく.
python -m pip uninstall -y protobuf tensorflow tensorflow-cpu tensorflow-gpu tensorflow-intel tensorflow-text tensorflow-estimator tf-models-official tf_slim tensorflow_datasets tensorflow-hub keras keras-tuner keras-visualizer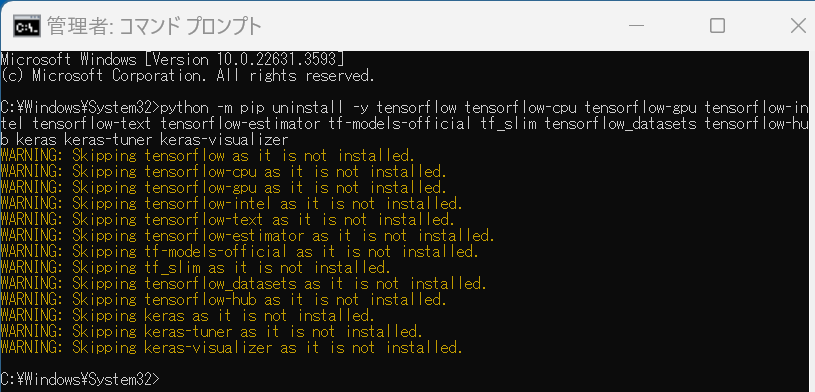
- TensorFlow 2.10.1 および関連パッケージ(tf_slim,tensorflow_datasets,tensorflow-hub,Keras,keras-tuner,keras-visualizer)のインストール.
あわせて,TensorFlowの公式ドキュメント,サンプルコード、Kerasの追加モジュールもインストールする.
pip を用いてインストールする.
python -m pip install -U protobuf tensorflow==2.10.1 tf_slim tensorflow_datasets==4.8.3 tensorflow-hub keras keras-tuner keras-visualizer
python -m pip install git+https://github.com/tensorflow/docs
python -m pip install git+https://github.com/tensorflow/examples.git
python -m pip install git+https://www.github.com/keras-team/keras-contrib.git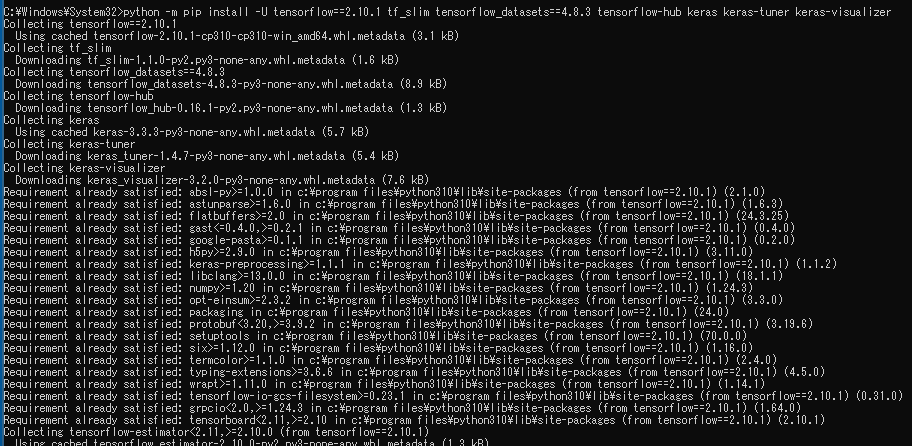
(以下省略) - Pythonパッケージ(Pillow, pydot, matplotlib, seaborn, pandas, scipy, scikit-learn, scikit-learn-intelex, opencv-python, opencv-contrib-python)のインストール(インストール済みのときは最新版に更新)
python -m pip install -U pillow pydot matplotlib seaborn pandas scipy scikit-learn scikit-learn-intelex opencv-python opencv-contrib-python - Windows の システム環境変数 TF_FORCE_GPU_ALLOW_GROWTH に,true を設定
次のコマンドを実行
powershell -command "[System.Environment]::SetEnvironmentVariable(\"TF_FORCE_GPU_ALLOW_GROWTH\", \"true\", \"Machine\")"
動作確認
TensorFlow がインストールできたかを確認したい.
- Windows では,コマンドプロンプトを実行.
- TensorFlow のバージョン確認
バージョン番号が表示されれば OK.下の図とは違うバージョンが表示されることがある.
python -c "import tensorflow as tf; print( tf.__version__ )"
次のようなメッセージが出た場合には,メッセージに従い, NVIDIA ドライバ,NVIDIA CUDA ツールキット, NVIDIA cuDNN のインストールを行う. 但し,GPU がない場合には,このメッセージを無視する.

- Windows での NVIDIA ドライバ,NVIDIA CUDA ツールキット 11.8,NVIDIA cuDNN v8.9.7 のインストールと動作確認: 別ページ »で説明
- TensorFlow パッケージの情報の表示
pip show tensorflow
- (GPU を使うとき) TensorFlow からGPU が認識できているかの確認
TensorFlow が GPU を認識できているかの確認は,端末で,次を実行して行う.
python -c "from tensorflow.python.client import device_lib; print(device_lib.list_local_devices())"実行結果の中に,次のように「device_type: "GPU"」があれば,GPUが認識できている.エラーメッセージが出ていないことを確認しておくこと.
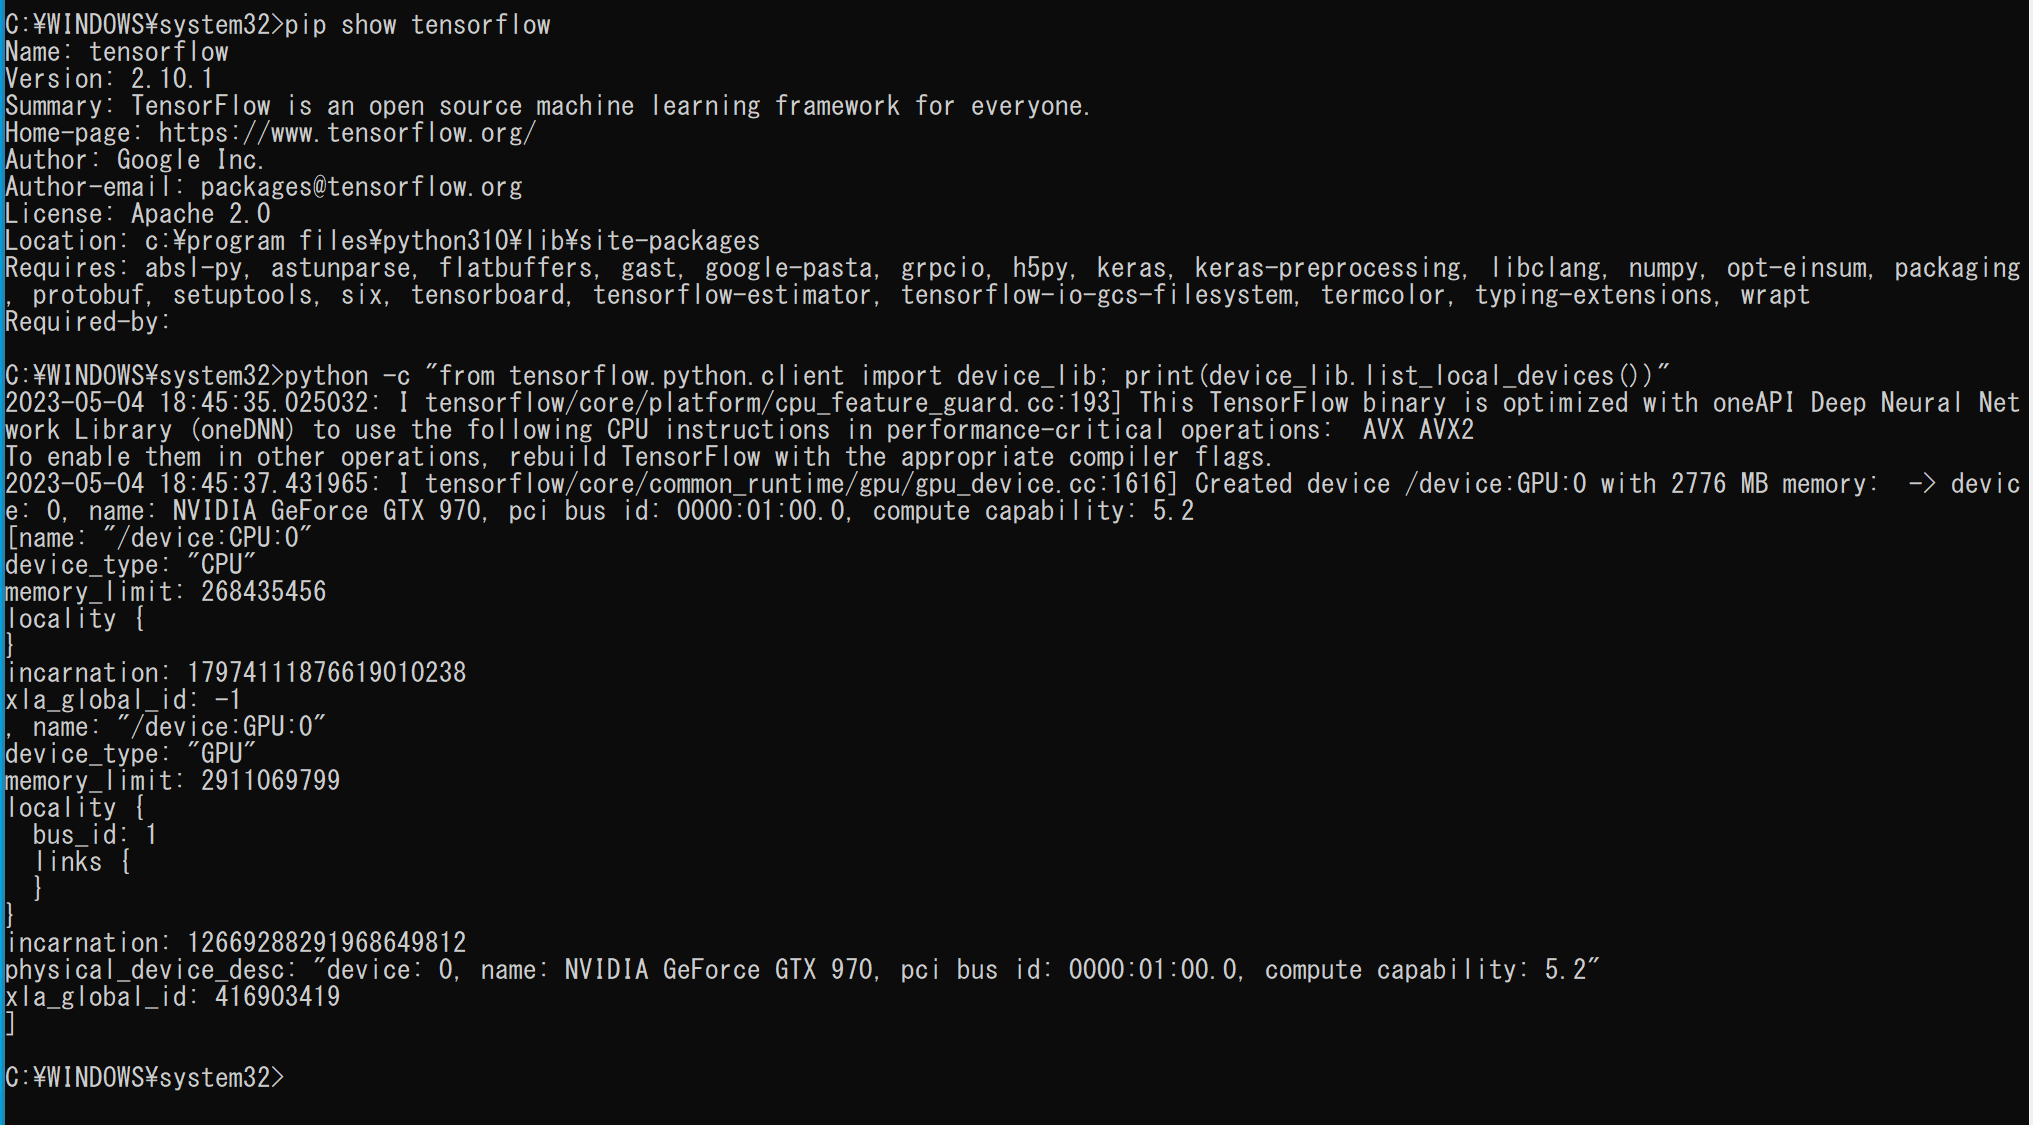
ここで,GPU があるのに,TensorFlow から認識されていないかもしれない. TensorFlow GPU 版が指定するバージョンの NVIDIA CUDA ツールキット,NVIDIA cuDNN がインストールされていないことが原因かも知れない.
TensorFlow 2.5 の GPU 版での,cuDNN のバージョンは 8.2,TensorFlow 2.4 の GPU 版での,cuDNN のバージョンは 8.0.5,TensorFlow 2.3, 2.2, 2.1 の GPU 版での,cuDNN のバージョンは 7.6.そして,TensorFlow 1.13 以上 TensorFlow 2.0 までの GPU 版での,cuDNN のバージョンは7.4 が良いようである.
Windows での NVIDIA ドライバ,NVIDIA CUDA ツールキット 11.8,NVIDIA cuDNN v8.9.7 のインストールと動作確認: 別ページ »で説明
行列の掛け算,主成分分析,特異値分解(TensorFlow 2 のプログラム例)(Windows 上)
行列の掛け算
- Windows で,コマンドプロンプトを実行
- エディタを起動
cd %HOMEPATH%
notepad matmul.py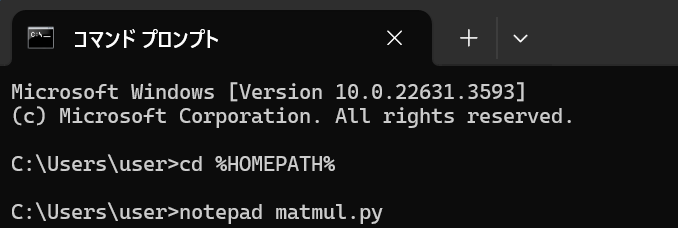
- エディタで,次のプログラムを保存
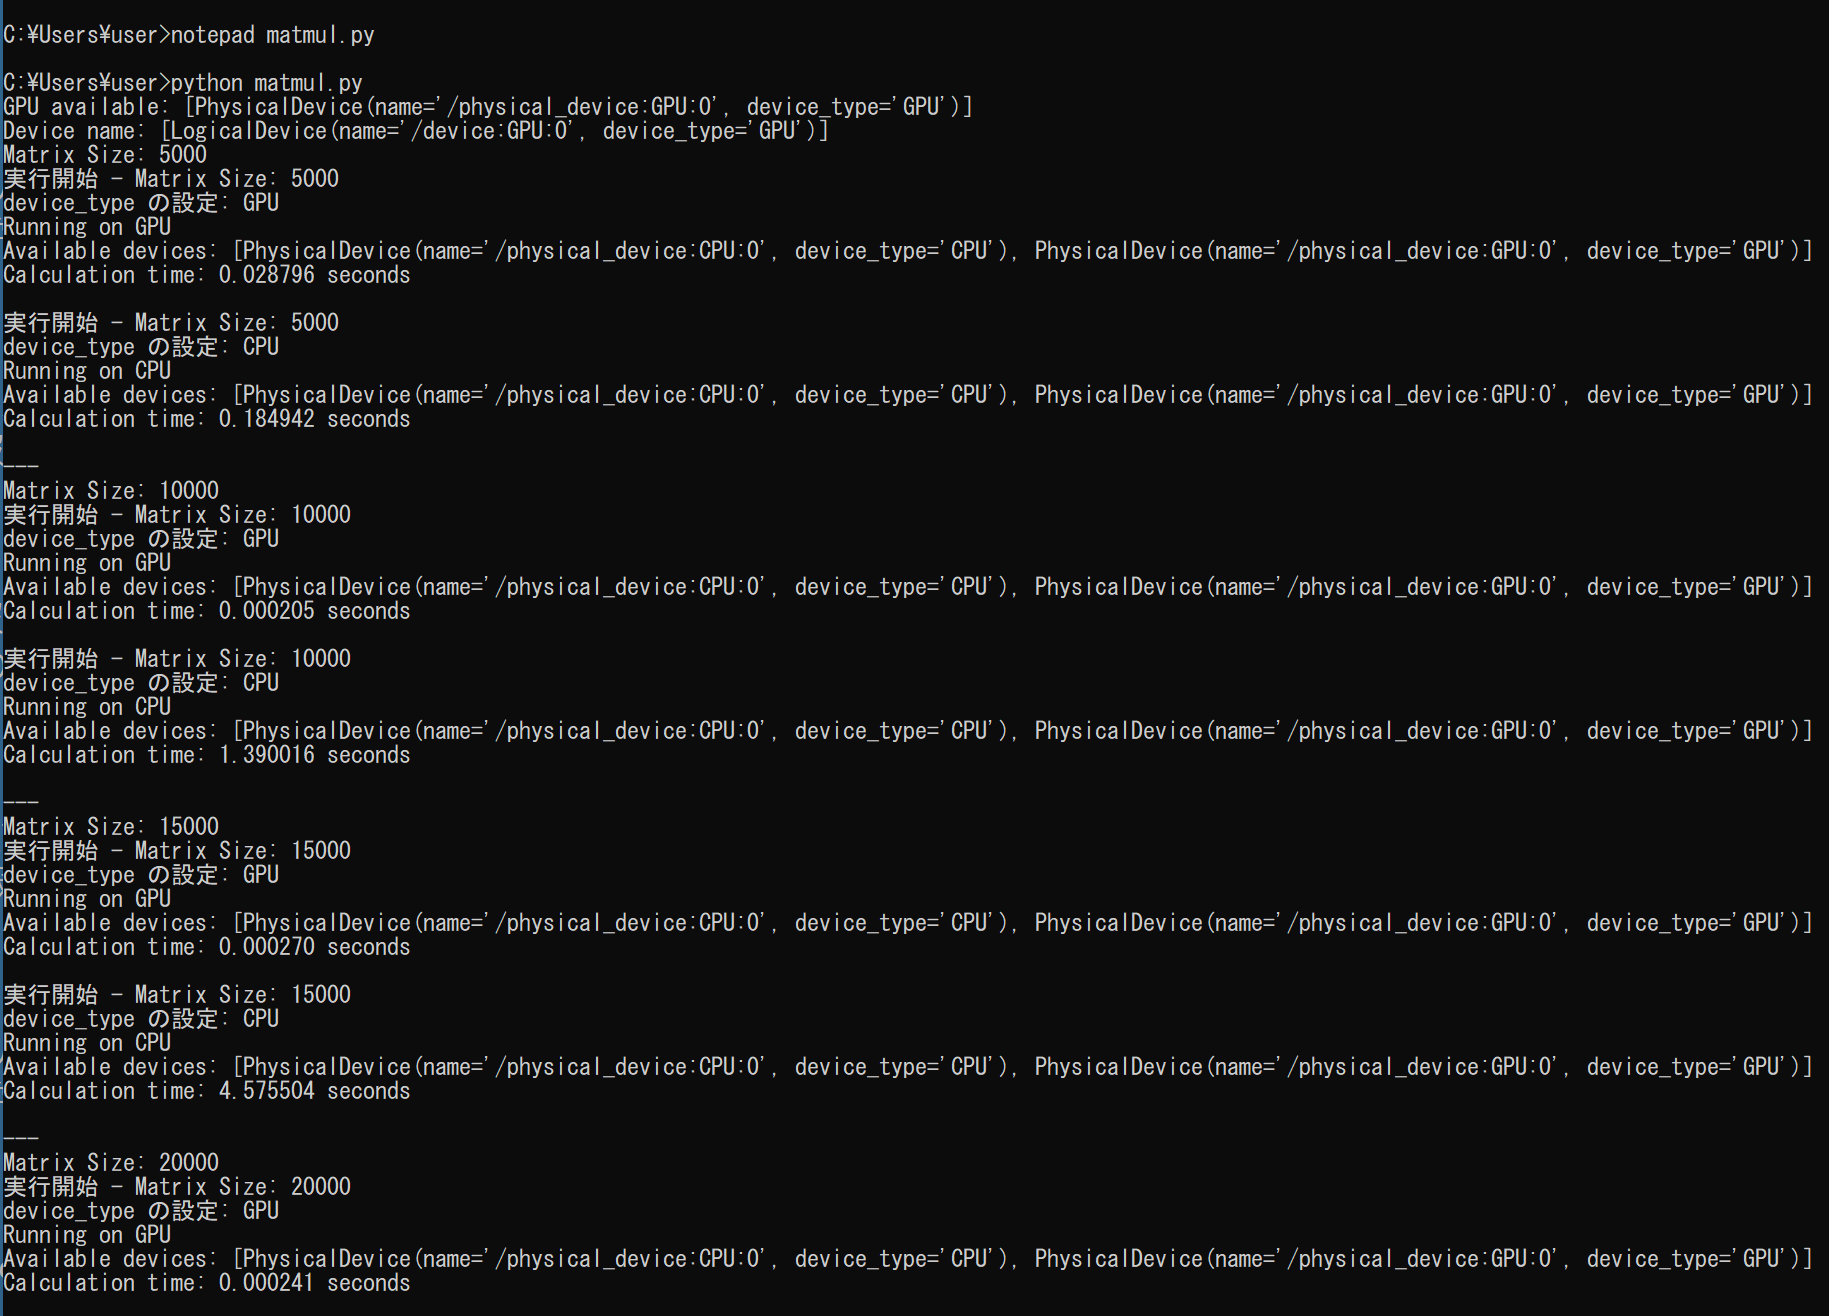
このプログラムは,TensorFlowを使用してCPUとGPUでの行列積の計算時間を比較する. [5000, 10000, 15000, 20000] の異なる4通りのサイズの行列を2つ生成し,その行列積を求める.そのとき, 計算時間を測定して結果を表示する.
import os
import tensorflow as tf
import time

def measure_time(func):
    start_time = time.perf_counter()
    result = func()
    end_time = time.perf_counter()
    calculation_time = end_time - start_time
    return calculation_time

def run_matmul(device_type, matrix_size):
    print(f'実行開始 - Matrix Size: {matrix_size}')
    print('device_type の設定:', device_type)

    with tf.device(device_type):
        X = tf.random.uniform((matrix_size, matrix_size), minval=0, maxval=1)
        Y = tf.random.uniform((matrix_size, matrix_size), minval=0, maxval=1)
        calculation_time = measure_time(lambda: tf.matmul(X, Y))

    physical_devices = tf.config.list_physical_devices()
    gpu_devices = tf.config.list_physical_devices('GPU')

    print(f"Running on {device_type}")
    print(f"Available devices: {physical_devices}")
    print(f"Calculation time: {calculation_time:.6f} seconds")
    print()

# GPUの確認,GPUのメモリに関する設定
def set_gpu_config():
    physical_devices = tf.config.list_physical_devices('GPU')
    if len(physical_devices) > 0:
        print("GPU available:", physical_devices)
        for device in physical_devices:
            tf.config.experimental.set_memory_growth(device, True)
    else:
        print("No GPU found. Running on CPU.")

def main():
    set_gpu_config()
    # デバイス名の表示
    device_name = tf.config.list_logical_devices('GPU')
    print("Device name:", device_name)

    matrix_sizes = [5000, 10000, 15000, 20000]
    for size in matrix_sizes:
        print(f'Matrix Size: {size}')
        run_matmul('/GPU:0', size)
        run_matmul('/CPU:0', size)
        print('---')

if __name__ == "__main__":
    main()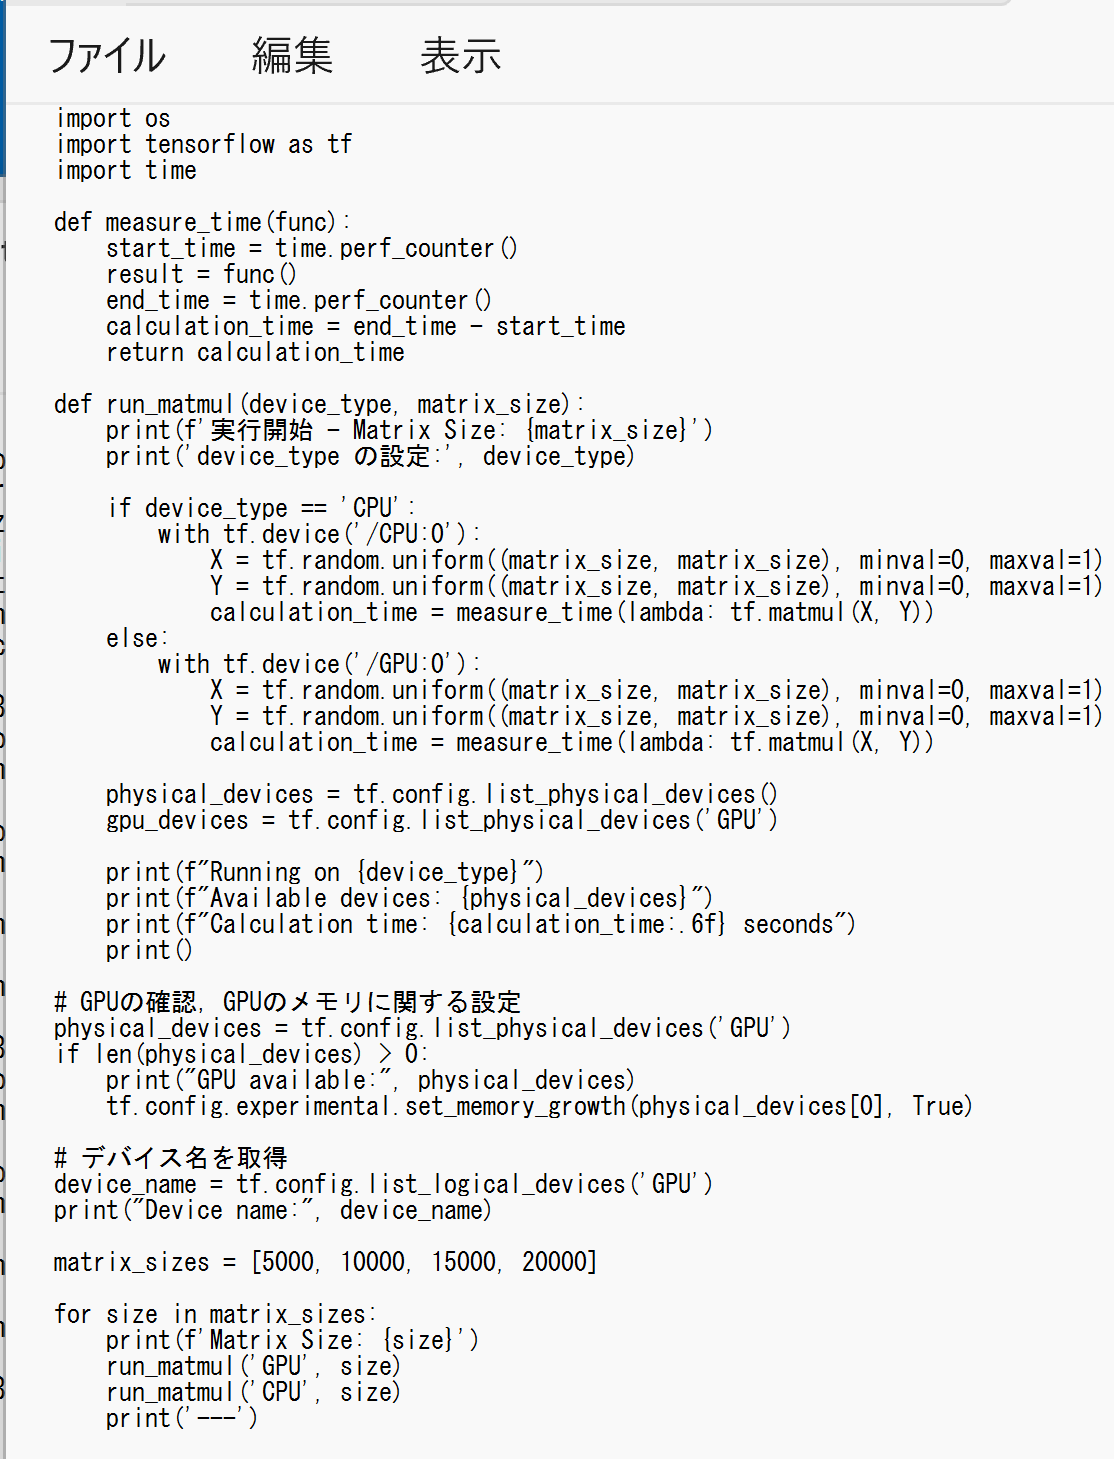
- Python プログラムの実行
Python プログラムの実行
- Windows では python (Python ランチャーは py)
- Ubuntu では python3
【サイト内の関連ページ】 Python のまとめ: 別ページ »
プログラムを matmul.pyのようなファイル名で保存したので, 「python matmul.py」のようなコマンドで行う.
python matmul.py
- 結果の確認
主成分分析,特異値分解
- Windows で,コマンドプロンプトを実行
- エディタを起動
cd %HOMEPATH%
notepad pcasvd.py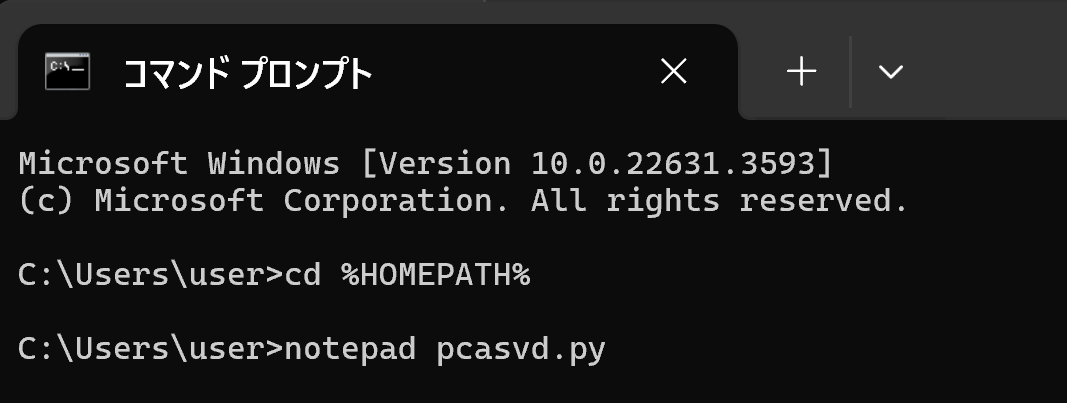
- エディタで,次のプログラムを保存
このプログラムは,TensorFlowを使用して,行列に対してPCA(主成分分析)とSVD(特異値分解)の計算を行い,GPUとCPUでの実行時間を比較する. [1000, 2000, 3000, 4000] の異なる4通りのサイズの行列に対して, PCAとSVDの計算時間を測定し,結果を表示することで,GPUとCPUの性能の違いを確認できる.
import os
import tensorflow as tf
import time

def measure_time(func):
    start_time = time.perf_counter()
    result = func()
    end_time = time.perf_counter()
    calculation_time = end_time - start_time
    return calculation_time

def run_pca_svd(device_type, matrix_size):
    print(f'実行開始 - Matrix Size: {matrix_size}')
    print('device_type の設定:', device_type)
    with tf.device(device_type):
        X = tf.random.uniform((matrix_size, matrix_size), minval=0, maxval=1)
        pca_time = measure_time(lambda: tf.linalg.eigh(tf.matmul(X, X, transpose_a=True)))
        svd_time = measure_time(lambda: tf.linalg.svd(X))

    physical_devices = tf.config.list_physical_devices()
    gpu_devices = tf.config.list_physical_devices('GPU')
    print(f"Running on {device_type}")
    print(f"Available devices: {physical_devices}")
    print(f"PCA calculation time: {pca_time:.6f} seconds")
    print(f"SVD calculation time: {svd_time:.6f} seconds")
    print()

# GPUの確認,GPUのメモリに関する設定
def set_gpu_config():
    physical_devices = tf.config.list_physical_devices('GPU')
    if len(physical_devices) > 0:
        print("GPU available:", physical_devices)
        for device in physical_devices:
            tf.config.experimental.set_memory_growth(device, True)
    else:
        print("No GPU found. Running on CPU.")

def main():
    set_gpu_config()
    # デバイス名の表示
    device_name = tf.config.list_logical_devices('GPU')
    print("Device name:", device_name)

    matrix_sizes = [1000, 2000, 3000, 4000]
    for size in matrix_sizes:
        print(f'Matrix Size: {size}')
        run_pca_svd('/GPU:0', size)
        run_pca_svd('/CPU:0', size)
        print('---')

if __name__ == "__main__":
    main()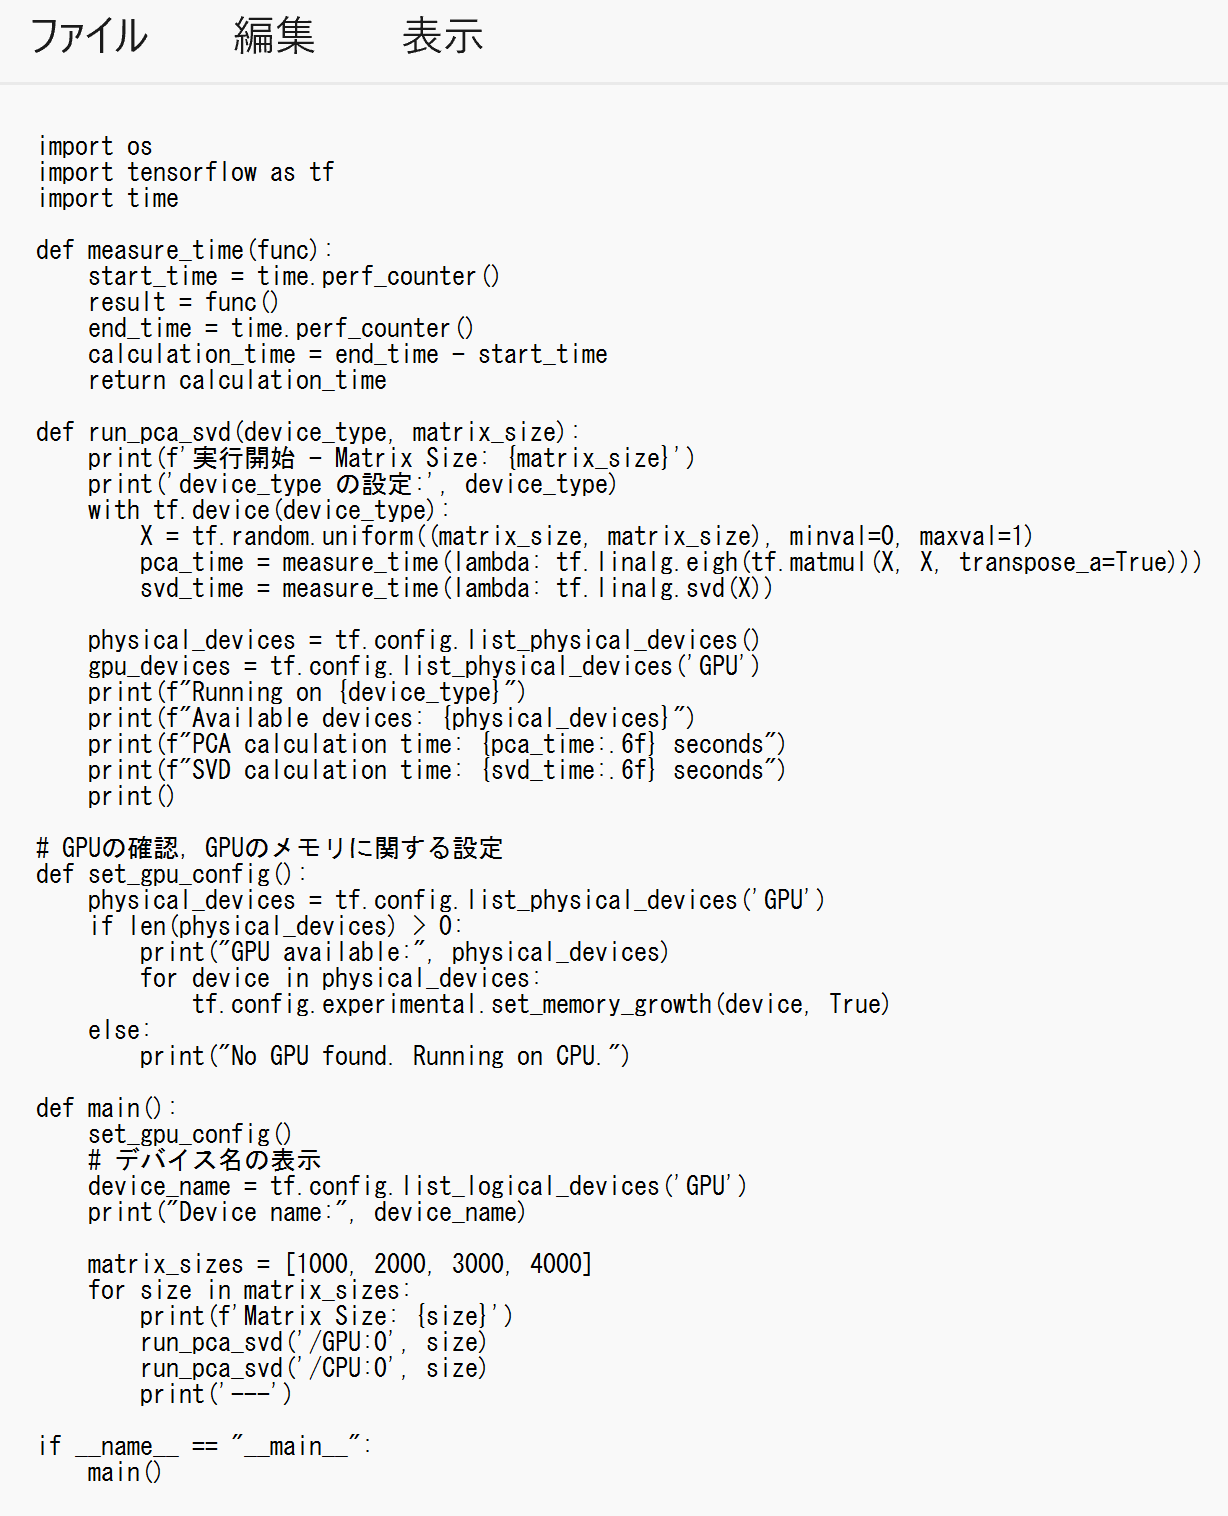
- Python プログラムの実行
Python プログラムの実行
- Windows では python (Python ランチャーは py)
- Ubuntu では python3
【サイト内の関連ページ】 Python のまとめ: 別ページ »
プログラムを pcasvd.pyのようなファイル名で保存したので, 「python pcasvd.py」のようなコマンドで行う.
python pcasvd.py
- 結果の確認
ImageNet で学習済みの ConvNeXtBase モデルを用いた画像分類(TensorFlow, Keras を使用)
パソコン接続のカメラを使用
ImageNet で学習済みの ConvNeXtBase モデルを用いた画像分類を行う.
- パソコン接続のカメラを使用するので準備しておく
- 前準備として Python 用 opencv-python のインストール
python -m pip install -U opencv-python opencv-contrib-python - Windows で,コマンドプロンプトを実行
- エディタを起動
cd %HOMEPATH% notepad convnext.py - エディタで,次のプログラムを保存
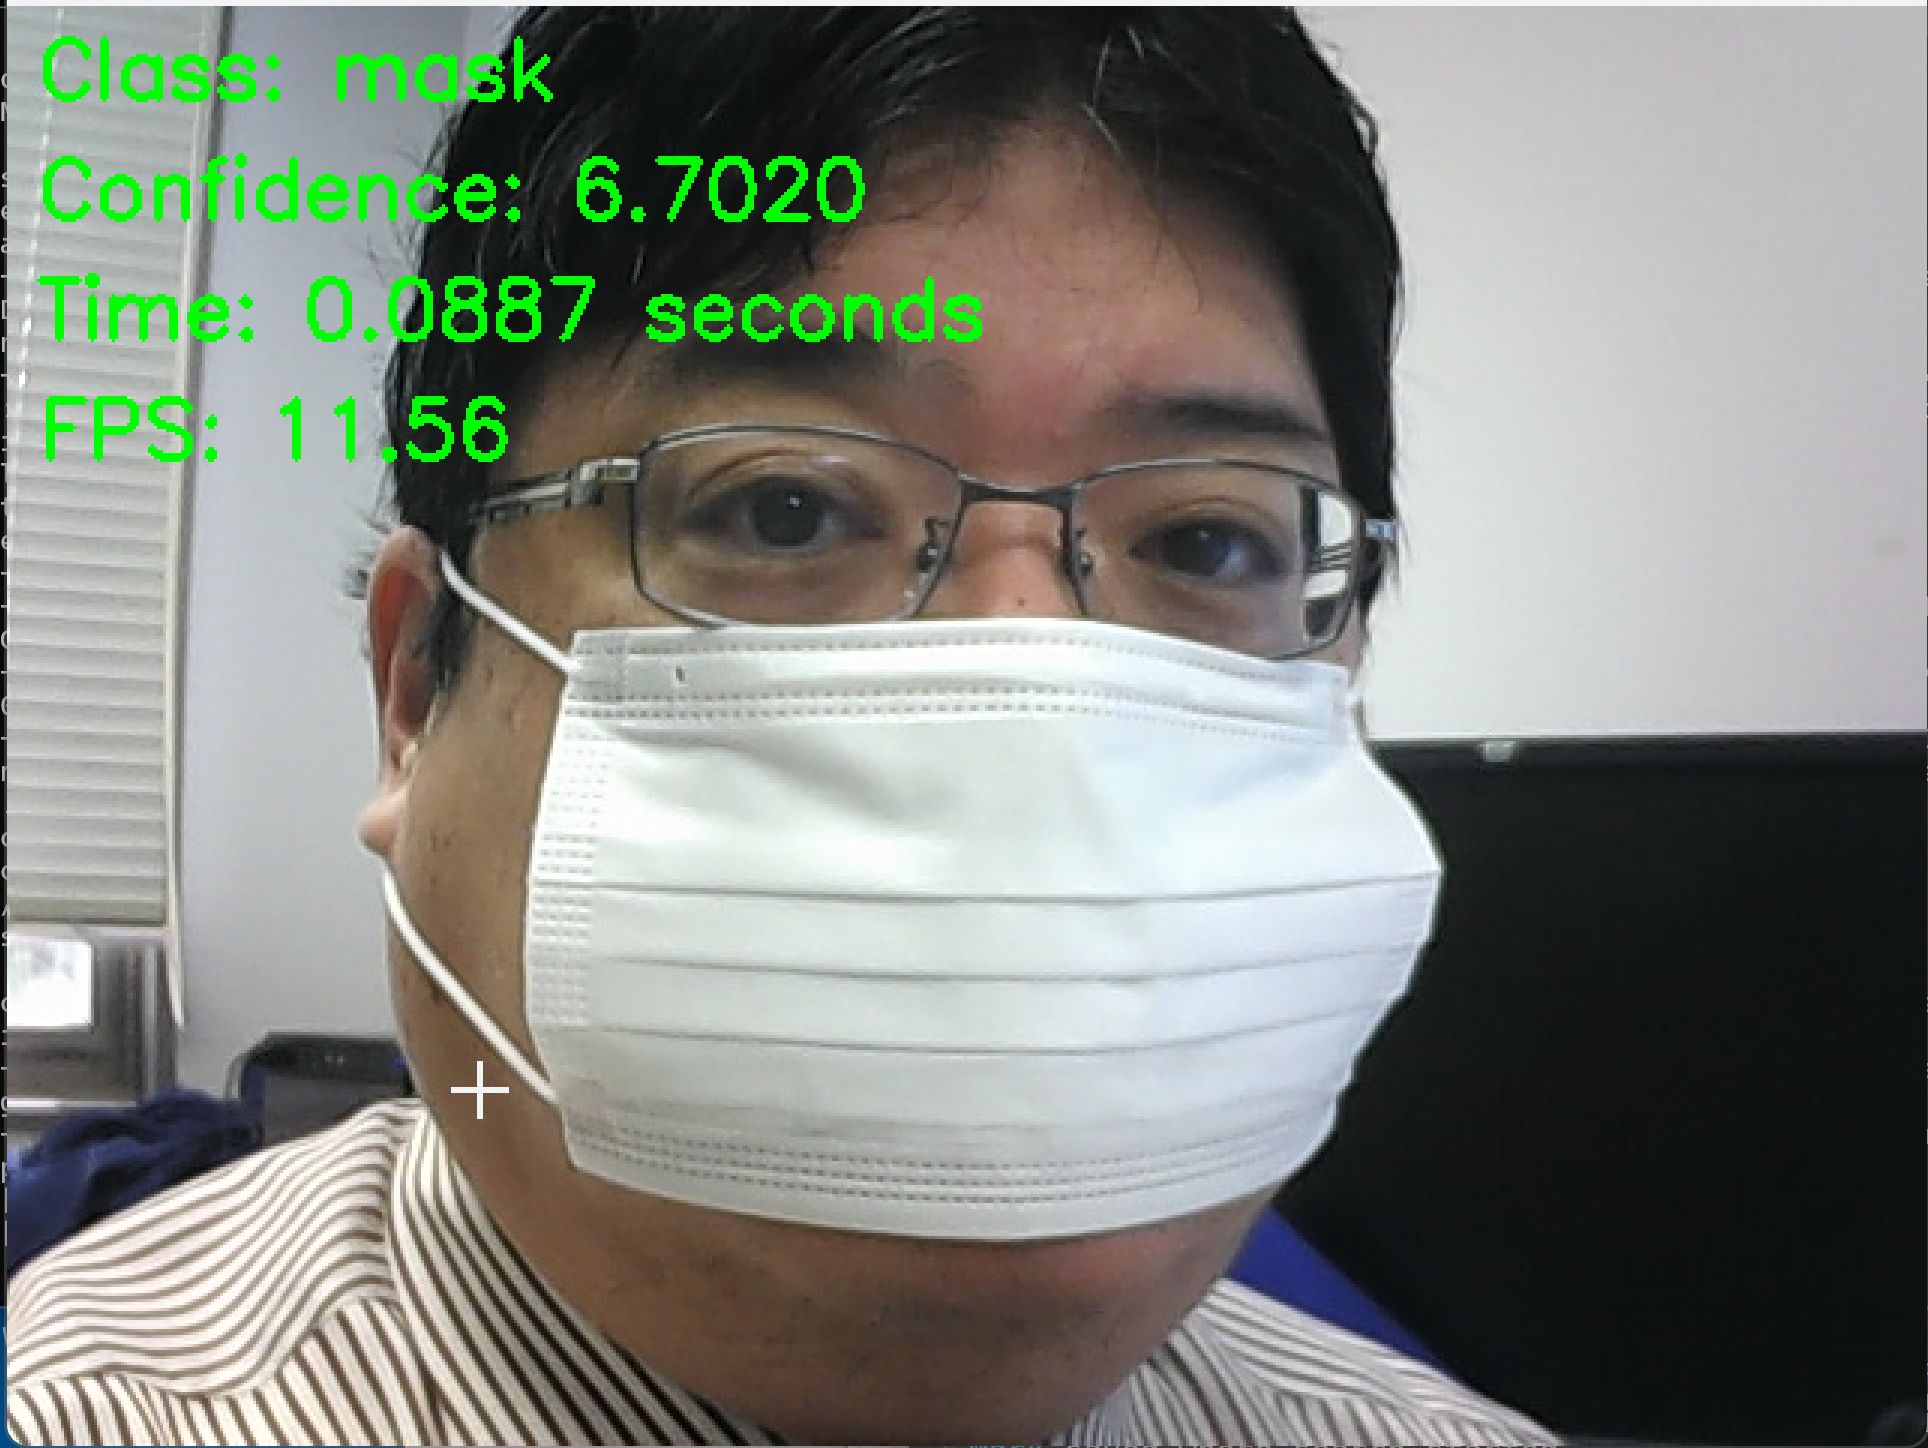
このプログラムは,TensorFlow,ImageNet で学習済みのConvNeXtBaseモデルを活用し,カメラから取得した画像をリアルタイムで画像分類します.プログラムでは,GPUの設定,モデルのロード,フレームの前処理,画像分類,結果と推論に要した時間を表示します.カメラからの画像をリアルタイムで画像分類し,その結果をビジュアルに確認できるプログラムです.
【説明】
- set_gpu_config()関数により、GPUの設定を行います。GPUが利用可能な場合は、使用可能なGPUデバイスを表示します。GPUが利用できない場合は、CPUを使用することを表示します。
- preprocess_image()関数により、入力画像の前処理を行います。前処理では、画像のリサイズ、色空間の変換、正規化を行います。
- load_model()関数により、ImageNetで学習済みのConvNeXtBaseモデルをロードします。
- classify_camera_frames()関数で、カメラからの画像を取得し、画像分類を行います。
- 取得した画像をpreprocess_image()関数で前処理します。
- 前処理された画像をモデルに入力し、分類を行います。
- 分類結果から、最も確率の高いクラスの名前と信頼度を取得します。
- 結果(クラス名、信頼度、推論時間、フレームレート)を画面上に描画します。
- main()関数で、GPUの設定を行い、モデルをロードし、classify_camera_frames()関数を呼び出してカメラからの画像の分類を開始します。
- 'q'キーが押されるまで、上記の処理を繰り返し行います。'q'キーが押されたら、プログラムを終了します。
【使い方】
- 必要な準備
プログラムを実行する前に、必要なライブラリ(TensorFlow、OpenCV、NumPy、urllib)がインストールされていることを確認してください。
- カメラの設定
プログラムはデフォルトでカメラデバイス0を使用します。 異なるカメラを使用する場合は、cv2.VideoCapture(0)の引数を適切なデバイスIDに変更してください。
- モデルの選択
プログラムはデフォルトでconvnext_baseモデルを使用します。 異なるTensorFlowのモデルを使用したい場合は、MODEL_NAMEの値を変更してください。 モデルによって入力サイズや前処理の要件が異なる場合があるため、注意が必要です。
- 前処理のパラメータ
プログラムはデフォルトでMEANとSTDの値を使用して前処理を行います。 これらの値は、ImageNetデータセットで使用される一般的な値です。 モデルによっては別の値が適切な場合があります。
- GPUの使用
プログラムは、利用可能な場合はGPUを使用します。 GPUが利用可能でない場合は、自動的にCPUにフォールバックします。
- プログラムの実行
プログラムを実行すると、カメラからのリアルタイム画像分類が開始されます。 分類結果、信頼度、推論時間、フレームレートが画面上に表示されます。
- キー操作:
'q'キーを押すとプログラムが終了します。 'p'キーを押すと、画像の分類を一時停止/再開できます。
- プログラムの終了:
'q'キーを押すか、ウィンドウを閉じるとプログラムが終了します。
以上の手順に従って、プログラムを実行してください。カメラからのリアルタイム画像分類を体験できます。
import tensorflow as tf
from tensorflow.keras.applications import ConvNeXtBase
import numpy as np
import time
import cv2
import json
import urllib.request
import os

# ==== 設定 ====
MODEL_NAME = 'convnext_base'
INPUT_SIZE = (224, 224)
MEAN = [0.485, 0.456, 0.406]
STD = [0.229, 0.224, 0.225]
FPS_BUFFER_SIZE = 10
IMAGENET_LABELS_URL = 'https://raw.githubusercontent.com/anishathalye/imagenet-simple-labels/master/imagenet-simple-labels.json'
# =============

def download_imagenet_labels(url: str, filename: str) -> None:
    if not os.path.exists(filename):
        print(f"Downloading {filename} from {url}")
        try:
            urllib.request.urlretrieve(url, filename)
            print(f"Downloaded {filename}")
        except Exception as e:
            print(f"Error downloading {filename}: {str(e)}")
            raise
    else:
        print(f"{filename} already exists.")

# ImageNetのクラスラベルとクラス名のマッピングをダウンロード
try:
    download_imagenet_labels(IMAGENET_LABELS_URL, 'imagenet_class_index.json')
except Exception as e:
    print(f"Error downloading imagenet_class_index.json: {str(e)}")
    exit(1)

# ImageNetのクラスラベルとクラス名のマッピングを読み込み
try:
    with open('imagenet_class_index.json', 'r') as f:
        imagenet_labels = json.load(f)
except Exception as e:
    print(f"Error loading imagenet_class_index.json: {str(e)}")
    exit(1)

# GPUの設定と確認を行う関数
def set_gpu_config():
    physical_devices = tf.config.list_physical_devices('GPU')
    if len(physical_devices) > 0:
        print("GPU available:", physical_devices)
        for device in physical_devices:
            tf.config.experimental.set_memory_growth(device, True)
    else:
        print("No GPU found. Running on CPU.")

# モデルをロードする関数
def load_model():
    model = ConvNeXtBase(weights='imagenet', input_shape=INPUT_SIZE+(3,))
    model.trainable = False
    return model

# モデルの情報を表示する関数
def print_model_info(model):
    print(f"Model: {MODEL_NAME}")
    print(f"Input image size: {INPUT_SIZE}")
    print(f"Number of classes: {len(imagenet_labels)}")

# 画像の前処理を行う関数
def preprocess_image(img):
    img = cv2.resize(img, INPUT_SIZE)
    img = cv2.cvtColor(img, cv2.COLOR_BGR2RGB)
    img = img.astype(np.float32) / 255.0
    img = (img - MEAN) / STD
    img = np.expand_dims(img, axis=0)
    return img

# 画像を分類する関数
def classify_image(model, img):
    preds = model.predict(img)
    class_id = np.argmax(preds)
    class_name = imagenet_labels[class_id]
    confidence = preds[0][class_id]
    return class_name, confidence

# フレームレートを更新する関数
def update_fps(fps_buffer, prediction_time):
    fps_buffer.append(prediction_time)
    if len(fps_buffer) > FPS_BUFFER_SIZE:
        fps_buffer = fps_buffer[-FPS_BUFFER_SIZE:]
    fps = len(fps_buffer) / sum(fps_buffer)
    return fps

# 結果を表示する関数
def display_results(frame, class_name, confidence, prediction_time, fps):
    cv2.putText(frame, f"Class: {class_name}", (10, 30),
                cv2.FONT_HERSHEY_SIMPLEX, 0.9, (0, 255, 0), 2)
    cv2.putText(frame, f"Confidence: {confidence:.4f}", (10, 70),
                cv2.FONT_HERSHEY_SIMPLEX, 0.9, (0, 255, 0), 2)
    cv2.putText(frame, f"Time: {prediction_time:.4f} seconds", (10, 110),
                cv2.FONT_HERSHEY_SIMPLEX, 0.9, (0, 255, 0), 2)
    cv2.putText(frame, f"FPS: {fps:.2f}", (10, 150),
                cv2.FONT_HERSHEY_SIMPLEX, 0.9, (0, 255, 0), 2)

# カメラからのフレームを取得し、分類を行う関数
def classify_camera_frames(model):
    cap = cv2.VideoCapture(0)
    fps_buffer = []
    paused = False

    while cap.isOpened():
        if not paused:
            ret, frame = cap.read()
            if not ret:
                break

            img = preprocess_image(frame)
            start_time = time.perf_counter()
            class_name, confidence = classify_image(model, img)
            prediction_time = time.perf_counter() - start_time
            fps = update_fps(fps_buffer, prediction_time)
            display_results(frame, class_name, confidence, prediction_time, fps)

        cv2.imshow("Camera Classification", frame)

        key = cv2.waitKey(1) & 0xFF
        if key == ord('q'):
            break
        elif key == ord('p'):
            paused = not paused

    cap.release()
    cv2.destroyAllWindows()

def main():
    set_gpu_config()
    model = load_model()
    print_model_info(model)
    classify_camera_frames(model)

if __name__ == '__main__':
    main()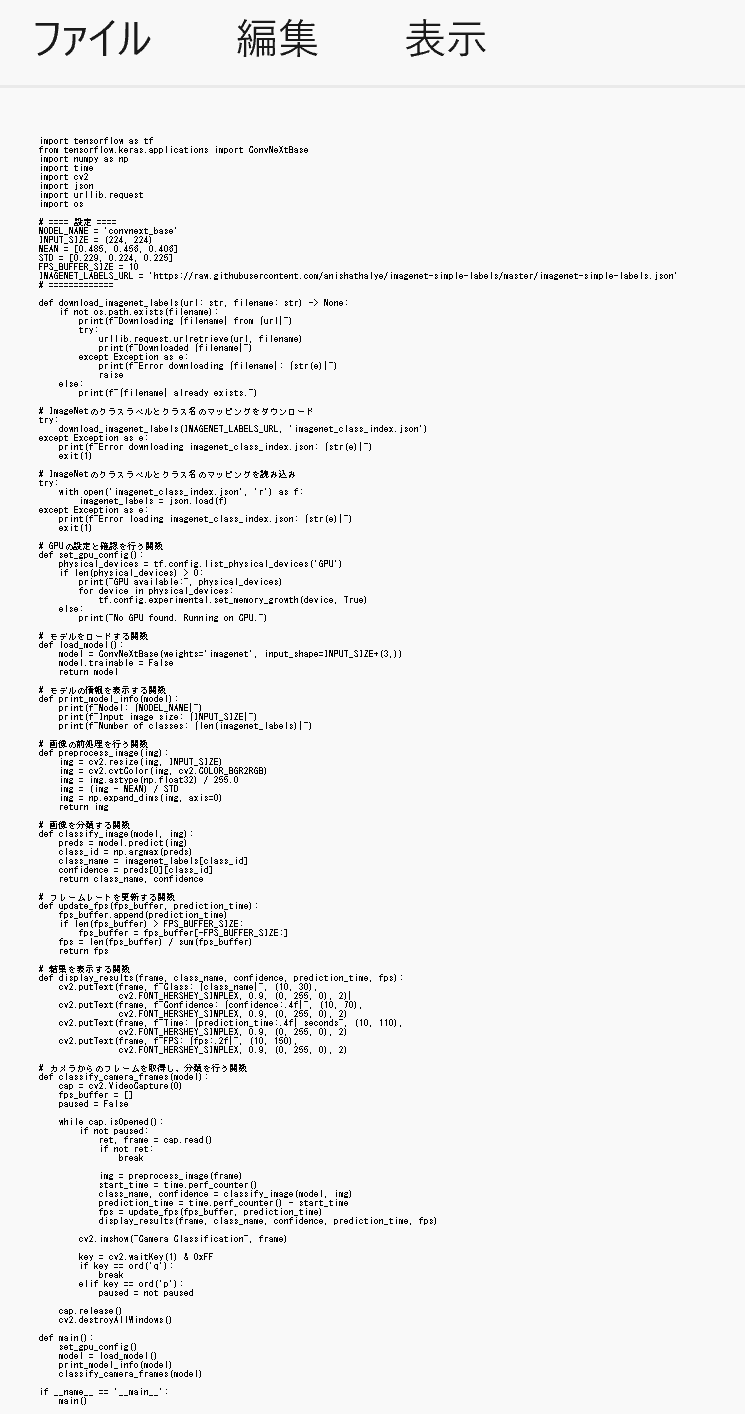
- Python プログラムの実行
Python プログラムの実行
- Windows では python (Python ランチャーは py)
- Ubuntu では python3
【サイト内の関連ページ】 Python のまとめ: 別ページ »
プログラムを convnext.pyのようなファイル名で保存したので, 「python convnext.py」のようなコマンドで行う.
python convnext.py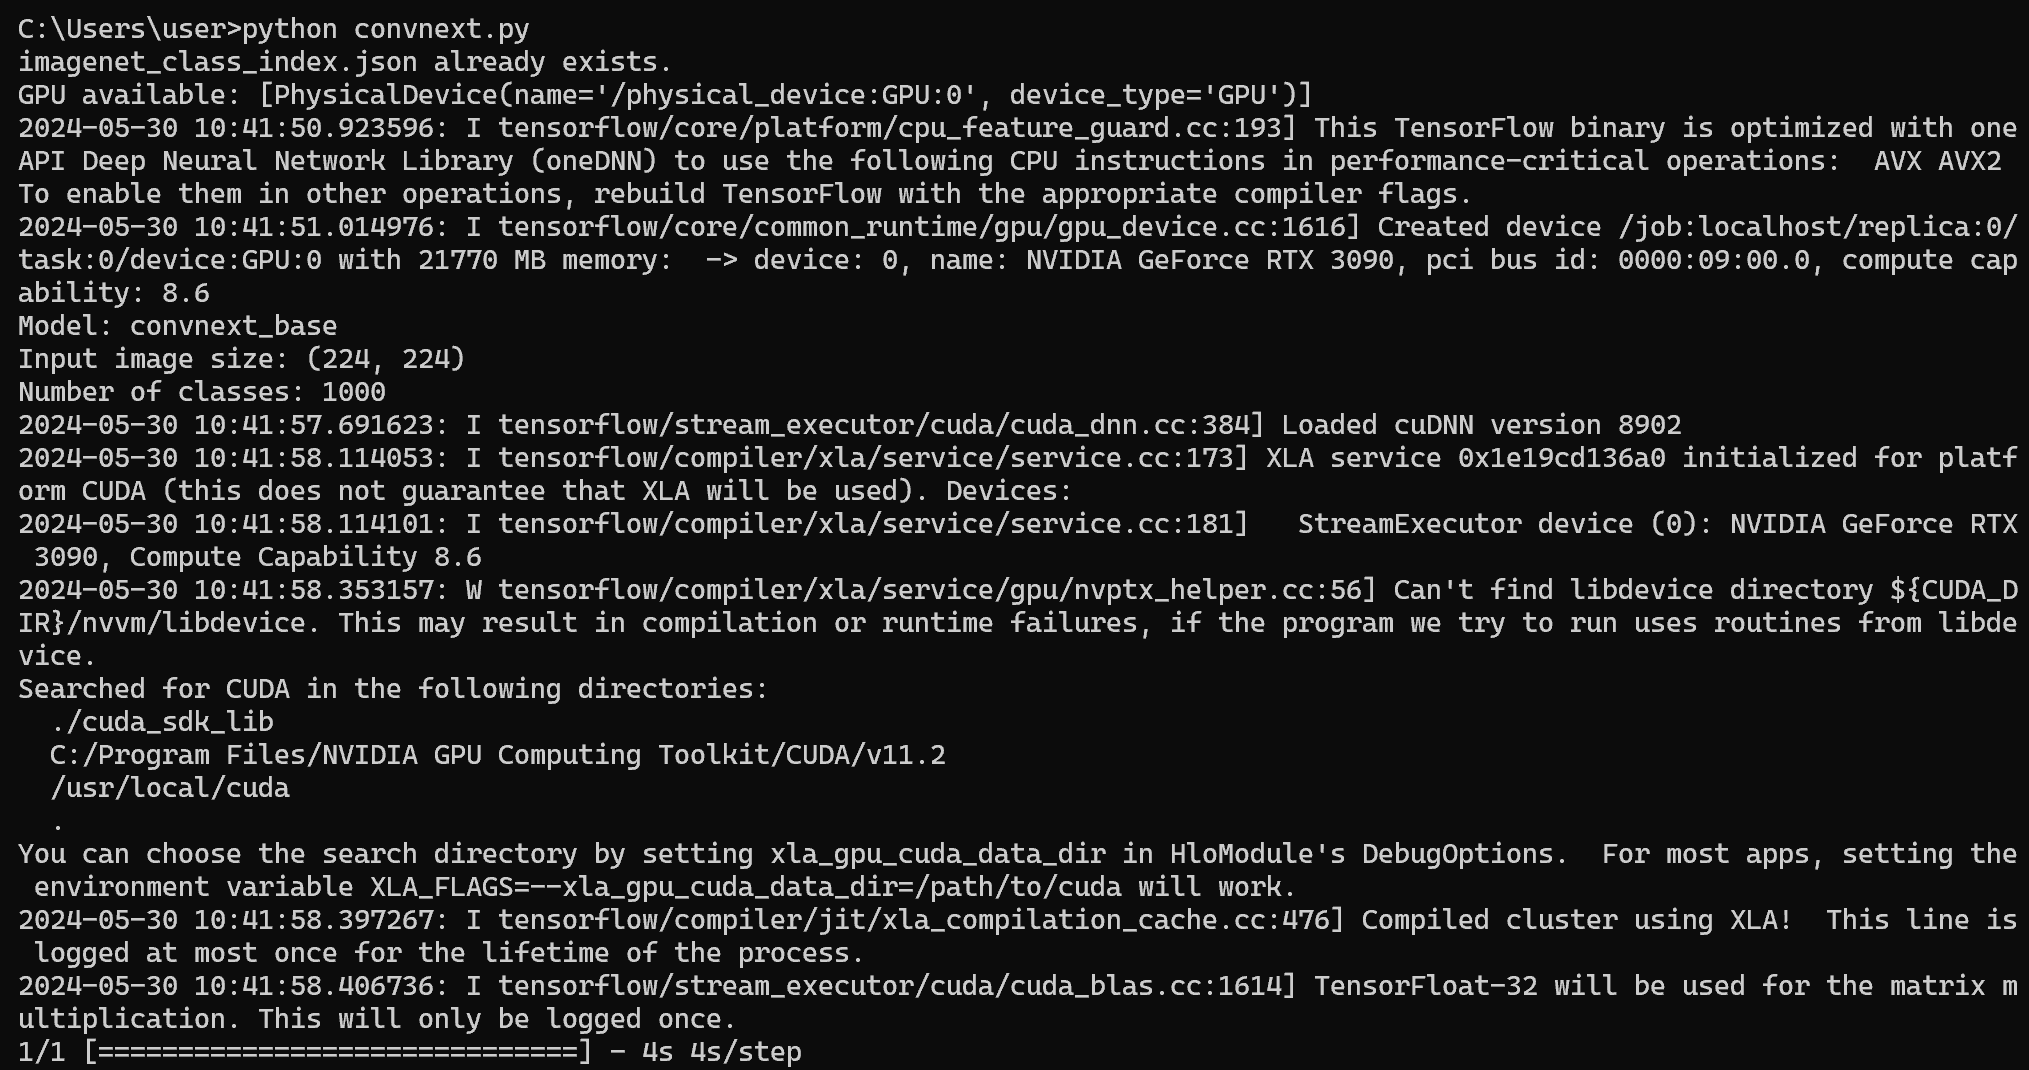
- 結果の確認
終了は q キー
画像ファイルを選択
ImageNet で学習済みの ConvNeXtBase モデルを用いた画像分類を行う.
- Windows で,コマンドプロンプトを実行
- エディタを起動
cd %HOMEPATH%
notepad convnextimg.py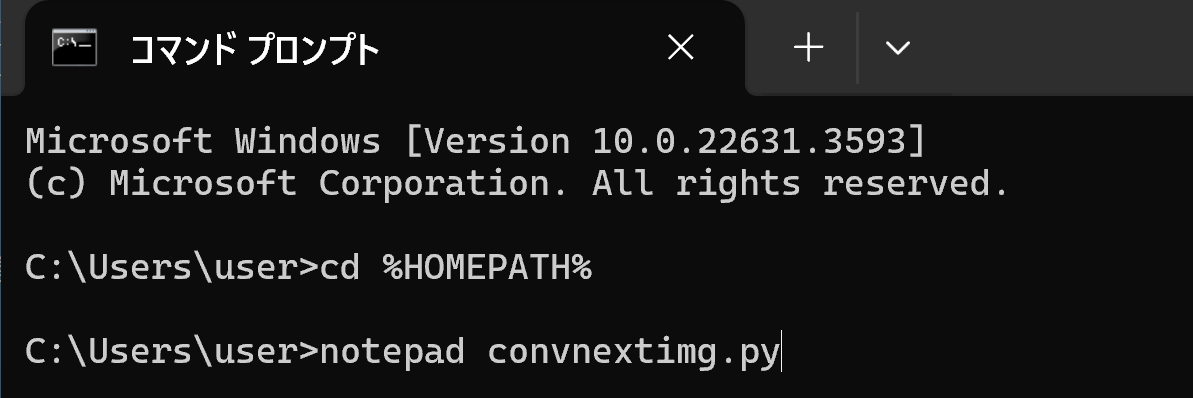
- エディタで,次のプログラムを保存
このプログラムは、TensorFlow、Keras、ConvNeXtBaseモデルを活用し、ユーザが選択した複数の画像について画像分類を行う。プログラムでは、GPUの設定、モデルのロード、画像の前処理、画像分類、結果と推論に要した時間を表示する。主な機能は以下の通りである。
【説明】
- GPUの設定
利用可能なGPUを確認し、GPUのメモリに関する設定を行う。GPUが見つからない場合はCPUで実行される。
- ConvNeXtBaseモデルのロード
ImageNetで学習済みのConvNeXtBaseモデルをロードする。
- 画像ファイルの選択と分類
ユーザーが複数の画像ファイルを選択し、選択された各画像に対して画像分類を実施する。分類結果と推論に要した時間を画像上に描画する。
- 結果の表示
分類されたクラス名、信頼度、推論時間を画像上に重ねて表示する。
- 任意のキーを押すと次の画像に進み、全ての画像の分類が完了すると終了する。
【使い方】
- 必要な準備
プログラムを実行する前に、必要なライブラリ(TensorFlow、Keras、OpenCV、NumPy、urllib、tkinter)がインストールされていることを確認してください。
- モデルの選択
プログラムはデフォルトでconvnext_baseモデルを使用します。 異なるKerasのモデルを使用したい場合は、MODEL_NAMEの値を変更してください。 モデルによって入力サイズや前処理の要件が異なる場合があるため、注意が必要です。
- 前処理のパラメータ
プログラムはデフォルトでMEANとSTDの値を使用して前処理を行います。 これらの値は、ImageNetデータセットで使用される一般的な値です。 モデルによっては別の値が適切な場合があります。
- GPUの使用
プログラムは、利用可能な場合はGPUを使用します。 GPUが利用可能でない場合は、自動的にCPUにフォールバックします。
- プログラムの実行
プログラムを実行すると、画像ファイルの選択ダイアログが表示されます。 分類したい画像ファイルを複数選択し、「開く」をクリックしてください。
import tensorflow as tf
from tensorflow.keras.applications import ConvNeXtBase
import numpy as np
import time
import cv2
import json
import urllib.request
import os
import tkinter as tk
from tkinter import filedialog

# ==== 設定 ====
MODEL_NAME = 'convnext_base'
INPUT_SIZE = (224, 224)
MEAN = [0.485, 0.456, 0.406]
STD = [0.229, 0.224, 0.225]
IMAGENET_LABELS_URL = 'https://raw.githubusercontent.com/anishathalye/imagenet-simple-labels/master/imagenet-simple-labels.json'
# =============

def download_imagenet_labels(url: str, filename: str) -> None:
    if not os.path.exists(filename):
        print(f"Downloading {filename} from {url}")
        try:
            urllib.request.urlretrieve(url, filename)
            print(f"Downloaded {filename}")
        except Exception as e:
            print(f"Error downloading {filename}: {str(e)}")
            raise
    else:
        print(f"{filename} already exists.")

# ImageNetのクラスラベルとクラス名のマッピングをダウンロード
try:
    download_imagenet_labels(IMAGENET_LABELS_URL, 'imagenet_class_index.json')
except Exception as e:
    print(f"Error downloading imagenet_class_index.json: {str(e)}")
    exit(1)

# ImageNetのクラスラベルとクラス名のマッピングを読み込み
try:
    with open('imagenet_class_index.json', 'r') as f:
        imagenet_labels = json.load(f)
except Exception as e:
    print(f"Error loading imagenet_class_index.json: {str(e)}")
    exit(1)

# GPUの設定と確認を行う関数
def set_gpu_config():
    physical_devices = tf.config.list_physical_devices('GPU')
    if len(physical_devices) > 0:
        print("GPU available:", physical_devices)
        for device in physical_devices:
            tf.config.experimental.set_memory_growth(device, True)
    else:
        print("No GPU found. Running on CPU.")

# モデルをロードする関数
def load_model():
    model = ConvNeXtBase(weights='imagenet', input_shape=INPUT_SIZE+(3,))
    model.trainable = False
    return model

# モデルの情報を表示する関数
def print_model_info(model):
    print(f"Model: {MODEL_NAME}")
    print(f"Input image size: {INPUT_SIZE}")
    print(f"Number of classes: {len(imagenet_labels)}")

# 画像の前処理を行う関数
def preprocess_image(img):
    img = cv2.resize(img, INPUT_SIZE)
    img = cv2.cvtColor(img, cv2.COLOR_BGR2RGB)
    img = img.astype(np.float32) / 255.0
    img = (img - MEAN) / STD
    img = np.expand_dims(img, axis=0)
    return img

# 画像ファイルを選択する関数
def select_files():
    try:
        if 'google.colab' in str(get_ipython()):
            from google.colab import files
            uploaded = files.upload()
            image_paths = list(uploaded.keys())
        else:
            root = tk.Tk()
            root.withdraw()
            image_paths = filedialog.askopenfilenames()
    except NameError:
        root = tk.Tk()
        root.withdraw()
        image_paths = filedialog.askopenfilenames()
    return image_paths

# 選択した画像の分類を行う
def classify_selected_images(model):
    image_paths = select_files()
    for image_path in image_paths:
        try:
            img = cv2.imread(image_path)
        except Exception as e:
            print(f"Error reading image {image_path}: {str(e)}")
            continue

        # 画像の前処理
        img_preprocessed = preprocess_image(img)

        # 画像の分類
        start_time = time.perf_counter()
        preds = model.predict(img_preprocessed)
        end_time = time.perf_counter()
        prediction_time = end_time - start_time

        top_pred_index = np.argmax(preds)
        class_name = imagenet_labels[top_pred_index]
        confidence = preds[0][top_pred_index]

        # 結果の表示
        cv2.putText(img, f"Class: {class_name}", (10, 30),
                    cv2.FONT_HERSHEY_SIMPLEX, 0.9, (0, 255, 0), 2)
        cv2.putText(img, f"Confidence: {confidence:.4f}", (10, 70),
                    cv2.FONT_HERSHEY_SIMPLEX, 0.9, (0, 255, 0), 2)
        cv2.putText(img, f"Time: {prediction_time:.4f} seconds", (10, 110),
                    cv2.FONT_HERSHEY_SIMPLEX, 0.9, (0, 255, 0), 2)

        cv2.imshow("Image Classification", img)
        cv2.waitKey(0)

    cv2.destroyAllWindows()

def main():
    set_gpu_config()
    model = load_model()
    print_model_info(model)
    classify_selected_images(model)

if __name__ == '__main__':
    main()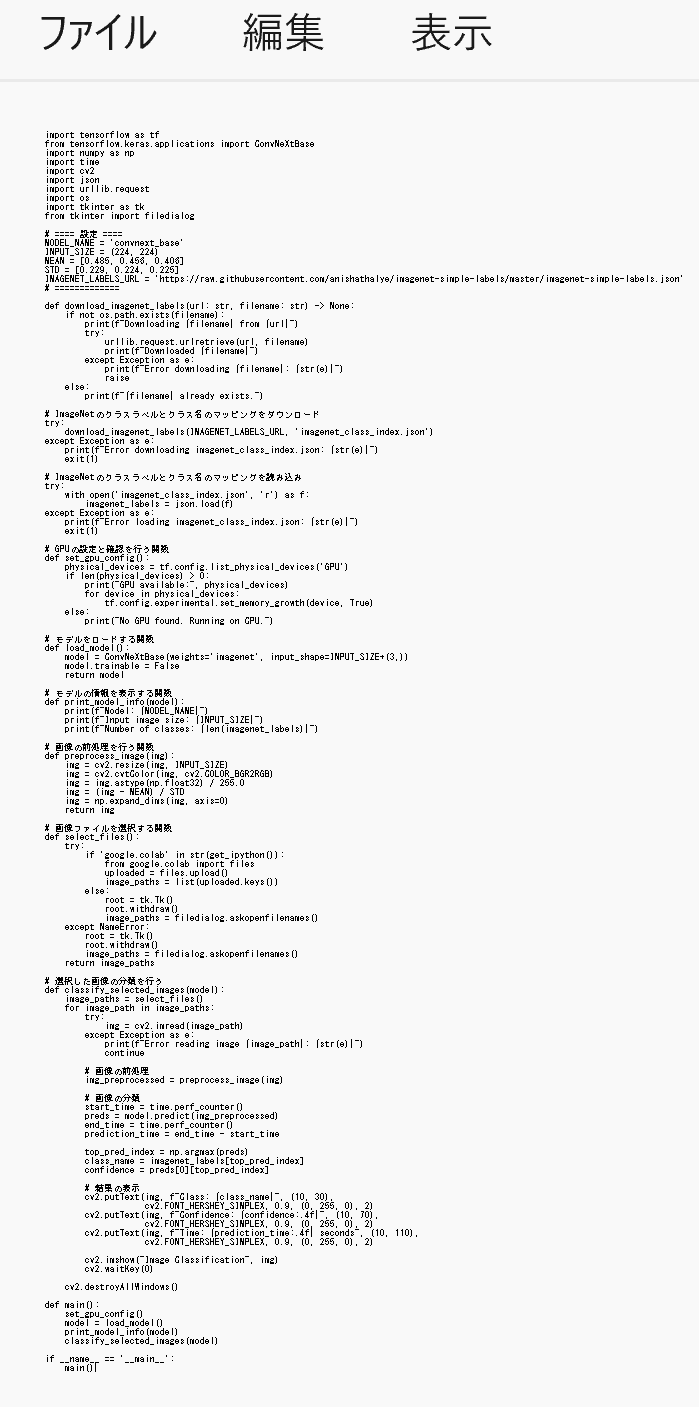
- GPUの設定
- Python プログラムの実行
Python プログラムの実行
- Windows では python (Python ランチャーは py)
- Ubuntu では python3
【サイト内の関連ページ】 Python のまとめ: 別ページ »
プログラムを convnextimg.pyのようなファイル名で保存したので, 「python convnextimg.py」のようなコマンドで行う.
python convnextimg.py
- ファイルダイアログが開くので,画像ファイルを選ぶ.
このとき,画像ファイルを複数選ぶことができる.
- 結果の確認
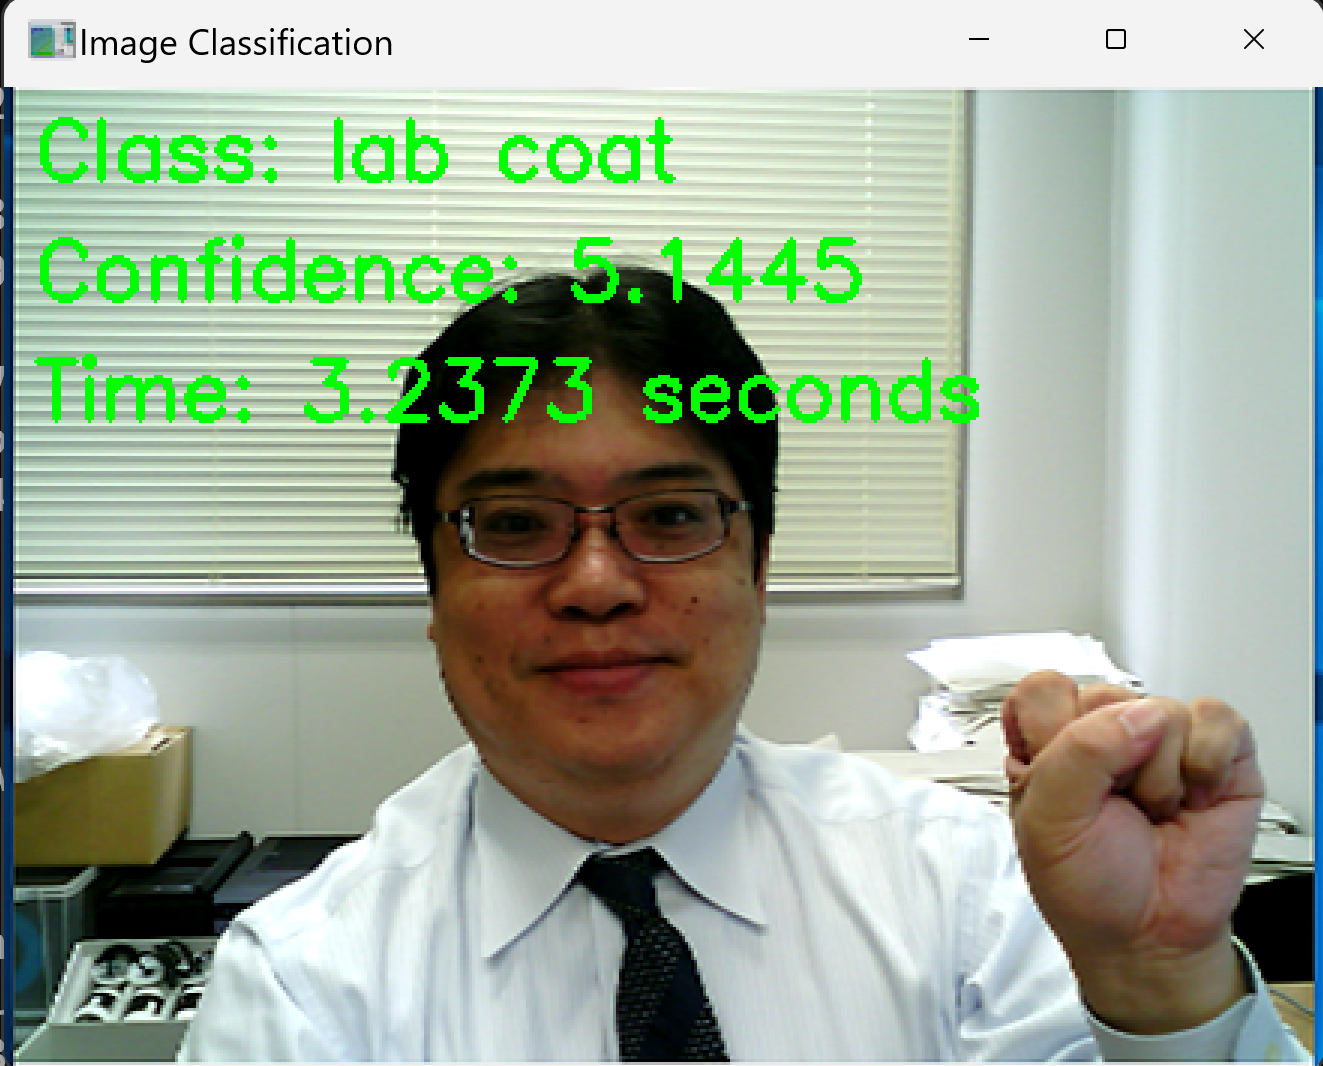
画像分類の結果のクラス名,信頼度(Confidence),処理に要した時間が表示される.

【まとめ】WindowsでのTensorFlowの環境構築から応用アプリケーションの実行まで,一連のプロセスを説明.
![[kaneko lab.]](https://www.kkaneko.jp/info/logo_png.png)